
Training Tips
Access quick and effective dog training tips, designed to help you tackle common issues and improve your training results with easy-to-follow advice.
What Public Neutrality Really Looks Like
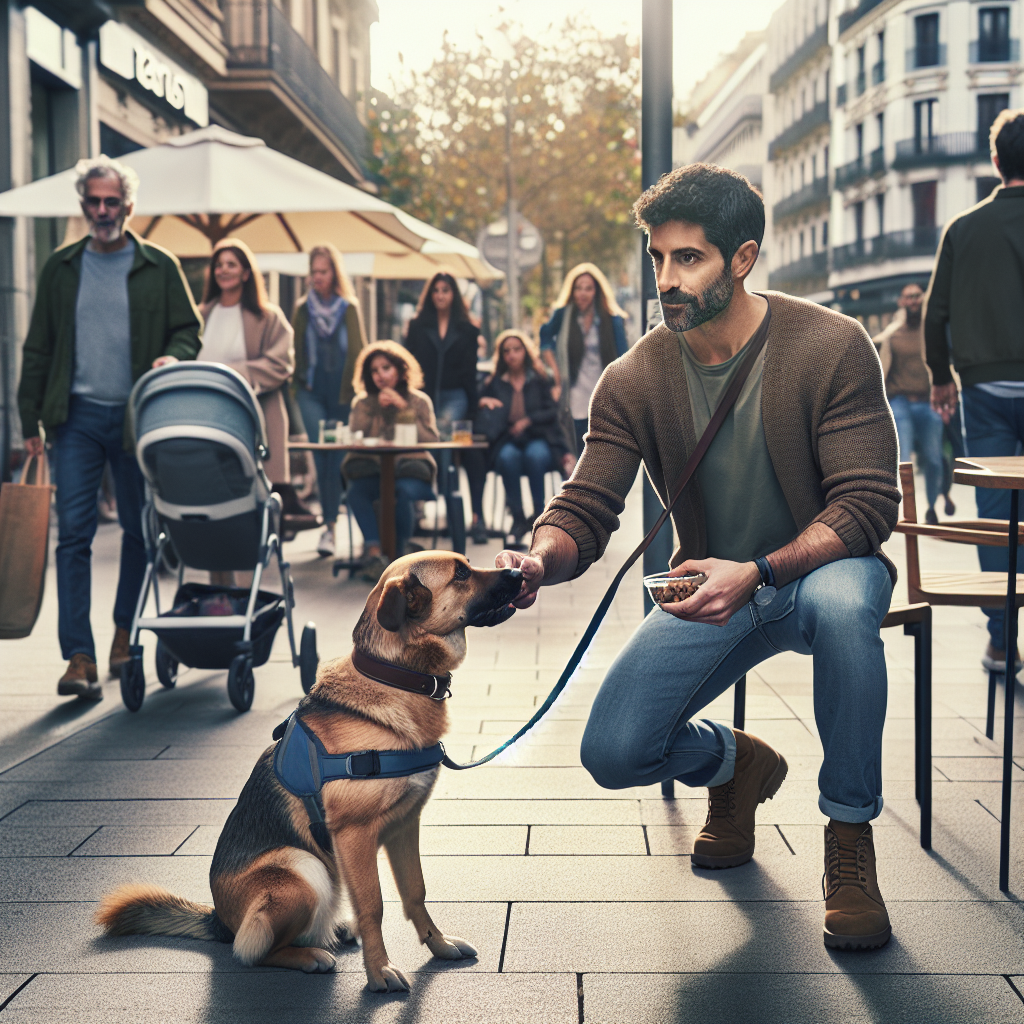
If you are training your dog to be neutral in public, you want a companion who stays calm, responsive, and relaxed in any busy place. Neutral does not mean dull. It means your dog can notice people, dogs, food, and noise without exploding with excitement or anxiety. At Smart Dog Training we define neutrality as calm observation, stable obedience, and a soft body, paired with clear focus on the handler when asked.
This outcome is the product of structured work. A certified Smart Master Dog Trainer will help you build it step by step using the Smart Method. With clear markers, fair guidance, and well timed reinforcement, your dog learns exactly how to behave in real life, not just in a quiet room. Training your dog to be neutral in public is a core goal across our puppy, obedience, and behaviour programmes.
Training Your Dog To Be Neutral In Public The Smart Way
The Smart Method is our proprietary system for producing calm, consistent behaviour. It is how we approach training your dog to be neutral in public in a way that lasts. Its five pillars guide every session.
Clarity
Dogs thrive on precision. We use concise commands, marker words, and predictable routines so your dog always knows what earns release and reward. There is no guesswork. When you say Sit, the dog knows the exact posture and the criteria for staying there while life moves around you.
Pressure and Release
Fair guidance is paired with clear release and reward. Light lead pressure asks. The instant your dog meets the criteria, pressure stops and reinforcement arrives. This builds responsibility without conflict. Your dog learns that choosing calm brings comfort and good outcomes.
Motivation
Food, praise, toys, and access to life rewards keep your dog engaged. We use the right reward at the right moment so neutral choices pay. The goal is a dog that wants to work and that finds calm self control rewarding.
Progression
We layer distraction, duration, and difficulty a little at a time. From quiet lanes to busy town centres, criteria stay fair and measurable. Your dog succeeds often and builds a habit of neutrality that holds anywhere.
Trust
Training strengthens your bond. When guidance and rewards are predictable, your dog trusts you in strange places. That trust keeps arousal low, which supports neutral behaviour in public.
Foundations Before You Step Outside
Training your dog to be neutral in public starts at home. The first goal is smooth communication, then self control, then movement skills. These are the bricks that make public neutrality possible.
Markers That Remove Guesswork
We teach three simple markers. Yes means you did it and you can move to take reward. Good means keep going and hold your position. Free means exercise finished. With these three, your dog understands when to stay, when to continue, and when to relax. Clarity lowers stress and prevents fidgeting or creeping in public setups.
Lead Mechanics That Set You Up For Success
Light, consistent lead handling drives calm movement. Hands stay low and still. You ask with a gentle feel and release the instant your dog softens toward the position you want. No yanking. No nagging. The dog learns to follow tiny changes, which is vital when crowds and noise rise around you.
Settle On A Mat
Teach a reliable Down on a mat with Good to extend duration and Yes to pay. Start with five to ten seconds, then build to minutes with mild background noise. Add your sit down and stand up movements as low level distractions. This maps directly to cafes, train platforms, and waiting rooms.
First Steps Outdoors
Move outside only when your indoor skills feel smooth. Training your dog to be neutral in public is built by choosing simple wins first.
Pick Low Pressure Locations
Begin on a quiet pavement or a car park corner at calm times. Keep sessions short. Two or three minutes of focused work then a short break. Success builds confidence and keeps arousal in check.
The Structured Walk
We use a repeatable pattern. Heel for ten to fifteen steps. Sit. Look at me. Free for a short sniff on a loose lead. Back to Heel. This pattern teaches your dog that neutrality brings both order and freedom. It also lets you reset quickly if interest spikes.
Reward Strategy That Builds Neutrality
The right reinforcer at the right time is the secret to training your dog to be neutral in public. We structure rewards so calm choices earn the best outcomes.
- Food for position and stillness. Pay while your dog holds a Down and watches people pass.
- Toys for energy release after successful control. Use short play after a stable Heel past dogs.
- Life rewards when safe. Sniff a lamppost, move to a grass verge, sit by your feet at a cafe. Access given by you teaches your dog that working with you unlocks the world.
As neutrality grows, we shift to variable reinforcement. Not every correct behaviour pays, but the chance of payout keeps your dog motivated without over arousal.
Reading Arousal So You Can Stay Ahead
Neutrality is not a switch. It is a state you build and protect. Learn the early signs that arousal is building so you can act before barking or lunging starts.
- Eyes lock and freeze on a trigger
- Breathing speeds up
- Tail lifts and stiffens
- Weight shifts forward
- Lead pressure creeps in as the dog leans
Interrupt early with a gentle lead cue, step away on a curve, mark a head turn with Yes, and pay. You are teaching your dog that looking away from the trigger and back to you is the fastest route to reward and relief.
Building Reliability With Real Distractions
Now we start training your dog to be neutral in public spaces that feel busy. We still move in small steps, but we make each step count.
People And Dogs
Work at the distance where your dog can notice and remain in control. Heel ten steps, Sit, pay. Down on the mat for thirty seconds, pay. Watch two dogs pass, pay. If your dog stares or leans, increase distance, reset with easy wins, then try again. We never flood. We plan. That is how the Smart Method keeps progress steady.
Urban Noise And Movement
Start with cyclists and joggers at a distance, then buses and prams, then crowds. Use the same pattern. Heel, Sit, Look, Free. Vary the direction and pace. Your dog learns that your plan always beats chasing the environment.
Cafes, Shops, And Queues
Bring the mat. Choose a corner with space. Begin with short sits and short downs. Feed low to keep posture relaxed. If your dog breaks, calmly reset and lower criteria. Over sessions, add duration, then add mild distractions like a dropped spoon or a chair scrape. Training your dog to be neutral in public means teaching the skill of resting on cue while life moves around you.
Using Equipment The Smart Way
We keep equipment simple and purposeful. A flat collar or similar and a standard lead are enough when you have good mechanics. A long line supports recall and controlled freedom in open areas. The tool is never the method. Your timing, clarity, and progression do the work. This is how a Smart Master Dog Trainer will coach you during lessons.
Progression That Does Not Overwhelm
Progress at the speed of confidence. Two green sessions beat one struggle. Use this sequence as your guide.
- Quiet street with one to two distant walkers
- Moderate foot traffic with space to step off
- Bus stop or corner cafe at off peak times
- Short queue outside a shop
- Town centre for short blocks, then a rest in a quiet side street
Keep your dog under threshold. If a session dips, end on a simple success and leave. Training your dog to be neutral in public is about stacking wins, not proving a point.
Correcting Without Conflict
Pressure and Release builds accountability without adding stress. If your dog breaks a Sit to lean toward a passer by, calmly guide back to position with light lead pressure, then release the instant they return and relax the muscles. Mark Good and pay after two seconds of stillness. Your dog learns that the fastest path to relief and reward is to comply. This keeps emotion low and trust high.
Common Pitfalls And How We Fix Them
Endless Luring
If you wave food at your dog, the food becomes the focus, not the work. We use markers and reinforcement timing so your dog understands the task, then gets paid for meeting criteria.
Letting The Lead Do The Talking
Constant lead pressure creates resistance. Use brief, clear cues and quick release. Reward the soft lead. The goal is a dog that chooses to stay close because it pays.
Jumping Into Crowds Too Soon
Skipping steps creates reactivity. We plan routes and pick times that match your dog’s current skill, then add stressors in small amounts.
Unclear End Of Exercise
If your dog never hears Free, they will guess. We always mark the end so the dog can relax without self releasing.
Weekly Practice Plan
Use this simple plan while training your dog to be neutral in public. Keep sessions short and focused.
- Day 1 Indoors. Markers, Heel in place, Down on mat for one to two minutes
- Day 2 Quiet street. Heel pattern for ten minutes. One mat settle of thirty to sixty seconds
- Day 3 Park edge. People at a distance. Heel, Sit, Look, Free cycles for ten minutes
- Day 4 Cafe corner off peak. Two to three short mat settles. Pay calm breathing
- Day 5 Rest day. Light play and easy recall games
- Day 6 Town path. Short exposures then break in a quiet lane
- Day 7 Review. Repeat the easiest session of the week to bank confidence
Log each session. Note distance to triggers, how quickly your dog settled, and which rewards worked. Share this with your trainer so we can fine tune your plan.
Safety And Etiquette In Public
Neutral training includes standards for you as a handler. Keep your lead short enough for control without tension. Give space to other teams. Park up on the edge when you need to reset. If a dog spirals toward you, step aside, place your dog behind your legs, mark a Look, and pay. Your calm choices teach your dog to stay calm too.
When To Work With A Professional
If your dog has a bite history, intense lunging, panic in crowds, or has rehearsed reactivity for months, do not go it alone. A Smart Master Dog Trainer will assess your dog and build a tailored plan that uses the Smart Method to rebuild stability. We deliver results focused programmes in home, in structured groups, and through comprehensive behaviour support. Ready to turn your dog’s behaviour around? Book a Free Assessment and connect with a certified Smart Master Dog Trainer available across the UK.
Real World Scenarios To Practice
Passing Dogs On A Narrow Path
Spot early. Step to the side. Cue Sit and Look. Feed low. Release after the pass with Free and a short sniff. Repeat for three passes then take a minute of calm walking.
Waiting At A Crossing
Down on the mat or Sit beside your leg. Mark Good every few seconds. Pay at heel level. When the signal changes, Heel across with a soft lead and normal pace.
Settling At A Cafe
Place the mat. Down. Good to maintain. Pay a few times, then switch to life rewards like quiet praise and a view of the street. If interest spikes, use a short Heel reset away from the table, then return and try a shorter duration.
Handling Surprise Triggers
Use your curve out. Turn your body, guide with a light lead, mark the first head turn back to you, and pay. Reset with a short Heel pattern, then ease back toward your route if your dog looks loose again.
Progress Checks And Milestones
- Week 1 Calm movement and short downs outside
- Week 2 Reliable Sit and Look with people five metres away
- Week 3 Passing one calm dog within three metres without pulling
- Week 4 A five minute cafe settle with mild noise
- Week 6 Town centre walk for ten minutes with two resets or fewer
These are guideposts. Your dog’s path may move faster or slower. The Smart Method keeps you improving without guesswork.
FAQs About Training Your Dog To Be Neutral In Public
How long does it take to see progress?
Most teams see better focus within one to two weeks of daily short sessions. Solid neutrality in busier places often builds over six to eight weeks with consistent practice and clear progression.
Can any dog learn public neutrality?
Yes. Age, breed, and history shape the plan, but the Smart Method adapts to each dog. With clear criteria, fair guidance, and good reinforcement, all dogs can learn to stay calm in public.
What if my dog is already reactive?
We can help. We begin at distances where your dog can think, rebuild clarity with markers, and use Pressure and Release with strong rewards to shape calm choices. Book a professional assessment if safety is a concern.
Do I need special equipment?
No. A well fitted collar, a standard lead, a long line for recall practice, and a mat are usually enough. The change comes from timing, structure, and consistency, not gadgets.
How often should I train outside?
Short daily sessions are best. Ten to fifteen minutes with clear goals will beat one long outing. End on a win and log results so you can plan the next step.
What does a session with Smart look like?
We start with a clear plan, run short focused reps, and coach you in calm handling. You will see your dog make better choices in the first lesson because clarity and reinforcement arrive at the right moments.
Will my dog still enjoy walks?
Yes. Neutral is not boring. It is relaxed and confident. We balance obedience with controlled freedom so your dog can enjoy the world without losing control.
Can I do this without food?
Food speeds learning and creates positive emotion. As skills grow, we blend in praise, toys, and life rewards so your dog listens even when you are not carrying treats.
Conclusion
Training your dog to be neutral in public is a gift to you, your dog, and the people around you. With the Smart Method, you build clarity, fair accountability, real motivation, steady progression, and deep trust. Start at home, choose smart locations, use short structured sessions, and watch your dog learn that calm pays in every space. When you want expert guidance and faster results, our nationwide team is ready. Your dog deserves training that truly works. With certified Smart Master Dog Trainers nationwide, you will get proven results backed by the UK’s most trusted dog training network. Find a Trainer Near You
Training Your Dog To Be Neutral In Public
Why Obedience During Family Chaos Matters
Busy homes are wonderful, but they can be hard on a dog. School runs, visitors, deliveries, children playing, and loud TVs can lead to barking, jumping, and frantic energy. Obedience during family chaos is not about making your dog dull. It is about building calm choices, reliable manners, and steady focus when life is loud. At Smart Dog Training, our structured approach produces behaviour that holds up anywhere, not just in quiet practice sessions.
The Smart Method is the foundation for obedience during family chaos. It balances clarity, pressure and release, motivation, progression, and trust. This method keeps training fair and consistent while making your dog eager to work. If you want expert guidance, a Smart Master Dog Trainer can map a programme around your family’s routine and support you through every stage.
The Smart Method That Works at Home
Every Smart programme follows five pillars that turn chaos into clarity.
- Clarity: Clear commands and markers remove guesswork so your dog knows what to do.
- Pressure and Release: Fair guidance followed by a clear release builds responsibility without conflict.
- Motivation: Rewards create positive emotions and a desire to participate.
- Progression: We add distraction, duration, and difficulty step by step until reliable anywhere.
- Trust: Consistent leadership strengthens the bond and produces calm, confident behaviour.
These pillars guide how we build obedience during family chaos in a way that lasts.
What Family Chaos Looks Like for Your Dog
Household noise and movement add stress. Dogs struggle when rules change or the environment overwhelms them. Typical triggers include doorbells, children running, playdates, meal prep, video games, and visitors who arrive excited. Without a plan, dogs fall back on barking, chasing, scavenging, and jumping. Smart programmes teach your dog what to do instead, then proof those skills in real life.
Foundation Skills for Calm Behaviour
Strong foundations make obedience during family chaos possible. Start here and build layer by layer.
Marker Language and Command Structure
We teach a simple language so your dog understands when they are right, when to keep working, and when they are done.
- Command: The cue that tells the dog what to do.
- Yes: A marker that ends the behaviour and leads to a reward.
- Good: A marker that means keep going, you are doing well.
- Free: A release that ends the exercise so your dog can relax.
Smart trainers keep markers crisp and consistent. That clarity is vital when the house gets loud.
Teach the Release Word
Dogs often break positions because they think the job is over. A clear release word fixes that. Ask for a Sit or Down, reward with Good while the behaviour continues, then Free to end. This simple structure keeps your dog steady even when distractions pop up.
Place Training as the Household Anchor
Place is the skill that transforms busy homes. Your dog goes to a bed or mat and remains there until released. It is a calm, controlled spot that reduces pacing, door dashing, and counter surfing. Place gives your dog a job to do, which lowers stress and prevents chaos from snowballing.
Step by Step Place Training
- Introduce the Mat: Guide your dog on, mark Yes, and reward.
- Add Duration: Use Good to reinforce staying put for a few seconds, then Free.
- Build Distance: Take a step away, return to reward, then Free.
- Change Positions: Ask for Down on the mat for deeper relaxation.
Proof Place Against Real Life
- Kitchen Prep: Ask for Place while you cook. Reward calm. Free when you finish.
- Homework Time: Children at the table, dog on Place. Reward at intervals.
- TV and Music: Turn the volume up, keep your dog on Place, and pay for quiet.
This single skill improves obedience during family chaos across the whole house.
Recall That Cuts Through Noise
Reliable recall is the safety line. Build it indoors first, then add movement and sound.
- Name Game: Say your dog’s name. When they orient to you, mark Yes and reward.
- Short Recalls: From 2 to 3 metres, back away playfully as they run to you.
- Layer Distraction: Add a family member walking past, then a toy on the floor, then kids chatting.
- Outdoor Proofing: Garden first, then front drive, then controlled park sessions.
Keep rewards high value and your voice upbeat. Progression makes recall dependable during family chaos.
Loose Lead Walking in Busy Spaces
Indoor practice teaches the pattern. Stand still until the lead softens, mark Yes, and move forward. Repeat every few steps. Then add movement at the door, past the bins, and by the school gate. If the lead goes tight, you stop. When the lead softens, you go. Pressure and release guides without conflict and builds clean walking even when life is bustling.
Impulse Control Around Doors and Food
Choose simple rules and keep them the same for everyone in the house.
- Doorway Manners: Sit at the door. Lead clipped on, wait, eye contact, then Free through.
- Food Time: Bowl down only when your dog waits politely on Place. Release to eat.
- Drop and Leave: Practice trades with toys and chews. Mark Yes for letting go, then give the item back often.
These rules create obedience during family chaos because your dog learns there is a right choice in every daily moment.
Kids and Dogs Working as a Team
Clear boundaries keep everyone safe and happy. Children can help with easy parts of training while adults handle the rest.
- Safe Zones: A crate or Place is off limits for play. It is a rest space.
- Calm Greetings: No hugging or grabbing. Ask for Sit, then gentle strokes under the chin.
- Structured Games: Short recall games with an adult present build teamwork and trust.
When children follow simple rules, obedience during family chaos becomes second nature.
Visitor and Delivery Protocol
Have a plan for guests and stick to it every time.
- Pre Doorbell: Dog on Place before visitors arrive.
- Open Door: Maintain Place. Use Good for staying calm while the door opens.
- Greeting: Only when your dog holds a Sit will you allow a brief greeting. If they break, pause, reset to Place, and try again.
Over a few visits, your dog learns the door is a routine, not a party.
Managing High Energy Times
Early mornings and early evenings can be wild. Use rhythm to your advantage.
- Morning Reset: Quick Place session after the first toilet break. Five minutes of focus sets the tone.
- Pre Dinner Calm: Place while you prep food. Short walk or play after the meal.
- Evening Wind Down: Sniff walk or puzzle feeder, then Place to settle before bed.
Daily rhythm is the quiet engine of obedience during family chaos.
Games That Build Stability
Turn training into play that rewards self control.
- Red Light Green Light: Walk together. When you stop, your dog sits. When you go, they go.
- Find It on Cue: Scatter a few treats, then recall off the search. This builds response even when excited.
- Zen Door: Approach the door. If your dog leans forward, you step back. When they wait, you step forward and release through.
Short games deliver high impact without overstimulating the house.
Fair Guidance Using Pressure and Release
Pressure and release is a Smart Method pillar. It is simple and humane. You apply gentle guidance to show the right choice, then release pressure the moment your dog makes that choice. The release is the dog’s reward because it brings clarity and comfort. This approach avoids nagging and gives your dog responsibility. It is a key reason our clients see dependable obedience during family chaos.
Motivation That Beats Distractions
Rewards are more than food. Use what matters to your dog in the moment.
- Food: Perfect for precision and repetition.
- Toys: Great for energy and drive after a few reps.
- Life Rewards: Go sniff, greet a friend, hop into the car. Real life fun for real life behaviour.
When motivation is strategic, your dog will choose you over the chaos.
Troubleshooting Common Problems
Barking at Movement and Noise
Pre load Place before activity starts. Reward quiet watching. If barking kicks off, calmly reset to an easier stage, then rebuild. Structure beats shouting every time.
Jumping on Guests
Visitors only greet when your dog holds Sit. If they break, the greeting ends. This pressure and release turns manners into access to people, which is the real reward.
Chasing Children
Use Place while kids play. Release for short recall games with adults managing the rules. Over time, chasing fades because it no longer brings fun.
Counter Surfing
During food prep, Place pays well. Add Leave practice with low stakes items first. Consistency closes the window of opportunity.
Daily Routine and Checklist
Use this Smart checklist to keep training simple.
- Morning: Toilet, Place for five minutes, short recall game.
- Midday: Loose lead walk, two Place breaks at home.
- Afternoon: Doorway manners practice during a delivery or school run.
- Evening: Food waiting routine, sniff walk or puzzle, calm Place before bed.
Tick these off and you will see steady gains in obedience during family chaos.
Coaching the Whole Family
Dogs thrive when rules do not change. Post your markers and rules on the fridge so everyone matches the same words and steps. Hold short family practice sessions twice a week. Rotate who handles Place, who opens the door, and who plays the recall game. Shared responsibility builds trust and speeds results.
When to Bring in Professional Support
If your dog shows anxiety, reactivity, or resource guarding, you need a tailored plan. A Smart Master Dog Trainer will assess your home, set clear goals, and coach you through the Smart Method with progression that fits your dog and your schedule. We work in real environments so success transfers to daily life.
Ready to turn your dog’s behaviour around? Book a Free Assessment and connect with a certified Smart Master Dog Trainer - available across the UK.
Case Study Style Framework You Can Use
Here is how we apply Smart structure in a typical busy home with two school age children and a friendly adolescent dog.
- Week 1 Foundations: Install marker language and the release word. Begin Place with five second holds. One short recall session indoors daily.
- Week 2 Household Habits: Add Place to meal prep and homework. Doorway sit and release routine. Walks focus on soft lead and short sits.
- Week 3 Distraction Work: Kids practise walking past Place. TV on during Place. Add outdoor recalls in the garden.
- Week 4 Real Life Proof: Visitor protocol with a neighbour. Short park trip with structured entry and exit. Maintain evening wind down.
By the end of week four, most families report less barking, clean greetings, and calm periods that felt impossible before. This is obedience during family chaos made practical.
Progression Roadmap for Reliability
Progression makes skills strong, so we move step by step.
- Distraction: Add one moving part at a time. People walking, then objects falling, then sound.
- Duration: Count in your head. Five seconds becomes ten, then thirty, then one minute.
- Distance: Start within arm’s reach. Add a step away, then around a corner, then out of sight for a moment.
If a step fails, drop back to the last success and rebuild. Smart programmes always protect confidence while raising standards.
Safety, Welfare, and Fair Expectations
Dogs need rest, exercise, and mental work. Use Place for off switches, walks for movement, and training for the brain. Keep sessions short and upbeat. If your dog is ill, in pain, or overtired, adjust your plan and contact a professional for guidance.
FAQs on Obedience During Family Chaos
How long does it take to see results?
Most families see calmer behaviour within two weeks when they follow the Smart Method daily. Strong reliability under distraction usually builds over four to eight weeks of steady practice.
Can young children be part of training?
Yes, with adult supervision. Give children simple jobs like delivering treats to Place or calling the dog for a short recall. Adults manage doors, visitors, and lead work.
What if my dog will not stay on Place?
Shorten the hold time, reduce distractions, and increase rewards. Use Good to pay for staying, and Free to end. Progress slowly and wins will stack up.
How do I stop barking at the doorbell?
Pre load Place before the ring. Reward quiet watching. Rehearse with a family member using the bell, then add real deliveries with the same plan.
Do I need special equipment?
You need a mat for Place, a well fitted lead, a secure collar or harness, and a range of rewards. Your Smart trainer will recommend kit that fits your dog and programme.
When should I call a professional?
If you see anxiety, reactivity, or guarding, or if progress stalls, book help. A Smart Master Dog Trainer will tailor the plan and coach you in your home for faster, safer results.
Conclusion
Obedience during family chaos is not luck. It is the result of a clear plan, fair guidance, and steady practice. The Smart Method gives you the structure to build calm behaviour that lasts. Start with markers and Place, layer in recall and walking skills, and follow a simple daily routine. With consistency, your dog will stay focused and relaxed even when life is messy. If you want expert support, we are ready to help.
Your dog deserves training that truly works. With certified Smart Master Dog Trainers (SMDTs) nationwide, you'll get proven results backed by the UK's most trusted dog training network. Find a Trainer Near You
Obedience During Family Chaos
Why Independence Matters for Over Attached Dogs
Many families ask how to start building independence in over attached dogs without harming the bond. When a dog cannot settle unless you are in sight, daily life becomes stressful. You sneak to the bathroom, tiptoe around naps, and cancel plans because your dog might panic. Independence is not distance, it is confidence. At Smart Dog Training, we teach dogs to feel safe and capable whether you are two metres away or out for the school run. Our approach is the Smart Method, delivered by a certified Smart Master Dog Trainer. It builds calm, reliable behaviour that lasts in real-life settings.
Over attachment can look like shadowing you from room to room, whining when you stand up, or barking the moment you open a door. It can also be subtle. A dog who seems fine at home but melts down at a café when you pop inside has the same core issue. Building independence in over attached dogs is about giving structure, clarity, and fair boundaries so your dog learns to regulate their emotions.
Signs Your Dog Is Over Attached
- Shadowing and constant checking in, even during rest
- Whining, pacing, or pawing when you move away
- Explosive greetings after short absences
- Lack of sleep unless a person is nearby
- Inability to settle on a bed or mat without contact
- Guarding a person from other dogs or family members
These patterns are not stubbornness. They are rehearsed habits that grow stronger each time they work. Building independence in over attached dogs begins with changing those patterns in small, controlled steps.
Myths That Hold Owners Back
- Myth 1 More cuddles will fix clinginess. Affection is wonderful, but without structure it can fuel dependency.
- Myth 2 You must ignore your dog to teach independence. We do not teach indifference. We teach calm choices through clear guidance and reward.
- Myth 3 Independence means long lonely hours. We build short, successful repetitions that create stability and trust.
The Smart Method for Building Independence
Smart Dog Training uses a proprietary, outcome-led system for building independence in over attached dogs. The Smart Method has five pillars that guide every step.
Clarity
Dogs relax when they know exactly what earns reward and what ends the exercise. We use precise commands and marker words so the dog can predict outcomes. Clear language removes guesswork.
Pressure and Release
Light, fair guidance shows a dog how to make the right choice. The instant they comply, the pressure ends and reward arrives. This teaches accountability without conflict and is central to building independence in over attached dogs.
Motivation
Food, toys, and praise are used with purpose to create focus and positive emotional states. Motivated dogs choose calm because it feels good.
Progression
We add distraction, duration, and distance in a structured way. Skills become reliable in the kitchen, then the hallway, then the café. Step by step builds real-world resilience.
Trust
The bond strengthens because communication is clean and consistent. The dog learns that your leadership creates safety. That trust is the engine of independence.
Step 1 Build a Calm Home Structure
Before separation games, stabilise the daily rhythm. Building independence in over attached dogs works best when the home has predictable patterns.
Set Predictable Routines
- Sleep windows Dogs need 16 to 18 hours of sleep across a day. Protect nap times after walks and training.
- Meal windows Feed at consistent times so energy and arousal are steady through the day.
- Training windows Short, focused sessions teach the brain to work, then switch off.
When the day has shape, your dog stops scanning every moment for what happens next. That alone reduces clinginess.
Teach Place for the Off Switch
Place training is the foundation of building independence in over attached dogs. Choose a raised bed or mat. Guide your dog on, mark “yes” when all four paws are on, and reward between the paws. Start with 10 to 20 seconds, then release with a clear word. Add calm leash guidance if needed, and always reward relaxation. Over days, expand duration and add mild distractions.
Crate and Confinement for Security
A crate or pen is a bedroom, not a punishment. Pair it with food, chews, and soft bedding. Close the door for short, successful reps during the day while you are home. The goal is comfort with neutral exits and entries. This environment gives your dog a safe place to practice being off duty.
Step 2 Clean Cues and Markers
Clarity is non negotiable. Building independence in over attached dogs depends on language that never changes and handling that is calm.
Release Words End the Exercise
Pick one release word like “free.” It should be the only signal that ends Place or a Sit. Without a release, many clingy dogs drift after you the moment you move. With a release, the dog learns to hold position while you go about your tasks.
Neutral Handling and Calm Exits
Practice standing up, picking up keys, or walking to the door while your dog remains on Place. If they step off, guide back with the lead, mark, and reward when calm. Keep your face and voice neutral. This shows your dog that movement does not predict fuss. It is a key part of building independence in over attached dogs.
Step 3 Progressive Separation Games
With Place growing strong, start tiny absences that succeed often. Short wins are the fastest route to stability.
Micro Absences and Threshold Work
- Close a door for two seconds while you stand outside, then return, pause, and release.
- Walk to the hallway for five seconds while your dog stays on Place. Return, pause, then reward.
- Open and close interior doors while your dog remains settled. Keep your energy low and predictable.
Gradually increase distance and then duration. The order matters. Add distance first, duration second, distraction third. That sequence keeps sessions achievable while building independence in over attached dogs.
Out of Sight with Clear Criteria
Move to brief out-of-sight reps. Step behind a doorframe for three to five seconds and return. If your dog vocalises, reduce the challenge and slow down. Your success criteria are quiet, still body language, and a soft face. Mark and reward those moments.
Step 4 Independence in Motion
Some dogs cling most when walking. They lean on the leg or freeze if the lead goes slack. We teach movement skills that reduce dependence on constant contact.
Loose Lead Without Clinging
Start in a low-distraction area. Walk in straight lines with a clear heel or follow cue. Use light lead pressure to guide, then release as soon as the dog chooses the right position. Reward at your knee, then vary the reinforcement schedule. As the dog learns the pattern, they stop checking your leg and start working the task. This is vital when building independence in over attached dogs outside the home.
Public Settles with You Disengaged
Practice Place or a down stay at a café table or park bench. Sit quietly. Do not stare or narrate. Mark and reward calm at intervals, then release. Over sessions, lengthen time and add mild distractions. Your dog learns that your stillness does not mean something is wrong. It means relax.
Step 5 Manage Affection and Attention
We love affection. We also structure it. Building independence in over attached dogs means the human attention economy becomes predictable.
Structured Affection
- Call your dog to you for fuss instead of responding to nudges.
- End affection with your release word so the session has a defined end.
- Use calm massage-like strokes instead of exciting play when you want a dog to settle.
Calm Greetings and Departures
Make arrivals and exits low key. When you come home, place your bag down, take a breath, then invite your dog to Place and greet there. When you leave, cue Place, wait for stillness, then exit without fanfare. This routine is a cornerstone of building independence in over attached dogs.
Step 6 Confidence Through Enrichment
Independence grows when dogs practice problem solving without human help.
Independent Activities
- Food puzzles that take 5 to 10 minutes
- Safe chew sessions during mat time
- Nosework games that your dog can complete solo
Set these up while you work nearby without engaging. Reward calm completion with a quiet “good.” Over time, do these in different rooms to generalise confidence.
Play With Rules
Play is wonderful when it teaches control. Use start and stop cues. Ask for a Sit before you re-engage. Rotate toys. Short, rules-based play teaches your dog to handle excitement, then switch off, which supports building independence in over attached dogs.
Step 7 Accountability and Fair Boundaries
Boundaries are not harsh. They are clear lines that help the dog relax. We use pressure and release with kindness so dogs learn how to succeed.
Lead and Place Boundaries
If your dog steps off Place without a release, guide back with light lead pressure, then release the moment they return. Mark and reward. On walks, guide to your chosen position. Release immediately when they comply. The fairness of the release teaches responsibility and reduces conflict.
Interrupting Attention Seeking
Jumping, pawing, and demand barking are requests you do not have to answer. Instead, guide the dog to Place, ask for stillness, mark, and reward when quiet. Over time, the dog learns which behaviours pay and which do not. This shift is central to building independence in over attached dogs.
Troubleshooting Common Setbacks
Whining or Barking
Check the last success point. Reduce duration or distance. Add more repetitions at the easier level. Increase your neutral handling and make rewards calmer. Often, a quick reset restores confidence.
Shadowing and Scanning
Increase Place time with you moving around the home. Reward soft eye blinks and relaxed posture. If your dog watches closely, add a chew on Place and step out of sight for brief reps.
Regression After a Holiday
Life happens. Go back one or two steps in the plan for a week. Rebuild clean repetitions. Because the patterns already exist, you will climb faster the second time. Consistency is your best friend when building independence in over attached dogs.
Multi Dog Homes
Teach each dog Place and crate time alone first. Then pair them for short sessions. If one dog fuels anxiety in the other, separate the sessions and progress each dog at their own pace.
Tracking Progress and Knowing When to Advance
What to Log
- Duration on Place without vocalising
- Distance you can move away comfortably
- Number of calm departures and returns each day
- Sleep totals across 24 hours
When to Level Up
Advance when you can do 10 calm reps in a row at the current level. Add either two seconds of duration or one metre of distance, not both. This measured climb is how Smart Dog Training keeps building independence in over attached dogs without creating setbacks.
Safety and Welfare First
Pain, gut upset, or hormonal changes can amplify anxiety. If your dog shows sudden behaviour change, consult your vet. Keep sessions short, surfaces safe, and equipment well fitted. If you feel stuck, get hands-on help early rather than pushing through frustration.
When to Work With a Smart Master Dog Trainer
If your dog panics, self harms, or cannot settle even with careful steps, partner with a professional. A Smart Master Dog Trainer will assess your dog, your routine, and your home layout, then design a plan that you can follow with confidence. SMDTs are certified through Smart University and mentored to deliver the Smart Method in real homes with real families.
Our programmes include in-home training, structured group classes, and tailored behaviour plans. We build actionable routines and coach you through daily life. That is the fastest path to building independence in over attached dogs and keeping results consistent long term.
Ready to turn your dog’s behaviour around? Book a Free Assessment and connect with a certified Smart Master Dog Trainer - available across the UK.
Example Daily Plan That Builds Independence
- Morning 20 minute walk with loose lead practice. Five minutes of Place at home after.
- Mid morning Three micro absences of 10 to 20 seconds each. Quiet rewards on return.
- Afternoon Enrichment chew on the mat while you work nearby for 10 minutes.
- Early evening Short training session Place with you moving around the house. Calm release, then rest.
- Bedtime Toilet break, then crate or bed with a soft chew for five minutes before lights out.
Repeat this flow most days, adjusting to your dog’s age and breed. The routine repeats make building independence in over attached dogs a predictable, low-stress process.
FAQs
How long does it take to see progress?
Most families see calmer settles within one to two weeks when they follow the plan daily. Full reliability takes longer. The path to building independence in over attached dogs depends on consistent practice and steady progression.
Is a crate required?
No. A crate is useful for many dogs, but you can use a pen or quiet room. The key is a defined rest space. Place training plus fair boundaries can still deliver strong independence.
Will this harm our bond?
Quite the opposite. Structured clarity reduces stress for both of you. Dogs trust leaders who are calm and consistent. That trust supports building independence in over attached dogs while keeping affection meaningful.
What if my dog cries when I leave the room?
Shorten the challenge. Work at a distance where your dog stays quiet, then build up one small step at a time. Reward calm, not noise. Many dogs improve quickly with this approach.
Can I use treats for every repetition?
Start with frequent rewards to build value. Then shift to variable reinforcement and include life rewards like access to the garden or a nap in the sun. Balance keeps behaviour strong.
Should I ignore my dog completely before I leave?
You do not need to ignore your dog. Keep your energy low, use Place, wait for stillness, then leave without fuss. Neutral exits prevent spikes in arousal.
What equipment do I need?
A stable Place bed, a well fitted flat collar or harness, a standard lead, and a few food rewards or chews. Keep tools simple and consistent.
When do I need professional help?
If there is intense distress, destruction, or self injury, contact us. A Smart Master Dog Trainer will tailor the plan and coach you through daily routines to keep your dog safe and progressing.
Conclusion
Building independence in over attached dogs is not about cold distance. It is about steady leadership, clean communication, and fair accountability. With the Smart Method, you create a calm home structure, teach place-based relaxation, and layer separation in small, successful steps. Your dog learns that your movement and absence are predictable and safe. The result is a confident companion who can rest, travel, and live well right beside you or on their own.
Your dog deserves training that truly works. With certified Smart Master Dog Trainers (SMDTs) nationwide, you'll get proven results backed by the UK's most trusted dog training network. Find a Trainer Near You
Building Independence in Over Attached Dogs
Understanding Calm Behaviour in High Stim Environments
Everyday life is busy. Buses whoosh past, scooters zip by, people laugh and shout, and dogs appear around corners. In the middle of all that, you want your dog to stay relaxed, listen, and make good choices. That is exactly what calm behaviour in high stim environments looks like. Your dog can notice the world without getting pulled into it. They stay focused, take direction, and recover fast when something exciting or worrying happens.
At Smart Dog Training, this outcome is not left to chance. We teach a clear system so dogs learn how to be calm and confident anywhere. Whether you live in a quiet village or a busy city, calm behaviour in high stim environments is a trained skill you can build step by step. A certified Smart Master Dog Trainer will map out the right plan for your dog and coach you through every stage of the process so results stick in real life.
If your dog already struggles with reactivity, overexcitement, or anxious behaviour, you are in the right place. You can shape calm behaviour in high stim environments with structure, motivation, and fair accountability. The Smart Method provides the framework and the path.
Why High Stim Environments Overwhelm Dogs
Dogs find busy places hard for a few simple reasons:
- There is more sensory load. Sights, scents, and sounds stack up and push arousal higher.
- There is less predictability. Unplanned events make it hard for an untrained dog to stay composed.
- There is a rich reinforcement history for pulling, scanning, or barking. If those behaviours have ever worked, they will repeat.
- Handlers often change the plan in the moment, which adds confusion and tension to the lead.
The good news is that each of these pressures can be answered with skills. Calm behaviour in high stim environments grows when your dog knows exactly what to do, is motivated to do it, and has been guided through fair pressure and timely release to hold that choice. That is the Smart way.
The Smart Method For Calm Behaviour in High Stim Environments
The Smart Method is our proprietary training system used across every Smart Dog Training programme. It builds calm behaviour in high stim environments through five pillars that balance clarity, motivation, structure, and trust.
Clarity
Dogs perform best when the rules are simple and consistent. We use precise commands and marker words so your dog always understands what earns a reward and what releases pressure. When the world gets busy, clarity cuts through the noise and supports calm behaviour in high stim environments.
Pressure and Release
Guidance is paired with a clear release and reward. This teaches accountability without conflict. Your dog learns how to switch off pressure by making good choices. With repetition, that choice becomes habit, and calm behaviour in high stim environments becomes the default.
Motivation
Rewards create a positive emotional state and strong engagement. We build food and toy drive in the right way, then use it to reinforce stillness, focus, and loose lead choices. Motivation makes the work enjoyable, which makes calm behaviour in high stim environments reliable.
Progression
We layer skills in a simple staircase. First teach the behaviour in quiet spaces. Then add distance to triggers, increase duration of calm, and raise distraction carefully. This progression is how we proof calm behaviour in high stim environments without flooding or guesswork.
Trust
Training should build the relationship. When your dog trusts your handling, they are more willing to follow your lead, even when things feel intense. Trust sits at the heart of calm behaviour in high stim environments, and it is baked into every Smart session.
Foundation Skills To Build at Home
Before you take on busy streets, install strong foundations. These skills anchor calm behaviour in high stim environments and make later proofing straightforward.
Place and Settle
Place is a boundary exercise. Your dog goes to a bed or platform and stays there until released. It creates a clear picture of stillness and helps your dog learn how to relax on cue. Start in a quiet room, then move Place to the kitchen while you cook, then to the garden, and later to calm public spaces. When your dog can settle in many rooms and during routine activity, you are ready to take this calm behaviour into high stim environments like cafes and parks.
- Cue Place, reward the down, and feed calm. Pet slowly between rewards.
- Vary reward timing so your dog learns to lie quietly, not just wait for food.
- Use a release word so your dog knows when the job is finished.
Lead Handling and Loose Lead Focus
Loose lead walking is a conversation. Your hands set the tone, your pace sets rhythm, and your body position sets clear boundaries. In quiet areas, build a reliable heel or structured loose lead. Reward check-ins and reinforce the position you want. This discipline sets the stage for calm behaviour in high stim environments because your dog already understands the rules of movement with you.
- Keep a short, relaxed lead, not tight and not slack.
- Reward attention to your hip or eye contact.
- Use gentle pressure and a prompt release to guide back to position.
Reward Timing and Marker Language
Markers make learning clean. A reward marker such as Yes tells the dog food is on the way. A release marker such as Free ends the job. A no reward marker such as Uh-uh resets focus without emotion. This language creates clarity and smooths the path to calm behaviour in high stim environments. With clear markers, you can reinforce what you want and redirect what you do not want without fuss.
Controlled Exposure and Proofing Without Overload
Taking skills from the lounge to the high street is where many owners get stuck. The key is controlled exposure. You want to work close enough to the world to be meaningful, but far enough that your dog can still think and choose. That balance protects your training and keeps calm behaviour in high stim environments on track.
- Start at a large distance from triggers. If your dog stops eating or scanning increases, you are too close.
- Keep sessions short. Five to ten minutes is often enough early on.
- Use Place or a quiet down at a safe distance to pattern relaxation before you move in.
- Mix movement with stillness. Walk a small loop, then return to Place to downshift arousal.
As your dog gets better, change only one factor at a time. Add a little duration of calm before you reduce distance. Add a new sound before you add a crowd. This simple rule preserves calm behaviour in high stim environments by keeping progress predictable and steady.
Handling Arousal Spikes in the Moment
Even well trained dogs can spike when something sudden happens. Your job is to interrupt arousal, redirect to a known task, and resolve with calm. Smart Dog Training teaches a clean, repeatable process so setbacks do not undo progress.
- Interrupt with your marker or name, then guide back to position with fair lead pressure.
- Redirect into a simple behaviour such as Sit, Heel, or Place that your dog knows cold.
- Resolve by reinforcing calm stillness and relaxed breathing. Reward a soft body and downturned ears.
This pattern prevents spirals and protects calm behaviour in high stim environments. With practice, your dog learns that looking to you is the quickest way to feel safe and get paid.
When to Bring in a Smart Master Dog Trainer
If your dog rehearses big reactions, or if you feel stuck, it is time to work with a professional. A Smart Master Dog Trainer will assess your dog in person, set the right criteria, and coach you on handling so you can build calm behaviour in high stim environments with confidence. Our trainers apply the Smart Method exactly as designed and tailor it to your breed, history, and goals.
Ready to turn your dog’s behaviour around? Book a Free Assessment and connect with a certified Smart Master Dog Trainer, available across the UK.
FAQs
What does calm behaviour in high stim environments actually look like?
Your dog notices the world but stays responsive to you. They keep a loose lead, offer check-ins, and can hold a Sit or Place while people, dogs, or vehicles move past. Most importantly, they recover fast from surprises.
How long does it take to achieve calm behaviour in high stim environments?
Most families see change in the first one to two weeks when they follow the Smart Method. Solid reliability often takes four to eight weeks of consistent training, then ongoing practice to maintain the standard in busier places.
My dog ignores food outside. What should I do?
Work further from the action and build food drive at home. Use higher value rewards and shorter sessions at first. As calm behaviour in high stim environments improves, your dog will take food more freely because arousal is managed.
Is pressure and release suitable for sensitive dogs?
Yes. Smart Dog Training pairs gentle guidance with clear release and reward. The aim is fair accountability and predictable outcomes, never conflict. Sensitive dogs thrive with this clarity and progress well.
Can I practise in busy places right away?
Start in easy environments to build success, then add challenge step by step. Jumping into the busiest space too soon makes calm behaviour in high stim environments much harder and can set training back.
What if another dog runs up to us during training?
Step aside, maintain your dog on Place or Heel, and use your body to create space. Advocate for your dog calmly. If needed, leave and reset elsewhere. Protecting the session keeps calm on track.
Do I need special equipment?
You need a suitable lead, a well-fitted collar or harness, a defined Place bed, and high value rewards. Your trainer will advise on safe, fair tools that support the Smart Method for your dog.
When should I seek professional help?
If you feel overwhelmed, if reactions are getting bigger, or if progress stalls, seek support. Your local Smart team can help you create calm behaviour in high stim environments with a clear, tailored plan.
Conclusion and Next Steps
Calm behaviour in high stim environments is not luck. It is the product of a clear method, the right motivation, fair guidance, and steady progression. Start by installing Place and Settle at home, polish your lead handling, then follow a controlled exposure plan that raises criteria one step at a time. Interrupt arousal, redirect to known tasks, and resolve with calm. This is how Smart Dog Training builds lasting manners that hold up in real life.
If you want a coach by your side, we are here to help. Your dog deserves training that truly works. With certified Smart Master Dog Trainers (SMDTs) nationwide, you'll get proven results backed by the UK's most trusted dog training network. Find a Trainer Near You
Calm Behaviour in High Stim Environments
What Owners Need to Know About Leash Handling Skills
Leash handling skills are the foundation of safe, calm, and enjoyable walks. When you know how to guide your dog with clarity and consistency, you prevent pulling, lunging, weaving, and endless sniffing. At Smart Dog Training, we teach owners the exact steps to create reliable leash manners that work on real streets. Every session follows the Smart Method so you get practical skills and measurable results. A certified Smart Master Dog Trainer SMDT will coach your handling and your timing so your dog understands and wants to comply.
In this guide you will learn how leash handling skills start before you even leave the house. You will see how to choose and fit equipment, how to stand and hold the lead, how to apply pressure and release with perfect timing, and how to reward in a way that builds focus instead of frantic energy. Follow the steps and you will feel more in control while your dog becomes calmer and more confident.
The Smart Method For Leash Handling
All leash handling skills at Smart Dog Training are taught through the Smart Method. This clear structure ensures your dog learns quickly and stays reliable around people, dogs, traffic, and tempting smells.
Clarity
Your dog should always know what position earns reward and what behaviour ends the reward. We teach simple marker words, precise hand signals, and a consistent leash picture so there is no confusion.
Pressure and Release
Guidance is fair and light. You apply gentle lead pressure to show direction and you release the moment your dog follows. The release is the information your dog needs. Paired with reward, this builds accountability without conflict.
Motivation
Food and praise build desire to work. We use rewards to create engagement, then we balance it with structure so your dog chooses focus over distractions.
Progression
Skills are layered step by step. We start in a quiet room, add movement, then add duration and distraction. By the time you reach busy streets, your leash handling skills are second nature.
Trust
Clear handling builds trust. Your dog learns you will guide and protect, so they can relax and follow. This is how we achieve calm, confident walks.
Choosing the Right Lead and Collar
Good gear supports good handling. At Smart Dog Training, we select simple, reliable equipment that allows clear pressure and clean release. We avoid clutter and gadgets that create mixed messages.
- Lead length: A standard 1.8 to 2 metre lead gives you room to move while keeping control. Avoid stretchy leads that blur feedback.
- Material: A firm, flat lead sits well in the hand and transmits information cleanly.
- Attachment point: A secure, well fitted collar or harness prevents escape and keeps the leash picture consistent.
Fitting and Safety
Before training, check fit. You should be able to place two fingers between collar and neck. Clip to one strong point only to keep the line of communication clear. Replace any gear that is worn or frayed.
Handler Positioning and Posture
Leash handling skills begin with your stance. Stand tall with relaxed shoulders. Keep your elbows by your sides and hands near your midline. This neutral posture creates a steady reference point for your dog. If you wave your arms or lean forward, the lead will tighten and excite your dog.
- Lead hand: Hold the lead with a light grip. Keep a small working loop for quick adjustments.
- Spare hand: Use it for rewards, signals, and door control. Do not reel the lead like a rope.
- Hip alignment: Face the direction you plan to go, then step off smoothly to avoid jerky cues.
Building Attention Before Movement
Attention creates control. Ask for a simple name response and eye contact before the first step. If your dog cannot offer focus at the door, they will not offer it on the pavement. Reward a calm pause, then move forward together. This small habit improves all leash handling skills and sets the tone for the walk.
The Three Walking States
Smart Dog Training teaches three clear walking states so your dog always knows the rule of the moment. This structure gives your leash handling skills a simple framework you can trust anywhere.
Loose Lead Walk
Your dog can be slightly ahead or to the side, as long as the lead stays soft. This state is for relaxed movement and sniff breaks that you allow. The rule is no pulling. If the lead tightens, pause, guide with light pressure, and release the instant your dog yields. Then move on.
Heel
Heel is for high control. Your dog aligns at your left or right hip, head even with your leg, lead soft, and attention in your direction. Use heel near people, dogs, traffic, and narrow spaces. Keep heel intervals short at first and reward often for position.
Free Time
Free time gives relief. Your dog can sniff a patch of grass that you choose while keeping the lead loose. End free time with a clear marker and return to loose lead or heel. This on off rhythm keeps your walk balanced and prevents frustration.
Marker Words and Timing
We use three simple markers at Smart Dog Training. This helps your dog decode your leash handling skills with speed.
- Yes: The exact moment your dog hits the correct choice. Follow with food or praise.
- Good: Sustained behaviour like a steady heel. This keeps your dog working.
- Finish: The behaviour is over. Use it to switch between walking states.
Time your marker at the moment of the correct action, not after. If your dog yields to pressure, mark the instant they give. If they find heel, mark when their shoulder aligns with your leg. Perfect timing turns ordinary leash handling skills into precise communication.
Pressure and Release Step by Step
This is the heart of Smart leash work. It is fair, light, and consistent.
- Invite: Say your dog’s name. Wait for a glance.
- Guide: Add gentle lead pressure in the direction you want.
- Follow: The moment your dog yields, release the pressure fully.
- Mark: Say Yes at the exact moment of yield.
- Reward: Deliver food at your seam or thigh to reinforce position.
Do not drag. Do not repeat the cue many times. The release is the lesson. When delivered with clean timing, your leash handling skills create fast learning and calm confidence.
Reward Placement That Drives Better Leash Handling Skills
Where you pay is what you get. If you feed out in front, you will create forging. If you feed at your seam, you will create a straight line. Keep rewards small and frequent at first, then fade the rate as your dog becomes consistent. Praise can replace food once your dog understands the game.
- For loose lead walk: Pay next to your leg when the lead stays soft.
- For heel: Pay in position with the dog’s head aligned to your thigh.
- For free time: Pay from your hand after you call your dog back to you.
Turning and Speed Changes
Direction changes keep your dog with you and prevent pulling. Use them often to make your leash handling skills active and clear.
- Inside turn: Turn toward your dog so they must slow and follow. Mark and reward when they line up again.
- Outside turn: Turn away and encourage your dog to come through to the new line. Guide with light pressure then release.
- Speed changes: Slow for three steps, then return to normal pace. This teaches your dog to key into your movement.
Distraction Proofing On Real Streets
Real life is full of dogs, people, bins, bikes, and scents. Smart Dog Training builds distraction tolerance through planned layers so your leash handling skills hold up anywhere.
- Start in a quiet room with no movement. Perfect your timing.
- Move to the garden or hallway. Add mild sounds and short turns.
- Train on a quiet street at off peak times. Use heel for tight spots.
- Add moving people and dogs at a distance. Reward for looking to you.
- Work near parks and shops. Keep sessions short and focused.
If your dog loses focus, reduce the difficulty, reset, and win the next small step. Progression keeps confidence high and prevents rehearsing bad habits.
Solving Common Problems On the Lead
With structured practice, most issues resolve quickly. Use the Smart Method steps below to refine your leash handling skills.
Pulling to People or Dogs
Before the lead tightens, cue heel and change direction. Apply light pressure toward your side, release on yield, then mark and reward. Keep moving with purpose. Do not let your dog fixate for long periods, since that increases arousal.
Lunging at Traffic or Bikes
Increase distance first. Use heel plus a calm voice. When your dog glances at the trigger and then back to you, mark and pay. If your dog locks on, step behind a parked car or hedge, reset attention, then re enter the path with a smooth turn.
Sniffing and Stalling
Sniffing has a place, but it should be on your cue. Offer free time on a chosen patch. When free time ends, say Finish, then step off and reward for movement with a soft lead. If your dog stalls, invite, guide, and release the moment they move.
Weaving and Zigzagging
Weaving often comes from unclear boundaries. Choose a side and stick to it. Pay in straight lines at your seam and use inside turns to reset alignment. Keep the lead short enough to prevent crossing in front.
Training Schedule For Owners
Consistency builds habits. Use this simple weekly plan to train leash handling skills that last.
- Days 1 to 3: Five minute sessions indoors. Focus on pressure and release timing and reward placement.
- Days 4 to 5: Ten minute sessions in the garden or quiet street. Add turns and speed changes.
- Days 6 to 7: Two short walks with planned distractions. Rotate between loose lead, heel, and free time. Keep wins high.
Log each session. Note where the lead got tight and what solved it. Small daily reps are better than long exhausting walks.
Safe Leash Skills for Kids and Seniors
Safety comes first. Adults should train the core leash handling skills before inviting children to help. For kids, use a second safety line held by an adult. Practice short heel intervals and reward often. For seniors, choose a comfortable lead length and a handle that is easy to grip. Keep routes simple and predictable. Smart Dog Training tailors sessions to each family so everyone can handle the dog with confidence.
Tracking Progress and Staying Accountable
Clear goals keep you on track. Define what a successful walk looks like. For example, ten minutes of loose lead with three clean turns and one short heel past a person. Increase difficulty only when you can repeat that outcome three days in a row. Your Smart Master Dog Trainer SMDT will help you set milestones and keep your form sharp.
When to Work With an SMDT
If your dog is strong, reactive, or anxious, do not wait. A certified SMDT from Smart Dog Training will assess your current leash handling skills and build a plan that balances motivation and structure. We coach you in home, in controlled group sessions, and in real world settings so results transfer quickly. Ready to turn your dog’s behaviour around? Book a Free Assessment and connect with a certified Smart Master Dog Trainer - available across the UK.
Leash Handling Skills FAQs
How long does it take to teach loose lead walking?
Most owners see real change within one to two weeks when they practice short daily sessions. With the Smart Method and precise reward timing, many dogs stop pulling in the first few sessions.
Should I use a long line for training?
Start with a standard lead to build clean pressure and release. Long lines are useful later for recall and field work, but they can muddy early leash handling skills if used too soon.
What if my dog gets overexcited at the door?
Pause before exiting. Ask for a name response and a small moment of eye contact. Mark and reward calm, then step out. This pre walk reset improves your leash handling skills on the street.
Can I train with food only?
Food is great for motivation, but you also need structure. Smart Dog Training blends reward with fair guidance so your dog learns to follow without bribery.
How do I stop pulling when we approach the park?
Switch to heel 10 metres before the gate. Use inside turns and steady movement. When your dog holds heel, mark and reward at your seam. Release to free time once you pass the gate calmly.
Is it safe for my child to hold the lead?
Only after an adult has trained the core skills and the dog is reliable. Use an adult controlled safety line. Keep sessions short and focused on calm walking states.
Putting It All Together
Leash handling skills are a learned craft. When you apply the Smart Method with clean timing, your dog understands, relaxes, and follows with ease. Choose simple gear, stand with purpose, guide with light pressure, release at the exact moment of yield, and pay at your seam. Set clear walking states and rotate them through every route. Progress from quiet rooms to real streets in measured steps.
Smart Dog Training delivers this structure in every programme. With local support, proven progression, and ongoing mentorship, we turn daily walks into calm, reliable habits that last. Your dog deserves training that truly works. With certified Smart Master Dog Trainers SMDTs nationwide, you'll get proven results backed by the UK's most trusted dog training network. Find a Trainer Near You
Leash Handling Skills for Owners
Why Focus Matters More Than Obedience
If you are training dogs that struggle to stay focused, you already know that sit and down are not enough. Real results come from calm attention that holds when life gets busy. At Smart Dog Training, we teach owners how to build focus first, then layer obedience on top. This approach follows the Smart Method and is led nationwide by every certified Smart Master Dog Trainer. With clear structure and the right motivation, any dog can learn to filter distractions and stay with you.
Focus is the skill that turns cues into reliable behaviour. It is your dog choosing you over the environment. It is your dog checking in when a runner goes past, pausing when the doorbell rings, and keeping a soft leash even when a pigeon flutters. Training dogs that struggle to stay focused starts with a plan that is simple to follow and easy to repeat in daily life.
Why Some Dogs Struggle to Stay Focused
There are many reasons attention slips. Understanding the cause helps you choose the right plan. The Smart Method addresses each factor with structure, progression, and fair guidance.
Genetics and Age Factors
Some breeds are wired for motion and scanning. Puppies and adolescents also find the world loud and exciting. This does not mean focus is out of reach. It means you will start lower and build up step by step. Training dogs that struggle to stay focused in these stages relies on short sessions, clear wins, and fast rewards.
Environment and Sensory Load
Busy spaces flood dogs with smells, sounds, and movement. When the environment is louder than you, focus fails. We reduce sensory load first, then add challenge in a measured way. This is the heart of training dogs that struggle to stay focused so they can cope anywhere.
Health and Diet Considerations
Pain, poor sleep, and a mismatch in nutrition can drain focus. If your dog seems edgy or flat, check the basics. Good sleep, calm routines, and food that suits your dog make training smoother. When these are in place, training dogs that struggle to stay focused becomes far easier and kinder.
The Smart Method for Training Dogs That Struggle to Stay Focused
The Smart Method is our proprietary system. It creates clarity for the dog, confidence for the handler, and results that last. Every Smart Master Dog Trainer uses the same pillars so your training is consistent across home, class, and real life.
Clarity
We remove guesswork. Commands are taught with clean markers that mean yes, try again, and finished. Clarity is the foundation for training dogs that struggle to stay focused because it prevents confusion and stress.
Pressure and Release
We use fair guidance to show the dog how to make the right choice, then release and reward the moment the choice is made. Pressure is information, not punishment. Release tells the dog that peace and reward live on the correct answer.
Motivation
Dogs work for what they value. Food, toys, play, and access are chosen to suit your dog. We build a positive emotional state so the dog wants to engage. This is vital when training dogs that struggle to stay focused in busy places.
Progression
We add duration, distance, and distraction one layer at a time. Progression makes skills reliable anywhere. Rushing breaks focus. Layering builds it.
Trust
Training must strengthen the bond. Your dog learns that your guidance is steady, fair, and safe. Trust produces calm, confident behaviour that lasts.
Foundation Skills That Build Focus
Before we ask for more in the park, we create habits at home. These foundations make training dogs that struggle to stay focused clear and repeatable.
Name Response
Say your dog’s name once. When eyes flick to you, mark yes and reward. Keep sessions short and snappy. If your dog does not look, do not repeat the name. Change your body position, help with a small leash cue, then release and reward the look. Name response is the first block in training dogs that struggle to stay focused.
Engagement Marker and Release
Teach a marker such as yes for correct choices. Teach a release word such as free to end a command. The release prevents blurring and keeps structure clean. It also helps when training dogs that struggle to stay focused because the dog learns exactly when they are working and when they are off duty.
Place Command for Calm
Place means go to your bed and settle until released. It creates an off switch that carries into public life. Start with one step to the bed, mark yes the moment paws land, then reward on the bed. Increase time in small amounts. This is essential for training dogs that struggle to stay focused around guests and doorbells.
Structured Leash Walking for Attention
Begin indoors. Hold the leash short enough to prevent forging without tension. Take one step, wait for eye contact or a soft head position, mark yes and reward at your leg. Repeat, then build to three steps, then five. This builds an automatic check in. It is the core of training dogs that struggle to stay focused in motion.
Step by Step Plan for Training Dogs That Struggle to Stay Focused
Use this plan daily. Short sessions beat long ones. The goal is quality reps with clear wins.
Stage 1 Create a Low Distraction Setup
- Choose a quiet room.
- Have 20 small rewards ready.
- Keep the leash on for guidance.
Work name response, engagement marker, and place. Focus on clean timing. This is the safest start when training dogs that struggle to stay focused.
Stage 2 Reward Timing and Value
- Mark yes the instant your dog makes the right choice.
- Deliver the reward where you want the dog to be, for example at your leg for heel.
- Use high value food for early steps.
Fast, precise reinforcement is the engine of training dogs that struggle to stay focused.
Stage 3 Add Duration
- Ask for one second of eye contact. Mark and reward.
- Grow to three seconds, five seconds, then ten.
- Keep success at eight out of ten reps or better.
If success drops, reduce time. Training dogs that struggle to stay focused improves when you make it easy to win.
Stage 4 Add Distance and Distraction
- Increase space by two steps at a time while maintaining focus.
- Add mild distractions like a dropped toy or a family member walking by.
- Reward more often when distractions appear.
Only raise one factor at a time. This simple rule protects focus.
Stage 5 Proof in Real Life
- Move to the garden, then a quiet street, then a park corner.
- Begin each new place at Stage 1 levels, then climb again.
- Finish sessions with an easy win and a release.
Proofing is the final step in training dogs that struggle to stay focused. It turns skills into habits anywhere you go.
Using Pressure and Release Without Conflict
Smart Dog Training uses fair guidance to help dogs find the answer. Pressure is gentle information that points the way. Release removes the pressure the moment the dog complies, then reward seals the lesson. This keeps training calm and clear.
Handling Forging and Scanning
If your dog forges, pause your feet, apply light leash guidance back to your leg, release the instant the dog softens and reorients, then mark and reward. If scanning starts, slow your pace, ask for a brief eye flick, then pay. This is a clean way of training dogs that struggle to stay focused during walks.
When to Pause and Reset
If errors stack, stop and reset. Break the task into smaller parts. The fastest fix is often to step back and rebuild clarity. This is especially true when training dogs that struggle to stay focused in new places.
Motivation That Matters
Rewards should match your dog. Motivation fuels engagement. We rotate value, keep sessions upbeat, and teach the dog that work is fun and safe.
Food Rewards and Toy Play
Use soft food that is easy to swallow. Deliver several small pieces for big wins. Toy play can follow a marker as a jackpot. Keep play short so arousal does not spill over. This balance is key when training dogs that struggle to stay focused.
Life Rewards and Neutrality
Access to sniff, greeting privileges, or a release to explore can be powerful. We also build neutrality by rewarding calm choices while other things happen. Your dog learns that stillness makes life open up. That lesson supports training dogs that struggle to stay focused in the presence of triggers.
Daily Routines That Support Focus
Training happens all day, not just in sessions. Structure gives dogs predictable patterns that lower stress and sharpen attention.
Sleep and Structure
Most dogs need more rest than we think. Provide a quiet sleep space and scheduled naps. Predictable meal times and walk times reduce anxiety. This stability helps when training dogs that struggle to stay focused.
Decompression and Enrichment
Gentle sniff walks, chew time, and food puzzles lower arousal. Five to ten minutes after training can lock in learning. Decompression is non negotiable for dogs that find the world loud.
Smart Walk Pattern
Start each walk with a two minute focus warm up at home. Add a short heel to the end of the driveway, then a release to sniff. Repeat that cycle along the route. This rhythm trains dogs that struggle to stay focused to check in often because engagement predicts freedom.
Common Mistakes to Avoid
Over Talking and Repeating Cues
Say cues once. Extra words dilute clarity. Silence makes your markers stand out, which helps when training dogs that struggle to stay focused.
Rewarding the Wrong Moment
Reward where the dog should be, not where the dog ended up after moving. Placement of reward drives behaviour. Correct placement is a lever for training dogs that struggle to stay focused.
Going Too Fast
Progress one layer at a time. If your dog fails twice in a row, lower duration, distance, or distraction. Patience now prevents problems later.
Troubleshooting Specific Scenarios
Focus Around Dogs
Increase space until your dog can take food and respond to the name. Work short reps of look, mark, reward, then release to sniff. Space and structure are the two anchors when training dogs that struggle to stay focused around other dogs.
Focus Around People
Teach a sit and look routine as a person passes. Mark and reward calm eye contact. If your dog is social, greet only after a calm check in. This keeps manners tied to focus.
Focus at the Door and on Delivery Days
Place is your best friend. Rehearse doorbell rings with your dog settling on the bed. Pay well for stillness. Add mild motion, then chatter, then the door opening. This is a repeatable plan for training dogs that struggle to stay focused in busy homes.
Focus for Adolescents
Adolescence brings big feelings and short attention. Drop your criteria, keep sessions short, and increase structure. Add more decompression. This stage passes faster when training stays clear and consistent.
Measuring Progress and Staying Accountable
Results come from honest measurement. Track sessions so you know when to push and when to hold.
Training Logs and Benchmarks
- Record the place, length, and success rate for each session.
- Move up when success holds at eight out of ten reps.
- Return to an easier step if success drops below seven out of ten.
These benchmarks make training dogs that struggle to stay focused objective and steady.
When to Call a Smart Master Dog Trainer
If reactivity, anxiety, or aggression appear, or if progress stalls for two weeks, bring in support. A certified Smart Master Dog Trainer will assess your dog, map a plan, and coach your timing and handling. Our trainers follow the Smart Method, so you get a structured pathway from first session to final proofing.
Ready to turn your dog’s behaviour around? Book a Free Assessment and connect with a certified Smart Master Dog Trainer - available across the UK.
Case Study A Calm Heel With a High Energy Dog
A young herding mix arrived pulling hard, scanning cars, and vocalising at bikes. The owner had tried longer walks and louder cues, which made arousal worse. We shifted to the Smart Method. Week one focused on name response, engagement, and a short indoor heel pattern. Rewards were soft food delivered at the left leg. Pressure and release guided the dog back when forging. By the end of week two, the dog could heel across the lounge, hold a ten second look, and settle on place for three minutes. By week four, we moved to a quiet cul de sac. Short heel sets alternated with releases to sniff. Bikes were added at a distance, then closer. At week six, the dog walked a park loop with a soft leash and calm head, ignoring bikes at five meters. The owner kept logs, adjusted criteria, and followed the plan. This is a typical outcome when training dogs that struggle to stay focused within a clear structure.
How Smart Programmes Deliver Lasting Focus
Smart Dog Training designs every programme for real life outcomes. Your dog learns to focus at home, in structured classes, and out in the world. The method stays the same so your dog never has to guess.
In Home Training
We coach you in your dog’s normal environment. This is ideal for training dogs that struggle to stay focused at the door, around family, and during daily routines.
Structured Group Classes
Group classes add managed distraction under a Smart Trainer’s guidance. You learn how to maintain focus near dogs and people in a controlled way.
Tailored Behaviour Programmes
For complex cases, we map a custom pathway. You work with an SMDT to address triggers, rebuild confidence, and restore calm. With national support through our Trainer Network and Smart University standards, every plan is consistent and accountable.
FAQs
How long does it take to build reliable focus
Most owners see change in the first week. Reliable focus in busy places often takes four to eight weeks, depending on age, history, and how often you train.
What if my dog refuses food outside
Decrease distraction first and use higher value rewards. Add short decompression before training. Many dogs start to eat once the environment is easier.
Can I train focus without using toys
Yes. Food and life rewards like sniffing work well. Use what your dog values most and keep sessions short and upbeat.
Is pressure and release suitable for sensitive dogs
Yes, when applied fairly and softly, and paired with instant release and reward. It provides clear information without conflict.
Should I train before or after walks
Begin each walk with a two minute warm up at home. Then use short focus sets along the route. End with a calm settle at home.
What if my dog only focuses at home
Rebuild criteria when you change locations. Start easy in new places, then add duration, distance, and distraction step by step.
Do I need a Smart Master Dog Trainer for this plan
Many owners succeed on their own, but an SMDT can speed progress by refining timing, leash handling, and progression for your dog.
How do I track progress
Use a simple log. Note location, success rate, and what changed. Move up when you hit eight out of ten successes over two sessions in a row.
Conclusion
Training dogs that struggle to stay focused does not require luck. It requires clarity, motivation, and a step by step plan that fits real life. The Smart Method gives you that plan. Start in a quiet room, reward clean choices, add duration and distraction slowly, and protect your dog’s confidence at every step. If you want expert support, our certified Smart Master Dog Trainers are ready to help across the UK.
Your dog deserves training that truly works. With certified Smart Master Dog Trainers (SMDTs) nationwide, you'll get proven results backed by the UK's most trusted dog training network. Find a Trainer Near You
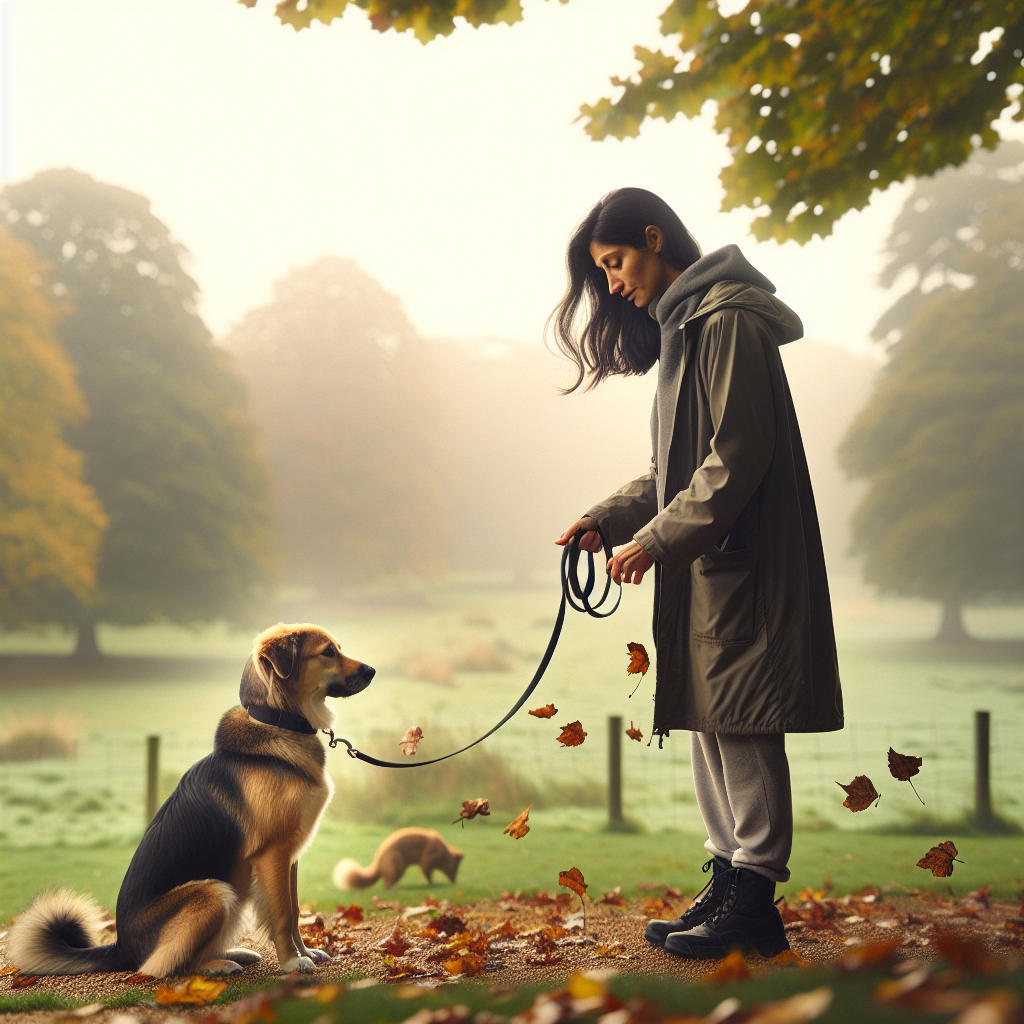
Training Dogs That Struggle to Stay Focused
Why Disengagement Matters For Real Life Calm
Many families struggle when their dog locks onto distractions and will not respond. Teaching disengagement from high arousal is how we change that. Disengagement means your dog chooses you over the trigger. This choice must be reliable in busy streets, parks, and at home. At Smart Dog Training, we use the Smart Method to turn chaos into calm. A certified Smart Master Dog Trainer will show you how to build that control in a fair, structured way.
When dogs learn to look away from triggers and back to you, pressure drops, clarity rises, and trust grows. Teaching disengagement from high arousal is not about suppressing your dog. It is about creating a clear plan that builds responsibility and focus.
The Science Of Arousal In Dogs
Arousal is the level of alertness and energy in your dog. High arousal can come from excitement, frustration, fear, or drive. In high states, thinking narrows, reactions speed up, and hearing seems to vanish. Teaching disengagement from high arousal helps your dog return to a thinking state. We do this by pairing clear markers, fair guidance, and meaningful rewards. Over time, your dog learns that calm choices are the fastest path to what they want.
The Smart Method For Teaching Disengagement From High Arousal
The Smart Method is structured and progressive. Every step builds responsibility and confidence. Teaching disengagement from high arousal follows the same five pillars that define Smart.
Clarity
We teach simple markers that never change. Yes to mark the correct choice. Good to hold behaviour. Free to release. A calm No Reward Marker tells the dog their choice did not pay. This clarity removes guesswork and speeds up learning when teaching disengagement from high arousal.
Pressure And Release
We use fair pressure with a clear release. Guidance might be line tension, body pressure, or spatial prompts. The instant your dog chooses to look back or soften, pressure releases and reward arrives. This teaches accountability without conflict and is central to teaching disengagement from high arousal.
Motivation
Food, play, and praise create engagement. We match rewards to the dog. Value is built for eye contact, proximity, and calm sits. Motivation keeps your dog keen to work, even when we are teaching disengagement from high arousal around powerful triggers.
Progression
We layer difficulty in a plan. First in quiet rooms, then garden, then street, then park. We adjust distraction, duration, and distance in a controlled way. This is how we make disengagement stick in real life.
Trust
Consistency and fairness build trust. Your dog learns that you give clear choices and you always release when they get it right. This grows a calm, willing partner.
Healthy Excitement Or High Arousal
Not all energy is a problem. Healthy excitement looks bouncy but thinking. The dog can take food, respond to their name, and settle quickly. High arousal looks stiff or frantic. Ears lock forward, pupils widen, tail may be high and tight, and breathing is fast. The dog ignores food and surges on the lead. Teaching disengagement from high arousal starts with spotting these signs fast so you can step in early.
Set Up For Success
- Use a well fitted flat collar or training collar, and a standard lead of 1.8 to 2 metres.
- Have high and medium value food ready in a pouch.
- Pick calm environments first, then increase challenge as you succeed.
- Train short sessions. One to three minutes per rep, then rest.
- Log every session to track progress while teaching disengagement from high arousal.
Foundation Skills You Need First
Name Response And Orientation
Stand still, say your dog’s name once, and wait. The moment they turn their head to you, mark Yes and reward at your knee. Repeat until they snap to you. Orientation is the root of teaching disengagement from high arousal.
Marker System
Teach Yes, Good, and Free indoors. Yes means reward now. Good means keep doing it and the reward is coming. Free means relax. Use a calm NR for incorrect choices. This system gives precise feedback and speeds up teaching disengagement from high arousal.
Calm Lead Mechanics
Hold the lead with two hands. Keep slack when your dog is with you. If they surge, hold steady. The moment they come back into position, release and reward. Your lead becomes information, not a tug of war.
Teaching Disengagement From High Arousal Step By Step
Below is the Smart Dog Training core process for teaching disengagement from high arousal. Work through each step until the behaviour is quick and confident.
Step 1 Look Back Pattern
Stand at a comfortable distance from a mild trigger. This could be a parked bicycle, a quiet toy, or a person at a distance. Allow your dog to notice the trigger, then wait. The instant their eyes flick back to you, mark Yes, step back, and feed at your thigh. Repeat five to ten times. If they cannot look back within two seconds, increase distance. This pattern is the backbone of teaching disengagement from high arousal.
Step 2 Release And Reset
After each rep, say Free and relax for a second. Let your dog glance again, then wait for the choice to look back. Mark and pay. This rhythm teaches your dog that checking in unlocks freedom.
Step 3 Add A Simple Position
When the look back is fast, ask for a sit after the mark. Yes, then sit, then feed. This adds a layer of control without pressure. It is a natural next step in teaching disengagement from high arousal.
Step 4 Short Duration
Increase the time your dog looks at you before the reward. Start with half a second, then one, then two. Use Good to support them. Keep sessions short so arousal stays low.
Step 5 Close The Gap
Reduce distance to the trigger by one to two steps at a time. If your dog struggles, back up and make it easier. Teaching disengagement from high arousal is about steady wins, not forced leaps.
Reward Strategy That Builds Value For You
- Pay at your body, not at the trigger. You become the source of good things.
- Mix reward types. Food for precise reps, play for energy release, calm strokes for recovery.
- Use variable rewards as you progress. Sometimes a single kibble, sometimes a jackpot of five. Keep it interesting.
- End on a win. Confidence fuels the next session when teaching disengagement from high arousal.
Pressure And Release Without Conflict
Pressure is information. If your dog forges toward a trigger, hold steady. Do not pull or pop. The millisecond they soften or shift attention to you, release tension and mark. The release is the lesson. This fair approach is key to teaching disengagement from high arousal while preserving trust.
Progression That Makes Skills Stick
Smart progression follows the three Ds. Distraction, Distance, Duration. Change one at a time. Keep your success rate above 80 percent. If your dog fails twice in a row, make it easier. This plan keeps momentum when teaching disengagement from high arousal.
Distraction
Start with low level triggers. Parked bikes before moving bikes. Calm dogs at a distance before excitable dogs.
Distance
Find the edge where your dog can still think. Work there until they are fluent, then move two steps closer.
Duration
Ask for slightly longer eye contact and calm on position before rewarding. Build in seconds, not minutes.
Real Life Scenarios To Practise
Dogs On Walks
Begin where your dog can eat and respond. Use the Look Back pattern. Keep a tree or parked car between you and the other dog if needed. Teaching disengagement from high arousal here prevents lead reactivity from growing.
Wildlife And Livestock
Start at large distances. Reward orientation to you. Add sits and heel positions as you improve. Never let your dog rehearse chasing. Teaching disengagement from high arousal protects wildlife and keeps your dog safe.
Doorbells And Visitors
Set up practice with a helper. Bell rings, you cue sit on a mat, mark, reward. Repeat until the bell triggers a look back to you. This is teaching disengagement from high arousal inside the home.
Toys And Play
Present a toy, ask for eye contact, then mark and release to play as the reward. Your dog learns that focus unlocks fun. This turns play into training.
Ready to turn your dog’s behaviour around? Book a Free Assessment and connect with a certified Smart Master Dog Trainer - available across the UK.
Troubleshooting Common Challenges
- My dog will not look back. Increase distance, lower the trigger value, or raise reward value. Aim for the first easy win while teaching disengagement from high arousal.
- My dog grabs the food and surges. Deliver rewards at your thigh and reset position before the next rep.
- My dog ignores food outside. Move to a quieter area and rebuild. Use play as a reward if your dog values it more.
- We backslide after a good week. Normal. Reduce difficulty, get quick success, then rebuild. Teaching disengagement from high arousal is a journey, not a single session.
- Family members are inconsistent. Align markers, rules, and rewards. Clarity prevents confusion.
Measuring Progress And Generalising
Track how quickly your dog looks back, the distance you can work at, and the number of clean reps per session. You should see faster check ins, calmer body language, and steadier lead tension. Generalise by training in new places each week. Teaching disengagement from high arousal becomes a habit your dog chooses everywhere.
When To Work With A Professional SMDT
If your dog has rehearsed lunging, barking, or fixating, guided help speeds up results. A Smart Master Dog Trainer will assess your dog and craft a step by step plan that fits your routine. We deliver in home sessions, structured classes, and tailored behaviour programmes. Our trainers follow the Smart Method so you get consistent results when teaching disengagement from high arousal.
FAQs
What does disengagement mean in dog training
It means your dog chooses to look away from a trigger and back to you. Teaching disengagement from high arousal turns that choice into a reliable habit.
How long does it take to see results
Many dogs improve in the first week with daily short sessions. Solid results often take four to eight weeks of consistent practice when teaching disengagement from high arousal.
Can I use toys instead of food
Yes. Use what your dog values. Many dogs progress fastest with food for precision and play for energy release while teaching disengagement from high arousal.
Will this stop reactivity
Disengagement is a core skill for reducing reactivity. When paired with the Smart Method plan, teaching disengagement from high arousal helps your dog stay calm and responsive.
What if my dog will not eat outside
Train farther from triggers, start after a light meal, and use higher value rewards. If needed, start with toy play. Then bring food back in as arousal lowers.
Is pressure and release right for sensitive dogs
Yes, when used fairly with a clear release. The release and reward teach the lesson. This builds confidence and trust during teaching disengagement from high arousal.
How do I keep progress from slipping
Use short daily reps, log sessions, and change only one difficulty at a time. Rehearse wins often. This keeps teaching disengagement from high arousal on track.
Do I need a professional
Many families benefit from expert coaching, especially with strong triggers. An SMDT ensures your handling and timing are precise while teaching disengagement from high arousal.
Conclusion
Calm, reliable behaviour is built, not wished for. Teaching disengagement from high arousal gives your dog a clear, fair route back to you in any setting. With the Smart Method, you combine clarity, fair pressure and release, strong motivation, and steady progression. Trust grows, choices improve, and daily life feels easy again. If you want guidance from the UK’s most trusted team, we are ready to help.
Next Steps
Your dog deserves training that truly works. With certified Smart Master Dog Trainers (SMDTs) nationwide, you'll get proven results backed by the UK's most trusted dog training network. Find a Trainer Near You
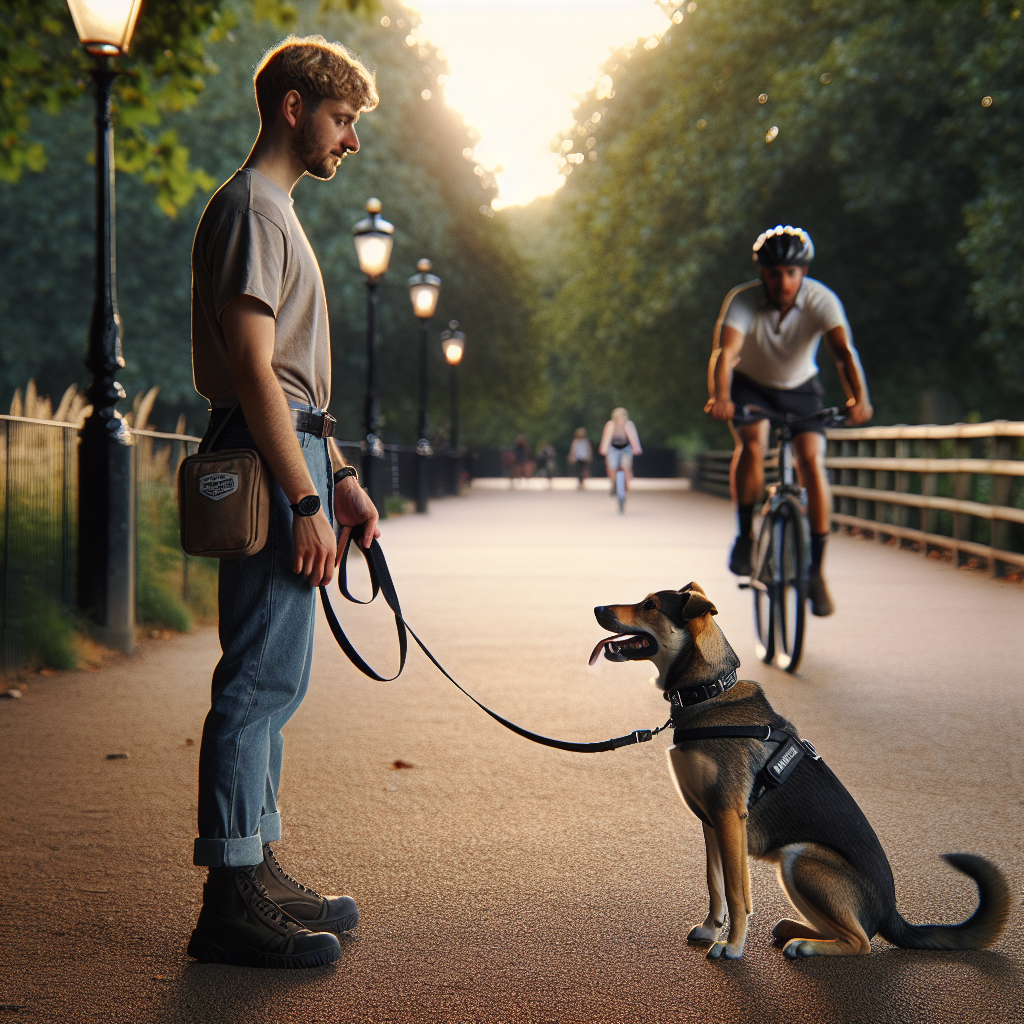
Teaching Disengagement From High Arousal
Why Teaching Stillness Before Reward Changes Everything
Teaching stillness before reward is one of the most powerful habits you can build into your dog’s daily life. It turns excitement into focus and chaos into calm cooperation. At Smart Dog Training, we make teaching stillness before reward a core skill in every programme because it delivers reliable behaviour in real life. From mealtimes to doorways and from children’s play to busy parks, this single concept builds neutrality, self control, and trust.
As a Smart Master Dog Trainer SMDT, I have seen families transform daily routines by teaching stillness before reward in small, structured steps. When your dog learns that calm behaviour makes good things happen, you get predictable choices that last. The Smart Method gives you a clear pathway so your dog understands exactly what to do, even when distractions rise.
The Smart Method Behind Calm, Reliable Behaviour
Every success with teaching stillness before reward comes from structure. The Smart Method is our proprietary system used across the UK by certified Smart trainers. It blends motivation with fair accountability so results stick.
- Clarity. We use precise commands and marker words so your dog knows when to hold position and when they are free to collect a reward.
- Pressure and Release. We give fair guidance when needed, then release pressure the moment your dog chooses stillness. This teaches responsibility without conflict.
- Motivation. Food, toys, and praise are used to build a positive emotional state so your dog enjoys the work and wants to repeat it.
- Progression. We start easy, then gradually add duration, distraction, and distance so the behaviour holds anywhere.
- Trust. Training always protects the bond. Your dog learns that calm choices create clear, consistent outcomes.
What Teaching Stillness Before Reward Really Means
Teaching stillness before reward means your dog pauses, holds position, and offers calm focus before they get access to anything they want. That includes food bowls, doors opening, greetings, toys, the lead going on, and outdoor freedom. The stillness does not need to be rigid; it is the absence of fidgeting, lunging, whining, or demand barking. In Smart programmes, stillness is often a Sit, Down, or Place, with relaxed body language and soft eyes.
When you practice teaching stillness before reward, you are building impulse control. Your dog learns to regulate emotion, think before acting, and look to you for permission. Over time, that becomes a default habit that makes daily life easier and safer.
Essential Language and Markers For Teaching Stillness Before Reward
Clarity starts with consistent words. In Smart training we separate three key markers so your dog always understands what just happened:
- Yes. A release and reward marker that tells the dog they have earned reinforcement and can collect it.
- Good. A calm sustain marker that means keep doing what you are doing. The reward is coming soon, but not yet.
- No. A neutral information marker that says the choice did not earn reinforcement. We reset calmly and try again.
These markers make teaching stillness before reward black and white for your dog. They learn exactly when to hold and when to collect. Precision prevents confusion and reduces frustration.
Equipment and Setup
For home practice you need a flat collar or well fitted harness, a standard lead, a designated Place mat, and your dog’s regular food or small treats. Choose a quiet room to start. Place the mat where your dog can see you clearly. Keep sessions short and calm. Teaching stillness before reward works best when you stop before your dog gets tired or restless.
Teaching Stillness Before Reward Step by Step
The sequence below reflects the Smart Method. Each step builds on the last so your dog always knows what to do.
Step 1 Name the Behaviour
Pick a position that signals calm. Sit, Down, or Place all work well. Lure your dog into position once or twice, then stop luring and wait. The moment your dog settles into the position, say Good in a quiet tone. Feed a small piece of food directly to your dog while they remain still. Repeat several times. You are teaching stillness before reward by making stillness the way to earn the food.
Step 2 Install the Sustain Marker
Now add tiny pauses before each piece of food. Say Good to confirm that your dog is correct, then wait a second and deliver. Build to two seconds, then three. Keep your tone soft. You are helping your dog feel safe waiting. Teaching stillness before reward requires this patient layering of duration, always within your dog’s ability.
Step 3 Add the Release Marker
Start to end each mini set with Yes and toss a piece of food slightly away, then invite your dog back to position. This shows the difference between holding for Good and being released by Yes. Clear markers are the heart of teaching stillness before reward.
Step 4 Introduce Pressure and Release
If your dog pops up before the marker, use calm information. Say No, pause for a second, guide them back with the lead if needed, and wait. The moment they choose stillness again, say Good and pay. By pairing fair guidance with immediate release when they get it right, you teach responsibility without conflict. Pressure ends the instant your dog makes the right choice. This is essential when teaching stillness before reward.
Step 5 Grow Duration
Once your dog can hold for three to five seconds, begin to stretch time in small increments. Work up to ten seconds, then fifteen, then thirty. Keep success high. Deliver small rewards during the hold and finish with a release. Teaching stillness before reward should feel achievable. If your dog breaks more than once or twice, shorten the hold and make the next rep easier.
Step 6 Add Simple Distractions
Begin to move your hands. Lift the food bowl slightly then put it down. Step to the side. Look away. Each time your dog remains still, mark Good and reward in place. If they break, reset without emotion. When teaching stillness before reward, your calm energy prevents the game from turning into a chase for food or attention.
Step 7 Introduce Higher Value Rewards
Swap to warmer food, a favourite toy, or the lead going on for a walk. Present the reward, then wait for stillness. Mark Good, then release with Yes to collect. This shows your dog that teaching stillness before reward applies to every context, not just snacks on a mat.
Step 8 Layer Real Life Triggers
Practice at doors, before car exits, when guests arrive, and around children playing. Start at a distance where your dog can succeed, then move a little closer. Use your markers. Pay often. End each set with a short break. Teaching stillness before reward becomes a lifestyle rule that keeps your dog thoughtful when life gets busy.
Why Teaching Stillness Before Reward Works
Dogs repeat what works. If jumping, whining, or pawing has ever produced attention or access, those habits stick. By teaching stillness before reward, you flip the pattern. Calm behaviour is now the only route to good outcomes. The Smart Method adds fairness and structure so the lesson is clear, fast, and stress free.
- It teaches your dog how to earn reinforcement instead of grabbing it.
- It reduces over arousal and replaces it with steady focus.
- It builds a bank of success reps that hold under pressure.
- It creates a universal cue for patience that you can use anywhere.
Common Mistakes to Avoid
- Talking too much. When teaching stillness before reward, your markers should be the loudest thing in the room. Extra chatter creates noise.
- Going too fast. Add time and distraction in small steps. If your dog struggles, you moved too quickly.
- Feeding for fidgeting. Pay only when the body is still. If the head tracks your hand or paws shuffle, wait for quiet.
- Inconsistent rules. Stillness should be the gateway in every context. If you drop the rule at the door but not at the bowl, confusion grows.
- Emotional correction. Information is enough. Reset and guide fairly. The release and reward make the lesson stick.
Tailoring the Plan to Your Dog
Every dog can succeed with teaching stillness before reward, but the path may vary by temperament.
- High drive dogs. Keep sessions short. Use movement of the reward to rehearse the release marker cleanly. Pay calm choices often.
- Soft or sensitive dogs. Use gentle voice and smaller steps. Lean on the sustain marker to build confidence.
- Young puppies. Work in two to three minute blocks. Use the Place mat to give a clear boundary for their body.
- Rescue or anxious dogs. Start in very quiet spaces. Focus on safety and predictability before adding challenge.
Daily Places to Use Teaching Stillness Before Reward
- Mealtimes. Bowl down, Sit or Place, Good, then Yes to release.
- Doorways. Sit, hand on handle, Good, door opens a crack, Good, door opens fully, Yes to go through together.
- Lead on. Stillness while the clip goes on, then Yes and out you go.
- Car exits. Wait calmly while the boot opens, then a controlled release to the lead.
- Greetings. Family and visitors say hello only when your dog is sitting still.
- Toys. Present the toy, mark stillness with Good, then release to play.
When you make teaching stillness before reward the rule across these situations, your dog learns to regulate emotion, even in high arousal moments.
How Smart Programmes Deliver Results
At Smart Dog Training, teaching stillness before reward is not a trick. It is a foundation used across puppy, obedience, and behaviour programmes. We build it with clear markers, fair guidance, and step by step progression so your dog performs under real life pressure. You get a simple framework to use every day, and your dog gains calm confidence that shows everywhere you go.
Ready to turn your dog’s behaviour around? Book a Free Assessment and connect with a certified Smart Master Dog Trainer - available across the UK.
Measuring Progress the Smart Way
Progress must be visible. Use these quick checks to confirm that teaching stillness before reward is working:
- Duration. Your dog can hold for at least thirty seconds in a quiet room.
- Distraction. Your dog remains still while you move, pick up the bowl, or open the door.
- Distance. You can step two to three paces away and return without a break.
- Recovery. If your dog breaks, they reset quickly and succeed on the next try.
- Generalisation. The behaviour holds in new rooms, the garden, and on walks.
Track reps in a notebook for a week. A few focused rounds a day beat one long session. Teaching stillness before reward grows fastest when success is frequent and easy.
From Foundation to Advanced Control
Once the basics are solid, you can use teaching stillness before reward to shape impressive real life outcomes.
- Neutrality to dogs and people. Ask for Place when visitors arrive. Pay stillness until your dog is settled and indifferent.
- Calm at sports or training venues. Build long holds around movement and noise so your dog can focus when it matters.
- Safety near roads and livestock. Pair door and gate access with stillness and clear release. Your dog learns that patience keeps them safe.
- Handling and grooming. Teach a comfortable stillness for nail trims and vet checks so care becomes cooperative.
When to Ask for Professional Help
If your dog struggles with arousal, guarding, or frustration, you do not have to figure it out alone. A certified Smart Master Dog Trainer SMDT will tailor the Smart Method to your dog and environment, then coach you through each step. We focus on teaching stillness before reward as a calm, fair way to build trust and accountability, even with complex behaviour.
FAQs on Teaching Stillness Before Reward
How long should a dog hold still before the reward?
Start with one to three seconds and build to thirty seconds in a quiet room. Teaching stillness before reward is about steady growth. Add only a second or two at a time.
Should I use food or toys?
Use what motivates your dog most. Food is easiest for early steps. As you progress, include toys, affection, and life rewards like going outside. Teaching stillness before reward should apply to all rewards.
What if my dog whines or fidgets?
Wait for a single moment of quiet and stillness, then mark Good and pay. If fidgeting continues, reduce difficulty. Teaching stillness before reward succeeds when you make the next rep easier than the last failed one.
Can puppies learn this?
Yes. Keep sessions very short and fun. Two minutes a few times a day is enough. Puppies thrive when teaching stillness before reward is part of every routine.
Do I need a Place mat?
It helps. A consistent surface makes the boundary obvious and speeds up teaching stillness before reward. Later you can fade the mat and the habit will remain.
What if my dog breaks position often?
You may be moving too fast. Shorten duration, reduce distraction, and add more reps that pay quickly. Teaching stillness before reward should feel achievable and predictable.
Work With Smart For Lasting Results
Smart Dog Training delivers outcome focused coaching using the Smart Method and clear markers. We will guide you through teaching stillness before reward until your dog can hold calm focus anywhere you go. Our trainers blend motivation, structure, and fair accountability so progress is steady and stress free for your dog and your family.
Your dog deserves training that truly works. With certified Smart Master Dog Trainers SMDTs nationwide, you will get proven results backed by the UK’s most trusted dog training network. Find a Trainer Near You
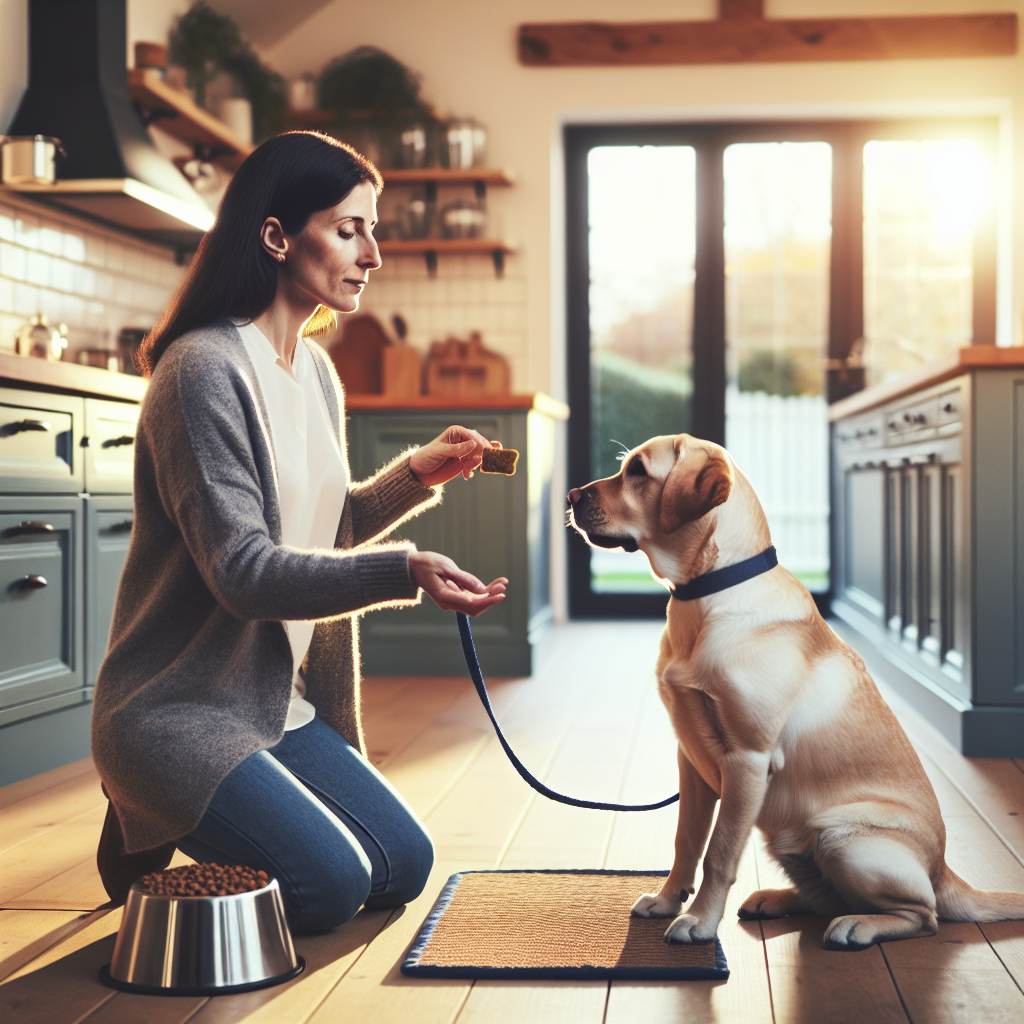
Teaching Stillness Before Reward
How to Desensitise Crate Sounds
If the rattle of a latch or the clang of a metal panel sends your dog over threshold, you need a plan for how to desensitise crate sounds that is structured, fair, and proven. At Smart Dog Training, we use the Smart Method to teach calm, reliable behaviour around the crate so sounds stop meaning stress and start meaning relax. Every step below is how to desensitise crate sounds in a way that builds confidence and trust.
This approach is taught by a certified Smart Master Dog Trainer SMDT and used across our programmes for puppies, adult dogs, and advanced pathways. If you want a repeatable process for how to desensitise crate sounds, you will find it here.
Why Crate Sounds Trigger Dogs
Crates are safe when introduced well. The challenge is the unpredictable noise. Hinges click. Latches snap. Wire panels vibrate. Dogs learn fast that these sharp cues predict change. Change can mean you walking away, loss of freedom, or excitement. Without clear information, those sounds create arousal.
Before we teach how to desensitise crate sounds, it helps to know what your dog may be feeling. Many dogs show one or more of the following:
- Startle or flinch at the first click
- Whining, barking, or yipping when the door moves
- Pawing or biting at the door when the latch rattles
- Freezing or refusing to enter the crate
- Escalation when sounds repeat or grow louder
The solution is a clear plan that makes each sound predictable and easy. That is exactly how to desensitise crate sounds with the Smart Method.
What Success Looks Like
When you follow this plan for how to desensitise crate sounds, aim for these outcomes:
- Your dog lies calmly in the crate while you touch or move the door
- Hinge clicks and latch sounds no longer predict excitement or panic
- Door can open or close without your dog rushing forward
- Release only happens on your permission, not on noise
- Calm behaviour holds in different rooms and new places
The Smart Method For Calm Crating
Smart Dog Training uses the Smart Method across all programmes. It delivers reliable behaviour that lasts in real life. Here is how the five pillars apply to how to desensitise crate sounds.
Clarity
We use a simple language of markers. A reward marker tells the dog they got it right. A release marker gives permission to change position. When sounds happen, clarity means the dog still knows what to do. This is vital for how to desensitise crate sounds.
Pressure and Release
We add fair guidance with the crate door and leash. Light pressure asks for stillness. Release comes the moment the dog relaxes. This teaches accountability without conflict. It is a core part of how to desensitise crate sounds the right way.
Motivation
We use rewards that matter to your dog. Food, praise, and calm touch build positive feelings around the crate. Motivation keeps your dog engaged in the work of how to desensitise crate sounds.
Progression
Skills are layered in a step by step ladder. We start quiet and simple. We add distraction, duration, and difficulty only when the dog is ready. This is the backbone of how to desensitise crate sounds.
Trust
Through calm leadership and consistent rules, the crate becomes a safe den. Your dog learns that you will guide them through any sound. Trust is the outcome and the reason how to desensitise crate sounds works long term.
Preparation Before You Start
Good prep reduces errors and speeds progress. Here is what to set up before you begin how to desensitise crate sounds.
Choose the Right Crate and Setup
- Place the crate in a quiet area to start
- Use a non slip mat under the crate to reduce movement noise
- Add a bed or mat that fits flat and does not bunch up
- Check hinges and latches so they move smoothly
Markers and Rewards Ready
- Pick a reward marker such as Yes and a release such as Free
- Prepare small treats your dog loves
- Have a short leash handy if you need calm guidance at the door
Safety and Welfare
- Keep sessions short and end on success
- Do not punish vocalising or movement
- Support anxiety with calm leadership and structure
Baseline Calm Without Sound
Before you practise how to desensitise crate sounds, build calm with zero noise. We teach a simple settle routine so the crate is already a place of rest.
The Three Minute Settle
- Guide your dog in with a reward marker for entering
- Close the door quietly and wait for stillness
- When your dog lies down and softens, mark and feed through the bars
- Feed two to three small rewards spread out over three minutes
If your dog pops up or whines, hold a neutral posture and wait for calm. Mark the first moment of relaxation and reward. Repeat until three minutes feels easy.
Release On Permission
- Stand at the door, hand on the latch
- If your dog stays calm, open the door a few centimetres and wait
- Close the door if they rush forward
- When they hold position, give the release marker and invite them out
This teaches that doors do not open on push. They open on calm and permission. It sets a strong foundation for how to desensitise crate sounds.
Build a Sound Ladder
To make sounds predictable, we use a sound ladder. It is a list of crate noises from easy to hard. It guides your step by step plan for how to desensitise crate sounds.
Map Your Sound List
- Light touch on the door
- Hinge click
- Latch wiggle
- Latch snap
- Panel tap
- Door open and close
- Crate moved a few centimetres
Create Intensity Levels
- Level 1 minimal movement and soft touch
- Level 2 gentle click or rattle
- Level 3 medium click or rattle
- Level 4 firm snap and clear movement
Now you have a clear framework for how to desensitise crate sounds without guessing.
Step by Step Plan for How to Desensitise Crate Sounds
Move through these stages at your dog’s pace. Only progress when your dog remains calm for three to five easy reps at each step. This is the structured way Smart Dog Training shows owners how to desensitise crate sounds.
Stage 1 Soft Touch With Door Held
- Dog is in the crate and settled
- Place your hand on the door and hold it steady
- Give a barely audible tap with your knuckle
- Mark and reward if your dog remains calm
- Repeat three to five times
If your dog startles, reduce the touch and wait for calm before you mark. The goal is to teach the first micro sound means relax, not react.
Stage 2 Hinge Click
- Hold the door and move it a few millimetres to trigger a tiny hinge click
- Mark and reward calm stillness
- Take brief breaks between reps
Keep the movement small. This precise work is how to desensitise crate sounds without pushing your dog over threshold.
Stage 3 Latch Wiggle and Snap
- Wiggle the latch so it lightly rattles
- Mark and reward for calm
- Later, add one firm snap then pause for stillness before marking
We use pressure and release here. If your dog creeps forward, close the door softly and wait. Release comes the moment they choose stillness. This is fair and clear.
Stage 4 Panel Taps and Door Movement
- Tap the side panel once, then twice, building to three taps
- Move the door open a few centimetres, then close
- Mark calm after each movement
Vary the order so your dog learns that any sound can happen and calm is still the rule. This variety is central to how to desensitise crate sounds in real life.
Stage 5 Full Open and Close
- Open the door halfway and pause
- Close the door and reward calm
- Open fully and pause
- Release only on your marker
Your dog learns that open doors do not equal a free run. Calm earns release. This is a key layer in how to desensitise crate sounds and door movement together.
Stage 6 Randomised Patterns
- Mix soft, medium, and firm latch sounds
- Change the number of taps and the length of pauses
- Reward calm randomly without rushing criteria
Random practice builds resilience. It prepares your dog for the normal ups and downs of daily life. It also cements how to desensitise crate sounds into a habit.
Stage 7 Real Life Practice
- Walk away a step, return, and reward calm
- Pick up keys or a bag while the dog remains settled
- Practise brief out of sight moments after calm is solid
Keep sessions short and positive. End before your dog gets tired. This is how to desensitise crate sounds while protecting confidence.
Ready to turn your dog’s behaviour around? Book a Free Assessment and connect with a certified Smart Master Dog Trainer - available across the UK.
Pair Sound With Clear Information
Dogs relax when they understand what earns reward and release. Smart Dog Training uses clarity so that sound never becomes a cue for chaos. This is at the heart of how to desensitise crate sounds.
Marker Timing and Delivery
- Mark the moment of stillness, not when food touches the mouth
- Feed through the bars to reinforce staying put
- Keep your body language neutral between reps
Release and Accountability
- Do not release on noise
- Give the release marker only after calm and eye softening
- If your dog anticipates, calmly close the door and try again
This helps your dog learn that the safe choice is the calm choice. It is also a kind and effective route for how to desensitise crate sounds.
Motivation Without Chaos
Rewards should create engagement, not frantic energy. Use small, easy to swallow food. Keep your tone warm but low and steady. If your dog gets giddy, slow the feeding and lengthen the quiet pause before marking. This is how to desensitise crate sounds while keeping arousal in check.
Progression That Holds Anywhere
Real life proofing matters. We add distraction, duration, and difficulty carefully. Follow this simple order when you progress how to desensitise crate sounds:
- Increase duration of calm between sounds
- Increase intensity of a single sound
- Add mild distractions like a step away
- Add multiple sounds in a row
- Change rooms once the above is easy
Only raise one variable at a time. That is the Smart way to keep learning clean.
Troubleshooting Setbacks
Setbacks are information. Use them to adjust your plan for how to desensitise crate sounds.
If Your Dog Vocalises
- Pause and wait for one second of quiet
- Mark and reward that quiet moment
- Drop back one step in your sound ladder
If Your Dog Paws or Bites the Door
- Hold the door steady and neutral
- Wait for stillness, then mark and reward
- Practise easier reps to rebuild calm
If Your Dog Freezes
- Lower the intensity of the sound
- Add more rewards for soft body language
- Shorten sessions and end on success
If you need guidance on how to desensitise crate sounds for a sensitive dog, an SMDT can coach your timing and criteria.
Generalise to New Places
Dogs do not generalise well without help. Once home practice is smooth, take your plan for how to desensitise crate sounds on the road.
- Repeat the ladder in a different room
- Practise at different times of day
- Let another family member run easy reps
- Use a travel crate in the car on a quiet street
Stay within your dog’s comfort zone and build up slowly. Smart Dog Training always prioritises confidence as skills scale.
Progress Tracking and Criteria
Write down your steps and your dog’s response each day. Clear notes make it easier to decide when to move on. A simple checklist for how to desensitise crate sounds might include:
- Calm for three minutes with door closed
- Calm with soft hinge click five times
- Calm with latch snap three times
- Calm with full open and close three times
- Calm with random pattern of five sounds
When each line is easy, increase either duration, intensity, or complexity, not all at once.
Common Mistakes to Avoid
- Rushing the ladder and skipping easy steps
- Releasing on noise or movement
- Feeding before you mark calm stillness
- Practising when your dog is already excited
- Making sessions too long
- Changing more than one variable at a time
Avoiding these errors keeps your plan for how to desensitise crate sounds on track.
When to Ask for Help
Some dogs have a long history of crate stress. Others are simply sensitive to sound. If progress stalls, you do not need to guess. Smart Dog Training can tailor the plan for your dog and coach your timing. A Smart Master Dog Trainer SMDT will assess your dog, set the right criteria, and guide you step by step on how to desensitise crate sounds in your home.
FAQs
How long does it take to desensitise crate sounds
Most dogs make clear progress in one to two weeks with daily short sessions. Sensitive dogs may need several weeks. The key is to go at the dog’s pace. That is the most reliable way for how to desensitise crate sounds.
Should I reward every calm moment
At first, yes. Mark and reward small moments of calm. As your dog improves, reward less often and extend the calm time between rewards. This keeps motivation high while you teach how to desensitise crate sounds.
What if my dog will not go in the crate
Start with entry games. Mark and reward for stepping in, then for lying down, before you add any sound. Build value for the crate first. Then begin how to desensitise crate sounds from the easiest level.
Do I leave toys in the crate during training
Keep the space simple during focused sessions. Fewer items reduce arousal and make it easier to read your dog. Once calm is consistent, add comfort items if you like. This keeps your plan for how to desensitise crate sounds clean.
Can I use a cover on the crate
A light cover can soften visual distractions. It will not remove sound, but it can help some dogs relax. Ensure airflow is safe. Use it as part of a structured plan for how to desensitise crate sounds.
What if my dog barks when I walk away
Return to easier steps. Practise sound work while you stand still. Later, add one step away, then two. Reward quiet moments. This staged approach is how to desensitise crate sounds and movement together.
Is this safe for puppies
Yes, with short sessions and gentle levels. Puppies do well with calm, clear steps. Smart Dog Training uses this plan to teach families how to desensitise crate sounds from the start.
Conclusion
Quiet crating is a learned skill. With a clear plan, you can teach any dog how to settle through clicks, rattles, and door movement. The Smart Method gives you the structure and confidence to do it well. Follow the steps above for how to desensitise crate sounds, keep sessions short and positive, and progress only when your dog is ready. If you want expert guidance, we are here to help.
Your dog deserves training that truly works. With certified Smart Master Dog Trainers SMDTs nationwide, you'll get proven results backed by the UK's most trusted dog training network. Find a Trainer Near You
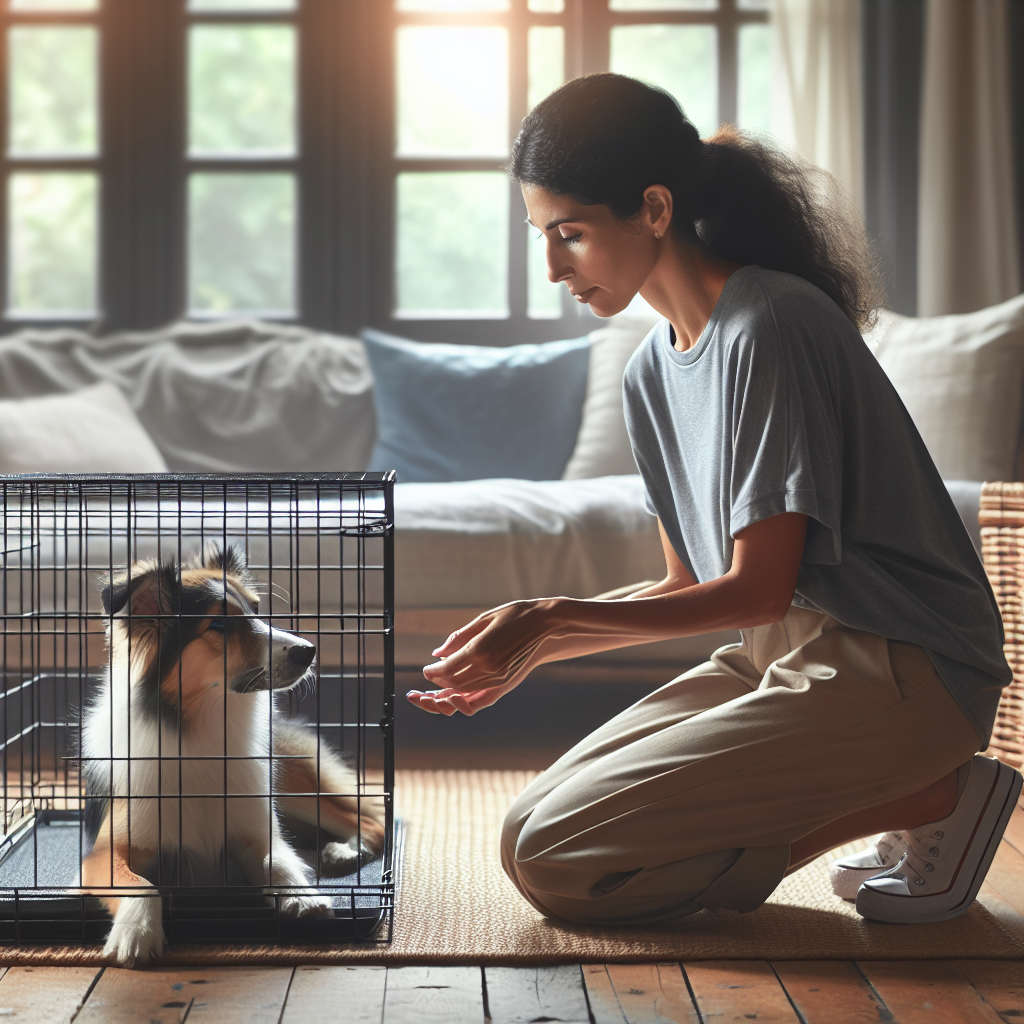
How to Desensitise Crate Sounds
What Fixed vs Variable Reward Really Means
Fixed vs variable reward is a core concept inside the Smart Method. It shapes how your dog learns, how long behaviour lasts, and how well your dog performs around real life distraction. At Smart Dog Training we sequence reward schedules on purpose. We begin with clarity and a fixed reward schedule, then progress to a variable reward schedule to produce reliability that holds anywhere. Every step is planned by a certified Smart Master Dog Trainer who understands how timing, criteria, and motivation work together.
This article explains fixed vs variable reward in plain terms, shows how Smart structures the shift, and gives practical steps you can use today. It is about real outcomes. Calm, consistent behaviour that you can trust in the park, the cafe, and at home.
The Role of Reward Schedules in the Smart Method
The Smart Method is structured, progressive, and outcome driven. Reward schedules are woven through all five pillars.
- Clarity. Clean commands and markers tell the dog exactly what earned the reward.
- Pressure and Release. Fair guidance paired with a clear release creates accountability.
- Motivation. Rewards build engagement and positive emotion so dogs want to work.
- Progression. We layer distraction, duration, and distance while adjusting reward schedules.
- Trust. Consistent delivery and fair criteria strengthen the bond and keep behaviour calm.
Fixed vs variable reward sits at the heart of progression. Get it right and you get steady gains without confusion or conflict.
Fixed vs Variable Reward Defined
Let us define the two reward schedules that matter most inside the Smart Method.
What Is a Fixed Reward
A fixed reward schedule means the dog receives a reward every time a behaviour meets the standard. Think sit, mark yes, pay. The goal is clarity. Early in training we want a strong pattern. Perform the skill, hear the marker, get paid. There is no guesswork. This is how we build clean understanding and fast learning.
What Is a Variable Reward
A variable reward schedule means the dog does not get paid every time. Sometimes the reward is food, sometimes a toy, sometimes praise, and sometimes the reward is withheld and replaced with a release to a new rep. The result is strong persistence and high hope. The dog stays in the game because rewards can happen at any time. Variable reinforcement keeps behaviour durable under pressure and distraction.
Fixed vs variable reward is not about more or less kindness. It is about timing and structure that produce lasting behaviour.
Why Reward Schedules Matter in Real Life
In the kitchen your dog may sit perfectly when paid every time. On a busy street the same dog may stall or blow you off. The gap is not the dog. The gap is the schedule and the way we layered difficulty.
Emotional State and Engagement
Fixed rewards calm and stabilise a dog during learning. Variable rewards build drive and attention once the dog understands. We use both on purpose to shape the dog’s emotional state without creating chaos.
Accountability Through Pressure and Release
Smart pairs a fair pressure and release system with both schedules. Light leash guidance and clean releases help the dog take responsibility. We do not rely on food alone. We build a dog that understands how to switch off pressure by performing the skill, and who stays motivated because the reward picture is well managed.
How Smart Builds Behaviour With Fixed Rewards First
The Smart Method begins with clarity. Fixed vs variable reward only works when the behaviour is first made clean under a fixed schedule. Here is how we do it.
Clarity With Markers and Timing
We use precise markers to tell the dog exactly which action earned it. A certified Smart Master Dog Trainer sets one marker for correct, one for keep going, and one for release. In early reps we mark and pay every correct response. The dog forms a strong link between action and outcome.
Setting Criteria and Measuring Success
We define criteria before we pay. For sit the criteria may be fast hips to ground, still body, and eye contact for two seconds. If the behaviour meets the standard, we pay on a fixed schedule. If it does not, we reset and try again. This is how the Smart Method protects clarity. We pay behaviour, not noise.
Moving to Variable Reward for Reliability
Once a behaviour is clean in a low distraction setting, we begin to shift. Fixed vs variable reward becomes a planned blend rather than an abrupt switch.
Creating Expectation and Hope
We introduce a keep-going marker and stretch the time between rewards. The dog learns that continued effort is often required. Hope rises and the dog stays engaged because the next rep could pay big. This is how Smart builds endurance and resilience without confusion.
Mixing Food, Toys, Praise, and Life Rewards
Variable rewards are not random. We plan them. Food for precision. Toys for speed. Praise for calm. Life rewards like going through a doorway for real life relevance. A Smart trainer blends these on purpose to match the dog’s temperament and the task at hand.
When to Change From Fixed to Variable
The timing of the shift is where many owners struggle. Move too soon and you get sloppy behaviour. Move too late and you create a dog that only works when paid every time. Smart solves this with clear checkpoints.
The Smart Progression Checklist
- Ten clean reps in a low distraction area under a fixed schedule.
- Fast response on the first cue, no extra prompts.
- Handler can add one small challenge, such as the handler turning away, with no loss of quality.
- Dog stays calm between reps, no fixating on the treat hand.
Once these are met we introduce a gentle variable reward pattern, such as pay every second or third correct response while keeping the keep-going marker active.
Avoiding Common Mistakes With Fixed vs Variable Reward
Paying Too Much or Too Little
Paying every single rep for weeks creates dependency. Paying too rarely too soon creates frustration and shutdown. Smart balances both. Build with fixed. Transition to variable with purpose.
Reinforcing Noise, Not Behaviour
If you mark while the dog breaks position, you reinforce the break. If you pay while the dog is whining, you reinforce the noise. The solution is clean timing and criteria, then apply fixed vs variable reward to the clean slice of behaviour only.
Variable Reward Without Chaos
Variable does not mean random. It means planned variety inside structure. Smart trainers plan the first five reps of any session so the dog experiences predictable patterns at the start, then thoughtful variability once the dog is warm and focused. This protects clarity while building resilience.
Using SMDT Level Structure in Sessions
- Warm up with two to four fixed reps for clarity.
- Blend in variable reward with a keep-going marker for two to three reps.
- Layer one new challenge such as mild distraction or small distance.
- Finish on a win with a higher value reward to anchor motivation.
This is a simple way to work fixed vs variable reward into every session with confidence.
Advanced Applications of Reward Schedules
Service Dog Neutrality and Public Access
For complex tasks and neutrality in public, the Smart Method starts with fixed rewards in quiet environments. We then add variable reward as we layer sound, people, and movement. The dog learns to hold position and perform tasks under pressure because the reward picture is still meaningful even when distractions spike.
Obedience Under Distraction and Distance
Down-stay at the park is a classic test. Start fixed in the garden. Move to variable reward once the down is clean. Add distance in small steps, reward some holds, and release on others. The blend of fixed vs variable reward here stops the dog from guessing and builds the ability to wait while life happens.
Integrating Pressure and Release Fairly
Pressure and release gives the dog a clear pathway to success. Light leash pressure appears only when needed. When the dog meets the criteria, pressure is released and the dog hears a marker. Fixed reward follows during learning. Later, the release and a keep-going marker bridge to a variable reward. This is clear, fair, and conflict free.
How Leash Pressure Pairs With Reward
Pressure introduces accountability. Reward maintains motivation. Used together with fixed vs variable reward, they produce a dog that understands how to switch off pressure, holds position when asked, and still wants to work.
Building Trust Through Consistency
Dogs trust what is consistent. Consistent markers, consistent criteria, and a consistent plan for moving from fixed to variable reward build that trust. The Smart Method protects the relationship at every step so your dog stays calm, confident, and willing.
Measuring Progress and Proofing
Distraction, Duration, Distance Triad
We add one D at a time. Keep the reward schedule supportive as you raise the bar. If you increase distraction, pay more often. If you stretch duration, let your variable schedule include occasional jackpots for longer holds. If you add distance, tighten criteria, then relax back into variable reward once the dog is steady.
Fixed vs Variable Reward in Puppy Training
Puppies thrive on clear, fast feedback. Start with short sessions and a fixed reward for sits, downs, name response, and simple leash work. As the puppy matures and understands the cues, blend in variable reward to grow staying power. Keep sessions playful and end on a success. This balance prevents over arousal and keeps learning fun.
Fixed vs Variable Reward in Behaviour Change
Reactivity, Aggression, and Anxiety
Behaviour cases require careful planning. In the Smart Method we shape calm choices first under low pressure. We use fixed rewards for the first clean seconds of neutral behaviour. As the dog proves it can make good choices, we introduce variable reward and fair pressure and release. This builds stable emotion and responsibility without conflict. The result is not a dog that needs constant food. It is a dog that can choose calm and hold it under stress.
Sample Week by Week Plan
This example shows how a Smart trainer might stage fixed vs variable reward for a sit stay.
- Week 1. Fixed reward for every correct two second sit stay in a quiet room. Ten clean reps per session.
- Week 2. Begin variable reward. Pay every second or third correct rep. Introduce a keep-going marker and stretch to five seconds.
- Week 3. Add mild distraction. A person walking by. Pay more often at first, then slide back to variable. Hold five to eight seconds.
- Week 4. Add small distance. One to two steps away. Reward some holds and release on others. Mix food and praise.
- Week 5. Train in the garden. Distraction rises. Return to more frequent pay to start, then move to variable again as the dog settles.
- Week 6. Proof in a park at quiet times. Keep sessions short. Finish with a higher value reward to anchor motivation.
Throughout, the Smart Method keeps criteria tight, markers clean, and the switch from fixed vs variable reward controlled.
Ready to turn your dog’s behaviour around? Book a Free Assessment and connect with a certified Smart Master Dog Trainer - available across the UK.
FAQs on Fixed vs Variable Reward
What is the fastest way to start using fixed vs variable reward
Begin with a clean behaviour in a quiet room. Pay every correct rep for clarity. After ten clean reps, start paying every second or third correct response while using a keep-going marker. Keep your criteria tight and your timing clean.
How do I know if I moved to variable too soon
Signs include slower responses, position breaks, or your dog staring at the reward hand. Go back to a fixed schedule for a few short sessions. Rebuild clarity, then reintroduce variable reward in smaller steps.
What rewards should I use for variable reinforcement
Blend food, toys, praise, and life rewards like going outside or greeting a friend. Match the reward to the behaviour. Use food for accuracy, toys for speed, praise for calm. Smart trainers plan the mix, not randomize it.
Does variable reward mean I stop rewarding forever
No. It means you stop rewarding every single rep. You still reward strategically. A well run variable schedule keeps behaviour strong without creating dependency.
Can I use fixed vs variable reward for loose leash walking
Yes. Start with a fixed reward for a few steps of position and focus. As the dog understands, vary when you pay and how you pay. Add small bursts of speed or a sniff break as life rewards. Use pressure and release fairly to maintain accountability.
How does a Smart Master Dog Trainer structure sessions
An SMDT warms up with a few fixed reps, adds a keep-going marker, blends variable reward as the dog settles, and layers one challenge at a time. They track criteria and adjust pay frequency to protect clarity and maintain motivation.
How often should I jackpot my dog
Use jackpots sparingly. Save them for breakthroughs, like the first perfect hold under a new distraction. Overuse reduces their power. Under the Smart Method, jackpots are planned and tied to clear milestones.
What if my dog only works for food
That signals a dependency created by long term fixed payment or poor variety. Switch to variable reward with a mix of praise and life rewards. Pair fair pressure and release. Your dog will begin to value the work itself, not just the food.
Work With a Certified Professional
Fixed vs variable reward is simple in theory and powerful in practice. The art lies in timing the shift, planning your mixes, and holding criteria steady as you raise distraction, duration, and distance. A certified Smart Master Dog Trainer can map this for your dog and your goals.
Your next step is easy. Book a Free Assessment and we will build a plan that follows the Smart Method from first rep to real life reliability.
Conclusion
Fixed vs variable reward is the backbone of reliable behaviour. Start with fixed to create clarity. Move to variable to build staying power and resilience. Pair motivation with fair pressure and release. Layer difficulty with intent. This is how Smart Dog Training produces calm, consistent behaviour that holds anywhere. Your dog can do this and you do not have to guess. With Smart you get a structured plan and a trainer who will guide you, rep by rep, to results that last.
Your dog deserves training that truly works. With certified Smart Master Dog Trainers (SMDTs) nationwide, you'll get proven results backed by the UK's most trusted dog training network. Find a Trainer Near You
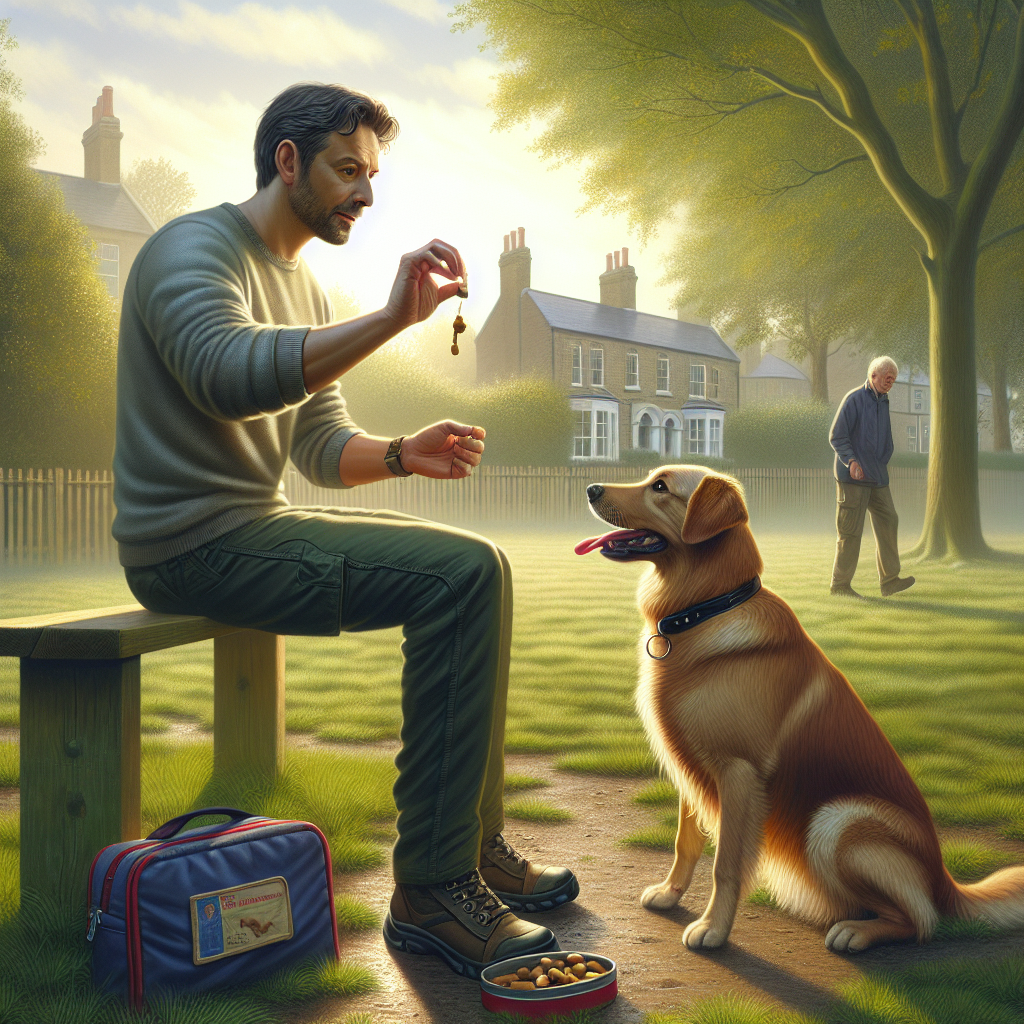
Fixed vs Variable Reward in Dog Training
Training Recall from Unexpected Distractions
Life throws curveballs. Bicycles cut across your path, a football skims the pavement, or a pigeon explodes from a hedge. Training recall from unexpected distractions is how you keep your dog calm, safe, and responsive when real life gets messy. At Smart Dog Training, we build that reliability through the Smart Method, our structured, step by step system that delivers recall anywhere. If you want results you can trust, work with a certified Smart Master Dog Trainer who understands how to guide your dog through surprise moments without conflict.
This guide lays out the exact process Smart Dog Training uses to deliver training recall from unexpected distractions. You will learn how to set foundations, how to layer in surprise, how to use pressure and release fairly, and how to progress until your dog turns on a dime in any environment.
Why Recall Breaks When Life Happens
Dogs do not fail recall because they are stubborn. They fail because surprise events out-compete their early training history. Sudden motion, high value scent, or social pressure from another dog can trigger automatic responses. In those moments, your cue has to be clearer, more practiced, and more rewarding than the environment. Training recall from unexpected distractions solves this by teaching your dog to prioritise you even when the world spikes their arousal.
Smart Dog Training addresses this through clarity, consistent feedback, and structured proofing. We treat recall as a life skill, not a party trick. The result is a dog that hears the cue and chooses you, even when a squirrel bolts or a dropped sandwich hits the ground.
The Smart Method for Reliable Recall
The Smart Method is our proprietary training system. Every step is designed to produce calm, confident behaviour that holds under pressure. Training recall from unexpected distractions is a perfect example of how the five pillars work together.
Clarity
We use a single recall cue, a clean marker system, and consistent body language. The dog should always know what the cue means and what earns reinforcement. Clear communication heads off hesitation when surprise hits.
Pressure and Release
Guidance is fair and timed. We use safe equipment and light directional pressure when needed, then release immediately when the dog makes the correct choice. This builds accountability without conflict. In training recall from unexpected distractions, that fair guidance helps the dog make the turn even when instincts pull the other way.
Motivation
Reinforcement is strategic. We pay with food, toys, or praise that the dog cares about, and we scale rewards to match difficulty. At high distraction, we pay high. Motivation keeps engagement strong when the world is loud.
Progression
We stack skills from easy to hard. Distance, duration, and distraction are layered in small steps so the dog can win at every stage. Progression is the engine that makes training recall from unexpected distractions hold in real life.
Trust
We protect the relationship. Recall should feel safe and rewarding. When your dog turns to you, good things happen and pressure melts away. Trust creates a dog that wants to come back, even when life gets chaotic.
What Counts as an Unexpected Distraction
Unexpected distractions are events your dog does not predict. Examples include a jogger appearing from behind a hedge, a cat shooting across the path, a child shouting, a football rolling, a delivery van door slamming, or a drone buzzing overhead. These events trigger reflex responses. Our job is to train a reflexive turn to you instead. Training recall from unexpected distractions teaches your dog that the first step after a surprise is to check in and then return.
Foundations Before You Add Chaos
Solid foundations make recall look easy. Before we add surprise, Smart Dog Training installs clean cues, markers, and leash handling. Training recall from unexpected distractions will only work if these basics are consistent.
Marker Words and Whistle
Choose one recall cue and one terminal marker that confirm the dog did it right. Pair a whistle if you like for an emergency recall. Keep tone upbeat and consistent. In low distraction spaces, pay every successful recall.
Handler Mechanics and Lead
Use a long line for early stages. Keep gentle hands, low tension, and clear footwork. When the dog turns, step back and invite them in, then pay. Good mechanics make training recall from unexpected distractions feel effortless later.
Building a Bulletproof Recall Cue
Smart Dog Training teaches a crisp turn and run to handler. Start indoors or in a quiet garden. Call once, mark the moment the dog commits, then pay at your legs. Keep sessions short. If the dog hesitates, reduce distance and distraction, then increase reward value. Repeat until the turn is automatic. This is the core skill that anchors training recall from unexpected distractions.
- One cue, one response, one payment
- Mark commitment, not arrival, to lock in the turn
- Pay at your legs to finish the chain cleanly
Micro Drills for Surprise Stimuli
Once the dog turns well in calm places, we add controlled surprises in a way that the dog can still win. Smart Dog Training uses micro drills that simulate the real world without risking failure.
Patterning the Turn
Walk with your dog on a long line. Drop a low value distraction, like a soft toss of a leaf. The moment the leaf moves, cue recall. Mark the turn and pay big. Repeat with slightly more motion. This links a startle to your cue and creates a new habit loop. Training recall from unexpected distractions means the turn becomes the first behaviour after a surprise.
Controlled Startle Games
Have a helper open and close a gate or lightly tap a ball on the ground. Vary timing so the dog does not predict it. You cue recall right after the sound or movement. Keep intensity low at first. Build slowly. You are teaching the dog that shock leads to you, not away from you.
Distance, Duration, and Distraction Progression
Progression is measured. Smart Dog Training increases one variable at a time while protecting success. Training recall from unexpected distractions requires careful steps.
- Distance: Increase the gap between you and the dog by a few steps at a time
- Duration: Ask for a longer hold at your side before payment
- Distraction: Increase novelty or motion in small increments
If the dog hesitates, step back a level. Success builds confidence. Confidence builds reliability.
Adding Real Life Proofing Walks
When fundamentals hold in set ups, we take the training out. Choose wide open spaces so you can manage distance. Keep the long line on. Plan short sessions with only two or three surprise events. Training recall from unexpected distractions in the field should be simple and clean, not chaotic.
- Scout routes with known triggers, like a park with bikes at certain times
- Warm up with easy recalls before you add surprise
- Allow the dog to notice the event, then cue recall once
- Mark and pay at your legs, then either break or repeat once
Ready to turn your dog’s behaviour around? Book a Free Assessment and connect with a certified Smart Master Dog Trainer, available across the UK.
Emergency Recall versus Everyday Recall
Smart Dog Training often installs two recalls. Your everyday recall is the one you use on walks. Your emergency recall is rare, higher value, and reserved for true surprises. Training recall from unexpected distractions works best when the emergency cue predicts a massive reward and zero conflict. Use it sparingly, pay it heavily, and keep it sacred.
- Everyday recall: Used often, paid well, maintains rhythm
- Emergency recall: Used rarely, paid like a jackpot, reserved for safety
Handling Setbacks and Non Compliance
Setbacks are normal. The key is to protect your cue. If the dog misses a recall, do not repeat the word. Guide with the long line, reduce the environment, and rebuild. Smart Dog Training applies pressure and release only to help the dog find the turn, then we let go and pay. Training recall from unexpected distractions still follows that rule, even when things wobble.
- Missed recall: Pause, help the turn with the line, pay smaller, then reset easier
- Sticky start: Shorten distance, use higher value reward, add movement from you
- Over arousal: End early, move to a quieter area, practice engagement games
Equipment That Helps
We keep equipment simple and fair. A well fitted flat collar or harness, a quality long line, a whistle if you choose, and rewards your dog loves. Tools never replace training. They only help you structure it. Training recall from unexpected distractions succeeds because of clear guidance and progression, not gadgets.
Common Mistakes to Avoid
- Repeating the recall cue, which teaches the dog to wait for multiple calls
- Paying too little for hard wins, which devalues the cue
- Jumping from easy to chaotic, which creates failure
- Letting the dog practice ignoring you off lead
- Calling only to end the fun, which poisons the cue
Safety and Ethics
Safety comes first. Keep the long line on until recall is reliable. Avoid busy roads until your dog is consistent. Smart Dog Training builds responsibility through fair pressure and immediate release when the dog chooses you. We never set dogs up to fail. Training recall from unexpected distractions is ethical when the dog understands the task and can access reinforcement for doing it right.
Sample Two Week Plan
This is a simple outline that shows how Smart Dog Training might structure early work. Adjust to your dog.
- Days 1 to 3: Indoors and garden. Ten to twelve recalls per session. Mark the turn, pay at your legs. Add gentle handler movement.
- Days 4 to 6: Quiet field with long line. Add low level moving distraction like a leaf toss. Two sets of six recalls.
- Days 7 to 9: Introduce a helper to create light sounds or slow rolling objects. Keep intensity low. Start one or two emergency recall reps with jackpot.
- Days 10 to 12: Wider space, more distance. Add mild real life triggers like distant bikes. Keep success high. Pay big wins.
- Days 13 to 14: Short proofing walks. Three surprise events each walk. One emergency recall per outing maximum.
Throughout, log your sessions. Note what worked, where your dog hesitated, and how you will reduce difficulty next time. Training recall from unexpected distractions is won through small, consistent wins.
When to Call a Professional
If your dog has chased wildlife, shows strong predation, or if you feel anxious handling surprise events, bring in help. A certified Smart Master Dog Trainer will assess your dog, fit the right plan, and coach your mechanics. Smart Dog Training supports you with structured sessions, clear homework, and progression that holds in real life.
Working with a professional can save months of trial and error. You will learn to apply the Smart Method correctly, which speeds up results and protects safety.
FAQs
How long does training recall from unexpected distractions take to work
Basic improvement shows in one to two weeks with daily practice. Full reliability depends on history and environment. Smart Dog Training builds steady wins so the behaviour holds for life.
Should I use a whistle for training recall from unexpected distractions
A whistle can help. We often pair a whistle for emergency recall because it is clear and consistent. Keep it rare and pay big so it stays powerful.
What if my dog ignores the recall when a squirrel runs
Go back to the long line and reduce the distance to the squirrel zone. Set easy reps, then add mild motion before you add wildlife. Training recall from unexpected distractions is built step by step.
Can puppies learn this or should I wait
Puppies can learn from day one. Keep sessions short, use soft distractions, and pay often. Early success makes later training recall from unexpected distractions much easier.
Do I need special equipment
No special gadgets. Use a flat collar or harness, a quality long line, a whistle if you like, and high value rewards. Smart Dog Training relies on clarity and progression, not tools.
What if my dog comes back slowly
Mark the decision to turn, then run backward a few steps to spark speed and pay more for fast arrivals. Speed is a paid behaviour. Training recall from unexpected distractions should feel exciting and safe.
How often should I practice
Short daily sessions work best. Ten minutes of focused work beats one long session. Mix easy and moderate challenges and finish on a win.
Is it safe to practice near roads
Do not practice near roads until recall is strong on a long line. Safety first. Smart Dog Training builds reliability in controlled places before busy environments.
Conclusion and Next Steps
Training recall from unexpected distractions is a life skill that keeps your dog safe and you in control. With the Smart Method, you will build a cue that cuts through chaos, a dog that chooses you without conflict, and a routine that holds in real life. If you want a clear path and coaching that fits your dog, we are ready to help.
Your dog deserves training that truly works. With certified Smart Master Dog Trainers SMDTs nationwide, you will get proven results backed by the UK’s most trusted dog training network. Find a Trainer Near You
Training Recall from Unexpected Distractions
How to Work With Stubborn Dogs
If you want to know how to work with stubborn dogs, you are not alone. Many families feel their dog is ignoring them or choosing mischief on purpose. At Smart Dog Training we see a different story. Most stubborn behaviour is a communication problem, not an attitude problem. When you give a dog clarity, fair guidance, and meaningful rewards, the behaviour changes fast and the change lasts.
In this guide you will learn how to work with stubborn dogs using the Smart Method, our structured system for calm, reliable behaviour. I will walk you through core skills, real life setups, and step by step progressions that our certified Smart Master Dog Trainers use every day. If you follow this process, you will get a dog who listens the first time and enjoys the work.
Why Dogs Seem Stubborn
Before we jump into how to work with stubborn dogs, it helps to know the common causes of stubborn behaviour. Dogs repeat what works for them. If a behaviour has a clear path to success, they will choose it. If the path is foggy or inconsistent, they will test and drift.
- Unclear commands and markers lead to guesswork and slow responses.
- Inconsistent rules make the dog gamble for better outcomes.
- Low motivation or poor reward timing reduces engagement.
- No progression plan means the dog is fine at home but fails in public.
- Missing boundaries and release cues create conflict or shutdown.
When families ask how to work with stubborn dogs, our answer is always the same. Create clarity, pair guidance with a fair release, build strong motivation, progress in layers, and protect trust. That is the Smart Method in action.
The Smart Method for Stubborn Dogs
The Smart Method is the backbone of every programme at Smart Dog Training. It delivers structure without stress, motivation without chaos, and standards without conflict. Here is how each pillar helps when you want to know how to work with stubborn dogs.
- Clarity. Clean commands and precise markers so the dog always knows what earns reward.
- Pressure and Release. Fair guidance paired with a clear release builds accountability and confidence.
- Motivation. Rewards that matter keep your dog engaged and willing.
- Progression. We layer skills through distraction, duration, and difficulty until they are reliable anywhere.
- Trust. Training strengthens the bond and produces calm, consistent behaviour.
Every Smart Master Dog Trainer is certified to deliver this system. That means your dog gets the same professional standard wherever you live in the UK.
Clarity First: Say It So Your Dog Understands
Clarity is the fastest way to change a stubborn pattern. If you want a clean response, you need a clean message. When we teach families how to work with stubborn dogs, we build a simple communication system that never changes under pressure.
- One cue per behaviour. Use the same word every time. Avoid repeating the cue.
- Two markers. A reward marker such as Yes that predicts the reward. A release marker such as Free that ends the behaviour.
- Calm voice. Give cues like a statement, not a question.
- Clear pictures. Stand still, face the direction you want the dog to go, and use consistent hand signals.
Start in a quiet room. Say Sit one time, guide if needed, mark Yes the instant the dog hits the position, then deliver the reward to the dog. Release with Free and step away to reset. Short, clean reps build fast understanding.
Pressure and Release Without Conflict
Pressure and release is a humane way to guide a dog into the right choice and then teach them how to turn pressure off. This is essential when you are learning how to work with stubborn dogs. Pressure is not force. It is controlled information through the leash or your body position. The release is the clear signal that the dog made the correct choice.
- Apply light leash pressure in the direction of the cue.
- Hold steady, do not tug or nag.
- When the dog complies, immediately soften the leash and mark Yes.
- Reward after the release. The contrast teaches the dog how to succeed.
As the dog learns, guidance fades and the dog takes responsibility. This is how we build consistent behaviour that holds up in real life.
Motivation That Makes Sense to Your Dog
Food, toys, play, and access to life rewards all have a place. If you ask how to work with stubborn dogs, the honest answer is you must pay well at the start. Then you shape the behaviour so the dog enjoys the work itself.
- Find the right reward. Use food your dog cares about in training, not in a bowl.
- Build engagement. Quick games of chase or tug can boost focus between reps.
- Make rewards contingent. Only pay for the picture you want. Be precise.
- Blend rewards with release. Mark Yes and then reward after the release so the behaviour stays clean.
Motivation grows when the dog understands how to win. When we design a plan for how to work with stubborn dogs, we always start with generous reward frequency, then taper as the behaviour becomes a strong habit.
Progression: From Living Room to Busy Street
Dogs do not generalise well. A Sit in the kitchen is not the same as a Sit at the park. If you want to master how to work with stubborn dogs, you need a simple plan for the three Ds: distraction, duration, and difficulty.
- Start easy. Low distraction, short duration, simple positions.
- Add one D at a time. Do not stack difficulty too quickly.
- Protect the marker. Only mark and reward the correct final picture.
- Keep sessions short. Quality beats quantity. End on a win.
This is how Smart builds real life reliability. Each layer is intentional, and the dog never feels trapped or confused.
Trust Is the Foundation
Trust is not a soft extra. It is central to how to work with stubborn dogs. Dogs follow people who are calm, consistent, and fair. If you get frustrated, reset and simplify. If your dog struggles, reduce the challenge and help them find the right answer. Your steady leadership builds the bond that makes your dog want to work with you.
Step by Step Plan for How to Work With Stubborn Dogs
Step 1 Assess and Reset Your Routine
Structure creates safety. Begin with a daily plan that supports training.
- Meal times. Use food in training sessions instead of free feeding.
- Walks. Two structured walks a day if health allows. Aim for a brisk pace and calm energy.
- Place time. Teach your dog to relax on a raised bed several times a day.
- Sleep. Ensure adequate rest. Tired dogs make better choices.
Step 2 Build Your Communication System
Teach the reward marker and the release marker before anything else. This is a must in how to work with stubborn dogs. Run ten short reps of a simple behaviour like Sit or Place. Mark Yes as the dog completes the behaviour. Deliver the reward to the dog, then say Free and invite them off the position. Keep your tone consistent every time.
Step 3 Teach Leash Skills and a Structured Walk
Leash communication makes or breaks reliability in the real world. Here is how to set the picture:
- Hold the leash short enough to feel the dog but not tight.
- Walk with purpose. Your movement sets the pace and direction.
- If the dog forges ahead, stop. Apply light pressure back to your side. Release and mark when the dog softens and returns.
- Reward near your leg. Reinforce the position you want to see.
When families ask how to work with stubborn dogs on walks, this simple loop stop, guide, release, mark, reward brings focus without conflict.
Step 4 Core Obedience: Sit, Down, Place, Come, and Heel
These five skills answer most stubborn patterns. Train them the Smart way so they hold under distraction.
- Sit and Down. One cue. Guide into position. Release clearly.
- Place. Send your dog to a bed and expect calm until released.
- Come. Use a long line at first. Give the cue once, apply light leash guidance, release and mark at your feet, then reward.
- Heel. Keep the head beside your leg. Reward in position. Add turns to deepen focus.
Build short sessions and mix positions. This blend keeps the dog engaged and prevents boredom, which is vital when you want to know how to work with stubborn dogs in day to day life.
Step 5 Proof With the Three Ds
Now take your clean behaviour and make it reliable.
- Distraction. Add mild sounds or movement. If your dog struggles, lower the challenge and rebuild.
- Duration. Extend the hold in small steps. Reward during the hold and after the release.
- Difficulty. Change locations, surfaces, time of day, and distance from you.
Remember the rule that guides how to work with stubborn dogs. Only raise one D at a time, and only when the dog is succeeding at the current level.
Step 6 Add Fair Boundaries and Accountability
Boundaries help dogs relax because the world becomes predictable. Keep it simple.
- Doorways. Wait for a release before moving through.
- Furniture. Access by invitation only in the early stages.
- Greeting people. Default to Sit and hold until released.
- Kitchen and dining areas. Teach Place during meal prep and meals.
When you consider how to work with stubborn dogs in busy homes, boundaries reduce conflict and speed up learning.
Step 7 Real Life Problem Solving
Apply the same steps to common issues. Guide, release, mark, and reward the behaviour you want. Keep sessions short and positive.
- Doorbell chaos. Send to Place before opening the door. Release once the dog is calm and guests are seated.
- Crate refusal. Reward the first step toward the crate. Guide with light leash pressure and release the moment the dog enters.
- Over arousal. Use slow feeding from your hand to lower energy, then train one simple behaviour and stop.
Handling Specific Stubborn Behaviours
Pulling on the Leash
For leash pulling, the fix is consistency. Walk in a quiet area. When the leash tightens, stop. Steady pressure guides the dog back to your side. Release, mark, and reward at your leg. Repeat every time. If you are learning how to work with stubborn dogs that pull, this loop builds self control and attention without frustration.
Ignoring Recall
Use a long line and set the dog up to win. Say Come one time. If your dog hesitates, guide with the line, release and mark at your feet, then reward well. Do many easy reps before trying this off lead. This is one of the most important parts of how to work with stubborn dogs in open spaces.
Jumping on People
Interrupt early. As a person approaches, cue Sit and reward the hold. If paws leave the floor, calmly guide the dog away, reset, and try again. Reward four feet on the floor. Teach family and friends to follow the plan so the rule is consistent.
Stealing and Counter Surfing
Management first. Control access to the kitchen when food is out. Train Place during food prep and meals. Reward calm on the bed and reset often. Prevention matters here, especially when you are focused on how to work with stubborn dogs who have learned that counters pay well.
Barking for Attention
Do not reward noise with eye contact or touch. Instead, cue Place, mark the quiet moment, and reward after a brief hold. If barking resumes, calmly guide back to Place and reduce the challenge. Build longer quiet periods over time.
Refusing Commands or Freezing
Freeze is often confusion, not defiance. Lower the difficulty, break the behaviour into smaller parts, and help with light guidance. Release and reward quickly. This is central to how to work with stubborn dogs that shut down under pressure.
Tools and Setups That Support Success
Smart Dog Training keeps tools simple and fair. The goal is clear communication and calm behaviour that lasts. Here is what we use most often when teaching families how to work with stubborn dogs.
- Leashes. A standard six foot leash for daily work and a long line for recall training.
- Place bed. A raised bed creates a defined target that is easy for dogs to understand.
- Crate. A safe rest space that supports routine and speeds house training.
- High value rewards. Food or toys chosen for training, not free access.
- Quiet training spaces. Start where your dog can win, then add challenge step by step.
Measure Progress and Know When to Get Help
Progress shows up as faster responses, longer holds, and calmer walks. Track simple metrics each week:
- Number of cues needed before your dog complies.
- Duration on Place without reminders.
- Recall success on a long line at increasing distances.
- Leash tension measured by how often you must stop and reset.
If you are stuck on how to work with stubborn dogs after two weeks of daily practice, bring in a professional. A Smart Master Dog Trainer will assess your dog, tailor a plan, and coach you through each step so you see results quickly.
Smart Programmes for Stubborn Dogs
Smart Dog Training offers structured programmes for puppies, adolescent dogs, and adults. All follow the Smart Method and can be delivered in home or through tailored behaviour programmes. If you are serious about how to work with stubborn dogs, this support will save you time and remove guesswork.
- Foundation Obedience. Core skills with clear markers, leash communication, and real life proofing.
- Behaviour Support. Custom plans for pulling, jumping, barking, recall, and household manners.
- Advanced Pathways. For teams ready to go further, we progress into complex skills and higher distraction environments.
Ready to turn your dog’s behaviour around? Book a Free Assessment and connect with a certified Smart Master Dog Trainer - available across the UK.
FAQs on How to Work With Stubborn Dogs
Why is my dog stubborn with me but not with a trainer
Dogs respond to clarity and consistency. Trainers use precise cues, fair guidance, and clean release markers. When you apply the same system, your dog will respond to you as well. This is the core of how to work with stubborn dogs at home.
How long does it take to see change with a stubborn dog
Many families see improvement within the first week when they apply the Smart Method. Full reliability takes longer and depends on daily practice. Plan for steady progress over several weeks.
Can older dogs learn or is stubbornness a permanent trait
Age is not the issue. Clarity and structure are. Older dogs do very well when the plan is fair and consistent. If your goal is how to work with stubborn dogs later in life, focus on communication and routine.
What should I do if my dog ignores a command
Do not repeat the cue. Help with light guidance, then release, mark, and reward when your dog complies. Reduce the difficulty and rebuild. This is a key part of how to work with stubborn dogs without nagging.
Should I use more treats with a stubborn dog
Use rewards your dog values, delivered with precise timing. At the start you will reward more often. As behaviour improves, shift some rewards to praise, access to life activities, and the satisfaction of a clean release.
What if my dog shuts down during training
Lower the challenge, shorten sessions, and help your dog succeed. Keep your tone calm and your expectations clear. This approach protects trust and is essential to how to work with stubborn dogs who get overwhelmed.
Do I need professional help for a stubborn dog
If your progress stalls or you feel uncertain, bring in support. A Smart Master Dog Trainer will tailor the plan, demonstrate handling, and coach your timing so you and your dog succeed faster.
Conclusion
Stubborn behaviour is not a character flaw. It is a cue for better communication and clearer structure. When you apply the Smart Method, you get a step by step plan for how to work with stubborn dogs that builds calm, consistent behaviour in real life. Start with clarity, use fair pressure and release, pay well for the right choices, and progress in layers while protecting trust. If you want expert guidance, we are here to help.
Your dog deserves training that truly works. With certified Smart Master Dog Trainers SMDTs nationwide, you'll get proven results backed by the UK's most trusted dog training network. Find a Trainer Near You
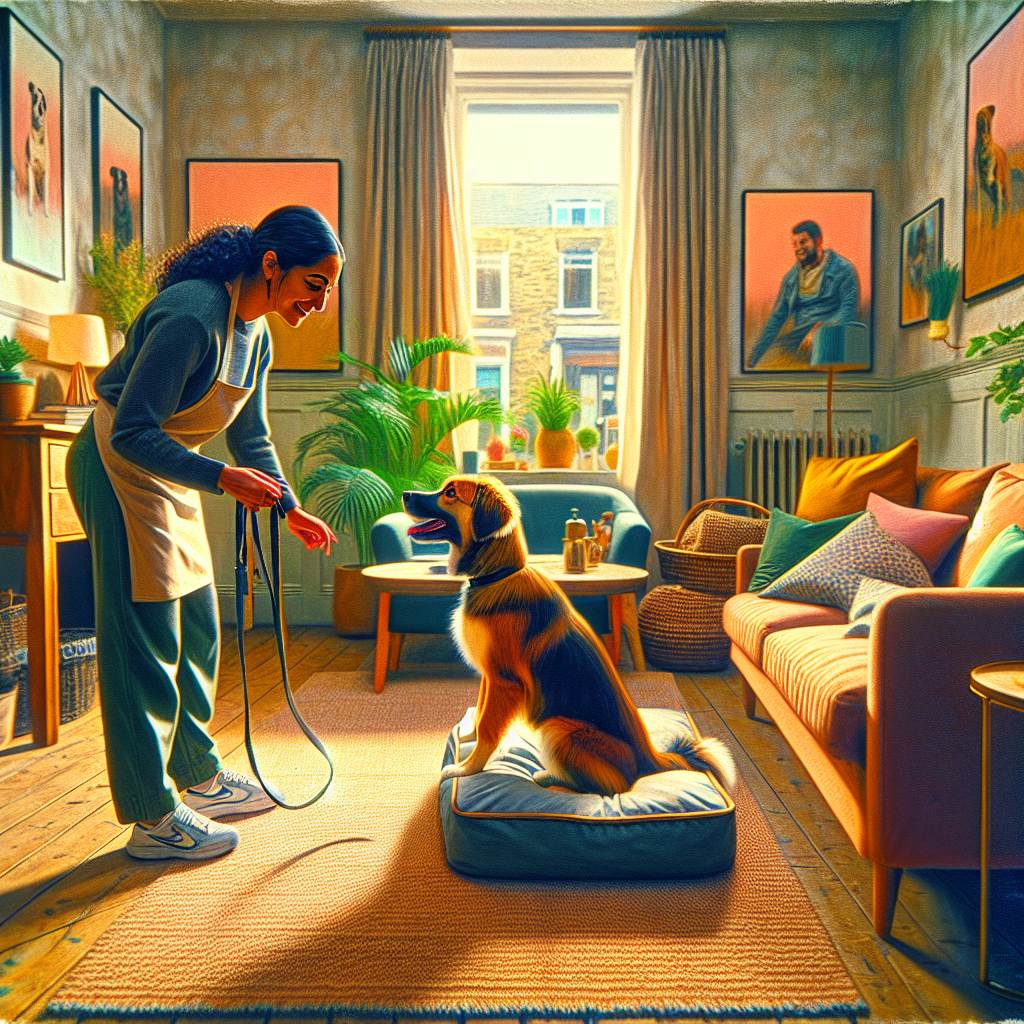
How to Work With Stubborn Dogs
Why Focus Matters on Busy Walks
City streets and village lanes are full of moving parts. Dogs, prams, scooters, traffic, food on the ground, and people who want to say hello. If your dog loses attention outside, you do not have a training problem. You have a clarity and structure problem in a world loaded with distraction. In this guide, I will show you how to hold your dog's focus on busy walks using the Smart Method so your dog stays calm and responsive anywhere.
As the Director of Education at Smart Dog Training, I see the same theme across thousands of cases. Dogs do not fail on purpose. They fail because real life asks for more skill than they have. Our Smart Master Dog Trainers set dogs up to succeed with clear markers, fair guidance, and a progressive plan. With the Smart Method, you can build focus that holds up on any pavement.
The Smart Method for Real Life Focus
Smart Dog Training uses a structured system that produces practical, reliable behaviour. Every step you take below follows this framework so you can hold your dog's focus on busy walks and keep it under pressure.
Clarity
We teach commands and markers with precision. Yes means reward now. Good means continue the behaviour. Break means free. When your dog knows exactly what each word means, attention becomes easy to keep.
Pressure and Release
We guide with fair pressure on the lead or body line, then release the moment the dog makes the right choice. The release is the reward. This builds accountability without conflict. It gives your dog a simple path back to focus when the world gets busy.
Motivation
Food, toys, and praise keep training upbeat. Rewards build a dog that wants to work. We use motivation to grow engagement, then shift to variable rewards so focus lasts even when treats are not present.
Progression
Skills are layered step by step. First at home. Then outside the front door. Then on quiet streets. Then busier areas. We add distance, duration, and distraction in a plan that your dog can handle.
Trust
Clear guidance plus fair boundaries grows confidence. Your dog learns you will lead. Trust holds focus together when life gets loud.
Understanding Distraction on the Pavement
To hold your dog's focus on busy walks, you need to read the world through your dog’s eyes. Three ideas help you get ahead of problems before they happen.
Thresholds and Arousal
Every dog has a threshold where focus drops and impulse takes over. Above that level they cannot think. Your job is to train under threshold, then step up in small, manageable layers.
Distance and Spatial Pressure
How close you are to triggers matters. Many dogs focus well until another dog passes within a few feet. Use distance to keep your dog in the thinking zone. Close the gap only when your dog shows reliable attention.
Patterns Over Chaos
Chaos steals focus. Predictable patterns build it. If you create a simple training pattern on walks, the world fades and your dog locks onto you.
Foundations at Home That Translate Outside
You cannot build focus on a busy high street if you do not have it in your kitchen. Start here so you can later hold your dog's focus on busy walks without a struggle.
- Name means eyes on you. Say your dog’s name once. The moment they look, mark Yes and reward. Build quick, snappy responses.
- Static focus. Sit, then 3 to 5 seconds of eye contact, mark Yes, reward. Slowly grow to 20 seconds before you step outside.
- Marker clarity. Yes means reward right now. Good means keep going. Break means free. Use these words the same way every time.
- Place training. Send to a bed or mat. Reward calm. This builds impulse control that carries over to the pavement.
Build a Focus Cue That Works Anywhere
A single cue helps you recapture attention fast. We like Watch or Eyes. Here is how to teach it so you can hold your dog's focus on busy walks when things get lively.
- At home, hold a treat near your face. Say Watch. The moment your dog locks eyes, say Yes and reward.
- Repeat 10 to 15 reps. Then ask for the same behaviour with empty hands so the cue causes eye contact, not the treat.
- Start to move. Ask Watch for one step of eye contact, mark Yes, reward. Build to 5 steps while holding focus.
- Add your release word Break so your dog learns there is a start and finish to the focus task.
Lead Handling and Position That Support Attention
Good lead handling makes focus easy. Poor handling makes it hard. Smart Dog Training teaches a calm, neutral lead with consistent position.
- Lead length. Use a fixed length that allows a relaxed J shape. A tight lead invites pulling and scanning.
- Handler position. Pick a side and stick with it. Changing sides causes confusion.
- Reset steps. If focus breaks, take two small steps back, cue Watch, mark Yes, reward. Then continue forward.
- Stop the slow drift. When the nose drifts away and the lead begins to lift, cue Watch. Reward the refocus.
Reward Strategy for Busy Walks
Motivation is not bribery. It is a plan that creates reliable behaviour under distraction.
- Start high value. In early stages use small, soft food your dog loves.
- Pay attention. Mark Yes when your dog chooses you over the world. Reward often at first.
- Shift to variable reward. As performance improves, pay every second or third success. Keep your dog guessing in a good way.
- Layer in life rewards. Access to sniffing, greeting, or moving forward can be a reward when your dog shows strong focus.
Using Pressure and Release Fairly
Pressure is information, not punishment. When your dog disconnects, apply gentle lead pressure toward you. The instant they turn in and reconnect, release the pressure and mark Yes. Pair this with food rewards in early stages. Over time the release itself becomes rewarding. This is how Smart Dog Training builds accountability that helps you hold your dog's focus on busy walks when the environment gets loud.
Progression Plan Week by Week
A clear plan stops guesswork. Follow this simple path and adjust to your dog’s pace.
Week 1 Quiet Home
- Watch cue to 10 seconds of eye contact
- Place training to 2 minutes calm
- Name response 10 out of 10
Week 2 Garden and Driveway
- Watch while you take 5 to 10 steps
- Lead handling with resets
- Reward every focus choice
Week 3 Quiet Street
- Short sessions of 10 minutes
- Watch cue near parked cars and bins
- Practice sit and focus at kerbs
Week 4 Moderate Distraction
- Pass one calm dog at a generous distance
- Vary rewards and add life rewards like sniff breaks
- Grow duration of focus to 20 seconds
Week 5 Busier Walks
- Introduce shops and light foot traffic
- Practice reset steps if attention drops
- Loose lead with consistent side position
Week 6 Real Life Proofing
- Short sessions near cyclists and prams with space
- Randomise rewards and praise
- Blend Watch with heeling for 10 to 20 steps
By week six many teams can hold your dog's focus on busy walks in most situations. If you need a custom plan, a Smart Master Dog Trainer can assess your dog and adjust the steps.
Handling Common Triggers on Busy Walks
Other Dogs
- Arc to create space before you pass
- Cue Watch as you arc, then Good to maintain
- Release to sniff once past and calm
People and Greetings
- Ask for sit and Watch before the hello
- Teach friends and family to wait for your Yes
- Stop greetings if focus breaks, then try again
Cyclists and Scooters
- Move to the side and face your dog toward you
- Mark and reward calm stillness as the bike passes
- Rehearse with a helper at slow speeds first
Wildlife and Fast Movement
- Increase distance early when your dog notices
- Use pressure and release to guide the head back
- Mark Yes for any quick refocus on you
Calm Composure at Kerbs and Crossings
Busy crossings test impulse control. Teach a simple ritual that you repeat at every kerb.
- Stop at the edge. Ask for sit
- Cue Watch for 3 to 5 seconds
- Say Good as you step forward together
- Reward once across if the lead stayed slack
This pattern becomes automatic. It will help you hold your dog's focus on busy walks even when horns, buses, and chatter compete for attention.
The Smart Check In Drill
This is our signature pattern to build attention under movement.
- Walk five steps at a relaxed pace
- Pause. Say Watch. Mark Yes for eye contact
- Reward and say Good as you restart the walk
- Repeat every 10 to 20 seconds at first, then stretch the gaps
The check in drill teaches your dog that attention pays even while moving. It gives you a simple tool to keep things together as you hold your dog's focus on busy walks.
Turn Focus into Loose Lead Walking
Attention and position go hand in hand. Once your dog checks in easily, build a calm heel that you can use through crowded spots.
- Start with two steps of heel and Watch
- Add one step at a time until you reach 15 to 20 steps
- Reward at your hip to keep position tidy
- Sprinkle in short sniff breaks so your dog can decompress
Smart Dog Training blends motivation with structure so the heel does not feel like hard work. This balance helps you hold your dog's focus on busy walks without constant micromanagement.
Mistakes That Break Focus
- Talking non stop. Too much chatter blurs your cues
- Repeating the name or Watch multiple times. Say it once and make it count
- Using food as a lure for long stretches. Build real behaviour, then reward it
- Holding a tight lead. Pressure without release creates conflict
- Jumping into chaos too soon. Follow the progression and proof in layers
When and How to Use Training Tools
Smart Dog Training chooses tools to improve clarity and safety. A well fitted flat collar or harness with a standard lead is a good starting point. If your dog is strong or reactive, speak with a trainer before changing equipment. The right tool makes it easier to guide and release pressure with perfect timing. The wrong tool blunts communication. A certified Smart Master Dog Trainer will match tools to your dog and coach you to use them with skill.
For Puppies and Rescue Dogs
Puppies need short, fun sessions and lots of rest. Keep walks brief and build skills at home. Rescue dogs often need a decompression period. Move slowly, focus on trust, and keep the environment simple at first. Both groups can learn to hold your dog's focus on busy walks. The difference is pacing and patience.
Measure Progress and Stay Consistent
- Track sessions. Aim for five short focus reps per outing
- Count wins. Celebrate each check in and calm pass by
- Review weekly. If you get stuck, step back one level of distraction
- Keep cues crisp and rewards timely
Ready to turn your dog’s behaviour around? Book a Free Assessment and connect with a certified Smart Master Dog Trainer - available across the UK.
How to Hold Your Dog's Focus on Busy Walks in Real Life
Here is a fast recap you can use on your next outing.
- Start the walk with two minutes of simple focus games near home
- Use the check in drill for the first five minutes
- Arc around triggers and maintain space
- Ask for sit and Watch at every kerb
- Reward early and often, then shift to variable rewards
- End with a calm decompression sniff so the walk finishes relaxed
FAQs
How long will it take to hold my dog's focus on busy walks
Most teams see clear progress in two to four weeks when they train five days a week for short sessions. Complex cases or strong reactivity may need a tailored plan from a Smart Master Dog Trainer.
What if my dog will only focus when I show food
Use food to start, then fade the lure fast. Ask for the behaviour first, then pay. Shift to variable rewards once the cue is solid. The Smart Method turns motivation into reliable behaviour that lasts.
Should I let people or dogs say hello during training
Yes, when your dog can hold focus first. Ask for sit and Watch. If your dog stays attentive, allow a brief hello as a life reward. If focus breaks, step back and try again with more space.
What do I do if my dog explodes at a trigger
Increase distance at once. Turn away calmly. Use pressure and release to guide the head back, then reward a check in. Resume training at a lower level of distraction. If this repeats, seek help from our team.
Can I use a long line to build focus
Yes for controlled practice in open spaces. Keep it tangle free and use it to guide and release. Do not use a long line near roads or crowded paths.
How many times should I cue Watch on a walk
In the beginning, every 10 to 20 seconds. As your dog learns to auto check in, reduce to moments where the world gets busy. The goal is natural attention without constant cues.
What is the best way to reward on the move
Deliver food at your hip with your hand low and close to your leg. This keeps position tidy and prevents jumping. Mix in praise and life rewards to keep motivation high.
Conclusion
Focus outside is a trained skill. When you use clear markers, fair guidance, the right rewards, and steady progression, your dog learns to stay with you no matter what the street throws at you. The Smart Method gives you a proven path to hold your dog's focus on busy walks so every outing becomes calm and enjoyable. If you want hands on help or a custom plan, our nationwide team is ready to support you.
Your dog deserves training that truly works. With certified Smart Master Dog Trainers (SMDTs) nationwide, you'll get proven results backed by the UK's most trusted dog training network. Find a Trainer Near You
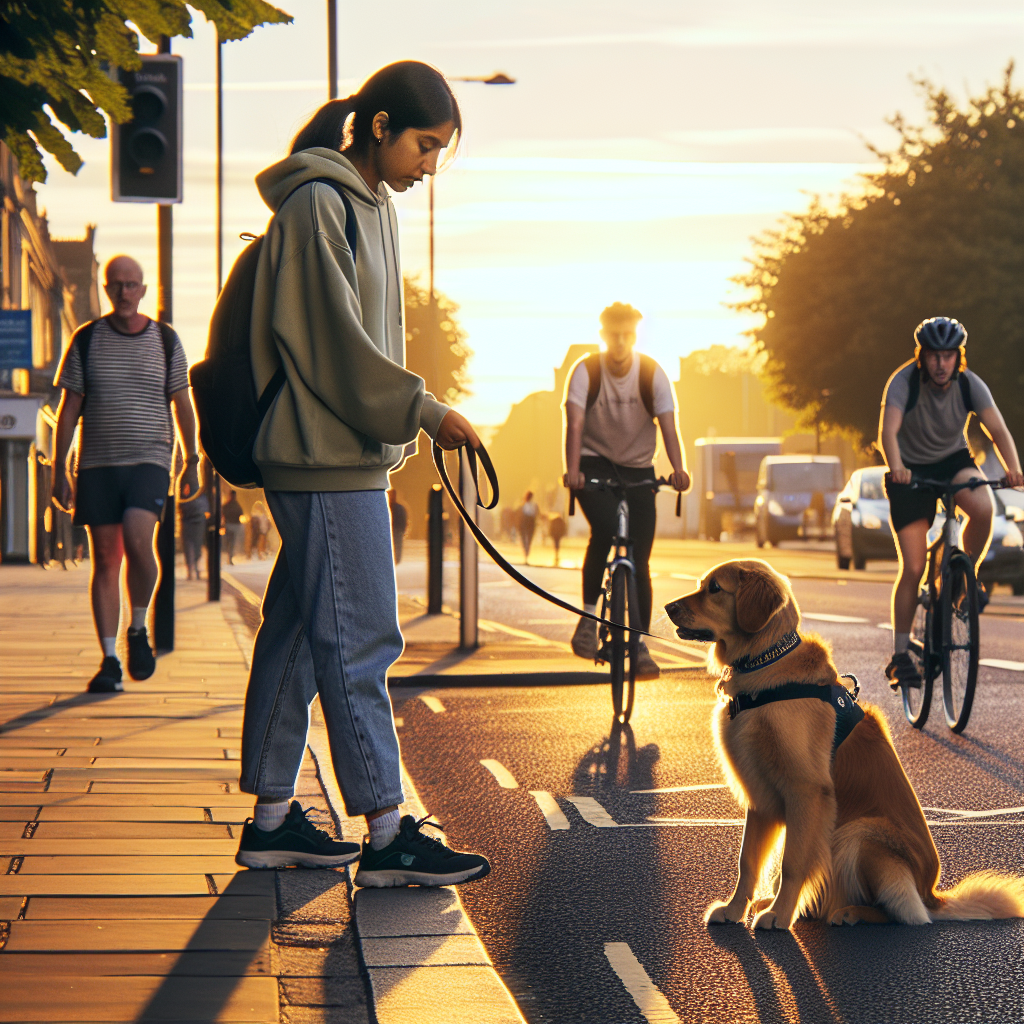
How to Hold Your Dog's Focus on Busy Walks
Why Training Down Stays With Distance Matters
Training down stays with distance is one of the most valuable skills you can teach your dog. It creates calm, builds impulse control, and gives you reliable management in real life. Whether you have a lively puppy or an adult dog that breaks position, a structured plan will turn chaos into clarity. At Smart Dog Training, we use the Smart Method to make training down stays with distance dependable in your home, on walks, and in busy public spaces. Your certified Smart Master Dog Trainer will guide you through a proven progression that delivers results.
Many owners try to rush distance and distraction before the dog understands the job. That is when creeping, whining, or breaking the stay shows up. Smart fixes that with clear markers, fair guidance, and step by step proofing. You will learn how to create a rock solid down, extend duration, then add distance in a way that feels easy for the dog and stress free for you. With the right plan, training down stays with distance becomes a calm habit your dog actually enjoys.
The Smart Method Behind Reliable Stays
Every Smart programme follows the Smart Method. It is structured, progressive, and outcome driven, so your training down stays with distance works anywhere.
- Clarity: Commands and markers are delivered with precision so your dog knows exactly what to do and when to release.
- Pressure and Release: Fair guidance with a clear release builds accountability and responsibility without conflict.
- Motivation: Rewards and praise create engagement so your dog wants to work.
- Progression: We layer distraction, duration, and distance gradually until the behaviour is reliable in the real world.
- Trust: Training strengthens your bond, building calm confidence.
A Smart Master Dog Trainer leads every programme with these pillars. That is why training down stays with distance becomes steady and easy to maintain over time.
Foundations First: Build a Clear Down
Before you add distance, teach a clean, confident down. This is the anchor for everything that follows.
- Choose your words: Pick one cue for the position such as Down and one marker for release such as Free. Be consistent.
- Shape or guide: Lure your dog into a down with food or guide with your lead as needed. Mark the instant elbows touch the floor.
- Reward in position: Deliver treats between the front paws, low and calm. This keeps your dog settled rather than popping up.
- Short holds: Ask for one to three seconds at first. Release, then reset. Keep reps quick and clean.
- Calm energy: Stand tall and breathe. Your dog reads your body language. Neutral posture creates a stable picture.
Repeat until your dog drops into position smoothly on a single cue. When the position looks fluent, you are ready to build duration.
Duration Before Distance
Training down stays with distance only works if duration is strong. If your dog cannot hold still for 60 seconds at your side, distance will fail. Build duration in small steps.
- Start at five to ten seconds. Reward in position.
- Increase by five to ten second increments per session as long as your dog stays calm.
- Use calm, slow treats or a quiet stroke under the chin. Avoid over arousal.
- Release on Free, then reset. Aim for five to eight clean reps.
When you reach one minute of quiet, focused duration beside you, move on. Your training down stays with distance will now have a solid base.
Introducing Distance the Smart Way
This is where many owners rush. The Smart Method makes distance simple and predictable.
- Step back one foot: From a steady down, take a small step back. Pause for two seconds. Step forward and reward in position. Release. Reset.
- Vary your step: One foot, then two feet, then half a step. Randomising early prevents pattern dependence.
- Add sideways movement: Step left, step right, small pivot, then return. Always reward in position.
- Build to three to five metres: Only increase distance when your dog can hold the previous level three times in a row without creeping.
- Add brief out and back: Walk out, pause, return, reward. Keep pauses short at first.
These micro steps keep training down stays with distance low stress. Your dog learns that your movement is part of the job, not a reason to break.
How to Use Pressure and Release Fairly
Pressure and Release is part of the Smart Method. It provides guidance your dog understands without conflict. During training down stays with distance, this looks like:
- Lead information: Use a light, steady lead to prevent creeping. The moment your dog settles again, soften the lead and reward.
- Clarity over correction: If your dog breaks, calmly guide back to the original spot, reset the down, and try a slightly easier rep.
- Release matters: Dogs work for the release as much as the reward. Make Free clear and timely so accountability stays high.
With fair guidance, your dog learns responsibility. That is how training down stays with distance holds up in public places.
Motivation That Keeps Your Dog Engaged
Motivation drives willingness. Use smart rewards to sustain focus through duration and distance.
- Reinforce in position: Food delivered low to the paws or calm praise maintains a settled picture.
- Switch to variable rewards: Once the behaviour is reliable, reward every few reps rather than every time. This builds durability.
- Use life rewards: Release to a sniff break or a toss of a toy after a series of strong reps. Keep arousal balanced.
When motivation is managed well, training down stays with distance becomes enjoyable for both of you.
Progression Plan From Home to the Real World
Follow this layered plan to proof your stay everywhere. The aim is steady, calm success at each level before you move on.
- Home quiet: Living room with no visitors. Two to three metres of distance for one minute.
- Home active: TV on, family walking by, door opening and closing. Repeat distance goals.
- Garden: Add birds, breezes, and sounds. Use a long line for safety. Increase to five to eight metres of distance.
- Front drive: People passing and mild traffic noise. Keep sessions short and successful.
- Local park off peak: Choose quiet times. Build to ten metres. Vary your angles and return routes.
- Park busier: More people and dogs at a distance. Hold your criteria. Reward the best reps.
- Public spaces: Cafe patio or shop doorway where dogs are allowed. Short reps with high quality rewards.
At any stage, if your dog struggles, step back to the last point of success. Training down stays with distance is a marathon, not a sprint. The Smart pathway keeps progress steady and stress low.
Handler Skills That Make the Difference
Your timing and posture can make or break training down stays with distance.
- Marker timing: Mark the moment your dog completes the down or meets the distance challenge. Late markers create confusion.
- Neutral body: Stand tall, breathe, and keep your hands still. Extra movement can cue your dog to break.
- Clean release: Say Free, pause half a second, then move. This keeps the release meaningful.
- Reset rhythm: Short sets with clear resets prevent mental fatigue.
Solving Common Problems in Stays
Even with a good plan, bumps can happen. Here is how Smart resolves the most common issues during training down stays with distance.
Creeping Forward
- Solution: Reduce distance, shorten the pause, and reinforce more frequently. Guide with light lead information back to the original spot, then release and reset.
Popping Up on Release Word
- Solution: Separate the marker and release. Reward in position first, pause, then give the release word. Keep the first movement after release small and calm.
Whining or Restlessness
- Solution: Lower difficulty and improve motivation. Use calmer rewards and shorter reps. Check the floor surface for comfort.
Breaking When You Turn Your Back
- Solution: Train back turns as their own step. Start with a small shoulder turn, build to a full turn for one second, then return and reward.
Over Focusing on Food
- Solution: Hold the reward out of sight. Reinforce from behind your back or from a pouch. Remember to praise in a quiet voice.
Smart trainers make small, precise adjustments. That is why training down stays with distance stays on track and stress free.
Using Place to Support Down Stays
A defined station like a mat or bed helps shape stillness. It gives your dog a clear boundary, which supports training down stays with distance.
- Introduce the mat: Reward any interaction. Build to a full down on the mat.
- Layer duration: Add seconds before distance.
- Transition away: Once reliable, practice without the mat so the behaviour transfers anywhere.
Distance, Duration, Distraction The Smart Balance
Balance the three Ds with intention. During training down stays with distance, only raise one D at a time. If you add distance, lower duration. If you add distraction, shorten both distance and duration. This balance prevents confusion and keeps success high.
Real Life Applications You Will Love
When training down stays with distance is reliable, daily life improves fast.
- At the door: Ask for a down stay when visitors arrive. Step away to greet, then return to reward.
- Family meals: Place your dog in a down at a comfortable distance from the table. Build duration gradually.
- Public spaces: Use a down stay beside your chair at the cafe. Start with short visits.
- Vet and grooming: A calm down stay with distance helps staff work safely and efficiently.
Smart programmes always target real life outcomes. The goal is calm, consistent behaviour you can trust.
When to Work With a Professional
If you are stuck or your dog rehearses breaking the stay, work with a certified professional. An SMDT from Smart will tailor the plan to your dog and your environment, then coach your timing and handling. That support turns training down stays with distance into a smooth, reliable routine.
Ready to turn your dog’s behaviour around? Book a Free Assessment and connect with a certified Smart Master Dog Trainer - available across the UK.
Weekly Practice Plan You Can Follow
Use this simple rhythm to keep momentum without burnout. It aligns with the Smart Method and keeps training down stays with distance building week by week.
- Session length: Five to eight minutes, twice per day.
- Reps: Six to ten clean reps per session.
- Week one: Build a fluent down and 30 to 60 seconds of duration beside you.
- Week two: Introduce one to three metres of distance with short pauses.
- Week three: Add sideways steps, back turns, and brief out and back walks.
- Week four: Move to the garden and front drive, then start quiet park sessions on a long line.
Keep notes on what worked and what did not. Small, steady steps create strong habits.
Equipment That Helps Without Overcomplicating
You do not need much to make training down stays with distance work well.
- Flat collar or well fitted harness
- Standard lead and a long line for safety outdoors
- Training mat or bed for early stationing
- Small, low crumb rewards your dog enjoys
Keep gear simple. The Smart Method leans on clarity, not gadgets.
Ethics and Welfare Come First
Smart programmes protect your dog’s welfare at every step. Training down stays with distance is never about flooding or force. We use fair guidance, clear releases, and thoughtful progression. Sessions are short, upbeat, and end on success. This builds trust and long term reliability.
How Smart Supports Families and Advanced Goals
From first time owners to those seeking advanced outcomes, Smart has you covered. Our structured approach to training down stays with distance is used across all public facing programmes, including puppies, obedience, behaviour change, service dog pathways, and protection training. Because every SMDT follows the same clear system, you get consistent standards and predictable results nationwide.
FAQs on Training Down Stays With Distance
How long should my dog hold a down stay before I add distance?
Build to at least 60 seconds beside you with calm focus. Once that is reliable, start with small steps back and short pauses. This keeps training down stays with distance smooth and stress free.
What should I do if my dog breaks the stay when I step away?
Calmly guide back to the original spot, reset the down, and reduce difficulty. Shorten the pause or take a smaller step. Reward in position, then try again. Clean, easy reps are key during training down stays with distance.
How often should I practice?
Two short sessions per day work well. Aim for six to ten clean reps. Consistency builds the habit and keeps training down stays with distance progressing every week.
Can I use toys instead of food?
Yes, if your dog stays calm. Mix food, praise, and life rewards such as a sniff break. Maintain a settled picture during training down stays with distance. If toys create too much arousal, use calmer rewards.
Is it okay to practice in busy parks right away?
No. Start at home, then the garden, then quiet public areas. Only add bigger distractions when the behaviour is ready. This staged approach keeps training down stays with distance reliable.
Do I need a professional trainer?
If you are unsure about timing, handling, or your dog keeps breaking position, a professional helps. A Smart Master Dog Trainer will tailor your plan and coach you through each stage of training down stays with distance.
Should I reward every stay forever?
Not forever. Once reliable, switch to variable rewards so the behaviour becomes durable. Still praise and release clearly. This maintains quality during training down stays with distance.
Conclusion
Training down stays with distance is a cornerstone of calm, reliable behaviour. With the Smart Method, you teach a clear position, build duration, then add distance and distraction one step at a time. Motivation stays high, guidance is fair, and results last. If you want steady progress and a dog you can trust anywhere, work the plan above or get hands on support from an SMDT. Your dog will learn to settle, focus, and hold position with ease in real life.
Your dog deserves training that truly works. With certified Smart Master Dog Trainers (SMDTs) nationwide, you'll get proven results backed by the UK's most trusted dog training network. Find a Trainer Near You

Training Down Stays With Distance
Training Dogs for Crowded Urban Environments
City life is loud, fast, and full of moving parts. Buses hiss, bikes glide past, prams appear from nowhere, and pavements get tight. Training dogs for crowded urban environments is how you turn that daily chaos into calm. At Smart Dog Training, we use the Smart Method to give every owner a clear plan that works in real life. Our certified Smart Master Dog Trainers deliver results that hold on busy streets, inside stations, and in your building lobby.
This guide sets out how we approach training dogs for crowded urban environments. We focus on clarity, motivation, fair pressure and release, steady progression, and trust. The aim is simple. Produce a dog that walks nicely on lead, remains neutral to people and dogs, settles in cafes, and listens even when the world is moving. With Smart, you get a structured system used by every Smart Master Dog Trainer across the UK.
Urban Dog Training at a Glance
Training dogs for crowded urban environments is about predictable behaviour under pressure. Instead of hoping your dog copes, we plan for every common city scenario and teach a response that is reliable. The Smart Method turns big goals into small, achievable steps, so your dog learns to handle noise, motion, closeness, and novelty without stress.
- Walk past people, dogs, scooters, and prams without pulling
- Hold a steady heel on narrow pavements
- Ignore food on the ground and street litter
- Settle on a mat in cafes and waiting areas
- Load and travel calmly on buses and trains
- Ride lifts and navigate lobbies politely
- Return on recall, even around distraction, using a long line during proofing
Why Training Dogs for Crowded Urban Environments Matters
Without structure, city triggers stack up. A dog pulls once, barks twice, then lunges when a cyclist passes. That cycle becomes a habit. Training dogs for crowded urban environments breaks that pattern and creates an alternative chain of calm behaviour. Safety improves at road crossings. Walks become easier. Your dog learns to filter out the noise and stay engaged with you.
We also protect welfare. Urban dogs are exposed to more pressure than suburban or rural dogs. Smart training builds confidence at a pace your dog can handle, so stress stays low and wins stack up. The outcome is a calm dog that is easy to live with and happy to work.
The Smart Method for City Living Dogs
Every Smart programme follows the Smart Method. This is how our trainers structure training dogs for crowded urban environments from the first session to full public reliability.
Clarity in Noisy Places
Clear markers tell the dog when they are right. We use precise cues for heel, sit, down, place, recall, leave it, and release. In a busy setting clarity removes guesswork, which cuts anxiety and keeps your dog working.
Pressure and Release with Fair Guidance
Fair guidance paired with a clear release teaches responsibility without conflict. When we guide a dog to heel or to a place, the release marks success. Pressure ends the moment the dog makes the right choice. Used consistently, this builds accountability and calm.
Motivation that Cuts Through Distraction
Dogs perform what they value. We build motivation with food, toys, and praise so your dog wants to work. Strong reinforcement helps your dog choose you over the city noise.
Progression from Home to High Streets
Training dogs for crowded urban environments begins where the dog can think. We start indoors, then the hallway, then the building entrance, then a quiet street, and finally busy routes, stations, and shopping areas. We add distraction, duration, and difficulty step by step.
Building Trust in Busy Spaces
Trust grows when dogs see that training is consistent and fair. You guide, they succeed, and the city becomes predictable. Trust is what lets your dog look to you instead of reacting to the crowd.
Foundation Skills Every City Dog Needs
Before we step into rush hour, we install core behaviours. Training dogs for crowded urban environments rests on these building blocks.
Name Response and Orientation
We teach a fast head turn to the handler on the name cue. This simple skill breaks fixation and reorients your dog when scooters or dogs appear.
Heel and Loose Lead Walking on Narrow Pavements
Heel is your stability gear. The dog’s shoulder aligns with your leg, leash is relaxed, and pace changes follow you. We proof heel in close quarters so you can pass people with ease.
Reliable Sit, Down, and Place
A solid sit and down allow you to pause at crossings, queue politely, and create space. Place means go to a mat or bed and stay until released. That one behaviour lets you manage cafes, lobbies, and platforms.
Solid Recall on a Long Line
City recall is insurance. We build it using a long line to keep your dog safe while you proof against pigeons, food scraps, and park activity.
Leave It and Drop It
Street litter, food, and broken items are common hazards. We teach a crisp leave it to prevent the grab, and drop it for safe release if your dog gets there first.
Settle in Cafes and Transport
Settle pairs a down with duration on a mat. The dog learns to switch off while people move around. Training dogs for crowded urban environments always includes a deep relaxation component.
Conditioning to Urban Sounds and Motion
Noise and motion sensitivity can derail a walk. We desensitise to buses, sirens, horns, skateboards, and rolling suitcases. Sessions start below threshold, then gradually increase intensity. We pair exposure with food or play, mark calm, and release often. The result is confident neutrality.
Smart trainers schedule sound sessions across varied times of day so dogs learn that the city soundtrack changes. By pairing clarity with motivation, we convert worry into predictability.
Social Neutrality Around People and Dogs
Social neutrality means your dog assumes nothing and waits for your instruction. We install neutrality through controlled setups. The dog learns that passersby and dogs are background, not an invitation or a threat. Training dogs for crowded urban environments hinges on this skill because greetings are rare and tight spaces are constant.
- Teach your dog to hold heel as people approach
- Reward eye contact and forward focus, not pulling toward others
- Use place to park your dog in queues and at doors
- Release only when you choose to greet or move on
Handling Triggers like Bikes, Scooters, and Prams
Moving triggers are predictable in cities. We script approaches at controlled distances. The dog holds heel, we mark calm, and the object passes. If arousal rises, we increase distance, regain clarity, and work back in. Pressure and release guides position without conflict. Motivation reinforces the choice to remain steady.
Safe Street Manners and Traffic Awareness
Smart street manners reduce risk. Training dogs for crowded urban environments includes traffic drills: stop at kerbs, wait for release, cross briskly, and resume heel. We teach the dog to sit at every crossing by default. This creates a reliable safety check even when you are distracted.
We also address bus stops, taxi ranks, and delivery zones. The dog learns that tight clusters of people, opening doors, and rolling trolleys are normal events. With repetition, calm becomes the habit.
Public Transport Training Step by Step
Transport is where training dogs for crowded urban environments truly pays off. We break this into phases:
- Approach the station entrance. Reward calm observation. If needed, practice sessions just outside the doors.
- Enter short, exit short. Walk in, perform a sit or place, reward, then leave before pressure rises.
- Platform neutrality. Teach settle away from edges. Pair noise exposure with food, then remove food as neutrality grows.
- Boarding. Heel to the door, pause, step on, then place near your feet. Keep the leash short, not tight.
- Riding. Maintain a quiet down. Use low value food only if needed. The goal is true relaxation, not constant feeding.
- Exiting. Release, heel off, and reset outside for a final sit. End the rep cleanly.
Smart trainers run these steps across buses, trams, and trains until the dog treats them all the same.
Elevator and Lobby Etiquette
Lifts can spook dogs due to motion and close quarters. We teach a front sit while the doors open, then a heel inside to a corner spot. Place holds until your release. In lobbies we model straight-line walking, door waiting, and calm greetings only when invited. Training dogs for crowded urban environments is about predictable routines that your dog recognises anywhere.
Managing Multi Sensory Distraction
Cities are multi sensory. You will face sound, movement, smell, and touch pressure at once. We train the dog to prioritise your cue over the environment. This starts with short reps. Ask for one behaviour, mark success, release, then reset. Layer two behaviours, then three. Build the chain slowly so your dog never guesses. Precision beats pressure every time.
Real Life Proofing Plans for City Routes
A plan is the difference between hoping and knowing. Smart proofing maps your actual routes. We identify hot spots such as a busy corner, a café strip, or a station tunnel, then assign drills for each. Training dogs for crowded urban environments includes these weekly targets:
- Two short heel sessions at peak foot traffic
- One settle on mat at a café with mild distraction
- One sound session near buses or roadworks
- One transport rep with a short ride
- Two recall and leave it drills in a safe open space with a long line
Keep sessions short and focused. End on success. Small wins compound quickly when you follow the Smart Method.
Equipment that Supports Training
We select equipment that adds clarity and fair guidance. A fixed length lead allows clean heel work and safe management in crowds. A properly fitted collar or approved training tool helps deliver timely pressure and release. A portable mat gives your dog a clear place target in any public setting. Training dogs for crowded urban environments is easier when the dog understands what each piece of equipment means.
Stress Signals and Welfare in the City
Smart training is dog centred. We watch for stress signals such as panting outside of heat, lip licking, scanning, and refusal to take food. When we see pressure building, we create distance, simplify the task, or switch to a lower intensity location. Progression never means flooding. It means steady challenge at a level your dog can handle. This is how we protect welfare while training dogs for crowded urban environments.
Common Mistakes and How Smart Fixes Them
- Going too fast. Fix by splitting steps and keeping reps short.
- Talking without clarity. Fix by using crisp cues and consistent markers.
- Letting the lead do the work. Fix by motivating the dog to engage and then guiding fairly.
- Only training on quiet streets. Fix by mapping weekly proofing in planned busy areas.
- Rehearsing pulling or barking. Fix by changing distance before the behaviour starts.
Smart programmes prevent rehearsals and build habits you can trust. Our SMDT certified trainers coach your timing so you can create reliability quickly and kindly.
When You Need Professional Help
If your dog already rehearses lunging, barking, or freezing, get structured guidance. Training dogs for crowded urban environments is safest with a plan tailored to your dog and your city routes. Our trainers assess history, triggers, and daily patterns, then build a step by step plan using the Smart Method. You will know exactly what to practice and how to measure progress.
Ready to turn your dog’s behaviour around? Book a Free Assessment and connect with a certified Smart Master Dog Trainer - available across the UK.
Step by Step City Training Plan You Can Start Today
Use this simple weekly structure to begin training dogs for crowded urban environments the Smart way.
- Day 1. Home foundation. Name game, heel mechanics in the hallway, place holds with mild distractions.
- Day 2. Building entrance. Heel in and out, door pauses, brief settle near the mailboxes.
- Day 3. Quiet street. Ten minutes of heel with planned stops at kerbs, two leave it reps with planted items.
- Day 4. Café corner off peak. Place on a mat for five minutes, release, short walk, repeat twice.
- Day 5. Transport primer. Approach a bus stop or station entrance, practice short ins and outs if suitable.
- Day 6. Open space drill. Long line recall and food refusal games, focus on fast orientation and clean releases.
- Day 7. Rest and review. Short fun session at home, light play, and reset goals for next week.
Keep criteria fair and celebrate small wins. If your dog struggles, drop criteria and rebuild. The Smart Method treats progression like a ladder. You do not skip rungs and you never saw the ladder off beneath you.
Case Examples from Smart Trainers
Every week our SMDT trainers take dogs from anxious to confident in city settings. A young terrier pulling toward every pigeon learned to heel calmly in four weeks by pairing clear guidance with strategic distance and high value rewards. A rescue shepherd that froze at station doors gained confidence by building predictable routines inside and outside, starting with five second exposures and growing to full rides. Both programmes followed the same Smart steps and produced behaviour that now holds in public.
FAQs
What age should I start training dogs for crowded urban environments?
Start as soon as your puppy is home and cleared for public exposure. Keep early sessions short and positive, focusing on orientation, heel mechanics, place, and sound desensitisation. Older dogs can improve quickly with the Smart Method as well.
How long does it take to see results in the city?
Most owners see measurable change in two to four weeks with daily practice. Full reliability around peak hour traffic may take eight to twelve weeks depending on your dog and your routes.
Do I need special equipment for city training?
You need a fixed length lead, a well fitted collar or approved training tool, a treat pouch, and a portable mat. These items create clear communication and predictable routines.
What if my dog already reacts to bikes and scooters?
We adjust distance so your dog can think, build heel focus, and reward neutrality as the trigger passes. Over time we close the gap. If reactions are intense, work with a Smart trainer for tailored support.
Is food always required during public training?
Food is valuable for building motivation and confidence. As skills improve, we fade to praise and life rewards while keeping food available for tough environments or maintenance.
Can the Smart Method help on public transport?
Yes. We use short entries and exits, platform neutrality, and calm place on board. Training dogs for crowded urban environments always includes transport steps designed for your local services.
What is the role of a Smart Master Dog Trainer?
An SMDT is certified through Smart University and trained to deliver the Smart Method with precision. They coach you on timing, criteria, and progression so behaviour lasts in real life.
How do I choose the right programme?
Book an assessment so we can match your goals and your dog’s history to a programme. We offer tailored behaviour plans and structured obedience pathways that follow the Smart Method.
Conclusion
Training dogs for crowded urban environments is a skill set, not a guess. With the Smart Method you get clarity, fair guidance, real motivation, and steady progression. Your dog learns to walk past distractions, settle in public, ride transport, and move through the city with confidence. When you follow the plan, calm becomes the default and the city becomes simple.
Your dog deserves training that truly works. With certified Smart Master Dog Trainers (SMDTs) nationwide, you'll get proven results backed by the UK's most trusted dog training network. Find a Trainer Near You
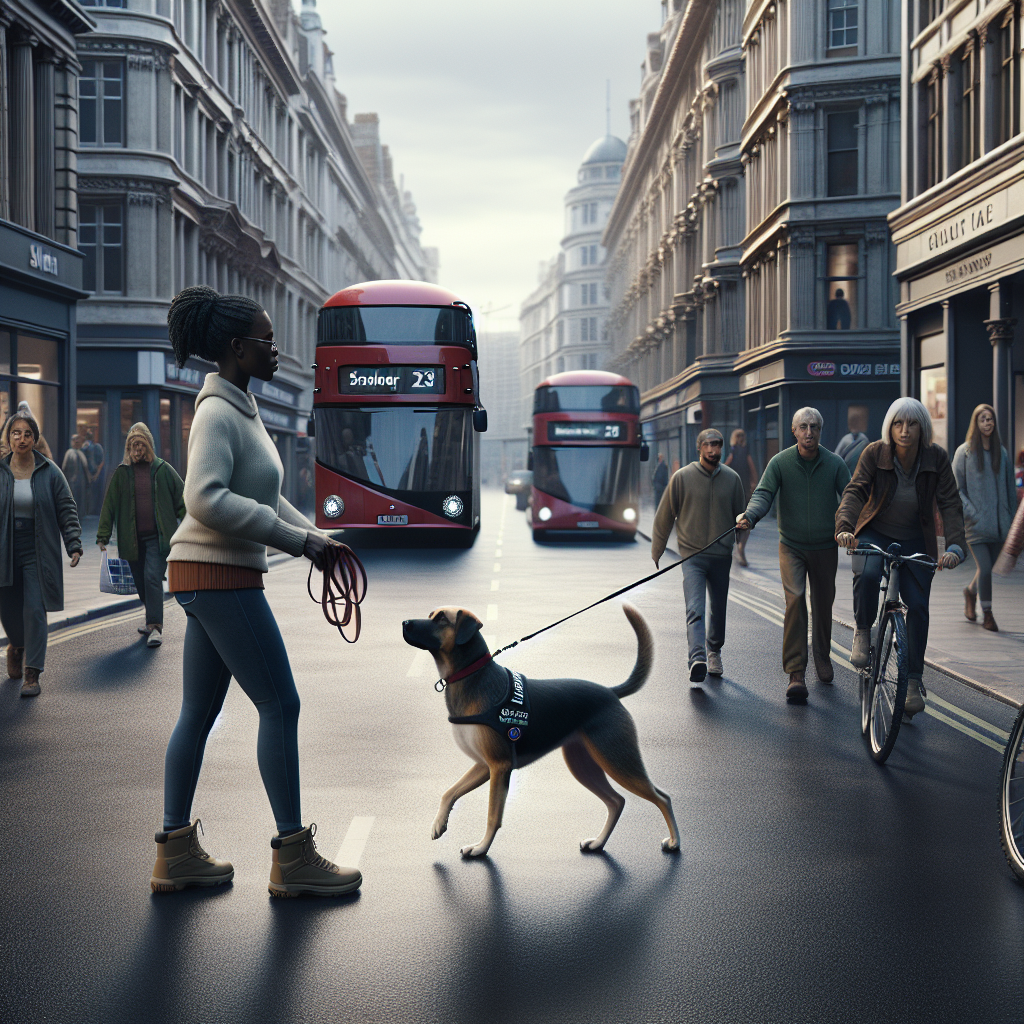
Training Dogs for Crowded Urban Environments
Understanding When to Stop Training Your Dog
Most owners ask when to stop training far less often than they should. Stopping at the right moment turns skills into habits and keeps your dog eager to work. At Smart Dog Training we teach you exactly when to stop training so your dog finishes fresh, not fried, and comes back wanting more. In our programmes a Smart Master Dog Trainer guides you to read your dog and time the end of a session with confidence.
Knowing when to stop training is not guesswork. It is a planned choice that fits the Smart Method. When you end on a success your dog remembers the win, not the struggle. When you leave them calm and focused you protect motivation for tomorrow. This article shows you how to judge when to stop training, how to end any session well, and how to use Smart structure so results stick in real life.
Why Stopping at the Right Moment Matters
Stopping at the right moment preserves clarity, prevents stress, and locks in progress. Your dog learns most in short, focused blocks. Go past the point of focus and you start to rehearse mistakes. When to stop training decides whether you build reliability or just create more confusion. Ending cleanly also protects your relationship because your dog trusts that work feels fair and achievable.
The Smart Method Framework for Session Length
The Smart Method is our proprietary system used in every Smart Dog Training programme. It blends motivation with structure and accountability so your dog stays engaged and responsible. It also tells you when to stop training by giving you clear markers to watch.
Clarity First Short Successful Reps
Clarity means your dog understands the picture of a behaviour. Early reps should be short and simple. Two to five clean repetitions are often enough before you stop. If the picture gets messy you are already past the point of value. When to stop training under the Clarity pillar is simple. Stop after a clear success, not after a mistake.
Motivation as the Meter for When to Stop Training
Motivation powers learning. Watch how fast your dog takes food, how quickly they orient to you, and how keen they are to start the next rep. If drive drops, you are near the cutoff. When to stop training in a motivational sense is the moment you see enthusiasm dip. End on a win and give a short break or finish the session entirely.
Progression and Planned Session Endings
Progression adds difficulty slowly. That includes planned endings. Decide your finish conditions before you start. For example, three perfect sits with two second holds in a quiet room, then a release to play. When to stop training is not based on a clock alone. It is based on meeting your planned criteria without errors.
Reading Your Dog’s State During Training
Great timing begins with reading state. Your dog’s body language and behaviour tell you when to stop training in the moment.
Physical Signs That Signal When to Stop Training
- Yawning or lip licking that repeats outside of a marker moment can mean rising stress.
- Slower responses, hesitations, or repeated mistakes show fatigue.
- Scanning the room instead of focusing on you suggests attention is dropping.
- Heavy panting in cool conditions can signal pressure or arousal rather than simple heat.
- Turning away or sniffing that appears between reps is a classic sign it is time to stop.
Emotional Signs That Tell You to Pause
- Frustration shows as vocalising, pawing, or pushy behaviour between reps.
- Shut down looks like stillness, slow movement, or refusal to engage.
- Over arousal looks like wild bouncing, mouthing, jumping, or grabbing the lead.
In each case the answer is the same. When to stop training is now. End on a small, achievable behaviour you know your dog can perform, mark it, reward, and finish.
Session Structures That Work in Real Life
Structure makes it easy to decide when to stop training. Use these Smart Dog Training patterns at home.
Micro Sessions for Busy Days
- One to three minutes, two to five clean reps, then end.
- Use one behaviour per micro session. Sit, down, or place.
- End with a release and a short play or sniff break.
When to stop training in a micro session is simple. Stop after the first string of clean reps. Do not wait for a mistake.
Focused Blocks for New Behaviours
- Five to eight minutes with short breaks between mini blocks.
- Start easy, then add one layer of difficulty such as small duration or mild distraction.
- End the block after you hit your planned criteria twice in a row.
When to stop training in focused blocks is right after the second clean success. Bank the win.
When to Stop Training During Problem Behaviour Work
Behaviour change needs even tighter timing. With issues like reactivity, resource guarding, or separation stress, ending well is vital. Smart Dog Training programmes set firm finish rules so you do not rehearse the problem.
- Reactivity sessions stop before your dog crosses into barking or lunging. You end after a calm look at the trigger followed by a turn back to you.
- Resource work ends after one calm approach and trade. Do not push for more once you get a clean rep.
- Separation work ends as soon as you hit your current time threshold while your dog is calm and quiet.
When to stop training in behaviour work is before escalation. You want calm, confident reps with room to spare.
Measuring Progress So You Know When to Stop Training
Objective measures take guesswork out of when to stop training. Use a simple training log. Track date, place, criteria, successes, and your dog’s state. In Smart Dog Training we ask clients to record two numbers each session.
- Success rate. Out of five reps, how many were clean
- Engagement score. On a scale of one to five, how keen was your dog
End a session if success falls below four out of five, or if engagement drops to three. You will collect data that guides when to stop training tomorrow. It also gives your Smart Master Dog Trainer clear insight into how to adjust the plan.
Common Mistakes When You Keep Going
- Chasing one more rep after a win. This is the fastest way to turn success into struggle.
- Training through whining, barking, or spinning. Those are signs to end or reset.
- Making sessions long to feel productive. Short and sharp beats long and sloppy.
- Raising difficulty after your dog is already tired. Add challenge only when engagement is high.
- Ending on a failure. Always find a small success to finish.
When to stop training is before any of these mistakes appear. If they do appear, take a breath, get one easy success, and finish there.
Working With a Professional When to Stop Training Together
Coaching helps you trust your timing. In our programmes your Smart Master Dog Trainer will model when to stop training, then coach you to do the same at home. You will learn session planning, state reading, and clean endings that protect motivation and deliver calm, reliable behaviour in real life.
Ready to turn your dog’s behaviour around? Book a Free Assessment and connect with a certified Smart Master Dog Trainer - available across the UK.
A Simple Session Plan You Can Use Today
Use this plan to apply the Smart Method and decide when to stop training with confidence.
- Pick one behaviour and one goal. For example, place for five seconds while you step one pace away.
- Set clear finish criteria. Two clean reps that meet the goal.
- Warm up with one easy success. A shorter duration or closer distance.
- Run two to four focused reps. Mark and reward each success.
- If you get your two clean reps, stop at once. Release and play.
- If you get an error, simplify the picture, get one easy win, then stop.
That is it. When to stop training is built into the plan. You will finish on a win and your dog will be eager for the next session.
Age and Breed Considerations for When to Stop Training
Puppies need very short sessions. Think one to two minutes with simple pictures. Adolescents have energy but short focus, so aim for frequent micro sessions. Senior dogs may tire mentally before they tire physically, so keep the work easy and the endings predictable. High drive working breeds can give you more reps, but only if engagement stays bright. When to stop training is about the dog in front of you, not the clock.
Tools and Reinforcers That Help You Finish Well
Smart Dog Training uses fair tools and clear markers to support calm, accountable behaviour. The right reinforcer and a clean release make ending simple.
- Use a clear terminal marker that means the rep is over and a reward is coming.
- Follow with food, play, or a life reward like sniffing, based on what motivates your dog.
- Use a calm release word to end the whole session. Then give a brief decompression break.
When to stop training becomes obvious when your dog lights up at the marker and then relaxes after the release. You get both motivation and calm in the same plan.
How the Five Smart Pillars Guide Endings
- Clarity. End after clear pictures, not confusion.
- Pressure and Release. Guide fairly, then release cleanly so the dog understands the end.
- Motivation. Stop while your dog still wants more.
- Progression. Fold in small challenges only while focus stays strong, then end.
- Trust. Consistent, fair endings build a willing, confident partner.
When to stop training is woven into each pillar so your dog gets the same message every time.
Case Examples From Smart Dog Training
Heelwork. The dog begins to drift after three clean passes along the path. We end after one more short, perfect pass, mark, reward, then release to sniff. When to stop training came just before focus slipped.
Recall. Two strong recalls with fast approaches and a clean sit. On the third rep the dog glances at birds. We finish after a short distance recall that feels easy. We leave the field with energy high and success fresh.
Place with guests. The dog holds place for ten seconds while one person walks past. We end after the second clean hold and move to a calm chew on the bed. When to stop training was set by our plan, not by the clock.
FAQs
How long should a daily training session be
For most dogs, two to five minutes is plenty. Use several micro sessions across the day. When to stop training is after two to five clean reps, not after a timer runs out.
Should I stop if my dog makes a mistake
Do not stop on a failure. Make the picture easier, get one clean success, then stop. When to stop training is after that easy win.
How do I end a session without over arousing my dog
Use a clear marker, deliver the reward, then give a calm release and a short decompression like a sniff walk. That sequence makes when to stop training feel predictable and calm.
What if my dog wants to keep going
That is perfect. Stop while desire is high. It keeps motivation strong for next time. When to stop training is before you see a drop in focus.
Does age change when to stop training
Yes. Puppies and seniors need shorter sessions. Adolescents benefit from frequent micro sessions. Working breeds can handle more reps if enthusiasm stays bright.
How do I decide when to stop training in public
Use lower criteria. Ask for one or two easy wins, then stop. Leave with your dog successful and calm. That makes the next public session easier.
Conclusion
Great training is not about how long you work. It is about when you finish. The Smart Method builds the answer to when to stop training into every plan. End on a win while engagement is high, protect clarity, and leave room for tomorrow. If you want expert eyes on your timing and a plan that fits your home and lifestyle, our team is ready to help.
Your dog deserves training that truly works. With certified Smart Master Dog Trainers (SMDTs) nationwide, you'll get proven results backed by the UK's most trusted dog training network. Find a Trainer Near You
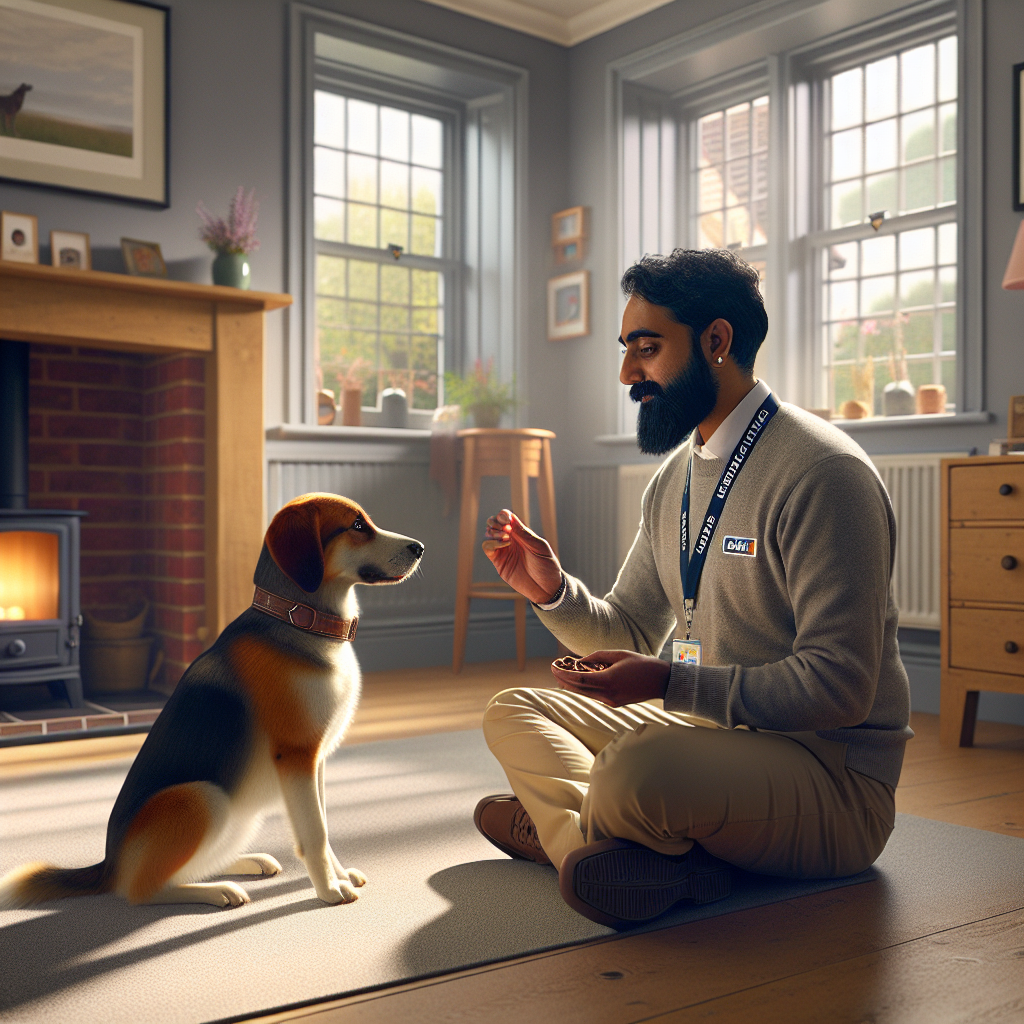
When to Stop Training Your Dog
Why Quiet Crate Behaviour After Meals Matters
If your goal is shaping quiet crate behaviour after meals, you are working on one of the most useful life skills your dog can learn. A calm post meal settle supports digestion, restores emotional balance, and prevents habits like whining, pacing, or demand barking. More importantly, it gives your family a predictable window for clean up and resets your dog for the next part of the day.
At Smart Dog Training we treat shaping quiet crate behaviour after meals as a structured training goal, not a hope. With the Smart Method we build clarity, motivation, and gentle accountability so calm becomes the default. When you follow the steps below, you will see steady progress that holds up in real life. If you want expert guidance, a certified Smart Master Dog Trainer can map a plan around your dog and your household schedule.
The Smart Method For Calm Crating
The Smart Method is our proprietary training system used across all Smart Dog Training programmes. It is designed to create calm, consistent behaviour that lasts. When shaping quiet crate behaviour after meals, each pillar does a specific job.
Clarity In The Crate
Dogs relax when they understand exactly what earns release and reward. We use clear cues to tell the dog when to enter the crate, when to lie down, and what quiet looks and sounds like. Clarity reduces confusion, which reduces noise.
Pressure And Release Done Fairly
Fair guidance matters. Light pressure can be as simple as guiding with the lead into the crate, then softening the moment your dog chooses the behaviour you want. Release happens when the dog is quiet and settled. This balance builds responsibility without conflict.
Motivation That Builds Willingness
We use food, praise, and calm touch to reinforce the right choices. After a meal the food reward shifts to lower value or non food rewards, since the dog has just eaten. Motivation keeps engagement high and makes quiet worth repeating.
Progression From Easy To Real Life
We start simple and add layers. First we shape stillness for short durations, then we add household noise, door movements, and family activity. Progression prevents backsliding and ensures quiet holds in daily life.
Trust Between You And Your Dog
When your dog learns that your cues are consistent and fair, anxiety drops. Trust grows. That trust is the foundation for shaping quiet crate behaviour after meals that lasts.
Smart Dog Training programmes are delivered by certified professionals across the UK. If you are unsure how to apply these pillars, an SMDT can coach you in home and show you the exact timing that makes quiet stick.
Setting Up The Crate And Feeding Routine
Environment and routine either support calm or fight it. Before shaping quiet crate behaviour after meals, set up the crate to feel safe and predictable.
- Choose location. Place the crate in a low traffic area with some visual cover. A corner of the living room or kitchen often works best.
- Ventilation and comfort. Use a flat bed that fits, with no loose toys or chews right after meals. Keep water available outside the crate and offer it before and after the settle period.
- Temperature and light. Keep it neutral. Dogs rest better in a steady environment.
- Lead on collar. During early stages, keep a light lead attached while you supervise. It helps guide without grabbing.
Next, build a feeding routine that primes calm. Feed at fixed times, use the same bowl and location, and keep a two minute quiet period after the last bite before you cue the crate. Predictability makes shaping quiet crate behaviour after meals faster and less stressful.
Step By Step Plan For Shaping Quiet Crate Behaviour After Meals
This plan is the Smart Dog Training blueprint for shaping quiet crate behaviour after meals. Move through each phase only when the dog meets the criteria for two to three days in a row.
Phase One Pre Meal Ritual
Goal Teach cooperation before food to set the tone for calm after food.
- Start with a pre meal sit. Ask for sit. Mark yes the instant the dog sits. Place the bowl down. Release with a clear cue such as take it.
- Build patience. If the dog breaks, lift the bowl, reset calmly, and try again. No scolding. Just clarity.
- Add crate preview. After eating, invite the dog to step into the open crate for one second, then release. Reinforce with quiet praise. This preview links meals to the crate without pressure.
Repeat this ritual for three to five meals. You are already shaping quiet crate behaviour after meals by creating a calm arc around food.
Phase Two The First Five Minutes After Eating
Goal Teach that the crate equals rest after meals.
- Two minute pause. Wait two minutes after the last bite to avoid immediate excitement.
- Guide to crate. Lead the dog to the crate. Cue in with crate. When all four feet are inside, mark yes and drop one small piece of kibble in the bowl as a symbolic reward.
- Down and stillness. Cue down once inside. Mark yes for the first three seconds of stillness. Then close the door calmly.
- Release on quiet. Set a timer for one minute. If the dog stays quiet for the full minute, open the door, invite out, take the lead, and give a short calm walk to the garden.
- If noise happens. If the dog whines or scratches, wait for one full second of quiet. Mark yes, then open and release. Do not release on noise. You are shaping quiet crate behaviour after meals by making quiet open the door.
Work this for three to six meals until one minute of quiet is easy.
Phase Three Building Duration And Distraction
Goal Extend quiet and build resilience around normal household movement.
- Duration ladder. Increase quiet time from one minute to two, then three, four, and five. Add one minute per day if the dog remains calm.
- Distraction ladder. Once you have three minutes of quiet, add light movement in the room, then the sound of plates being washed, then the fridge door, then a family member walking through.
- Mark and reward. Use quiet yes markers every 30 to 60 seconds in the early steps. Shift to intermittent markers as the dog succeeds.
- Release on a schedule. Keep the total settle time under ten minutes in this phase. Always release on quiet, not on restlessness.
By now, shaping quiet crate behaviour after meals should feel natural. You are pairing clarity with fair release in a way that your dog understands.
Phase Four Generalising To New Contexts
Goal Make quiet the default in any room and at varied times.
- New rooms. Move the crate to another calm spot for a day or two. Repeat three to five minute settles after meals until the dog transfers the skill.
- Time shifts. Practise the same plan after breakfast and after dinner. Add a light snack settle if needed for variety.
- Family involvement. Rotate handlers so your dog learns to be calm with each person. Keep cues identical.
Generalising is the final step in shaping quiet crate behaviour after meals. It proves the behaviour is reliable and not tied to one room or one person.
Handling Whining Barking Or Pacing
Even with a solid plan, some dogs will test the rules. Here is how Smart Dog Training addresses the most common bumps while shaping quiet crate behaviour after meals.
- Whining. Do not rush to the crate. Wait for one full second of silence, mark yes, then release. You are teaching that quiet makes the door open.
- Demand barking. Step away out of sight. Return only when there is a pause. Mark the pause and release. If barking persists, reduce duration and rebuild success at the lower step.
- Pacing or circling before you cue the crate. Ask for a sit or down away from the crate. Mark and release to the crate once the dog shows self control. This resets the brain from motion to stillness.
- Scratching or pawing at the door. Cover the door sightline with a towel for a short period to lower stimulation. Reinforce quiet and stillness, then remove the cover as progress holds.
- Melting or refusal to enter. Break it down. Reinforce one paw in, then two, then full entry. Pair with calm praise. Fair pressure to guide in, instant release on entry, then reward. This is the Smart Method in action.
If stubborn patterns linger, shaping quiet crate behaviour after meals will speed up with direct support. Ready to turn your dog’s behaviour around? Book a Free Assessment and connect with a certified Smart Master Dog Trainer available across the UK.
When To Call A Professional Trainer
Most families can follow this plan and see steady results within two to three weeks. Call in a professional if you see any of the following while shaping quiet crate behaviour after meals.
- Escalating distress. Vocalising grows longer or more intense over several days.
- Barrier frustration. The dog fixates on the door and cannot settle without guidance.
- Separation issues. Panic begins when you step away from the crate.
- Resource guarding around the bowl or crate space.
- Health flags. Repeated discomfort after eating or visible bloating. Speak with your vet about health concerns.
A certified Smart Master Dog Trainer will assess your dog in context, adjust the pressure and release balance, and refine your timing. Smart Dog Training delivers structured programmes that follow the Smart Method so your dog understands the rules and trusts the process.
FAQs
How long should my dog stay in the crate after a meal
Most dogs do well with five to fifteen minutes once training is complete. During the early stages of shaping quiet crate behaviour after meals start with one minute and build slowly. End the session on success before the dog becomes restless.
Should I give chews or toys right after eating
During the first phases of shaping quiet crate behaviour after meals keep the crate bare. Chews can add excitement or movement. Once quiet is reliable, you can introduce a low value chew if your dog remains calm.
What commands should I use
Keep it simple. Crate means enter. Down means lie down. Yes marks the correct choice. Out means release. Use the same words every time while shaping quiet crate behaviour after meals so clarity stays high.
What if my dog refuses to enter the crate after meals
Break the task down and use the Smart Method. Guide with light lead pressure, release the instant the dog steps in, and mark yes. Reward small wins. Over a few sessions, full entry will feel natural.
Can I train a rescue dog or an older dog with this plan
Yes. Shaping quiet crate behaviour after meals works for all ages. Older or rescue dogs might need more time in Phase One and Phase Two, with extra focus on trust and predictable routines.
Why does my dog whine more after dinner than after breakfast
Evening energy, more family movement, or a fuller stomach can raise arousal. Reduce duration, lower distractions, and rebuild success. With steady practice, shaping quiet crate behaviour after meals will hold at any time of day.
Is it okay to cover the crate
Yes, if it helps your dog settle. Use a light cover that reduces visual stimulation. Remove it as your dog becomes reliable so quiet is not dependent on the cover.
How do I know when to progress to the next step
Use the two day rule. When your dog meets the target for two to three consecutive sessions with easy quiet, move up one notch. If you see setbacks, step down and win again. That is how Smart Dog Training builds real world reliability.
Conclusion
Shaping quiet crate behaviour after meals is not a mystery. It is a method. Prepare the environment, use clear cues, guide fairly, reward generously, and progress at a steady pace. The Smart Method gives you a structure that removes guesswork and replaces it with results you can measure in minutes of calm.
If you want tailored help or faster progress, Smart Dog Training can step in with a programme that fits your dog and your routine. Your dog deserves training that truly works. With certified Smart Master Dog Trainers SMDTs nationwide, you will get proven results backed by the UK’s most trusted dog training network. Find a Trainer Near You
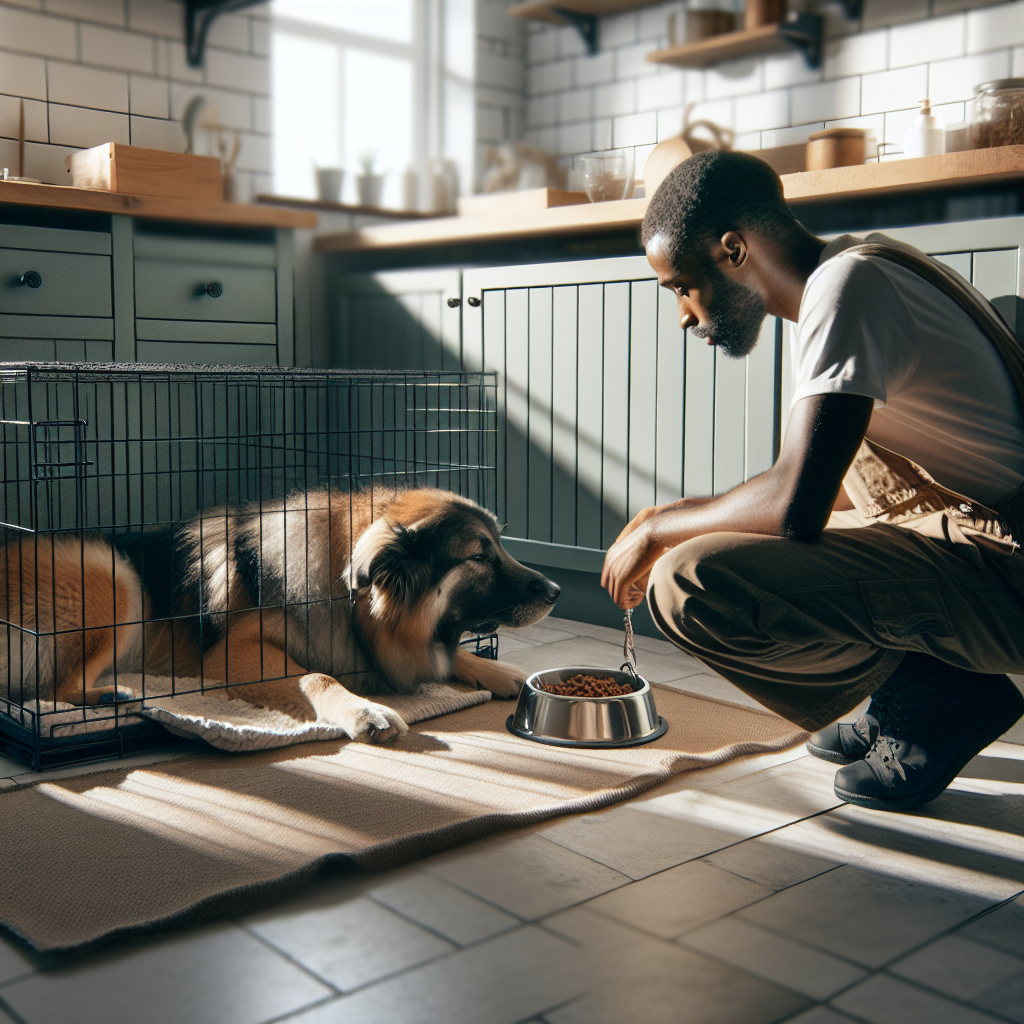
Shaping Quiet Crate Behaviour After Meals
Teach Your Dog to Wait for a Cue: Why It Matters
If you want calm, safe, and reliable behaviour in real life, you must teach your dog to wait for a cue before they act. This single skill reduces pulling, door dashing, counter surfing, and frantic greetings. It makes daily life smooth and stress free. At Smart Dog Training, we use the Smart Method to teach this in a structured way so it lasts everywhere. Every certified Smart Master Dog Trainer is trained to install the habit of waiting for a cue as a foundation skill.
When you teach your dog to wait for a cue, you give them clarity. Your dog learns that action begins only when you say so. This creates a dog that thinks before they move. It protects safety around roads, doorways, children, and food. It also builds trust between you and your dog. The result is a calm partner who can handle real world pressure with confidence.
The Smart Method Foundation
The Smart Method is our proprietary training system. It is designed to teach your dog to wait for a cue in a way that is fair, consistent, and reliable. It blends a balance of motivation, structure, and accountability. We build clarity with precise markers. We guide with pressure and release. We keep your dog engaged with rewards. We add progression step by step. We protect trust at every stage.
- Clarity so your dog always knows what to do
- Pressure and Release so guidance is fair and easy to understand
- Motivation so your dog wants to work with you
- Progression so skills hold under distraction and duration
- Trust so the bond grows stronger with training
What Waiting for a Cue Looks Like in Real Life
Here is how it plays out once you teach your dog to wait for a cue. Your dog sits and holds at the door until you give a clear release. They stay off the road edge until you invite them to cross. They hold a down while the food bowl is placed and only eat when released. They keep four paws on the floor when guests arrive and greet only when invited. They wait for the lead to clip on and they step out of the car only when you say the word. These are daily moments that add up to a calm life.
Understanding Impulse Control and Clarity
Impulse control is not about removing your dog’s drive. It is about teaching your dog to wait for a cue so they make better choices. At Smart Dog Training, we build impulse control with clear instructions and fair boundaries. When your dog understands precisely when action starts and stops, stress falls and reliability rises.
Markers and Release Words That Matter
To teach your dog to wait for a cue, we use precise markers. A marker tells your dog if what they just did was correct, if the reward is coming, or if the exercise is finished. We also use a single release word. When you are consistent, your dog learns that the release is the green light. Without it, they hold position. This is the heart of waiting for a cue.
Motivation Without Conflict
Dogs work best when they enjoy the process. The Smart Method uses rewards to keep focus high while we teach your dog to wait for a cue. Food, toys, praise, and environmental access are built into the plan. Your dog learns that patience pays. Over time, the behaviour itself becomes rewarding because it produces clarity and success.
How to Teach Your Dog to Wait for a Cue Step by Step
Follow this simple plan to teach your dog to wait for a cue. Keep sessions short and calm. Use clear markers and a single release word. Work through each layer only when the previous layer is solid.
Step 1 Build Engagement and Marker Understanding
Start indoors with low distraction. Stand in neutral body posture. Say your marker for correct behavior and deliver a reward. Repeat until your dog links the marker with reward. Now add a release word. Ask for a simple position like sit. Mark the sit, then pause. Say your release, move slightly, then reward. Early on, the reward can follow the release to highlight the green light.
Step 2 Introduce a Pause and Your Release
Ask for sit or down. Mark the position. Then wait for a short beat. If your dog breaks, calmly reset them without reward. If they hold, say the release, then reward with food or movement. The goal is to teach your dog to wait for a cue before moving. Start with a one second hold and build to three seconds, then five.
Step 3 Add Duration and Distraction
To teach your dog to wait for a cue under pressure, add duration first, then light distraction. Duration may look like a ten to fifteen second hold. Distraction may be a small hand movement, a step to the side, or a treat held out of reach. If your dog breaks, reset. If they hold, release and reward. Keep reps crisp and end the session on success.
Step 4 Generalise to Rooms and Outdoors
Once you can teach your dog to wait for a cue indoors, move to new rooms, then the garden, then the pavement. New locations reset difficulty. Go back to shorter holds, then stretch them again. Use the same release word and the same markers. Success comes from keeping the rules the same everywhere.
Step 5 Proof With Real World Triggers
Now proof the skill against daily stressors. The door opening is a trigger. So is the food bowl, the car boot, the lead, the sight of other dogs, or people you meet. Ask for a position. Wait. Release. Reward. If you can teach your dog to wait for a cue in the presence of these triggers, you have a safe and reliable companion.
Core Exercises That Build Waiting for a Cue
These practical drills are used in Smart programmes to teach your dog to wait for a cue in daily life. They are simple, repeatable, and very effective.
Doorways and Thresholds
- Approach the door. Ask for sit facing you.
- Hand goes to the handle. If your dog pops up, reset. If they hold, open the door five centimeters.
- Close the door, return to neutral. Release. Reward by stepping through together or by a treat.
- Repeat and gradually open wider. The door becomes the distraction. Your dog learns to wait for a cue before crossing.
Food Bowl and Feeding Routine
- Prepare the bowl while your dog holds a down.
- Lower the bowl to the floor. If they move, lift the bowl and reset.
- Place the bowl. Step back. Wait for stillness.
- Say the release. Only then may your dog eat. This teaches your dog to wait for a cue around high value food.
Lead Clip, Car Doors, and Greetings
- Lead Clip Hold a stand or sit while you clip the lead. Release to move.
- Car Doors Wait with two paws on the ground. Open the door. Close it if they load early. Release to jump in or out.
- Greetings Ask for sit while guests enter. Release to greet when calm. Your dog learns that people are not a free for all and that they must wait for your cue.
These drills fit naturally into daily life. You will find dozens of micro moments to teach your dog to wait for a cue, and each rep strengthens the habit.
Ready to turn your dog’s behaviour around? Book a Free Assessment and connect with a certified Smart Master Dog Trainer available across the UK.
Handling Mistakes With Pressure and Release
Dogs learn fastest when feedback is clear. At Smart Dog Training, we guide with pressure and release. This is a fair language that helps you teach your dog to wait for a cue without conflict. Here is how it looks in practice.
- Set the exercise. Ask for sit or down.
- If your dog breaks early, apply gentle guidance back to position, then remove the guidance once they comply. There is no emotion. Just clear pressure and release.
- Wait one second. Release and reward for holding.
Pressure is information, not punishment. Release highlights the right choice. Your dog learns which choice turns pressure off. Over time, this creates accountability and responsibility. It keeps the skill strong even when you add real world stress.
Progression Plans for Puppies and Adult Dogs
We teach puppies and adult dogs to wait for a cue using the same Smart Method. The steps do not change, but the pacing does.
- Puppies Use very short holds and lots of rewards. Keep sessions under five minutes. Focus on markers, release, and calm handling.
- Adolescents Expect more pushback. Keep rules consistent. Be patient and precise with resets.
- Adults Start with low distraction, but you can layer duration faster if the dog is focused. Still, proof slowly in new places.
Across all ages, the promise stays the same. When you teach your dog to wait for a cue with clarity, you stop many problems long before they start.
Common Problems and How Smart Fixes Them
Breaking Position at the Door
If your dog always breaks as the door opens, you moved too fast. Go back to tiny door movements. Reward holds heavily. Your dog needs many wins to rebuild trust. Use resets that are calm and consistent. This will teach your dog to wait for a cue even when guests are at the door.
Noise Sensitivity and Startle
Some dogs pop up when they hear a clank or a knock. Run quick, planned noise reps. Ask for position, create a soft noise, then release and reward. If they break, reset with no emotion. Soon the dog will only move when they hear your release. This keeps the focus on you, not the environment.
Over Excitement Around Food or Toys
High value items can tempt any dog. Place the toy or food on the floor. Cover it with your hand or foot if the dog moves. Wait for stillness, then release and reward. Repeat until you can teach your dog to wait for a cue even when the reward is right there. This builds real impulse control.
Stay vs Wait and Why We Prefer Clear Cues
Many owners ask about stay and wait. At Smart Dog Training, we keep it simple. One position cue like sit or down. One release word. When you teach your dog to wait for a cue with this simple system, you remove confusion. The dog learns that position holds until the release. Clear words create clear behaviour.
Measuring Progress and Accountability
Progress needs to be visible. Track your holds in seconds, your distance in steps, and your distractions in a simple list. Each week, add a small layer. If errors rise, strip a layer and rebuild. This is how the Smart Method keeps your training moving forward. It also shows you and your family the exact gains made as you teach your dog to wait for a cue.
Real Life Scenarios to Practice Daily
- At the kerb Stop and hold position. Release to cross.
- At the lift Lobby sit. Release to enter or exit.
- At the park Gate sit. Release to go play.
- In the kitchen Down while you cook. Release to leave the boundary.
- On the sofa Only climb up on your release. Off means off until you give permission again.
Each moment reinforces the rule. Your dog must wait for your green light. The more you teach your dog to wait for a cue in daily life, the calmer your home becomes.
When to Get Professional Help
If you have safety concerns or your dog rehearses risky habits, work with a professional. A Smart Master Dog Trainer will assess your dog, your handling, and your home setup. We tailor the Smart Method to your routine so you can teach your dog to wait for a cue in every context. We deliver in home programmes, structured group classes, and tailored behaviour plans across the UK.
How Smart Dog Training Delivers Lasting Results
Smart Dog Training is built on clarity, structure, and progression. Our trainers use one method and one standard. From first session to final proofing, we teach your dog to wait for a cue using the same system across doors, bowls, roads, and greetings. That consistency is why families see reliable change. Graduates of our Smart University earn the SMDT certification and launch as trusted local trainers who uphold our national standard.
Owner Skills That Accelerate Success
- Timing Practice your marker and release with a metronome or a clock. Precision builds clarity.
- Posture Stand tall and still during holds. Move only on release to avoid mixed messages.
- Reward Placement Deliver rewards in position often. Move the reward to reinforce the hold, not the break.
- Calm Resets Return the dog to position with no fuss. Speak less, do more.
- Reps and Rest Many short sessions beat one long session. End early and on a win.
These handler skills help you teach your dog to wait for a cue much faster. Small details create big gains.
Safety and Welfare First
We protect your dog’s wellbeing at every step. Waiting for a cue is never about fear. It is about calm understanding. Use fair guidance, clear release, and appropriately sized rewards. If your dog is anxious or reactive, we adapt the plan within a structured behaviour programme so you can still teach your dog to wait for a cue without overwhelm.
FAQs
What is the fastest way to teach your dog to wait for a cue?
Start in a quiet room. Use one position cue, a clear marker, and a single release word. Reward holds and reset breaks. Keep sessions short. This simple plan lets you teach your dog to wait for a cue within the first week.
Should I use food or toys to teach my dog to wait for a cue?
Use what motivates your dog most. Food is fastest for most dogs. Toys or access to the environment work well too. The Smart Method uses motivation to keep engagement high while you teach your dog to wait for a cue.
How is wait different from stay?
We teach position holds with one release word. The dog stays in position until released. This simple structure helps you teach your dog to wait for a cue with less confusion and better results.
What if my dog keeps breaking position?
Reduce duration or distraction. Reset calmly. Reward more often for small wins. With clear markers and release, you can still teach your dog to wait for a cue that holds under pressure.
Can puppies learn this skill?
Yes. Puppies can learn to hold for one to three seconds within days. With gentle repetition, you can teach your dog to wait for a cue at bowls, doors, and kerbs before six months of age.
Is this suitable for reactive or anxious dogs?
Yes, with a tailored plan. The Smart Method scales down pressure and builds up clarity. Many reactive dogs improve quickly once you teach your dog to wait for a cue in triggering contexts with careful progression.
How long until this works in public?
Many owners see change in two to four weeks of daily practice. The pace depends on consistency. Keep the same markers and release everywhere to teach your dog to wait for a cue that holds in busy places.
Conclusion
Calm, safe behaviour starts with one habit. Teach your dog to wait for a cue and the rest of life gets easier. Doors, bowls, roads, and greetings all become training opportunities. With the Smart Method, you get a clear plan and a fair language that works in the real world. If you want a proven pathway, we are here to help across the UK.
Your dog deserves training that truly works. With certified Smart Master Dog Trainers (SMDTs) nationwide, you'll get proven results backed by the UK's most trusted dog training network. Find a Trainer Near You
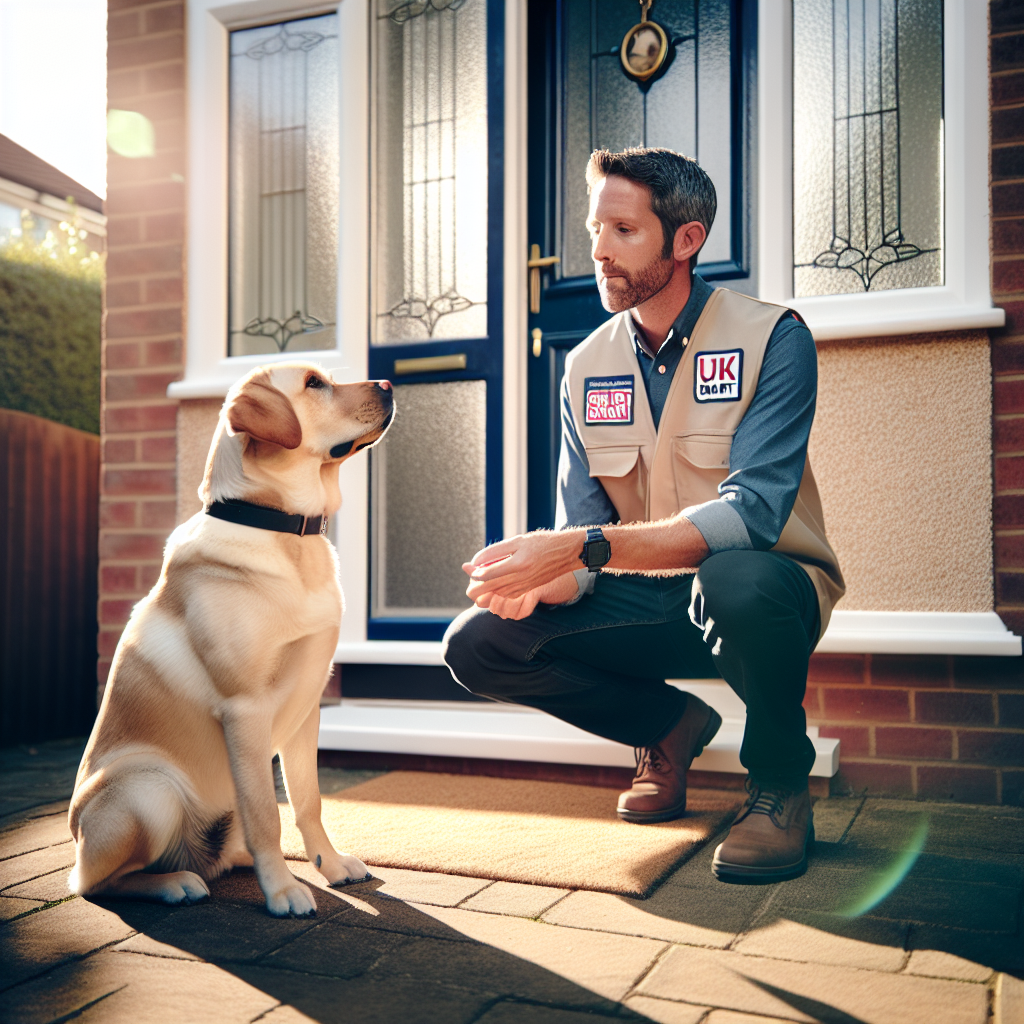
Teach Your Dog to Wait for a Cue
Quiet Waiting at the Vet
Many families want the same thing for their dog. A calm walk into the clinic, a steady sit during check in, and quiet waiting at the vet until it is time to be seen. With Smart Dog Training, this is not wishful thinking. It is a skill set we teach every day using the Smart Method. If you want quiet waiting at the vet that holds up in real life, our structured approach delivers. Every certified Smart Master Dog Trainer is prepared to coach you through it with clear steps that fit your dog and your routine.
This guide explains how Smart Dog Training creates quiet waiting at the vet with clarity, fair guidance, and motivation. You will learn what to practise at home, how to introduce clinic sights and sounds, and how to manage the lobby with confidence. Most of all, you will understand why quiet waiting at the vet is a learnable behaviour that your dog can enjoy.
Why Calm Vet Visits Matter
Vet care is part of life. Dogs that learn quiet waiting at the vet cope better with new people, new smells, and gentle restraint. Calm behaviour lowers stress for your dog and for the team who handles them. It also helps the vet work faster and safer. The Smart Method builds calm as a default, so the same daily manners you use at home transfer to the clinic without fuss.
What Quiet Waiting Looks Like
Quiet waiting at the vet is not a single command. It is a routine that stacks several skills.
- Loose lead walking from car to door
- Polite check in with a sit or down while you speak
- Relax on a mat in the waiting room
- Focus on you during movement and distractions
- Stillness for handling, weighing, and exam
When trained with the Smart Method, each piece has clear markers and rewards. That is how quiet waiting at the vet becomes predictable and easy for your dog.
The Smart Method for Vet Readiness
The Smart Method is our proprietary system that produces calm, consistent behaviour. It drives quiet waiting at the vet by following five pillars.
- Clarity. We use precise commands and marker words so your dog knows when they are correct.
- Pressure and Release. We give fair guidance with a timely release that teaches responsibility without conflict.
- Motivation. We use rewards that your dog values to build a positive emotional state.
- Progression. We layer distraction, duration, and difficulty in a steady plan.
- Trust. We strengthen the bond between dog and owner so the dog feels safe and willing.
Every SMDT uses these pillars to install quiet waiting at the vet as a reliable, real life skill.
Foundations at Home
Quiet waiting at the vet starts far from the clinic. We build the core behaviours in your living room where your dog can focus. Smart Dog Training programmes set the tone with short, simple sessions that end on success.
Marker Words and Calm Positions
Choose a sit or down as your default settle. Pair that position with a release word. Mark the moment your dog holds a calm posture. Reward in place, then release. Early on, keep duration short. The aim is a smooth rhythm of calm, mark, reward, release. This structure becomes the backbone of quiet waiting at the vet later.
Building Duration with Pressure and Release
We layer gentle guidance to help your dog hold position when life moves around them. If they pop up, guide them back with the lead, then release as soon as they reset. That release is the reward. Over time the dog learns that staying put makes everything easier. This is how we build true quiet waiting at the vet, not just a quick sit.
Reinforcement that Builds Motivation
Use a mix of food and calm praise. Deliver rewards in the position. Keep hands low and slow. Your dog learns that stillness brings good things. Later, when we add the clinic lobby, this emotional pattern drives quiet waiting at the vet even when other dogs and people are near.
Desensitisation to Handling
Most stress in vet settings comes from touch in new ways. Smart Dog Training rehearses each piece at home before it shows up in the exam room.
- Feet. Touch each paw, lift gently, hold for one second, mark, reward, release.
- Ears. Lift an ear flap, look, mark, reward, release.
- Mouth. Lift a lip, touch a tooth, mark, reward, release.
- Body. Run hands over ribs and spine, brief hug, mark, reward, release.
- Collar. Hold the collar for a second, then reward for stillness.
Keep reps short and easy. The goal is a calm response. This preparation makes quiet waiting at the vet during handling much more likely.
Sound and Smell Prep for the Clinic
Clinic spaces sound and smell different. We simulate them at home so quiet waiting at the vet does not fall apart when those cues appear.
- Play quiet recordings of clinic sounds while your dog rests on their mat.
- Open rubbing alcohol at a distance so the smell appears while your dog holds a down.
- Move metal items and open cupboards to mimic clinks and doors.
Pair these cues with calm posture and rewards. Your dog learns that odd sounds and smells predict settled work and safety.
Lead Skills that Reduce Stress
Loose lead walking is the first test when you arrive. Smart Dog Training teaches a clean heel or close position with strong attention. We teach the dog to pause before doorways and to sit while you speak. These skills support quiet waiting at the vet from the car park to the counter.
- Approach the door. Ask for a sit. Door opens only when the sit is steady.
- Enter on a release word. Walk in a straight line to a chosen spot.
- Place a mat. Ask for down. Reward calm breathing and stillness.
With this routine, your dog knows exactly what to do. Predictability is the fastest route to quiet waiting at the vet.
Rehearsals in Real Places
Once home skills are strong, we take them on the road. Smart Dog Training runs short rehearsal visits to low distraction spaces before we step into a clinic.
- Practice in a foyer, pet friendly shop car park, or quiet lobby.
- Keep sessions under ten minutes. End on success.
- Build duration in small steps. Add one new challenge at a time.
These field reps confirm that your dog can hold quiet waiting at the vet when the world around them changes.
How to Teach Quiet Waiting at the Vet
Use this simple framework on your next visit. It keeps the training clear and fair.
- Arrive early. Give yourself five minutes to walk and reset.
- Pick your spot. A corner away from doorways is ideal.
- Place the mat. Ask for a down. Mark and reward.
- Add small challenges. Shift your weight, look at the desk, take one step away and back.
- Refresh. Give a release and a short walk, then return to the mat.
Repeat this plan every time. Consistency turns the routine into quiet waiting at the vet that holds up under pressure.
Clinic Lobby Game Plan
Arrival Routine
Keep a slow pace from the car. If your dog surges, stop, reset, and continue. At the door, ask for a sit and eye contact. Inside, move to your chosen corner. Lay the mat and cue down. You are already halfway to quiet waiting at the vet before you reach reception.
Managing the Waiting Room
- Stand so your dog faces you, not the room.
- Keep the lead short and relaxed, with a light J shape.
- Use quiet food delivery at your dog’s mouth for stillness.
- Avoid play, chatter, or high arousal praise.
- If another dog approaches, step forward to block the view and reset the down.
This low key approach keeps excitement down and protects quiet waiting at the vet from sudden surprises.
When the Unexpected Happens
If a dog barks or a door slams, mark the moment your dog stays down. Reward that choice. If they break position, guide back, then release once calm returns. The release is part of the reward cycle. This is how the Smart Method keeps quiet waiting at the vet even when life gets noisy.
Settling on the Vet Table
For many dogs the table is the hardest part. We treat it like any other surface. Approach, place front paws, reward, release. Then all paws up, reward, release. Add light touch, reward, release. Keep reps short. Build to a steady stand or down while the vet works. Your dog learns that quiet waiting at the vet includes the table, the scale, and gentle restraint.
Puppies and Adult Dogs
Puppies can start mat work from day one. Keep sessions very short. Add handling games after meals when the pup is calm. Adults can move faster on duration but may need more desensitisation to touch. In both cases, the Smart Method builds quiet waiting at the vet through structure and reward, not chance.
Helping Reactive or Anxious Dogs
Some dogs arrive with a history of fear or reactivity. Smart Dog Training adapts the plan so these dogs can win. We use greater distance from triggers, more clarity in cues, and careful progression.
- Pre visit walk and toileting to release tension.
- Park farther away to reduce crowded entries.
- Seat near an exit for easy movement breaks.
- Increase food value but keep delivery calm.
- Keep eyes off triggers and on you.
With patience and structure, these dogs can achieve quiet waiting at the vet. If you need support, a Smart Master Dog Trainer will guide the process and keep sessions safe and effective.
Medication and Muzzle Training
Some dogs benefit from vet approved medication as part of a behaviour plan. Smart Dog Training folds this into the same structure so your dog continues to build true coping skills. We also recommend proactive muzzle training for all dogs. A well fitted basket muzzle paired with rewards is a sign of thoughtful care. It helps vets work safely and can make quiet waiting at the vet easier for dogs that worry about touch.
Common Mistakes to Avoid
- Arriving late and rushing from the car to the door
- Letting the lead go tight and then pulling
- Speaking too much or in an excited tone
- Trying new skills for the first time in the lobby
- Using food to lure without any structure or release
Avoid these slips and you protect the routine that creates quiet waiting at the vet.
Progress Tracking and Criteria
We move at the pace your dog can handle. Smart Dog Training sets clear criteria so you know when to increase difficulty.
- Home goal. Three minutes of down on a mat while you walk around.
- Field goal. Two minutes of down in a quiet public lobby.
- Clinic goal. Two minutes of down during check in and at least three calm resets.
When these markers are met, quiet waiting at the vet is likely to hold up even when the room is busy.
How SMDTs Coach Families
An SMDT guides you through each step and removes guesswork. We demonstrate calm lead handling, tighten your marker timing, and show you how to read your dog. Coaching sessions are practical and focused on outcomes. This support makes quiet waiting at the vet a lasting habit, not a one off fluke.
Ready to turn your dog’s behaviour around? Book a Free Assessment and connect with a certified Smart Master Dog Trainer - available across the UK.
When to Book Help
If your dog cannot settle after a week of home practice, or if you see signs of escalating stress, bring in support. Smart Dog Training programmes are designed to deliver quiet waiting at the vet with a calm, confident dog and a relaxed handler. Early help means faster results.
FAQs
How long does it take to teach quiet waiting at the vet?
Most families see progress within two to three weeks of structured practice. With daily five minute sessions at home and one or two field rehearsals each week, quiet waiting at the vet becomes reliable over the next month.
What should I bring to help with quiet waiting at the vet?
Bring a small mat, a short lead, and medium value food. Avoid toys that raise arousal. The mat anchors your dog and supports quiet waiting at the vet by giving a clear target.
My dog barks in the waiting room. What should I do?
Step to a corner, face your dog, ask for a down, and reward stillness. If barking continues, take a short break outside and reset. With the Smart Method you can protect quiet waiting at the vet by lowering pressure and returning to structure.
Can puppies learn quiet waiting at the vet?
Yes. Start with very short mat sessions, gentle handling games, and calm entries. The earlier you set the routine, the faster quiet waiting at the vet becomes normal.
Do I need a muzzle for quiet waiting at the vet?
It depends on your dog. Proactive muzzle training is useful for many dogs and can make handling safer and calmer. We introduce the muzzle with rewards so it supports quiet waiting at the vet rather than adding stress.
When should I work with a trainer?
If you feel stuck, if your dog is reactive, or if you simply want a fast, clear plan, work with us. An SMDT will set up a custom routine so you achieve quiet waiting at the vet that lasts.
Conclusion
Quiet vet visits are not luck. They are the result of a clear plan, fair guidance, and steady practice. Smart Dog Training uses the Smart Method to build quiet waiting at the vet through clarity, pressure and release, motivation, progression, and trust. Start at home, rehearse in real places, and follow a calm lobby routine. If you want expert support, we are ready to help you and your dog.
Your dog deserves training that truly works. With certified Smart Master Dog Trainers (SMDTs) nationwide, you'll get proven results backed by the UK's most trusted dog training network. Find a Trainer Near You
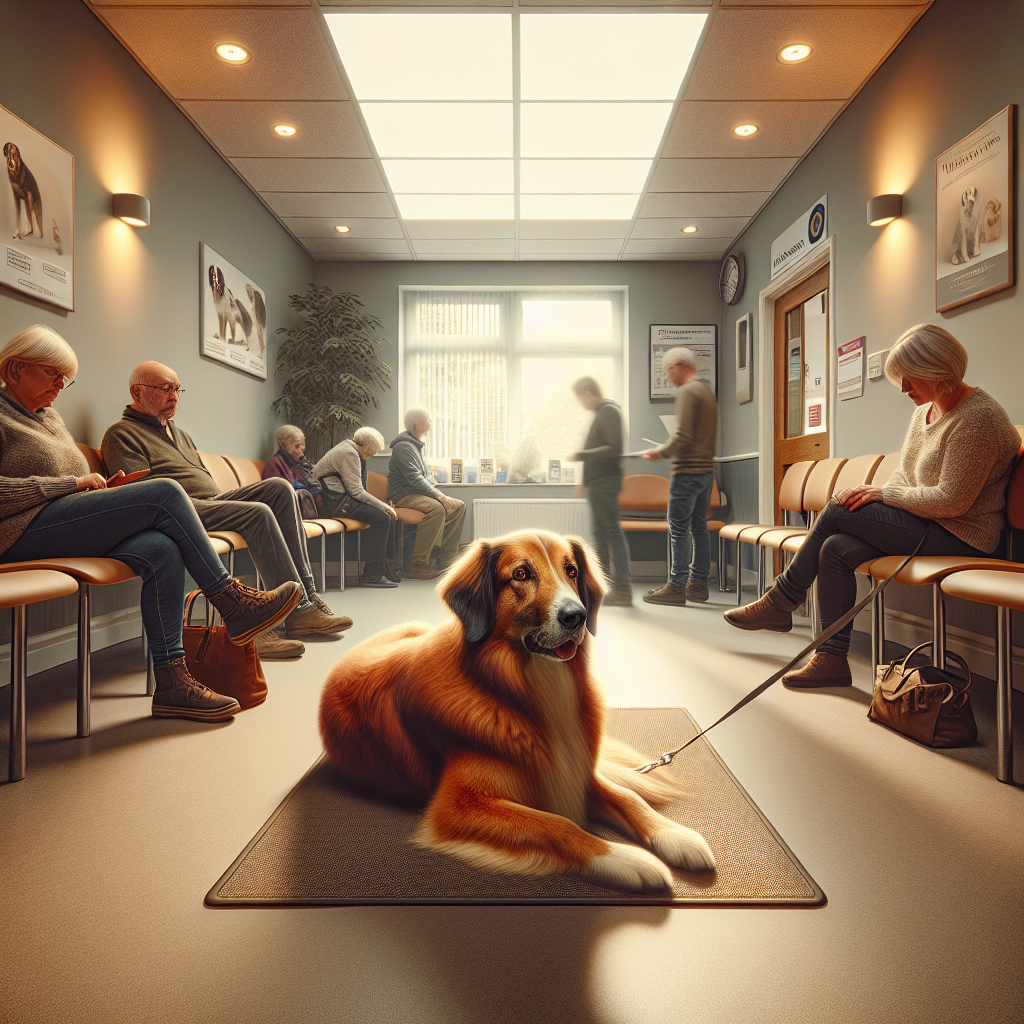
Quiet Waiting at the Vet
Why Impulse Control Around Gates Matters
Gates and doorways create some of the highest risk moments in daily life. A dog that rushes a garden gate, front door, or vehicle hatch can end up in the road, collide with a passerby, or bolt after a distraction. Training for impulse control around gates gives you a reliable pause and a clear release so movement is safe and calm every time. At Smart Dog Training we make this skill a core part of family training because it protects your dog and the people around you. From the first session, a Smart Master Dog Trainer, or SMDT, shows you how to build clarity, confidence, and accountability at every threshold.
With the Smart Method, training for impulse control around gates becomes a simple process you can trust. We show you how to set clear markers, guide fairly with pressure and release, and reward in a way that motivates your dog to wait because it feels good and makes sense.
The Smart Method Applied to Gate Manners
Our proprietary Smart Method has five pillars that we apply directly to training for impulse control around gates.
- Clarity. You use precise commands and markers so your dog knows when to stop, when to hold, and when to go.
- Pressure and Release. Light guidance helps the dog discover the boundary. The instant the dog makes the right choice, you release and reward.
- Motivation. Food, praise, toys, and life rewards such as going for a walk build a positive mindset around waiting.
- Progression. We layer distraction, duration, and distance step by step until the behaviour holds anywhere.
- Trust. Consistent training at gates builds calm confidence and a stronger bond with you.
Safety Risks of Gate Rushing
Before we teach the fix, understand the risks. A dog that blasts through a gate can cause traffic accidents, frighten neighbours, or injure itself on hinges and latches. Gate rushing also reinforces frantic energy. Each success rehearses the same pattern, making it harder to stop next time. Training for impulse control around gates stops rehearsals and replaces them with calm behaviour that your dog finds rewarding.
Foundation Behaviours Your Dog Must Know
Strong gate manners rest on a few core skills. If these are new, your SMDT will install them first so training for impulse control around gates is smooth and fast.
- Name and attention. Your dog looks to you when you speak.
- Stationing. A sit or down that your dog can hold for short periods.
- Release word. A single word that means you are free to move. We teach this with structure so it stays reliable.
- Loose lead fundamentals. Calm on lead prevents lunges and rushing as you approach any threshold.
Equipment and Setup for Success
Keep it simple and safe. You will need a flat collar or well fitted harness, a standard lead, high value food rewards, and a calm environment for first lessons. Choose one gate to start with, such as your back garden gate. Place a clear boundary line on the ground using a mat or a visual marker so the stop point is obvious in early reps. This supports clarity during training for impulse control around gates.
Step One Teach a Solid Stop at the Threshold
We begin with a clear stop before the gate.
- Approach slowly on lead. Stop before the gate and stand still.
- Give your stop cue such as sit or simply block forward motion with your body and lead.
- The instant your dog pauses or sits, mark yes and reward in place. Feed low and calm.
- Reset by stepping away from the gate, then repeat. Short, smooth reps build understanding.
Keep the gate closed at this stage. We are introducing your dog to the idea that waiting at a closed gate pays well. This is the start of training for impulse control around gates and sets the tone for safety and calm.
Step Two Build Duration and Calm at Gates
Once your dog stops reliably, ask for a few seconds of stillness.
- Count to three while your dog holds position. If your dog breaks, gently guide back to the spot and reduce the duration.
- Mark and reward during the hold at first, then after the hold. Mix in calm praise to keep your dog settled.
- Repeat several short sets. End the set with a release word, then step away from the gate as the reward.
Duration grows slowly. By layering time in small steps, your dog learns that patience is part of training for impulse control around gates.
Step Three Add Distance and Handler Movement
Next we teach your dog to hold the boundary while you move.
- Ask for the stop. Take one step toward the gate without your dog. If the dog holds, mark and return to reward in place.
- Build to two or three steps and small turns. Always return to your dog to pay. This keeps the boundary strong.
- Begin to touch the latch while your dog holds. Reward for holding steady.
We are showing the dog that your movement is not the release. The release word is. This clarity is central to training for impulse control around gates with the Smart Method.
Step Four Add Distractions and Real World Triggers
Now we introduce the things that usually break the hold.
- Open and close the gate a little, then fully open. Reward for calm waiting.
- Toss a low value toy on the other side while your dog holds. Use your lead to prevent rehearsal if needed.
- Have a family member walk past the opening. Keep sessions short and end on success.
If your dog breaks, guide back to the line, reset, and reduce the difficulty. Training for impulse control around gates works best when the dog can win often and learns that patience unlocks the reward.
Step Five Proof Across Different Gates and Places
Genuine reliability means you can trust your dog anywhere.
- Practice at the front door, the car boot, garden side gates, and public park gates.
- Change the time of day and environment. Early morning, after school, or evening dog traffic will test focus.
- Switch handlers so the behaviour belongs to the family, not only one person.
Progression is non negotiable in the Smart Method. We build up difficulty in small, planned steps so training for impulse control around gates becomes part of daily life rather than a trick that only works in your kitchen.
Marker Systems and Release Words Your Dog Can Trust
Markers are short words that tell your dog right or wrong in the moment. We teach three simple markers in most programmes.
- Good. A soft bridge that means keep going, you are doing well.
- Yes. A precise marker that means you earned a reward.
- Release word. One word that means move with permission such as free or break.
With training for impulse control around gates, the release word must be black and white. Nothing else opens the door, not your movement, not the latch clicking, not the sight of a delivery van. Only the release word. This is how we create calm, consistent behaviour that lasts in real life.
Common Mistakes and How Smart Fixes Them
Smart trainers see the same errors often. Here is how we solve them.
- Letting the gate itself be the reward. Solution. Use the release word as the only green light. The gate opens and closes while your dog still holds. You then release.
- Talking too much. Solution. Use short markers and quiet handling. Excess chatter blurs clarity.
- Big leaps in difficulty. Solution. Add one challenge at a time. If your dog breaks, reduce and win again.
- Paying away from the boundary. Solution. Pay at the boundary while your dog holds. Do not lure forward.
- Unclear lead handling. Solution. Gentle, steady pressure back to the line, then instant release and reward when your dog commits to the hold.
Each fix comes straight from the Smart Method, which is built on clarity, pressure and release, motivation, progression, and trust. Follow these and training for impulse control around gates becomes straightforward.
Training for Impulse Control Around Gates With Puppies
Puppies can learn this from day one. Keep sessions short and upbeat.
- Use a visual boundary such as a mat to make the stop obvious.
- Reward often for tiny holds. One second today, two seconds tomorrow.
- Practise before meals and walks so natural motivation is high.
Make it part of routine. Every door and gate is a chance to rehearse calm. With structured puppy sessions, training for impulse control around gates becomes a habit faster than you think.
Training for Impulse Control Around Gates With Reactive or Rescue Dogs
Reactive or newly rehomed dogs need extra structure. We put safety and distance first.
- Work further from the gate at the start to lower arousal.
- Use higher value rewards, but deliver calmly to keep the dog thoughtful.
- Limit visual triggers with screens or by choosing quiet times of day.
- Keep the lead short and steady to prevent lunges without conflict.
If your dog struggles to focus, an SMDT will tailor the plan and adjust pressure and release so the dog can make better choices. This is where expert support speeds up training for impulse control around gates and keeps everyone safe.
Daily Reps and Real Life Integration
Repetition is what locks in reliability. Tie short reps to the moments you already have.
- Every walk. Stop, hold, release through the front door.
- Garden time. Practise a calm pause before the gate opens.
- Car practice. Train the same hold at the boot before jumping out.
- Delivery practice. Simulate a knock or doorbell. Hold and release with control.
Keep each rep under a minute. Five to ten clean reps each day will transform training for impulse control around gates inside a few weeks.
Ready to turn your dog’s behaviour around? Book a Free Assessment and connect with a certified Smart Master Dog Trainer - available across the UK.
FAQs
How long does training for impulse control around gates usually take?
Most families see strong progress in two to three weeks with daily practice. Full reliability under big distractions can take six to eight weeks. An SMDT can shorten that timeline with a tailored plan.
Should I use sit or stand at the gate?
Either is fine. What matters is a clear stop and a calm hold. Many dogs find a sit easier at first. Smart Dog Training focuses on clarity and consistency so the behaviour stays solid.
What if my dog breaks the hold when the gate opens?
Close the gate, guide the dog back to the line, reduce the difficulty, and win again. Do not release forward after a break. The release word must be the only green light in training for impulse control around gates.
Can I train this off lead?
Start on lead for safety and clarity. Move to a long line for proofing, then off lead only when your dog is consistent. Your SMDT will coach each step.
What rewards work best?
Use a mix of food, praise, and life rewards. Often the best reward for waiting is the release to go through the gate. We structure this so the reward never dilutes the rule.
Will this help with other impulse issues?
Yes. The same structure helps with doorbell excitement, counter surfing, car exits, and recall. Training for impulse control around gates teaches your dog to pause and think first.
Is this suitable for multi dog homes?
Yes, but teach dogs one at a time first. Then add the second dog on lead, and finally progress to both dogs waiting together with separate release words if needed.
What if my dog is anxious near gates?
Go slower, use more distance, and keep rewards calm. Pressure and release must be gentle and fair. A Smart Master Dog Trainer will shape the plan to lower stress while building confidence.
Get Started Today
Training for impulse control around gates is one of the highest value skills you can teach. It protects your dog, prevents accidents, and creates a calmer home routine. With the Smart Method, we make the process clear and repeatable so your dog learns to stop, hold, and move on your release every time. If you want a tailored plan or faster results, work directly with a certified Smart Master Dog Trainer. Your dog will learn with structure, motivation, and fair accountability that lasts in real life.
Your dog deserves training that truly works. With certified Smart Master Dog Trainers (SMDTs) nationwide, you'll get proven results backed by the UK's most trusted dog training network. Find a Trainer Near You
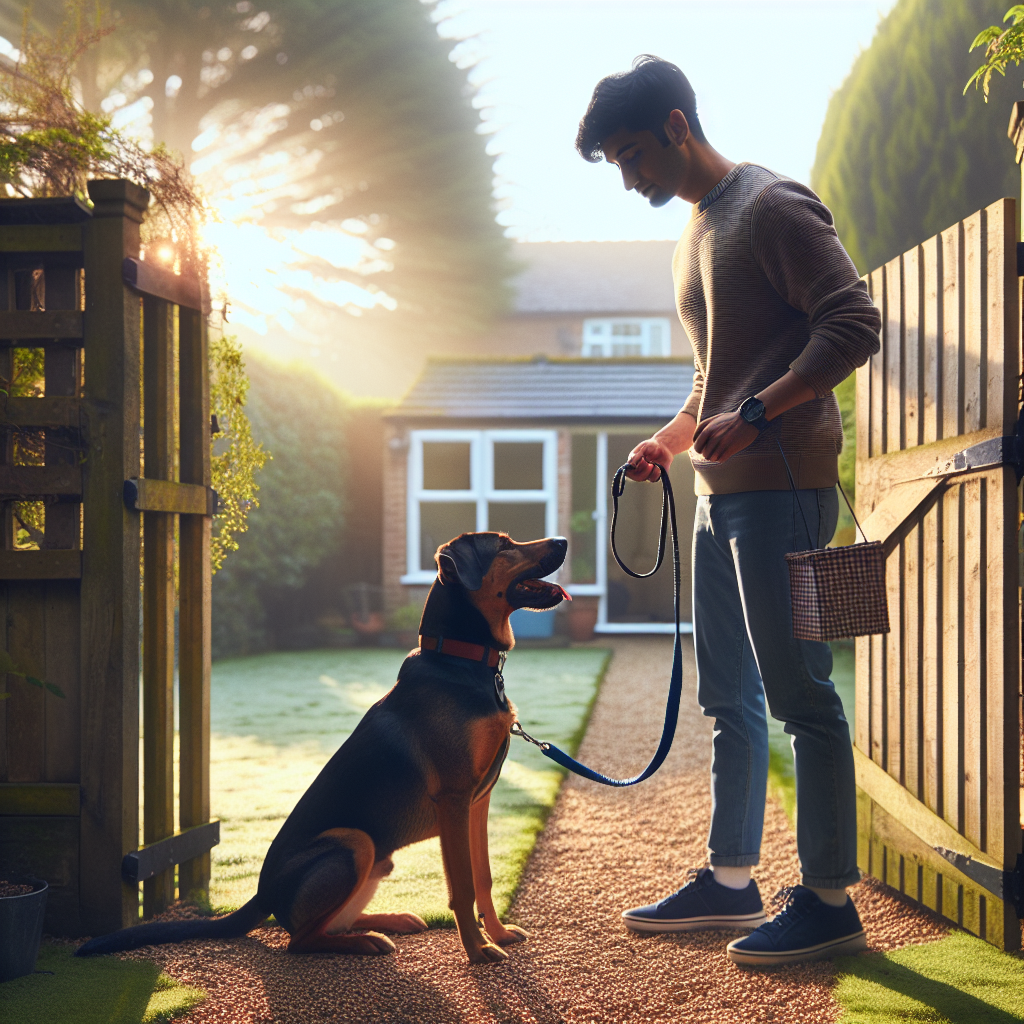
Training for Impulse Control Around Gates
Shaping a Polite Approach to Visitors
A polite approach to visitors is one of the most useful skills your dog will ever learn. It protects guests, prevents chaos at the door, and builds a calm home. At Smart Dog Training, we use the Smart Method to create clear steps that shape a polite approach to visitors from the first knock to a relaxed goodbye. Guided by a certified Smart Master Dog Trainer, this process becomes simple, fair, and reliable.
This article sets out a practical plan that any family can follow. You will learn how to define a polite approach to visitors, measure progress, and build real life reliability. Every step uses Smart Dog Training structure so you can see steady change and results that last.
What Polite Looks Like When Visitors Arrive
Before you train, define the goal. A polite approach to visitors means your dog:
- Hears the doorbell and stays calm
- Goes to a set place on cue and holds position
- Waits while the door opens without lunging or slipping past
- Greets on invitation only, with four paws on the floor
- Returns to place when asked and settles
When you picture this standard, you can teach to it. A polite approach to visitors is not random good luck. It is a clear skill set delivered step by step with the Smart Method.
Why a Polite Approach to Visitors Matters
Training a polite approach to visitors improves safety, reduces stress, and protects your bond with your dog. Guests feel welcome. Children can move around without worry. Your dog learns how to succeed rather than getting told off. Smart Dog Training programmes focus on these real outcomes so your home stays calm and controlled.
The Smart Method Applied to Visitor Greetings
The Smart Method is our proprietary system that shapes calm, consistent behaviour in real life. Here is how it builds a polite approach to visitors.
- Clarity. You will use precise markers and commands so your dog understands what to do at each stage.
- Pressure and Release. Fair guidance with leash or body position helps the dog find the right answer. The release and reward confirm success.
- Motivation. Food, toys, and praise build engagement so a polite approach to visitors feels good to your dog.
- Progression. We add distraction, duration, and difficulty at the right pace, from quiet rehearsals to busy doorways.
- Trust. Consistent training underpins a calm relationship. Your dog learns to rely on you when visitors arrive.
Every Smart Dog Training programme follows this structure. A Smart Master Dog Trainer will tailor the plan to your dog, your home, and your goals.
Assess Your Starting Point
To shape a polite approach to visitors, you need a baseline. Watch your dog the next time a friend arrives and note:
- Trigger. Is it the knock, the bell, footsteps, or new scents
- Distance. How close to the door does behaviour break down
- Intensity. Does your dog bark, whine, jump, or freeze
- Recovery. How long to settle after the guest enters
- History. Has your dog rehearsed door chaos for months
This assessment tells you where to begin and what to prioritise. Smart Dog Training uses these observations to design the first steps toward a polite approach to visitors.
Immediate Management to Stop Rehearsal
Training works best when you stop the problem from repeating. Put these management tools in place today.
- Leash your dog before opening the door.
- Use a baby gate, crate, or separate room to control space.
- Keep rewards ready near the hallway.
- Tell guests in advance how to help with calm entries.
These steps protect your progress. They also show your dog that a polite approach to visitors is the new normal.
Ready to turn your dog’s behaviour around? Book a Free Assessment and connect with a certified Smart Master Dog Trainer - available across the UK.
Foundation Skills You Will Need
A polite approach to visitors depends on a few key building blocks. Teach these first in a quiet room.
- Marker system. Use a clear word for success like Yes and a different word for release like Free. Pair with food to start.
- Name response. Say your dog’s name. When they look at you, mark and reward.
- Place cue. Send to bed or mat. Mark for getting on. Reward for staying.
- Leash conversation. Light pressure means try. The instant your dog gives to pressure, release and reward.
Smart Dog Training emphasises clean mechanics. Your timing should be crisp. Rewards should be delivered to the spot you want the dog to value, which supports a polite approach to visitors later.
Teach Place for Visitor Control
Place is the hub of a polite approach to visitors. It gives your dog a clear job and a safe location.
- Introduce. Lure onto the mat. Mark when all four paws land. Feed on the mat.
- Duration. Feed one piece every couple of seconds as your dog stays. If they step off, guide back and reset.
- Release. Say Free and toss a treat away. Repeat the cycle several times.
- Add distance. Take one step back from the mat, then return to reward. Build to two, then three steps.
- Add distractions. Light movements. Pick up keys. Walk to the door and back. Reward for holding place.
Repeat short sessions. End while your dog is still keen. With Smart Dog Training structure, you will see steady gains.
Doorbell Neutrality
Many dogs struggle when the bell rings. Teach that sound equals calm and rewards on the mat. This builds a polite approach to visitors from the first cue.
- Pair the bell with Place. Ring the bell. Say Place. Guide the dog onto the mat. Mark and reward.
- Short pauses. Delay the reward for one extra second each time. Keep it easy.
- Increase realism. Ring the bell from outside while your dog holds place.
Keep repetitions frequent and short. The bell becomes a signal to settle rather than a trigger to explode.
Opening the Door Without Drama
We now link Place to a polite approach to visitors at the threshold.
- Handle on the latch. Touch the handle. If your dog stays, mark and reward on the mat.
- Crack the door. Open one inch. Close it. Reward on the mat. Repeat.
- Build to open. Open two inches, then four, then a foot. If your dog steps off, close the door, calmly reset, and lower the demand.
- Door stays open. Hold a brief chat with an empty hallway while the dog stays.
Every successful rep confirms that polite choices keep the door open and bring rewards.
Structured Greetings on Invitation
Once your dog can hold place with the door open, teach a polite approach to visitors during the greeting itself.
- Visitor enters quietly and stands side on. No eye contact at first.
- Handler walks the dog on leash from Place toward the visitor.
- Ask for Sit or Stand. Mark for four paws on the floor.
- Visitor gives one gentle stroke under the chin or hands a treat. No leaning in.
- Handler says Place and guides the dog back to the mat for a reward.
This one step greet builds a polite approach to visitors by keeping the interaction short and successful. Repeat two or three times, then end the session.
Using Pressure and Release Fairly
Smart Dog Training uses fair guidance paired with immediate release. If your dog forges ahead, add a light leash cue back to your side. The moment the dog softens and returns to you, release and reward. Your leash becomes a calm conversation, not a battle. This approach supports a polite approach to visitors because the dog learns how to make good choices under mild pressure.
Fixing Jumping, Barking, and Mouthing
Common speed bumps can slow a polite approach to visitors. Here is how to solve them with the Smart Method.
- Jumping. Ask for Sit before any greeting. If paws lift, remove attention at once and guide back to Place. Reward only when four paws stay down.
- Barking. Increase distance and reduce stimulation. Reward quiet seconds on Place. If needed, bring the visitor in after the dog has practiced calm with the door open.
- Mouthing. Replace with a hold of a tug or chew on Place before greeting, or skip the greeting and build more Place time.
Stay consistent. Your dog should learn that a polite approach to visitors always leads to access and reward. Wild choices remove access.
Coach Your Visitors
Guests play a key role in a polite approach to visitors. Share clear rules before they arrive.
- Enter calmly. No excitable voices.
- Stand side on. Hands low. No leaning over the dog.
- Wait for your cue. Greet only after Sit or Stand is steady.
- Keep it brief. One stroke. Then pause. Let the dog return to Place.
Smart Dog Training teaches owners to lead the interaction. Your visitor follows your plan so your dog can succeed.
Progression Plan Week by Week
Polite behaviour grows through layers. Use this simple progression to expand your dog’s polite approach to visitors.
- Week 1. Place mastery in a quiet room. Doorbell pairing begins.
- Week 2. Door handling, opening, and empty hallway practice.
- Week 3. One step greetings with a known helper. Short visits.
- Week 4. Add new visitors, different coats, hats, and bags.
- Week 5. Add food on the coffee table and children moving around.
- Week 6. Practice after a walk, at evening, and with multiple arrivals.
Move forward only when success is at 80 percent or better. If errors rise, drop back to the last easy step. This is how Smart Dog Training keeps a polite approach to visitors on track.
Generalise to Real Life
Your dog needs to show a polite approach to visitors of all kinds. Vary the picture.
- Different people. Tall, short, quiet, loud.
- Different times. Morning, afternoon, and evening.
- Different clothing. Umbrellas, hats, backpacks.
- Different locations. Front door, back door, garden gate.
Each new picture strengthens your dog’s calm response. This is progression in action.
Special Notes for Puppies and Rescue Dogs
Puppies can learn a polite approach to visitors early. Keep sessions short and fun. Use high value rewards and lots of Place time. For rescue dogs, go slower. Build trust on Place first. Avoid pressure if fear shows. Smart Dog Training tailors the tempo so each dog feels safe and successful.
When Behaviour Runs Deeper
If your dog shows fear, reactivity, or guarding when guests arrive, you still need a polite approach to visitors, but you also need a specialist plan. A Smart Master Dog Trainer will assess triggers, set safety layers, and coach you through structured steps using the Smart Method. Do not wait if bites or close calls have happened. Ask for help early.
Track Progress and Build Accountability
Write down your sessions. Note time of day, who visited, how long Place was held, and how the greeting went. Clear records help you refine your polite approach to visitors and keep everyone on the same page. Smart Dog Training programmes include progress tracking so results stay visible and consistent.
Recommended Equipment
Quality tools support a polite approach to visitors.
- Flat collar or well fitted harness
- Standard 6 foot leash
- Non slip mat or raised bed for Place
- Treat pouch for fast rewards
- Baby gate or crate for management
Use equipment to guide and prevent mistakes, not to overpower. The Smart Method pairs tools with clarity and motivation so your dog stays willing and confident.
Common Mistakes to Avoid
- Letting the dog rush the door while you plan to train later
- Too much talking and not enough clear markers
- Guests exciting the dog with big greetings
- Jumping getting attention while calm gets ignored
- Adding difficulty before foundation is stable
Fix these and your polite approach to visitors will improve fast.
FAQs
How long does it take to teach a polite approach to visitors
Most families see change within two weeks if they practice daily. Full reliability with many types of guests can take six to eight weeks. Smart Dog Training builds steady, repeatable progress.
What if my dog will not stay on Place when the door opens
Lower the difficulty. Reward more often for holding Place with the door only cracked. Use your leash for gentle guidance and release the instant your dog returns. This protects a polite approach to visitors.
Can I let guests give treats
Yes, but only for calm behaviour. Ask for Sit or Stand first. Mark success. Then the guest can place a treat on the palm at the dog’s chest level. This reinforces a polite approach to visitors without adding excitement.
What should I do if my dog barks at the doorbell
Teach doorbell neutrality. Pair the bell with Place and then reward quiet. If barking persists, increase distance from the door and shorten sessions. Smart Dog Training builds calm through clear steps.
Is leash guidance necessary
Leash guidance with pressure and release speeds learning. It makes the criteria clear and fair. When you release the moment your dog makes the right choice, you strengthen a polite approach to visitors.
My dog is friendly but too excited. Do I still need structure
Yes. Over arousal blocks learning. Structure helps even the friendliest dog earn a polite approach to visitors. Place, short greetings, and clear releases keep excitement from boiling over.
What if we live in a busy flat with constant deliveries
Use more management and shorter sessions. Create a buffer with a gate and move the Place mat further from the door. Practice often. Smart Dog Training adapts the plan to your home so a polite approach to visitors still holds.
Your Next Step
A polite approach to visitors is not luck. It is a structured skill built with clarity, fair guidance, and strong motivation. The Smart Method gives you a blueprint from the first ring of the bell to a calm goodbye. If you want tailored coaching for faster results, we are ready to help.
Your dog deserves training that truly works. With certified Smart Master Dog Trainers (SMDTs) nationwide, you'll get proven results backed by the UK's most trusted dog training network. Find a Trainer Near You
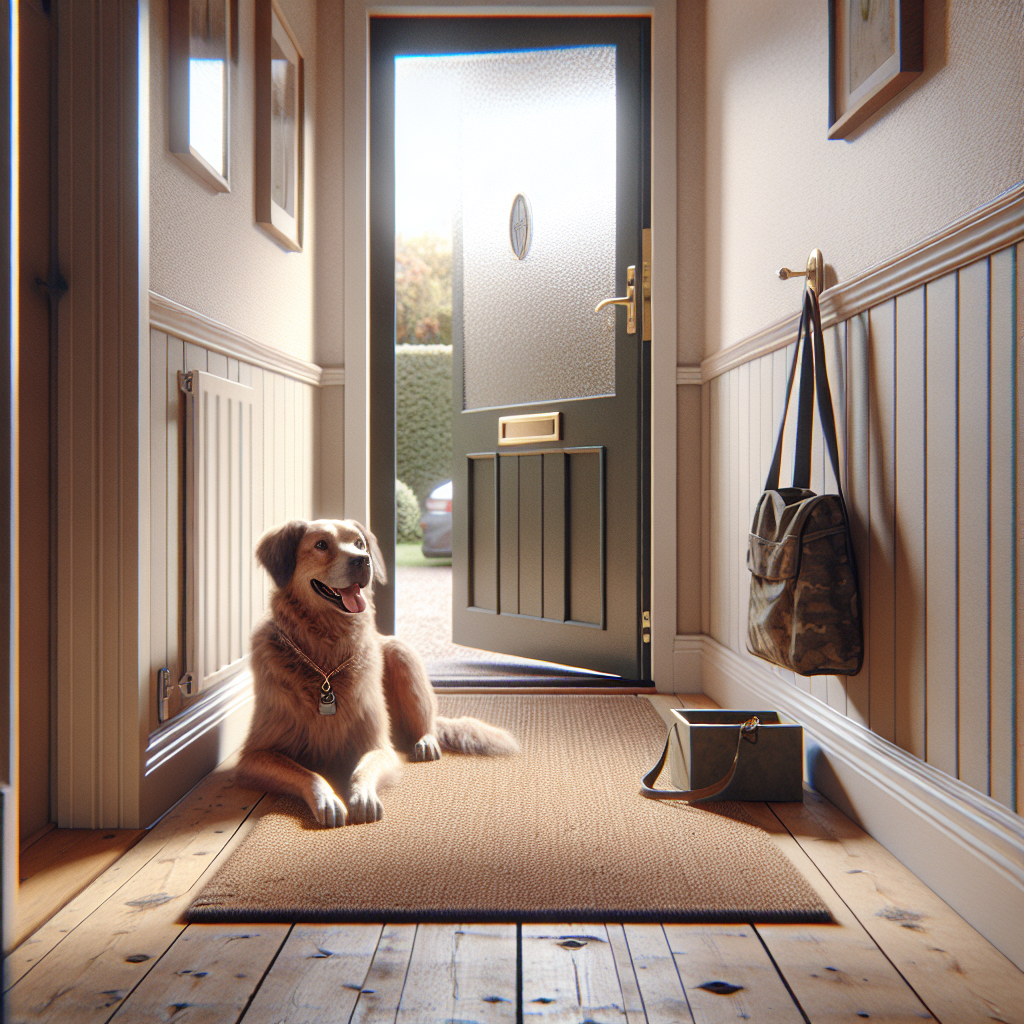
Polite Approach to Visitors
Introduction
When you understand the dog arousal scale, everything about daily life with your dog gets easier. You can read their state in seconds, choose the right response, and guide them back to calm before problems start. At Smart Dog Training, we teach families to use the dog arousal scale through the Smart Method, a structured system that delivers steady behaviour in real life. From puppies to advanced working dogs, we coach you to notice small changes, act early, and create calm that lasts. Every programme is delivered by a certified Smart Master Dog Trainer, and every step follows the Smart Method.
This guide explains what the dog arousal scale is, how it affects behaviour, and how to manage it with Smart processes. You will learn the signs at each level, how to measure your dog’s arousal in real time, and the exact steps we use to reset and prevent over arousal. If you want trusted support from a Smart Master Dog Trainer SMDT, you can Book a Free Assessment and get started.
What Is the Dog Arousal Scale
The dog arousal scale is a practical way to map your dog’s emotional and physical state from calm to over aroused. Think of it as a thermometer for behaviour. Low numbers mean rest and calm. Mid numbers mean alert and ready to learn. High numbers mean stress, drive, or overload. We use the dog arousal scale to match the training approach to the dog’s current state, which makes learning faster and safer.
At Smart Dog Training, we teach the dog arousal scale as a daily language. Owners learn to scan posture, muscle tone, breathing, pupil size, ears, tail, vocalisation, and recovery speed. With this skill, you can predict problems before they happen and create a smooth path back to calm.
Why Arousal Matters in Training and Daily Life
Arousal is not good or bad. It is simply energy and focus. The key is control. On the dog arousal scale, learning is easiest in the middle, where the dog is alert but able to think. Too low and the dog is sleepy or disengaged. Too high and the dog is impulsive or reactive. By keeping your dog in the right zone, you get faster results, safer walks, and a calmer home.
The Smart Method and Arousal Management
The Smart Method gives you a clear roadmap for the dog arousal scale.
- Clarity: Commands and markers are clean and consistent, so the dog knows exactly what to do at every arousal level.
- Pressure and Release: Fair guidance is paired with a clear release and reward. This sets boundaries and builds responsibility without conflict.
- Motivation: Rewards are timed to maintain the right level on the dog arousal scale. We use food, toys, and praise to create the best learning state.
- Progression: We add distraction, duration, and difficulty in small steps. This builds reliability in any environment.
- Trust: Clear, predictable training builds confidence and a strong bond. Dogs learn that calm choices always pay.
Every Smart programme follows this framework. It is how our SMDT trainers coach steady behaviour across the UK.
Signs at Each Level of the Dog Arousal Scale
The levels below help you assess where your dog sits on the dog arousal scale in real time. Your dog may skip levels if the trigger is intense, so watch for patterns.
Level 1 Calm Resting State
Body is loose, breathing is slow, eyes are soft, and recovery from small sounds is instant. This is the lowest end of the dog arousal scale. Use this time for rest, decompression, and low-effort skills like place with duration.
Level 2 Relaxed and Available for Learning
Body is relaxed but alert, ears move with sounds, and the dog takes food easily. This is the sweet spot on the dog arousal scale for teaching new skills. Sessions should be short and upbeat.
Level 3 Alert and Engaged
Focus sharpens, tail carriage lifts, and response speed increases. The dog is eager and ready to work. This is a productive level on the dog arousal scale for proofing commands with light distraction.
Level 4 Heightened Arousal
Breathing gets shallow, pupils widen, and the body leans forward. Food may still work but response latency grows. This level on the dog arousal scale needs structure. Reduce distraction and ask for known behaviours to lower pressure.
Level 5 Over Aroused and Reactivity
Muscle tension rises, vocalisation starts, and the dog may fixate or lunge. Food often loses value. This level on the dog arousal scale requires a reset. Create distance, ask for simple obedience, and let the nervous system settle.
Level 6 Red Zone and Safety
Loss of thinking, high drive or panic, and no response to normal cues. This is the top of the dog arousal scale. Safety comes first. End the session, remove triggers, and reset before trying again. Structured coaching from an SMDT is advised.
Measuring the Dog Arousal Scale in Real Time
To use the dog arousal scale, you need a fast scan. Follow this simple sequence in any setting.
- Posture and muscle tone: Loose means low arousal. Braced means higher arousal.
- Eyes and ears: Soft eyes and neutral ears are calm. Wide pupils and fixed ears mean rising levels.
- Mouth and breathing: Easy panting is normal in heat. Tight lips and shallow breaths point higher on the dog arousal scale.
- Recovery time: If your dog settles within seconds, you are mid scale. If recovery takes minutes, you are higher on the dog arousal scale.
- Food and toy interest: If rewards work, you can train. If not, reset first.
Common Triggers That Shift the Dog Arousal Scale
The dog arousal scale changes with context. Common triggers include fast movement, other dogs, strangers, doorbells, traffic, crowded spaces, tight leads, and handler tension. Internal factors matter too, like pain, hunger, lack of sleep, or hormonal change. At Smart Dog Training, we map your dog’s triggers and build a plan to change how your dog feels and responds.
Reset Strategies That Work
When your dog climbs the dog arousal scale, use these Smart resets.
- Create distance: Step away from the trigger. Space lowers pressure.
- Switch tasks: Ask for a simple known behaviour like sit, down, or place.
- Pattern feed: Deliver a predictable stream of small rewards to slow breathing and restore focus.
- Calm handling: Soften your posture and voice. Your calm lowers the dog arousal scale.
- Release and reset: Use a clear release word, then begin again with an easier setup.
Building Resilience with the Smart Method
Resilience means your dog can hold steady across environments. We build resilience on the dog arousal scale through the Smart Method tools.
- Clarity: One marker means correct. One marker means try again. One release ends the job.
- Pressure and Release: Fair pressure guides the dog to the right choice, and the release confirms success. This creates responsibility without conflict.
- Motivation: Rewards are earned and delivered with purpose, keeping the dog in that thinking zone.
- Progression: We add distance, distraction, and duration in small steps to prevent spikes.
- Trust: Predictable rules grow confidence, which stabilises the dog arousal scale over time.
Structured Daily Routine for a Balanced Dog Arousal Scale
A consistent routine controls the dog arousal scale before problems start.
- Sleep: Aim for age appropriate rest. Puppies often need 16 to 20 hours in a day.
- Exercise: Mix controlled walks, structured play, and short training. Avoid long bursts of chaotic play that push the dog arousal scale too high.
- Place and settle: Teach a place command for calm time after activity.
- Nutrition and health: Feed a balanced diet and check for pain. Discomfort can move the dog arousal scale up fast.
- Daily training: Ten to fifteen minutes split into small sessions beats one long session.
Training Games to Lower Arousal Fast
Use these Smart games to bring the dog arousal scale down and build stability.
- Pattern feeding walks: Reward every four to six steps for a soft heel. Gradually widen the gap as the dog settles.
- Find it: Scatter a few treats in grass to switch the nose on. Sniffing reduces arousal.
- Place plus duration: Send to place, reward calm, and release. Pair with slow breathing from you.
- Catch and release: Short toy play, then out on cue, then heel to place. This teaches toggling on the dog arousal scale.
- Box breathing for handlers: Breathe in for four, hold for four, out for four, hold for four. Your breathing sets the tone.
When High Arousal Is Useful and How to Channel It
High energy can be a gift when you control it. Sports, scent work, service tasks, and advanced obedience all need energy. The dog arousal scale helps you find the right height for the job, then guides a clean return to calm. At Smart Dog Training, we teach owners to channel drive into structured work, then settle on cue.
Tools and Markers for Clarity and Arousal Control
Tools do not fix behaviour on their own. Clear handling does. The Smart Method uses structured markers so your dog understands what each moment means on the dog arousal scale.
- Marker for correct: Confirms success and earns the reward.
- Marker for continue: Tells the dog to hold the behaviour while arousal shifts.
- Release word: Ends the job and lets the dog reset.
- Fair guidance: Pressure and release, timed correctly, builds accountability and lowers confusion.
With an SMDT guiding you, timing becomes clean and consistent, which stabilises the dog arousal scale across sessions.
Handling Setbacks Without Stress
Every dog will spike on the dog arousal scale at times. Setbacks are part of learning. Focus on process, not perfection.
- Reduce the picture: Go back a step, then rebuild with success.
- Shorten sessions: End on a win while your dog is thinking.
- Score your walk: Note the highest level reached on the dog arousal scale and what helped bring it down.
- Stay consistent: The same cues and rules create safety and trust.
Case Studies from Smart Families
Ruby, a young Spaniel, jumped quickly to Level 5 on the dog arousal scale when bikes passed. We mapped her triggers, built distance first, then layered a heel pattern with food, then toys. Within two weeks she could hold Level 3 near slow bikes. After a month, she passed a busy cycle path at Level 2 to 3 with a calm settle at the end.
Max, a rescue Shepherd, barked at visitors and spiked on the dog arousal scale. We taught place with duration, door routines, and a calm greet plan. With Clarity, Pressure and Release, and Motivation in balance, he learned to hold place while guests entered. Within six weeks, he settled at Level 2 with predictable visits.
How Smart Programmes Support You
Smart Dog Training programmes are built to manage the dog arousal scale from day one. We train in-home, in structured groups, and through tailored behaviour programmes. Every plan follows the Smart Method and is delivered by a certified Smart Master Dog Trainer. If you want support right now, you can Find a Trainer Near You and connect with your local expert.
Ready to turn your dog’s behaviour around? Book a Free Assessment and connect with a certified Smart Master Dog Trainer, available across the UK.
FAQs
What is the dog arousal scale
The dog arousal scale is a way to read your dog’s state from calm to over aroused. It helps you choose the right training step so your dog can think and respond.
How do I know if my dog is too high on the dog arousal scale
Look for tight muscles, wide pupils, fast breathing, loss of food interest, and slower responses. If you see these, create distance, ask for simple skills, and reset.
Can the dog arousal scale help with reactivity
Yes. Reactivity is often a spike on the dog arousal scale. Smart routines, clear markers, and fair guidance lower arousal and build control around triggers.
What level is best for training
Most learning happens in the middle of the dog arousal scale, where the dog is alert but can think. We aim for Levels 2 to 3 for new skills, then proof upwards.
How long does it take to change my dog’s arousal
Many dogs improve in the first one to two weeks when owners follow a Smart plan. Lasting change comes from daily practice and steady use of the dog arousal scale.
Do I need a professional to use the dog arousal scale
You can start today with this guide, but a certified Smart Master Dog Trainer SMDT will speed up results. They will tailor the plan and correct timing in real time.
What if my dog will not take food outside
That often means your dog is too high on the dog arousal scale. Create distance, reduce distraction, and use a known behaviour to reset. Then reintroduce rewards.
Is high arousal always bad
No. Energy is useful when guided. The dog arousal scale helps you channel drive into structured work, then return to calm when the job is done.
Conclusion and Next Steps
Mastering the dog arousal scale lets you prevent problems, build focus, and create calm that lasts. With the Smart Method, you get a clear plan that balances motivation, structure, and accountability. If you want a personal roadmap for your dog, we will build it with you.
Your dog deserves training that truly works. With certified Smart Master Dog Trainers SMDTs nationwide, you will get proven results backed by the UK’s most trusted dog training network. Find a Trainer Near You
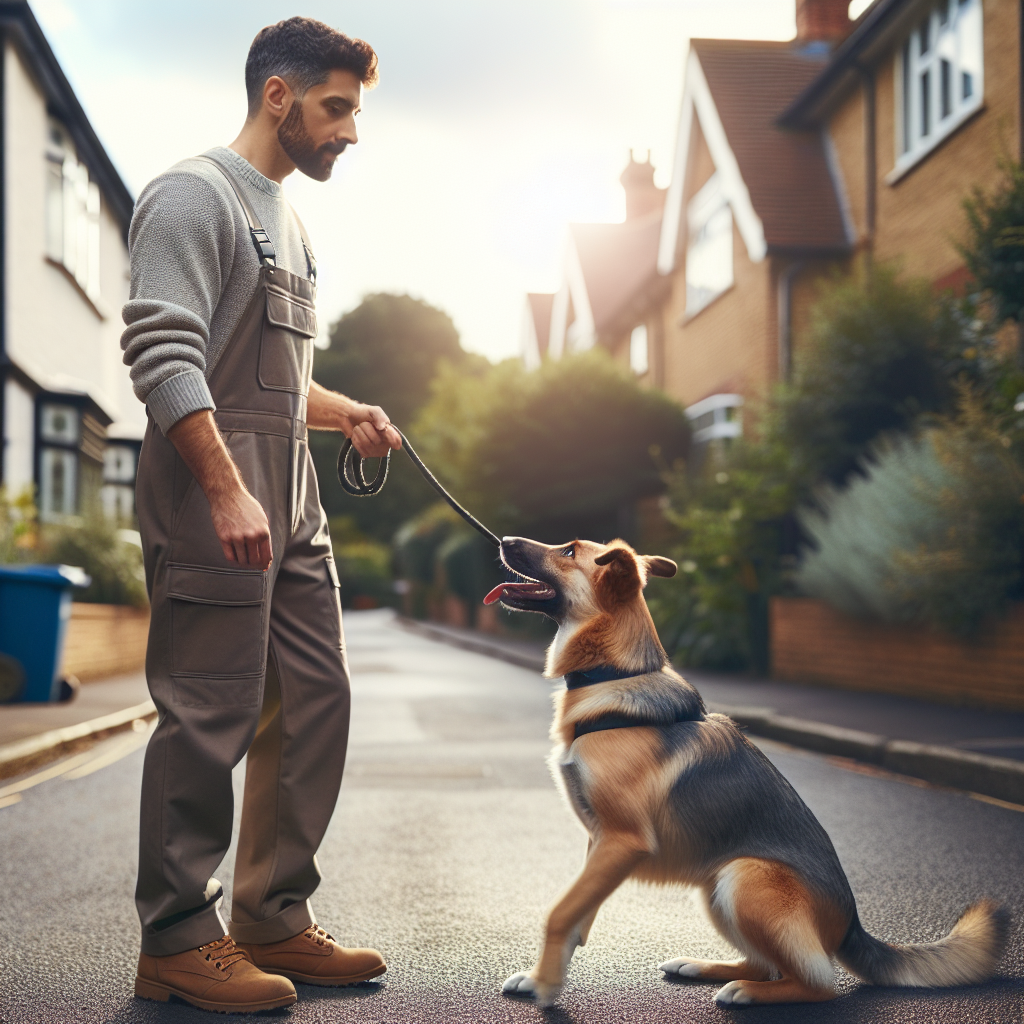
Understanding the Dog Arousal Scale
Why Calm Entry and Exit Routines Matter
Calm entry and exit routines for dogs transform the most chaotic moments of your day into predictable, safe interactions. Doorways are high energy places where excitement peaks and impulse control tends to fail. Without a clear routine, many dogs jump, door dash, bark, or tug the lead the moment a handle turns. The Smart Method gives you a structured way to teach reliable doorway manners that hold up in real life.
At Smart Dog Training we turn those split second choices into learned behaviour. Our programmes create clarity, add fair guidance, and build motivation so your dog chooses calm every time a door opens. Your local Smart Master Dog Trainer will show you how to apply the same framework across front doors, garden gates, car doors, and venue entrances.
The Smart Method Applied to Doorways
Calm entry and exit routines for dogs depend on five pillars that guide every Smart programme.
- Clarity: Your markers and commands are precise so the dog understands what to do before, during, and after a door opens.
- Pressure and Release: Fair guidance with the lead and body position prevents rushing, followed by an immediate release and reward when the dog relaxes.
- Motivation: Food, toys, and praise keep the dog engaged with you so calm becomes rewarding.
- Progression: We layer skills from easy to complex. You will add distance, duration, and distraction until the routine works anywhere.
- Trust: Consistent, kind leadership builds a confident dog that follows direction without conflict.
Every step outlined below follows this system. A certified Smart Master Dog Trainer will personalise the routine to your home layout, family needs, and your dog’s temperament.
What Calm Looks Like at the Door
Before we train, define success. For most families, calm entry and exit routines for dogs look like this:
- Dog moves to a chosen spot away from the door as you prepare to leave or greet someone.
- Loose lead and soft body. No bouncing, whining, or pawing.
- Eyes back to you when the handle turns or the bell rings.
- No movement through the threshold until you give a clear release.
- A quiet, polite greeting if guests enter.
Set Up Your Space for Success
Environment design is the first win. Calm entry and exit routines for dogs are easier when the space lowers arousal and blocks rehearsal of bad habits.
- Choose a stable “place” such as a bed or mat two to three metres from the door. Angle it so the dog can see the door without sitting in the path.
- Use a simple lead and flat collar or a training tool recommended by your Smart trainer. Keep it within easy reach at the doorway.
- Store rewards at the door. Have small food rewards and a quiet toy ready to reinforce calm choices.
- Reduce visual triggers. Frosted film or a curtain on glass panels stops constant scanning and barking at passers by.
Core Language for Threshold Manners
Clarity begins with consistent markers. Smart programmes use simple language and clean timing.
- Place: Move to your mat and stay there until released.
- Sit or Down: The posture that holds calm for your dog.
- Wait: A brief pause at the door while you check the environment or handle the lock.
- Free: The release that allows the dog to move through the threshold.
- Good: A calm marker to reinforce relaxation and position without breaking it.
Keep words short and do not stack commands. One cue, one response, clean feedback. This is the backbone of calm entry and exit routines for dogs.
Foundation Away from the Door
Start where excitement is low. Practise place and release in a quiet room. Reward the dog for choosing stillness and eye contact. Add the following layers:
- Distance: You step one to five metres away while the dog stays on place.
- Duration: Hold the position for ten to sixty seconds before releasing.
- Movement: You walk past, pick up keys, and return, reinforcing calm.
Progress only when the dog is fluent. If the dog breaks position, reset with low energy. Calm entry and exit routines for dogs are built by thousands of tiny wins stacked with patience.
Introduce the Door Without Opening It
Now bring the foundation to the threshold. Lead the dog to place, reinforce, then approach the door alone. Touch the handle, jingle keys, or knock softly. Reward the dog for staying calm and attentive. Repeat short sets so the dog learns that door sounds predict quiet reinforcement, not frantic action.
Open the Door in Micro Steps
Use the Smart principle of Pressure and Release with clear timing.
- Place the dog. Step to the door. Hand on the handle. If the dog leans forward, close your hand and pause. When the dog settles, say Good and try again.
- Crack the door by two centimetres. If the dog stays calm, mark Good and deliver a reward to the dog on place.
- Open slightly wider. If the dog creeps forward, calmly return the door to closed. When the dog relaxes, open again. The release of the door plus your marker teaches that relaxation makes the door open.
- Once the dog is reliable, add the Free release and invite a single step forward, then back to place for another reward.
This is the turning point for calm entry and exit routines for dogs. The dog learns that self control moves the world forward.
Lead Skills That Prevent Door Dashing
Lead handling should be quiet and consistent. The Smart Method pairs fair guidance with immediate release.
- Neutral lead: Keep a small smile of slack in the line. Avoid constant tension.
- Clear boundary: If the dog passes the threshold before the release, guide back to position, then soften the lead at once.
- Step with purpose: Your feet set the pace. Step, pause, breathe. Your calm body helps the dog match your rhythm.
Calm Greetings for Returning Home
Many dogs explode with joy when family returns. Channel that joy into a pattern that keeps paws on the floor.
- Before you open the door, breathe and prepare rewards.
- Enter in neutral silence. Place the dog or cue Sit at a known spot.
- Wait for a full second of stillness. Mark Good and reward low by the chest.
- If the dog jumps, step away. Remove attention until four feet return to the floor, then praise calmly.
- End with a Free that releases the dog to greet, still with soft energy.
Repeat the same sequence for all family members. Consistency cements calm entry and exit routines for dogs.
Visitor and Delivery Protocol
Guests and parcel arrivals add pressure. Use the same structure with extra clarity.
- Pre cue place before the knock. Reinforce two or three times before touching the handle.
- Open and speak to the guest while the dog holds position. Reward calm during the conversation.
- Invite the guest in only when the dog’s body is soft. If the dog surges, reset the door and try again.
- For deliveries, keep the dog on place while you receive the parcel, then release after the door closes.
Every successful rehearsal strengthens calm entry and exit routines for dogs in real life contexts.
Car Doors and Garden Gates
Threshold rules apply anywhere. Start with the car parked and the engine off.
- Clip the lead before opening. Cue Wait. Crack the door. Reward stillness.
- Release only when you have secure footing and the environment is safe.
- At the garden gate, use the same sequence. Approach, pause, open a sliver, reward calm, then free to exit under control.
Adding Distractions the Smart Way
Progression is essential. Add one distraction at a time.
- Sound layer: Doorbell, recorded voices, or gentle knocking.
- Motion layer: A family member walking past, a bag rustling, or a toy rolling.
- People layer: One guest who follows your instructions, then two guests.
- Outside layer: Neighbour voices, street noise, or mild dog traffic.
If the dog struggles, drop one layer and win again. Smart training is a staircase, not a leap. This is how we maintain calm entry and exit routines for dogs when life gets busy.
Common Mistakes and Simple Fixes
- Talking too much: Extra words blur clarity. Use short cues and quiet praise.
- Rushing reps: Open the door slower. Calm behaviour earns a faster open.
- Rewarding the wrong moment: Pay stillness and eye contact, not bouncing or creeping.
- Inconsistent rules: Align the whole family. Everyone uses the same cues and release.
- Letting the lead go tight: Guide, then soften at once when the dog yields.
When Excitement Turns to Anxiety
Some dogs bark, spin, or mouth at the lead from stress rather than joy. The Smart Method addresses the emotion and the behaviour together.
- Lower the criteria. Work farther from the door and shorten sessions.
- Increase reinforcement for calm. Use higher value food but deliver quietly.
- Add decompression walks and place training away from the threshold to reduce overall arousal.
If anxiety persists, a tailored behaviour programme may be required. Our national team will assess and design the right plan.
Integrating Kids and Family Members
Children can help build calm entry and exit routines for dogs with simple jobs.
- Bell captain: One child rings the bell on cue during practice sessions.
- Reward runner: Another delivers a treat to the dog on place after the Good marker.
- Door spotter: An adult leads the first weeks of training, then teens begin to take turns under guidance.
Keep the rules the same for every person. Calm energy in equals calm energy out.
Daily Practice Plan
Short, frequent sessions create strong habits. Use this simple plan.
- Morning: Five minutes of place and release away from the door.
- Afternoon: Three door reps with handle touches and two small opens.
- Evening: One visitor rehearsal with a family member acting as a guest.
- Walk time: Practise the exit sequence before every walk. Even one clean rep is progress.
Within two to three weeks, most families report that calm entry and exit routines for dogs feel natural and automatic.
Measuring Progress
Track objective wins so you know when to increase difficulty.
- Number of clean reps in a row without a break of position.
- Seconds of calm while the door stands open.
- Ability to respond to Free and then re settle after a greeting.
- Visitor reports of polite greetings and quiet exits to walks.
When you reach eight clean reps in a row, add a new layer of challenge.
Get Tailored Coaching
Every home and dog is different. If you want expert guidance, we are here to help. Smart trainers deliver programmes in home and in structured classes, all using the same method and language so results are consistent. Ready to turn your dog’s behaviour around? Book a Free Assessment and connect with a certified Smart Master Dog Trainer available across the UK.
FAQs on Calm Entry and Exit Routines for Dogs
How long does it take to teach calm entry and exit routines for dogs
Most families see clear progress within one to two weeks of daily practice. Full reliability with guests and street noise often takes three to six weeks. Consistency and clean timing speed things up.
What if my dog door dashes the second I open it
Close the door at once, guide the dog back to place, and wait for relaxation. The door opens when the dog is calm. Repeat several quick reps. This Pressure and Release pattern teaches that self control creates access.
Should I use sit or down for calm entry and exit routines for dogs
Choose the posture your dog maintains with ease. Many families use sit for quick exits and down for longer visitor greetings. The cue matters less than consistent rules and clear release.
How do I stop jumping on guests
Pre cue place before the knock, reinforce calm while the guest enters, and release to greet only when four feet stay on the floor. If the dog jumps, step back, reset, and reward a quiet approach.
Can I train calm entry and exit routines for dogs without treats
Food builds early motivation and speeds learning. Over time you will shift to life rewards like access outside, praise, and door opens. Smart programmes show you how to fade food while keeping strong behaviour.
What if multiple dogs crowd the door
Train each dog alone first. Add the second dog on lead at a distance, rewarding parallel calm. Gradually close the gap once both dogs hold position. Clear release cues are essential when working with a pair or more.
Conclusion
Doorways do not need to be chaotic. With clear language, fair guidance, and steady progression, calm entry and exit routines for dogs become a reliable habit at every threshold in your life. The Smart Method gives you a precise plan that works at the front door, the car, the garden gate, and busy venues. If you want a personalised roadmap, our nationwide team is ready to help you achieve calm, confident, and consistent behaviour that lasts.
Your dog deserves training that truly works. With certified Smart Master Dog Trainers SMDTs nationwide, you will get proven results backed by the UK’s most trusted dog training network. Find a Trainer Near You
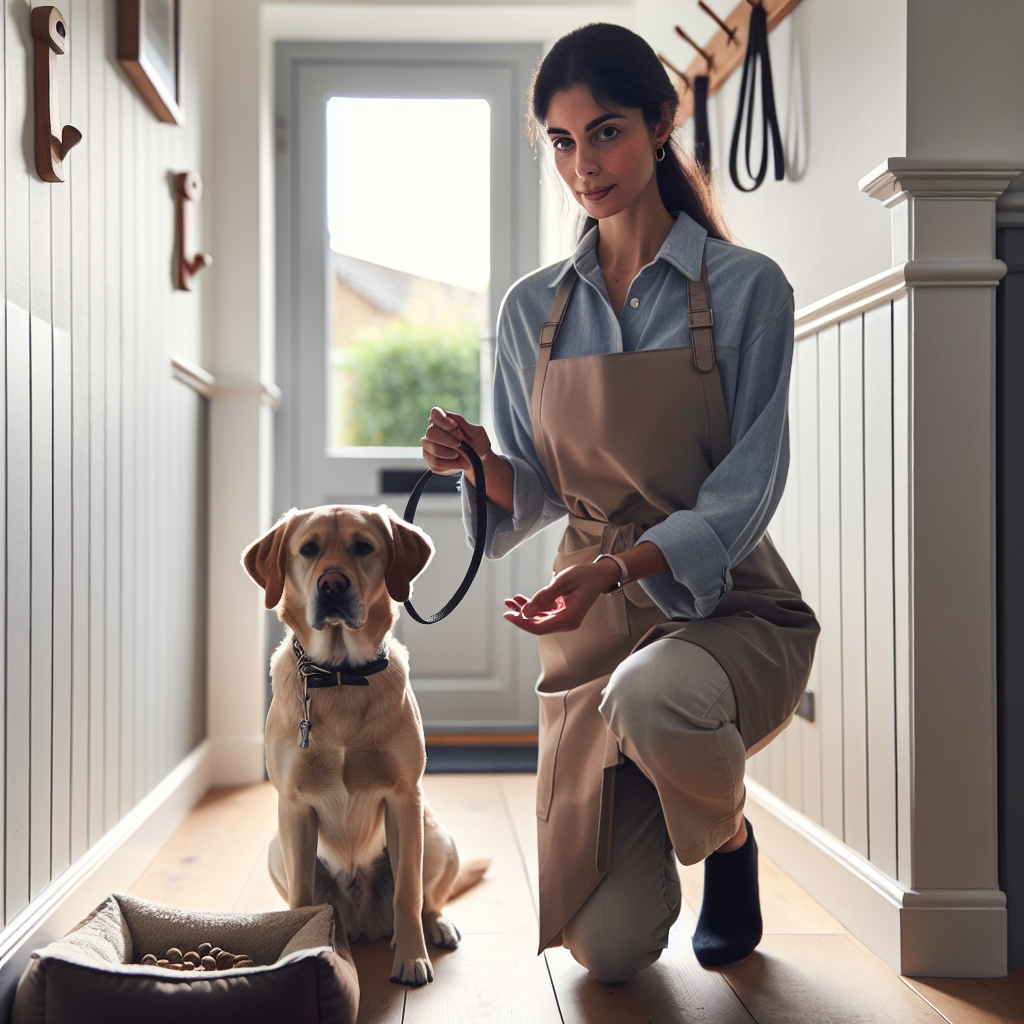
Calm Entry and Exit Routines for Dogs
Dog Training for Airbnbs and Travel
Dog training for Airbnbs and travel is about more than a weekend away. You want a calm guest who settles on cue, keeps quiet in shared spaces, and adapts quickly to new rooms and routines. That is exactly what we deliver with the Smart Method. As Director of Education, I see families transform their trips when they prepare properly and train with structure. With a certified Smart Master Dog Trainer guiding you, your dog learns to behave beautifully anywhere.
Smart Dog Training is the UK authority on real life training. We focus on results in the environments that matter most, including rentals and holiday stays. In this guide, I will show you how our system creates reliable manners for every stage of your journey. You will learn how to prepare at home, how to manage arrival and daily routines, and how to troubleshoot common challenges in unfamiliar places.
Why It Matters
Unwanted barking, door dashing, or anxious pacing can ruin a break and put your booking at risk. A structured plan prevents problems before they start. Dog training for Airbnbs and travel gives your dog clear expectations so they can relax and you can enjoy your time away.
The Smart Method for Travel Ready Dogs
Every Smart Dog Training programme follows the Smart Method. It is structured, progressive, and outcome driven. Here is how it supports dog training for Airbnbs and travel.
- Clarity. We use precise commands and marker words so your dog understands what earns reward in new environments.
- Pressure and Release. Fair guidance paired with timely release builds accountability and calm control near doors, lifts, and car parks.
- Motivation. Rewards keep your dog engaged and optimistic so they want to work despite novel sounds and smells.
- Progression. We add distraction, duration, and difficulty step by step until behaviours are reliable anywhere.
- Trust. Training strengthens your bond, which reduces stress and supports confident settling in any Airbnb or hotel style setting.
This unique balance of motivation and structure is why our clients choose Smart Dog Training for Airbnbs and travel readiness.
Pre Trip Foundations at Home
Travel success begins before you pack. Set clear foundations at home so your dog knows how to behave the moment you step into a rental. Practising now protects your booking and helps your dog feel safe later.
Teach a Solid Settle on a Mat
Settle is the anchor behaviour for dog training for Airbnbs and travel. It replaces pacing and barking with calm relaxation.
- Introduce a mat. Reward four paws on the mat and a down position. Mark yes or good the instant your dog relaxes.
- Add duration. Build short periods of stillness while you sit, stand, or move around. Reward calm, not fidgeting.
- Add distance and distraction. Step away, open a door, walk to the kitchen, then return to reward quiet staying.
- Generalise. Practise in different rooms, then in the car, then in a friend’s house. Mat goes with you on every outing.
With practice your dog learns that new places mean lie down on your mat and switch off. That is the backbone of dog training for Airbnbs and travel.
Crate Training for Travel and Rentals
A well conditioned crate gives your dog a safe bedroom in any property. It prevents night time pacing and keeps them secure during food deliveries or maintenance visits.
- Build a positive association. Feed meals in the crate. Use a calm release cue to come out.
- Practise doors closing. Reward quiet while the door is shut for short periods. Extend slowly.
- Move the crate. Teach that the crate is the constant, even when the room changes.
- Layer sounds. Play recorded hallway or street sounds at low volume while your dog relaxes in the crate.
Smart Dog Training uses crate work to support clarity, safety, and predictable rest. It is a key skill in dog training for Airbnbs and travel.
Door Manners and Thresholds
Doors in rentals are risk points. We teach sit and stay while doors open, then a calm release. Practise with the front door, interior doors, and car doors. Add polite greetings so your dog does not rush cleaners, hosts, or neighbours. This is non negotiable for dog training for Airbnbs and travel.
Quiet on Cue and Bark Control
Barking travels through thin walls. Teach a quiet cue in two parts. First mark and reward voluntary silence between barks. Next introduce quiet as the signal that earns reinforcement. Pair with settle on the mat near windows. Cover glass at night if visual triggers set your dog off. Our trainers will show you how to use fair guidance with rapid release so your dog understands exactly when to switch off.
Packing and Preparation Checklist
Bring the structure your dog recognises. Consistency is the secret to dog training for Airbnbs and travel.
- Crate or travel pen and familiar mat
- Two leads, head collar or harness as advised, and a long line for first toilets
- Training pouch and high value rewards
- Chews for decompression and quiet time
- Portable water bowl and measured food
- White noise machine or app on a spare device
- Poo bags and cleaning spray
- Door anchor or baby gate if needed for management
- Medical records, vet contact, and a photo of your dog
- Spare ID tag with the holiday address and your mobile number
Car Travel and Arrival Routine
How you travel sets the tone for your stay. Use calm routines that match your training at home.
Car Conditioning
- Load and unload on a sit and wait cue.
- Use a crate or seat belt attachment so movement is limited and safe.
- Break every two hours for a short loose lead walk and toilet.
- Ignore attention seeking in the car. Reward quiet resting only.
The First Fifteen Minutes at Check In
- Walk first. Take a five to ten minute decompression walk before you enter the property.
- Tour on lead. Keep your dog on lead while you walk the rooms together. Let them sniff with you, not alone.
- Place the mat. Put the mat in the living area and cue settle. Reward calm.
- Crate placement. Set up the crate in the sleeping area. Invite your dog in and reward relaxation.
- First toilet on lead. Choose a safe toilet spot. Mark and reward quickly to set the routine.
This simple sequence reduces anxiety and prevents accidental marking or frantic racing around. It is travel proof dog training for Airbnbs and travel.
Dog Proofing an Airbnb
Protect the property and your peace of mind.
- Move tempting items. Shoes, remotes, and cables go out of reach.
- Block access if needed. Use doors or a gate to limit rooms at first.
- Secure bins and food areas. Prevent scavenging with lids and distance.
- Cover windows at night. Reduce visual triggers that drive barking.
- Lay down the mat. Create a clearly defined relaxation zone.
House Rules That Keep Stays Stress Free
Simple rules prevent big problems and make dog training for Airbnbs and travel work day to day.
- No free roaming on arrival. Leash and mat first, free time later.
- Quiet hours. White noise on at bedtime and during early mornings.
- Leash for doors and corridors. Always assume a person is outside.
- Feeding routine. Meals happen in the crate or on the mat to stop scavenging.
- Toilet rhythm. Same times every day, same spot outside if possible.
- Greeting protocol. Sit to say hello, then relax on the mat.
Managing Alone Time and Separation
Even if you plan to take your dog everywhere, brief alone time is realistic. Build it in thoughtfully.
- Rehearse at home. Start with one to two minutes behind a door while your dog settles on the mat or in the crate.
- Progress in tiny steps. Add a minute at a time. Return while your dog is quiet, not when they cry.
- Recreate the cues. In the rental, follow the same routine. Settle, chew, white noise, then a simple I will be right back cue.
- Keep it short. Holidays are not the time to test long absences.
If your dog struggles with separation, work with a Smart Master Dog Trainer before you travel. Our behaviour programmes use the Smart Method to replace anxiety with predictability and trust.
Quiet Nights and Neighbour Friendly Etiquette
Thin walls and new sounds can trigger alert barking. Set expectations early and stick to them.
- Night plan. Toilet, settle on the mat, then crate or bed with white noise.
- Window management. Close curtains to remove visual triggers.
- Prompt response. If your dog vocalises, guide to the mat, ask for a down, reward silence, then release after a short calm period.
- Morning routine. Calm lead out to the toilet spot, then breakfast and a short training session.
Public Manners During Travel
Shared corridors, lifts, pubs, and cafes require reliable manners. Smart Dog Training teaches a set of core skills for public life.
- Loose lead walking. Heel or loose lead past doorways and people.
- Ignore food on floors. Leave it is rehearsed at home and on walks.
- Settle under tables. Use your travel mat in cafes. Reward calm, not fidgeting.
- Neutral greetings. Sit for attention. No jumping, no pulling toward others.
These behaviours are essential parts of dog training for Airbnbs and travel. They keep your dog welcome wherever you go.
Troubleshooting Common Problems
Barking at Hallway Noises
Keep distance from the door and practise settle away from traffic. Pair quiet with reward. If needed, increase structure by using the crate for evening wind down.
Marking Indoors
Prevent access, start with short on lead supervision, and give fast trips to the chosen toilet spot. Reward heavily for outdoor toileting. Clean any accidents thoroughly to remove odour cues.
Overexcitement at the Door
Interrupt early. Ask for sit and eye contact before you touch the handle. Open a crack, close, reward calm. Repeat until your dog can wait while the door opens fully.
Scavenging in the Kitchen
Use a boundary. Settle on the mat while food is prepared. Reward calm every few seconds at first, then extend duration. No access to counters until the session ends.
Reactive Moments on Walks
Increase distance, turn away early, and ask for focus. Reward engagement. Use planned routes at quieter times while your dog adjusts to the new area.
How Smart Programmes Support Dog Training for Airbnbs and Travel
Our programmes are built to deliver real results in real places. We work in your home, on your street, and in public settings that mirror your travel goals. Your SMDT will design a clear plan for dog training for Airbnbs and travel, blending obedience, behaviour, and lifestyle coaching that fits your itinerary.
- Puppy foundations that prevent problems in rentals
- Obedience for calm control near doors, corridors, and car parks
- Behaviour plans for barking, anxiety, and reactivity that travels with you
- Advanced pathways for service lifestyle skills such as settle anywhere
Ready to turn your dog’s behaviour around? Book a Free Assessment and connect with a certified Smart Master Dog Trainer - available across the UK.
Two Week Travel Conditioning Plan
Use this simple plan to build confidence and control before your trip. It is a practical template for dog training for Airbnbs and travel.
- Days 1 to 3. Daily settle on a mat in two rooms, ten minutes each. Add quiet cue and door practice. Short car rides with crate.
- Days 4 to 6. Visit a friend’s house for a short settle session. Practise polite greetings and a calm tour on lead. Add white noise at bedtime.
- Days 7 to 9. Train in a new public place such as a quiet cafe at off peak time. Mat under table for five to ten minutes, reward calm.
- Days 10 to 12. Rehearse arrival routine at home. Walk, tour on lead, place the mat, and crate set up. Add brief alone time rehearsal.
- Days 13 to 14. Combine all steps. Car ride, arrival routine, settle, quiet cue, and evening wind down with white noise.
Safety and Emergencies on the Road
Preparation keeps your dog safe and protects your booking.
- ID checks. Collar with tag showing your mobile number and a spare tag with the holiday address.
- Secure exits. Confirm doors and gates close properly before you let your dog off lead indoors.
- Emergency plan. Save local vet details and know the nearest out of hours practice.
- First aid kit. Include bandage, antiseptic wipes, tick remover, and any medication.
- Weather aware. Pack layers, shade, and water as needed for the season.
FAQs on Dog Training for Airbnbs and Travel
When should I start dog training for Airbnbs and travel?
Start at least two weeks before your trip. Build settle on a mat, crate comfort, door manners, and quiet on cue. Short daily sessions create lasting results.
How do I stop barking in a rental without upsetting neighbours?
Reduce triggers, use white noise at night, and cue settle away from doors and windows. Reward silence and guide calmly when noise starts. Consistency is key.
Can my dog be left alone in an Airbnb?
Only if your dog is already calm and quiet when left at home. Keep absences brief and follow your rehearsal plan. If in doubt, plan dog friendly outings instead.
What if my dog has separation issues?
Address it before you travel. Work with an SMDT on a step by step protocol using the Smart Method. Travel is not the time to start from scratch.
Do I need a crate for travel?
We strongly recommend it. A crate gives your dog a safe space in unfamiliar rooms and prevents night pacing and door rushing.
How do I manage greetings with hosts or maintenance staff?
Put your dog on lead, ask for sit and eye contact, then allow a brief hello if appropriate. End with a settle on the mat and reward calm.
What should I pack for training while away?
Mat, crate, leads, long line, rewards, chews, white noise device, cleaning spray, and spare ID tag. Replicating home routines is central to success.
How can Smart Dog Training help with my specific goals?
We design a plan that matches your dog, your destination, and your schedule. Your Smart Master Dog Trainer will coach you through each step until skills hold anywhere.
Conclusion
Memorable trips come from calm routines and clear training that travels with you. Dog training for Airbnbs and travel needs structure, motivation, and accountability so your dog can relax and you can enjoy your stay. The Smart Method delivers that balance through clarity, pressure and release, motivation, progression, and trust. If you want your dog to settle anywhere, stay quiet at night, and greet politely in shared spaces, we are ready to help.
Your dog deserves training that truly works. With certified Smart Master Dog Trainers (SMDTs) nationwide, you'll get proven results backed by the UK's most trusted dog training network. Find a Trainer Near You
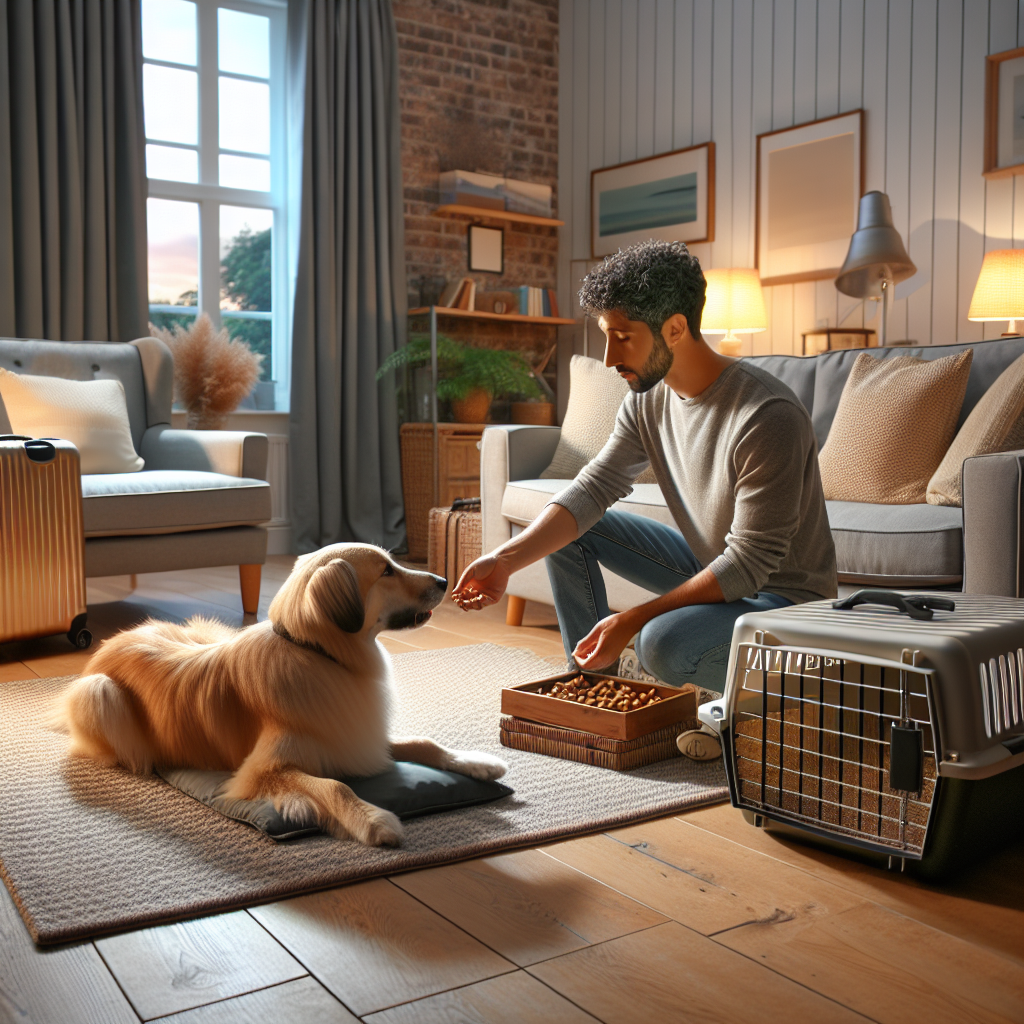
Dog Training for Airbnbs and Travel
Managing Energy for Training Success
Every behaviour you see has an energy story behind it. Barking, pulling, ignoring or settling on cue all link to how your dog feels and how they regulate that feeling. Managing energy for training success is about setting the right state of mind first, then teaching skills that stick. At Smart Dog Training, we use the Smart Method to shape calm, willing behaviour that holds under pressure. That is why a certified Smart Master Dog Trainer will always begin by assessing energy before teaching any exercise.
In this guide, you will learn why managing energy for training success is the foundation of reliable obedience, how to read your dog’s state, and how to build a daily structure that produces focus without conflict. We will also cover tailored plans for puppies and reactive dogs, engagement games, and a clear path for progression in real life.
Why Energy Drives Behaviour
Energy is the fuel behind every choice your dog makes. High arousal can create speed and power, yet it can also flood thinking, which leads to jumping, mouthing or poor impulse control. Low energy can make learning slow, and a dog may disengage. Managing energy for training success means finding the zone where your dog is calm, alert and ready to work. In that zone, they can take guidance, understand consequences, and hold decisions even when life gets busy.
The Smart Method Foundation
Smart Dog Training follows a proven framework that makes managing energy for training success both clear and practical.
- Clarity. We use precise commands and marker words so the dog always knows what is expected and when they are correct.
- Pressure and Release. We pair fair guidance with a clean release and reward. This builds accountability and responsibility without conflict.
- Motivation. We use rewards to create engagement and positive emotion, so dogs want to work with you.
- Progression. We layer skills step by step, increasing distraction, duration and difficulty until reliability is real life ready.
- Trust. Training strengthens the bond, turning pressure into guidance, and guidance into confidence.
Every Smart Master Dog Trainer applies these pillars in the same structured way across the UK, which is why families see consistent results.
Reading Your Dog’s Energy Levels
You cannot change what you cannot read. Managing energy for training success starts with observation. Notice eyes, ears, tail set, mouth tension, respiration, weight shift, and the pattern of movement. Write down what you see across the day. You will start to recognise the windows where your dog learns best.
Calm, Alert, Aroused, Over Threshold
- Calm. Loose body, soft eyes, mouth relaxed, steady breathing. This is ideal for teaching new skills and building duration.
- Alert. Engaged, focused, ears forward, quick but thoughtful responses. Great for proofing and short dynamic reps.
- Aroused. Fast movement, less response to cues, shallow breathing. Use resets and decompression, then return to work.
- Over Threshold. Locked stare, frantic movement, no food interest. Prioritise distance, decompression, and a strategic retreat.
The Energy Baseline Audit
Spend one week logging wake times, naps, walks, training, meals, play, and settle time. Note where engagement is high and where impulse control drops. The goal is managing energy for training success by placing work inside your dog’s natural focus windows, then shaping those windows to last longer over time.
Daily Structure That Fuels Focus
Structure is not strict for the sake of it. Structure gives your dog a predictable rhythm, which reduces stress and boosts focus. At Smart Dog Training we build plans that make managing energy for training success simple for families to follow.
Sleep and Decompression
- Sleep target. Adult dogs need 12 to 16 hours of sleep and rest. Puppies often need more.
- Place training. Use a bed or mat as a clear place of rest. Mark calm, reward, and build duration in small steps.
- Decompression walks. Slow, sniff heavy walks on a loose lead in quiet areas help lower arousal and reset the nervous system.
- Quiet hours. Protect at least two uninterrupted rest blocks per day. No play, no training, no high traffic.
Exercise That Regulates, Not Hypes
More exercise is not always better. The right type and timing matter for managing energy for training success.
- Balance the mix. Pair decompression walks with structured heel, controlled fetch with planned breaks, and short recall sprints with place rests.
- Watch the rebound. Intense play can spike arousal. Follow it with a settle period and a short obedience block to return to calm.
- Pre work warm up. Five minutes of engagement and simple obedience primes focus before harder reps.
Nutrition and Timing
- Meal timing. Many dogs learn best one to two hours after eating. Adjust to your dog’s response.
- Treat choice. Use high value food when arousal is up, then fade to everyday rewards as clarity and confidence grow.
- Water and temperature. Hydration and heat impact arousal and stamina. Plan sessions in cooler parts of the day.
Motivation and Reward Strategy
Motivation is not random. It is planned. Managing energy for training success means using reward type, timing and placement that match your dog’s state in the moment. Smart Dog Training programmes show you how to shift motivation without losing structure.
Reward Placement and Value
- Calm reinforcement. Place food directly to the mouth on the bed to deepen relaxation and duration.
- Dynamic reinforcement. Toss a reward behind to reset into heel, or forward to power a recall. Use energy to guide the next rep.
- Variable schedule. Start with frequent pay for clarity, then move to variable reinforcement to build resilience and focus.
Engagement Games For Any Energy State
- Name game. Say the name, mark, pay for eye contact. Build fast orientation under mild distraction.
- Find it. Scatter food in grass to lower arousal and encourage sniffing, a natural decompressor.
- Chase to still. Use a toy chase, then a clean out cue to end the game, mark for stillness, and pay a calm reward. This turns high energy into self control.
Pressure and Release With Clarity
Pressure and release is a core pillar of the Smart Method. It is fair, clear and conflict free when handled by a trained professional. Managing energy for training success requires using guidance that your dog understands and can turn off by making the right choice. Apply light guidance, mark the instant of compliance, and release into reward. This creates accountability without fear and builds trust in the process.
Progression in Real Life Environments
Progression means your dog performs anywhere, not just in the lounge. Managing energy for training success as you progress is about adding one variable at a time.
- Duration. Hold sits, downs, and place for longer while keeping calm breathing and loose muscles.
- Distraction. Add one moving person, one dog at distance, or one sound at a time. Keep your dog under threshold.
- Distance. Increase the gap between you and your dog after you have duration and distraction under control.
The Reset Protocol
Even with careful planning, arousal can spike. Use this simple reset when you see focus drop.
- Pause and breathe. You go calm first.
- Change picture. Take three slow steps back and ask for an easy skill such as touch or sit.
- Decompress. If needed, walk a quiet loop with a loose lead and sniffing.
- Re enter. Do one short, successful rep, then reward and end on a win.
Managing Energy for Training Success With Puppies
Puppies are learning to regulate their bodies and minds. Short, fun, and frequent wins are the goal. Managing energy for training success in puppies means keeping sessions brief, building settle skills early, and protecting sleep.
- Micro sessions. Train for two to three minutes, several times per day. End before focus fades.
- Place is gold. Teach a bed cue in week one. Reward calm heavily. This shapes a lifetime habit of switching off.
- Right play. Use soft tug with clear out, short fetch with a still sit between throws, and food scatters for decompression.
- Social exposure, not free for all. Keep distance, reward attention on you, and end before your puppy is overwhelmed.
Managing Energy for Training Success for Reactive Dogs
Reactivity is often an energy and threshold problem. The dog cannot process the trigger and defaults to barking or lunging. Smart Dog Training builds a progression plan that lowers arousal, raises clarity, and returns choice to the dog. Managing energy for training success here means distance first, then engagement, then gradual approach under control.
- Patterned walking. Slow, predictable heel with frequent marks for position builds rhythm that soothes the nervous system.
- Look to earn. Eye contact earns distance from the trigger, which the dog finds rewarding. Later, eye contact earns food and movement with you.
- Place near life. Build place on a quiet verge, then in a car park, then nearer a path. Always end with success.
Household Harmony and Children
Family life is full of energy spikes. Doorbells, meal prep, playtime, and school runs all shift the state of the home. Managing energy for training success in a family means clear rules for greetings, supervised play, and regular calm breaks.
- Door manners. Put your dog on place before you open the door. Reward calm, release after guests are seated.
- Toy rules. One toy out, then tidy it away. Short play, then a settle on the bed.
- Kid led cues. Teach older children to ask for sit, feed calmly, then step back and allow the dog to relax.
Seven Day Energy and Training Plan
Use this sample to begin managing energy for training success. Adjust timing to your household and your dog’s needs.
- Morning. Short decompression walk, five minutes of engagement and heel, breakfast, then a place nap.
- Midday. Two minute skills session, scatter feed, calm cuddle, then rest.
- Afternoon. Structured play with clean outs, simple obedience, then a short settle on place.
- Evening. Decompression loop, dinner, one rep of recall or down stay, then a long rest period.
Across the week, log arousal spikes and wins. Nudge the plan so the biggest asks sit in your dog’s best focus windows.
When to Bring in a Professional
If you are unsure how to read your dog, or if reactivity, aggression, or anxiety is present, working with a professional is the safest and fastest path. A Smart Master Dog Trainer will evaluate energy, design a structured plan, and coach you through the Smart Method step by step. Managing energy for training success becomes simple when you have expert eyes on the process.
Ready to turn your dog’s behaviour around? Book a Free Assessment and connect with a certified Smart Master Dog Trainer, available across the UK.
Common Mistakes That Drain Focus
- Endless play without rules. This spikes arousal and teaches your dog to ignore you when excited.
- Training when the dog is exhausted. Low energy leads to low learning. Choose windows where focus is fresh.
- Skipping decompression. High energy without a pressure valve builds frustration.
- Unclear markers. If yes and no change every day, your dog will guess, and guessing raises stress.
- Jumping ahead too soon. Add only one challenge at a time, then confirm success.
Proofing Skills With Smart Progression
Proofing is where training becomes reliable anywhere. Managing energy for training success during proofing means you keep the dog below threshold while you add challenge in a controlled way.
- Change one thing. Keep location and duration the same while you add a mild distraction.
- Return to easy wins. If your dog struggles, drop back to the last successful step, then move forward again.
- Protect the reward. Pay calm in calm states and dynamic in dynamic reps, so energy stays aligned with the lesson.
FAQs
What does managing energy for training success actually mean?
It means shaping your dog’s state so they can think, listen, and choose the right behaviour. We use structure, clear guidance, and tailored rewards within the Smart Method to keep arousal in the learning zone.
How much exercise does my dog need for best learning?
Enough to be relaxed yet alert. Many dogs do best with one decompression walk and one short structured session daily, plus brief training blocks. The type and timing matter more than raw minutes.
Can I use toys if my dog gets over excited?
Yes, with clear rules. Use a clean out cue to end the game, reward stillness, and add short place rests. This turns high energy into self control without removing fun.
My puppy is wild in the evening. What should I do?
Plan a late afternoon decompression loop, a small training block, dinner, then place with calm reinforcement. Protect quiet hours so your puppy can switch off.
How do I know if my dog is over threshold?
Common signs include fixed stare, fast breathing, stiff body, and low interest in food or you. Increase distance, decrease demand, and use the reset protocol before you continue.
When should I seek help from a trainer?
Any time there is reactivity, aggression, anxiety, or if progress stalls. A Smart Master Dog Trainer will assess energy, adjust the plan, and coach you to success with the Smart Method.
Conclusion
Calm, consistent behaviour starts with state. When you focus on managing energy for training success, everything else gets easier. Structure the day, build settle skills, match rewards to the moment, and progress step by step. With Smart Dog Training, you get a clear plan that produces real life reliability and a stronger bond with your dog.
Your dog deserves training that truly works. With certified Smart Master Dog Trainers, SMDTs, nationwide, you will get proven results backed by the UK’s most trusted dog training network. Find a Trainer Near You
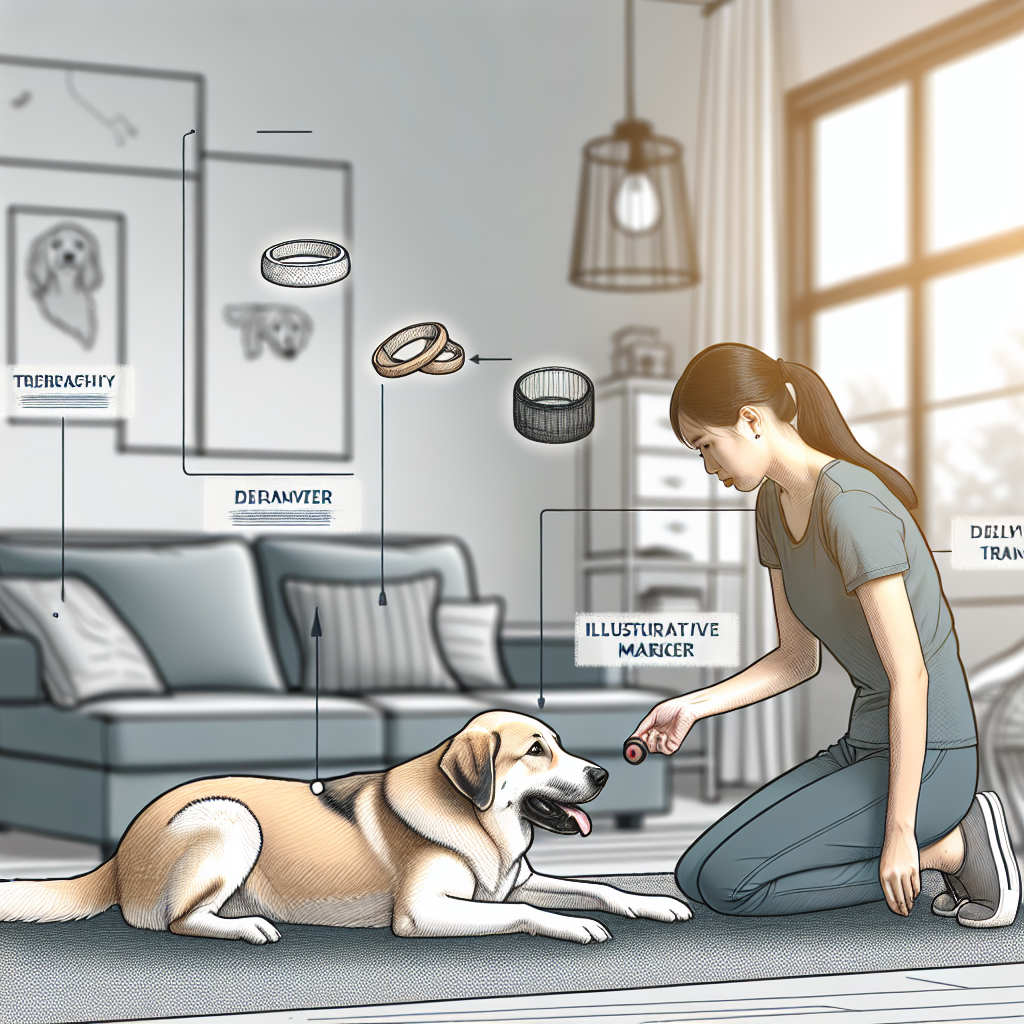
Managing Energy for Training Success
Why Timing Matters for Training That Lasts
Knowing when to rest and when to retrain is the difference between a dog that improves every week and a dog that stalls or regresses. At Smart Dog Training, we teach families to read their dog, pace sessions, and apply the Smart Method so progress sticks in real life. Within this approach, a certified Smart Master Dog Trainer ensures that decisions about rest or retraining are made with clarity and purpose.
Training is learning, and learning needs space. Brains consolidate new skills during downtime, not during endless repetitions. At the same time, dogs need structured practice to grow. The art is deciding which your dog needs today. This article gives you a clear framework so you know when to rest and when to retrain without second guessing yourself.
The Smart Method Decision Framework
The Smart Method is our proprietary system for building calm, consistent behaviour. It guides every call on when to rest and when to retrain.
- Clarity. If a cue is not absolutely clear, we retrain at a simpler level. If cues are clear but focus fades, we rest.
- Pressure and Release. We use fair guidance and a clean release so the dog understands how to turn pressure off. If the dog is confused, retrain with lower criteria. If the dog is checked out, rest.
- Motivation. If effort drops because rewards are weak or mistimed, retrain the reward system. If the dog is over aroused or frantic, rest.
- Progression. If the dog succeeds at least four out of five times, we may progress. If success falls below that, we retrain. If success is fine but energy crashes, we rest.
- Trust. If the bond feels strained, we switch to rest and easy wins to rebuild confidence. If trust is solid but skill is shaky, we retrain with structure.
Clear Signs Your Dog Needs Rest
Before you decide when to rest and when to retrain, learn the signs of real fatigue. Pushing on when your dog is spent will only create sloppy patterns and stress.
Physical Fatigue You Can See
- Slower responses to known cues
- Heavy panting in cool conditions
- Dropping or avoiding eye contact
- Messy sits or downs that look uncomfortable
- Lagging behind on simple movement work
Emotional Stress and Disengagement
- Sniffing the floor or looking away instead of working
- Startling at small noises that were fine earlier
- Vocalising or frustration barking during easy tasks
- Taking food roughly or refusing food altogether
Context and Threshold Clues
- The environment suddenly feels too big. For example, a dog that worked well at home freezes outside.
- Triggers stack up. A van door slams, then a stranger passes, then a dog appears. Even a solid dog will tire quickly under stacked stress.
- Quality drops after a short burst. This means the dog needs decompression, not more repetitions.
Clear Signs It Is Time to Retrain
Retraining is not punishment. It is a structured reset so your dog can understand and succeed. Here is when to retrain instead of resting.
Clarity Is Missing
- Your cues change each time. For example, saying Sit, Sit down, or a different tone. Reset to one cue and one marker system.
- Timing is late. Rewards arrive after the behaviour ends. Retrain your marker timing to land rewards inside the behaviour.
- Criteria drift. You asked for a still sit, but you paid for a hover sit. Retrain the picture so stillness pays.
Patterned Mistakes
- Repeat errors in the same place. For example, breaking a stay at three steps away every time.
- Anticipation. The dog offers the next behaviour before being asked.
- Quitting early. The dog downs halfway to avoid heelwork. That is a pattern that needs a reset, not a rest.
Over Reliance on Prompts
- Hand lures that never fade
- Leads doing the steering instead of the brain
- Multiple cue repeats before action
If any of these appear while energy is still good, it is time to retrain at an easier level with the Smart Method rather than call it a day.
How to Decide When to Rest and When to Retrain
Use this simple Smart checklist whenever you are unsure about when to rest and when to retrain.
- Check success rate. If your dog is under 80 percent success on a known skill, retrain with easier criteria. If success is high but enthusiasm drops, rest.
- Check energy and emotion. If the dog is bright but confused, retrain. If the dog is flat or frantic, rest.
- Check clarity. If you gave mixed signals, retrain your delivery. If your delivery is consistent yet quality falls, rest.
- Check environment. If the setting is too difficult, retrain in an easier space. If the space is fine but the dog is tired, rest.
The 80 Percent Rule You Can Trust
At Smart Dog Training we use a simple benchmark. When a dog achieves four correct reps out of five, we maintain or gently increase difficulty. If the rate drops below that, we do not push through. We retrain at a level where the dog can win often, then we rebuild. This keeps motivation high and prevents confusion from setting in. It is one of the easiest ways to judge when to rest and when to retrain with confidence.
Structure Your Sessions to Prevent Burnout
Good structure makes the choice between rest and retrain much easier. Follow this Smart session plan.
- Warm up. One to two minutes of focus games and easy positions to prime clarity.
- Main set. Five to seven short reps of the target skill with precise markers and clean rewards.
- Micro breaks. Ten to twenty seconds of calm on a mat or a short sniff so arousal stays balanced.
- Cool down. Slow lead walking, gentle strokes, and a final easy win to end on success.
Keep total focused work under ten minutes for puppies and under fifteen minutes for most adults. Multiple short blocks beat one long grind. This rhythm builds a dog that loves to switch on and off by request.
Use Rest as a Training Tool
Rest is not empty time. It is where learning settles. When you are weighing up when to rest and when to retrain, make sure rest is purposeful.
Sleep and Recovery Windows
- Puppies need up to eighteen hours of sleep in a day.
- Adults often need twelve to sixteen hours, including naps after learning.
- After a new skill, schedule a calm period so the brain can lock it in.
Decompression That Works
- Sniff walks on a loose lead
- Calm chewing on a safe long lasting chew
- Place training for quiet time with soft music
Active Rest for Busy Minds
- Short scatter feeds in the garden
- Simple scent games that ask for focus without pressure
- Massage and slow touch to lower arousal
Retrain the Smart Way
When the decision is to retrain, make it clean and fair. This is how Smart Dog Training rebuilds skills fast.
Reset Criteria
- Drop distance, duration, or distraction. Change only one at a time.
- Return to the last point of clear success.
- Define one picture. For example, down means elbows on the floor and stillness until released.
Use Pressure and Release Fairly
- Apply gentle guidance only as a prompt, never as a crutch.
- Release instantly the moment the dog makes the right choice.
- Follow with a reward to keep motivation high.
Layer Progression Step by Step
- Add mild distraction only when the dog is winning easily at home.
- Increase duration by seconds, not minutes.
- Proof in new locations once the skill is fluent in the last one.
Real Life Scenarios That Show the Choice
Barking at Visitors
If your dog barks when guests arrive, start at a distance where the dog can look at the visitor, then look back to you. If the dog can do this five times with a calm body, retrain the picture by moving one step closer. If focus collapses even at the original distance, rest with a decompression walk and try later at an easier time of day.
Lead Pulling
When teaching loose lead walking, set a clear rule. Tension stops forward motion and slack brings forward motion. If your dog pulls more than two out of five steps, retrain by working in a quiet driveway. If the dog starts lagging, shaking off, or panting in cool weather, rest and reset the next day.
Recall Setbacks
If recall fails at the park, do not repeat the name louder. Retrain by going on a long line in a low distraction field and reward every fast turn back to you. If your dog chased squirrels earlier and is now wired, choose rest and decompression before any more recall practice.
Puppies, Adults, and Seniors
Puppies are sponges but tire quickly. Plan several two to five minute blocks and expect to rest often. Adults can work longer but still need breaks to maintain quality. Seniors may need more rest for joints and focus. In every age group, success rate and emotional state decide when to rest and when to retrain.
Working Breeds and High Drive Dogs
Dogs bred for intense tasks can look as if they never need a break. In reality, they hide fatigue with effort. Watch for rising arousal, busy paws, and over eager taking of food. That is a cue to rest. When clarity is the issue, these dogs thrive on precise retraining with fast releases and strong reinforcement as laid out by the Smart Method.
Health and Pain Checks
If a reliable behaviour suddenly falls apart, and your handling has stayed consistent, consider discomfort. Reluctance to sit, slow to lie down, licking joints, or sudden sensitivity to touch can be pain. In that case, pick rest and seek appropriate care. After clearance, retrain at a level that respects any new limits.
Owner Mindset and Expectations
Frustration is a sign to pause. Dogs read your body and tone. If you feel rushed or annoyed, rest. When you return, retrain with calm, clear mechanics. Use one cue, one marker, and one release. The Smart Method insists on this clarity because it keeps trust high and progress reliable.
Track Progress so Decisions Get Easier
Keep simple notes after sessions. Record the skill, success rate, location, and how your dog felt. Patterns will appear quickly and you will know when to rest and when to retrain without guessing. Smart Dog Training clients receive structured homework plans and feedback so this process becomes second nature.
Ready to turn your dog’s behaviour around? Book a Free Assessment and connect with a certified Smart Master Dog Trainer, available across the UK.
When to Call an Expert
If you keep hitting the same wall, bring in a professional. A Smart Master Dog Trainer will assess your dog, your handling, and your environment, then set exact criteria for when to rest and when to retrain. Because every trainer in our network follows the Smart Method, your plan will be consistent, progressive, and results focused.
FAQs
How often should I train before taking a rest day?
Most dogs do best with short daily sessions and frequent micro breaks. A full rest day each week helps consolidate skills. Follow success rate and emotional state to decide when to rest and when to retrain within that rhythm.
What if my dog seems excited but keeps making the same mistake?
That is a clarity problem. Choose retraining with easier criteria rather than more energy. Simplify the picture, deliver precise markers, and reward the exact behaviour you want.
Can too much rest slow progress?
Rest without structure can stall momentum. Use purposeful rest with decompression and sleep, then return to well planned, short sessions. Balance is how you decide when to rest and when to retrain day by day.
How long should a training session be?
For puppies, two to five minutes per block. For adults, five to fifteen minutes depending on the skill and environment. End on a clear win, not on fatigue.
Do I need special equipment to retrain skills?
No special kit is required beyond a comfortable lead, a flat collar or harness, and suitable rewards. The Smart Method relies on clear handling, pressure and release, and well timed reinforcement rather than gadgets.
What if my dog shuts down during training?
Switch to rest. Offer decompression, reduce the environment, and return later with simpler criteria. If it repeats, book a session with an SMDT to review your mechanics and plan.
How do I know when to move on to harder versions?
When your dog is winning at least four out of five times with relaxed focus, progress one step. If success drops, retrain at the previous level.
Conclusion
Mastering when to rest and when to retrain gives you control over your dog’s progress. Use success rate, energy, and clarity as your guides. Build sessions with clean structure. Protect trust by choosing rest before frustration. When it is time to reset, retrain with the Smart Method so every rep builds lasting behaviour. If you would like expert guidance, our nationwide team is ready to help.
Your dog deserves training that truly works. With certified Smart Master Dog Trainers (SMDTs) nationwide, you'll get proven results backed by the UK's most trusted dog training network. Find a Trainer Near You

When to Rest and When to Retrain
Training Multiple Dogs at Once That Works
Training multiple dogs at once can transform a lively home into a calm, cooperative team. With the Smart Method, you can build structure, focus, and reliability across all your dogs, not just one. This guide sets out a clear plan for training multiple dogs at once so you see real changes in day to day life. If you want assurance and accountability from the start, working with a Smart Master Dog Trainer SMDT gives you expert guidance and a proven pathway.
The Smart Standard for Multi Dog Households
Life with more than one dog brings twice the joy and also twice the moving parts. Excitement can feed on excitement. Small gaps in training can grow fast when dogs copy one another. Training multiple dogs at once requires a system that removes guesswork. Smart Dog Training delivers that system through the Smart Method. It is structured, progressive, and outcome driven, designed to produce calm, consistent behaviour that lasts in real life situations.
The Smart Method is built on five pillars. Clarity so every dog understands the task. Pressure and Release so guidance is fair and paired with a clear release and reward. Motivation so dogs want to work. Progression so skills are layered step by step. Trust so training strengthens the bond between you and your dogs. Every step in this guide follows these pillars and keeps your dogs moving forward together.
Why Training Multiple Dogs at Once Needs a Plan
When dogs train together without structure, three issues often slow progress. First, competition and copying. One dog watches another and mirrors the good and the bad. Second, handler bandwidth. It is easy to give too little feedback to each dog during group work. Third, unclear criteria. If rules change between dogs, none of them truly know what to do.
Training multiple dogs at once works best when you sequence the work. Teach each dog the rules one to one. Then pair dogs with similar skill and energy. Finally, bring the group together with precise markers and routines. This plan prevents confusion and reduces conflict, which keeps learning smooth.
The Smart Method Applied to Multi Dog Training
Smart Dog Training applies the same system to single dogs and to teams. When training multiple dogs at once, you will use each pillar with intent.
- Clarity: Use consistent markers for Yes, Good, and No. Keep body language and leash guidance uniform across dogs.
- Pressure and Release: Guide with calm pressure, then release the moment the dog makes the right choice. The release is the lesson.
- Motivation: Use rewards that matter for each dog. Food, toys, praise, or access to something they want. Build drive to work.
- Progression: Raise distraction, duration, and distance in small steps. Do not rush the group phase before the one to one phase is steady.
- Trust: Keep sessions fair and predictable. Your dogs should learn that working with you is safe, clear, and rewarding.
Step One Assess Each Dog
Before training multiple dogs at once, assess each dog on their own. Note age, temperament, health, motivation, and sensitivity to pressure. Identify any red flags like resource guarding, reactivity, or anxiety. Write a short profile for each dog that lists strengths, rewards, and triggers. Smart trainers do this at the start of every programme to make sure we design the right steps for each dog and for the group.
Step Two Teach Clear Markers and Core Positions
Markers create clarity. They tell the dog exactly which moment earned the reward and which choice was not correct. Teach a Reward marker Yes that releases the dog to food or a toy. Teach a Sustained marker Good that means keep going and a reward is coming. Teach an Error marker No that ends the option and resets the dog to try again. Keep tone and timing identical with every dog.
Layer in core positions Sit, Down, and Place. Place is a defined bed or mat. In multi dog homes, Place is your best friend. It removes conflict, promotes calm, and gives each dog a job while others work. Build these positions first with one to one sessions before training multiple dogs at once.
Step Three Manage the Environment
Set your home up for success. Use tethers, crates, and baby gates to control space while you train. Remove food bowls, toys, or beds that cause competition. Plan short sessions with high success. Ten focused minutes beats an hour of chaos. Your goal is to prevent rehearsals of unwanted behaviour while you build the new rules.
One to One First, Then Together
Smart Dog Training always starts with individual sessions. When dogs are fluent alone, you can begin training multiple dogs at once with confidence. Follow this sequence.
- One to one foundation for each dog. Walk on a loose lead, handler focus, Sit, Down, Place, recall.
- Proof the skills against mild distractions. Door knocks, food on the counter, family moving around.
- Pair dogs with similar skill and energy. Short two dog sessions build teamwork without overload.
- Rotate pairs until all combinations are calm and compliant.
- Bring the full group together. Keep duration low and criteria clear in the first group sessions.
During the pair and group steps, your job is to remain neutral, fair, and precise. When in doubt, split the session and return to one to one. It is far better to protect clarity than to push too fast when training multiple dogs at once.
Rotations That Keep Learning Fast
Use a simple rotation. One dog works with you while the others hold Place. Switch every one to two minutes. This maintains engagement and teaches impulse control. If a resting dog breaks Place, calmly guide back, mark Good for holding, and reward after a short duration. The dog working earns frequent Yes markers. The dogs resting earn Good for duration and the occasional Yes. Everyone is learning at the same time.
How to Build Place for Harmony
Place is the anchor skill for training multiple dogs at once. Teach Place as a calm state, not a parking spot. Start with short durations and frequent rewards. Add distractions gradually, like walking past with a toy, opening the front door, or training another dog in front of them. Fade rewards but keep the Good marker to maintain confidence. In the group phase, assign a Place for each dog so there is no confusion or crowding.
Loose Lead Walking With More Than One Dog
Multi dog walks are one of the biggest tests. Success does not come from stronger equipment. It comes from clarity and progression. Teach each dog to walk on a loose lead alone. The lead is slack, the dog keeps a soft J in the lead, and checks in without nagging prompts. Then pair two dogs with you in the middle. Keep sessions short and neutral. Limit greetings and do not allow play on lead.
When you try training multiple dogs at once on a walk, choose quiet routes with space to create distance from triggers. Reward calm focus and release pressure the instant they find position. If one dog struggles, swap back to solo work for that dog, then return to pairs. Progress to three dogs only when two dog walks are boring and easy.
Recall That Works Despite Distractions
Recall is about responsibility. Each dog must understand that coming when called ends what they were doing and starts something better. Teach a clear recall cue. Reward heavily and occasionally with high value play. Proof the cue with one dog while the others hold Place. Then recall one dog at a time from the group. Avoid recalling multiple dogs at once until each dog can recall past the others reliably. In early stages, recall one, reward, then release back to Place so the others learn to stay neutral.
Prevent Competition and Guarding
Competition can erode trust fast. Smart Dog Training uses structure to remove it. Feed meals in Place or crates. Run toy play as a turn taking game where one dog works and the others remain in Place. Use clear release cues so no one grabs early. If resource guarding is present, do not attempt group sessions until each dog is stable on the foundation and can disengage on cue. An SMDT can assess and design a plan for more complex guarding or conflict.
Training Multiple Dogs at Once at Home
Home is where patterns stick for good. Follow this daily structure to keep momentum.
- Morning reset: Short obedience session for each dog. Place while others eat breakfast.
- Midday: Two dog walk with simple drills like Sit to release, step back recall, and settle breaks.
- Evening: Group Place while the family cooks and eats. Rotate short one to one reps during adverts or breaks.
- Wind down: Calm handling, light grooming, and Place to settle before bed.
This cadence turns your whole day into a practice field. You are not adding hours. You are shifting normal moments into training opportunities. Over time, training multiple dogs at once becomes the natural rhythm of your home.
How to Add Distraction, Duration, and Distance
Progression is how you move from living room success to real life reliability. Use the three Ds.
- Distraction: Start with mild. Add movement, sounds, and simple temptations. Reward decisive choices.
- Duration: Build seconds into minutes. Keep the dog winning by paying at random intervals. Do not make them guess what you want.
- Distance: Step back one metre at a time. Maintain line of sight so your timing stays sharp.
When training multiple dogs at once, add only one D at a time. If you raise distraction, shorten duration. If you increase distance, lower distraction. This keeps your dogs accurate and confident.
Advanced Group Skills
Once the basics are reliable, you can layer advanced work that pays off in daily life.
- Group heel changes: Call one dog to heel while the others hold Place. Switch dogs every twenty steps.
- Doorway etiquette: One dog sits while another moves through on release. Rotate order so no one rehearses pushing.
- Shared play with rules: Tug or fetch with one dog working while others wait. Clean outs on cue. No unsolicited entries.
- Calm guest protocol: All dogs on Place. Release one to greet at a time. Swap dogs to prevent crowding at the door.
These drills make training multiple dogs at once both practical and enjoyable. They also teach dogs to celebrate the success of others without losing control.
Family Roles and Consistency
Families thrive on clear roles. Assign a lead handler for each dog for the first month. Others can assist with Place management and simple rewards. Keep markers and rules identical across the family. Write the cues on a card near the door or by the treats. Smart Dog Training programmes include family coaching so every person knows how to create calm and prevent mixed messages.
When Progress Stalls
If you notice repeated mistakes in group sessions, pause and diagnose. Ask three questions. Is the dog fluent alone. Is the reward strong enough in this context. Did I raise difficulty too fast. Reset to the version where the dog can win, then step forward again. Training multiple dogs at once works best when you protect clarity and reduce conflict.
Ready to turn your dog’s behaviour around. Book a Free Assessment and connect with a certified Smart Master Dog Trainer available across the UK.
Common Challenges When Training Multiple Dogs at Once
Over Arousal
High energy dogs can tip into chaos when others move. Use Place to lower arousal before group work. Start with low key drills like position changes rather than fast recalls or play. Reward calm choices generously.
Selective Hearing
Dogs learn to tune out when cues are repeated without consequence. Reduce cue repetition. Guide once, then help with leash pressure and release when the dog complies. Your clarity and timing restore responsiveness across the group.
Sibling Rivalry
Littermates or bonded pairs can be strong together yet uncertain alone. Train them separately more often than together at first. Build independent confidence, then reunite for short group sessions.
Different Ages and Abilities
Puppies and seniors can train together if criteria are individual. Puppies get short, fun reps with frequent Yes markers. Seniors get gentle guidance and more Place breaks. Keep standards fair for each dog while holding the same overall rules.
Safety and Ethics in Group Training
Smart Dog Training keeps safety at the center. Dogs should never need to sort out disputes. The handler sets rules and enforces them calmly. Use fair pressure and clear release so dogs learn how to switch off pressure through the right choice. Reward to build motivation and a positive emotional state. This balance is the heart of the Smart Method and is vital when training multiple dogs at once.
Real Life Scenarios You Can Aim For
- Three dogs hold Place for twenty minutes while guests arrive and settle.
- Two dogs walk on loose leads through a busy high street without pulling or barking.
- All dogs recall to you one at a time from a field with other dogs present.
- Family dinner with all dogs resting on Place and zero begging.
These outcomes are realistic when you follow the sequence. One to one. Pairs. Group. Reward and release with precision. Train short and often. Keep standards clear. Training multiple dogs at once becomes a steady path rather than a gamble.
How Smart Dog Training Supports You
Our programmes are built for families and multi dog homes. You will work with a certified Smart Master Dog Trainer SMDT who understands how to map individual goals into group success. We coach you through the exact sessions described in this guide, and we tailor them to your dogs and your home. You will get structure, measurable milestones, and support from start to finish.
Want help building your plan for training multiple dogs at once. Find a Trainer Near You and speak with a local Smart trainer today.
FAQs on Training Multiple Dogs at Once
Is it better to train dogs together or separately
Start separately to build clarity. When each dog is fluent alone, pair dogs with similar skill. Then progress to full group sessions. This sequence is the fastest path for training multiple dogs at once.
How long should group sessions be
Ten to fifteen minutes is plenty at first. Rotate one to two minute turns for each dog while others hold Place. Short, focused reps beat long sessions every time.
Can I use food rewards with more than one dog present
Yes, with structure. Reward the working dog while others hold Place. Pay the waiting dogs for duration with a Good marker and occasional food. Prevent crowding by using distance and clear release cues.
What if one dog keeps breaking Place
Lower difficulty. Reduce distractions, shorten duration, and guide the dog back calmly. Reward small wins. When that dog is steady alone, rejoin group work. This keeps training multiple dogs at once clear and fair.
How do I handle barking when another dog is working
Interrupt calmly, guide to Place, and reward quiet. If arousal is too high, split the session. Rebuild neutrality with one to one Place training, then return to pairs.
My dogs fight over toys. Can I still train them together
You can with strict structure, but first resolve the conflict in one to one sessions. Use turn taking games and clear release cues. An SMDT can help design a plan if guarding persists.
What equipment should I use
Use a flat collar or training tool recommended by your Smart trainer, a standard lead, and Place beds for each dog. Keep equipment consistent across dogs for predictable feedback.
When should I seek professional help
Anytime there is aggression, severe anxiety, or stalled progress. A certified Smart Master Dog Trainer can assess and coach you through the exact steps for training multiple dogs at once.
Conclusion
Training multiple dogs at once is not about luck. It is about a clear plan, fair guidance, and a steady progression that all your dogs can follow. The Smart Method gives you precision markers, balanced motivation, and accountability through pressure and release. Build foundation skills one to one. Rotate through pairs. Bring the group together with Place, loose lead walking, and turn taking games. Keep sessions short, criteria clear, and rewards meaningful. The result is a calm, capable team that does well at home, on walks, and everywhere you go.
Your dog deserves training that truly works. With certified Smart Master Dog Trainers SMDTs nationwide, you will get proven results backed by the UK’s most trusted dog training network. Find a Trainer Near You

Training Multiple Dogs at Once That Works
What Is Shaping Calm Body Language
Shaping calm body language means reinforcing the exact moments your dog offers stillness, soft eyes, and neutral posture so those choices become their default in real life. At Smart Dog Training we make shaping calm body language practical for busy families by using the Smart Method to turn small moments of relaxation into steady behaviour that lasts. Every certified Smart Master Dog Trainer builds this skill with clear markers, fair guidance, and a step by step plan that fits your home and lifestyle.
Instead of waiting for problems, we capture and reward calm before excitement spirals. With consistent structure your dog learns that quiet choices open doors to everything they want. This is the foundation of reliable manners in hallways, at the front door, out on walks, and anywhere your dog meets people or dogs.
The Smart Method That Produces Calm
All Smart Dog Training programmes follow the Smart Method, our proprietary system that delivers calm, confident, and willing behaviour.
- Clarity. You will use precise commands and markers so your dog always knows what earns a reward.
- Pressure and Release. Gentle guidance pairs with a clear release and reward. Your dog gains accountability without conflict.
- Motivation. We create desire to work through food, toys, and life rewards, then channel that motivation into calm choices.
- Progression. We layer distraction, duration, and difficulty until calm holds anywhere.
- Trust. Training strengthens the bond between you and your dog, building calm from the inside out.
Shaping calm body language sits at the heart of each pillar. You mark the exact second your dog relaxes, you release the moment they comply, you motivate calm, you progress calm under pressure, and you build trust through fair communication.
Reading Calm vs Tense Signals
Before you can reinforce calm, you need to read it. Smart trainers teach you to spot body changes in real time.
- Calm signs. Soft eyes that blink, mouth softly open or closed, ears neutral, loose muscles, slow breathing, tail in a neutral position, weight balanced over all four feet, and a gentle shift to a settled posture.
- Tense signs. Hard eyes that stare, mouth tight, ears pinned or high, stiff body, shallow breaths, forward weight, tail high and tight or low and tucked, scanning or pacing.
Shaping calm body language means you reward the first list and interrupt or redirect the second without drama. The earlier you notice a change, the easier it is to steer your dog back to neutral.
Set Up for Success
Calm is a skill and a habit. Preparation helps your dog win more often.
- Daily structure. Consistent wake, walk, train, rest, and play routines reduce anxiety and over arousal.
- Appropriate outlets. Use planned exercise and enrichment so your dog has a clear on and off switch.
- Training tools. A well fitted flat collar or headcollar, a standard lead, a long line for distance work, and a non slip mat for settle training.
- Reward kit. High value food, a calm marker word, and a release word. Keep toys reserved for controlled games to avoid frantic energy during calm work.
With a stable routine, shaping calm body language becomes straightforward, since your dog is less likely to spin into chaos.
Core Steps for Shaping Calm Body Language
Step 1 Neutral Posture on Lead
Start in a quiet room. Stand with your dog on lead. Say nothing. The moment your dog softens their eyes, loosens their neck, or squares their feet under the body, mark with your calm marker and feed by your thigh. Keep rewards low and slow to reinforce quiet energy. Repeat until your dog offers this neutral posture within three seconds of pausing. This is the first building block for shaping calm body language in motion and at rest.
Step 2 Mark Soft Eyes and Stillness
Now add a brief pause of one to two seconds before you mark. Watch for a tiny exhale or a weight shift into balance. Mark and feed. You are teaching your dog that stillness has value. If the dog fidgets, reduce the pause. Precision beats pushing too far too soon.
Step 3 Calm at Doors and Thresholds
Approach a door on lead. Stop one step short. Wait for neutral posture and soft eyes. Mark, feed, then open the door a few centimetres. If your dog stays calm, mark and feed again. Door opens become the reward. If they surge, the door closes. This pressure and release pattern is clear and fair. It teaches accountability without conflict and it is a cornerstone of shaping calm body language during exciting moments.
Step 4 Settle on a Mat
Place a mat in a low traffic area. Stand near it and wait. The click of nails stepping on the mat or a glance toward it earns a mark and reward on the mat. Next, reward a sit on the mat, then a down. Feed slowly between paws to anchor the body. Build to short relaxations with your dog resting a hip and breathing slowly. Use the release word to end. The mat becomes a portable place of calm you can take to any room, cafe, or friend’s house.
Step 5 Polite Greetings
Set up a greeting with a family member. Approach, stop two steps away, and wait for neutral posture. Mark and reward. The person then steps closer only when your dog remains calm. If your dog jumps or leans hard, the person turns away and you reset. Your dog learns that polite body language brings the person closer. That is shaping calm body language with life rewards.
Step 6 Calm Movement in Busy Places
Take the work to your drive or a quiet pavement. Walk three to five steps, then stop, wait for soft eyes and balanced stance, mark, and feed by your thigh. Progress by increasing the number of steps and the level of distraction. Keep the lead loose and your rewards slow. Calm movement is the proof that your training is transferring to real life.
Add Duration Distraction and Distance
The Smart Method layers the three Ds in a structured way.
- Duration. Hold neutral posture for two seconds, then five, then ten. If your dog breaks, reduce the ask and reward sooner. The clock is your dial for shaping calm body language without flooding.
- Distraction. Add one mild noise or a person walking past at a distance. Reward calm. Gradually add moving dogs, bikes, or doorbells. Control the environment so your dog stays successful.
- Distance. Work closer to the trigger over sessions, not minutes. If your dog stiffens, increase distance until their body softens again.
Progress only when the previous level is easy three times in a row. That rule keeps training smooth and confidence high.
Motivation and Pressure Release for Calm
Motivation and guidance are balanced within the Smart Method. Food and praise build desire to offer calm. Pressure and release adds accountability so calm holds even when excitement rises.
- Motivation. Use calm, low arousal food delivery. Feed low, slow, and close to your body. Life rewards also matter. Doors open, people approach, toys start, and walks continue when your dog stays neutral.
- Pressure and release. Use the lead as information, not force. If your dog leans or surges, hold a steady line and wait for a softening. The moment the body relaxes, the lead relaxes and you move forward. This teaches your dog that their body language controls the environment. It is a practical way of shaping calm body language on every outing.
This balance is never harsh and never vague. It is fair, consistent, and focused on clarity for both dog and owner.
Common Mistakes and Fixes
- Paying frantic energy. Fast or high feeding speeds dogs up. Fix it by slowing the hand, lowering the reward position, and pausing between treats.
- Over talking. Too many words add pressure. Fix it by using one clear marker and one release word.
- Rushing the three Ds. If calm falls apart in new places, your steps were too big. Fix it by reducing duration, distance, or distraction and winning small again.
- Reinforcing the wrong moment. If you reward after the dog pops up, you pay the pop up. Fix it by marking the still body, then delivering calmly while the dog stays in position.
- Inconsistent doors and greetings. If family members sometimes allow jumping, the behaviour persists. Fix it with one household rule. Calm opens access. Excitement closes access.
When to Work With a Smart Master Dog Trainer
If your dog struggles with reactivity, anxiety, or hyper arousal in busy areas, guided help speeds results. A Smart Master Dog Trainer will assess your dog, set clear markers and releases, and place you on the right step of the Smart Method. You will learn exactly how to continue shaping calm body language between sessions so gains stick. Our trainers operate nationwide and deliver in home, group, and tailored behaviour programmes.
Ready to turn your dog’s behaviour around? Book a Free Assessment and connect with a certified Smart Master Dog Trainer - available across the UK.
FAQs
What does shaping calm body language look like day to day
It looks like your dog pausing with soft eyes before the lead goes on, standing balanced at the front door, settling on a mat while you cook, and walking with a loose lead in busy places. You capture and pay those quiet choices until they become habits.
How long does it take to see results
Many families see changes within the first week when they mark neutral posture and stillness several times a day. Reliable calm in public usually takes four to eight weeks of daily practice with steady progression.
What rewards work best for calm
Use medium to high value food delivered slowly at a low position. Pair food with life rewards like opening doors, moving forward on walks, greeting people, and starting play when calm is shown first.
Can I use toys without causing excitement
Yes, when used with structure. Ask for calm first, begin play on a release word, keep games short, and end with a brief settle or down. You are still shaping calm body language by bracketing play with quiet.
What if my dog scans or stiffens around other dogs
Increase distance until you see a softening of the eyes and body. Mark and pay that softening. Work closer in small steps. If tension returns, back up, reset, and win easy reps again.
Do I need professional help for jumping at guests
Some families can solve it with threshold and greeting protocols. If jumping persists or guests trigger high arousal, work with an SMDT. You will get a plan that rewards calm and uses fair pressure and release so manners hold under pressure.
Is a settle on a mat different from a down stay
Yes. A mat settle builds relaxation and soft body tone, not just position holding. It teaches your dog how to turn tension off, which is the essence of shaping calm body language.
Conclusion
Calm is not an accident. It is a trained, reinforced skill that carries through every part of daily life. By following the Smart Method and steadily shaping calm body language, you teach your dog to choose soft eyes, neutral posture, and stillness even when the world gets busy. With clear markers, fair pressure and release, and the right level of motivation, your dog will develop calm that lasts at home, on the pavement, and anywhere you go. If you want expert guidance and a proven plan, our nationwide team is ready to help.
Your dog deserves training that truly works. With certified Smart Master Dog Trainers (SMDTs) nationwide, you'll get proven results backed by the UK's most trusted dog training network. Find a Trainer Near You
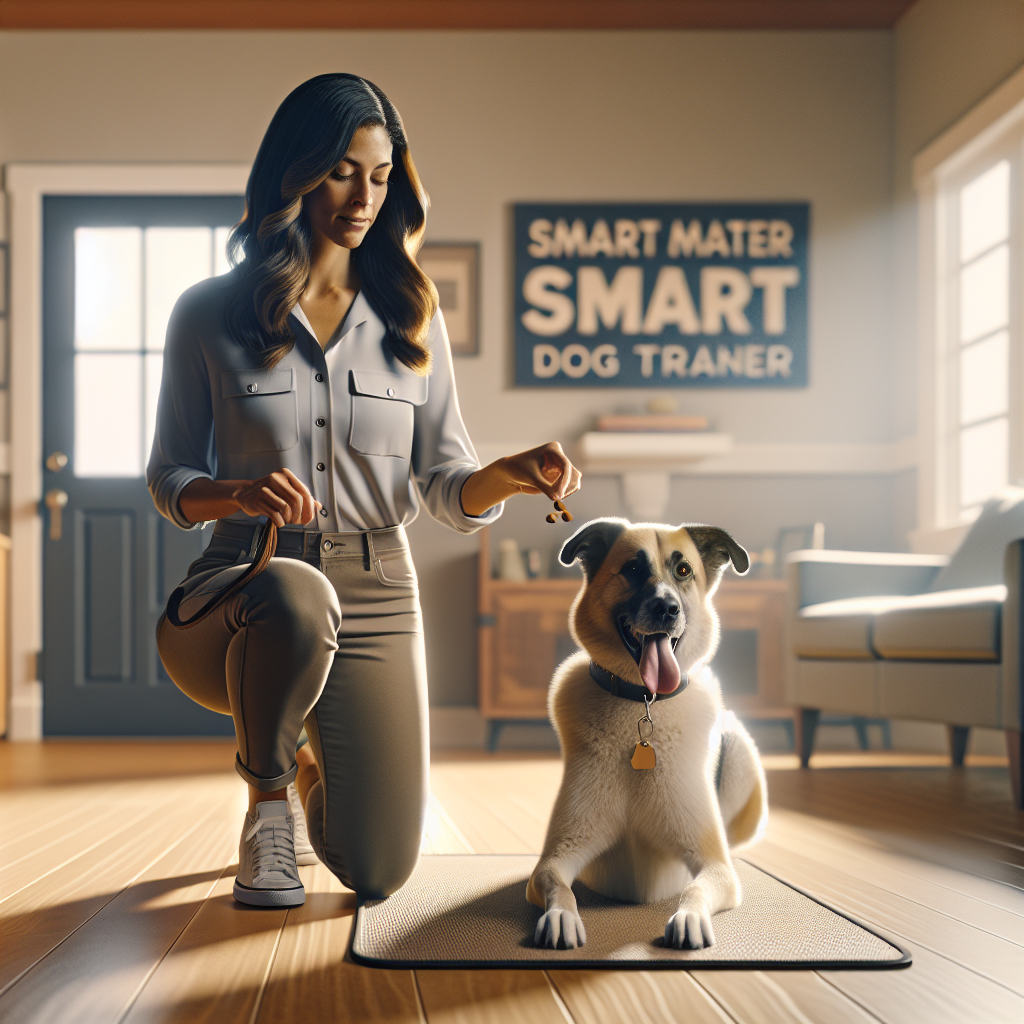
Shaping Calm Body Language in Dogs
What Reward Timing Means in Dog Training
Reward timing in dog training is the precise moment you mark and reinforce the behaviour you want. It is not only about giving a treat. It is about telling the dog exactly which action earned that reward. Within the Smart Method at Smart Dog Training, we pair clear markers with well placed rewards to build calm behaviour that holds up in real life. When a certified Smart Master Dog Trainer sets your plan, you will see how fast clear timing turns messy responses into reliable habits.
Most dogs understand sit or down at home, yet they struggle outside. The missing piece is often reward timing in dog training. If the marker or the food arrives late, the dog learns the wrong thing, such as standing up after a sit or diving toward your pocket. When you time the marker at the moment of success, then deliver the reward with purpose, reliability goes up without conflict.
Why Reward Timing in Dog Training Drives Reliability
Dogs learn by consequences. The behaviour that brings a good outcome gets repeated. Reward timing in dog training lets your dog connect success with that outcome in a clean way. Timely markers make the path obvious. With repetition, the dog chooses the same correct behaviour even when life gets busy or distracting.
Smart Dog Training builds reliability by layering clarity, pressure and release, motivation, progression, and trust. These five pillars act together. Good timing sits at the centre of them all, since every pillar depends on precise communication. In the first 20 percent of training, your Smart Master Dog Trainer will help you set markers, plan reward placement, and reduce lag between behaviour and reinforcement.
Markers and Clear Communication
Marker words are the bridge between behaviour and reward. A marker is a short sound such as yes that tells the dog the exact moment they got it right. Reward timing in dog training starts with a consistent marker that lands within one second of success. That marker buys you time to move the reward into the perfect spot without losing clarity.
Smart Dog Training uses three marker types for clarity and reliability. We use an event marker for the exact moment of success, a release word to end a position, and sometimes a keep going marker to maintain a behaviour. When you pair these with neat delivery, your dog learns faster and stays calm under pressure.
The Smart Method Framework
The Smart Method is our proprietary system for teaching calm, consistent behaviour that lasts. Reward timing in dog training supports each pillar of the method as follows:
- Clarity. Your marker lands at the exact moment of success, so your dog is never guessing.
- Pressure and Release. Light guidance, such as lead pressure or body pressure, is paired with a clean release and a reward at the right moment. The release becomes valuable because it predicts reinforcement.
- Motivation. Timely rewards build drive to work and a positive emotional state. Your dog wants to repeat the behaviour.
- Progression. Timing holds steady while you add duration, distance, and distraction in a fair sequence.
- Trust. Consistent timing proves you are reliable. Your dog follows you with confidence.
Every public programme at Smart Dog Training follows this structure, from puppy foundations to advanced obedience, behaviour programmes, and service or protection pathways.
Marker Words and Clickers How to Use Them
Both a clicker and a spoken yes can work well. The tool is less important than the timing. Reward timing in dog training depends on a clean, short marker that is always followed by reinforcement during learning. Choose one tool and stay consistent while your dog builds understanding.
Keep your marker neutral and clear. Avoid repeating it or stretching it out. One marker equals one reward during the teaching phase. This rule prevents noise and protects clarity for the dog.
Event Markers and Release Words
An event marker tells the dog the moment of success. For example, as the dog’s bottom meets the floor in a sit, you say yes. The release word ends a position. For example, after a short sit, you say free to let the dog move. Reward timing in dog training uses both. Mark the sit at the instant of success, then either reward in position or release and reward based on your goal.
Use the release with care. If you mark sit then always release and reward as the dog stands up, you teach a fast pop up. To keep a solid sit, reward in position more often and vary when you release. This simple shift in timing reduces breakage and builds reliability.
Reward Placement and Delivery
Where you deliver the reward matters as much as when. Reward timing in dog training is supported by smart placement that reinforces the picture you want.
- Reward to position. Feed where you want the dog to remain. For a down, feed low between the paws. For heel, feed at your seam.
- Reward to handler. Bring the dog back to you after a recall and pay close to your body to grow a tight finish.
- Reward away. Throw the food to reset a repetition or to build speed, then call the dog back into position.
Deliver the first rep fast. Later, stretch your timing with variable rewards and longer holds. Smart Dog Training builds these layers step by step so your dog remains confident.
Step by Step Plan to Improve Reliability
Here is a simple plan that uses reward timing in dog training to build reliable behaviour. Keep sessions short, upbeat, and focused. Three to five minutes can be enough for each block.
Phase 1 Capturing and Fast Reinforcement
- Set your marker. Decide on yes or a click.
- Capture easy wins. Ask for a sit, down, or a look. Mark the moment of success within one second.
- Reward in position. Feed where you want the behaviour to live. This prevents creeping or popping up.
- Repeat five to eight times. Keep the rate of reinforcement high so your dog stays engaged.
- End with a release. Use a clear release word, then a calm reset for the next rep.
In this phase, reward timing in dog training should feel fast and clean. Avoid extra words. Let the marker and food do the talking.
Phase 2 Duration and Distraction
- Add short holds. Build from one second to three, then five, then ten. Mark success at the end of the hold, then reward in position.
- Use a keep going marker. A soft good can maintain the behaviour without ending it. Do not feed after this word. Save the food for the event marker.
- Layer gentle distractions. Step to the side, tap your thigh, move your hand. If the dog holds, mark and reward. If the dog breaks, reset without scolding.
- Mix easy and hard reps. Sprinkle in simple wins to keep motivation high.
Smart Dog Training keeps criteria fair. Change one variable at a time, either duration or distraction or distance, not all at once. Reward timing in dog training stays precise even as the picture grows harder.
Phase 3 Real World Generalisation
- Change locations. Practise in different rooms, then the garden, then a quiet pavement.
- Use a long lead for safety. Keep guidance light and clear. Release pressure the instant your dog makes the right choice.
- Pay the best work. Save top value rewards for tough environments, and mark perfect moments cleanly.
- Shift to variable reinforcement. Not every correct rep needs food once the skill is strong. Keep markers accurate and scatter surprise jackpots for great choices.
Real life is where reward timing in dog training proves its worth. The marker cuts through noise, and your dog learns to choose the right behaviour anywhere.
Common Timing Mistakes and Fixes
- Late marker. If you mark after the dog has moved, they learn the wrong action. Fix it by rehearsing your marker with easy behaviours, then speed up in small steps.
- Rewarding movement. Feeding after the dog breaks position creates a pop up pattern. Reward in position more often to anchor the behaviour.
- Bribing with food. Waving food before the behaviour turns it into a lure. Ask first, mark success, then bring the reward out.
- Double cues. Repeating sit teaches the dog to wait for the second cue. Say it once, then help with light guidance if needed, and mark the instant the dog complies.
- No release word. Without a release, dogs guess when to get up. Add a clear release to reduce anticipation and creeping.
- Cluttered chatter. Extra talk muddies clarity. Keep to cue, marker, and release.
Smart Dog Training fixes these issues with clear rules, practice reps, and tidy mechanics. Reward timing in dog training becomes second nature with the right coaching.
Ready to turn your dog’s behaviour around? Book a Free Assessment and connect with a certified Smart Master Dog Trainer, available across the UK.
Timing for Puppies and Adult Dogs
Puppies need a faster pace and many short sessions. Keep one to two minute drills with five or six rewards, then a play break. Reward timing in dog training helps puppies form clean pictures before habits set in. For adults, timing remains vital, yet you can stretch duration sooner and add more structured distractions.
Older rescue dogs may have mixed histories. Use high clarity and slow steps at first. The marker builds trust and reduces confusion. When the dog realises that success is easy to find, motivation grows and behaviour settles.
Obedience Skills That Benefit Most
Many core skills sharpen quickly when you focus on reward timing in dog training. These examples show how to apply timing and placement.
- Sit and down. Mark the exact moment the dog completes the position. Feed low and in place. Release occasionally, not every time.
- Place or bed. Mark calm stillness, not fidgeting. Deliver the reward to the bed to reinforce staying put.
- Recall. Mark the moment your dog commits to you. Pay close to your legs to build a tight finish. Occasionally throw a reward behind you to add speed through the finish.
- Loose lead walking. Mark eye contact or a step in position. Feed at your seam to shape a tidy heel picture without crowding.
- Leave it. Mark the choice to ignore or move away from the item. Reward from your hand, not from the ground, to avoid scavenging habits.
Across these skills, Smart Dog Training keeps the same structure. Clear cues, clean markers, well placed rewards, and measured progression. Reward timing in dog training turns good reps into reliable habits.
Behaviour Issues That Improve with Better Timing
Behaviour cases are often about clarity under pressure. With reward timing in dog training, you can catch the right decisions before trouble appears.
- Reactivity. Mark a head turn away from the trigger or a look back to you. Reward by your leg and move away. The dog learns that calm choices make space and bring pay.
- Over arousal. Mark stillness, a closed mouth, or a breath out. Deliver slow rewards to reinforce calm, not frantic grabbing.
- Impulse control. Mark waiting at doors or holding a place while food moves. Vary release times to stop anticipation.
- Jumping up. Mark four paws on the floor. Reward low, not high, to keep feet down.
Smart Dog Training integrates fair pressure and release when needed, for example light lead guidance to help the dog hold position, with a clean release the instant the dog makes a good choice. The release predicts reward, so accountability grows without conflict.
Working with a Smart Master Dog Trainer
A certified SMDT from Smart Dog Training will design a plan for your home, your dog, and your goals. We teach the mechanics of reward timing in dog training, coach your handling, and build a progression that fits your lifestyle. Programmes can be delivered in home, in structured group classes, or through tailored behaviour programmes, all under the Smart Method.
If you are ready to start, you can Find a Trainer Near You and connect with an SMDT in your area. Together we will build calm, reliable behaviour that lasts.
FAQs
What is the ideal window for reward timing?
Mark within one second of the correct behaviour. Then deliver the reward with purpose, either in position or on release. This is the core of reward timing in dog training and it protects clarity.
Should I always reward after the marker?
During teaching, yes. One marker equals one reward to build confidence. Later, you can shift to variable reinforcement while keeping the marker accurate.
Do I need a clicker?
A clicker or a crisp yes both work. Choose one and stay consistent. The precision of the marker matters more than the tool.
How do I stop my dog popping up after the sit?
Reward in position more often. Use the release word less predictably. Mark the hold, feed low, then release at varied times to reduce anticipation.
Can timing help with reactivity?
Yes. Mark calm choices such as a head turn away or a look back. Pair this with distance for safety and reward near your leg to build focus under stress.
What if my timing is slow?
Practise with simple behaviours at home. Count one, cue, mark, reward. You can also rehearse without the dog by pretending to mark a bouncing ball on a screen. Consistent practice makes reward timing in dog training feel natural.
Conclusion
Reliable behaviour is not an accident. It is the product of clear cues, precise markers, and purposeful rewards. By focusing on reward timing in dog training, you teach your dog exactly which choices pay. The Smart Method turns this into a simple progression that works in your kitchen and on a busy pavement. Build clarity first, layer duration and distraction fairly, then generalise to real life. With tidy mechanics and a plan set by Smart Dog Training, your dog will respond with calm, confident behaviour anywhere.
Your dog deserves training that truly works. With certified Smart Master Dog Trainers (SMDTs) nationwide, you'll get proven results backed by the UK's most trusted dog training network. Find a Trainer Near You
Reward Timing in Dog Training for Reliable Behaviour
Shaping Calmness Around Known Triggers
Shaping calmness around known triggers is the most direct path to a steady, reliable dog who can handle real life. At Smart Dog Training, we use the Smart Method to turn stressful moments into proven training wins. Whether your dog reacts to bikes, doorbells, other dogs, or visitors, our structured approach builds a calm default response that lasts. Every step is guided by certified Smart Master Dog Trainers, and delivered within a clear plan you can follow at home and out in the world.
This guide sets out how shaping calmness around known triggers works in the Smart Method, why it matters, and exactly how to progress. You will learn how to select triggers, set criteria, use markers and rewards with precision, and layer difficulty so your dog stays under threshold. The goal is not a temporary fix. The goal is calm behaviour that stands up to pressure and distraction, wherever you go.
What Calmness Means in Real Life
Calmness is not the absence of movement. It is a trained, rehearsed state of mind and body. When we talk about shaping calmness around known triggers, we mean teaching your dog to settle, disengage, and choose you over the environment. That looks like:
- Soft body and neutral tail
- Closed mouth or gentle panting
- Eyes that can glance at the trigger and return to handler
- Loose lead and steady breathing
- Default sit or down without prompting
Calmness is a skill. It can be trained, measured, and made reliable with repetition and fair guidance.
The Smart Method for Calm Behaviour
Shaping calmness around known triggers sits inside the Smart Method, our proprietary system built for results that last. The five pillars keep training structured and fair.
Clarity
Commands and markers are delivered with precision so your dog always understands what earns reward and what releases pressure. Clear language makes shaping calmness around known triggers both faster and cleaner.
Pressure and Release
Fair guidance creates accountability without conflict. A steady lead, clear boundaries, and a consistent release teach the dog how to make good choices. This pillar is essential when shaping calmness around known triggers in busy environments.
Motivation
Rewards matter. Food, toys, and praise build engagement and positive emotion. Motivation ensures your dog wants to repeat calm behaviour when triggers appear.
Progression
Skills are layered step by step. We add distance, duration, and distraction carefully so success stays high. Progression is the backbone of shaping calmness around known triggers.
Trust
Training deepens the bond between dog and owner. Trust turns calmness into a willing response, not a forced one.
Known Triggers and How to Map Them
Known triggers are things that have a predictable effect on your dog. Common examples include bikes, scooters, dogs, men with hats, door knocks, visitors, and delivery vans. To start shaping calmness around known triggers, list each trigger and rate its intensity on a scale of 1 to 5. Note distance, movement, sound, and context. A bike 50 metres away may be a 2, but a bike passing at 2 metres may be a 5. The map helps you pick entry points where your dog can learn without tipping over threshold.
- Trigger type and features
- Distance at which the dog notices but stays responsive
- Typical body language at each distance
- Time to recover when the trigger leaves
This is your calmness map. It guides every session so shaping calmness around known triggers remains consistent and progressive.
Foundation Skills Before You Begin
The fastest way to make shaping calmness around known triggers work is to install clean foundations at home first. We build three core skills:
- Marker system: Yes for reward, Good for duration, and Free for release
- Place command: A defined mat or bed that signals relax and stay put
- Loose lead position: Calm at your side with attention available on cue
When these skills are fluent, triggers become training opportunities, not battles.
Equipment That Supports Calm Behaviour
Use a flat collar or well fitted harness and a 2 to 3 metre lead that allows smooth, steady guidance. Pick high value food rewards and a neutral, non crinkly treat pouch. For place work, choose a defined mat that travels easily so you can bring the dog’s calm station into new environments. The goal is simple, fair handling that keeps clarity high while shaping calmness around known triggers.
Session Structure That Delivers Results
Every Smart session follows a predictable arc. This keeps the dog safe, the criteria clear, and your progress measurable.
- Decompress for 5 to 10 minutes with relaxed walking in a quiet area
- Warm up on markers, eye contact, and a short Place duration
- Introduce one known trigger at a distance where the dog notices but stays responsive
- Rehearse calmness with short, successful reps
- End on a win and step away before fatigue shows
Short, high quality sessions beat long, messy ones. The rule for shaping calmness around known triggers is end while your dog still wants more.
Reading Threshold and Trigger Stacking
Threshold is the line between learning and overload. Cross it, and thinking stops. Stay under it, and learning thrives. Watch for early signs such as a fixed stare, faster breathing, ears locking onto the trigger, and weight shift. If two or more triggers appear in quick time, the load can stack. This makes shaping calmness around known triggers harder in that moment. Reduce difficulty by adding distance, lowering duration, or changing angle so your dog can reset.
Step by Step Plan to Shape Calmness
Use this plan to make shaping calmness around known triggers predictable and repeatable. Adjust distances and criteria to match your calmness map, and record your reps for accuracy.
Phase 1 Baseline Calm at Home
- Place for 3 to 5 minutes with Good marker at random intervals
- Free to release, then reset Place
- Goal: 90 percent success for 3 sessions in a row
Phase 2 Simulated Triggers
- Play recorded sounds at low volume or have a family member slowly pass the doorway
- Mark Yes for head turn back to you or for a calm look away
- Return to Place and pay with calm food delivery
- Goal: No vocalising, body stays soft, 5 to 10 clean reps
Phase 3 Real Trigger at Safe Distance
- Work at a distance where your dog notices the trigger but can still eat, follow markers, and hold Place
- Mark Yes for orientation to you and for re settling on Place
- Use Free to reset between reps
- Goal: 10 to 15 clean reps without tension on the lead
Phase 4 Close The Gap Gradually
- Reduce distance in small steps, keeping success above 80 percent
- Add duration before the reward to build calm endurance
- Introduce movement of the trigger if it was still before
- Goal: Calmness holds at practical, everyday distances
Phase 5 Generalise to New Locations
- Repeat the plan in two new environments each week
- Rebuild distance and duration from easier levels at first
- Goal: Calmness around known triggers is reliable in parks, pavements, and car parks
Progress through phases at your dog’s pace. Shaping calmness around known triggers is about steady wins, not rushing the timeline.
Markers and Reward Delivery That Build Clarity
Clarity speeds learning. Here is how we deliver markers when shaping calmness around known triggers:
- Yes means the rep is complete and the reward is coming now
- Good means keep doing that, calmness is paying
- Free means the exercise is finished and the dog can move
Pay low and slow for calm behaviours. Deliver food to the mat or your side rather than above the head. Keep the lead relaxed during reward. Calm delivery teaches a calm state of mind.
Using Pressure and Release Fairly
Fair guidance allows the dog to find the right answer without conflict. When shaping calmness around known triggers, use a light, steady lead to block forward load and anchor position. The instant your dog softens, releases pressure, or reorients to you, mark and relax the lead fully. The release is part of the reward. This is how accountability and choice come together in the Smart Method.
Motivation That Makes Calmness Worth It
Rewards drive repetition. Use food with real value to your dog. Keep pieces small so you can pay often without filling them up. If your dog loves toys, set them aside for breakthrough moments when they hold calmness near a tougher trigger. You are showing that shaping calmness around known triggers pays better than chasing the environment.
Progression Principles That Protect Success
When you add difficulty, change only one variable at a time. The three variables are distance from the trigger, duration of calm, and level of distraction. If you reduce distance, keep duration short. If you add movement of the trigger, back off on distance. This one change rule keeps shaping calmness around known triggers clean and helps you avoid dips in performance.
Troubleshooting Common Sticking Points
The Dog Freezes or Stares
Increase distance, add angle, and deliver two quick Yes markers for a head turn back to you. Reset on Place and reduce session length. Shaping calmness around known triggers works best when the dog stays in thinking mode.
The Dog Vocalises
Break the chain. Step out of line of sight, breathe, and return to a level where your dog can succeed. Reinforce quiet seconds generously. Vocalising is a sign the criteria were too hard in that moment.
The Dog Will Not Take Food
Food refusal means you crossed threshold. Add distance and start with orientation to you. When food returns, resume shaping calmness around known triggers with smaller steps.
Setbacks After a Good Week
Expect variables like weather, fatigue, or trigger intensity to swing performance. Use your calmness map and return to the last level where success was high. One step back today protects two steps forward tomorrow.
Home Routines That Support Calm
Calmness around known triggers is easier when the whole day supports it. Keep these routines steady:
- Quality sleep with set quiet hours
- Predictable feeding times
- Structured walks with decompression time before training
- Short enrichment that encourages sniffing and settling
Consistency at home reduces background arousal so shaping calmness around known triggers lands faster.
Why Professional Guidance Accelerates Results
A certified Smart Master Dog Trainer understands how to set criteria, read your dog, and solve problems in real time. Personal coaching turns confusion into clarity, often within the first session. If you are ready for tailored help, you can start with a plan that is built exactly around your dog’s known triggers.
Ready to turn your dog’s behaviour around? Book a Free Assessment and connect with a certified Smart Master Dog Trainer - available across the UK.
Case Study Style Scenarios
Bikes On The Park Path
Begin at a field’s edge where bikes pass 30 metres away. Work Place on a mat, mark Yes for head turns and breathing that stays soft, and pay calmly to the mat. Over a week, close to 15 metres, then 10. Add duration at 10 metres before reducing further. This is shaping calmness around known triggers with practical criteria you can measure.
Visitors At The Door
Install Place near but not facing the door. Rehearse knock recordings at low volume, pay for staying on Place, and build duration. Add an actual person who can pause outside, open, then step back. Mark and pay for staying down and for choosing to relax. Over time, your dog will offer calmness when the bell rings.
Dogs On Pavement Walks
Start across a wide road. When your dog glances at the other dog and reorients, mark and pay at your side. Keep the lead neutral. Close the gap only when your calmness criteria holds for several reps. This is how shaping calmness around known triggers becomes a reliable habit.
How We Measure Progress
Smart trainers teach owners to score each session simply. Use these three numbers after you finish:
- Success rate: percent of reps that met your criteria
- Stress signs: none, light, or present
- Recovery time: seconds to return to baseline calm
When success stays above 80 percent, stress is light, and recovery is fast, you can progress. These numbers keep shaping calmness around known triggers objective and honest.
When To Add Difficulty
Raise criteria when three sessions in a row are clean. Increase only one variable and confirm success with two short sessions before you move again. Calmness is not a sprint. It is a sequence of wins that add up to confidence.
How The Trainer Network Supports You
Smart Dog Training operates nationwide, with every coach trained through Smart University and supported with mapped visibility and ongoing mentorship. The Smart Method means your plan is consistent from the first lesson to graduation. When shaping calmness around known triggers, this consistency is what makes results hold in new places and under new pressures.
FAQs on Shaping Calmness Around Known Triggers
What counts as a known trigger?
A known trigger is anything you can predict will raise your dog’s arousal or cause reactivity. Common examples are bikes, doorbells, joggers, other dogs, or visitors. The key is predictability so you can plan sessions.
How long does it take to see results?
Most owners see early wins within one to two weeks when they follow the Smart plan daily. Full reliability takes longer, as you must generalise to new places and harder versions of the trigger.
Do I always need a Place mat?
Place is a powerful anchor for calm behaviour, but the real goal is portable calmness. We start with a mat for clarity, then fade it so your dog can settle anywhere.
What if my dog barks or lunges?
That means the criteria were too hard right then. Increase distance, lower duration, and rebuild. With the Smart Method, shaping calmness around known triggers resumes once your dog is back under threshold.
Should I reward every calm look?
At first, yes. Early in training, pay often to make the choice obvious and valuable. As your dog becomes fluent, switch to Good markers for duration and fewer Yes markers to build endurance.
Can I try this without a trainer?
You can start foundations at home, but tailored coaching from an SMDT speeds progress and prevents common errors. If you want a plan matched to your dog’s exact triggers, professional support is the fastest route.
What equipment do you recommend?
A flat collar or a well fitted harness, a 2 to 3 metre lead, and a defined mat for Place. Keep gear simple so clarity stays high.
How do I know when to progress?
Move forward when you can run three short sessions with at least 80 percent success, minimal stress signs, and fast recovery. Change only one variable at a time.
Conclusion
Shaping calmness around known triggers is the clearest route to a stable, confident dog. With the Smart Method, you gain clarity, fair guidance, motivation, steady progression, and deep trust. Start with a calmness map, rehearse short wins, and raise criteria carefully. If you want help building a tailored plan, we are ready to coach you step by step.
Your dog deserves training that truly works. With certified Smart Master Dog Trainers (SMDTs) nationwide, you'll get proven results backed by the UK's most trusted dog training network. Find a Trainer Near You
Shaping Calmness Around Known Triggers
Real Life Recall to Handler Starts Here
Real life recall to handler is the skill that keeps your dog safe and your walks calm. It means your dog turns away from the world and comes straight to you on one cue, even when life is busy. At Smart Dog Training, every recall programme follows the Smart Method to build reliability you can trust in the park, on the street, and at home. If you want professional support from day one, work with a Smart Master Dog Trainer. SMDTs apply a clear, structured system that produces results in real life.
This guide shows you exactly how we teach real life recall to handler. You will learn the foundation skills, the step by step progression, and how to add distance, distraction, and duration without stress. You will also learn how pressure and release, motivation, clarity, and trust fit together to create recall that lasts.
What Real Life Recall to Handler Really Means
Real life recall to handler is more than come when called in the garden. It is a complete behaviour pathway. Your dog must orient to you, disengage from distractions, move to you at speed, and arrive into position ready for the next cue. We build this flow on a long line first so it is safe, then transfer to off leash when the behaviour is proven.
- One cue, one response every time
- Fast turn, direct line, clean finish
- Calm emotional state after the return
- Reliable around dogs, people, wildlife, food, and play
With the Smart Method, real life recall to handler becomes a natural habit. Your dog chooses you because the training makes the right choice easy and rewarding.
The Smart Method Applied to Recall
Smart Dog Training uses a single, proven system across all programmes. Real life recall to handler follows the same five pillars.
Clarity
We use clean marker words, a single recall cue, and clear release signals. Clarity removes guesswork. Your dog learns exactly what yes means, what try again means, and when the job is done.
Pressure and Release
On a long line, we teach gentle guidance paired with instant release when your dog turns in. Pressure communicates and release confirms the right choice. This is fair and conflict free when done the Smart way.
Motivation
Rewards build energy and desire to come fast. We use food, toys, and life rewards like access to sniffing. The right reward at the right time keeps the recall powerful.
Progression
We scale distraction, duration, and distance in a clear plan. Skills are layered step by step so your dog wins at each stage. Progress never outpaces understanding.
Trust
Every repetition should grow confidence. Your dog learns that coming to you always leads to safety, clarity, and good outcomes. Trust is the foundation for reliable choices.
Before You Start: Core Foundations
Strong recall is built on simple habits. Spend a few short sessions to create these first steps. You will feel the difference when you move into full real life recall to handler.
Name Response
Say your dog’s name once. Mark yes the instant they flick eyes to you. Reward near your legs. Repeat five times, then pause for a minute. Train indoors first, then in the garden, then near the front door. The goal is fast orientation every time you say the name.
Marker Words
Pick three short markers and stick to them.
- Yes means correct, come take your reward
- Good means hold the behaviour, reward is coming
- Nope means try again or we reset
Say the marker, then deliver the reward within two seconds. This pairing sharpens communication and helps real life recall to handler feel simple.
Handler Orientation Game
Walk in a quiet room. Each time your dog offers eye contact or moves toward your legs, mark yes and drop a treat by your feet. This game builds the habit of checking in and driving to your position.
Equipment Setup
- Long line of 5 to 10 meters
- Flat collar or well fitted harness
- Reward pouch with high value food and a tug or ball
- Quiet shoes and calm handling so your body language stays neutral
Practice line handling in the garden before training. Keep slack in a loose J shape. Step on the line if you need to stop a sprint. Never wrap line around fingers.
Choose and Protect Your Cue
Pick one recall cue that you will not say in casual conversation. Say the cue once. If your dog stalls, guide with the long line rather than repeating yourself. Protecting the cue is vital in real life recall to handler because it keeps the cue meaningful.
Phase One: Clean Mechanics in Low Distraction
Start indoors or in a very quiet garden. The goal is a fast, direct return on one cue. This phase sets the tone for the rest of your real life recall to handler training.
- Say the name. Wait for eye contact. Mark yes.
- Pause one second. Say your recall cue once.
- Run backward two steps to open space. Guide lightly if needed.
- As your dog commits and moves to you, release any pressure. Mark yes at your legs.
- Feed three to five small treats in a row at your knees. Add a short play burst if your dog loves toys.
- Release with OK and toss a treat away to reset.
Complete six to ten reps across two short sessions. End while your dog is keen and focused.
Phase Two: Distance and Speed
Now we build push and pull. Your dog learns to drive out and then sprint back. This creates power in real life recall to handler.
- Toss a treat five steps away. As your dog eats, softly take the slack out of the long line
- Say the name. Mark eye contact. Cue recall once
- Guide with the line if needed then release instantly when your dog turns in
- Pay with a jackpot at your legs for fast, straight returns
When your dog races to you from five steps, move to eight, then ten. Keep success high. If speed drops, make it easier and raise the reward quality.
Phase Three: Distraction Training
This is where real life recall to handler turns into a dependable habit. Use the 3D model and move one lever at a time.
Distance
Increase how far your dog is from you before you cue recall. Keep distractions low while you add distance.
Duration
Ask for a short sit at your side after arrival. Count one second, mark yes, pay. Build to three seconds, then five. Duration after arrival builds calm.
Distraction
Add mild distractions like a static toy on the ground or a friend standing still. When your dog succeeds, add movement, sound, or food scents one at a time. The long line is your insurance policy.
How Pressure and Release Makes Recall Clear
Pressure and release is a communication tool in the Smart Method. It is never about force. It is about clarity. On the long line, close the gap until you feel the lightest tension as you cue recall. The instant your dog turns in, soften and let the line go slack. That release is information. It tells your dog yes, you made the right choice. Pair the release with your voice praise and with your marker word at your legs. Used this way, pressure and release makes real life recall to handler clean and conflict free.
Reward Strategy That Drives Reliability
Recall has to feel worth it. Choose rewards that match the environment and your dog.
- Food for early learning and frequent reps
- Toys for speed and power returns
- Life rewards like return to sniffing, greeting a friend, or going back to play
In real life recall to handler, the biggest reward happens at your legs. Deliver three to five rapid treats or a short tug party, then release back to the original activity when safe. This teaches your dog that coming to you does not end all fun. It unlocks more fun.
Proofing in Real Settings
Real life recall to handler must work where you actually live and walk. Build proof in a planned order.
Home and Garden
- Kitchen with low distraction
- Garden with mild scents
- Front drive with people passing at a distance
Parks and Fields
- Quiet corner of a park on a long line
- At a distance from other dogs first
- Closer to movement and play once success is high
Urban and Pavement
- Wide pavements for space
- Near traffic noise at a safe distance
- Outside shops with people flow
If your dog fails twice in a row, lower one variable. Bring the distance in, reduce distraction, or sweeten the reward.
Common Mistakes That Break Recall
- Repeating the cue. Say it once, then help your dog succeed
- Paying too little. Use better rewards to build speed and enthusiasm
- Ending all fun after the return. Use life rewards to keep recall strong
- Calling when your dog cannot succeed. Close the gap with the long line first
- Inconsistent markers. Keep language precise
Safety and Management While You Train
Management protects the behaviour while it grows. For real life recall to handler, safety is part of the plan.
- Use the long line until you have at least 90 percent success around mild distractions
- Avoid off leash play that you cannot recall from
- Choose safe spaces with room to learn
- Keep sessions short and end on a win
Real Life Scenarios and Setups
Around Other Dogs
Start with calm, neutral dogs at a distance. Cue recall when your dog glances away from the distraction. Pay big. Build to brief greetings with a recall out. This keeps your dog fluent in real life recall to handler even when social pressure is high.
Wildlife and Scent
Train downwind first so the scent is milder. Reward with a return to sniffing. Layer interruptions like name response before asking for a full recall if the scent is intense.
Kids and Ball Games
Work at a long distance from moving balls. Use the line so you can help. Reward with a toy sprint after a successful recall to meet the need for movement.
Food on the Ground
Place low value food in a container. Practice approach and recall away. Reward well, then release to investigate on your OK if safe. This teaches your dog that you control the environment and keeps real life recall to handler strong near food.
Adolescents, Chasers, and Independent Dogs
Teenage dogs often test recall. Keep your expectations clear and your plan tight.
- Raise reward value during peaks of distraction
- Shorten sessions and ask for fewer hard reps
- Use more line guidance and faster releases
- Make orientation games part of every walk
For chase driven dogs, meet the need with structured sprint games and toy play at your legs. For independent dogs, pay generously for check ins and reward with freedom bursts when safe.
Criteria and Measuring Success
Track your progress so real life recall to handler stays on course.
- Response time under two seconds after the cue
- Fast, straight approach with ears and eyes on you
- Clean arrival within arm’s reach
- Calm sit or stand for one to three seconds after the return
- Ability to recall away from mild distractions at ten meters on a long line
When you hit these metrics in three locations, begin short off leash trials in a safe enclosed space.
Multi Handler Consistency
Everyone in the family must do it the Smart way. Use the same cue, markers, rewards, and release. Practice handing the long line smoothly to each other so your dog gets the same feel. Consistency keeps real life recall to handler strong.
Build Recall Into Your Day
Make recall a lifestyle, not a drill.
- Recall before crossing roads
- Recall out of doorways and then release
- Recall off sniffing, pay, then back to sniffing
- Recall during play, pay, then return to play
These mini reps keep real life recall to handler fresh and fun.
When to Work With a Professional
If you feel stuck or anxious about off leash reliability, bring in an expert. A Smart Master Dog Trainer can assess your dog in person, tighten your mechanics, and map the right progression for your environment. With the Smart Method, you get a clear plan that fits your goals and lifestyle.
Ready to turn your dog’s behaviour around? Book a Free Assessment and connect with a certified Smart Master Dog Trainer - available across the UK.
FAQs on Real Life Recall to Handler
How long does it take to get reliable recall?
Most families see strong progress within two to four weeks of daily practice. Full reliability for real life recall to handler can take eight to twelve weeks depending on your dog’s age, history, and environment.
Should I use a whistle for recall?
You can, but keep one cue only. A whistle can cut through wind and distance. Train it the same Smart way with clear markers, pressure and release on the line, and high value rewards.
What if my dog ignores me outside?
Go back a step. Close the gap with the long line, lower distraction, and raise reward value. Build wins and protect the cue. This is the fastest route to real life recall to handler.
Can I train recall without treats?
Food is efficient for early learning. As recall strengthens, mix in toys and life rewards. The Smart plan blends rewards so your real life recall to handler stays strong without always needing food.
Is it safe to let my dog off leash?
Only when you have proof of success. Use the long line until you can recall away from mild to moderate distractions at a distance. Start off leash in secure spaces first.
What if my dog chases wildlife?
Build more structure before you need it. Practice at a distance, use the line for guidance, and reward with movement at your legs. For faster progress with chase issues, work with an SMDT for a tailored plan.
Should I change my recall cue if it is weak?
Yes, if the cue has lost meaning. Pick a fresh word and rebuild with the Smart steps. Guard it well by saying it once and helping your dog succeed.
Conclusion: Make Recall Your Dog’s Best Habit
Real life recall to handler is a skill that protects your dog and gives you freedom together. With the Smart Method, you build clarity, use fair pressure and release, create strong motivation, and progress step by step. Keep sessions short and focused, protect your cue, and reward well at your legs. If you want guidance tailored to your dog and your routine, Smart Dog Training is ready to help.
Your dog deserves training that truly works. With certified Smart Master Dog Trainers SMDTs nationwide, you'll get proven results backed by the UK's most trusted dog training network. Find a Trainer Near You

Real Life Recall to Handler
Why Training for Low Arousal States Transforms Daily Life
Training for low arousal states is the foundation of calm, reliable behaviour in real life. It is how your dog learns to stay composed when the doorbell rings, lie down and relax at a cafe, or walk through a busy park without pulling and scanning. At Smart Dog Training, we make training for low arousal states practical, structured, and proven to work in everyday settings. Every programme follows the Smart Method so your dog develops steady behaviour you can trust.
Low arousal does not mean a dull dog. It means a dog who is calm by default and ready to engage when asked. This is a trained skill, not a personality trait. With clear guidance from a certified Smart Master Dog Trainer, your dog learns what to do, how to switch off, and how to make better choices without conflict. Our approach makes training for low arousal states a simple step by step process that fits family life.
What Low Arousal Looks Like
Low arousal shows up as steady breathing, loose muscles, soft eyes, and slow movements. Your dog settles on a bed when visitors arrive, waits at thresholds, and checks in with you in busy places. You see fewer emotional spikes and faster recovery after exciting moments. Training for low arousal states builds this baseline so calm becomes the default.
Why Arousal Drives Behaviour
Arousal is the body and brain preparing for action. High arousal can be useful during focused work, but without structure it pushes dogs toward impulsive choices. Jumping, barking, lunging, pacing, and poor recall often trace back to unmanaged arousal. Training for low arousal states teaches your dog to regulate emotions and follow guidance even when the world is busy.
The Smart Method For Calm That Lasts
The Smart Method is our proprietary training system. It blends motivation, structure, and fair accountability to create steady behaviour that holds up anywhere. This is the backbone of training for low arousal states across all Smart programmes.
Clarity
We use precise markers, cues, and release words so your dog always understands what is expected. Clear communication reduces conflict and prevents confusion, which keeps arousal down. In training for low arousal states, clarity is the first control lever for calm.
Pressure and Release
We use fair guidance with clear release back to comfort and reward. This teaches responsibility without fear. When your dog feels the path to success, confidence rises and arousal settles. This pillar is central to training for low arousal states in the real world.
Motivation
We build positive engagement with food, toys, and praise. Rewarding measured choices makes calm valuable to your dog. The more your dog chooses calm for reward, the stronger the habit becomes. Motivation keeps training for low arousal states enjoyable and sustainable.
Progression
We layer distraction, duration, and difficulty step by step. A dog that can settle in the kitchen must learn to do it in the garden, then on the pavement, then in a cafe. Structured progression is how training for low arousal states becomes reliable anywhere.
Trust
We build trust between you and your dog through consistent, fair training. Trust lowers stress, shortens recovery from excitement, and supports calm choices. It is the bond that makes training for low arousal states stick for life.
Start With a Calm Baseline
Before we add challenges, we create the baseline for quiet behaviour at home. Without this, public training feels hard and unpredictable. A Smart Master Dog Trainer will assess your dog’s emotional triggers, daily routine, and the exact moments where arousal spikes. Then we map a plan that builds calm first and tests it later.
Signs Your Dog Needs Lower Arousal
- Constant scanning and fast movements in familiar places
- Difficulty settling after play or visitors
- Explosive greetings and jumping
- Pulling and panting on walks from the first step
- Reactive barking at noises, dogs, or traffic
- Slow recovery after exciting events
If you recognise these signs, training for low arousal states will bring stability and relief for both you and your dog.
Simple Management That Helps Right Now
- Use a short, light lead and fit gear that sits comfortably
- Keep toys and food rewards tidy and only available during training
- Reduce high sugar treats and switch to steady, healthy options
- Shorten play sessions and finish with a calm settle
- Build predictable routines for feeding, walks, and rest
These choices lower background arousal so formal training for low arousal states works faster.
Core Smart Exercises For Low Arousal
The following Smart exercises are the backbone of training for low arousal states. We teach each one with clear cues, a fair release, and rewards that match effort. Begin at home, then add distractions step by step.
Smart Place
Place teaches your dog to go to a mat or bed and stay relaxed until released. It is a core stationing skill that turns waiting into a calm habit.
- Introduce the mat and reward any approach
- Add the cue Place and guide onto the mat, then mark and reward
- Build duration in seconds, then minutes, with a soft lead nearby
- Release with a clear word and a calm walk off the mat
- Proof by adding mild movement, then door knocks, then visitors
Use Place during meals, deliveries, homework time, or when you need quiet. This is central to training for low arousal states because it teaches off switch on cue.
Smart Leash Calm
This teaches a slow, steady walk with relaxed muscle tone. Calm lead pressure means stop and breathe. Release means move forward.
- Start indoors where distraction is low
- Apply gentle lead pressure until your dog softens and checks in
- Mark the softening, then release forward as the main reward
- Repeat in short bursts to create a rhythm of relax then go
With practice, your dog learns that movement comes from calm. This flips walk time into training for low arousal states every step of the way.
Smart Doorway Pauses
Thresholds are arousal hotspots. We teach a sit or stand with soft eyes and steady breathing before moving through.
- Approach the door and stop one step short
- Wait for softness and stillness, then mark
- Release and step through together at an easy pace
Use this at gates, kerbs, and car doors. Doorway pauses reinforce training for low arousal states dozens of times per day.
Smart Engagement and Disengagement
Your dog learns when to tune in and when to tune out. We build a quiet focus on cue and an easy relax when work ends.
- Teach a brief Look cue for one to two seconds of eye contact
- Release with a soft Yes or Free and reward relaxation
- Blend short focus with longer relax on a mat
This balance prevents over focus and helps training for low arousal states feel natural and sustainable.
Smart Food Protocol
Food is powerful. We use it to reward slow breathing, soft posture, and stillness. Rewards follow calm, not frantic behaviour.
- Deliver food low and steady to keep posture soft
- Mark quiet breaths and loose muscles
- Pause feeding if movement speeds up, then resume once calm returns
Feeding this way turns meals and training into daily reps of training for low arousal states.
Smart Handling and Grooming
We teach your dog to accept touch on cue and to settle while being handled.
- Pair gentle handling with markers and a slow reward delivery
- Release often so your dog learns the pattern of start and finish
- Add mild distraction once your dog stays soft during handling
This sets up vet visits and home grooming to support training for low arousal states rather than spike it.
Smart Crate and Rest Routines
Rest is part of training. A crate or quiet zone becomes a predictable place to decompress.
- Introduce the space with calm food rewards and a clear release
- Keep sessions short and finish while your dog is still relaxed
- Use after exercise or training to speed recovery
Healthy rest stabilises arousal. It multiplies the impact of training for low arousal states across the day.
Reward Strategy That Builds Calm
Reward placement and timing shape emotion. In training for low arousal states we deliver rewards slowly, low to the ground, and in a rhythm that keeps breathing steady.
- Rate of reward starts high, then tapers as duration grows
- Low delivery prevents jumping and keeps muscles loose
- Calm release maintains the quiet tone of each rep
Used well, rewards do more than pay behaviour. They set the mood your dog carries into the next choice.
Progression From Home to Public Spaces
We progress environment and difficulty only when the last step is clean. This is how training for low arousal states becomes bulletproof.
Step by Step Progression
- Home with no distraction
- Garden with mild sounds
- Front pavement at quiet times
- Local park when calm dogs are present
- Cafe terrace with gentle movement nearby
- Town centre at off peak times
At each step, build duration first, then add mild distraction, then add movement. If arousal spikes, go back one step and rebuild. This keeps training for low arousal states clear and fair.
Real Life Scenarios To Proof Calm
Visitors at the Door
- Place before the knock
- Open the door in stages, rewarding soft posture
- Release to greet only when breathing is slow and body is loose
Repeat until Place becomes the default. This is a signature win for training for low arousal states.
Busy Walks
- Blend Leash Calm with brief focus cues
- Use pauses at kerbs to reset breathing
- Keep distance from triggers while you build confidence
Distance is a tool, not a retreat. It lets training for low arousal states stay clean while skills grow.
Cafes and Pubs
- Rehearse Place under the table at home
- Start with five to ten minutes at a quiet spot
- Reward soft posture and stillness every minute, then space it out
Public settle is a milestone in training for low arousal states. Celebrate it and keep reps short at first.
Car Travel
- Use a crate or seat belt with a chew for quiet focus
- Start with short drives and calm exits
- Reward soft body before opening the door
These habits turn travel into steady practice of training for low arousal states.
Troubleshooting Common Sticking Points
My Dog Pops Up on the Mat
Reduce duration, reset the release word, and deliver rewards lower and slower. If needed, attach a light lead to guide back to Place with gentle pressure and a clear release. This keeps training for low arousal states predictable.
My Dog Will Not Settle Outside
Go back a step in your environment ladder. Use a quieter spot or more distance. Layer short reps and finish early while success is strong. Training for low arousal states grows through well timed wins, not long battles.
Food Makes My Dog Overexcited
Switch to lower value food, cut rewards into smaller pieces, and lengthen the pause before delivery. Pair food with slow breathing and soft posture. In training for low arousal states, food should quieten, not wind up.
We Regress After a Busy Day
Regression is normal. Use your rest routine and rebuild quick wins the next day. Calm is a trained habit. Consistency restores training for low arousal states quickly.
Special Notes For Puppies and Adolescents
Puppies can learn calm early, but sessions must be short and simple. For adolescents, hormones and growth can spike arousal. Keep your plan steady and your rules kind and clear. Training for low arousal states during this phase prevents habits that are hard to undo later.
- Short sessions of one to three minutes
- Plenty of sleep and structured rest
- Simple Place and Doorway Pauses daily
- Leash Calm in the garden before street walks
For Reactive or Anxious Dogs
Reactivity often comes from chronic high arousal and poor recovery. Our behaviour programmes focus on state first, then on specific triggers. Training for low arousal states gives these dogs a roadmap to feel safe and make better choices.
For complex cases, a tailored plan with a certified Smart Master Dog Trainer provides the structure and support you need. We help you build skills step by step so progress is steady and clear.
How Smart Programmes Deliver Results
Smart Dog Training delivers results focused programmes across the UK. We come to your home, teach in small group classes, and run tailored behaviour programmes for reactive and anxious dogs. Every programme uses the Smart Method and follows a clear progression so training for low arousal states turns into real world results.
Ready to turn your dog’s behaviour around? Book a Free Assessment and connect with a certified Smart Master Dog Trainer - available across the UK.
Daily Routine That Supports Calm
- Predictable feeding and toilet times
- Two to three structured training blocks
- One decompression walk in a quiet area
- Guided play that ends with a settle
- Planned rest windows in a quiet space
When life has a rhythm, training for low arousal states becomes the path of least resistance. Your dog learns that calm pays every single day.
Measuring Progress You Can See
- Faster settle time on the mat after activity
- Lower lead tension and smoother pace on walks
- Softer eyes and slower breathing around triggers
- Fewer explosions and quicker recovery when they happen
These markers show that training for low arousal states is taking hold. Keep notes for one to two weeks. Small improvements add up fast.
FAQs
What is training for low arousal states?
It is a structured plan that teaches your dog to stay calm by default and to recover quickly after exciting moments. We build this with the Smart Method using clear cues, fair guidance, and rewards that value calm choices.
How long does it take to see results?
Most families see changes within the first week when they follow the plan. With daily practice, training for low arousal states creates visible progress in two to four weeks and becomes a habit over eight to twelve weeks.
Will my dog lose drive if we focus on calm?
No. We teach your dog to switch between calm and work on cue. Drive stays available when you ask for it, and settles when you do not. Training for low arousal states creates better control, not less enthusiasm.
What tools do you use?
We use comfortable gear, clear markers, and fair pressure and release with strong positive reward. Our focus is clarity and progression so training for low arousal states is consistent and kind.
Can I do this if my dog is reactive?
Yes. We begin with calm at home, then add distance and structure outside. Training for low arousal states is the base layer for any reactivity plan, and our behaviour programmes are built to support this step by step.
How do I prevent setbacks?
Keep sessions short, finish on a win, and maintain your rest routine. If you hit a block, step back in difficulty and rebuild. Training for low arousal states works best with small, steady wins.
Do I need professional help?
Many families do well with guidance and a clear plan. If you want faster, cleaner results, a certified SMDT will tailor the programme to your dog and home. Our team will coach you through training for low arousal states until it holds up in real life.
Conclusion
Calm is a trained skill that changes everything about life with your dog. With the Smart Method, training for low arousal states becomes clear, fair, and reliable in the places you need it most. Build the baseline at home, progress step by step, and proof in real life. The result is a steady, happy dog who can switch on for work and switch off for rest.
Your dog deserves training that truly works. With certified Smart Master Dog Trainers (SMDTs) nationwide, you'll get proven results backed by the UK's most trusted dog training network. Find a Trainer Near You

Training for Low Arousal States
Creating Calm Obedience in New Settings
Creating Calm Obedience in New Settings is the goal for every family who wants a relaxed life with their dog. It is also the mark of a well trained dog under the Smart Method. If your dog listens at home but falls apart outside, you are not alone. Real life is full of new environments, people, scents, and moving things. With Smart Dog Training you can build reliability that holds up anywhere. Every programme is delivered by a certified Smart Master Dog Trainer so you get a proven process and steady support.
Calm obedience is not luck. It is the result of clear communication, fair guidance, and step by step progression in a plan. This article maps the exact process Smart Dog Training uses to generalise skills and proof behaviour. Follow it closely and your dog will become calmer, more responsive, and more confident in new settings.
Why Calm Obedience Breaks Down Outside
Outdoors is rich with novelty. Scent, sound, movement, and space pull your dog in many directions. If a behaviour only exists in the kitchen, it is not ready for the street. This is a generalisation problem. The behaviour has not been taught to survive change. Many owners also add too much difficulty too soon. The dog gets confused and stress rises. When stress rises, thinking drops and obedience goes with it.
At Smart Dog Training we fix this by controlling three levers. We manage distance, duration, and distraction. We also maintain clarity so the dog understands what starts and ends work. Calm obedience builds when the dog can predict what earns release and reward in any place.
The Smart Method for Real Life Reliability
The Smart Method has five pillars. Clarity, Pressure and Release, Motivation, Progression, and Trust. This balance creates calm, consistent behaviour that lasts in new settings.
- Clarity. Commands and markers are precise so your dog knows exactly what earns reward and what ends the exercise.
- Pressure and Release. Fair guidance paired with timely release builds responsibility without conflict. This includes lead pressure and body guidance used with calm intent.
- Motivation. Rewards build engagement and a positive state of mind. The dog learns to enjoy the work.
- Progression. We add challenge step by step. We scale distraction, duration, and distance only when the dog is ready.
- Trust. Training strengthens the bond. Your dog learns that your guidance is safe and reliable everywhere.
Every Smart Master Dog Trainer uses these pillars in the same structured way. That is why results are consistent across our national network.
Read Your Dog Before You Train
Calm obedience begins with a calm brain. Before each session, check your dog’s arousal level. Look for soft eyes, steady breathing, and a mouth that opens and closes easily. If your dog is scanning, pacing, whining, or too fixated on the environment, you need a reset. Use a short decompression walk in a quiet area, then begin.
Choose the right reinforcement for the setting. If the environment is busy, use a reward that matters but does not spike arousal. A calm food reward and gentle praise will usually beat a frisbee in town. If your dog is flat and unmotivated, raise the value and energy. Match the reward to the goal.
Step One Clarity Indoors
Start where focus is easiest. Teach the language of training before you enter new settings. Create clear markers for correct, keep going, and release. When the dog understands the markers, obedience becomes a predictable game. That predictability is what keeps the dog settled in more complex environments later.
Marker System and Release Words
Smart Dog Training uses a simple marker system. One sound pays the dog. One sound tells the dog to continue. One word releases the dog from the task. Keep the sounds short and consistent. Reward directly after your pay marker. Release cleanly so the dog learns the end of the exercise. This clarity builds calm because there is no guesswork.
Neutral Positions Sit Down Place
Teach a few neutral positions that lower arousal. Sit, Down, and Place are the foundation. Place means four paws on a defined spot such as a mat or bed. We teach the dog to hold the position until released. Keep early durations short. Pay often. End on success. When your dog can sit, down, and place for short periods with soft focus, you are ready to expand.
Step Two Build Motivation Without Chaos
We want a dog who works with heart but not frantic energy. To build this balance, Smart Dog Training pairs food rewards and calm praise with brief games that end neatly on a release. The key is rhythm. Work. Mark. Reward. Reset. The dog learns that effort leads to a predictable payoff. That rhythm keeps the dog settled when the environment changes.
- Use small food rewards to keep movement slow and thoughtful.
- Deliver rewards where you want your dog to be. If you want a close heel, pay at your leg.
- End each rep with a clear release, then pause for a breath. Do not blur reps together.
Step Three Introduce Fair Pressure and Release
Pressure and Release creates accountability and reduces conflict. It also helps the dog make good choices in new settings. We use gentle, steady lead pressure to guide the dog into position, then release the moment the dog complies. The release tells the dog it found the answer. Pair this with a marker and reward so the lesson is clear and calm.
Lead Skills That Create Calm Movement
Teach your dog to yield to light lead pressure on the collar. Practice forward, back, left, and right. Keep your hands quiet and your steps small. The goal is a soft dog on a soft lead. When your dog moves with you calmly indoors, it will be easier to handle new environments without pulling or lunging.
Step Four Progression Into New Settings
Creating Calm Obedience in New Settings depends on controlled progression. We change one thing at a time. If you change distance, do not also increase duration. If you add a distraction, reduce something else. This keeps stress low and learning high.
Distraction Duration and Distance in Layers
- Distraction. Begin with mild distractions such as a person walking at a distance. Reward for focus and position. Gradually increase the intensity.
- Duration. Add seconds slowly. Pay a few times during the hold to keep the dog engaged.
- Distance. Step away a little, then return to pay. Do not vanish. Slow changes build trust.
The Twenty Percent Rule for New Places
When you enter a new location, drop difficulty by about twenty percent. If your dog held a one minute Place at home, ask for forty seconds at the park on your first rep. Win a few easy reps, then grow from there. This simple rule protects confidence and keeps sessions calm.
Ready to turn your dog’s behaviour around? Book a Free Assessment and connect with a certified Smart Master Dog Trainer available across the UK.
Step Five Trust and the Handler Relationship
Trust is built by fair guidance and consistent follow through. Your dog should feel that you are a safe leader in every setting. Keep your body language calm. Keep your voice soft. Move with purpose. If your dog makes an error, guide back to position and release tension the instant the dog tries. Reward effort. Over time, your dog will trust the process and settle faster in new places.
Proofing Scenarios You Will Actually Use
Plan your training around real life. We choose scenarios that match daily needs. Train short, focused sessions and keep quality high. Below are examples used across Smart Dog Training programmes.
Cafe or Pub Garden
- Start with an empty outdoor area at quiet times.
- Use Place on a mat under your chair. Reward calmly every few seconds at first.
- Add small distractions. A friend walks by. A server sets down a glass.
- End with a short walk out to keep arousal low.
Vet Reception
- Visit during a quiet period for a simple walk through.
- Practice loose lead walking past seating, then a thirty second sit away from the door.
- Reward contact with you and relaxed breathing.
School Gate or Busy Path
- Train at a distance first so movement does not flood your dog.
- Use heel for ten steps, then Place on a mat near a fence.
- Rotate heel and Place, keeping reps short and achievable.
Public Transport
- Start with a stationary platform away from crowds.
- Teach a calm step on and off. Reward for staying close and quiet.
- Build up to short rides at off peak times.
Handling Setbacks and Stress
Even with good planning, you will meet setbacks. Your dog may freeze, pull, or vocalise. Do not push through. Reduce the difficulty and rebuild. Use the twenty percent rule. Create more distance. Shorten duration. Remove a distraction. Guide calmly with the lead and return to easy wins. The faster you restore clarity, the faster calm returns.
If a pattern repeats in several places, book support from Smart Dog Training. A certified Smart Master Dog Trainer will assess the cause and adjust your plan so progress continues.
Measuring Progress and When to Add Difficulty
Track three metrics. Latency, accuracy, and recovery. Latency is how fast your dog responds to a known cue. Accuracy is how correct the response is position, stillness, and hold. Recovery is how fast calm focus returns after a surprise. If two of these improve across sessions, you can add a little challenge. If they drop, make it easier and win more reps before moving on.
- Latency. Aim for a one second response to Sit, Down, or Place before adding distractions.
- Accuracy. No creeping, no paw lifts, clean position holds.
- Recovery. Calm breathing and soft eyes within thirty seconds after a distraction.
Common Mistakes to Avoid
- Asking for too much, too soon. Drop difficulty in new settings and rebuild.
- Messy markers and unclear release. Without clarity, stress rises.
- Only paying at the end. Pay during the hold to keep the dog engaged.
- Dragging on the lead. Use light pressure and quick release when the dog gives.
- Long sessions. Keep sessions short and end on a win.
- Training only at the park. Rotate several locations so generalisation sticks.
Smart Programmes and How We Work
Smart Dog Training delivers results focused programmes for families across the UK. We come to you for in home sessions, run structured group classes, and build tailored behaviour programmes for complex needs. Every programme follows the Smart Method and is delivered by trained professionals who meet our national standard.
During your first assessment we map your goals and test skills in a calm setting. We teach your marker system, your release, and your plan for Creating Calm Obedience in New Settings. Then we progress through real world locations that match your lifestyle. You will learn how to handle the lead, how to layer distraction, and how to reward for the state of mind we want. The result is a dog that listens and settles anywhere.
If you want a trusted professional to guide this process, we can help. Find a Trainer Near You and connect with Smart Dog Training in your area.
FAQs
How long does it take to achieve calm obedience in new settings
Most families see clear change within two to four weeks of structured practice. Full reliability depends on your starting point, the number of locations you need, and how consistent you are with the Smart Method. Short daily sessions and steady progression deliver the best results.
What if my dog is too excited to take food outside
Reduce the difficulty. Increase distance from distractions and shorten the task. Use calm movement, light lead pressure and release, and a simple Place for a few seconds. Once your dog takes a lower value food, you can begin to build challenge again.
Can I train more than one dog at a time
Train one dog at a time in the early stages. Once each dog can hold Place with calm focus, you can introduce the second dog as a mild distraction and rotate turns. Keep reps short and fair.
What equipment should I use for loose lead walking
Use a well fitted flat collar and a standard lead. Keep pressure light and release the moment your dog yields. Equipment is only part of the picture. Clear markers, timing, and progression create the result.
How do I stop my dog from breaking Place to greet people
Lower the difficulty. Start with a person at a distance. Pay during the hold. If your dog leans or creeps, guide back with gentle lead pressure and release when the dog returns to stillness. Only allow greetings after a clean release so your dog learns that calm earns access.
What is the best first new setting to practice
Pick a quiet car park corner or a familiar path at off peak times. Keep sessions short and finish before your dog gets tired. Add busier locations only after you have several easy wins.
Should I talk to my dog a lot during training
Keep speech minimal and consistent. Use your markers and simple praise. Too much chatter creates noise and reduces clarity. Calm body language matters more than many words.
When should I seek professional help
If you see repeated setbacks, lead reactivity, or anxious behaviour, book support. A Smart Dog Training professional will assess the cause and build a plan that fits your dog. You can Book a Free Assessment to start.
Conclusion
Creating Calm Obedience in New Settings is not a mystery. It is a method. Teach clear markers and releases. Build neutral positions that lower arousal. Use fair pressure and release to create responsibility. Progress in measured steps and reward the calm state of mind. With Smart Dog Training, you will guide your dog through real life with confidence. The outcome is a dog that listens, settles, and enjoys the world by your side.
Your dog deserves training that truly works. With certified Smart Master Dog Trainers SMDTs nationwide, you will get proven results backed by the UK’s most trusted dog training network. Find a Trainer Near You
Creating Calm Obedience in New Settings
Why Transitions Matter in Heelwork
Heelwork is the art of a dog moving in sync with the handler, holding a precise position, and responding to cues with accuracy. The polish you notice in top teams comes down to one thing. They have smooth transitions during heelwork. These are the moments between positions, turns, pace changes, and halts that can either look sharp and effortless or messy and confusing. When you master smooth transitions during heelwork, your dog looks calm, confident, and ready to work anywhere.
At Smart Dog Training, every step builds on the Smart Method. We teach families and competitors how to create clarity, rhythm, and reliable position without conflict. If you are new to heelwork or you want to iron out small gaps, our certified Smart Master Dog Trainer team will guide you through a clear plan. In this article, you will learn how we build smooth transitions during heelwork from the ground up, how to fix common mistakes, and how to proof the work in real life.
Our goal is simple. By the end, you will have a plan to produce smooth transitions during heelwork that hold up under pressure. This plan is the same approach our SMDTs use every day with clients across the UK.
The Smart Method For Smooth Transitions During Heelwork
The Smart Method is our proprietary system for teaching calm, consistent behaviour that lasts. It guides how we build smooth transitions during heelwork in a way that is fair, precise, and repeatable.
- Clarity. We use clean marker cues and exact mechanics so the dog knows what they did right.
- Pressure and Release. We give light guidance and pair it with immediate release and reward. This creates accountability without conflict.
- Motivation. Rewards matter. We build desire to work so the dog chooses heel with energy and focus.
- Progression. We layer distraction, duration, and difficulty in small steps until the behaviours are solid anywhere.
- Trust. Training must grow the bond. Your dog should feel safe and sure through every transition.
When you apply these five pillars, smooth transitions during heelwork stop feeling like luck and start feeling like a learned skill you can reproduce session after session.
Foundation Skills Before Transitions
Transitions rest on clean foundations. If the base is wobbly, changes in position or pace will look messy. Before you focus on smooth transitions during heelwork, set these pieces in place.
- Heel Position Picture. Define where the head, shoulder, and rear should be. For most teams, the dog’s collarbone lines up with the handler’s trouser seam. Keep it consistent.
- Marker System. Use a clear yes marker for release to reward, a good marker for ongoing work, and a no-reward marker only if you have trained it with care. Smart uses markers to reduce confusion and speed learning.
- Reinforcement Zone. Feed or play in the exact position you want to see in motion. Rewards placed in heel build muscle memory for smooth transitions during heelwork.
- Equipment. Use a flat collar or well fitted training collar and a short lead. Keep it light and tidy. The equipment supports clarity. It does not replace training.
- Handler Posture. Stand tall, shoulders square, hips driving straight. Your body sets the lane the dog follows.
Building Your First Transitions
Start with simple changes you can make crisp in a short session. These three give you fast wins and lay the track for more complex work.
Halt to sit at heel
- Walk at a steady pace with the dog in heel.
- Prepare. Take a breath, keep your hands still, and think sit before you stop.
- Stop with both feet together. Do not drift the head or lean.
- Say sit one time as you stop if you are still teaching. Later you will fade the verbal.
- Mark the instant the rear hits. Feed in position at your trouser seam.
Sit to heel start
- Begin with the dog sitting in heel.
- Lift your core and step off with the same foot every time. Consistency produces smooth transitions during heelwork.
- Mark two clean steps of correct position. Feed at your seam and carry on.
Pace changes in heel
- Walk at normal pace for five steps.
- Cue slow. Shorten your steps. Keep your shoulders square. Reward for staying with your hip.
- Cue fast. Lengthen your stride. Mark when the dog matches your new speed without forging.
Keep these sessions short. Ten quality reps beat fifty sloppy ones. When these look clean, you will notice smooth transitions during heelwork starting to appear even as you add small distractions.
Turning Transitions That Flow
Turns are where many teams lose line and rhythm. To keep smooth transitions during heelwork, plan your footwork, then add the dog.
- Left turn. Step slightly left with your left foot. Keep your left elbow soft to make space for the dog’s shoulder. Mark when the shoulder stays parallel.
- Right turn. Step your right foot across your midline to guide the dog to move rear end in. Avoid swinging your shoulders. Reward for tight alignment.
- About turn. Decide on left about or right about and stick with it when beginning. Slow one step before the pivot. Mark the dog when they drive through the turn without drifting out.
If the dog swings wide, you have two likely causes. Too much speed into the turn or unclear handler footwork. Slow down, reduce the turn angle, and build back up. Your goal is smooth transitions during heelwork where the dog keeps shoulder to seam all the way through.
Position Changes In Motion
Position changes while moving are advanced but very rewarding. The secret to smooth transitions during heelwork is to pre-plan the exact moment you will mark and where you will pay.
Down in motion
- Walk five steps. Say down on step four as your left foot hits the ground.
- The instant elbows hit the floor, mark. Step forward one more step and return to the dog’s front, then reward.
- Restart the heel with a clean sit and step off together.
Stand in motion
- Walk five steps. Say stand on step four. Keep your hands neutral.
- Mark when all four feet stop together. Reward in position by reaching to the seam and delivering just in front of the chest.
- Step off again and collect the dog back into heel smoothly.
Use short lines, clear foot cues, and consistent pay points. These details create smooth transitions during heelwork that look effortless.
Distraction Proofing That Sticks
Distractions expose weak links. We proof using Smart’s 3D model. We adjust distraction, duration, and difficulty in tiny steps so the dog can stay confident and precise.
- Distraction. Start with mild triggers like a static toy on the floor. Progress to moving people or dogs at a distance. Reward often for choosing heel.
- Duration. Add five clean steps at a time before pay. Watch for tiny lapses and cut criteria before position slips.
- Difficulty. Combine turns, pace changes, and a position change only after each is solid alone. This is how you keep smooth transitions during heelwork even when things get busy.
As you proof, remember that smooth transitions during heelwork depend on timing. If your mark is late, you are paying the wrong thing. Film your sessions to check timing.
Common Problems And Fixes For Smooth Transitions During Heelwork
Even good teams hit bumps. Here are the most frequent issues we see and the Smart fixes we use to restore smooth transitions during heelwork.
- Forging. The dog creeps ahead. Fix by lowering speed for three steps before the halt or turn. Pay from your seam backward, not in front of the nose. If needed, reset by stepping back one step and inviting the dog to fall into position before you pay.
- Lagging. The dog hangs back. Use a short burst of fast pace and immediate mark when the shoulder lines up. Then blend into normal pace. Keep your eyes up so you do not accidentally lean back.
- Crooked sits. The rear swings out at halt. Stop feeding forward from your hand. Pay with your left hand back at your hip. Add a small left step at the halt to invite rear end in.
- Wide turns. The arc gets big and messy. Reduce speed one step before the turn. Practise the turn on a painted line or edge of paving to give you a visual lane. Reward mid turn when the shoulder stays tight.
- Late responses. Dog takes two steps before sitting or downing. Set a consistent foot cue. If you cue sit as you stop, always do it at the same moment. Mark the first correct split second and pay big.
Addressing these with clean mechanics brings back smooth transitions during heelwork very quickly.
Handler Mechanics And Rhythm
Heelwork is a team sport. Your dog reads your hips, shoulders, and stride. Poor mechanics lead to messy pictures. Better mechanics make smooth transitions during heelwork almost automatic.
- Neutral Hands. Keep hands quiet at your waist. Swinging arms pull the dog off line.
- Consistent Step Off. Always step off with the same foot. This becomes your dog’s green light.
- Breath Control. Exhale before a halt or turn. It helps you slow and stay balanced.
- Eye Line. Look ahead, not down. Your posture is the track your dog follows.
Drill these without the dog first. Ten strides up and back in a hallway while focusing on posture can do more for smooth transitions during heelwork than another dozen reps with the dog.
Reward Strategy For Smoothness
Rewards shape behaviour. Where and how you pay matters as much as when. Smart uses strategic reinforcement to cement smooth transitions during heelwork.
- Placement. Pay at your seam or slightly behind it. This pulls the dog into the pocket you want.
- Variable Reinforcement. Once the picture is clean, vary the number of steps between rewards. The dog stays engaged, and transitions stay snappy.
- Toys Versus Food. Food builds precision. Toys build energy. Use both, but do not let toy play pull the dog forward.
- Patterned Jackpots. After a perfect chain say a left turn into a halt to sit, deliver three to five rapid rewards in position. This marks the moment and tells the dog this is the picture we love.
With smart reinforcement, you will find smooth transitions during heelwork hold up even when you stretch the chain.
Progressing To Real Life And Trial
Good heelwork is useful at home and in competition. You want the same smooth transitions during heelwork on the pavement, in the park, and in a busy class. Work through these steps.
- Surface Changes. Train on grass, pavement, rubber, and carpet. Some dogs shorten stride on slick floors. Adjust criteria and reward for matching you.
- Environment Switches. Start in your lounge, then your garden, then a quiet car park, then a busier walkway. Keep criteria tight at each step.
- People and Dogs. Begin with one calm person at distance, then walkers, then dogs passing. Ask for one clean transition and pay big.
- Trial Rehearsal. Map the ring pattern. Rehearse the exact order of turns and halts. This is how you protect smooth transitions during heelwork under pressure.
Measuring Progress And Criteria
Objective measures keep you honest. Smart trainers track criteria so teams build smooth transitions during heelwork with purpose.
- Rep Counts. Aim for sets of 6 to 10 quality reps. Stop before quality dips.
- Latency. Note how fast your dog sits at halt or downs in motion. Under one second is a strong goal.
- Position Checks. Film from behind and from the left side. Is the shoulder on the seam at the mark point
- Fluency Score. Rate each session out of five for rhythm and flow. Two weeks of fours and fives means you are ready to add difficulty.
A simple logbook helps. Write your plan, note the results, and adjust. This is how Smart delivers reliable, smooth transitions during heelwork for families and competitors alike.
When To Get Professional Help
If you feel stuck, it is time to bring in a professional eye. A certified Smart Master Dog Trainer can spot micro errors in timing or footwork that you will not see alone. We will then give you tailored drills for smooth transitions during heelwork that suit your dog and your goals. Ready to see what a focused plan can do for you
Work with our team in home, in class, or on a bespoke behaviour pathway. We align the Smart Method with your lifestyle so you see results fast and keep them long term.
Mini Case Study Calm To Crisp Heelwork
Bailey, a one year old Cocker Spaniel, forged on straight lines and blew wide on right turns. His handler leaned forward, fed in front of the nose, and stepped off with a different foot each time. We reset the foundation with three short sessions.
- Session 1. Defined heel position. Switched to consistent step off. Paid at the seam for three steps of position. Added a slow breath before halts.
- Session 2. Practised right turns on a line painted on the pavement to create a clear lane. Marked mid turn for tight shoulder to seam. Added a variable reward schedule.
- Session 3. Layered in a stranger walking by at distance. Asked for one turn and a halt to sit. Paid a patterned jackpot for a clean chain.
After seven days, Bailey delivered smooth transitions during heelwork at the park. The wide turns vanished, halts were square, and the team looked calm and connected.
FAQs On Smooth Transitions During Heelwork
How do I teach my dog to stop forging in heel
Lower speed one step before turns and halts, pay at your seam, and add short fast bursts only when the shoulder is aligned. Consistency in step off and reward placement is key to smooth transitions during heelwork.
How often should I practise heelwork transitions
Short daily sessions are best. Aim for two to three sets of 5 to 8 reps. Stop before quality drops. This builds smooth transitions during heelwork without fatigue.
What markers should I use for transitions
Use a yes marker to release to reward, a good marker to continue work, and a neutral reset cue if needed. Clear markers speed up smooth transitions during heelwork.
My dog sits crooked at halts. What can I do
Feed from your left hand at your hip, not in front of the nose. Add a tiny left step as you stop to invite the rear end in. This cleans up the picture and protects smooth transitions during heelwork.
Can I build transitions without food rewards
Food creates precision early, and toys add energy later. Over time, you can move to life rewards like going through a gate or greeting a friend. The Smart approach uses both to maintain smooth transitions during heelwork.
When should I ask for position changes in motion
After your straight line heel and halts are clean. Add one change like down in motion with a clear foot cue. Keep criteria easy so you maintain smooth transitions during heelwork as difficulty rises.
What if my dog gets distracted in new places
Drop criteria, raise pay, and shorten the chain. Use the Smart 3D plan, building distraction, duration, and difficulty one step at a time. This keeps smooth transitions during heelwork even in busy areas.
Conclusion Next Steps For Your Heelwork
Smooth heelwork is not an accident. It is the product of clarity, fair guidance, and smart progression. When you apply the Smart Method, reward with purpose, and rehearse clean mechanics, you will see smooth transitions during heelwork take shape fast. Keep sessions short, film often, and track your criteria. If you want expert eyes and a plan tailored to you, our SMDT team is ready to help you unlock your dog’s best work.
Ready to turn your dog’s behaviour around Book a Free Assessment and connect with a certified Smart Master Dog Trainer available across the UK.
Your dog deserves training that truly works. With certified Smart Master Dog Trainers SMDTs nationwide, you will get proven results backed by the UK’s most trusted dog training network. Find a Trainer Near You
Smooth Transitions During Heelwork
Why Calm Café Behaviour Matters
Cafés are part of everyday life in the UK. Many families want their dog to relax by the table while they enjoy a drink and a chat. Teaching dogs to be calm in busy cafés makes that possible and safe. It protects your dog from stress and it makes you a welcome guest anywhere you go.
At Smart Dog Training we build real world skills. Our programmes focus on calm, steady behaviour that holds under noise, movement, and food smells. In the first phase you learn to read your dog. In the second you guide with clarity and reward. A certified Smart Master Dog Trainer SMDT leads you through each step so you see progress you can trust.
The Smart Method for Teaching Dogs to Be Calm in Busy Cafés
The Smart Method is our structured path to reliable manners in public. It is the backbone for teaching dogs to be calm in busy cafés. Every pillar works together so your dog understands, participates, and stays relaxed even when the room feels full and loud.
Clarity
Dogs thrive when the picture is clear. We teach clean markers for yes and try again. We set a defined spot for the dog to settle. We use one cue for each action. In cafés your dog will hear many sounds at once. Clear signals cut through the noise so your dog knows what to do and for how long.
Pressure and Release
Smart uses fair guidance. Light lead pressure means hold position. Release and reward tell your dog that choice was right. This pairing builds responsibility without conflict. It matters when you need steady behaviour by a table or near a doorway where space is tight.
Motivation
Rewards keep the dog engaged and happy to work. We use food, praise, and calm touch at the right time. Motivation is not random. It is placed with skill so the dog values the settle, not the chaos. This balance is essential for teaching dogs to be calm in busy cafés.
Progression
We layer distraction, duration, and difficulty in small steps. First at home, then in the garden, the car park, a quiet café corner, and finally a busy table. We add sounds and movement on purpose so success grows without guesswork.
Trust
Training should strengthen your bond. When guidance is fair and rewards are timely, your dog learns that you are safe to follow. Trust is what keeps your dog calm when a cup clatters or a child walks by.
Foundation Skills at Home
Real life starts at home. Before your first latte together, build skills in a quiet room. This is where teaching dogs to be calm in busy cafés truly begins.
The Settle on a Mat
Place a non slip mat on the floor. Lure your dog onto the mat and mark yes as elbows touch down. Feed two or three small treats on the mat, then release with a clear free cue. Repeat in short sets until the mat itself invites the dog to lie down. Your goal is a settled body, a soft face, and steady breathing.
Place with Duration
Add the cue place once the behaviour is consistent. Build duration a few seconds at a time. Reward while your dog remains on the mat. End with your release. Do not pull the dog off the mat. The dog should learn that staying pays.
Impulse Control with Food and People
Place your dog and walk around the room with a plate or cup. Start slow. If your dog breaks, reset without fuss. Mark and reward for holding position as you move past. Ask a family member to enter the room, sit, and stand up. Reward if your dog remains settled.
Gear and Set Up for Café Success
Good gear supports teaching dogs to be calm in busy cafés. Keep it simple and consistent.
- A sturdy lead that feels comfortable in your hand
- A flat collar or training tool fitted by your trainer
- A foldable mat that grips the floor
- Small, low crumb treats in a pouch
- A chew reserved for long duration work
Practice clipping the lead to the table leg only if the table is heavy and stable. Often the safer choice is to keep the lead in your hand or under your foot so you can give clear guidance and prevent wandering.
Choosing the Right Café Environment
Start with a quiet café at off peak hours. Pick a corner table away from the main aisle and the counter. Avoid wobbly chairs and small walkways. Look for non slip flooring. These choices make the first visit feel simple for your dog.
Step by Step Plan for the First Café Visit
Your first outing sets the tone. Approach like a training session, not a long social event. This is where teaching dogs to be calm in busy cafés moves from theory to practice.
Arrival and Entry
Pause outside for a minute of focus and a short settle on the mat. Walk in with your dog at your side. If the doorway is tight, ask for a sit, then move when clear. Walk to your table with purpose. Avoid greetings while you set up.
Positioning and the First Five Minutes
Lay the mat by your chair so your dog faces you, not the aisle. Ask for place. Feed a few calm rewards on the mat, then switch to praise. Keep your lead short and relaxed. Your first five minutes set the rhythm for the visit.
Order and Reward Timing
Order your drink while your dog holds place. Mark and reward once the staff walks away. This shows your dog that ignoring movement pays. Teaching dogs to be calm in busy cafés relies on this simple pattern. Stay, wait, reward. Release only when you are ready.
Handling Distractions
Use your body to block if someone passes very close. If a cup clatters, drop a small treat between your dog’s paws. If the dog pops up, guide back to the mat and reward for settling again. Keep your voice calm and low.
Ready to turn your dog’s behaviour around? Book a Free Assessment and connect with a certified Smart Master Dog Trainer - available across the UK.
Building Duration and Distraction
Short wins create strong habits. Stay for ten to fifteen minutes, then leave on a success. Over a few visits, extend the time and add new challenges. This stage cements teaching dogs to be calm in busy cafés into daily life.
Adding Movement and Noise
Choose times with steady background noise. Add simple tasks like you standing to collect your order while your dog stays. Reward after you return and your dog remains settled.
Proofing Around Food
Set a rule that food comes only after calm. No crumbs from the table. If a snack falls, cover it with your foot and then give a clean treat for holding place. Your dog learns that ignoring dropped food is how food appears.
Progress to Peak Times
When your dog can hold a long settle in quiet periods, try a slightly busier time. Sit farther from the door first. Increase difficulty one piece at a time. Progression prevents overwhelm and keeps the exercise clean.
Handling Common Problems
Most issues in cafés have simple fixes when you apply The Smart Method. Keep the focus on teaching dogs to be calm in busy cafés by meeting the dog’s needs and adjusting the plan.
Whining, Barking, or Pacing
These are signs of stress or confusion. Shorten the visit. Make the picture simple. Reward more often for quiet seconds. Use your mat as an anchor. If the pattern repeats, return to the car park stage and rebuild.
Lunging at Passing People or Dogs
Choose a corner table with more space. Face your dog toward you. Use light lead pressure to guide back to place, then release pressure when the dog settles. Mark and reward. If the café is too busy, leave and try again another day.
Begging or Food Snatching
Prevent rehearsal. Keep the lead short and the mat under your foot. Reward for head on paws. Practice leave it at home with real plates and cups so the picture matches the café.
Unable to Switch Off
Many dogs need a small chew to relax on longer visits. Offer a quiet chew only on the mat. Remove it if the dog lifts off. This builds clean rules that help the dog rest.
Social Etiquette for Café Dogs in the UK
Be considerate of the space and other guests. Pick a table that leaves clear walkways. Keep your dog close to you. Ask staff where they prefer dogs to sit. Bring a mat so your dog’s paws do not slide. Clean any spills from the water bowl. These habits support teaching dogs to be calm in busy cafés and keep doors open for all dog owners.
How Smart Programmes Deliver Real World Results
Smart Dog Training designs every step around the places you live and work. Our programmes are built for daily life, including teaching dogs to be calm in busy cafés. You do not guess. You follow a plan that delivers.
In Home Coaching
Your trainer builds foundations in your living room so the cues and markers are precise. We set up mock café scenes with chairs, cups, and background sounds. You master the timing before you go out.
Structured Group Sessions
Group training lets you practise around other dogs in a controlled space. We use aisle drills, table setups, and moving staff simulations. Your dog learns to hold position while people pass.
Tailored Behaviour Programmes
If your dog struggles with reactivity or anxiety, your SMDT designs a tailored programme. We blend behaviour change with obedience so your dog can cope with the sights and sounds of public places.
When to Call a Smart Master Dog Trainer
If progress stalls or your dog shows high stress, bring in a professional. A Smart Master Dog Trainer SMDT will assess your dog, adjust the plan, and coach your timing. Expert guidance keeps teaching dogs to be calm in busy cafés moving forward and prevents bad habits from taking root.
Simple Daily Homework Plan
- Two short place sessions at home each day, two to five minutes each
- One field trip practice in a quiet public space each week
- One short café visit after week two, then extend by five minutes each visit
- Mat work during family meals so the routine feels normal
- Calm leash walking to and from the café to bookend success
Safety and Welfare Considerations
Check your dog’s needs before you go. A short walk and a toilet break make settling easier. Bring water. Watch for signs of stress such as panting, yawning, or scanning. If you see them, shorten the visit. Choose seating with shade outside on warm days. Keep paws and noses away from hot cups. Comfort and safety always come first.
FAQs
What age should I start café training?
Start foundation skills as soon as your puppy comes home. Mat work and short settles are safe and simple. Short field trips begin after your pup has basic vaccinations and can focus for a minute or two.
How long does it take to see results?
Most families see steady progress in two to four weeks with daily practice. Complex behaviour issues may take longer. The Smart Method gives you a clear path and measurable wins along the way.
What should I do if my dog reacts in the café?
Guide back to place, reward for calm, and shorten the visit. If reactions repeat, train in a quieter space and rebuild. A Smart trainer can refine your timing and the level of difficulty.
Do I need special equipment?
No. A good lead, a well fitted collar or chosen training tool, and a non slip mat are enough. Your trainer will advise on fit and handling so you can guide without conflict.
Is food in the café a problem for training?
Not if rules are clear. Food appears for calm on the mat. It does not come from the table. Practise leave it at home with real plates so the picture matches public life.
What is the best age for teaching dogs to be calm in busy cafés?
Any age can learn. Puppies can start with short, simple sessions that build a love for the mat. Adult dogs can learn to switch off with the right structure and rewards. The method is the same, the steps are scaled.
Ready to Train in Real Life
Teaching dogs to be calm in busy cafés is a gift to you, your dog, and everyone around you. With The Smart Method you get a clear plan that works. If you want coaching from a trusted professional, we are here to help.
Your dog deserves training that truly works. With certified Smart Master Dog Trainers SMDTs nationwide, you'll get proven results backed by the UK's most trusted dog training network. Find a Trainer Near You
Teaching Dogs to Be Calm in Busy Cafés
Training Dogs to Pause Before Movement
Training dogs to pause before movement is one of the most powerful habits you can build. It protects your dog at busy roads, creates calm at doors and gates, and turns chaos into control in everyday life. At Smart Dog Training, we teach this skill through the Smart Method so families see real results they can trust. Every certified Smart Master Dog Trainer uses the same structured approach, which means you get consistent progress and reliable behaviour that lasts.
When families ask for a fix that changes everything, this is it. A simple pause unlocks impulse control without conflict. It teaches your dog to think, not just react. With the right markers, fair guidance, and a clear release, your dog learns to hold position until you say go. That is the heart of training dogs to pause before movement, and it is how we create safe, steady choices in the real world.
Why A Pause Before Movement Matters
Life moves fast. Dogs feel that speed and often rush with it. Doors fly open, bowls get placed down, boots step toward the car, and a dog that surges can put itself and others at risk. The pause gives you a moment of control. It gives your dog a moment to think. That single second becomes a habit that spreads to everything else.
- Safety at thresholds such as front doors, garden gates, lifts, and car doors
- Road awareness at kerbs before crossing
- Calmer starts to walks for better lead manners
- Polite feeding routines that reduce frustration and guarding
- Cleaner obedience and focus under distraction
For these reasons, training dogs to pause before movement is a core standard in every Smart programme. It is a foundation for puppies, a reset for unruly adolescents, and a precision tool for advanced work such as service dog and protection pathways.
What A Pause Really Means
A pause is a short moment of stillness that your dog holds until released. It can be paired with sit, stand, or down, but the position is less important than the rule. Wait for the release. In the Smart Method we separate three parts so your dog understands every step.
- A clear cue for the behaviour such as sit or step back
- A marker that confirms the choice such as Good
- A release word that allows movement such as Free
When these are delivered with clarity, your dog learns to control the impulse to rush. That clarity is what makes training dogs to pause before movement both simple and powerful.
The Smart Method Behind The Pause
The Smart Method balances motivation, structure, and accountability so dogs understand how to work and why it pays to listen.
- Clarity: We use consistent cues and markers so the dog is never guessing
- Pressure and Release: We guide with fair pressure on the lead, then release and reward the stillness so the dog learns how to turn pressure off
- Motivation: Food, toys, and life rewards like access to the garden reinforce calm choices
- Progression: We add distraction, distance, and duration in layers so the pause holds anywhere
- Trust: Owners and dogs learn to communicate without conflict, building a calm and confident bond
Every certified Smart Master Dog Trainer follows this structure. That is why training dogs to pause before movement becomes a predictable pathway rather than a guessing game.
Foundations Before You Start
The pause is simple when the building blocks are in place. Take time to set the stage and you will move faster later.
Marker Words And Release Cues
Choose short, clear words and stick to them.
- Good means you are on the right track and keep going
- Yes means you did it and the reward is coming now
- Free means you may move
Say the release once, then allow movement. If you change the word or repeat it, your dog may learn to self release. Consistency is key in training dogs to pause before movement.
Equipment And Set Up
- A flat collar or well fitted harness and a standard lead
- A long line for early outdoor practice
- High value food rewards cut small
- A calm starting environment
Keep sessions short. Five minutes done well beats twenty minutes of drift and confusion.
Step By Step For Reliable Pauses
Use these steps to teach training dogs to pause before movement in a clear, progressive way. Work through each stage until it is smooth and relaxed. Then move up a level.
Step One Bowl Manners
Start where motivation is high and feedback is instant. The food bowl offers both.
- Ask for sit with the bowl in your hand
- Lower the bowl halfway and mark Good for stillness
- If your dog moves, lift the bowl back up and reset
- Place the bowl down only when your dog holds the sit
- Pause for one second, say Free, then allow the meal
Repeat for several meals. Soon the bowl becomes a cue to wait. This is a keystone in training dogs to pause before movement because it makes the release cue crystal clear.
Step Two Doorway Pause
Thresholds are where safety and manners meet. Teach your dog to stop at the line.
- Approach the door calmly on lead
- Ask for sit with the door closed, mark Good for stillness
- Crack the door a little, then close if your dog rises
- Open fully only when the sit holds
- Count one to two seconds, say Free, then step out together
Repeat on different doors in the house. Then add the front door, garden gate, and lift if you have one. Training dogs to pause before movement at every threshold turns safety into habit.
Step Three Car Door And Kerb Safety
Cars and roads are high stakes. Control must be simple and automatic.
- Car: Clip the lead before you open the boot. Ask for sit, open the door, wait for stillness, release with Free, then guide out
- Kerb: Approach, ask for sit at the edge, mark Good, scan for traffic, then release and cross
Keep the count short. One to two seconds is enough early on. Build longer only when your dog is relaxed.
Step Four Lead Pressure And Release
Pressure and Release is the heart of real life reliability. It is fair, clear, and kind. Your dog learns how to turn pressure off by choosing stillness.
- Hold the lead steady. If your dog leans forward, maintain gentle pressure
- The moment your dog shifts back or sits, soften the lead and mark Yes
- Pause, then release with Free and step forward
Repetition turns this into muscle memory. Training dogs to pause before movement with Pressure and Release produces accountability without conflict.
Step Five Add Distraction Duration And Distance
Layer difficulty one piece at a time.
- Distraction: Add a family member walking past or a toy on the floor
- Duration: Hold the pause for three to five seconds
- Distance: Take one step away, then return, mark, and release
Only increase one factor at a time. If your dog breaks, lower the bar and win easy reps. Training dogs to pause before movement must feel achievable so your dog stays motivated.
Step Six Generalise To Real Life
Dogs do not generalise by default. You must show the rule in many places.
- Every door and gate at home
- Front path, kerbs, and crossings on your route
- Park gates, car parks, and shop entrances where dogs are allowed
Keep a calm tone and steady pace. The more places you practice, the stronger training dogs to pause before movement becomes.
Rewards That Build Calm Choices
Motivation is not just food. It is also access to things your dog wants. Use both to reward the pause.
- Food rewards for precision and learning
- Life rewards such as stepping through the door or hopping out of the car
- Short play after a great rep to keep energy positive
Fade food slowly as the habit grows. Let life become the main reward. In training dogs to pause before movement, life rewards make the behaviour stick in daily routines.
Common Mistakes And Fixes
- Repeating the release cue: Say it once. If your dog does not move, gently encourage forward after a beat, then try again next rep
- Over long pauses too early: Start at one second. Build time only when your dog is relaxed
- Rushing the door: You set the pace. Step calmly and keep the lead short and steady
- Big hand signals that tease movement: Keep hands neutral once you ask for sit
- Inconsistent rules across family: Agree on the same cues and release for every threshold
Small adjustments bring quick wins. Fix the environment first. Then refine timing and cue delivery. These small details are what make training dogs to pause before movement feel easy to your dog.
Puppies And The Early Pause
Puppies can learn this on day one. Keep sessions short and cheerful.
- Use micro reps at the bowl and inside doors
- Reward after a half second, then a full second
- Keep your body still to avoid luring movement
- End sessions while your puppy is still keen
With puppies, training dogs to pause before movement builds a calm default that carries through adolescence. It shapes polite behaviour before bad habits form.
Advanced Applications Of The Pause
Off Lead Reliability
A reliable pause supports off lead recall and safety around wildlife or other dogs. Ask for sit as your dog returns, hold a short pause, then release to a heel or a free run. The pause becomes a respectful checkpoint before freedom.
Service And Protection Pathways
In our advanced programmes, the pause before movement is essential. It anchors focus in high energy work, keeps accuracy under pressure, and sets the dog to perform with a clear head. Training dogs to pause before movement at this level is still built on the same simple rules you learn at home.
Household Etiquette
Use the pause before movement wherever excitement spikes. Before greeting guests. Before jumping into the car. Before running up or down stairs. These small habits calm the whole household.
How Smart Trainers Coach Families
Smart Dog Training delivers this skill through structured lessons that map to real life. We coach timing, markers, and the correct use of Pressure and Release so owners gain confidence fast. Your trainer sets benchmarks, plans practice between visits, and helps you solve problems on the spot.
Working with an SMDT means your plan is consistent from first session to final result. Our national network ensures training dogs to pause before movement follows the same high standard in every home we serve.
Progress Tracking And Milestones
Clarity builds when you measure what matters. Track these points each week.
- Threshold list: How many doors and gates now cue a natural pause
- Time on pause: The average seconds your dog holds before release
- Distraction level: Calm at family traffic, toys on floor, visitors
- Carryover: Does your dog pause without cues at new thresholds
When you see automatic pauses at home and smooth kerb sits on your walk, you are ready to stretch duration and distraction further. This is how training dogs to pause before movement grows from a taught skill to a daily habit.
Troubleshooting Tough Cases
Some dogs find thresholds hard. Here is how we smooth the path.
- High arousal door rushers: Start with the bowl to build success, then practice at an inside door before the front door
- Whining or barking during the pause: Lower duration. Reward breath out moments and soft eye contact
- Dogs that creep forward: Reset with gentle lead pressure. The instant your dog rocks back, release pressure and mark
- Fear at thresholds: Pair doors with quiet and extra space. Reward calm looking and small steps forward
- Owners who feel stuck: Reduce goals to one second and one threshold. Win easy reps, then build again
These adjustments keep training dogs to pause before movement fair and achievable. If you want hands on support, our team can coach you in home or in structured sessions.
Ready to turn your dog’s behaviour around? Book a Free Assessment and connect with a certified Smart Master Dog Trainer available across the UK.
Real Life Practice Plan
Use this simple weekly plan to build momentum without overwhelm.
- Week one: Bowl and inside doors, one second pause, five short sessions
- Week two: Front door and garden gate, one to two second pause, add light distractions
- Week three: Car door and kerbs, one to two second pause, clip lead before opening
- Week four: Parks and shops where dogs are allowed, variable one to three second pause, fade food to life rewards
Document wins daily. The habit of logging progress helps you stay consistent. With steady practice, training dogs to pause before movement becomes automatic across your routine.
FAQs About Training Dogs to Pause Before Movement
What is the difference between a wait and a pause
In our system a pause is a short stillness that ends with a release. It can be paired with sit, stand, or down. The key is that your dog holds position until you say Free. This is the rule that guides training dogs to pause before movement in every setting.
How often should I practice the pause
Daily but short. Five minutes twice a day beats long sessions. Attach the pause to real moments like doors and bowls so it becomes part of your routine.
Should I use food or life rewards
Use both. Start with food for fast learning, then let life rewards such as stepping outside do most of the work. This shift makes training dogs to pause before movement stick in the real world.
What if my dog breaks the pause
Reset calmly. Close the door, lift the bowl, or step back to reduce pressure. Ask for sit, mark stillness, then try a shorter pause. Success breeds success.
Can puppies learn this
Yes. Puppies can start on day one with half second pauses. Keep it cheerful and end while your puppy is still keen. Early wins make later work much easier.
Will this help with lead pulling
Yes. The pause builds impulse control and pairs well with Pressure and Release on the lead. Dogs learn that soft leads and stillness open doors. This is central to training dogs to pause before movement on walks.
Do I need one word for release
Yes. Pick a single release word and keep it consistent. Say it once. Clarity is how dogs learn to wait without confusion.
Conclusion
Training dogs to pause before movement is a small habit with a huge payoff. It keeps your dog safe, makes walks calmer, and turns daily routines into training moments. Through the Smart Method you get a clear plan with fair guidance, strong motivation, and stepwise progression so your dog understands and enjoys the work.
If you want a fast, confident start, our trainers can coach you through timing, markers, and Pressure and Release in your home environment. With our mapped structure and national support you get the same trusted results wherever you live.
Your dog deserves training that truly works. With certified Smart Master Dog Trainers SMDTs nationwide, you'll get proven results backed by the UK's most trusted dog training network. Find a Trainer Near You

Training Dogs to Pause Before Movement
Training Relaxed Responses to Doorbells The Smart Method
Training relaxed responses to doorbells is one of the most valuable life skills for any family dog. With Smart Dog Training, you will replace chaos at the door with calm, reliable behaviour that holds even when guests arrive. Our programmes are delivered by a certified Smart Master Dog Trainer, so you get a structured plan that works in real homes across the UK. Every step follows the Smart Method, our proprietary system that builds clarity, motivation, progression, fair pressure and release, and deep trust.
Dogs are not born knowing how to handle doorbells. The sound predicts change and excitement, which easily turns into barking, jumping, or rushing the hallway. By applying the Smart Method, training relaxed responses to doorbells becomes a simple routine that your dog understands and chooses because it has been made clear, rewarding, and accountable.
Why Doorbells Trigger Over Arousal
Doorbells are sudden, high value signals. They predict people, parcels, movement, and new smells. Many dogs learn a pattern where the sound leads to a burst of adrenaline, and that energy is rehearsed over and over. Without guidance, practice makes permanent. The Smart Method replaces that habit loop with a calm, predictable sequence that makes good choices easy.
- Sound surprise and startle responses kick in
- Lack of clear rules about where to go or what to do
- Human energy rises which feeds the dog’s arousal
- Repeated success at rushing the door creates a self rewarding pattern
What Calm Looks Like At The Door
We define calm in precise, observable terms so you can train and measure it. In Smart Dog Training programmes, success looks like this:
- On the first chime, your dog moves to a known station such as Place
- Quiet mouth and soft eyes, with a loose body
- Stays on Place until released, even while you open and close the door
- Greets only when invited, with four feet on the floor
- Returns to Place if the doorbell rings again
Foundations Before You Start
Before you bring the doorbell into play, set the ground rules. Foundation skills create clarity and make training relaxed responses to doorbells straightforward.
Equipment and Setup for Success
- A stable raised bed or mat for Place
- A standard flat lead or long line to guide when needed
- High value food rewards in a pouch for fast delivery
- Access to your doorbell button, a recorded chime, or a helper to press it
- Optional baby gate to manage space while your dog is learning
Pick a quiet time and a neutral room near the door. Reduce clutter and remove toys that can pull focus. The goal is to build clean repetitions before you add the real world noise of visitors and parcels.
Teaching Clear Markers and Release
Clarity is the first pillar of the Smart Method. Your dog must understand when they are right and when the job is finished. Choose two markers:
- Good as a calm, sustained marker that tells your dog to continue the current behaviour
- Yes as a release marker that ends the behaviour and pays a reward
Pair each word with its meaning. Feed on the bed after Good, then toss a reward off the bed only when you say Yes. This contrast makes Place sticky and the release meaningful. If you apply light lead guidance, release the pressure the moment your dog complies. That timely release is a reward in itself, and it keeps training fair.
Teach Place as the Calm Default
Place is your anchor for training relaxed responses to doorbells. It gives your dog a clear spot and a job that can be held while life happens around them. In every Smart Dog Training programme, Place becomes the default when excitement rises.
Step by Step Place Training
- Introduce the bed. Walk your dog to it. The instant two paws touch, mark Good and feed on the bed.
- Build value on the bed. Feed several times with your dog standing or lying down. Keep the pace easy.
- Add the release. Say Yes and toss a treat a step off the bed. Reset by guiding back to Place and marking Good.
- Shape duration. Count slowly to three between each Good. If your dog leaves early, calmly guide back, reduce time, and succeed again.
- Name it. When your dog is choosing the bed, say Place just as they move onto it, then mark Good.
Add Duration and Distance
Expand the skill in small layers. This is the Progression pillar of the Smart Method.
- Add time. Move from three seconds to ten, then twenty, then a minute or more
- Add distance. Take one step back, return and mark Good, then feed on the bed before you release with Yes
- Add mild distractions. Lift the handle, jingle keys, walk to the door and back
- Keep the ratio of success high. If your dog breaks, reduce difficulty and win the next three reps
Introduce the Doorbell in Progressive Stages
Now you can begin training relaxed responses to doorbells. Start with a low intensity version of the sound and build gradually. Your dog already understands Place, markers, and release, so the doorbell becomes a cue for the behaviour you want.
From Low Volume to Real Visits
- Low volume chime. While your dog is holding Place, press a low volume bell. Pause one second. Mark Good and feed on the bed. Repeat five to ten times.
- Full volume chime. Increase the volume. If your dog holds, mark and feed. If they pop off, guide back, reduce volume, and succeed again.
- Add motion. Hear the bell, take two steps to the door, return, mark Good, feed, then release with Yes and reset.
- Handle and open. Hear the bell, touch the handle, open the door five centimetres, close, return, mark and feed. Slowly extend the open time.
- Helper visit. Invite a helper to press the bell, stay quiet, and stand neutral. You reinforce Place, then release to greet only when invited.
Keep your rewards meaningful. Quiet food delivery on the bed reinforces the emotional picture we want. Avoid high pitched praise or fast movements that can spark arousal. Calm handling builds calm dogs.
Ready to turn your dog’s behaviour around? Book a Free Assessment and connect with a certified Smart Master Dog Trainer - available across the UK.
Handler Skills and Timing
Your skill at the door determines how quickly the plan sticks. The Smart Method gives you the tools.
- Clarity. Say Place once, then guide if needed. Do not repeat commands. Reward on the bed, release with Yes.
- Pressure and release. Apply light lead guidance toward the bed. The instant your dog follows, soften the lead. That release is information and reward.
- Motivation. Pay often during early stages. Shift to intermittent pay once your dog is consistent, then use life rewards like greeting when invited.
- Progression. Change one variable at a time. Volume, distance, door movement, and visitor behaviour should scale in small steps.
- Trust. Keep sessions short and successful. End on a win so your dog looks forward to the next repetition.
Troubleshooting Barking and Lunging
Even with clean training, you may hit bumps. Smart Dog Training expects them and shows you how to fix them within the plan.
- Barking on the bell. Mark Good the moment of quiet on Place. Feed calmly. If barking continues, increase distance from the door, lower the volume, and increase the rate of reinforcement for quiet.
- Lunging off Place. Reduce difficulty and hold the line. Guide back to the bed without chatter, then make the next rep easier. Pay several times for staying as you move.
- Spinning or vocalising after you open the door. Shorten the open time. Reward for stillness with the door only a crack open. Add open time slowly over several sessions.
- Multi dog households. Train each dog alone first. Then add the second dog on lead while the other works Place. Finally, both dogs hold Place together before any greeting is allowed.
- Apartment or shared hallway noise. Run proofing reps at times when the hallway is quiet. Once the skill is solid, softly play recorded hallway sounds while paying calm on Place, then move to live noise.
Generalisation and Family Rules
Training relaxed responses to doorbells must work under pressure. Generalisation makes the behaviour reliable anywhere and with any person in the home.
- Vary the bell. Use different chimes and knocks so your dog responds to the idea of the door, not one sound.
- Change the handler. Every adult should run short reps. Teens can help once the dog is consistent. Young children should never manage the door.
- Dress rehearsal. Hold Place while you carry a parcel, sign for a delivery, or greet a friend. Release to greet only when invited.
- Guest rules. Ask visitors to stay neutral for the first minute. No eye contact or reaching until you release your dog from Place.
- Family routine. One person answers the door while another rewards the dog on Place. Consistent roles keep the picture clear.
When to Work with a Smart Master Dog Trainer
If your dog shows intense reactivity, cannot settle, or you want faster progress, work with a certified Smart Master Dog Trainer. An SMDT will assess your home layout, tailor your plan, and coach your handling so you see steady gains. Smart Dog Training provides in home sessions, structured classes, and behaviour programmes that use the same Smart Method you have read here, so results are predictable and durable.
FAQs
How long does training relaxed responses to doorbells take?
Most families see a change within the first week of daily practice. With two or three short sessions per day, many dogs can hold Place through a real visitor in two to four weeks. Strong habits need consistency and clear rules to settle.
Should my dog greet visitors or stay on Place the whole time?
Early on, keep greetings brief and only by invitation. The goal is a calm dog that can choose Place when the doorbell rings, then greet politely if you allow it. Many families release for a short hello, then return the dog to Place while the guest enters.
What if I live in a flat with constant hallway noise?
Start far from the door and use low volume training first. Reward quiet on Place while the recorded bell plays. Then practise at times when the hallway is calm. Progress to short reps with real hallway noise once your dog is winning easily.
Will this stop barking completely?
The aim is calm and controllable behaviour. Occasional alert barks can be normal, but with Smart Dog Training you will teach your dog to switch off and hold Place after the first chime. Over time, rehearsed calm replaces rehearsed barking.
Can puppies learn this?
Yes. Puppies can start foundation Place work right away, with very short sessions and frequent rewards. Training relaxed responses to doorbells builds impulse control that benefits every part of life, from mealtimes to walks.
What if my dog bolts when the door opens?
Use a lead and a baby gate during early stages. Reinforce Place as you crack the door a few centimetres at a time. Only open fully when your dog stays settled. Accountability through fair guidance keeps the picture clear.
Do smart doorbells and different chimes matter?
Variety helps. Train with the real bell, a recording, and knocks. Your dog learns that any door sound means go to Place and wait for release, which is the heart of training relaxed responses to doorbells.
Conclusion and Next Steps
With Smart Dog Training, training relaxed responses to doorbells becomes a predictable routine your dog understands and enjoys. You taught Place, added time and distance, brought in the bell in small steps, and kept your handling calm and clear. The result is a dog that holds steady while life moves around the doorway, then greets politely when invited. If you want a tailored plan and faster progress, we are here to help.
Your dog deserves training that truly works. With certified Smart Master Dog Trainers (SMDTs) nationwide, you'll get proven results backed by the UK's most trusted dog training network. Find a Trainer Near You
Training Relaxed Responses to Doorbells
Why Focus Matters and How to Build It for Real Life
If you have ever felt your dog switch off the moment a squirrel appears, you are not alone. Teaching dogs to hold focus longer is the foundation of calm, reliable behaviour in the real world. At Smart Dog Training, we use the Smart Method to create engagement that lasts at home and in busy public spaces. From puppies to adults, and even for dogs with big feelings, focus can be taught and made reliable.
In this guide, I will walk you through the exact process we use when teaching dogs to hold focus longer. You will see how clarity, motivation, and fair guidance work together to build focus that stands up under pressure. If you want tailored help, a Smart Master Dog Trainer can assess your dog and build a plan that gets results without guesswork.
What Focus Means in the Smart Method
Focus is not just eye contact. In the Smart Method, focus means your dog remains engaged with you and stays accountable to the task even when distractions appear. The dog understands when to work, when to switch off, and how to handle pressure, which prevents confusion and conflict. Teaching dogs to hold focus longer becomes a natural result of structure paired with rewards.
Why Dogs Lose Focus
- Competing motivation such as scents, wildlife, and people
- Unclear communication or inconsistent rules
- Low reinforcement history in distracting places
- Stress, fatigue, or over arousal
Smart programmes address each of these factors step by step. We build skills in quiet places first, then layer in distraction, duration, and distance at a pace your dog can understand.
Teaching Dogs to Hold Focus Longer with the Smart Method
Every Smart programme follows five pillars. When teaching dogs to hold focus longer, we use each pillar in a clear progression so the dog always knows how to win.
Clarity
We use precise markers to tell the dog what is right. A marker like Yes for a reward, Good for sustained effort, and a release word like Free makes the rules obvious. Clarity reduces guessing, which keeps the dog calm and engaged.
Pressure and Release
Fair guidance helps the dog take responsibility. Light lead pressure paired with a clear release and reward teaches the dog how to make good choices. Pressure is information, not punishment. When the dog makes the correct choice, the pressure goes away and rewards follow. This builds confidence and accountability.
Motivation
Dogs work best when they want to work. We use food, toys, and praise with strategic timing so the dog enjoys the process. Motivation is not random. We pay well for hard moments and fade rewards for easy ones. This balance makes teaching dogs to hold focus longer far more efficient.
Progression
Skills grow through the three Ds. Duration, distance, and distraction. We build duration first in low distraction settings, then add movement, and finally proof in busy places. Progression prevents overwhelm and keeps success rates high.
Trust
When the dog understands the rules and your timing is fair, trust grows. Trust produces calm, willing behaviour that lasts. This is the heart of Smart training and the reason our results are consistent across the UK.
Before You Start
Set yourself up for success. Teaching dogs to hold focus longer works best when the environment and training plan are dialled in.
- Pick simple marker words, for example Yes, Good, Free
- Use a standard flat collar or well fitted harness and a 1.8 to 2 metre lead
- Choose high value food such as soft treats the dog can eat fast
- Train before meals when motivation is higher
- Keep early sessions under five minutes
Core Focus Exercises
These exercises are the backbone of teaching dogs to hold focus longer. Start in a quiet room. Keep early reps short and upbeat.
Name Response
- Say the dog’s name once. Pause.
- The moment the dog flicks attention to you, mark Yes and feed.
- Repeat five to ten times. Set the dog up so it can win easily.
Goal. A fast head turn to you every time you say the name. Build to two seconds of eye contact before the reward.
Static Look
- Hold a treat near your eye. When your dog locks on, mark Yes and feed.
- Fade the lure quickly. Ask for Look and wait for a half second of eye contact, then pay.
- Stretch to one second, then two seconds, then three seconds. Pay after the marker each time.
We use the Good marker during the hold to tell the dog to keep going. This is key when teaching dogs to hold focus longer because it keeps the dog engaged through the duration.
Moving Focus in Heel
- With your dog at your left side, step off. Say Heel or Close, then feed from the seam of your left leg for attention on the move.
- Mark Yes for brief check ins while walking. Reward often.
- Add brief pauses. Ask for Look for one second, then step off again.
Moving focus prevents the dog from switching off when you need to navigate real life. It is a core skill in Smart obedience programmes.
Place for Calm Duration
- Guide your dog onto a raised bed. Mark Yes and feed.
- Say Place and use Good for small holds. Release with Free, then pay.
- Build to 30 seconds of relaxed focus with light distractions in the room.
Place creates an off switch. It is ideal for teaching dogs to hold focus longer during family life and when guests arrive.
A Four Phase Progression Plan
This is the same structure our trainers use. Follow each phase for five to seven days before moving on. If success drops below 80 percent, go back one step.
Phase 1 Home, Low Distraction
- Three to five sessions per day, two to five minutes each
- Build Name, Look, Place, and short heel focus in your living room
- Goal. Ten seconds of eye contact and 60 seconds on Place with calm breathing
Phase 2 Novel Rooms and Garden
- Train in the kitchen, hallway, and garden
- Add motion distractions such as you taking a step back or lifting a hand
- Goal. Fifteen seconds of Look, 90 seconds on Place, and short focus in heel turns
Phase 3 Quiet Public Spaces
- Work in a quiet car park or green space at off peak times
- Reward more often at first, then stretch the gaps
- Goal. Ten seconds of Look around mild distractions and steady engagement in short walks
Phase 4 Busy Public Proofing
- Train near busier paths, cafes, and school routes
- Use Good during longer holds to keep the dog working
- Goal. Teaching dogs to hold focus longer for 20 seconds in real life and staying engaged during stops, doorways, and crossings
By following this plan you are not just teaching dogs to hold focus longer. You are building a habit of checking in with you that will hold under pressure.
Reward Strategy That Builds Duration
- Front load rewards in new places. Pay often for small wins.
- Stretch time between rewards as the dog shows it can cope.
- Use variable rewards. Sometimes pay with food, sometimes with a game, sometimes with a quick release to sniff as a life reward.
- Pay the hardest moments the best. When a skateboard rolls past and your dog chooses you, celebrate.
Smart trainers measure progress by counting clean reps. If you achieve five clean reps in a row at a given duration, move up. If you get two misses within five reps, move back and rebuild.
Using Pressure and Release Fairly
Pressure and release is part of the Smart Method. When used fairly it makes teaching dogs to hold focus longer simple and kind.
- Apply light lead pressure when the dog disconnects
- Release the pressure the instant the dog re engages
- Mark Yes and reward to confirm the choice
The release is what teaches. We never drag or force. We show the path, allow the dog to choose, then pay.
Handling Common Challenges
Over Arousal
Shorten sessions, increase distance from triggers, and add simple pattern games like one step heel, sit, feed. Use Place between reps to bring the nervous system down. Teaching dogs to hold focus longer works best when the dog is below threshold.
Sniffing and Scanning
Earn the sniff. Ask for five seconds of Look, mark, then release to sniff as a reward. This turns the environment into part of your reinforcement plan and keeps focus strong without conflict.
Reactivity
Work at a distance where your dog can still eat. Use a high rate of reinforcement for check ins. Pair this with fair lead guidance. If reactivity is a pattern, work with a Smart Master Dog Trainer for a tailored programme that addresses calm, control, and focus together.
Handler Skills That Multiply Results
- Consistent cues. Say Look once, then wait.
- Clean timing. Mark at the peak of the behaviour.
- Calm voice. Your tone sets the emotional state.
- Still hands. Avoid fidgeting, which distracts the dog.
- Steady posture. Face the direction you want to go.
Small handler habits have a big impact when teaching dogs to hold focus longer. If you are clear and consistent, your dog will be too.
Measuring Progress and Increasing Duration
Use a simple rule. Increase duration by one to two seconds at a time until you reach 20 seconds in quiet places. Then begin to add mild distractions, followed by distance. Keep a quick log. Note date, place, duration, and success rate. If focus drops, lower difficulty, win easy reps, then climb again. Teaching dogs to hold focus longer is a staircase. Avoid skipping steps.
Integrate Focus into Daily Life
- Ask for a five second Look before meals
- Use Place during TV or dinner time
- Ask for two seconds of eye contact before going out the door
- Build short focus holds at kerbs before crossing roads
- Reward spontaneous check ins on walks
These micro reps add up. They make teaching dogs to hold focus longer feel effortless and turn engagement into a habit.
Family and Kids
Children can help by playing simple focus games under supervision. Keep sessions under two minutes. Use soft voices and clear markers. Safety first. Adults manage the lead and reward delivery while children give the simple cues. This keeps the process steady and positive.
Ready to turn your dog’s behaviour around? Book a Free Assessment and connect with a certified Smart Master Dog Trainer - available across the UK.
When to Seek Professional Help
If your dog shuts down, escalates, or cannot eat near distractions, bring in support. Teaching dogs to hold focus longer can require skilled adjustments, especially with reactivity or anxiety. Our SMDTs specialise in focus and calm behaviour using the Smart Method. We will assess your dog, design a plan, and coach you through every step so results stick.
If you are ready to get started with a local expert, you can Find a Trainer Near You or Book a Free Assessment.
FAQs
What is the fastest way to start teaching dogs to hold focus longer?
Begin in a quiet room. Use Name and Look with a high rate of reinforcement. Keep sessions under five minutes. Build to ten seconds of eye contact before moving to new rooms.
How often should I train focus each day?
Three to five short sessions are ideal. Teaching dogs to hold focus longer works best with many small wins rather than one long session.
Which rewards work best for focus?
Soft food the dog can swallow quickly is best to start. As focus grows, add toys and life rewards like a release to sniff. Pay the hardest moments the best.
My dog stares at the treat hand. How do I fix it?
Fade the lure early. Hold your hands still at your sides. Ask for Look and only mark when your dog’s eyes meet yours. Then bring the reward up from a neutral position.
Can I teach puppies to hold focus?
Yes. Keep sessions very short. Use gentle markers and lots of success. Teaching dogs to hold focus longer starts young, but the same rules apply to adults.
What if my dog will not look at me outside?
Increase distance from distractions, switch to higher value food, and lower the duration goal. Rebuild the behaviour at an easy level, then progress step by step.
Conclusion
Teaching dogs to hold focus longer is not about tricks. It is about structure, motivation, and fair guidance delivered with consistency. The Smart Method gives you a clear path from first reps at home to reliable focus in the real world. Follow the progression, measure your wins, and keep sessions short and upbeat. If you want a tailored plan, our certified Smart Master Dog Trainers are ready to help you build calm, confident, and willing behaviour that lasts.
Your dog deserves training that truly works. With certified Smart Master Dog Trainers (SMDTs) nationwide, you'll get proven results backed by the UK's most trusted dog training network. Find a Trainer Near You
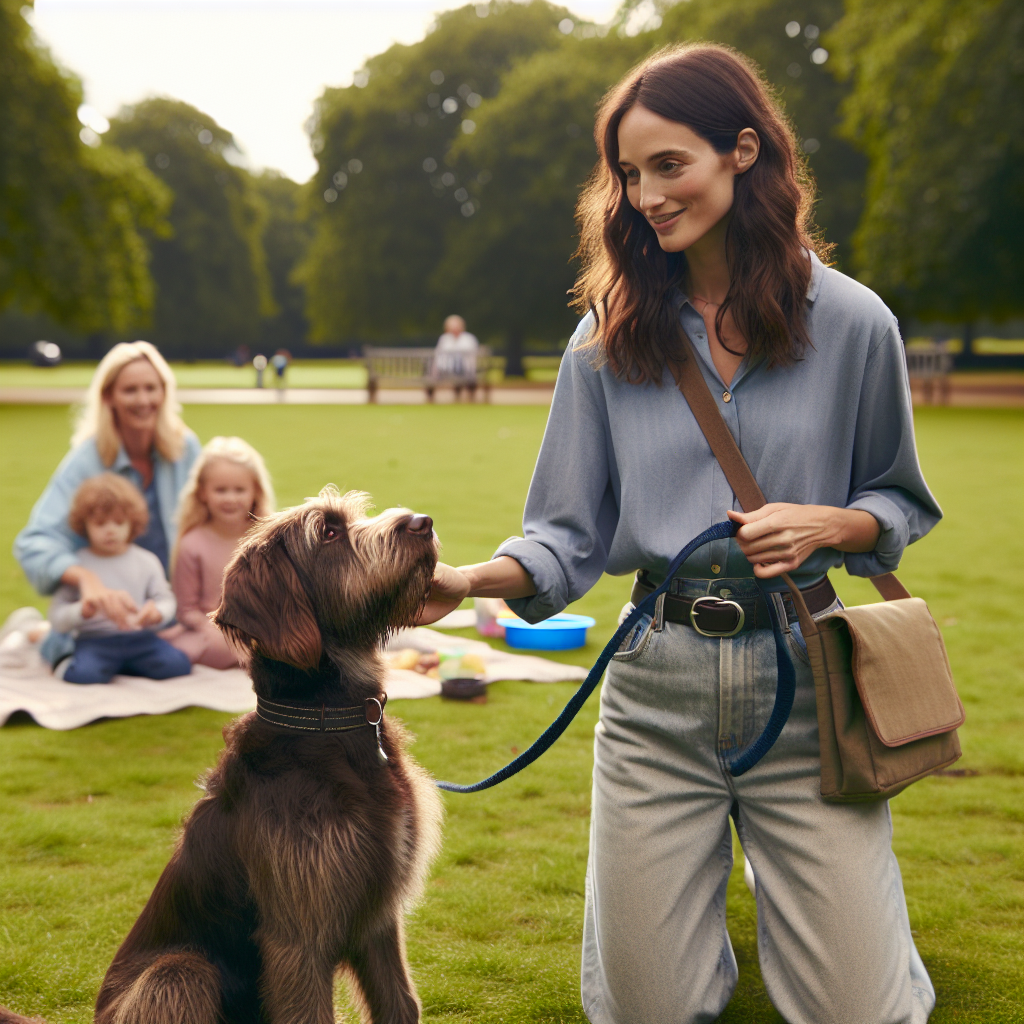
Teaching Dogs to Hold Focus Longer
Teaching Dogs to Release Pressure
Teaching dogs to release pressure is a core skill in the Smart Method, because it builds calm, reliable behaviour that holds up in real life. When a dog understands that soft guidance leads to comfort and reward, you get willing cooperation rather than conflict. Under the Smart Dog Training system, this is delivered with clarity, motivation, and fair accountability. If you want expert help, a Smart Master Dog Trainer can guide you through every step, from first reps at home to distraction proof walks in your area.
What Release Pressure Means in Smart Training
In plain terms, release pressure means a dog learns to move in the direction of gentle guidance and to maintain position until released. The moment the dog yields, pressure stops and reward follows. Teaching dogs to release pressure shows the dog how to turn off mild, instructional input by making the right choice. This is not about force. It is about teaching cause and effect with fairness and precision.
In Smart programmes, pressure is simply information. The dog experiences a soft prompt, understands what action shuts it off, then earns praise or food. Teaching dogs to release pressure becomes a language the dog trusts. Done well, it creates a thinking dog that looks for the right answer and chooses it with confidence.
The Smart Method Pillar Pressure and Release
The Smart Method has five pillars. Pressure and Release is one pillar, and it works in balance with the others.
- Clarity: Commands, markers, and handling are precise so the dog knows exactly what to do.
- Pressure and Release: Soft, fair guidance is paired with a clear release and reward, building responsibility without conflict.
- Motivation: Food, toys, and praise create enthusiasm and positive emotion.
- Progression: We add distraction, duration, and difficulty step by step until the skill is reliable anywhere.
- Trust: Training deepens the bond, so the dog is calm, confident, and willing.
Teaching dogs to release pressure sits at the center of this balance. It allows us to teach leash skills, recalls, positions, and calm in exciting environments with a clear, consistent structure.
Safety and Welfare Foundations
Smart Dog Training always prioritises safety, comfort, and emotional wellbeing. Pressure starts at the lowest level that the dog can notice and understand. We build slowly, keep sessions short, and stop before the dog is tired or stressed. All gear is fitted correctly. Rewards are generous and frequent. You will also practice handling skills without your dog first, so you can deliver cues smoothly and avoid mixed messages.
Tools and Markers for Teaching Dogs to Release Pressure
Teaching dogs to release pressure relies on simple tools and clear markers. Smart trainers use minimal equipment and a clean training plan. The aim is calm cooperation, not conflict.
Clarity with Cues and Directional Pressure
Directional pressure means the dog feels a soft prompt that points the way. Think of a low, steady suggestion rather than a tug. The instant the dog follows the direction, all pressure stops. Teaching dogs to release pressure this way is clean and predictable.
Core cues include:
- Follow: Move toward the handler when the leash suggests that direction.
- Yield: Step back or give space when the handler moves gently into the dog’s bubble.
- Hold: Maintain a position, such as Sit or Place, until released.
Reward Timing and Release Markers
Markers tell the dog which choice was correct and what happens next. Teaching dogs to release pressure requires tight timing.
- Release marker: A short word like Free signals the end of a position or the moment pressure turns off.
- Reward marker: A word like Yes tells the dog they earned food or a toy.
- Keep going marker: A word like Good maintains the behaviour while the dog holds position.
Use food and praise right after the dog yields. Pressure off, then mark, then reward. When teaching dogs to release pressure, this sequence is the heart of fast learning.
Step by Step Plan to Teach a Dog to Release Pressure
Follow this progressive plan. Keep sessions short, two to five minutes, with lots of breaks. Teaching dogs to release pressure should feel like a puzzle game the dog can solve and win often.
Phase 1 Collar Pressure to Follow
Goal: The dog learns that soft, steady collar pressure means move with the handler. The instant the dog steps in the right direction, the pressure turns off and a reward arrives.
Setup:
- Use a well fitted flat collar and a light lead.
- Stand in a quiet room with minimal distraction.
- Have small food rewards ready in a pouch or pocket.
Steps:
- Apply a soft, steady pressure in one direction. Do not pop or jerk.
- Stay still and wait. The moment the dog shifts weight or steps toward the pressure, release the lead completely.
- Mark Yes and deliver a reward at your leg to build focus on you.
- Reset and repeat in fresh directions, a few reps at a time.
Criteria to progress:
- The dog follows pressure within one to two seconds most reps.
- Minimal latency and a relaxed body language.
- Willing return to the start position. No avoidance.
What to avoid:
- Increasing pressure quickly. Stay at the lowest steady level possible.
- Talking too much. Keep verbal noise low so the dog hears the lesson.
- Rewarding late. The payoff should land right after pressure goes off.
Why it works: Teaching dogs to release pressure in Phase 1 creates the base rule. Movement in the right direction makes the pressure stop and earns reward. The pattern is clear and fair.
Phase 2 Body Pressure and Spatial Awareness
Goal: The dog learns to yield space to the handler. This builds manners at doors, around guests, and near food or toys. It also prepares the dog for calm passing on pavements and paths.
Setup:
- Quiet room, lead on for safety.
- Stand square to your dog at an arm’s length.
Steps:
- Step slowly into the dog’s space with a soft, neutral posture.
- As soon as the dog shifts back or sideways, stop moving, mark Yes, and reward. You can place the food slightly away to encourage space giving.
- If the dog plants or leans forward, reduce pressure, reset the distance, and try a smaller step.
Criteria to progress:
- Dog yields with one small step from you.
- Body stays loose and attentive.
Why it works: Teaching dogs to release pressure with body movement builds real world respect for space without conflict. The dog learns that giving room turns off the pressure and pays.
Phase 3 Leash Pressure on Walks
Goal: The dog learns that a light feel on the lead means return to a loose position. This is the engine behind loose lead walking. Teaching dogs to release pressure here ends the pulling cycle.
Setup:
- Choose a quiet pavement or garden path.
- Hold the lead short but relaxed, hands at your midline.
Steps:
- Begin walking. If the lead tightens, stop moving your feet and add gentle backward pressure until the dog softens and steps back to slack.
- The instant slack appears, release pressure completely, mark Yes, then move forward as the reward. Mix in food for bonus wins.
- Repeat. Keep a calm rhythm. No pops, no frustration, just clear on off information.
Progression:
- Change directions often so the dog checks in with you.
- Work past mild distractions at a distance, then close the gap over sessions.
Why it works: Pulling is a self rewarding habit. By teaching dogs to release pressure, you remove the reward for pulling and make slack the fast path to movement and pay.
Phase 4 Duration Distraction and Distance
Goal: The dog maintains positions and manners even when life is exciting. Teaching dogs to release pressure along with markers gives you a reliable off switch.
Steps:
- Pick a position such as Sit or Place. Guide the dog into position with minimal pressure and a lure if needed.
- Use a keep going marker like Good at short intervals while the dog holds. If the dog breaks, guide back with the least pressure needed, then calmly reset and try a shorter duration.
- Add mild distractions such as a dropped toy at a distance. Reward holds with food to build commitment.
Progression:
- Increase duration in small steps, five to 10 seconds at a time.
- Close the gap to distractions as the dog succeeds.
- Proof in different rooms, then in the garden, then on quiet pavements.
Why it works: Teaching dogs to release pressure with strong markers builds clarity. The dog understands how to turn pressure off and how to earn release while keeping composure.
Ready to turn your dog’s behaviour around? Book a Free Assessment and connect with a certified Smart Master Dog Trainer, available across the UK.
Common Mistakes and How to Fix Them
Teaching dogs to release pressure can go wrong if the plan loses clarity. Here are the most common issues and how Smart trainers resolve them.
- Going too fast: If the dog is unsure, return to the last easy step and win three quick reps before progressing.
- Inconsistent release: Pressure must turn off the instant the dog yields. Any delay blurs the lesson.
- Excessive talking: Verbal noise hides the rule. Let the pressure and the markers do the teaching.
- Popping or jerking: This creates confusion and can harm trust. Replace with a light, steady feel.
- Long sessions: Keep it short. Many small wins beat one long grind.
- Skipping rewards: Motivation matters. Pay often so the dog enjoys the game.
Building Accountability without Conflict
In Smart programmes, accountability means the dog understands what is expected and knows how to turn off pressure. It is never about confrontation. Teaching dogs to release pressure is paired with motivation, so the dog chooses the right answer willingly. We teach with a calm tone, clear body language, and markers that make sense to the dog.
As skills grow, we blend release pressure with core obedience. Sit, Down, Place, and Recall all benefit. For example, a gentle leash suggestion helps the dog step into a straight Sit at your side. When the dog sits, pressure stops, you mark Yes, and reward. This pattern is clean and kind, yet it creates real world reliability.
Measuring Progress and When to Get Help
Track outcomes that matter in daily life. Teaching dogs to release pressure should improve these markers within two weeks of regular practice.
- Lead slack appears faster when you stop.
- Fewer resets are needed to return to position.
- Dog maintains focus around mild distractions.
- Recovery after mistakes is calm and quick.
If progress stalls, an expert eye can help refine timing, pressure levels, and reward placement. A Smart Master Dog Trainer can evaluate your handling, adjust criteria, and set a step by step plan that fits your dog and your routine.
FAQs
What does teaching dogs to release pressure actually look like?
The handler applies a soft, steady prompt in a direction. The moment the dog follows or yields, the prompt turns off. A marker like Yes and a reward follow. Teaching dogs to release pressure uses this on off pattern to build clear choices.
Is release pressure training fair for sensitive dogs?
Yes, when done the Smart way. Pressure starts at the lightest level the dog can notice. Rewards are frequent, and sessions are short. Teaching dogs to release pressure this way builds confidence rather than stress.
What gear do I need to start?
A flat collar, a standard lead, and small food rewards are enough. Fit gear well and keep handling calm. Teaching dogs to release pressure relies more on timing and clarity than on equipment.
How long until I see results?
Most families see changes within a few sessions. Lead slack improves first, then focus around mild distractions. With daily practice, teaching dogs to release pressure creates reliable skills within a few weeks.
Can I use this for loose lead walking?
Yes. Teaching dogs to release pressure is the core of loose lead walking in the Smart Method. Slack becomes the path to movement and reward, so pulling fades.
Do I need a professional to get started?
You can begin the early phases at home. If you want faster progress, a Smart Master Dog Trainer can guide your timing, tailor the plan, and help proof skills in real life settings.
Conclusion and Next Steps
Teaching dogs to release pressure is a simple, powerful skill that creates calm behaviour you can count on. It pairs fair guidance with generous reward, so your dog understands how to make pressure turn off and how to earn release. Within the Smart Method, this skill supports everything from leash manners to recalls and calm stays in busy places.
If you are ready to move from theory to results, Smart Dog Training will map a clear, step by step plan for your dog and your lifestyle. Start with a friendly conversation, then see how structured, progressive training changes your day to day walks, greetings, and routines.
Your dog deserves training that truly works. With certified Smart Master Dog Trainers, SMDTs, nationwide, you will get proven results backed by the United Kingdom’s most trusted dog training network. Find a Trainer Near You or Book a Free Assessment today.
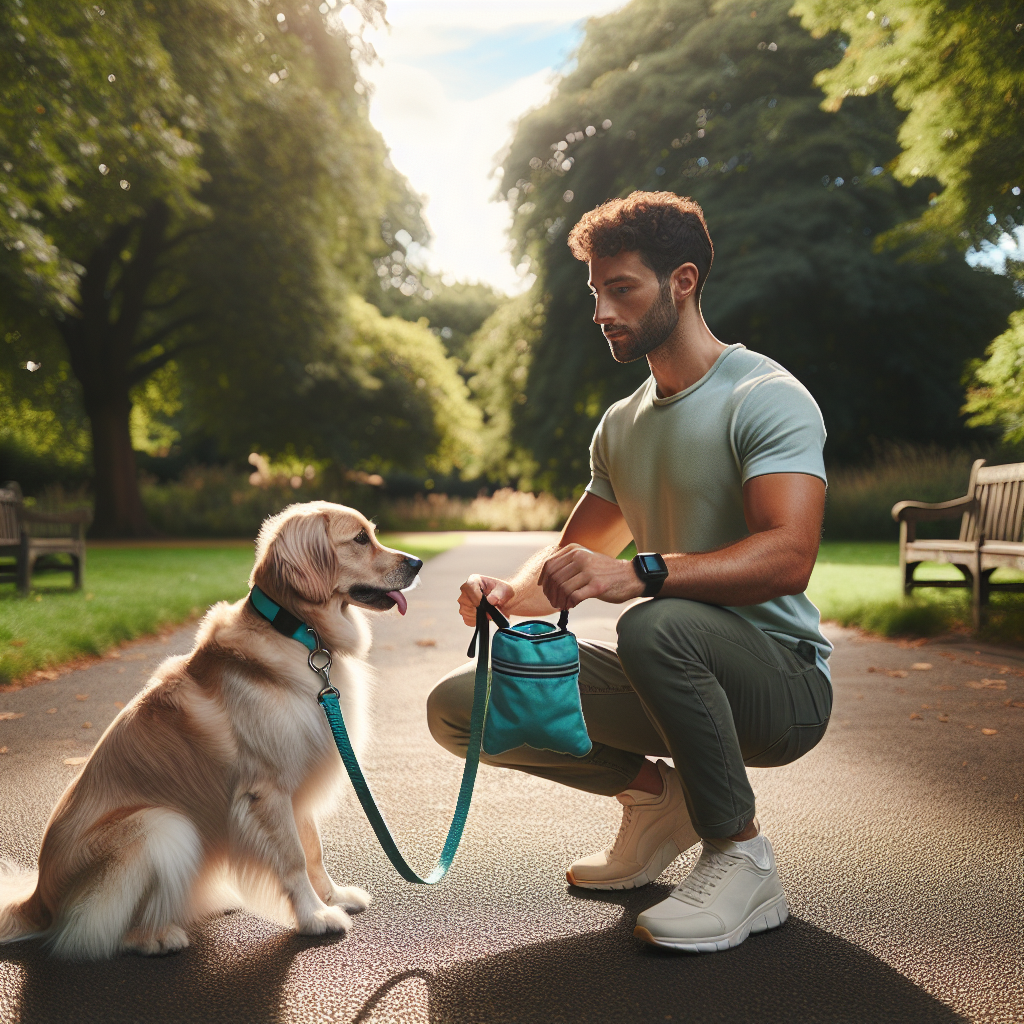
Teaching Dogs to Release Pressure
Training Dogs to Handle New Environments
Training dogs to handle new environments is one of the most important skills for modern life. Whether you live in the city or the countryside, your dog will face people, noises, surfaces, traffic, shops, and travel. At Smart Dog Training, we use a structured system to turn this into calm, confident behaviour that lasts. If you want results you can rely on, our Smart Method gives you a clear path forward with the support of a Smart Master Dog Trainer.
Many owners try social exposure without a plan and end up reinforcing anxiety or excitement. Training dogs to handle new environments requires clarity, fair guidance, and steady progression. Smart Dog Training delivers all three in a step by step programme that helps your dog understand what to do, stay accountable, and enjoy the process.
The Smart Method For Real Life Reliability
Every Smart Dog Training programme is built on the Smart Method. It delivers calm behaviour in any place by blending five pillars.
- Clarity. Your dog gets precise commands and markers so there is never confusion in busy places.
- Pressure and Release. Your guidance is fair and easy to understand, followed by a clear release and reward.
- Motivation. Food, toys, and life rewards keep your dog engaged and willing.
- Progression. We add distraction, duration, and difficulty at a pace your dog can meet.
- Trust. Training builds a strong bond so your dog looks to you for direction when the world gets loud.
This method is the backbone for training dogs to handle new environments. It removes guesswork and gives you a road map from the living room to the busiest street.
What Handling New Environments Really Means
At Smart, we define success as environmental neutrality. Your dog can walk, settle, and respond to you even when life is moving around them. That outcome does not happen by accident. Training dogs to handle new environments means building skills at home, then folding in novelty, then proofing in real locations with structure and accountability.
A Smart Master Dog Trainer guides you through this process so you avoid common traps, like flooding with too much exposure or relying only on food with no standards. Our approach balances motivation with clear boundaries, which is why results last.
Readiness Checklist Before You Go Out
Before you start training dogs to handle new environments, set your foundation. Five simple pieces prepare your dog for success.
- Health and fit. Your dog is healthy, well rested, and has had a chance to toilet.
- Equipment. A well fitted flat collar or training collar, a standard lead, and a short tab if you use one. No flexi leads in busy areas.
- Markers. Yes, good, and free or release are practiced indoors. Your dog understands what each one means.
- Place or mat training. Your dog can hold a relaxed settle on a bed for five minutes at home.
- Loose lead basics. Your dog can walk next to you at home for a few minutes without pulling.
With these in place, training dogs to handle new environments becomes simpler and safer for you both.
Week 1 Home To Garden
Start where distractions are light. We keep sessions short, upbeat, and clear.
- Place to release. Send your dog to their bed, reward calm, then release. Repeat until your dog waits for your release cue.
- Door thresholds. Sit, focus, and release through the door. No dragging or lunging is allowed.
- Loose lead turns. Walk in slow figure eights. Mark and reward the position you want, then add a gentle turn away if your dog forges ahead, followed by a clear release.
In Week 1, you are already training dogs to handle new environments by adding the garden as a new step. Keep standards high and sessions brief.
Week 2 Quiet Street Work
Move to a quiet street with light traffic.
- Clarity drills. One step, stop. Three steps, stop. Change pace often. Your dog learns to watch you.
- Neutral greetings. People can pass without your dog moving toward them. Reward neutrality, not over social behaviour.
- Place on the go. Use a portable mat. Ask for a two minute settle near the driveway or on the pavement.
Week 2 continues training dogs to handle new environments by adding mild movement, distant sounds, and surfaces like pavement and kerbs.
Week 3 Parks And Paths
Now add dogs at a distance and more motion around you.
- Distance first. Keep a wide buffer from other dogs. If your dog is curious, increase distance, ask for a sit, then reward eye contact.
- Pattern games with purpose. Use predictable sequences, like sit, heel, place, release, so your dog anchors to you when life is busy.
- Settle and stay. Three to five minute mat settles while joggers pass. Reward calm, then release and walk on.
By shaping these moments, you are training dogs to handle new environments that include dogs, bikes, prams, and wildlife.
Week 4 Shops And Outdoor Cafes
We now practice calm in places people spend time.
- Entrance manners. Stop before doors. Ask for focus. Enter only when your dog is with you.
- Under table settle. Place the mat under your chair. Reward slow breathing and stillness. Keep food out of reach until your dog is neutral.
- Life rewards. Release to a short sniff break as a reward for long calm settles.
This stage is key for training dogs to handle new environments where food, movement, and close quarters combine. Your dog learns that quiet earns freedom.
Week 5 Transport Skills
Travel multiplies novelty. We make it predictable and safe.
- Car loading and unloading. Sit before the door opens. Wait for the release. Load on cue. Exit on cue. Never jump out on their own.
- Public transport. Start by standing near a platform or bus stop. Practice heel, sit, and settle as vehicles arrive and depart, then add short rides when your dog is calm.
- Moving surfaces. Practice on ramps, grated floors, and lifts with slow steps and steady reinforcement.
These steps are essential for training dogs to handle new environments that move and echo, like stations and car parks.
Week 6 Clinics And Groomers
Many dogs worry in care settings. Smart programmes turn these visits into well rehearsed routines.
- Cooperative handling. Teach chin rest to hand, soft ear lifts, and paw presentation at home.
- Smell and settle. Visit the car park or lobby. Do a short mat settle. No appointments needed for the first few visits.
- Short, positive reps. Build from one minute to ten minutes across several visits. Keep exits calm and controlled.
This plan keeps momentum. You are training dogs to handle new environments that matter for health and grooming, which reduces stress for life.
Handling Sensitivities And Triggers
Every dog has a threshold where things feel hard. Smart Dog Training keeps pressure fair and readable, then releases when your dog makes a better choice.
- Sounds. Start with low volume and distance. Pair with simple tasks like sit and eye contact. Progress to closer or louder only when calm is consistent.
- Surfaces. Introduce metal grates, wet floors, and uneven ground at a slow pace. Reward a single paw on, then two, then all four.
- Motion. Practice near bikes and trolleys at a distance, then lower the distance as neutrality improves.
When you apply this structure, you are steadily training dogs to handle new environments without flooding or guesswork.
Motivation That Works In Busy Places
Smart Dog Training uses rewards to build desire and optimism.
- Food. Pay often at first, then thin out as your dog meets higher criteria. Use calm feeding patterns for settles and brighter food delivery for movement.
- Toys. Short play breaks can lift energy between long calm work. Keep it tidy and controlled.
- Life rewards. Sniffing, moving forward, greeting a friend. Release to these when your dog nails the task.
Balanced motivation keeps your dog engaged while training dogs to handle new environments. They learn that good choices make the world open up.
Pressure And Release Without Conflict
Smart programmes pair gentle guidance with clear releases. If your dog pulls toward a distraction, you apply light pressure to return to position, then release and reward the instant they choose you. This teaches responsibility and reduces conflict. The result is calm, steady behaviour even when training dogs to handle new environments that are noisy or crowded.
Progression And Tracking
Progression means raising criteria at a pace your dog can meet. Use this simple ladder to structure training dogs to handle new environments.
- Distance. Start far from the distraction, then close the gap over several sessions.
- Duration. From seconds to minutes for settles and stays.
- Difficulty. Add sounds, surfaces, tighter spaces, and closer movement one element at a time.
Track sessions in a simple log. Note location, distance, duration, and your dog’s comfort score from one to five. When you hit fours and fives for three sessions, level up one notch. If you see twos, increase distance or simplify until your dog wins again.
Common Mistakes To Avoid
- Too much, too soon. Flooding creates shut down or frantic behaviour.
- Only feeding, no standards. Food without clarity and accountability will fade under pressure.
- Long outings. Quality reps beat marathon sessions. Keep practice short and end on success.
- Inconsistent rules. Doors, greetings, and lead manners must be the same everywhere.
- Skipping rest. Recovery days help your dog absorb learning.
Steer clear of these and you will feel the difference when training dogs to handle new environments.
Sample One Hour Field Session
Use this template for a focused outing.
- Warm up, five minutes. Heel, sit, and short place on a mat.
- Primary exposure, twenty minutes. Choose one element, like cyclists or a busy corner. Work at a distance that keeps your dog thinking, not reacting.
- Settle, ten minutes. Quiet mat work with calm feeding every minute, then space the rewards out.
- Progression reps, fifteen minutes. Reduce distance by a few steps or add a mild surface challenge.
- Cool down, ten minutes. Easy walking, a few sits, then release for a sniff.
A session like this keeps momentum while training dogs to handle new environments with purpose.
Ready to turn your dog’s behaviour around? Book a Free Assessment and connect with a certified Smart Master Dog Trainer, available across the UK.
When To Work With A Professional
If your dog is fearful, vocal, or strong, or if progress has stalled, it is time for guided support. A Smart Master Dog Trainer will tailor the Smart Method to your dog and your lifestyle, then coach you through each step. Because our programmes are structured and outcome focused, you avoid confusion and see steady gains while training dogs to handle new environments.
Real Life Behaviours We Build
- Loose lead walking in town centres and markets
- Confident loading and riding in cars and on trains
- Calm settle under a table or next to a bench
- Neutrality to people, dogs, bikes, scooters, and trolleys
- Reliable recall in parks and open spaces
- Cooperative care for vets and groomers
These skills form the foundation for training dogs to handle new environments day in and day out.
Frequently Asked Questions
How long does it take to see results?
Most owners see clear progress in two to four weeks when they follow the Smart Method plan. Training dogs to handle new environments continues to improve for months as you build distance, duration, and difficulty.
Can adult dogs learn environmental neutrality?
Yes. Smart Dog Training works with dogs of all ages. Our structured progression makes training dogs to handle new environments achievable for puppies, adolescents, and adults.
What if my dog is afraid of loud sounds?
We start at a distance or volume where your dog can think, then pair simple tasks with gradual exposure. This keeps momentum without flooding while training dogs to handle new environments.
How often should we practice?
Short daily sessions work best. Two to three focused outings each week, plus quick home drills, will keep training dogs to handle new environments moving forward.
Do I need special equipment?
No. A well fitted collar, a standard lead, a mat, and suitable rewards are enough. What matters is clarity, progression, and fair guidance when training dogs to handle new environments.
When should I get help from a trainer?
If you feel stuck, or safety is a concern, get support. A Smart Master Dog Trainer will assess your dog and create a step by step plan for training dogs to handle new environments with confidence.
Conclusion
Training dogs to handle new environments is not a single outing. It is a structured journey that starts at home and grows into calm behaviour anywhere. With the Smart Method, you use clarity, pressure and release, motivation, progression, and trust to create a reliable teammate who looks to you first. If you want results that last, Smart Dog Training is ready to guide you from your living room to the busiest street in the city.
Your dog deserves training that truly works. With certified Smart Master Dog Trainers, SMDTs, nationwide, you will get proven results backed by the UK’s most trusted dog training network. Find a Trainer Near You
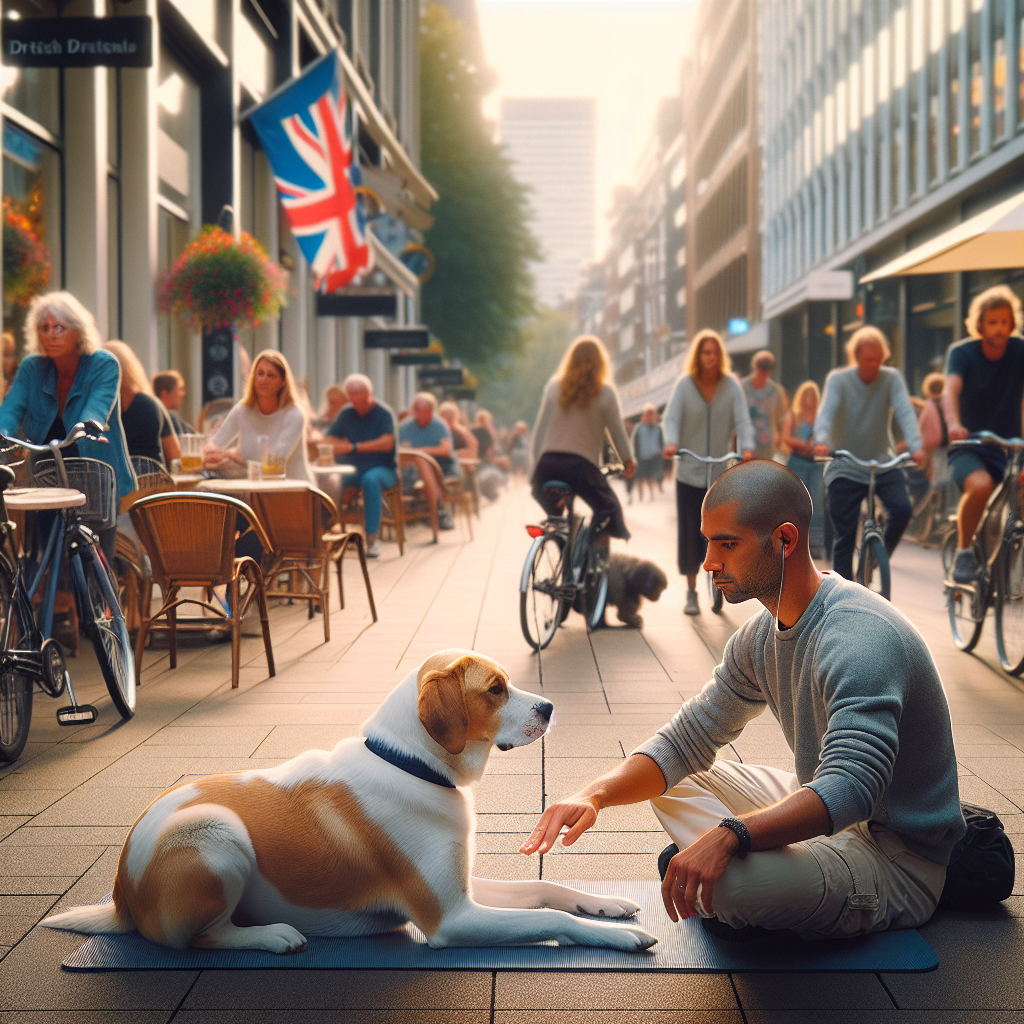
Training Dogs to Handle New Environments
Why Calm Car Travel Matters
Trips to the park, school runs, and longer journeys are smoother when your dog rides quietly and confidently. Dog training for calm behaviour in cars is not just about comfort. It is a safety essential, a legal requirement in the UK to secure your dog, and a key life skill that reduces stress for everyone. At Smart Dog Training, we use the Smart Method to build lasting calm that holds up in the real world. From puppies to adult dogs, our structured approach creates reliability, even with distractions. If you want to work with a Smart Master Dog Trainer, our programmes deliver measurable results you can notice in days and strengthen over weeks.
Dog training for calm behaviour in cars needs a plan that blends motivation with structure. We create clear markers, fair guidance, and step by step progression so every ride becomes predictable and relaxed. With qualified SMDTs leading your programme, you will understand exactly how to load, settle, and secure your dog so calm becomes the new normal.
The Smart Method Applied to Car Travel
Smart Dog Training follows a single proven framework across all programmes. We apply every pillar to dog training for calm behaviour in cars so your dog understands what to do from the driveway to the motorway.
- Clarity Simple commands and crisp markers remove guesswork. Your dog learns a clear settle position that means relax until released.
- Pressure and Release Gentle guidance to position and stillness, then an immediate release and reward for correct choices. This builds accountability without conflict.
- Motivation Food, praise, and calm touch reinforce the emotional state we want in the car. Rewards are delivered for quiet and focus.
- Progression We start with engine off, then idle, short movement, varied routes, and finally high distraction scenarios like school pick ups and petrol stations.
- Trust Consistent routines grow confidence. Your dog learns that the car is predictable and safe, and that you handle it all.
Dog Training for Calm Behaviour in Cars
To make car travel reliable, follow a repeatable routine before, during, and after each journey. Dog training for calm behaviour in cars becomes easy when each step has purpose and timing.
Pre Drive Neutrality Routine
- Five minute sniff walk on lead to decompress and toilet.
- One minute of focused engagement. Name response, eye contact for two to three seconds, then reward.
- Door manners at the house and at the car. Sit or stand and wait until released to load. This is part of dog training for calm behaviour in cars because impulse control begins before you ever open the boot.
Loading and Positioning
Decide where your dog will travel. A secured crate in the boot is ideal for many dogs. A crash tested seatbelt harness on the back seat can also be used. What matters is safety and repeatability. Mark the entry with a simple cue like Up or In. Place your dog into a lie down or settle. Dog training for calm behaviour in cars starts with a still body before the engine turns on.
Markers and Rewards in the Car
- Good marks calm behaviour. Soft yes or good when your dog chooses to lie quietly or looks to you.
- Release cue ends the behaviour. Use release when the engine is off and you are ready to unload. Consistency is key in dog training for calm behaviour in cars.
- Reinforcers should be quiet. Deliver food slowly or place it between paws to avoid arousal.
Equipment That Sets You Up to Win
Smart Dog Training selects equipment to support outcomes. Our focus is safe restraint, clear positioning, and minimal movement.
- Car Crate A well fitted crate helps many dogs relax because the space is defined. Covering three sides can reduce motion and visual triggers. Use a nonslip mat so the settle position is comfortable.
- Seatbelt Harness Use a robust harness with a reliable tether on the rear seat. Teach your dog to settle within the restraint just like you would in a crate.
- Calming Layer A familiar blanket or place mat becomes the cue for stillness. Dogs that have learned Place at home transition faster during dog training for calm behaviour in cars.
- Ventilation and Shade Keep airflow steady. Avoid open windows that trigger reactivity or motion sickness.
Step by Step Training Plan
This plan uses short sessions and clear benchmarks. Move forward only when your dog can remain calm for the listed durations two or three times in a row. Progression is the core of dog training for calm behaviour in cars.
Phase 1 Engine Off Confidence
- Day 1 to 3 Load your dog into the crate or seat area. Cue settle. Close doors. Sit in the driver seat. Reward quiet every 10 to 20 seconds for two minutes. Release and unload. Repeat twice.
- Day 4 to 6 Extend duration to five minutes. Reward every 30 to 60 seconds. If your dog whines, wait for one second of quiet before marking. In dog training for calm behaviour in cars, we reward the state we want, not noise or fidgeting.
Phase 2 Engine On Neutrality
- Day 7 to 9 Load and settle. Start the engine. Do not move. Reward intermittently for three to five minutes of quiet. End session.
- Add mild triggers. Open a window slightly without allowing your dog to move toward it. Mark for staying in position.
Phase 3 Micro Drives
- Day 10 to 12 Drive 30 to 90 seconds around the block. One person drives while another observes. Reward at the end when the engine stops and your dog is still calm. Dog training for calm behaviour in cars works best when rewards arrive after calm, not during motion.
- Add one variable per session. Different route, small speed bumps, short stop at a quiet layby.
Phase 4 Real Life Proofing
- Practice at school pick up, a supermarket car park, and at a petrol station. Focus on neutrality. No barking at doors, people, or trolleys.
- Build duration up to 20 to 30 minutes of relaxed travel. Maintain clear release at the end.
Teaching the Settle Cue for the Car
Settle means lie quietly and switch off until released. You will train it at home first, then move it to the car. This is a cornerstone of dog training for calm behaviour in cars.
- At home use a mat. Lure into down. Mark and feed for stillness. Build two to three minutes.
- Generalise to different rooms. Light distractions like a door knock or someone walking past.
- Move to the car with the mat. Place it in the crate or back seat. Mark whenever your dog chooses to relax on the mat. Gradually fade the mat once calm is a habit.
Reducing Motion Sickness and Anxiety
Some dogs feel unwell or anxious when the car moves. Smart Dog Training addresses state of mind and routine. Dog training for calm behaviour in cars improves physiological comfort because the dog stops bracing and panting.
- Feed light before travel. A small portion at least 90 minutes beforehand helps. Avoid heavy meals.
- Ventilation and temperature. Stable airflow and shade prevent overheating, which can trigger nausea.
- Smooth driving. Predictable acceleration and braking reduce stress.
- Short sessions. Stack many micro drives instead of single long ones early in training.
- Calm reinforcement. Slow petting and low value food delivered at end of travel keeps arousal low.
Managing Triggers in the Car
Many dogs react to people, bikes, or dogs outside the window. Dog training for calm behaviour in cars teaches neutrality even when the world moves fast.
- Limit visual access. Crate covers or window shades reduce scanning.
- Head position. Reinforce head down between paws or resting on a mat. It is hard to bark with a relaxed jaw.
- Engagement intervals. At stops, ask for two seconds of eye contact and pay it. Then back to settle. This balances motivation and calm.
- Distance from triggers. Park at the far end of a car park while you proof neutrality.
Loading and Unloading Without Chaos
Door manners are part of safety. Dog training for calm behaviour in cars must include controlled entry and exit.
- Approach the car on a loose lead. Stop at the boot. Ask for a sit or stand. Open slowly. If your dog breaks position, close the door and reset. Release only when still.
- After parking, switch the engine off first. Wait for a breath of quiet. Mark. Then release. This sequence prevents door darting and teaches patience.
Puppies and Early Foundations
Puppies can learn quickly when sessions are short and upbeat. Smart Dog Training starts puppy car work with simple, repeatable reps. Dog training for calm behaviour in cars for puppies looks like two minutes of engine off practice, then a tiny drive, and a nap at home. Keep reinforcement frequent and calm. Teach the meaning of release early, so the puppy does not guess when to move.
Common Mistakes to Avoid
- Letting the dog pace in the car. Movement rehearses anxiety. Instead, teach a settle with release.
- Rewarding noise. If you feed while your dog whines, you reward the noise. Wait for a second of quiet, then pay.
- Big first journeys. Long drives too early often create carsickness and panic. Use micro drives.
- Unstructured unloading. Opening doors while the dog is excited teaches door rushing.
- Inconsistent rules between family members. Dog training for calm behaviour in cars succeeds when everyone uses the same cues and release.
Two Week Sample Schedule
Use this as a guide and adapt the pace to your dog. The goal is steady progress without overwhelm. The Smart Method is progressive by design, which is why our dog training for calm behaviour in cars delivers consistent results.
- Week 1 Engine off days 1 to 3. Five minutes of settle twice daily. Engine on days 4 to 7. Three to five minutes idle after settling.
- Week 2 Micro drives days 8 to 10 around the block. Proofing days 11 to 14 with short errands and calm unloads.
How to Measure Progress
- Time to settle. Target under 30 seconds from loading to relaxed down.
- Frequency of vocalisation. Track barks or whines per minute. Aim for consistent zero.
- Body language. Loose musculature, soft jaw, and slow breathing indicate success.
- Consistency across locations. Calm in the driveway should match calm at busy car parks. Data helps you adjust dog training for calm behaviour in cars with precision.
When You Need Hands On Help
If your dog shows persistent panic, car reactivity, or aggression at doors, work with a certified Smart Master Dog Trainer. Our SMDTs will assess history, triggers, and handling patterns, then build a tailored plan. Ready to turn your dog’s behaviour around? Book a Free Assessment and connect with a certified Smart Master Dog Trainer available across the UK.
Real Life Scenarios to Proof
Dog training for calm behaviour in cars should include common British routines so skills hold everywhere.
- School drop off. Practice a five minute idle with kids and doors moving nearby. Reward neutrality only.
- Fuel stops. Your dog remains settled as you step out briefly. Safety first. Secure your dog before you open your door.
- Vet visits. Build calm before and after. Reward in the car for quiet while you wait.
- Motorway services. Park at the quiet end. Toilet on lead. Reload with door manners and reset settle.
Smart Dog Training Standards
Every Smart programme follows one clear standard. We teach clarity so the dog always knows what to do. We guide with pressure and release so the dog learns responsibility without conflict. We maintain motivation so the dog enjoys the work. We progress in structured steps so calm holds up anywhere. We build trust so the bond deepens. Applied to dog training for calm behaviour in cars, this means you get a dog that loads on cue, settles, rides quietly, and unloads when released. The result is a safe, enjoyable journey every time.
FAQs
How long should my dog be able to travel calmly?
Most dogs can build up to 30 minutes within two weeks using dog training for calm behaviour in cars. Longer trips come after you can complete short drives with zero vocalisation and a fast settle.
Should I open the window for my dog?
Limit windows in early stages. Open airflow can help, but wind and moving views often trigger scanning and barking. During dog training for calm behaviour in cars, prioritise ventilation through vents and use shades to reduce visual triggers.
What if my dog barks at people near the car?
Reduce visual access, increase distance, and reinforce a head down settle. Park further away until neutrality is consistent. This is central to dog training for calm behaviour in cars.
Can I use chew toys in the car?
Yes, if they keep arousal low and do not distract from settling. Soft chews can help some dogs relax. If chewing increases excitement, remove it and focus on calm reinforcement within dog training for calm behaviour in cars.
How do I stop door darting?
Teach door manners. Engine off, wait for quiet, then release. If your dog moves early, close the door and reset. That consistency anchors dog training for calm behaviour in cars.
Will this work for puppies?
Yes. Puppies progress faster with many short reps. Start with engine off practice and micro drives. Keep reinforcement calm and frequent. Puppy dog training for calm behaviour in cars protects against future anxiety.
Conclusion
Calm travel is a trained skill, not a lucky break. When you follow the Smart Method with clear markers, fair guidance, and step by step proofing, your dog learns to relax in any car and any car park. Dog training for calm behaviour in cars delivers safety, reduces stress, and opens up more of life with your dog. If you want expert support, our certified Smart Master Dog Trainers are ready to help you implement this system at home and on the road.
Your dog deserves training that truly works. With certified Smart Master Dog Trainers SMDTs nationwide, you will get proven results backed by the UK’s most trusted dog training network. Find a Trainer Near You

Dog Training for Calm Behaviour in Cars
Impulse control at thresholds is the foundation of safe, calm daily life with your dog. Every doorway, gate, crate door, and car boot is a point where excitement can boil over. With the Smart Method you will turn those hot spots into simple routines your dog understands and follows every time. If you want a proven path, work with a certified Smart Master Dog Trainer SMDT who delivers the Smart Dog Training standard in real homes across the UK.
What Is Impulse Control at Thresholds
Impulse control at thresholds means your dog pauses, checks in, and waits for a clear release before crossing any boundary. The boundary could be the front door, a garden gate, the car boot, or a crate door. The goal is not a temporary trick. The goal is reliable manners that keep everyone safe in the moments that matter.
At Smart Dog Training we define success in real life. That means your dog can wait with the door open, hold position while guests enter, and load or unload from the car only when invited. This is built step by step so your dog understands the rules and wants to follow them.
The Smart Method Applied to Impulse Control at Thresholds
Clarity
Dogs need crystal clear communication. We teach a simple set of markers and a consistent release word. Your dog learns that doors do not move them. Your words do. When the cue is given, they cross. Until then, they hold a calm position such as sit, stand, or place.
Pressure and Release
Fair guidance teaches responsibility. With light guidance on the lead, paired with an immediate release when your dog makes the right choice, we build accountability without conflict. Pressure ends the moment the dog chooses to pause and look to you. The release tells them they got it right.
Motivation
Rewards build engagement and optimism. We use food, praise, and life rewards like going for a walk. The door becomes a paycheck moment for attentive behaviour. Your dog learns that calm earns access.
Progression
We build skills in layers. Start in a quiet room, then move to still doors, then doors that move a little, then full opens, then add distractions and duration. Progress only when your dog is calm and consistent at the current step. This is how impulse control at thresholds holds up in busy real life.
Trust
Consistency grows trust. Your dog learns you will guide them fairly and reward them clearly. Trust lowers stress at thresholds, and that calm state is what produces reliable obedience.
Step by Step Threshold Training
Foundation Skills
Before working at doors, teach three simple skills the Smart way.
- Name recognition and eye contact. Say your dog’s name, mark attention, reward. Repeat until you get instant focus even in mild distractions.
- Place command. Your dog can settle on a defined mat or bed. This gives you a calm default when the door opens.
- Release word. Choose a single word for release, such as Free. Say it only when you intend to release. Never chatter the release word.
Keep sessions short, upbeat, and structured. Use clear markers, fair pressure and release, and strong rewards. Your SMDT will personalise criteria if your dog is fearful, pushy, or easily frustrated.
Stage 1 Patterning the Stop
Goal. Your dog stops and looks to you as they approach a boundary, even when the door is shut.
- Approach on lead at a walking pace. One step before the threshold, stop your feet. Keep the lead relaxed.
- Wait one beat. If your dog stops with you, mark and reward. If they creep forward, guide them gently backward to reset, then try again.
- Repeat as a rhythm. Step, stop, mark, reward. Build a clean pattern. End while it is smooth and stress free.
Common mistakes. Talking too much, fiddling with the lead, or opening the door too soon. Keep it simple. Pattern first.
Stage 2 Adding Door Movement
Goal. Your dog holds position while the door moves a little.
- Set up at the closed door. Ask for sit or stand. Place can also be used with a mat near the door.
- Crack the door a few centimetres. If your dog remains steady, close the door, mark, reward. If they lean forward, close the door calmly and reset. No scolding. The door closing is the consequence and your timing is the lesson.
- Repeat. Increase the door movement gradually. Reward often for stillness and eye contact.
Tip. Mix in still reps. If the door always moves, anticipation can build. A few easy wins maintain calm optimism.
Stage 3 Distraction and Duration
Goal. Your dog stays steady with a fully open door while time passes and distractions happen.
- Open the door fully, then close it after two seconds if your dog is calm. Mark and reward. Slowly extend the time.
- Add low level distractions. Tap the frame, jingle keys, talk to a family member. Reward calm. If your dog breaks, close the door, guide them back to position, lower the difficulty, and rebuild.
- Add guest rehearsal. One handler works the dog. One person plays the guest. The guest approaches and steps in only when you release your dog. If the dog pops up, the guest steps back and the door closes. No fuss, just structure.
Release cleanly. Say your release word once. Step through together on a loose lead. The release is the paycheck for impulse control at thresholds.
Beyond the Front Door
Car Doors and Crate Doors
Use the same Smart structure for the car boot, side doors, and crates.
- Car doors. Clip the lead before opening. Ask for sit or stand. Open a crack. Reward stillness. Open fully. Wait for eye contact. Release to jump down or load up. Build duration before release to avoid spring loaded launches.
- Crates and baby gates. Hands on the latch become the cue to settle, not to rush. Touch the latch, reward stillness. Lift the latch, reward stillness. Open a little, reward stillness. Open fully, then release. If the dog tries to surge, close gently and reset.
Life rewards matter here. Access to the car park or the lounge is often more valuable than food. Use both. Calm earns access. Access builds calm.
Handling Mistakes and Common Problems
Training is learning. Mistakes are information. The Smart Method gives you clear choices when things wobble.
- Dog forges through the door. Close the door smoothly, guide the dog back to the starting point, lower the difficulty, and repeat. No drama, no raised voice. Structure teaches the lesson.
- Dog whines or bounces at the threshold. Break the session into shorter, easier reps. Reinforce stillness with frequent rewards. Add a place mat to help the dog settle.
- Dog freezes and will not cross. This often means uncertainty. Reward a few micro steps toward the door, then release back to the room. Pair the door with good outcomes so confidence grows.
- Dog only listens when you have food. Use life rewards as the main paycheck. Access to outside is the big prize. Reward the wait by opening the door, then release to cross.
- Dog nails it at home but fails outside. Your progression jumped too far. Step back to a lower level in the new place and rebuild the layers.
If you are unsure how to balance guidance and reward, a certified Smart Master Dog Trainer SMDT will coach your timing and criteria. That makes progress faster and calmer for you and your dog.
Ready to turn your dog’s behaviour around? Book a Free Assessment and connect with a certified Smart Master Dog Trainer - available across the UK.
FAQs
Below are the most common questions we hear when families start training impulse control at thresholds with Smart Dog Training.
How long does it take to teach impulse control at thresholds
Most families see clear progress within the first week when they follow the Smart Method. Solid reliability with guests and busy streets often takes three to six weeks of short daily sessions. Complex behaviour or reactivity may need a tailored behaviour programme.
What if my dog will not sit at the door
Sit is not essential. Many dogs do better in a calm stand or on place. The key is stillness and focus, not a specific posture.
Should I use the lead indoors
Yes during early stages. A light lead gives you clean guidance and prevents rehearsal of rushing. As your dog becomes reliable, fade the lead.
Is food required forever
No. Start with frequent rewards, then shift to life rewards like going for a walk. Keep occasional food or praise to maintain a positive attitude.
What if guests arrive and training falls apart
Pre plan. Put your dog on place several metres from the door. Use the lead. Coach your guest to pause outside while you do one or two calm reps. Release your dog only when the guest is inside and the door is closed. Your SMDT will show you how to set up the entry so success is likely.
Can puppies learn impulse control at thresholds
Yes. Keep sessions very short and upbeat. Focus on patterning the stop and the release. Avoid long durations. The goal is a confident puppy that loves the routine.
What if my dog guards the door
Do not tackle resource guarding or territorial behaviour alone. Book a structured behaviour programme so we can assess safely and apply the Smart Method in a way that protects everyone.
Conclusion
Impulse control at thresholds is a life skill that keeps your dog safe and your home calm. With the Smart Method you use clarity, fair guidance, strong motivation, and stepwise progression to make door manners second nature. Start by patterning the stop, then add door movement, then layer in distraction and duration. Apply the same structure at car doors and crates. Handle slips without conflict and reward the calm choices you want to see again.
If you would like tailored coaching and faster results, we are here to help. Your dog deserves training that truly works. With certified Smart Master Dog Trainers SMDTs nationwide, you'll get proven results backed by the UK's most trusted dog training network. Find a Trainer Near You
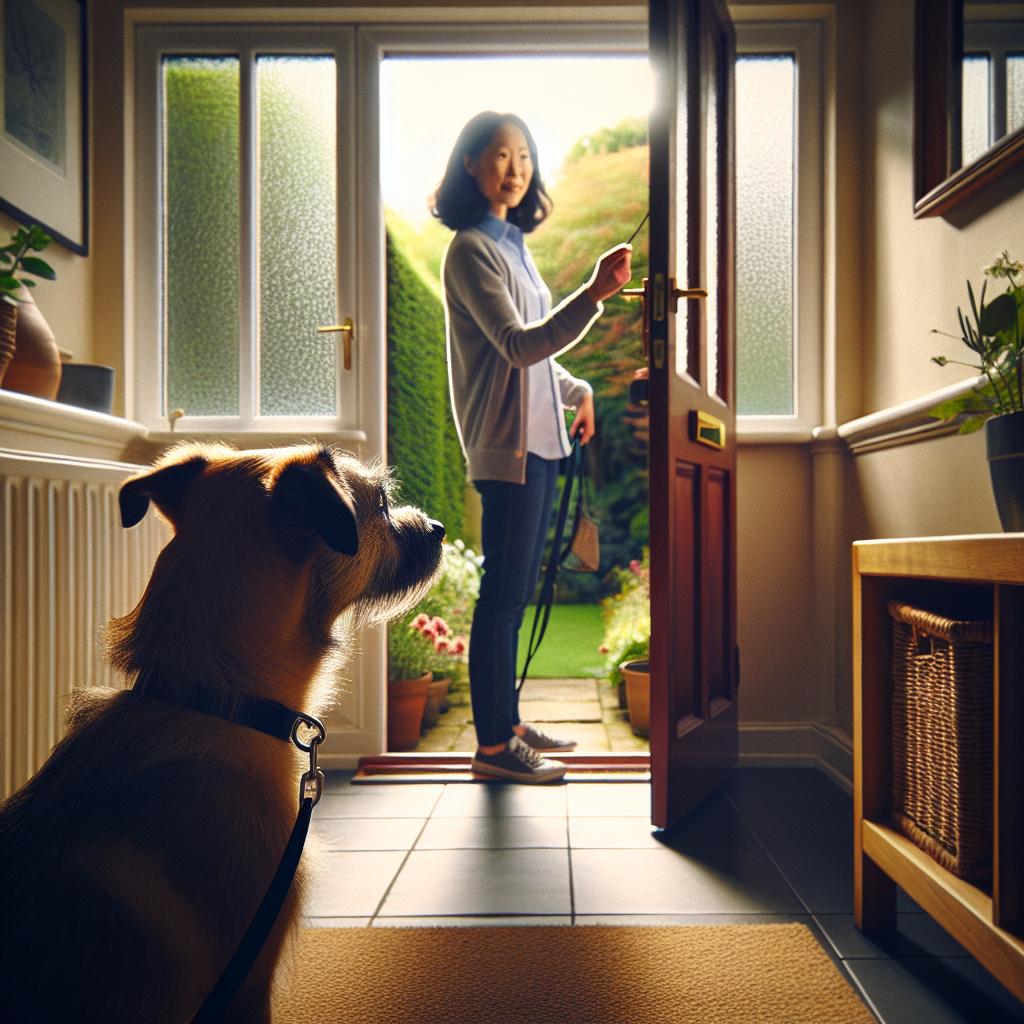
Impulse Control at Thresholds
What Is Shaping Quiet Behaviour in the Crate
Shaping quiet behaviour in the crate is the structured process of reinforcing calm, silent choices until your dog can settle on cue and for duration. At Smart Dog Training we use the Smart Method to make this process clear, fair, and repeatable in real life. From puppies to adult dogs, shaping quiet behaviour in the crate builds confidence, reduces anxiety, and prevents nuisance noise at night or during the day.
As a Smart Master Dog Trainer, I guide families to create calm in the crate step by step. The goal is not to tire the dog out or hope for the best. The goal is a plan that marks the right choices, introduces fair guidance, and builds duration without conflict. When owners follow this method, shaping quiet behaviour in the crate becomes a daily habit that sticks.
Why Quiet Crating Matters
Reliable crate calm protects your dog and your home. It gives you control when guests arrive, during mealtimes, when children play, on travel days, and at bedtime. It supports toilet training, helps with recovery after veterinary work, and makes life easier in busy households. By shaping quiet behaviour in the crate, you give your dog a predictable place to rest. That predictability reduces stress and prevents loud rehearsals of barking or whining.
Dogs do what works. If noise brings attention or freedom, noise will grow. If silence and the settle position bring release and reward, your dog will choose those instead. That is why shaping quiet behaviour in the crate is central to Smart Dog Training programmes for puppies and for behaviour issues. It is controlled, measurable, and it produces results you can rely on.
The Smart Method for Crate Calm
Every Smart programme follows our proven system. The Smart Method blends motivation, structure, and accountability so dogs work willingly and owners get predictable outcomes. Here is how it applies when shaping quiet behaviour in the crate.
Clarity
Clarity means your dog always knows what earns reward. We teach a simple marker for quiet and stillness and a release marker that ends the repetition. When shaping quiet behaviour in the crate, clarity removes guesswork. The dog knows silence and calm body language are the exact behaviours that make good things happen.
Pressure and Release
Fair guidance helps the dog take responsibility without conflict. Pressure and release is not force. It is timely information followed by immediate release when the dog makes the right choice. In crate work, pressure might be the door remaining closed while noise continues. The instant your dog offers even one second of quiet, the door opens and reward comes. That clean release teaches the dog to control the outcome through calm.
Motivation
Rewards build desire to work. We use food, verbal praise, and life rewards such as coming out of the crate to join the family. When shaping quiet behaviour in the crate, rewards must be timely and earned. We never reward noise. We pay for silence, soft eyes, a relaxed jaw, and a settled body. That keeps emotion positive and learning fast.
Progression
Skills must grow from easy to hard. Smart progression adds seconds of duration, then distance, then distraction. When shaping quiet behaviour in the crate, we begin with a single second of quiet and grow to minutes and then hours, across rooms and in different environments. We never jump steps. We raise criteria only when the dog is ready.
Trust
Training should strengthen the bond. When owners follow this plan, the crate becomes a predictable retreat, not a place of confusion. Trust grows because the dog learns that quiet choices always pay and that people stay consistent. This is why shaping quiet behaviour in the crate can transform daily life.
Foundations Before You Start
Before you begin shaping quiet behaviour in the crate, set the stage for success. Simple preparation shortens learning time and protects welfare.
Crate Setup and Location
- Choose a crate size that allows standing, turning, and lying flat with legs out, without extra space that invites pacing.
- Place the crate in a quiet area with gentle light and low foot traffic. Avoid tight corners where heat builds.
- Use a flat mat or bed that does not cause the dog to overheat. Remove items if they trigger play or shredding.
- Coverings can help some dogs but are not a cure. If used, ensure airflow and visibility remain comfortable.
Markers and Rewards
- Pick one marker word to confirm quiet, such as "good," and one clear release like "free." Be consistent.
- Choose rewards your dog cares about. Use small food pieces, quiet praise, or permission to exit the crate.
- Stage rewards so they do not wind the dog up. Calm feeding supports calm behaviour.
Walk and Toilet Routine
- Give a short decompression walk and a toilet break before sessions. Movement helps the dog settle.
- Keep water available nearby. For night routines, allow a final toilet break before crating.
- Avoid high intensity play before crate practice. It can spike arousal and delay calm.
Step by Step Plan for Shaping Quiet Behaviour in the Crate
This plan shows how we apply the Smart Method to everyday families. Follow each stage until your dog meets the criteria three sessions in a row before moving on. If you hit a wall, drop back one step. Shaping quiet behaviour in the crate depends on clean repetitions and fair criteria.
Stage 1 Capture First Quiet
Goal: One to two seconds of silence with a soft body before any reward.
- Guide your dog into the crate, door closed. Wait. Do not cue or chat.
- The moment you observe a single second of quiet, mark with your chosen word. Open the door. Reward calmly outside the crate. Reset.
- Repeat ten short reps. If the dog barks, ignore. Wait silently. The first second of quiet earns the marker and release.
- End the session while the dog is still successful. Success builds confidence.
Stage 2 Build Duration
Goal: Ten to sixty seconds of continuous quiet, plus a visible settle.
- Start at two seconds of silence. Mark and release. Add two seconds per successful repetition.
- If the dog breaks with noise, allow the rep to continue with the door closed. Mark the next moment of quiet and drop back to the last successful duration.
- Begin to reinforce the down position if offered. Quiet plus down equals a bonus payout.
- Mix short and slightly longer reps so the dog stays engaged. This variable schedule keeps motivation high.
Stage 3 Add Distance and Movement
Goal: Quiet while you move around the room and leave for brief moments.
- Begin with one step away, then return. Mark quiet and release.
- Walk to the door, touch the handle, return. Mark quiet and release.
- Step out for one second, return, mark quiet, and release. Build to five, then ten seconds.
- Scatter easy successes between harder reps. When shaping quiet behaviour in the crate, never stack five difficult reps in a row.
Stage 4 Generalise to Real Life
Goal: Quiet crating during normal household activity.
- Run the kettle, sit down for a meal, greet a family member, and fold laundry while your dog remains quiet in the crate.
- Introduce low level distractions first. If noise returns, pause, wait for quiet, mark, and drop criteria.
- Schedule at least two mini sessions per day. Many short wins beat one long struggle.
Ready to turn your dog’s behaviour around? Book a Free Assessment and connect with a certified Smart Master Dog Trainer, available across the UK.
Generalising to Real Life
Shaping quiet behaviour in the crate must work in different rooms, at different times of day, and with you doing different tasks. Dogs do not generalise well without help. Create a checklist of scenarios and tick them off gradually.
- Different rooms in the house
- Morning, afternoon, and evening sessions
- Doorbell practice with a helper
- You working at a desk, cooking, or watching television
- Short car sessions in a secured travel crate
Keep sessions short and focused. One minute of clean success is worth more than ten minutes of rehearsal of noise. With repetition, shaping quiet behaviour in the crate becomes the default around the home.
Handling Whining Without Reinforcing Noise
Noise is information. It tells you criteria are too high or the dog lacks clarity. Here is the Smart approach to manage it while shaping quiet behaviour in the crate.
- Stay neutral during noise. Do not cue, look, or touch. Attention can reward the behaviour.
- Wait for the first tiny pause. Even half a second of silence is your window. Mark, release, reward.
- Lower criteria. Return to a success point that produces quiet every time.
- Use fair pressure and release. Keep the door closed during noise. Open the door the moment quiet appears. The release teaches responsibility.
- Keep your rewards calm. Avoid high pitch voices or bouncing energy that restarts vocalising.
If your dog escalates beyond light whining into distress, stop and reset the plan. Break the task into smaller steps. Shaping quiet behaviour in the crate should never become a cycle of conflict.
Night Time Crating
Night routines need extra structure. Puppies and new rescues require patience. Use the same rules you apply during the day while shaping quiet behaviour in the crate at night.
- Plan a calm evening and a toilet break just before bed.
- Place the crate where the dog can relax. For some dogs, being closer to the bedroom early on helps. You can move the crate further away as duration builds.
- Respond to real toilet needs. If you take the dog out, keep it all business. No play, no chat. Straight back to the crate.
- Mark and reward the first quiet morning moments before opening the door. This prevents a habit of alarm clock barking.
Consistency is key. With clear markers and fair release, shaping quiet behaviour in the crate at night becomes reliable within days or weeks, depending on age and history.
Progress Checks and When to Get Help
Track progress so you know when to raise criteria. A simple log will keep you honest when shaping quiet behaviour in the crate.
- Duration achieved each day
- Number of resets and drops in criteria
- Distractions added and location changes
- Night time wake ups and morning performance
Good signs include faster settling, softer body language, and fewer vocal spikes. If you stall for more than a week, or if your dog shows signs of anxiety or frustration, contact a professional. A certified Smart Master Dog Trainer can assess your setup, your markers, and your timing, then adjust your plan so shaping quiet behaviour in the crate continues to move forward.
Smart Programmes for Crate Training
All Smart Dog Training programmes follow the same structured plan that delivers results where it matters most. Whether you have a young puppy learning house rules or an adult dog rehearsing noise, our trainers apply the Smart Method to speed up shaping quiet behaviour in the crate and to sustain it long term.
- In home sessions to set up your environment and routine
- Structured group classes for puppies to build calm around other dogs
- Tailored behaviour programmes for dogs with a history of crate stress
With national coverage and mapped visibility, it is easy to get help. Find a Trainer Near You and start shaping quiet behaviour in the crate with guidance you can trust.
FAQs
Below are common questions families ask when shaping quiet behaviour in the crate.
How long does shaping quiet behaviour in the crate take
Puppies often make fast gains within a week when you train twice daily. Adult dogs with a long noise history may need several weeks of consistent practice. The Smart Method cuts guesswork so progress is steady.
Should I cover the crate during training
Some dogs relax with partial cover, while others feel trapped. Try a light sheet that allows airflow and visibility. If noise increases, remove it and focus on timing your marker and release. The method, not the cover, drives success when shaping quiet behaviour in the crate.
Can I use chews or stuffed toys in the crate
Yes, but use them to support calm, not to distract from poor training. Introduce them after the dog already understands quiet earns reward. If the chew causes frantic behaviour, remove it and return to simple rewards while shaping quiet behaviour in the crate.
What if my dog barks when I leave the room
That is a distance jump. Go back to one step away and rebuild gradually. Use short exits of one to two seconds, and pay the first quiet moment on your return. Build to longer absences only after many wins at short distances.
Is it fair to ignore my dog when he whines
We do not ignore. We wait for the first quiet moment to teach the dog what works. The instant your dog offers silence, you mark and reward. That is fair and clear, and it is the core of shaping quiet behaviour in the crate.
How many sessions per day should I run
Two to three mini sessions per day are ideal. Keep them short and successful. End on a win. You can add one longer session once your dog starts offering long stretches of quiet.
Will this help separation related issues
Structured crate work improves calm and predictability, which often helps. Some dogs need a wider behaviour plan. If you suspect distress beyond crate training, book support so a trainer can integrate a full plan while shaping quiet behaviour in the crate.
Ready to see real progress with your dog and home routine We can help. Book a Free Assessment and we will tailor a plan that makes shaping quiet behaviour in the crate simple and sustainable.
Final Thoughts
Shaping quiet behaviour in the crate is not about luck. It is about structure, timing, and progression that your dog understands. The Smart Method makes that structure simple to follow and easy to measure. With clear markers, fair pressure and release, and well timed rewards, you can create calm that lasts in real life. Your dog learns that silence, stillness, and a soft body always pay. That lesson translates to relaxed evenings, peaceful nights, safe travel, and a stable daily routine.
Your dog deserves training that truly works. With certified Smart Master Dog Trainers (SMDTs) nationwide, you'll get proven results backed by the UK's most trusted dog training network. Find a Trainer Near You
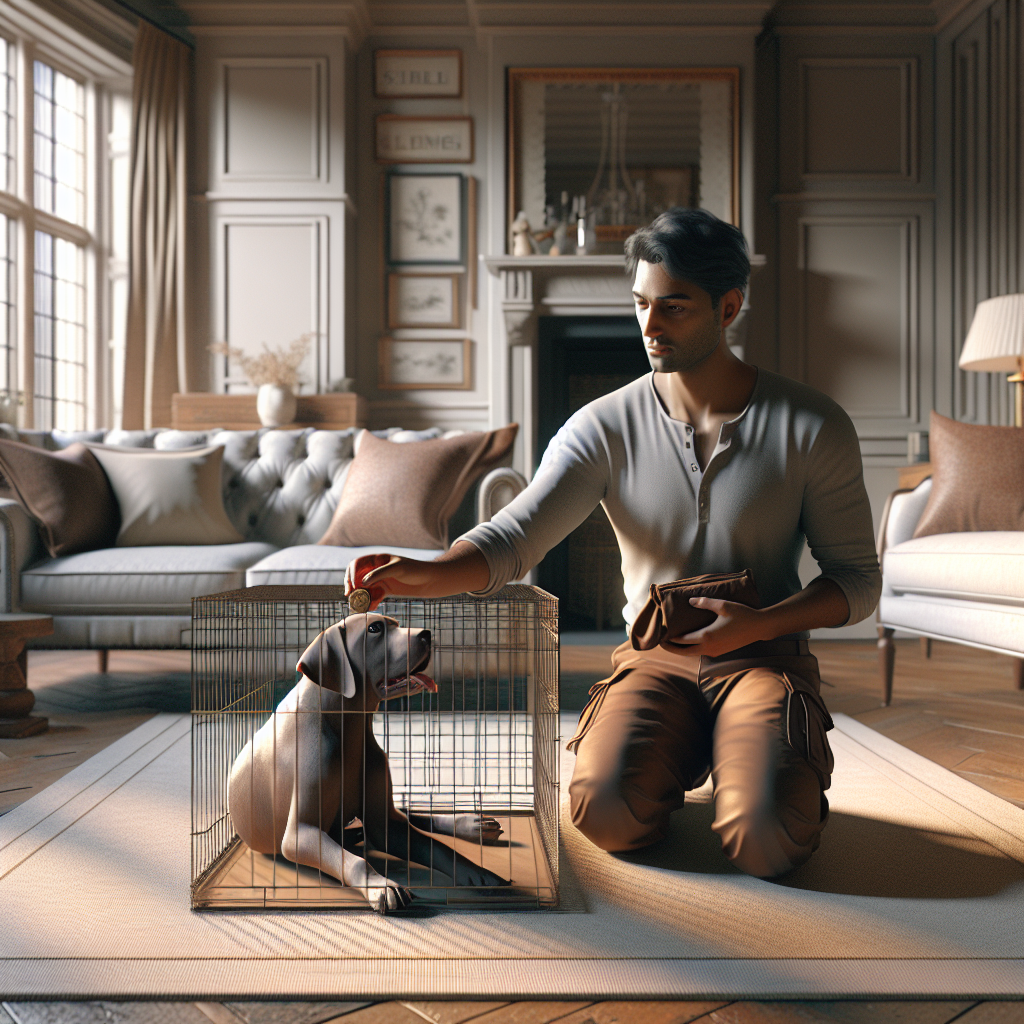
Shaping Quiet Behaviour in the Crate
Training Dogs to Follow Inside
Training dogs to follow inside is one of the most valuable skills you can teach at home. It builds calm, prevents chaos at doorways, and turns daily life into structured practice. At Smart Dog Training we use the Smart Method to make this simple and reliable. Every step is clear, fair, and motivating for your dog. A certified Smart Master Dog Trainer can set this up fast and show you how to keep results for life.
When you focus on training dogs to follow inside, you reduce pulling, door rushing, and pacing. You build trust and order without conflict. The method is gentle yet firm, and the results feel natural to your dog because they know exactly what to do.
Why Following Indoors Matters
Home is where patterns start. If your dog learns to drift, ignore, or rush from room to room, that habit shows up on walks and in public. Training dogs to follow inside turns your home into a calm learning space. It improves safety on stairs, helps with guests at the door, and makes daily tasks easy. Your dog learns to stay near, move with you, and settle when asked. This is not a trick. It is a core life skill that shapes focus and self control.
The Smart Method Explained
The Smart Method is our proprietary training system used across all Smart Dog Training programmes. It is progressive, structured, and designed for real life outcomes. When we focus on training dogs to follow inside, we apply all five pillars.
- Clarity: You will use simple, consistent words and markers so your dog always knows what is expected.
- Pressure and Release: Light guidance paired with a clear release and reward builds accountability without conflict.
- Motivation: Food, toys, and praise create a positive emotional state so your dog wants to work.
- Progression: We layer skills from quiet rooms to busy hallways and finally to full household activity.
- Trust: The process builds confidence and strengthens your bond.
This unique balance defines Smart. It is how we deliver stable results in every Smart Dog Training programme.
Foundations Before Movement
Strong foundations make following easy. Before training dogs to follow inside, set up three basics.
- Name Response: Say your dog’s name once. When they look, mark and reward. Build speed and clarity.
- Marker Language: Choose a clear word for Yes and a release cue like Free. Mark the exact moment your dog does what you want.
- Reward Skills: Teach your dog to take food gently, to chase a toy on cue, and to orient back to you after each reward.
These skills make following feel smooth. Your dog learns that paying attention to you leads to good outcomes. A Smart Master Dog Trainer will ensure your foundations are tight before you add movement.
Clarity First: Teaching the Follow Cue
When training dogs to follow inside, start in a quiet room with few distractions.
- Stand with your dog on a light house line or lead for safety.
- Say your follow cue once. You can use Here or With me. Keep it the same every time.
- Take one slow step. As your dog moves with you, mark Yes and reward at your thigh.
- Reset with your release cue. Repeat three to five times, then rest.
Keep steps small and rewards frequent. The goal is to build understanding. Your dog learns that moving with you pays. This is the clarity pillar in action. In the first sessions of training dogs to follow inside, do not chase distance. Chase clean reps and a happy attitude.
Motivation That Fuels Focus
Dogs follow what they value. Use rewards that matter to your dog. Food rewards help new learners. Tug or a quick toss of a toy can lift energy if your dog prefers play. Keep rewards at your side or slightly behind your leg so your dog stays close rather than cutting in front. When training dogs to follow inside, vary your reinforcement. Sometimes give a single treat. Sometimes give a small jackpot. Sometimes release to a bed to settle. Variety keeps drive high without creating frantic behaviour.
Pressure and Release Done Fairly
Pressure and Release is core to the Smart Method. It is clear guidance, not force. When training dogs to follow inside, use a gentle lead feel as a boundary, not a battle. If your dog drifts away, hold a light, steady line. The moment they step back toward you, release the pressure and mark Yes. Then reward. The release tells your dog they made the right choice. It builds responsibility, and it keeps the work conflict free.
Progression: From One Step to Whole Rooms
Progression turns small wins into robust behaviour. Use this path when training dogs to follow inside.
- Stage 1 One Step: One step, mark, reward. Keep sessions short.
- Stage 2 Two to Five Steps: Add steps slowly. Vary your direction and speed.
- Stage 3 Room Laps: Walk a calm circle in one room. Keep your dog on your left or right side.
- Stage 4 Thresholds: Move through doorways. Pause, ask for focus, then continue.
- Stage 5 Hallways and Stairs: Short, straight lines teach alignment. On stairs, go slow and reward at landings.
- Stage 6 Household Flow: Practice while taking the bin out, making tea, or moving laundry. Daily life becomes training.
Each stage keeps the standard the same. Your dog moves with you until released. Smart Dog Training programmes always build this way so success stacks and lasts.
Distractions Indoors
Homes are full of triggers. Doorbells, kids, the hoover, and food smells all test focus. Training dogs to follow inside prepares your dog for these moments. Use a simple three step plan.
- Lower Criteria: Shorten distance and increase your rate of reward.
- Manage the Environment: Use a baby gate or move to a quieter space.
- Return to Baseline: After a distraction, do three perfect one step reps to reset clarity.
Do not rush. If your dog struggles, step back to the last stage where they were solid. Then build again with more support.
Safe Use of a House Line
A house line is a light lead that drags on the floor when you supervise your dog. It gives you safe access without grabbing a collar. When training dogs to follow inside, a house line helps you guide position and prevent rehearsals of running off. Always supervise, avoid tangles, and remove the line when crating or unsupervised. The goal is less reliance over time as your dog learns the rules.
Structured Routines That Build Habit
Habit makes behaviour automatic. We build habit by using short, predictable routines during training dogs to follow inside.
- Doorways: Ask for follow, step through together, then release to a bed or settle mat.
- Meals: Invite your dog to follow to their place, wait, then release to eat.
- Play: Follow to the garden, play on cue, then follow back inside.
- Guests: Follow to a bed when the bell rings, reward calm, and release when ready.
These routines teach your dog that following earns access to the good stuff. That reduces pushy behaviour and anxiety.
Common Mistakes To Avoid
- Too Much Talking: Use clear markers and cues. Do not chatter.
- Long Sessions: Keep early work to two or three minutes.
- Reward in Front: Place rewards at your side to keep position clean.
- Skipping Release: Always release so your dog knows when the job is done.
- Going Too Fast: Progress only when your dog is consistent.
When training dogs to follow inside, the fix is almost always to simplify, slow down, and reward more often for a short time.
Troubleshooting Behaviour Challenges
Every dog is an individual. Smart Dog Training adapts the plan to suit your dog and your home.
- Over Aroused Dogs: Start with settle training, then short follow reps with calm food rewards.
- Anxious Dogs: Pair following with predictable routines and a soft tone. More structure reduces worry.
- Pullers: Use clear Pressure and Release with a well fitted collar or harness. Reward close position often.
- Door Rushers: Teach a consistent pause at thresholds. Only move when your dog is focused.
- Worried on Stairs: Reward each landing. Use slow steps and keep the line loose.
When you invest time in training dogs to follow inside, these issues improve because your dog learns how to move with you calmly.
Puppies and Adult Dogs
Training dogs to follow inside works for any age. Puppies learn fast with short bursts. Focus on markers, tiny steps, and playful rewards. Adult dogs benefit from predictable structure and clear rules. Senior dogs may need slower sessions and softer surfaces. The method is the same. We flex the pace to keep your dog engaged and comfortable.
Multiple Dogs in One Home
In multi dog homes, teach one dog at a time first. Once each dog understands, pair them and run short reps together. Keep rewards at your leg for each dog. When training dogs to follow inside with more than one dog, run rotation practice. One follows, one settles on a bed. Then swap. This builds patience and reduces competition.
Layering Follow With Obedience and Settle
Follow links to other core skills. Add these once your dog is steady.
- Recall Indoors: Call your dog, then transition into follow for five steps.
- Sit or Down at Stops: When you halt, ask for a sit. Reward, then continue.
- Place: Follow to a mat or bed. Reward calm for two minutes.
Training dogs to follow inside sets the stage for a well mannered dog who can settle fast, move with you calmly, and handle change without stress.
Measuring Progress
Progress should be visible and easy to track. Smart Dog Training uses simple criteria when training dogs to follow inside.
- Contact: Your dog checks in every few steps without prompting.
- Position: Your dog stays by your left or right leg without crossing in front.
- Response: Your dog moves with you on the first cue.
- Recovery: After a distraction, your dog returns to position within three seconds.
- Duration: Your dog can follow through a room, a hallway, and up or down stairs.
Review these weekly. If one area lags, go back a stage and rebuild. Consistency wins.
When You Need Professional Help
If you feel stuck, do not wait. A certified Smart Master Dog Trainer will assess your home setup, your handling, and your dog’s state of mind. Small tweaks often unlock fast progress when training dogs to follow inside. Our team delivers in home sessions, structured classes, and tailored behaviour programmes that follow the Smart Method from start to finish.
Ready to turn your dog’s behaviour around? Book a Free Assessment and connect with a certified Smart Master Dog Trainer - available across the UK.
Daily Practice Plan
Here is a simple weekly routine for training dogs to follow inside.
- Day 1 to 2 Foundations: One step reps in a quiet room. Three sets of two minutes.
- Day 3 Thresholds: Add one doorway. Short sessions, high reward rate.
- Day 4 Hallway Lines: Walk straight lines for five to ten steps. Reward at your leg.
- Day 5 Stairs: One flight with pauses at landings. Keep it slow.
- Day 6 Household Flow: Follow during chores for two to three minutes at a time.
- Day 7 Review and Rest: Two easy sessions, then a longer settle on a bed.
Repeat, adjust difficulty, and keep standards clear. This plan keeps momentum while preventing burnout.
Equipment That Supports Success
Smart Dog Training keeps equipment minimal. For training dogs to follow inside, we suggest a flat collar or well fitted harness, a light house line, and a treat pouch. Choose soft, pea sized food rewards that your dog enjoys. Keep toys nearby for quick play breaks. Simple tools, clear rules, and steady handling create the best results.
Reader Scenarios
These common home moments show how training dogs to follow inside helps daily life.
- Cooking: Your dog follows to a mat and settles while you prepare food, rather than counter surfing.
- Doorbell: Your dog follows to a bed when guests arrive, rather than rushing the door.
- Laundry: Your dog moves with you up and down stairs safely, rather than pulling ahead.
- School Run: Your dog follows to the door and waits calmly, rather than bolting.
In each case, you are using the same follow rules. Your dog trusts the pattern and stays composed.
Maintaining Results Over Time
Maintenance is simple when the habit is strong. Keep short practice blocks each week, mix in rewards, and use clear releases. If life gets busy and things slip, return to early stages for a few days. Training dogs to follow inside is not a one time project. It is a living routine that keeps your home calm and your dog confident.
FAQs on Training Dogs to Follow Inside
How long does it take to see results?
Most families see change within the first week of training dogs to follow inside. Clear markers, short sessions, and high value rewards speed progress. Full household reliability takes a few weeks of steady practice.
Can I teach this without treats?
You can, but it is slower. We use food and play to build desire and focus. When training dogs to follow inside, rewards are key at the start. You can fade to praise and real life rewards once the habit is set.
What if my dog is too excited to follow?
Start with a calm warm up on a bed. Use slow steps and feed at your leg every one to two steps. Training dogs to follow inside should lower arousal, not raise it. Short, quiet work wins.
Is this different from heel?
Yes. Heel is precise and formal. Following indoors is relaxed but accountable. In training dogs to follow inside, we teach your dog to stay near, move with you, and respond to changes in speed and direction with ease.
How do I stop rushing through doors?
Teach a pause at thresholds. Ask for focus, then move together. Practice this as part of training dogs to follow inside so doors become calm checkpoints, not launch points.
Do I need a professional trainer?
Many families succeed with this guide. If you hit a plateau or face complex behaviour, a certified Smart Master Dog Trainer can help quickly. Our programmes use the Smart Method and adapt to your home. You can Find a Trainer Near You or Book a Free Assessment.
Conclusion
Training dogs to follow inside gives you a calm, safe, and orderly home. With the Smart Method you use clarity, fair guidance, strong motivation, and steady progression to build real life results. Start with foundations, add steps slowly, and weave the skill into daily routines. If you want support, Smart Dog Training has certified SMDTs across the UK who can coach you in person, guide your practice, and help you maintain results for life.
Your dog deserves training that truly works. With certified Smart Master Dog Trainers (SMDTs) nationwide, you'll get proven results backed by the UK's most trusted dog training network. Find a Trainer Near You
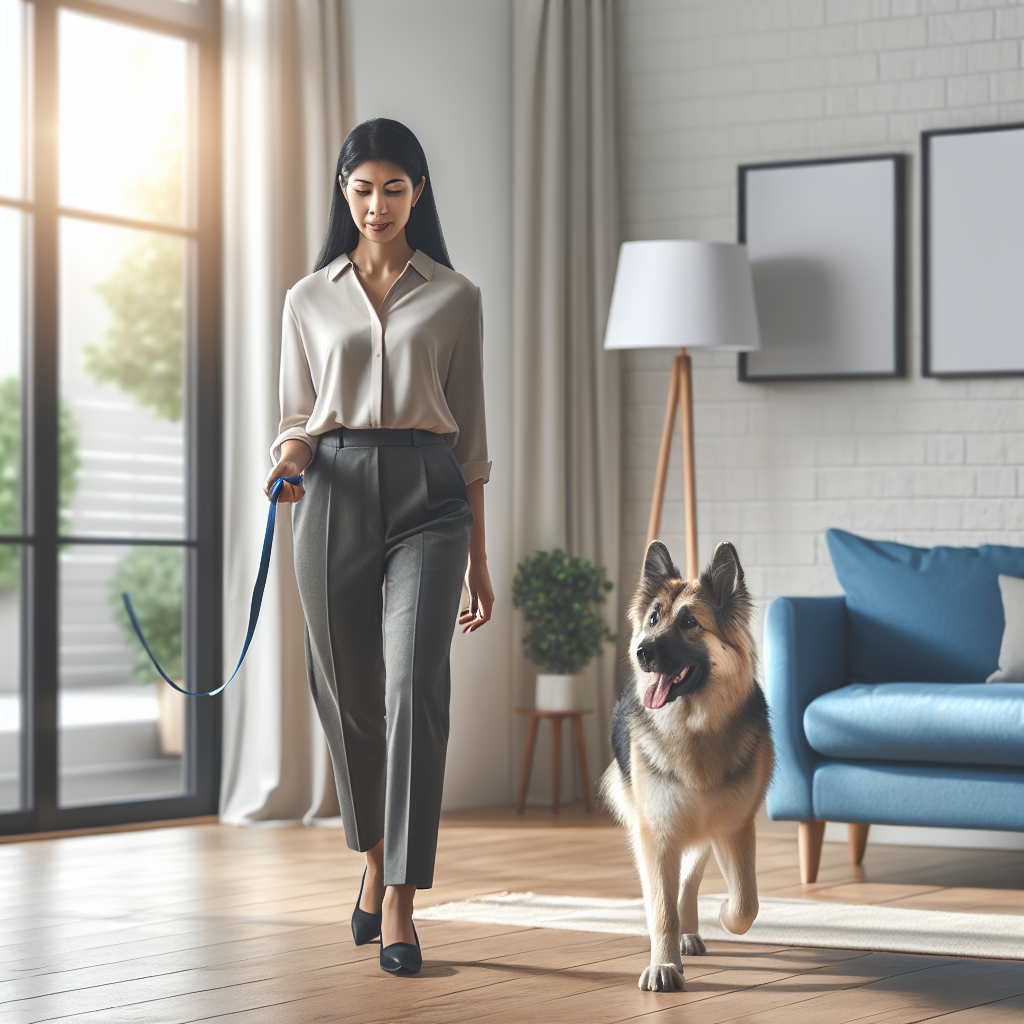
Training Dogs to Follow Inside
Why Your Dog Seems Disinterested
If you are facing a dog not interested in training, you are not alone. Many owners start with good intentions then find their dog wandering off, ignoring cues, or switching off after a minute. At Smart Dog Training, we see this every week and we solve it with a structured, proven system. The Smart Method creates clear communication, fair guidance, and strong motivation that lasts in real life. When you work with a certified Smart Master Dog Trainer SMDT, you get a calm path that builds focus without conflict and without guesswork.
This guide explains why a dog not interested in training behaves that way and exactly how we turn disengagement into eager, reliable performance. We will walk through assessment, motivation, structure, and progression so you can see real change at home and outdoors.
Understanding Dog Not Interested in Training
Disinterest looks different from dog to dog. One puppy may sniff the floor instead of looking at you. An adult may comply once then wander off. A rescue may shut down around new people. Although it looks like stubborn behaviour, a dog not interested in training is usually missing one or more of three things clarity, motivation, or progression.
- Clarity means your markers, rewards, and releases are predictable so the dog knows how to win.
- Motivation means your rewards and relationship are strong enough to compete with the world.
- Progression means you have layered distraction, duration, and distance in the right order.
With these three aligned under the Smart Method, the same dog not interested in training becomes engaged and responsive.
Common Signs Your Dog Is Not Engaged
- Looking away or scanning the environment when you speak
- Stalling, scratching, or sniffing during cues
- Accepting food then spitting it out
- Only responding once, then fading
- Working indoors but failing outdoors
Each of these points to a dog not interested in training because the picture is unclear or the reward is not worth the effort at that moment. We fix the picture first.
The Smart Method For Disinterested Dogs
Smart Dog Training uses one system across every programme. The Smart Method is structured, progressive, and outcome driven. It is specifically designed to transform a dog not interested in training into a willing partner.
Clarity
We teach a simple marker system yes for reward, good for ongoing behaviour, and a release cue. A dog not interested in training often lacks a clear map for how to earn success. With clear markers the path becomes obvious.
Pressure and Release
Fair guidance with timely release creates accountability and reduces conflict. Light leash pressure, then a clean release the moment the dog makes the right choice, builds responsibility. This helps a dog not interested in training understand that effort matters and that relief and reward follow good decisions.
Motivation
We strengthen food value, personal play, and life rewards. A dog not interested in training must discover that working with you is the most rewarding part of the environment. We show you how to build that belief.
Progression
Skills scale from easy to challenging with clear steps. We add distraction, duration, and distance in a measured way so progress sticks. This turns a dog not interested in training into a dog that can perform anywhere.
Trust
When training is consistent, fair, and rewarding, your dog relaxes and invests in you. Trust gives you a reliable partner even under pressure.
First Check Why Your Dog Is Disinterested
Before you change your sessions, answer these briefing questions.
- Health and comfort Is your dog in pain, itching, or overtired
- Feeding timing Is your dog full from a meal, reducing food motivation
- Environment Is the area too busy for the current skill level
- Reward value Do the rewards match what your dog truly wants
- Handler clarity Are your words, timing, and leash skills consistent
When a dog not interested in training has these needs met, engagement rises quickly.
Build Motivation Before You Ask For Precision
Motivation is not bribery. At Smart Dog Training, we design reward systems that create drive and focus while preserving clarity and accountability. This is how we reframe a dog not interested in training into a dog that loves to work.
- Food done right Use small, high value pieces. Mark yes as the dog earns, then deliver with energy. Vary delivery to keep attention.
- Personal play Learn to play with your dog, not just with a toy. Short chases, light tugs, and praise bursts change emotional state.
- Life rewards Access to the garden, greeting a friend, or hopping into the car can be earned through simple behaviours like sit or look.
Two minute engagement drills, repeated a few times per day, are the fastest way to flip a dog not interested in training into a focused learner.
Fast Engagement Drills That Work
Orientation Game
Stand still, say your dog’s name once. The instant your dog looks at you, mark yes and reward. Step to a new spot and repeat. After ten wins, your dog learns that checking in pays. This is perfect for a dog not interested in training because it creates a simple win loop.
Find Me
Walk backwards three steps. As your dog follows, mark yes and feed. Repeat three short sets. Movement towards you builds pursuit and focus in a dog not interested in training.
Release to Reward
Ask for sit, mark good while the dog holds position, then release with your release cue to a food toss or a toy. This balances impulse control and energy, ideal for a dog not interested in training that struggles to stay engaged.
Structure Your Sessions For Wins
Short, crisp sessions generate momentum. For a dog not interested in training, we recommend a clear structure.
- Session length One to three minutes of focused work
- Rep count Three to five reps of one skill
- Breaks One minute reset between blocks, light play or calm sniff
- Finish strong End while your dog still wants more
Always start with an easy engagement drill, then a core skill at your dog’s current level, then a fun release. This rhythm keeps a dog not interested in training invested.
Layer Distraction, Duration, and Distance
Progression is the antidote to a dog not interested in training outdoors. We layer one difficulty at a time.
- Distraction Begin in a quiet room. Add a person walking past. Add a toy on the floor. Add the garden. Add the front path. Only proceed when you are winning often.
- Duration Get one second of a behaviour, then two, then three. Mark good during the hold so the dog knows they are right.
- Distance Step away one step at a time. Return and reward. Do not add distance while increasing distraction and duration at the same time.
This measured plan is how Smart Dog Training converts a dog not interested in training into a dog that can hold focus anywhere.
Fair Guidance Using Pressure and Release
Leash guidance gives your dog a clear path. Apply light leash pressure in the intended direction, then release and mark yes the instant your dog follows. The release is as important as the food. This teaches a dog not interested in training that effort leads to comfort and reward. It is calm, fair, and fast to learn.
Markers and Timing That Make Sense
Consistency is king. At Smart Dog Training we teach three core markers so any dog not interested in training knows exactly what is happening.
- Yes means the rep is complete and a reward is coming now
- Good means keep doing what you are doing and you are right
- Release cue means the job is finished and you are free
Pair these markers with crisp timing and your dog will work with confidence.
Level Up Rewards For Real World Focus
If your dog not interested in training ignores food, it is usually a value or delivery issue. Raise food value, shrink portion sizes, and deliver with more energy. If toys do not engage your dog, build interest by limiting access and playing for seconds, not minutes. For some dogs, praise, proximity, or environmental access are stronger currencies. Smart Dog Training teaches you to mix currencies so a dog not interested in training stays invested in any setting.
Training Outside When Your Dog Shuts Down
Outdoors is full of competing rewards. Start at the edge of the environment. Reward for orientation. Move in small arcs, not straight lines. Give your dog frequent chances to win. A dog not interested in training outside needs distance from triggers and a clear reward picture. Keep asks simple look, move with me, sit then release to a sniff break your dog earned. These earned sniff breaks are powerful for a dog not interested in training.
Avoid Common Mistakes That Kill Engagement
- Too many words Your dog cannot follow a speech. Use markers and clear cues.
- Asking for too much too soon Your dog fails, you nag, engagement dies.
- Bribery Waving food first teaches your dog to wait for the lure. Earn the yes, then reward.
- Endless sessions Stop before your dog runs out of gas.
- Inconsistent rules Mixed messages create a dog not interested in training because nothing feels predictable.
Bring The Whole Family On Board
Disinterest grows when rules change between people. Agree on marker words, release cue, and daily routines. Give each family member a two minute drill to run at set times. When everyone plays the same game, a dog not interested in training becomes a family success story.
When To Work With A Professional
If your dog not interested in training is paired with anxiety, reactivity, or resource guarding, or if you have tried for a few weeks without progress, it is time to get help. A certified Smart Master Dog Trainer SMDT will assess your dog, design the right progression, and coach your timing so improvements happen quickly.
Ready to turn your dog’s behaviour around? Book a Free Assessment and connect with a certified Smart Master Dog Trainer, available across the UK.
Smart Programmes That Solve Disinterest
Every public facing programme at Smart Dog Training uses the same trusted framework.
- Puppy Foundations Build engagement from day one so your puppy never becomes a dog not interested in training.
- Obedience and Lifestyle Teach heel, recall, and place with clarity and reward balance so your dog loves to comply.
- Behaviour Programmes Blend motivation with fair accountability for dogs that avoid or resist work.
- Advanced Pathways Service or protection tracks require strong engagement under pressure. The Smart Method makes that foundation dependable.
Case Snapshots From The Field
Spaniel, six months, only worked for treats indoors. Outdoors he checked out a classic dog not interested in training. We raised food value, used orientation games at the car door, and layered distance from the park path. Within two weeks he heeled past joggers with eye contact for several seconds.
Rescue collie, three years, refused toys and turned away from food when nervous. We used life rewards and calm pressure and release to create small wins. We paired good with gentle stroking and short sniff releases. The dog not interested in training began to offer eye contact on her own and recovered from startle within seconds.
Family labrador, two kids, mixed cues, long sessions. We standardised markers, used one minute drills before school, and finished every rep with a playful release. The dog not interested in training now runs to the training spot twice a day with a wagging tail.
FAQs
Why is my dog not interested in training even when hungry
Reward value and delivery matter as much as hunger. Many dogs need higher value food, energetic delivery, and a clear release cue. Smart Dog Training blends food, personal play, and life rewards so a dog not interested in training finds the work worth doing.
How long should sessions be for a disinterested dog
One to three minutes is ideal. End early and strong. Multiple short wins change the emotional picture for a dog not interested in training.
What if my dog ignores treats outside
Start farther from distractions, raise reward value, and use earned sniff breaks as part of your plan. We teach this progression so a dog not interested in training outside becomes reliable.
Will toys make my dog too excited
Not when used with structure. We use brief play with clear markers and a release. This builds drive then brings your dog back to clarity. It is perfect for a dog not interested in training that needs energy without chaos.
Can the Smart Method help adult dogs or only puppies
All ages benefit. The Smart Method is about clarity, motivation, and progression. Any dog not interested in training can improve when the plan fits that dog’s needs.
When should I bring in a professional
If you see slow progress after two to three weeks, or if your dog shows anxiety or reactivity, get help. A Smart Master Dog Trainer SMDT will design a plan and coach your timing for faster results.
Do I need special equipment
No special gadgets are required. A flat collar, standard lead, and suitable rewards are enough. Smart Dog Training focuses on timing, clarity, and fair guidance to help a dog not interested in training.
Conclusion
A dog not interested in training is not stubborn. They are simply missing clarity, motivation, or a measured progression. The Smart Method brings these parts together. With clean markers, fair pressure and release, stronger rewards, and step by step layering, your dog can become focused, confident, and consistent in any setting.
Your dog deserves training that truly works. With certified Smart Master Dog Trainers SMDTs nationwide, you will get proven results backed by the UK’s most trusted dog training network. Find a Trainer Near You
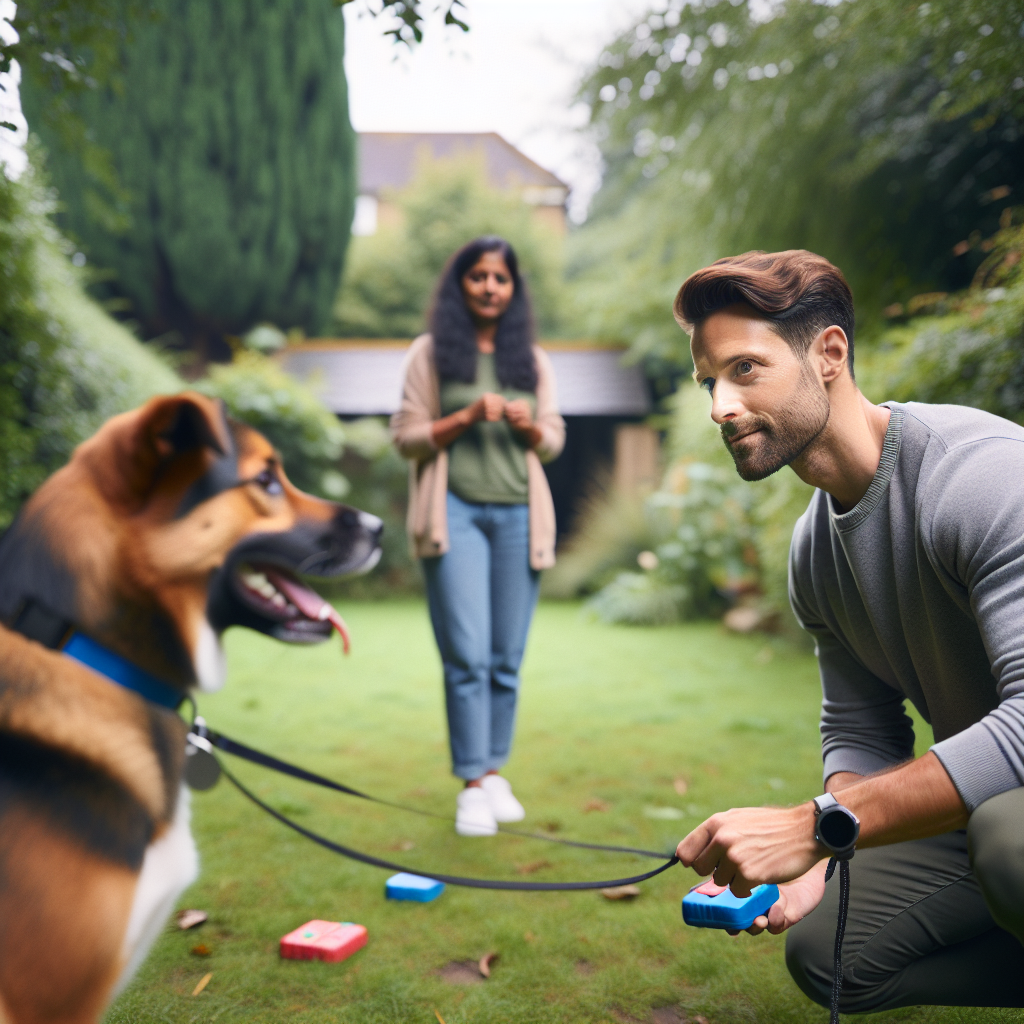
Dog Not Interested in Training
Training Dogs in Unfamiliar Places
Training dogs in unfamiliar places is the key to behaviour that holds up in real life. Living rooms are easy. Busy streets, shops, hotels, parks, and new homes ask more of your dog and more of you. At Smart Dog Training we use the Smart Method to make this process clear, fair, and repeatable. With precise guidance and planned progression, your dog can listen, stay calm, and work with you anywhere. If you want a guide you can trust, a certified Smart Master Dog Trainer will map every step and coach you through each new environment.
Why Unfamiliar Places Matter
Training dogs in unfamiliar places builds generalisation. Your dog learns that sit, down, come, and heel mean the same thing in the kitchen and in town. New sights, smells, and sounds create pressure. We use that pressure to teach resilience and focus. The result is a dog that thinks clearly, responds quickly, and moves with you through life. Smart Dog Training treats training dogs in unfamiliar places as a core skill, not a final polish.
Training Dogs in Unfamiliar Places with the Smart Method
The Smart Method is our proprietary system for reliable behaviour in any setting. It is built on five pillars that guide training dogs in unfamiliar places:
- Clarity. Clear commands and markers that remove guesswork.
- Pressure and Release. Fair guidance paired with a clear release to reward. This builds accountability without conflict.
- Motivation. Rewards that create drive and a positive emotional state.
- Progression. Step by step layering of difficulty, duration, and distraction.
- Trust. A strong bond that turns training into teamwork.
Each pillar supports the next. Together they make training dogs in unfamiliar places simple to follow and strong under pressure. Early in your journey, work with a Smart Master Dog Trainer to set mechanics and timing. Their coaching ensures your dog learns fast and stays happy.
Clarity First in New Environments
Clarity is the foundation of training dogs in unfamiliar places. Your dog needs to know exactly what earns reward. We keep language simple and markers consistent. Use one cue for each skill and one marker that means yes, that was right. In a new place, reduce verbal chatter. Speak once, guide, then mark and reward. That rhythm lets your dog filter out background noise and focus on you.
Practical steps for clarity in new locations:
- Pick a small number of cues. For example sit, down, here, and heel.
- Use a single marker. A crisp yes or a click. Keep tone the same.
- Reward in position. If you ask for down, pay while the dog is down.
- Keep sessions short. Two to five minutes is enough in a new place.
Leash Skills That Travel
Loose lead walking is central to training dogs in unfamiliar places. The lead is your communication line. At Smart Dog Training we teach heel and loose lead using pressure and release. When the lead tightens, we guide back to position. When the lead softens, we mark and reward. The dog learns how to turn off pressure and earn praise. This creates calm movement and reduces pulling in busy areas.
In a new place, start with slow pacing and wide turns. Reward often for a soft lead and calm eye contact. If the lead goes tight, pause, guide back, then reset. Keep standards fair and consistent. Loose lead is not just for walks. It is the skill that lets you navigate crowds, doorways, lifts, and car parks with ease.
Focus Games That Anchor Your Dog Anywhere
Engagement is the spark that makes training dogs in unfamiliar places work. Build it with simple focus games before formal obedience. Try these Smart Dog Training favourites:
- Find Me. Back up two steps, say here, then mark when your dog hits your front position. Reward fast. Repeat until you see eager turns to find you.
- Look. Present a treat. When your dog offers eye contact, mark and pay. Add short movement between reps.
- Hand Target. Offer your palm at your dog’s nose level. When they touch, mark and reward. Use it to move past distractions.
Two minutes of engagement can shift the whole session. Your dog will be ready to work, and training dogs in unfamiliar places will feel smooth and productive.
Pressure and Release Without Conflict
We guide dogs with clear pressure and release. This is not about force. It is about information. A gentle lead cue or body pressure asks for a change. The instant the dog tries, we release and reward. The release is the lesson. In new places the world is busy, so our signals must be clean. Smart Dog Training coaches will show you how to apply, observe, and release with perfect timing. This creates calm accountability. The dog learns to take responsibility for position and impulse control, even when the world is noisy.
Motivation That Stands Up to Distractions
Rewards must compete with the environment. When training dogs in unfamiliar places, pack rewards your dog cares about. Use a mix of food and play. Pay better for harder reps. If your dog refuses a treat, lower the difficulty and rebuild engagement, then try again. Smart Dog Training keeps motivation high while maintaining standards. We want the dog to want to work and to know exactly how to win.
The Progression Ladder for Real Life Reliability
Progression turns skill into reliability. We layer three elements during training dogs in unfamiliar places:
- Difficulty. Add space from you, more complex tasks, and longer sequences.
- Duration. Grow holds on sit, down, and place.
- Distraction. Add people, dogs, movement, food, and noise.
Change one element at a time. If the dog struggles, step back one layer and win again. Smart Dog Training calls this working the zone, the edge, and the flow. The zone is easy success. The edge is stretch where learning happens. The flow is a rhythm of reps that build confidence. Keep moving between these states while training dogs in unfamiliar places.
Trust as the Outcome
Trust is built when guidance is fair and consistent. Your dog trusts that your cues are clear and that effort earns reward. You trust that your dog will listen even when the world is loud. Smart Dog Training designs every session to grow this bond. Training dogs in unfamiliar places then becomes a chance to deepen your teamwork.
Your First Field Session Step by Step
Here is a simple plan for training dogs in unfamiliar places on day one in a new location.
- Scout the spot. Choose a quiet corner with space. Watch the flow of people and dogs for one minute.
- Set equipment. Use a standard lead, well fitted collar or harness, and rewards your dog loves.
- Start with engagement. Two minutes of Find Me and Hand Target.
- Run short obedience reps. Ten to fifteen seconds each. Use sit, down, here, and heel.
- Layer one distraction. Add gentle movement past a bench or near a bin. Mark and reward for focus.
- Reset on success. Break with a sniff for ten seconds. Then return to work.
- Finish early. Leave while you are winning. Keep the session under ten minutes at first.
This structure keeps arousal low and clarity high. It is the safest way to start training dogs in unfamiliar places without overwhelm.
City Streets, Parks, Shops, and Indoors
Different places test different skills. Smart Dog Training prepares both dog and owner for each setting.
City streets
- Focus on loose lead and hand targets to move around people.
- Practise threshold manners at kerbs and doors.
- Use short down stays while you pause to check your phone or wait for a light.
Parks
- Prioritise recall and impulse control around dogs and wildlife.
- Use long lines to protect recalls while you increase distance.
- Practise place on a blanket to build calm near play areas.
Shops and indoor public spaces
- Refine down and heel in tight aisles.
- Teach settle under a table for coffee stops.
- Keep sessions short and always ask staff before entry if needed.
With this approach, training dogs in unfamiliar places becomes a set of clear drills you can repeat anywhere.
Puppies in Unfamiliar Places
Puppies benefit from early exposure with structure. Smart Dog Training uses short, positive sessions to introduce the world without flooding. For puppies, training dogs in unfamiliar places should focus on confidence and calm.
- Keep visits brief. Three to five minutes in one new spot.
- Reward exploration and return to you.
- Practise simple sits, name response, and gentle loose lead.
- End sessions before your puppy gets tired.
This sets a base that pays off for life. Your puppy learns that new places are safe and that you are the anchor.
Reactivity and Sensitive Dogs
Some dogs find new places stressful. They may bark, lunge, freeze, or shut down. Smart Dog Training specialises in behaviour programmes that address reactivity with the Smart Method. The plan keeps distance, uses pressure and release to guide, and builds motivation through success. Training dogs in unfamiliar places is still the goal, but we start where the dog can cope.
- Work at a distance where your dog can eat and respond.
- Use controlled exposure with one trigger at a time.
- Mark calm looking and choose to disengage from triggers.
- Reward heavily for checking back in with you.
A certified Smart Master Dog Trainer will help you set thresholds, manage safety, and build a path back to confident public behaviour.
Advanced Pathways that Rely on New Places
Service dog work, protection sports, and advanced obedience all depend on training dogs in unfamiliar places. Smart Dog Training designs advanced pathways that layer public access skills, neutral responses, and task reliability. We proof tasks in shops, car parks, stations, and offices. The standard is simple. The dog should be calm, quiet, and responsive under any reasonable distraction.
Common Mistakes to Avoid
- Starting too hard. Jumping straight into a busy market can overwhelm your dog.
- Talking too much. Extra words blur clarity and raise arousal.
- Paying late. Delayed rewards teach the wrong moment.
- Letting the lead teach pulling. A tight lead that moves forward rewards the pull.
- Staying too long. Short, high quality sessions beat long ones.
- Skipping rest. Tired dogs make poor choices, especially in new places.
Smart Dog Training avoids these traps with clear plans and short sessions. This is how training dogs in unfamiliar places becomes consistent and stress free.
Gear Checklist for Success
- Standard lead between 1.2 and 1.8 metres. No extendable leads.
- Well fitted flat collar or suitable harness.
- High value food and a favourite toy.
- Portable mat for place and settle.
- Long line for recall drills in open spaces.
- Poo bags and a small water bottle.
Pack your kit the night before. When the moment appears, you will be ready for training dogs in unfamiliar places.
Measuring Progress
Progress should be visible. Smart Dog Training tracks simple metrics to judge how training dogs in unfamiliar places is landing.
- Lead tension. How often is the lead soft over ten minutes.
- Recall response. How fast does your dog turn on the cue.
- Duration holds. Time in sit, down, or place in a new spot.
- Recovery time. How fast your dog returns to you after a surprise.
- Owner effort. How many cues do you need to maintain position.
Each week, choose one measure and aim for a small improvement. This builds momentum and keeps sessions focused.
Real Session Example
Let us apply the plan to a busy park. The goal is training dogs in unfamiliar places with dogs, bikes, and children nearby.
- Arrive and park at the edge of the activity. Do two minutes of Find Me and Hand Target.
- Walk a quiet path on a loose lead. Mark soft lead and eye contact. Reward often.
- Stop at a bench. Practise down with five second holds. Release and play after each success.
- Approach the main path to the edge of your dog’s comfort. Practise look and hand target to pass one moving bike. Reward big.
- Back off to the quiet path. End with a calm place on a mat for one minute.
This mix of zone, edge, and flow creates wins while raising difficulty in tiny steps. Training dogs in unfamiliar places should feel like this. A rhythm of effort and success.
Ready to turn your dog’s behaviour around? Book a Free Assessment and connect with a certified Smart Master Dog Trainer - available across the UK.
When to Bring in a Professional
If you feel stuck or your dog struggles with fear, frustration, or aggression, do not wait. Training dogs in unfamiliar places is a skill set that grows faster under expert coaching. Smart Dog Training delivers structured private sessions, group classes, and tailored behaviour programmes. An SMDT will assess your dog, set a plan, and guide you through real locations you use every week.
FAQs on Training Dogs in Unfamiliar Places
How long should sessions be in a new place
Keep them short. Five to ten minutes is ideal at first. Short sessions help your dog stay clear and motivated. This pace is perfect for training dogs in unfamiliar places.
What should I do if my dog will not take food outside
Lower difficulty and build engagement. Step back to a quieter corner. Use Find Me and Hand Target. When your dog starts to eat, return to simple reps. Smart Dog Training uses motivation first while keeping standards fair.
How do I stop pulling in busy areas
Teach loose lead with pressure and release. Mark and reward when the lead is soft. If it goes tight, pause, guide back, and reset. Repeat until your dog understands how to turn off pressure. This is a core part of training dogs in unfamiliar places.
Can I practise recall in public spaces
Yes, use a long line for safety. Start at low distraction, then add distance and movement. Mark the first turn to you, then reward at your feet. Smart Dog Training proof recalls step by step so they hold up in real life.
What if my dog is reactive to other dogs
Work at a safe distance where your dog can think and eat. Use calm looking and choose to disengage as paid behaviours. A Smart Master Dog Trainer can set thresholds and help you progress without setbacks.
How do I know my dog is ready for busier places
Use metrics. If your lead stays soft, recalls are fast, and your dog recovers quickly from surprise, move one step closer to higher distraction. Training dogs in unfamiliar places should feel steady and successful, not chaotic.
Is it okay to train in shops
Many shops are fine with calm dogs. Always ask staff first. Keep the visit brief, practise one or two skills, and leave while you are winning. This is a helpful step when training dogs in unfamiliar places.
Putting It All Together
Training dogs in unfamiliar places is not a leap. It is a ladder. With the Smart Method you build clarity, guide with pressure and release, fuel motivation, and progress in planned steps. Trust grows with every rep. The payoff is a dog that is calm, confident, and consistent anywhere you go.
Your dog deserves training that truly works. With certified Smart Master Dog Trainers (SMDTs) nationwide, you'll get proven results backed by the UK's most trusted dog training network. Find a Trainer Near You
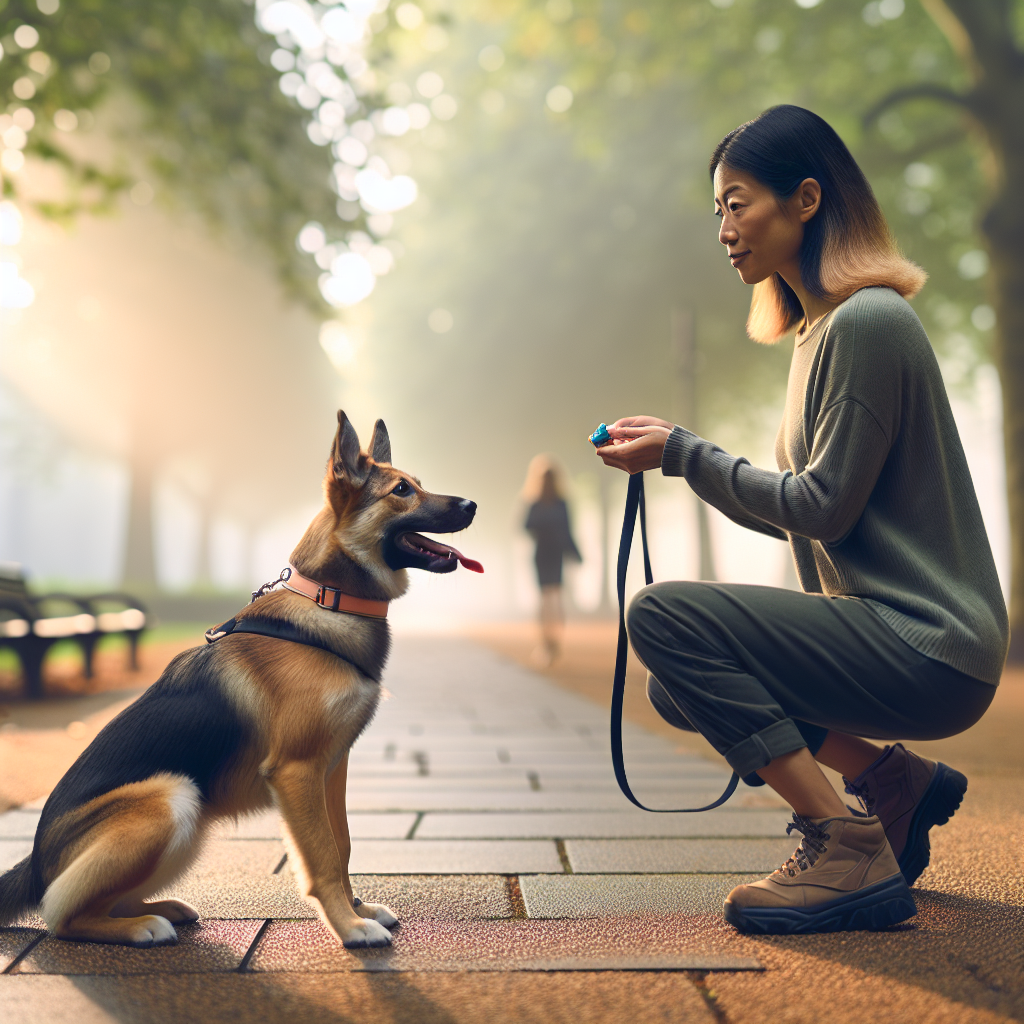
Training Dogs in Unfamiliar Places
Introduction: Why Dogs Get Confused in Training
If you have ever wondered why a good dog still struggles to follow simple instructions, you are not alone. Many owners want to know how to avoid confusing your dog during training. Confusion is not stubbornness. It is the gap between what we think we taught and what our dog actually understands. At Smart Dog Training, we close that gap with the Smart Method. Our certified Smart Master Dog Trainers work across the UK to bring clarity, structure, and calm to every session so your dog can perform with confidence in daily life.
In this guide, you will learn practical steps that remove mixed signals, set clean criteria, and build reliability that sticks. You will also see how the five pillars of the Smart Method give you a simple roadmap so you always know what to do next.
The Smart Method that Removes Confusion
The Smart Method is our proprietary system for calm, consistent behaviour that lasts in real life. It prevents confusion by defining what to say, when to say it, and how to guide your dog fairly.
Clarity
Clarity means your dog always knows what earns reward and what ends the exercise. We use precise words, a consistent marker system, and a clean release. This shuts down guesswork and removes grey areas.
Pressure and Release
Dogs learn through the feel of pressure and the relief that follows the correct choice. We pair fair guidance with an immediate release and reward. That release is the green light that tells your dog yes, you made the right choice. This is done without conflict and creates dependable accountability.
Motivation
Engagement drives learning. Food, toys, praise, and access to life rewards all have a place when used with structure. Motivation keeps sessions upbeat, and a motivated dog learns faster and remembers longer.
Progression
Skills are layered step by step. We add distraction, duration, and difficulty only when your dog is ready. Progression stops confusion because each new challenge is built on a solid base.
Trust
Trust is the result of fair rules, predictable outcomes, and a strong relationship. When your dog trusts you, he will work with you in busy places, not only at home.
How to Avoid Confusing Your Dog During Training
You can remove uncertainty today by following these core habits from the Smart Method. Use this section as your checklist for every session.
One Cue One Meaning
Pick one word for each behaviour and keep it the same. Sit means sit every time. Do not rotate between sit, sit down, and be good. If you shift words, your dog will hesitate or offer random behaviours to guess your meaning.
- Choose short words that are easy to say.
- Teach a separate release word. Ready and free are common examples.
- Use the release to end positions. Without a release, your dog will end the behaviour on his own.
This single rule goes a long way toward how to avoid confusing your dog during training.
Use Precise Markers and Releases
A marker is a short sound that tells your dog the exact moment he got it right. We use a marker for reward and a different marker for keep going. We also use a neutral no reprompt to reset without emotion. Then we release to end the exercise.
- Reward marker. Yes means reward is coming now.
- Duration marker. Good means keep doing what you are doing.
- No reprompt. No or uh uh means try again, then guide and help.
- Release. Free ends the position so your dog can move.
Markers remove the space for confusion. They make your timing precise even if your hands are full. They are central to how to avoid confusing your dog during training using Smart standards.
Nail Your Timing
Timing is how your dog connects a choice with an outcome. Late rewards or late corrections blur that link and breed confusion.
- Mark and pay within one second of the correct action.
- If your dog breaks a position, reset the moment it happens, not ten steps later.
- Use short, focused reps so your timing stays sharp.
Good timing is quiet, confident, and consistent. It keeps learning clean and reduces frustration.
Keep Leash Language Consistent
The leash should mean the same thing every time. A steady guide means maintain. A clear release means move with me. Do not tug, then ignore, then tighten, then talk over the top. Mixed leash signals are a top reason dogs look uncertain.
- Hold the leash the same way every session.
- Apply light pressure to guide, then release the moment your dog follows.
- Do not talk over the pressure. Give the cue, then guide, then release and reward.
This simple pattern teaches your dog how to turn pressure off by making the right choice. It is a key part of pressure and release within the Smart Method.
Align Body Language with Cues
Dogs read pictures faster than words. If your body says come and your leash says stay, your dog will stall. Match your posture to your cue.
- Stand tall and still for stay positions.
- Lean back a hair to invite a sit. Lean forward to invite motion.
- Keep your hands quiet. Do not wave or fidget while giving cues.
When your body, leash, and voice tell the same story, you greatly reduce confusion.
Control the Environment
Dogs learn best when distractions are managed. If you raise difficulty too fast, you do not build reliability, you build doubt.
- Start in a quiet area with predictable setups.
- Add one distraction at a time. Distance, movement, and sound are good variables.
- Remove clutter. Put food bowls, toys, and extra leads away during sessions.
Steady progression creates wins. Wins build confidence. Confidence prevents confusion.
Set Clean Criteria and Structure Sessions
Criteria tells your dog what success looks like. Vague criteria causes messy reps and muddled outcomes. At Smart Dog Training, we define the picture before we train it.
- Decide the exact position you want. For sit, bottom on ground, head up, paws still.
- Decide the duration and the boundary. For place, stay on the bed until released.
- Decide the context. For heel, move at your left leg with a loose lead.
Then structure your sessions so each rep is short and clear.
- Warm up with one easy success.
- Run three to five tight reps with clear markers and payouts.
- Change one variable or take a break.
This session rhythm is central to how to avoid confusing your dog during training and keeps motivation high without losing clarity.
Session Structure and Reinforcement
Reinforcement schedules matter. Early on, pay often to build value. As skills grow, shift to varied, earned rewards that keep your dog engaged.
- Early stage. Pay every correct rep with food or a toy.
- Middle stage. Vary rewards. Sometimes pay big, sometimes praise and continue.
- Advanced stage. Pay for the best efforts and the hardest reps.
End each set on a win. Use your release to end cleanly. This protects confidence and reduces confusion over what ended the exercise.
Family and Tools Consistency
If three people give three versions of the same cue, your dog will struggle. Make the whole household part of the plan.
- Write your cue list on the fridge. Keep words, markers, and release the same for everyone.
- Use the same tools each session so the feel stays consistent.
- Agree on the rules. The sofa is either allowed on release or it is not. No sometimes.
Household alignment is one of the most powerful ways to avoid confusing your dog during training at home.
Ready to turn your dog’s behaviour around? Book a Free Assessment and connect with a certified Smart Master Dog Trainer, available across the UK.
Troubleshooting Confusion vs Disobedience
Sometimes owners worry that a dog is ignoring them when the dog is simply unsure. Here is how to spot the difference and what to do about it.
- Confusion looks like slow responses, freezing, looking away, lip licking, or scanning.
- Disengagement looks like sniffing, wandering off, or choosing the environment over you.
If you see confusion, lower criteria or give clearer help. If you see disengagement, raise motivation, cut session length, or add a fair accountability step through pressure and release paired with a clear release and reward.
When to Lower Criteria or Add Consequence
- Lower criteria when a new distraction appears, when the surface changes, or when your dog has not rehearsed the behaviour in that context.
- Add a fair consequence when your dog clearly knows the cue in that context but chooses a different behaviour. Guide with light leash pressure, then release and reward the correct choice.
This balanced approach is built into the Smart Method so your dog always understands how to get it right.
Build Reliability in Real Life
Reliability does not happen in a single room. It grows as you take the same clear pictures into new places. Use this simple progression to avoid confusing your dog during training across daily routines.
- Home base. Teach and proof in the quietest room.
- Garden or hallway. Add mild movement and distance.
- Front drive or local path. Add traffic and novel smells.
- Busy park. Layer in dogs, people, and play.
- Shops and cafe paths where dogs are allowed. Add tight spaces and noise.
Keep your cues, markers, and releases identical in each place. Change only one difficulty at a time. Your dog will learn that the rules do not change even when the world does.
Common Mistakes to Stop Today
- Repeating cues. Say sit once. If no response, help, then release and reward.
- Talking through the exercise. Fewer words, more markers and releases.
- Paying for the wrong thing. Reward the moment of correct choice, not a second later when the behaviour has changed.
- Dragging with the lead. Guide, then release. Do not hold steady pressure for long.
- Training when your dog is tired or hungry in the wrong way. Balance energy and use planned reinforcement.
- Only training at home. Proof in new places so your dog can generalise without confusion.
When to Work with a Professional
If your dog struggles with reactivity, anxiety, or high arousal, precision matters even more. A certified Smart Master Dog Trainer will assess your dog, map a step by step plan, and coach your timing so you remove confusion and build calm. You will work through matching cues, marker systems, pressure and release, and clear progression in real life setups. This is how to avoid confusing your dog during training when stakes are higher or distractions are strong.
You can begin with a clear action plan in your first session and see measurable changes within the first week when you follow the Smart Method at home.
FAQs
How long does it take to fix confusion in training
Most dogs show cleaner responses in one to two weeks when owners follow consistent cues, markers, and releases. Complex behaviours or busy environments may take longer. Progression and repetition are key.
Should I change my cue word if my dog ignores it
Do not change the word. Clarify it. Go back to a quiet space, use a clear help with light leash guidance, mark the correct moment, release, and reward. Changing words adds more confusion.
What markers should I use
We teach a simple three part system at Smart Dog Training. Yes for reward now. Good for keep going. Free for release. Keep them short, sharp, and consistent.
How do I know if I should raise or lower difficulty
If your dog hesitates or shows stress, lower criteria or help more. If your dog responds quickly and looks eager, you can raise one variable like time, distance, or distraction.
Can food rewards make my dog dependent on treats
No, when used with structure. We begin with frequent rewards to build value, then shift to a varied schedule. Your dog learns to work for the exercise, your praise, and life rewards, not only food.
What if different family members train the dog
Agree on the cue list, markers, and release word. Practise together so timing and leash handling match. Consistency across people is essential to avoid confusing your dog during training.
Does pressure and release mean harsh corrections
No. In the Smart Method, pressure is fair and minimal. It guides your dog to the right choice, then releases the moment he complies. That release plus reward builds understanding without conflict.
Conclusion
Clarity is kindness. When you use one cue with one meaning, precise markers, clean releases, and fair pressure and release, you remove guesswork and build trust. This is the heart of the Smart Method and the foundation of how to avoid confusing your dog during training at every stage. If you want expert help, our nationwide team is ready to support you with structured programmes that bring calm, reliable behaviour into daily life.
Your dog deserves training that truly works. With certified Smart Master Dog Trainers, SMDTs, nationwide, you will get proven results backed by the UK’s most trusted dog training network. Find a Trainer Near You
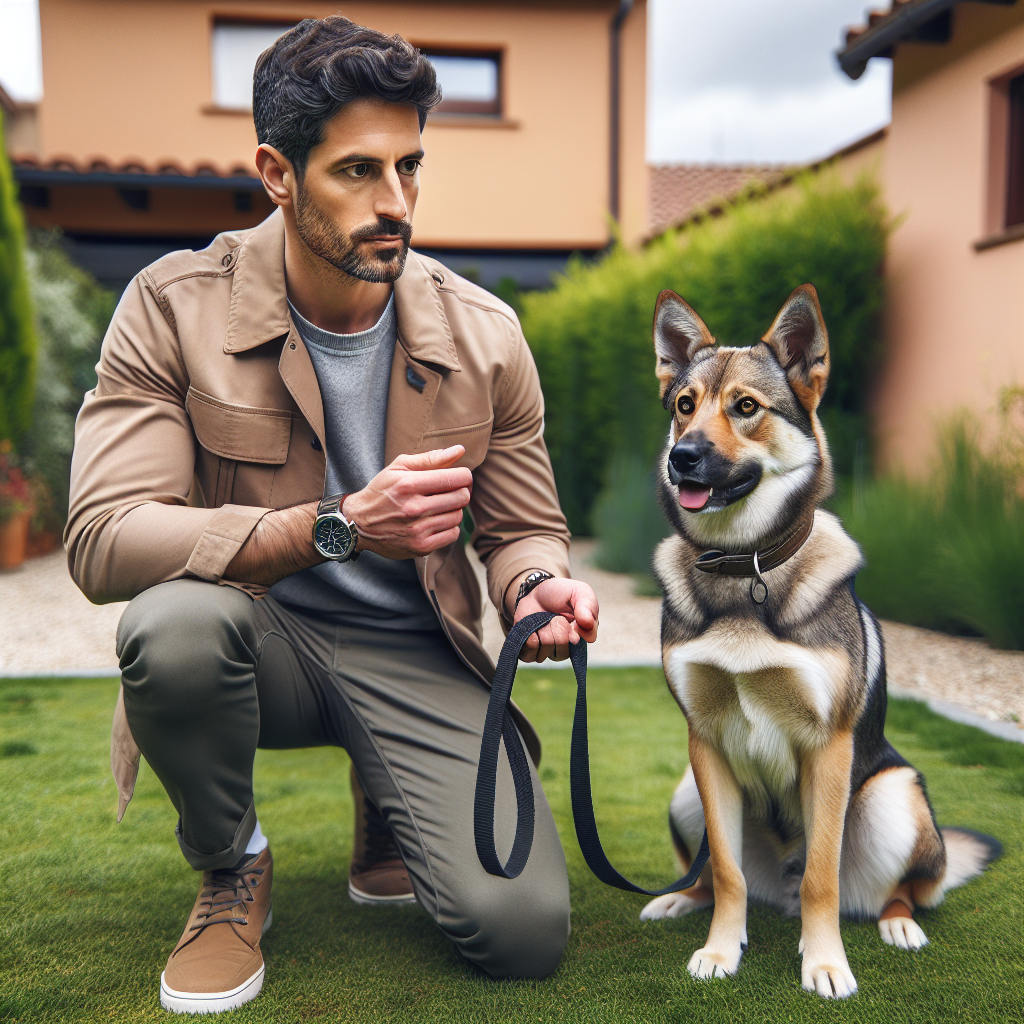
How to Avoid Confusing Your Dog During Training
What to Do When Your Dog Refuses to Train
When a session stalls and your dog turns away or shuts down, it is easy to feel stuck. Knowing what to do when your dog refuses to train is the difference between more frustration and a real breakthrough. At Smart Dog Training, we use the Smart Method to turn these moments into progress. If you want direct guidance, a Smart Master Dog Trainer can assess your dog in your home and start a plan that fits your goals, lifestyle, and daily routine.
This guide shows you exactly what to do when your dog refuses to train. You will learn how to diagnose the cause, apply the five pillars of the Smart Method, and follow a step by step plan that builds calm focus and consistent results in real life. Everything here reflects the programmes delivered by certified Smart trainers across the UK.
Understanding Why Your Dog Refuses to Train
Before you can decide what to do when your dog refuses to train, you need to identify the reason. Dogs are always giving feedback. If they check out, there is a cause. Once you address the cause, you open the door to engagement.
Unclear communication
Confusion is the most common reason a dog stops working. If your cue changes, if your timing is late, or if you reward at the wrong moment, your dog will not understand how to earn success. In this case, the fix is clarity, not more repetition. The Smart Method begins here, so your dog knows exactly what is expected every time.
Competing rewards and low motivation
Many dogs would rather sniff the breeze, watch the world, or chase a leaf than sit and focus. If the environment pays better than you do, your dog will choose it. That is why your reward strategy matters. High value food, access to toys, social access, and permission to explore can all be used on purpose. You will learn how to match the reward to the task so your dog chooses you first.
Stress and environment overload
Some dogs shut down due to pressure, noise, or the weight of a busy space. Others are anxious or sensitive to equipment. When stress goes up, performance goes down. If this is the reason your dog refuses to train, you must lower the pressure, simplify the picture, and provide a clear release. Smart programmes are designed to protect the dog’s emotional state while building responsibility.
The Smart Method Framework
What to do when your dog refuses to train is not guesswork at Smart. Every programme is built on the Smart Method. This structured and progressive system balances motivation, guidance, and accountability so dogs work with calm confidence in real life.
Clarity
Clear communication is the foundation. We teach precise cues and marker words, and we teach you how to deliver them. The dog learns a simple pattern. Hear a cue, do the behaviour, receive release and reward. When clarity rises, conflict falls. If your dog refuses to train, first check your cue, your marker timing, and your reward placement.
Pressure and Release
Fair guidance lets the dog know how to turn pressure off and earn relief. This is never about force. It is about giving helpful information and then releasing as soon as the dog makes a good choice. Dogs relax because they understand the path to success. When your dog is stuck, gentle guidance paired with a clear release can unlock attention and help them try again without conflict.
Motivation
Motivation creates a willing worker. Smart trainers design a reward economy that includes food, toys, praise, and life rewards such as freedom to sniff. We teach your dog that choosing you is the fastest route to everything they value. If you want to know what to do when your dog refuses to train because treats no longer work, align the value of the reward to the task and use delivery that sparks engagement.
Progression
Skills are layered step by step, adding duration, distance, and distraction at the right time. This is how you create reliability anywhere. If your dog fails in the park, you likely skipped steps and added too much, too soon. Progression gives you a path to scale back, solidify the behaviour, then proof it in realistic settings.
Trust
Training should build the bond. Dogs perform best when they trust that your guidance is fair and your expectations are consistent. Trust is earned every session through clear communication, clean releases, and timely rewards. It is the thread that holds the other pillars together.
What to Do When Your Dog Refuses to Train
Here is the plan Smart trainers follow when a dog stalls. Use these steps exactly as written. Each step reflects the Smart Method so you can move from stuck to steady progress.
Reset expectations and assess baseline
- Check health and comfort. Make sure equipment fits, there is no pain, and your dog is not hungry, thirsty, or overtired.
- Change the picture to make success easy. Move to a quiet room with minimal distractions.
- Shorten the behaviour. Ask for a one second sit, a single step of heel, or two seconds on place. Mark and release quickly.
- End the session on a win, even if that win is eye contact and a step toward you.
When you remove friction and set a small goal, you show your dog that training is safe and predictable. This is the first answer to what to do when your dog refuses to train.
Build engagement and focus
- Start with name response and simple orientation to you. Mark any eye contact and pay well.
- Use pattern games from Smart programmes. For example, step back, the dog moves with you, mark, then feed at your leg. Repeat until the dog follows easily.
- Mix food tosses with recalls to build speed and enthusiasm. Keep the rhythm snappy and positive.
- Layer in calm moments. Ask for a brief place, reward, then release to a sniff break. Alternate activity and calm to balance arousal.
When in doubt about what to do when your dog refuses to train, get engagement first. Do not push complex behaviours without focus. Engagement is the fuel that powers learning.
Short structured sessions
- Work in two to five minute blocks. Quality beats quantity.
- Use a clear start and end routine so your dog knows when work begins and when it is over.
- Aim for eight to ten clean repetitions of a single behaviour rather than hopping between cues.
- Finish with a predictable release and a reward your dog loves. Leave them wanting more.
If sessions run long or feel messy, the dog will tune out. Small, crisp wins stack into big results.
Gradual proofing
- Add one layer at a time. Increase either duration or distraction or distance, not all three at once.
- Use a long line outside so you can give guidance without losing control.
- Reward more generously in new places. The environment is a real competitor.
- Return to simple steps if your dog struggles. Progress is a ladder, not a leap.
When you follow progression, you always know what to do when your dog refuses to train in a harder space. You go down a step, rebuild clarity, then climb again.
Ready to turn your dog’s behaviour around? Book a Free Assessment and connect with a certified Smart Master Dog Trainer - available across the UK.
Signs You Are Moving in the Right Direction
- Your dog offers eye contact faster in each session.
- Latency between cue and response shrinks.
- Recovery from distractions improves with minimal resets.
- Your dog chooses to stay with you after the release.
These are practical milestones used in Smart programmes to track real life reliability.
Daily Structure That Supports Training
When you wonder what to do when your dog refuses to train, look outside the session. The day around training can make or break engagement.
- Use the lead for guided freedom during busy periods. Prevent self rewarding chaos.
- Feed from your hand or training pouch during sessions to increase value for working with you.
- Rotate toys and use them as rewards rather than free for all access.
- Use place and crate time to promote calm and lower arousal before a session.
Structure creates predictability. Predictability creates focus.
Motivation That Actually Works
Many owners ask what to do when your dog refuses to train when food is on offer. The answer is strategic motivation. Smart trainers match reward type and delivery to the dog and the task.
- Use higher value food for new or difficult work. Use lower value for maintenance.
- Deliver the reward where you want the dog to be. Place food at your leg for heel, on the bed for place, or on the ground for down stays.
- Blend food with life rewards. Release to sniff, greet, or explore after correct responses.
- Keep the ratio right. In new environments, pay more often to beat the world.
Motivation is not bribery. You ask for the behaviour first, then you mark and reward accordingly. This keeps the dog responsible for the job and eager to work.
Using Guidance Without Conflict
Pressure and release is about information and timing. If you ever ask what to do when your dog refuses to train after you cue, you can guide gently, then release when they try. The release is the key. It tells the dog they solved the puzzle. Over time they need less guidance and offer the behaviour more freely. This is how you build accountability while protecting the relationship.
Fixing Sticking Points in Common Situations
Behaviour breaks down in patterns. Here is what to do when your dog refuses to train in typical scenarios.
- In the park: Step back from the busiest area. Use a long line. Ask for short sits, mark fast, feed at your leg, then release to sniff. Repeat until your dog checks in without a cue.
- At the front door: Put your dog on place before you open. Reward calm. Keep the lead on for guidance. Build success with one visitor at a time.
- On walks: Slow down your pace, shorten the criteria, and reward orientation to you every few steps. Work one side street before tackling the high street.
- With other dogs present: Increase distance until your dog can focus. Reward calm choices and end with a controlled release.
Common Mistakes That Keep Dogs Stuck
- Repeating cues until they lose meaning.
- Bribing with visible food before the behaviour is offered.
- Running sessions too long and losing quality.
- Changing rules between family members so the dog gets mixed messages.
- Advancing to busy environments before the behaviour is solid.
If you remove these friction points, you will know exactly what to do when your dog refuses to train next time. You will simplify the picture, guide fairly, and pay well for good choices.
How a Smart Trainer Gets Results
Sometimes the fastest answer to what to do when your dog refuses to train is to bring in structured help. A Smart Master Dog Trainer will run a full assessment, identify the causes, and create a targeted plan that blends in home sessions with progression in realistic environments. You get a clear road map and weekly accountability. The result is engagement that holds when life gets busy.
- Assessment and plan: A detailed review of history, triggers, routines, and equipment.
- In home coaching: You learn precise cues, markers, and reward placement to lift clarity.
- Real life practice: Park sessions, doorstep practice, and walk coaching to proof behaviours.
- Measured outcomes: Track latency, duration, and distraction scores so progress is visible.
Frequently Asked Questions
What should I do first when my dog refuses to train?
Stop, take a breath, and simplify. Move to a quiet space, ask for a very small slice of the behaviour, mark and release quickly, then end on that win. This resets confidence and sets the stage for a fresh start.
Why does my dog work at home but refuse outside?
The behaviour is not yet proofed. Outside adds distraction and competing rewards. Go back a step, use a long line for guidance, increase your reward rate, and rebuild in a quieter outdoor area before moving to busier places.
How do I motivate a dog that is not food driven?
Most dogs will work for food when the value, timing, and delivery are right. If food is still weak, blend in toys, praise, and life rewards such as permission to sniff or greet. A Smart trainer will design the right reward economy for your dog.
Is it okay to guide my dog when they do not respond?
Yes, as long as guidance is fair and paired with a clear release the moment your dog tries. This reduces confusion and builds responsibility without conflict. It is a core part of the Smart Method.
How long should each session be?
Two to five minutes is plenty for most dogs. Aim for clean repetitions, not long marathons. Multiple short sessions across the day beat one long session every time.
When should I seek professional help?
If you have followed this plan for two weeks without meaningful change, or if your dog shows stress, anxiety, or aggressive behaviour, work with a certified trainer. Smart programmes deliver structured help that speeds up progress and lowers stress for both of you.
Conclusion
Now you know what to do when your dog refuses to train. Start by reducing confusion, lifting motivation, and protecting your dog’s emotional state. Follow the Smart Method pillars so your dog understands the job, feels guided and safe, and wants to work. Short, structured sessions and steady progression turn frustration into reliability you can trust anywhere.
Your dog deserves training that truly works. With certified Smart Master Dog Trainers (SMDTs) nationwide, you'll get proven results backed by the UK's most trusted dog training network. Find a Trainer Near You
What to Do When Your Dog Refuses to Train
Why Training Dogs for Multi-Handler Homes Matters
Training Dogs for Multi-Handler Homes is about more than teaching sit and stay. It is the art of building one clear system that every person can use. When the whole family handles a dog, mixed messages can creep in. That often leads to selective hearing, pulling on lead, guarding one person, or a dog that listens only when treats are out. At Smart Dog Training, we prevent those issues with a single, structured method that everyone follows.
Our Smart Method shapes calm, consistent behaviour that lasts in real life. It gives you a shared language, simple rules, and a plan you can trust. From the first session, a certified Smart Master Dog Trainer will show each handler exactly how to move, speak, and reward so the dog understands every time. Training Dogs for Multi-Handler Homes becomes straightforward when the system is clear and repeatable.
The Smart Method for Multi-Handler Families
Smart Dog Training uses five pillars that fit perfectly with Training Dogs for Multi-Handler Homes. These pillars keep the process fair and easy to follow, even when several people share the lead.
Clarity
Clarity means your cues, marker words, and rewards are precise. Every handler says the same words, in the same tone, and uses the same release. That uniform approach prevents confusion and speeds learning.
Pressure and Release
Pressure and Release is fair guidance paired with a clear release and reward. Each handler learns to apply light guidance, then relax and pay the dog when it makes the right choice. This builds responsibility without conflict and keeps Training Dogs for Multi-Handler Homes balanced.
Motivation
Motivation creates engagement. We choose high value rewards that suit the dog, then teach every handler to deliver them with timing and intent. The result is a dog that wants to work for anyone, not just one person.
Progression
Progression layers skills step by step. We add distraction, duration, and distance in a planned way so the dog stays successful. This gives families a roadmap for Training Dogs for Multi-Handler Homes that holds up anywhere.
Trust
Trust grows when the dog experiences fair, predictable training. When every person follows the same rules, the dog feels safe and calm. Trust is the glue that holds multi-handler training together.
Setting Shared Household Rules
Training Dogs for Multi-Handler Homes starts with house rules everyone can follow. Dogs thrive on structure. When rules are the same across people and places, behaviour smooths out fast.
- Doorways are calm zones. The dog waits to be released before exiting.
- Food prep and feeding are quiet and orderly with a clear release from place.
- No rehearsal of jumping, mouthing, or demand barking. Every handler redirects calmly to an alternative behaviour.
- Crate or bed equals rest. Children and guests respect that space.
Capture these rules on a one page poster. Place it by the door and in the kitchen. Training Dogs for Multi-Handler Homes succeeds when reminders are visible and simple.
Creating a Unified Communication System
A single communication system removes guesswork. Smart Dog Training uses markers and releases so the dog always knows what earned the reward and when the job is done.
Marker Words, Cues, and Release Language
- Primary reward marker such as Yes tells the dog the exact moment it was right.
- Duration marker such as Good means keep going, reward is coming.
- Release word such as Free ends the behaviour.
Pick one cue for each behaviour. If Sit is your cue, everyone must use Sit, not Sit down or Park it. Keep cues short and neutral. This is vital for Training Dogs for Multi-Handler Homes.
Leash Handling and Body Language
Leash handling should look the same across handlers. Hands in the same position, light pressure, and smooth release. Body language should be calm and upright. Avoid bending over the dog or repeating cues. Training Dogs for Multi-Handler Homes relies on these small details.
The Handler Ladder and Role Assignment
Not all handlers are equal at the start. That is normal. Use a Handler Ladder so the dog learns to respond to everyone.
- Primary handler leads the early teaching sessions and manages the routine.
- Secondary handlers rehearse taught skills in simple contexts.
- Guest handlers follow the rules for short, easy reps with supervision.
The Smart Method formalises each step, then promotes handlers as they gain skill. A Smart Master Dog Trainer will coach timing, leash feel, and reward delivery so the standard stays high.
Designing Sessions for Multi-Handler Success
Well planned sessions make Training Dogs for Multi-Handler Homes efficient. Keep them short and focused so energy stays high and mistakes stay low.
One Dog One Handler vs Team Sessions
Start with one dog and one handler while others observe. Rotate handlers every few reps. When the dog is fluent, run team sessions where handlers trade places mid exercise to proof reliability. This is a core Smart Dog Training strategy for multi-handler flow.
Weekly Training Schedule Template
- Daily micro sessions 3 to 5 minutes, 3 times per day.
- Two structured walks per day with planned training moments.
- Two family practice blocks per week focused on handovers and distractions.
- One progress check where you log wins and challenges.
Consistent scheduling keeps Training Dogs for Multi-Handler Homes on track.
Reinforcement and Accountability That Aligns
Rewards and consequences must match across people. If one person pays for loose lead walking and another allows pulling, the dog learns to gamble. Smart Dog Training removes the gamble with aligned reinforcement and fair accountability.
Reward Strategy and Timing
- Pay the position you want. Reward at heel for heel. Reward on the bed for place.
- Deliver the Yes, then reward fast to reduce confusion.
- Use a variable schedule once behaviours are strong to build endurance.
Fair Corrections and Release
Accountability is ethical and clear. Guidance is light. Release is timely. When handlers apply the same sequence and the same release, Training Dogs for Multi-Handler Homes stays consistent and kind.
Handover Rituals That Prevent Mixed Messages
Handover rituals teach the dog that switching handlers is normal and calm. Smart Dog Training uses a simple protocol.
- Handler A brings the dog to neutral heel or place.
- Handler B takes the lead slack, repeats the cue, and breathes.
- Handler A relaxes and steps away. Handler B continues the task.
Practice this ritual on walks, at the front door, and during recall games. Make it clean and quiet. This keeps Training Dogs for Multi-Handler Homes steady under pressure.
Preventing Common Problems in Multi-Handler Homes
Dog Favouring One Person
Rotate feeding, training reps, and play. The primary handler steps back for a week while others lead short successful sessions. Maintain the same markers and release. The dog will generalise trust to everyone.
Over Arousal When Different People Arrive
Use pre arrival calm routines. The dog goes to place as the person enters, then gets paid for four feet on the floor. Only release when calm. Every handler follows the same plan.
Inconsistent Recall or Obedience
Audit your cues. Are they identical across handlers. Run round robin recall where handlers stand in a circle and take turns calling once. Pay high value only for the first response. Keep criteria the same for all.
Multi-Handler Solutions for Puppies
Puppies are sponges, which makes Training Dogs for Multi-Handler Homes ideal. Keep reps short and upbeat. Limit the number of handlers per session to prevent overwhelm. Use place for settling between reps. Ensure all family members know the no rehearsal rules for jumping, nipping, and barking. Smart Dog Training builds life skills early so puppies learn to listen to anyone.
Multi-Handler Solutions for Rescue or Sensitive Dogs
Rescue and sensitive dogs may carry baggage. Start with the calmest handler and the quietest room. Let others join as the dog shows relaxed posture and normal breathing. Use high value food and a gentle voice. Keep Pressure and Release very light. Training Dogs for Multi-Handler Homes works best when stress is low and wins are frequent.
Integrating Children and Elderly Family Members
Safety and clarity come first. Children can place food in a bowl, cue sit, and toss rewards to a bed. Older family members can lead short indoor leash walks and call the dog to place. Set up success with easy tasks. A Smart Master Dog Trainer can tailor the Smart Method to suit mobility or cognitive needs so everyone is involved.
Visitors, Walkers, and Pet Sitters
Anyone who handles your dog must use your system. Share your marker words, cue list, and rules in writing. Walkers and sitters should rehearse your handover ritual and follow your reward strategy. This keeps Training Dogs for Multi-Handler Homes intact even when you are away.
Tools We Recommend and How to Use Them Consistently
Smart Dog Training selects tools that support clarity and fair guidance. Use a well fitted flat collar or training collar as advised, a standard lead, and a crate or bed for place. Every handler should place the lead on the same way, hold it the same way, and follow the same sequences. Consistency with tools is part of Training Dogs for Multi-Handler Homes.
Measuring Progress With the Smart Scorecard
Track progress each week. Score calm at doorways, loose lead walking with each handler, recall to each handler, and duration on place with distractions. Note the handler who led the reps and the environment. Training Dogs for Multi-Handler Homes becomes measurable, which keeps everyone accountable and motivated.
When to Seek Professional Help
If guarding, reactivity, or conflict appears, get expert help. Smart Dog Training provides structured, in home programmes that match your household. We align every handler with the Smart Method so the dog receives one clear message. Ready to turn your dog’s behaviour around. Book a Free Assessment and connect with a certified Smart Master Dog Trainer available across the UK.
Step by Step Plan for Training Dogs for Multi-Handler Homes
Use this simple plan to bring it all together.
- Week 1 Build your shared rules, cue list, and markers. Practice sit, down, and place indoors with one handler at a time.
- Week 2 Add the handover ritual. Rotate handlers during place and heel. Introduce calm door routines.
- Week 3 Move outdoors to a quiet area. Train loose lead and recall with each handler. Start round robin recall.
- Week 4 Add distractions. Practice with visitors, delivery moments, and short café stops. Keep sessions short and clean.
- Week 5 and beyond Progress to busier places, longer durations, and more frequent handler switches. Log scores weekly.
Follow the plan and keep sessions upbeat. Remember that Training Dogs for Multi-Handler Homes is a process. The Smart Method gives you the structure to make it reliable.
Case Study Snapshot
A family of four with a lively young dog struggled with pulling, barking at arrivals, and the dog ignoring two of the handlers. We installed the Smart Method foundation in week one and taught a crisp handover ritual. By week three, recall success was above 90 percent with each person. By week six, the dog settled on place for guests and walked calmly on a loose lead regardless of who held it. Training Dogs for Multi-Handler Homes worked because the system was unified and progressive.
FAQs
How do we choose cue words for Training Dogs for Multi-Handler Homes
Pick short, clear words that everyone can remember. Use one cue per behaviour, a single reward marker, a duration marker, and one release word. Write them down and stick to them.
What if one family member forgets the rules
Use visible reminders like a cue list near the door and the crate. Run weekly check ins to review. A short reset session with an SMDT can also keep the system tight.
Can Training Dogs for Multi-Handler Homes work with a reactive dog
Yes, if the plan is structured and pressure stays low. Start with the calmest handler and simplest spaces, then build out with the Smart Method. Seek support early if reactivity spikes.
How many handlers should train at once
Start with one, rotate after a few reps, then progress to two or more when the dog stays calm. The goal is clean repetitions, not crowding the dog.
What rewards are best for Training Dogs for Multi-Handler Homes
Use soft, high value food the dog can eat quickly. Pair with calm praise. Toys are fine for short bursts if arousal stays low. All handlers should use the same reward rules.
How do we stop the dog from only listening to one person
Rotate high value activities like meals, training, and play. The favoured handler steps back while others lead short wins. Keep cues and markers identical.
How long does it take to see results
Most families see change in one to two weeks when they follow the Smart Method. Full reliability across all handlers depends on practice and environments, usually four to eight weeks.
Do we need professional support for Training Dogs for Multi-Handler Homes
Guidance speeds results and prevents mistakes. Our programmes align every handler to one system so progress is steady. You can Book a Free Assessment to get started.
Conclusion
Training Dogs for Multi-Handler Homes succeeds when your family speaks with one voice. The Smart Method provides that voice. Clear markers, fair pressure and release, high motivation, stepwise progression, and trust form the backbone of reliable behaviour. When each person follows the same rules, your dog learns fast and stays calm, no matter who holds the lead. Your dog deserves training that truly works. With certified Smart Master Dog Trainers SMDTs nationwide, you will get proven results backed by the UK’s most trusted dog training network. Find a Trainer Near You
Training Dogs for Multi-Handler Homes
Dog Neutrality vs Friendliness: Why the Difference Matters
Most families want a friendly dog, yet real life demands something more precise. The question of dog neutrality vs friendliness sits at the heart of modern training. A truly reliable companion can be friendly when invited, and neutral by default. At Smart Dog Training, we build that balance on purpose. As a Smart Master Dog Trainer (SMDT), I can tell you that neutrality is not cold or unkind. It is calm, confident, and under control.
When your dog understands that other dogs, people, bikes, and birds are background noise unless you say otherwise, everything changes. Walks become easy. Guests feel welcome. Public spaces feel safe. This is what we mean by neutrality. Friendliness remains a choice you give, not a habit your dog imposes.
What Neutrality Means
Neutrality is a trained state where your dog observes the world without seeking engagement. The dog notices but does not act. That means no pulling toward dogs, no jumping at people, no fixating on distractions. In the Smart Method, neutrality is the default position your dog holds unless you release them. It looks polite, steady, and confident.
What Friendliness Means
Friendliness is a social state your dog enters when you invite it. Think of a calm sit to greet a neighbour, or a loose tail wag while you hold a short conversation. Controlled friendliness follows your cue, maintains manners, and ends on your marker. It is a skill, not a personality free for all.
Where Dog Neutrality vs Friendliness Goes Wrong
Many dogs are over friendly, which sounds sweet until it becomes chaotic. Dragging toward dogs and people, bouncing at strangers, and ignoring recall are all common results. The dog is not bad. It simply thinks every social opportunity belongs to them. In our programmes, we teach that social time exists, but only when the handler says so.
Why Neutrality Creates Real Life Freedom
Neutrality unlocks the freedom most families want. A neutral dog can go anywhere because you can trust them to ignore the world until you cue interaction. That confidence means more coffee shop visits, calm school runs, and stress free travel. The public experience becomes reliable because your dog is reliable.
- Calm passes by other dogs on pavements
- Steady behaviour in busy parks and markets
- Safe greetings for children and guests
- Focus that holds around wildlife and bicycles
In the debate of dog neutrality vs friendliness, neutrality wins for daily life. It does not erase friendly moments. It protects them. Controlled friendliness is richer because the dog can switch it on and off.
How the Smart Method Builds Neutrality
Smart Dog Training delivers results through the Smart Method. Every programme follows the same five pillars: Clarity, Pressure and Release, Motivation, Progression, and Trust. This structure moves dogs from distracted to reliable with a steady, humane, and outcome driven approach.
Clarity
We teach precise commands and markers so your dog always knows what to do. Clear language means less conflict and faster learning. Sit means sit. Heel means heel. Place means stay on your bed until released. Clarity is how neutrality becomes predictable.
Pressure and Release
Fair guidance with a clear release builds responsibility without struggle. Your dog learns how to make good choices, then discovers that calm choices bring comfort and reward. Pressure ends the moment the dog makes the right decision, which speeds up learning.
Motivation
We use food, play, and praise to create desire to work. Motivation makes neutrality feel good, not restrictive. The dog learns that ignoring distractions opens the door to rewards from you, not the environment.
Progression
Skills are layered step by step. We start in quiet spaces and add distraction, duration, and difficulty until the behaviour holds anywhere. This is the only way neutrality thrives outside your living room.
Trust
Trust grows when communication is consistent and fair. Your dog learns that you are safe and predictable. That bond produces calm, confident behaviour your family can count on.
Foundations at Home
Neutrality starts in the home. If your dog cannot hold focus in your kitchen, they will struggle on the high street. In Smart programmes, we install foundations quickly.
Name Response
Your dog should snap their attention to you the instant they hear their name. Reward this heavily. Attention is the gateway to every skill we teach.
Place
Place teaches your dog to settle on a bed and ignore life moving around them. Start with short durations, then extend while you cook, take calls, or greet visitors. Place is the home version of neutrality.
Heel and Loose Lead
A clean heel position removes conflict on walks and becomes the moving version of neutrality. Your dog learns to hold alignment with you and to ignore what passes by. Praise and reward the picture you want.
Marker System
We use a simple set of markers to confirm or release behaviour. A reward marker confirms success. A release marker ends an exercise. A no reward marker resets the dog without emotion. This structure supports the balance of dog neutrality vs friendliness in every session.
Socialisation the Smart Way
Most owners think socialisation means more play. In the Smart Method, socialisation means exposure with neutrality. Your dog learns that the world is safe and not for them to micromanage.
See, Hear, Smell, But Do Not Engage
Take your dog to new environments and let them watch. Reward calm observation. Move past dogs and people without stopping. Your message is simple. We can be near it without touching it.
Controlled Greetings
Friendly moments happen on cue. Ask for a sit, release your dog to greet, then call them back and reward. Limit greetings to short, calm sessions. This keeps the social dial under your control.
On Lead Manners Around Dogs and People
Lead manners decide how the world sees your dog. The goal is a dog that chooses to stay with you. If another dog stares or a child appears suddenly, you already have a plan.
- Step off line and ask for heel
- Mark and pay for eye contact
- Use place on a portable mat for outdoor calm
- Release only if you decide a greeting is suitable
This routine keeps the balance of dog neutrality vs friendliness clear for your dog. You own the social switch.
Off Lead Control That Holds
Off lead freedom is not a right. It is a result of training. We build a recall that cuts through distraction, plus a disengagement cue that ends interest quickly. Proof recall with distance, then with other dogs and wildlife at a safe gap. Reward big for fast returns.
Disengagement
Your dog should be able to look at a distraction and choose to look back at you. Mark that moment and pay well. This is neutrality in motion.
Common Problems From Excess Friendliness
Over friendly dogs can be as difficult to manage as reactive dogs. The outcome looks different, but the stress level for owners often matches.
Dragging to Dogs
Pulling hard toward every dog teaches your dog to self reward. Each time they get there, the habit gets stronger. Rebuild heel and mark calm passing to break the cycle.
Jumping on People
Jumping is friendly in intention but rude and unsafe in practice. Ask for sit before any hello. No sit, no greeting. Consistency turns this into an easy habit.
Loss of Focus
A dog that scans for friends cannot listen to you. Install short focus games at home. Use them as your warm up before walks and in new locations.
Turning Friendly Into Neutral: A Simple Plan
Here is a clear path our trainers use to rebalance dog neutrality vs friendliness. Adjust the pace to your dog.
Week 1 to 2 Reset
- Short lead walks in quiet areas only
- Heel practice for two to five minutes at a time
- Place twice daily with easy wins
- Reward name response fifty times a day with tiny treats
Week 3 to 4 Controlled Exposure
- Walk past dogs at a distance where your dog can still focus
- Mark and pay for disengagement
- One or two planned greetings per session, on cue only
- Introduce a portable mat for outdoor place
Week 5 to 6 Proofing
- Add busier locations with bicycles and children
- Lengthen place during guest arrivals
- Begin off lead recall work in safe enclosed spaces
- Increase calm time between any greetings
By the end of this block your dog should default to you, not the environment. If you need help calibrating distance and timing, a Smart Master Dog Trainer is the fastest way to get there.
Ready to turn your dog’s behaviour around? Book a Free Assessment and connect with a certified Smart Master Dog Trainer available across the UK.
How Smart Coaches Families
Smart Dog Training delivers structured, progressive programmes for families. We teach in home, in carefully designed group classes, and through tailored behaviour programmes for complex cases. Every plan follows the Smart Method so results are consistent no matter where you live.
Our Smart University trains each Smart Master Dog Trainer through a blended pathway. Six online modules build knowledge. A four day practical workshop builds handling skill. Twelve months of mentorship and business support ensures real world results. Graduates join our Trainer Network and serve local families under the Smart brand.
Measuring Real Life Progress
We care about outcomes. That means your training should be visible in daily routines.
- Walk a busy pavement without pulling
- Settle on place while a visitor enters and sits down
- Pass ten dogs in a park with no loss of heel
- Recall off a mild distraction in an enclosed field
- Greet a neighbour calmly for fifteen seconds, then return to you on cue
When you can pass these tests, you have mastered the balance of dog neutrality vs friendliness in practice.
Ethical Structure That Builds Trust
Our approach is simple. Clear communication. Fair guidance. High motivation. Step by step progression. When you stay consistent, your dog learns to relax and work with you. This ethical structure is what sets Smart apart and is why families trust us across the UK and Europe.
Case Study: From Social Butterfly to Calm Companion
Milo was a one year old spaniel who wanted to greet everyone. His owners loved his spark, but walks were a struggle. He pulled to every dog, jumped at people, and could not hold still for guests. In six weeks of Smart training, his story changed.
We began with clarity. Name response and place at home. We added heel in the garden, then short quiet walks. Pressure and release timing helped Milo learn how to make good choices. Motivation kept his tail soft and his mind engaged. In week three we layered controlled exposure near other dogs, paying for disengagement. By week six Milo walked past dogs politely and greeted on cue, then returned to heel. Friendliness stayed, neutrality led. His owners now take him everywhere.
FAQs on Dog Neutrality vs Friendliness
Is neutrality unkind to social dogs
No. Neutrality reduces stress. Your dog does not need to manage the world. They learn that you will say when it is time to be social. This produces calm confidence and better manners.
Will neutrality make my dog antisocial
Not at all. In our system, friendliness is invited and structured. Your dog will still enjoy people and dogs, but with rules that keep everyone safe.
How long does it take to balance dog neutrality vs friendliness
Most families see clear changes in two to six weeks with daily practice. Timelines vary by dog, environment, and handler consistency.
Can puppies learn neutrality
Yes. We teach puppies to watch the world without reacting. Short sessions, clear markers, and calm exposure set the best foundation for life.
What if my dog is already reactive
Reactivity and over friendliness are both forms of over arousal. We rebuild foundations the same way. Start at a distance where your dog can think, then progress step by step.
Do I need professional help to teach this
You can make progress with the plan above. For faster results, work with a Smart Master Dog Trainer. We tailor timing, distance, and reward to your dog and coach your handling with precision.
What about off lead parks and busy trails
Build neutrality first in easy places. Then add complexity. Do not go off lead until recall is strong and your dog can disengage from dogs and wildlife on cue.
How many greetings should I allow per walk
Fewer than you think. One or two calm greetings are enough. Quality over quantity keeps neutrality as the default and protects your progress.
Conclusion: Choose Neutrality, Keep Friendliness
In the real world, neutrality is the skill that unlocks freedom. It keeps friendliness special, safe, and under your control. At Smart Dog Training, we build this balance through a structured method that families can follow and trust. If you are ready to resolve the debate of dog neutrality vs friendliness in your home, we are here to help.
Your dog deserves training that truly works. With certified Smart Master Dog Trainers (SMDTs) nationwide, you'll get proven results backed by the UK's most trusted dog training network. Find a Trainer Near You

Dog Neutrality vs Friendliness
Why Cue Clarity Across Family Members Changes Everything
Dogs read patterns. When every person in the home asks for the same behaviour with the same word and the same timing, your dog relaxes and complies without confusion. That is the power of cue clarity across family members. At Smart Dog Training, we build this clarity into every home programme so your dog responds calmly and reliably to each person, not just the primary handler. When needed, a certified Smart Master Dog Trainer will coach your entire household to align words, timing, and rewards so results last in real life.
Without cue clarity across family members, even well taught skills fall apart. One person says Sit while another says Sit down. Someone praises too early while another forgets to release. The dog tries to guess and the guesswork turns into slow responses, frustration, and conflict. With the Smart Method, we eliminate that guesswork and give your dog a single, consistent language that every family member speaks the same way.
This article shows you exactly how to create cue clarity across family members. You will learn the language to use, how to deliver markers and release words, and the daily habits that keep your dog responsible and willing. Follow the plan and you will see your dog become more focused, less anxious, and far more reliable wherever you go.
Cue Clarity Across Family Members Starts With Shared Language
Your dog should hear one word per behaviour and experience one meaning per word. Consistency begins with an agreed vocabulary, then expands to timing and body language. The Smart Method provides that structure so every family member gives the same instruction and the dog never has to decode mixed messages.
One Word Per Behaviour
Pick the simplest word and stick with it. One behaviour gets one cue. Avoid synonyms and filler words that muddy the signal. Examples that work well for most families:
- Sit for a fold of the hips with still front feet
- Down for a relaxed belly on the floor
- Place for go to bed and stay there until released
- Come for a direct return to you
- Heel for walk by my left leg
Write your list. Keep it short at first so it is easy to learn. Expand only when the core list is consistent for two weeks. That disciplined vocabulary is the heart of cue clarity across family members.
Marker Words That Mean Something
Markers tell the dog the exact moment they got it right. They make training faster and create strong engagement. Smart programmes use two markers to keep things simple:
- Yes as an event marker that promises a reward. It pinpoints success and is followed by food, a toy, or praise.
- Good as a duration marker that means keep doing that. It maintains position and confidence while the dog holds a task.
Use Yes for single actions like Sit and Come. Use Good to keep a Down or Place steady. Everyone in the home uses the same markers with the same meaning. This unified approach is core to cue clarity across family members.
The Release Word That Ends the Job
Every job needs a clear end. The release word tells your dog the task is over and they are free. We recommend Free as the universal release. Say it once, then allow the dog to break position. If the dog pops up before Free, gently guide them back, then release correctly. This builds accountability without conflict and protects the meaning of your markers.
Tone Timing and Body Language
Dogs respond to patterns in sound and motion before they understand language. Your delivery must match from person to person so the dog experiences the same signal each time. This is where many homes lose cue clarity across family members, even if the words are correct.
Hand Signals That Mirror Speech
Layer a simple hand signal onto each cue. Signals should be clean and easy to see:
- Sit palm up, small lift of the fingers
- Down palm facing down, smooth sweep toward the floor
- Place point to the bed, then look at the dog
- Come hands to centre line at the waist
- Heel tap your left leg once as you begin to walk
Everyone performs the same signal with the same pace. Avoid rushing or towering over the dog. Stand tall, breathe, and move with intention. The goal is quiet clarity, not volume.
The One Second Mark
Timing builds trust. Aim to mark the correct moment within one second. If you are training Sit, say Yes the instant hips touch the floor. If you are holding Place, say Good every few seconds to maintain confidence. Late marking confuses the dog and erodes the meaning of your words. When each person marks on time, cue clarity across family members becomes second nature.
The Smart Method In Your Household
The Smart Method is our proprietary training system. It is structured, progressive, and outcome driven. It takes the guesswork out of family communication and creates calm, consistent behaviour that lasts in real life.
Clarity Motivation Trust
Clarity sets the vocabulary and timing so your dog knows exactly what earns a reward. Motivation uses food, toys, praise, or access to life rewards to keep your dog eager to work. Trust grows when the rules are fair and consistent across all handlers. When clarity, motivation, and trust work together, the dog stops checking out and starts checking in.
Pressure and Release Done Fairly
Smart Dog Training uses fair guidance with clear release and reward. That can be light leash pressure to point the way, then an immediate release the moment your dog follows through. The release and a marker tell the dog they made the right choice. This balanced approach builds responsibility without conflict and protects cue clarity across family members.
Progression That Sticks
Skills are layered step by step. First indoors with low distraction, then in the garden, then street side, then public spaces. We add distraction, duration, and difficulty only when the dog is successful. This methodical progression ensures your dog listens to every person in every place, not just the quiet kitchen with the primary handler.
Build Your Family Cue Book
A single reference keeps everyone aligned. Create a one page cue book and place it where the family gathers. This simple tool is the backbone of cue clarity across family members.
- List each behaviour and its one cue word
- Add the hand signal for each behaviour
- Note your marker words Yes and Good and your release Free
- Define position standards Sit means still front feet, Down means elbows and hips on the floor
- Include a reward list high value food, toy options, calm praise
- Summarise the rules say each cue once, mark on time, release with Free
Hold a five minute family huddle twice a week. Read the cue book out loud, rehearse together for two minutes, then go back to normal life. That tiny habit prevents drift and keeps the language sharp.
A Six Week Plan For Consistency
Follow this plan to install cue clarity across family members and solidify your dog’s behaviour. Keep sessions short and upbeat. If you feel stuck at any step, a Smart Master Dog Trainer will guide you through each layer.
Week 1 Align and rehearse the vocabulary. Each person practises Sit, Down, Place, and Free for three minutes a day. Use Yes for events, Good for duration. Focus on timing within the one second window. End with a calm walk around the home together.
Week 2 Reward mechanics and markers. Everyone practises delivering the reward from the same position. For Sit and Down, present the reward at nose level with a soft hand. For Place, deliver to the bed while the dog remains on it. Keep hands still until you say Yes, then move to reward. This sharpens the meaning of the marker.
Week 3 Lead skills and positions. Add light leash guidance for Heel and Come. Use gentle pressure to suggest the position, then release the instant the dog steps into place. Mark with Yes and reward. Keep steps short and precise. Cue clarity across family members improves as the dog feels the same micro guidance from each person.
Week 4 Distraction and distance. Take the same cues to the garden or a quiet street. Lower expectations slightly at first. Use Good to maintain Place while one person walks past, then release with Free. Keep success high and errors low by adjusting distance and distraction early.
Week 5 Real life rehearsal. Use Place during dinner. Practise Heel to the door. Ask for a Sit and Wait before exiting the car. Rotate handlers so the dog hears the same cues from different voices. Reward good choices, guide calmly through mistakes, and maintain a steady release pattern.
Week 6 Maintenance and review. Revisit your cue book. Tighten any words that drifted. Film two short sessions and watch together. Celebrate wins. Set a weekly family tune up of ten minutes to protect the system you built.
Ready to turn your dog’s behaviour around? Book a Free Assessment and connect with a certified Smart Master Dog Trainer - available across the UK.
When to Bring in a Smart Master Dog Trainer
Some homes face extra layers of challenge. Rescue histories, adolescent energy, or competing schedules can make it harder to keep everyone aligned. That is when a certified Smart Master Dog Trainer SMDT becomes invaluable. Your trainer will assess your dog, map your household patterns, and install the Smart Method so each person gets the same results.
- If your dog responds to one person but ignores others
- If cues crumble outside the home
- If children are involved and need simple steps that work
- If leash skills or recall feel inconsistent
- If anxiety or reactivity is present alongside confusion
Your SMDT will create a tailored plan, coach you on timing, and set up accountability so cue clarity across family members becomes your new normal. You can start with a no pressure consultation and then choose the programme level that fits your goals.
FAQs
How do we decide our vocabulary for cue clarity across family members?
Select the smallest set of behaviours you need daily Sit, Down, Place, Come, and Heel. Choose one plain word per behaviour, then add Yes, Good, and Free. Write them in a cue book and rehearse twice a week.
What if one person has a very different voice or accent?
Dogs care more about timing and pattern than accent. Keep your cadence steady, mark within one second, and use the same hand signals. The Smart Method removes confusion by aligning timing and movement, not just words.
Can children help without confusing the dog?
Yes. Give kids one or two cues only, like Place and Free. Teach them to say each cue once, then wait. They can mark with Yes and deliver a reward quietly. This builds confidence and preserves clarity.
Do we need a clicker if we use marker words?
No. Smart programmes rely on clear verbal markers Yes and Good because they transfer easily to real life. A clicker can work if every person uses it the same way, but most homes achieve better consistency with words.
How do we fix a cue that has become noisy?
Retire the noisy cue for a week and retrain with a fresh word. For example, replace Come with Here if Come has lost meaning. Rebuild indoors, mark correctly, and release with Free. Then generalise to new places.
What should we do when the dog breaks position before the release?
Guide them calmly back to the exact spot, pause, then release properly with Free. Do not reward the early break. Reward the correct hold. This protects duration and prevents creeping.
How do we maintain progress when life gets busy?
Use micro sessions of two minutes, three times a day. Tie cues to routines Place during meals, Sit at doors, Heel to the car. Small, frequent wins keep clarity alive.
Conclusion
When your home runs on one language, your dog feels safe and responsible. Cue clarity across family members removes guesswork and delivers reliable behaviour that holds up in real life. The Smart Method gives you the structure to align words, timing, and rewards so every handler gets the same calm response. If you want a personalised plan with hands on coaching for your family, we are ready to help.
Your dog deserves training that truly works. With certified Smart Master Dog Trainers SMDTs nationwide, you'll get proven results backed by the UK's most trusted dog training network. Find a Trainer Near You
Cue Clarity Across Family Members
Training Calmness Around High Value Toys
Many families struggle when a favourite ball, tug, or chew turns play into chaos. Training calmness around high value toys is the answer. With the Smart Method, you can guide your dog to show relaxed, reliable behaviour around prized items without conflict. Every step is designed and delivered by Smart Dog Training, led by a certified Smart Master Dog Trainer. Our approach blends clear structure with fair rewards so your dog learns to think, not just react.
Calm behaviour around toys is not just nice to have. It protects your dog from overarousal, prevents resource guarding, and keeps everyone safe. Our structured system for training calmness around high value toys gives you a plan you can rely on. It fits real life, works for all ages and breeds, and scales from the living room to the park. The process is taught by an SMDT and follows our five pillars of Clarity, Pressure and Release, Motivation, Progression, and Trust.
Why Calmness Around Toys Matters
High value items can lift arousal fast. Without structure, that arousal spills into snatching, chasing, guarding, and ignoring recall. Training calmness around high value toys changes the emotional picture. Your dog learns that toys live inside rules and that calm choices are the shortest path to fun. The result is safe play, a stronger bond, and clear communication that carries into every part of life.
- Safety for kids and visitors
- Prevention of guarding and conflict
- Cleaner obedience and faster recoveries from excitement
- Better recall and leash manners around play
- A stronger relationship built on trust
What Makes a Toy High Value
Value is in the dog. Some dogs light up for a tennis ball. Others obsess over tug, squeakers, or long-lasting chews. The more the item triggers chase, bite, tear, or keep-away instincts, the more structure you need. Training calmness around high value toys starts by respecting what your dog loves and turning that motivation into a training tool.
- Novelty and scarcity increase value
- Texture, taste, and sound add excitement
- Movement fuels chase and possession
- Owner attention can raise value further
The Smart Method Foundations
Smart Dog Training uses a proven framework to produce calm, consistent behaviour that lasts in real life.
- Clarity: We teach crisp commands and markers so the dog always knows what earns and what releases.
- Pressure and Release: We pair fair guidance with clear release and reward. This builds accountability without conflict.
- Motivation: We use rewards to create engagement and a positive emotional state. Dogs choose to work.
- Progression: We layer skills step by step. We add distraction, duration, and difficulty until they are solid anywhere.
- Trust: We strengthen the bond between dog and owner. Your dog learns you are a safe guide, not a rival.
Every element in training calmness around high value toys sits inside these pillars. The method keeps sessions simple, measurable, and repeatable by any family member.
Reading Arousal Before It Spikes
Early signs tell you when to slow the game, cue an Out, or reset. Watch for:
- Hard eyes or fixed stare
- Stiff body, tail up and still
- Fast regripping and frantic chewing
- Shallow rapid breathing or vocalising
- Head turns to block your approach
- Ignoring known cues
Training calmness around high value toys means catching these signals early and guiding the dog back to clarity. If you can read the dog, you can change the outcome.
Setting the Environment for Success
Management lets training win. Before you start training calmness around high value toys, set up a space that removes confusion.
- Store special toys and chews out of reach between sessions
- Use a leash or long line for early reps to prevent keep-away
- Have your markers, rewards, and a second toy ready
- Choose low-distraction rooms at first
- Limit session length to keep arousal in a learning zone
Core Language for Clarity
Smart Dog Training uses a precise marker system. This is how we make training calmness around high value toys crystal clear.
- Yes: Instant release to reward. Ends the rep.
- Good: Sustains behaviour. Reward may come while the dog holds position.
- Nope: Brief reset. Try again without emotion.
- Out or Drop: Release the item completely, mouth open and off.
- Take: Permission to take the item calmly.
- Free: Session end or break. Not a release to break rules.
Keep words short and consistent. Everyone in the home must use the same cues with the same meaning.
Teaching a Clean Out
A reliable Out is the backbone of training calmness around high value toys. We build it with clarity and fair trade.
- Start with a low to medium value toy. Put the dog on leash for structure.
- Offer Take. When the dog grips, keep the toy still. Calm hands, no tugging yet.
- Say Out once. Hold the collar tab or leash close and bring the toy slightly toward the dog’s chest to slacken the bite. Do not pull the toy away.
- When the mouth opens, mark Yes and immediately pay with a second toy or a high value food reward brought to the dog’s nose. Reward appears the moment the mouth clears.
- Pause for two seconds of neutrality. Then offer Take again.
- Repeat brief reps. Gradually fade food and pay with the same toy by restarting the game only after a clean Out.
Common errors include repeating the cue, wrestling, and rewarding late. A clean, fast trade turns Out into a prediction of more fun. That is the heart of training calmness around high value toys.
Place and Relaxation on Cue
Calmness is a skill. We teach Place as a clear station where the dog can down, decompress, and switch off around toys.
- Lure the dog onto a bed or mat. Mark Good for staying, Yes for position changes you want.
- Begin with short one to three second holds. Pay calmly into the dog’s mouth.
- Introduce low value toy presence. The toy is on the floor while the dog holds Place.
- Build to tossing the toy past the bed while the dog relaxes. Reward the choice to stay.
- Layer duration, then distance, then distraction. This is Progression in practice.
Place gives you a reliable off switch and anchors training calmness around high value toys during and after play.
Building a Permission Structure
Dogs feel safest when rules are simple. A strong permission pattern prevents snatching and teaches manners.
- Wait: Sit or down before the game starts
- Take: Calm permission to engage
- Out: Clean release on cue
- Place: Reset to relaxation between reps
- Free: End of session
Run this pattern every time you bring out a special item. Training calmness around high value toys sticks when the structure never changes.
Pressure and Release Done Right
Smart Dog Training uses fair guidance to help the dog make the right choice. If the dog clings to the toy, keep the item still and apply gentle, steady leash pressure straight up on a close grip. The moment the mouth softens and opens, release pressure and mark Yes. This clean release is how the dog learns that letting go turns pressure off and starts the reward. Paired with upbeat motivation, this builds accountability without conflict and is essential for training calmness around high value toys.
Reward Strategies That Build Calm
Rewards shape emotion. If payment is too frantic, arousal spikes. Shape calmness by:
- Delivering food at the dog’s mouth with slow movement
- Restarting games only after the dog shows soft eyes and loose body
- Using a second identical toy for fair trades
- Switching to Place after two or three high energy reps
- Keeping tug at medium intensity unless you are training power and outs are perfect
These strategies keep training calmness around high value toys balanced and enjoyable.
Progression Plan for Real Life Reliability
Progression turns skills into habits. Use this step by step plan for training calmness around high value toys.
- Phase 1 Calm Foundations: Teach markers, Out, Place in a quiet room with a low value toy.
- Phase 2 Predictable Trades: Add a second toy. Build fast, clean Outs with immediate restarts.
- Phase 3 Controlled Excitement: Introduce brief tug, then Out to Place. Keep reps short.
- Phase 4 Movement and Distance: Toss toy past the dog. Add heel between reps. Maintain calm permissions.
- Phase 5 Higher Value Items: Introduce the favourite ball or chew. Lower criteria at first, then rebuild speed and precision.
- Phase 6 Distractions: Add family members, door knocks, garden work, or passing dogs. Expect to slow down and coach choices.
- Phase 7 Outdoors: Garden, then quiet field, then busier parks. Use a long line until recall and Outs are reliable.
Keep a simple log of sessions so you know when to raise or lower difficulty. Training calmness around high value toys improves the fastest when you control one variable at a time.
Handling Chews Without Conflict
Static chews raise possession in some dogs. Use the Smart Method to keep trust and safety.
- Start with the dog on Place. Deliver the chew once the dog is calm.
- Approach neutrally. No teasing or reaching over the head. Turn your body sideways.
- Cue Out. If needed, add gentle leash guidance and a food reward offered right at the nose. Mark Yes when the mouth clears.
- Give the chew back after a successful Out. This teaches the dog that releasing does not mean losing.
- Finish by removing the chew during a calm moment. Pay with a simple food reward and a walk or cuddle time.
Consistency in this routine cements training calmness around high value toys and chews, and prevents guarding from forming.
Family Rules That Keep Everyone Safe
Everyone must follow the same script. This is non negotiable for training calmness around high value toys.
- No chasing the dog to steal toys
- No rough play without permissions in place
- Kids do not take toys from the dog, ever
- Use Place before and after every game
- End the session if arousal climbs too high
Simple house rules protect relationships and help the dog relax because the game is always fair.
Troubleshooting Common Problems
Most issues resolve with clearer structure and better timing. Here is how Smart Dog Training addresses typical sticking points during training calmness around high value toys.
Problem: The dog runs off with the toy.
Fix: Use a light line to remove the option. Play in small spaces. Pay fast after the Out and restart the game to reward staying close.
Problem: The dog clamps and will not release.
Fix: Keep the toy still. Add steady leash pressure up and slightly forward. The instant the mouth opens, release pressure and mark Yes. Practice with lower value items and rebuild wins.
Problem: The dog regrips or snaps when you reach.
Fix: Slow down. Approach from the side. Use Place resets between reps. Reward soft eyes and loose body before you cue Take again.
Problem: Growling or guarding around chews.
Fix: Go back to structure. Deliver chews on Place. Use neutral body language. Cue Out and trade calmly. If guarding has a bite history, pause home practice and book an SMDT.
Problem: Overarousal with balls or squeakers.
Fix: Use more Place and heel between throws. Reward stillness. Replace squeak toys with similar but quieter options until control improves.
Problem: Ignoring cues outdoors.
Fix: You progressed too fast. Step back to a quieter space, rebuild clean reps, then reintroduce the environment in small doses.
Proofing Skills in Real Life
Proofing cements behaviour where it counts. The Smart Method makes training calmness around high value toys reliable in daily life.
- Living Room: Two to three short sets with Place breaks
- Garden: Add birds, wind, and neighbours as natural distractions
- Front Drive: Layer in delivery vans and passersby
- Local Park: Long line for safety. Work Out, Place, and heel between throws
- Busy Spaces: Keep criteria simple. One perfect Out beats five messy ones
Training Calmness Around High Value Toys with the Smart Method
Here is the flow you will follow with your Smart Dog Training coach. It is structured, progressive, and easy to repeat.
- Prime Calm: Two minutes of leash walking and Place
- Permission: Wait then Take
- Short Game: Ten to fifteen seconds of tug or a single fetch
- Out: One cue, clean release, instant reward
- Reset: Place for ten to twenty seconds with Good markers
- Repeat: Two to four cycles, then Free and put the toy away
Stick to this template for two weeks and you will see measurable gains. Training calmness around high value toys is a habit you both build through repetition and fair rules.
When to Call a Professional
If your dog guards items, has snapped, or if you feel uneasy, bring in help. A certified Smart Master Dog Trainer can assess risk, tailor your plan, and coach safe handling. We will implement the Smart Method step by step so you see results and feel confident.
Ready to turn your dog’s behaviour around? Book a Free Assessment and connect with a certified Smart Master Dog Trainer - available across the UK.
FAQs
How long does training calmness around high value toys take
Most families see change in one to two weeks with daily five to ten minute sessions. Full reliability in busy places can take four to eight weeks. Consistency and clean markers speed progress.
What if my dog refuses to Out without food
Keep food early on, but shift to paying with the same toy. Out then restart the game is the strongest reinforcement for training calmness around high value toys. Fade food as the behaviour becomes habit.
Can I still play tug if my dog gets overexcited
Yes. Use short rounds, calm restarts, and Place between reps. Keep hands still, avoid frantic movements, and step back to lower value toys until you have clean control.
Will trading teach my dog to guard
No. Fair trades reduce conflict. The Smart Method teaches that releasing predicts more good things. This lowers the need to hold or guard and supports trust.
Is this safe for dogs that already guard chews
Yes with structure. Start on leash, use Place, and keep body language neutral. If there is a bite history, work directly with an SMDT who will tailor safety and steps for your home.
What cues do I need to teach first
Focus on Out or Drop, Take, Good, Yes, and Place. These cues form the core of training calmness around high value toys and map cleanly into daily life.
How do I help my kids follow the rules
Make the game simple. Adults control special toys. Kids invite the dog to Place and deliver calm rewards. No taking items from the dog. End the session if excitement rises.
Can I use a ball launcher during training
Not at first. Launchers spike arousal and distance. Build control with hand throws and Place resets. Add the launcher only when your dog offers fast, clean Outs and stays engaged near you.
Conclusion
Calm, safe play starts with clear structure. By training calmness around high value toys the Smart way, you turn excitement into engagement and possession into trust. You will get a reliable Out, a solid Place, and a permission pattern that works anywhere. Most important, your dog will look to you for guidance because the rules are fair and consistent. That is the Smart Method difference.
Your dog deserves training that truly works. With certified Smart Master Dog Trainers (SMDTs) nationwide, you will get proven results backed by the UK’s most trusted dog training network. Find a Trainer Near You
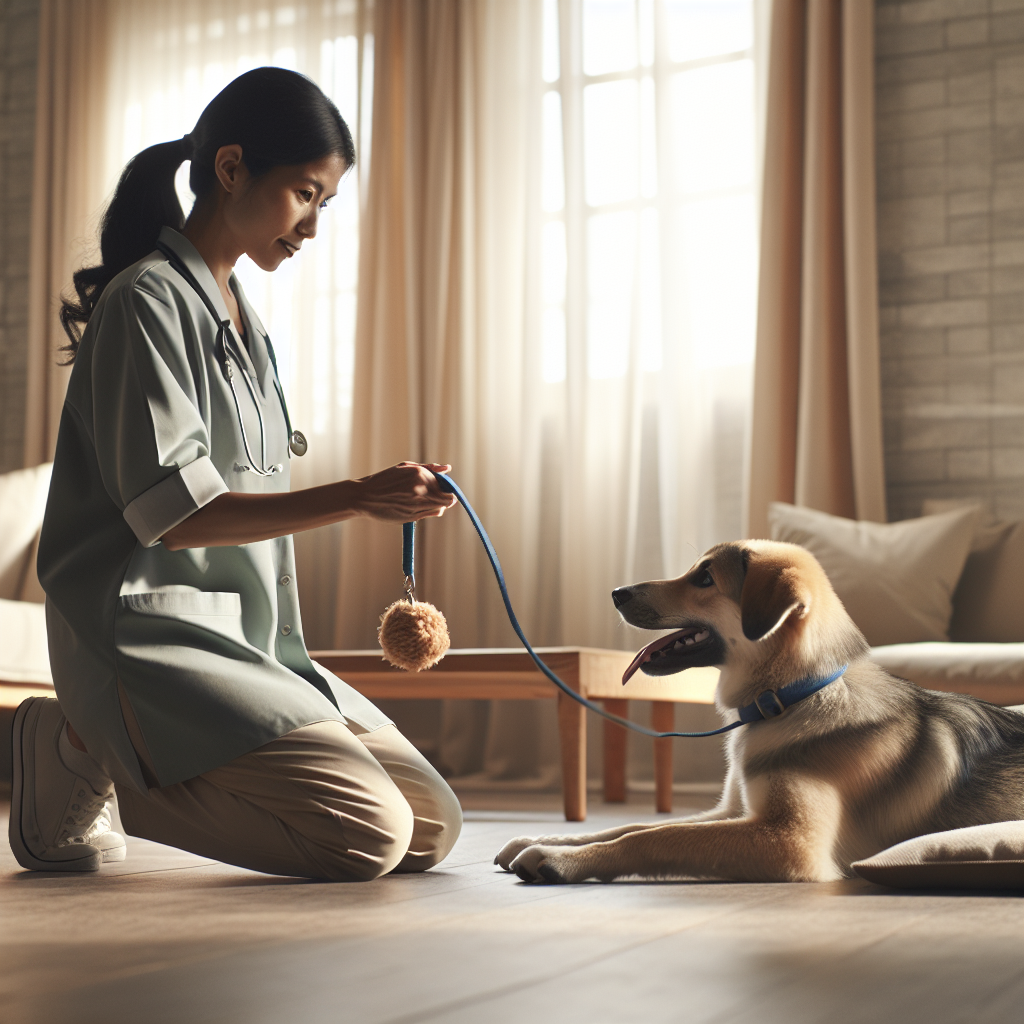
Training Calmness Around High Value Toys
Why Realistic Stay Durations Matter
A reliable stay is more than a party trick. In daily life it is the difference between calm and chaos. Your dog holding position while guests arrive, while you cook, or while a cyclist passes on a narrow path is real control that protects safety and reduces stress. The key is training realistic stay durations that your dog can perform anywhere, not just in the living room. At Smart Dog Training we build that reliability through the Smart Method so families enjoy calm, confident behaviour that lasts.
Realistic stay durations are about clarity and proof, not wishful thinking. Chasing five or ten minute holds before your dog understands the rules only creates confusion. Instead we map a clear plan that grows duration in sensible steps, then add distance and distraction once the dog shows genuine understanding. Every Smart programme is delivered by a certified team, and when you work with a Smart Master Dog Trainer, you feel the difference in structure, pace, and results.
What Are Realistic Stay Durations
Realistic stay durations are time frames your dog can achieve with calm body language, low stress, and consistent success across settings. A realistic duration for a young puppy may be ten to twenty seconds indoors with you close by. For an adult dog with practice, it can be several minutes, even around moderate distractions. Realistic does not mean easy. It means fair, repeatable, and built with a plan.
In Smart programmes realistic stay durations are defined by three factors working together. First is duration, which is how long your dog holds position. Second is distance, which is how far you move away. Third is distraction, which includes people, dogs, sounds, food, toys, and new places. We introduce each factor in a structured order so your dog learns what stay really means.
The Smart Method for Reliable Stays
The Smart Method is our proprietary system used in every stay programme. It blends motivation with structure and accountability so dogs want to work and also take responsibility for the behaviour. Its five pillars guide every step you take with stay training.
Clarity
We teach clear markers and commands so your dog always knows what is expected. You will use a single stay cue, a good marker to confirm correct behaviour as time passes, and a release word that ends the exercise. Timing and tone are consistent so the message is never muddied.
Pressure and Release
We provide fair guidance to help the dog choose the right answer, then release pressure as soon as the dog complies. The instant release communicates success. This balanced approach creates accountability without conflict and speeds up learning.
Motivation
We use rewards strategically to keep engagement high. Food, toys, and access to life rewards are used to build a positive emotional state. Your dog learns that holding position pays.
Progression
We layer skills step by step. First short stays with you close by, then longer holds, then measured distance, then planned distractions. We raise difficulty only when your dog meets the current standard with confidence.
Trust
Training should strengthen the bond between you and your dog. Calm repetition and fair rules create trust. That trust turns into reliable behaviour in real places like the park, the vet, and your front door.
Foundations Before You Train Duration
Before you stretch time, set the foundation. Strong foundations make realistic stay durations possible without stress.
Choose the Position
Stay can be taught in sit, down, or place. Place means holding a defined spot such as a raised bed or mat. For many families, place is the most practical because the boundary helps the dog relax and it is easy to deploy anywhere.
Teach Marker Language
Use three simple markers. Yes to release to reward, good to confirm the dog is correct while still holding position, and your release word such as free to end the exercise. Keep the words short and always consistent.
Pick the Right Environment
Start indoors in a quiet room. Remove obvious distractions, set up your mat or bed, and have rewards ready. Short sessions are best. Think five to eight repetitions, then a break.
Building Duration Step by Step
Here is the Smart progression we use to create realistic stay durations. Move to the next step only when the current step is smooth and repeatable.
Step One The Ten Second Standard
Ask for place or down. Count a calm five to ten seconds. Mark with good once or twice during the hold, then say the release word and feed. Repeat five times. The goal is quiet, still body language and soft eye contact. If your dog breaks, calmly reset without reward and reduce time on the next repetition.
Step Two Stretch to Thirty Seconds
Increase in small increments. Ten seconds to fifteen, then twenty, then thirty. Sprinkle your good marker every five to ten seconds. Keep your body still and hands quiet. Many dogs break because owners fidget. Smooth stillness from you encourages stillness from your dog.
Step Three Two Minutes Indoors
Once thirty seconds is easy for five consecutive repetitions, start aiming for one minute, then ninety seconds, then two minutes. Reward at the end, but also add an occasional walk in to feed a small treat during the hold right after your good marker. This teaches your dog that rewards appear while they maintain position.
Step Four Add Distance Without Losing Time
Now step back one metre for two seconds, return, mark good, then release and reward. Gradually increase how far you step away, up to four or five metres, while keeping the total hold time similar to your recent success. Keep changes small. Distance comes after duration, not before.
Step Five Introduce Movement
Walk around the dog, step to the side, or turn your back for a second or two. Keep your return pattern consistent. If your dog struggles, reduce the movement and reward more often.
Step Six Chain Duration, Distance, and Distraction
Once your dog can hold two minutes with you near and can tolerate a few metres of distance, add tiny distractions. Pick one easy distraction such as placing a toy on a table or slowly opening a door. Maintain the same duration and distance so only the distraction changes. Realistic stay durations are built by changing one variable at a time.
Distraction Proofing for Real Life
Proofing is where most stays fall apart. Smart programmes make distraction proofing clear and progressive so the dog stays calm and confident.
Household Distractions
- Door knocks and doorbell sounds recorded at low volume, then gradually louder
- Family members walking past, sitting, and standing up again
- Food on a table or light meal prep while the dog holds place
- Picking up leads, keys, or post
Work each distraction alone. Start at a level where your dog can succeed. For food on a table, begin with low value food and a short exposure. Reinforce during the hold, then release to a planned reward away from the table.
Outdoor and Community Distractions
- Quiet park with low foot traffic
- Passing cyclists or joggers at a safe distance
- Calm dogs at a distance your dog can handle
- Cafe seating during off peak times
Move the mat to each location. Begin with short stays and close range. Build to two minute holds in easy outdoor spots before trying busy areas. Realistic stay durations outside mean you adjust the environment so success stays high.
Handler Skills That Protect the Stay
Owner habits can make or break a stay. Use these Smart habits to support realistic stay durations.
- Set criteria before you start. Decide the time you will hold, the distance you will add, and the reward schedule.
- Count in your head to avoid rushing. Calm breathing helps your dog settle.
- Mark behaviour, not hope. Use good during the hold and release only when the dog is still.
- Return to your dog before you pay. Avoid luring the dog out of position with food.
- End strong. Give the release word, then deliver the reward with praise.
Troubleshooting Common Problems
Breaking the Stay
If your dog stands up or creeps forward, quietly reset to the original spot without a reward. Reduce the last change you made. That may mean shorter time, closer distance, or fewer distractions. Success is the teacher. The Smart approach avoids nagging and shows the dog how to win.
Vocalising, Fidgeting, or Paw Licking
These can be signs of stress. Shorten the session and increase your reinforcement during the hold. Use place to give a clear boundary. If stress persists, consult a Smart Master Dog Trainer for a tailored plan that keeps the dog confident while you build realistic stay durations.
Slow Returns or Late Rewards
Dogs may become unsure if your timing is inconsistent. Practise without the dog. Rehearse your walk away, your count, your turn, your good marker, your release word, and reward delivery. Smooth mechanics create smooth dogs.
Overuse of the Cue
Do not repeat the stay cue. Give it once, then either reinforce success or reset on an error. Repeating cues teaches the dog that the first cue does not matter.
What Is Realistic at Each Stage
Puppies
Puppies can achieve ten to thirty seconds indoors within the first week of training. By three to four months of steady practice many can hold one to two minutes inside and shorter periods outside. Keep sessions short and upbeat, and use plenty of planned releases.
Adolescents
Adolescent dogs have more energy and curiosity. Expect to maintain two minutes indoors and build outdoor stays carefully. Use the mat to anchor behaviour and make your releases predictable. This stage is where the Smart Method structure pays off.
Adult Dogs
Healthy adult dogs with practice can hold several minutes indoors and two to three minutes in normal outdoor spaces. In high pressure spots such as busy pavements, aim for shorter realistic stay durations and more frequent rewards, then lengthen over time.
Reactive or Anxious Dogs
For dogs who struggle with triggers, realistic stay durations start in very easy environments. Use greater distance from triggers and a higher rate of reinforcement. The goal is calm, not gritted teeth. Professional guidance is recommended for this group so criteria remain fair and progress steady.
Reward Strategies That Build Calm
How you reinforce matters. Smart programmes use reward schedules that keep the dog invested without making them frantic.
- During early duration, use frequent small rewards delivered to the dog on the mat after you mark good.
- As duration grows, thin the rewards slightly but continue to confirm with good at planned intervals.
- Release to bigger rewards such as play or a short sniff walk. Life rewards make the behaviour practical.
Remember that feeding during the hold is not luring. It is payment for the behaviour the dog is already doing. Always deliver the treat while the dog is still in position, then step back and continue the hold if the exercise is not over yet.
Maintaining the Behaviour Long Term
Once you have built realistic stay durations, protect the behaviour with simple habits.
- Use daily micro sessions. Two or three short stays during normal routines are enough to maintain standards.
- Vary the environment. Practise in different rooms, the garden, and quiet outdoor spaces.
- Keep your release word sacred. Never release the dog for breaking position.
- Refresh proofing every few weeks. Lightly reintroduce distractions so the skill does not fade.
Real Life Applications
Stays are most valuable when they solve daily problems. Here is how our clients use them.
- Front door management while deliveries arrive
- Polite behaviour at cafes during a quick coffee
- Calm during cooking or meal times
- Settled waiting at the vet or groomer reception
- Safety at kerbs while traffic passes
In each case start with shorter realistic stay durations than your indoor standard, then build back up as your dog settles.
Case Study From Ten Seconds to Five Minutes Calm
A young spaniel joined a Smart programme struggling to hold a stay for more than ten seconds. We began with place in a quiet room and used the Smart Method markers. By the end of week one the dog held thirty seconds with easy focus. Week two reached ninety seconds with the owner stepping two metres away. Week three added sound proofing with the doorbell at low volume. At the four week mark the dog held two minutes at a quiet park and one minute at a cafe during off peak hours. By week six the team achieved five minutes indoors while dinner was cooked. The owner kept two short maintenance sessions per day and the dog remained calm and confident.
Ready to turn your dog’s behaviour around? Book a Free Assessment and connect with a certified Smart Master Dog Trainer - available across the UK.
When to Work With a Professional
If your dog shows signs of stress, if progress stalls, or if you are unsure how to set criteria, professional help speeds up results and protects welfare. An SMDT will assess your dog, demonstrate clean mechanics, and map a plan that fits your home and routine. With Smart Dog Training you are never guessing. You are following a proven path to realistic stay durations in real life.
FAQs
How long should a dog realistically hold a stay
For most family dogs, one to three minutes indoors and one to two minutes in quiet outdoor spaces are realistic stay durations once trained. In busy environments start shorter and build up as your dog succeeds.
Should I teach sit stay or down stay first
Down is often easier for calm duration because the posture is more restful. Place on a mat is even clearer for many dogs. Choose one position and build skill before adding others.
How do I handle mistakes during a stay
Quietly reset the dog to the original spot without a reward. Reduce criteria to the last level your dog could handle, then rebuild with small steps. Avoid repeating the cue and avoid scolding.
Can I feed during the stay or only at the end
Feeding during the stay after marking good is encouraged. You are paying for correct behaviour. Keep treats small and calm, then continue the hold or release as planned.
When should I add distractions
Add distractions only after you have built at least one to two minutes of calm duration indoors and a few steps of distance. Introduce one new distraction at a time and keep it easy at first.
What if my dog gets anxious when I step away
Reduce distance to a single step or less and increase your rate of reinforcement. Practise small departures and immediate returns. If anxiety persists, work with a Smart Master Dog Trainer for a tailored plan.
Is the release word different from the reward marker
Yes. The release word ends the exercise. The reward marker confirms correct behaviour during the hold. Keep them distinct so your dog does not leave position early.
Conclusion and Next Steps
Reliable stays are built, not wished for. When you follow the Smart Method you set clear expectations, you reward calm, and you progress in steps that make sense. That is how realistic stay durations become part of daily life, from doorways and cafes to vet waiting rooms and busy pavements. If you want a plan that removes the guesswork and delivers results, we are ready to help.
Your dog deserves training that truly works. With certified Smart Master Dog Trainers (SMDTs) nationwide, you'll get proven results backed by the UK's most trusted dog training network. Find a Trainer Near You
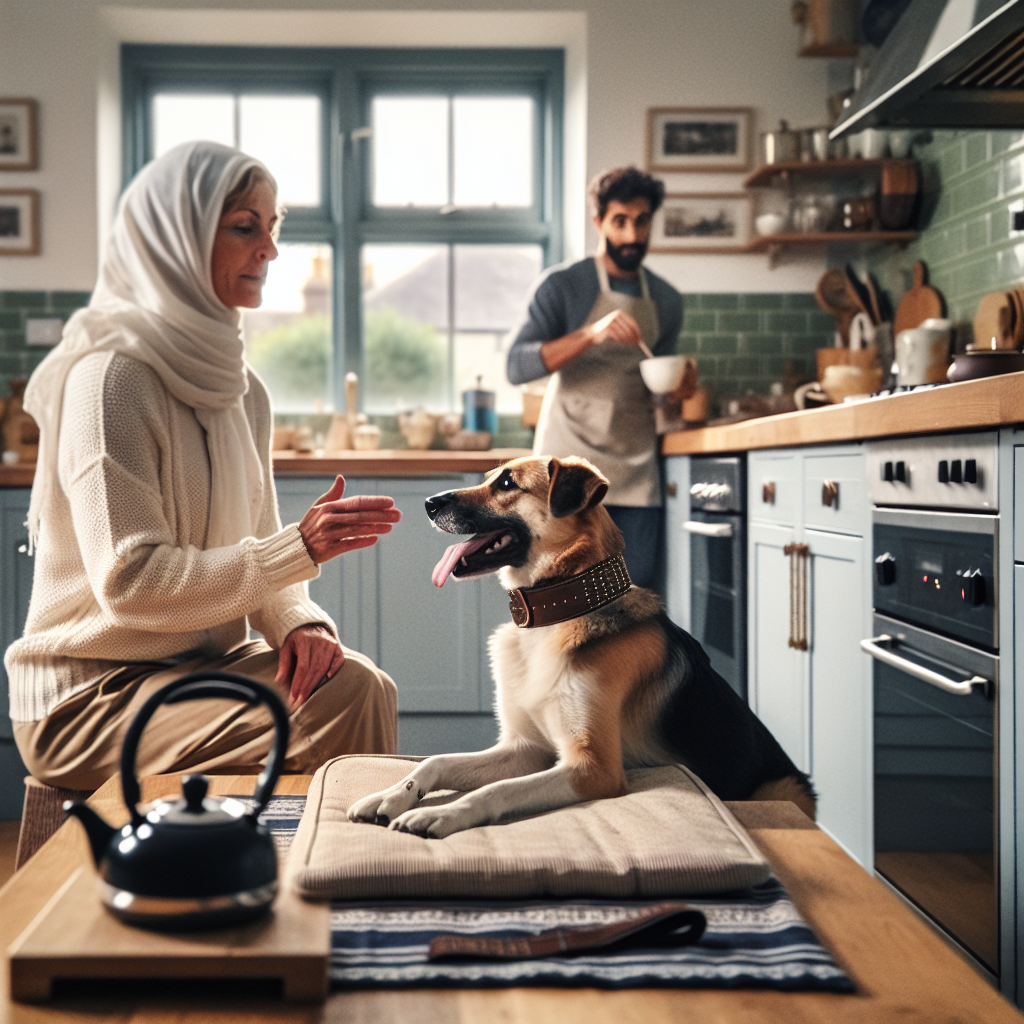
Training Realistic Stay Durations
Recognising Pre Bark Signals
If you can spot pre bark signals before your dog vocalises, you can change the outcome in seconds. This skill prevents rehearsed barking, keeps arousal low, and builds calm behaviour that lasts. At Smart Dog Training, we teach owners to see the tiny shifts that come before a bark and to respond with precision using the Smart Method. If you would like tailored guidance, you can work directly with a Smart Master Dog Trainer SMDT who will assess your dog and coach you step by step.
What Are Pre Bark Signals
Pre bark signals are the small, early changes in body language and behaviour that occur just before a dog barks. They are the runway to vocalisation. When owners learn to recognise these cues, they can redirect the moment before sound, which prevents escalation and builds better decision making.
Common pre bark signals include a shift in posture, forward weight transfer, stillness, ear movement, eye hardening, lip tension, breath changes, tail set changes, and a closing or freezing of the mouth. Each dog presents a slightly different pattern, yet the sequence is consistent once you learn to read it.
Why Pre Bark Signals Matter
Barking is often self reinforcing. It changes the environment in ways that feel rewarding. The postman leaves, the jogger moves away, the family looks up. When barking works, dogs repeat it. Intervening at the level of pre bark signals stops that learning loop. It is kinder, quieter, and more effective than trying to shout over the behaviour after it starts.
This is exactly why Smart Dog Training builds owner awareness of pre bark signals into every programme. It aligns with the Smart Method by creating clarity for the dog, motivating calm choices, and layering difficulty so the behaviour holds in real life.
How to Recognise Pre Bark Signals
Look for the earliest, smallest change, not the loudest one. Most dogs show a two to five step sequence before a bark. The steps often appear in the same order when the trigger type is similar. You are aiming to notice step one and step two, then guide your dog back to baseline before step three or four turns into sound.
- Head and neck lift or crane toward the trigger
- Body freezes or goes very still for a beat
- Weight shifts onto the front feet, toes grip
- Ears angle forward or rotate like satellite dishes
- Mouth closes, swallowing stops, lip corners tighten
- Eyes fix and pupils dilate, blinking slows
- Tail lifts, stiffens, or starts a high tight wag
- Breathing switches from relaxed to held breath or sharp sniffs
- Low rumble or a quiet whuff starts in the chest
Make a mental note of your dog’s unique first two steps. Some dogs show lip tension before anything else. Others display ear height as their earliest tell. Awareness of these details will make your timing accurate and your success rate high.
Context That Triggers Pre Bark Signals
Pre bark signals tend to show up in predictable contexts. Noticing the pattern means you can prepare in advance and create a better training setup.
- Windows and fences where your dog watches the street
- Doorway moments such as the doorbell, letterbox, or visitors
- Walks with moving triggers like bikes, scooters, joggers, or dogs
- High arousal play that tips toward excitement or frustration
- Garden time with wildlife, cats, or rustling hedges
- Evening fatigue when tolerance drops and startle responses rise
Plan your training time in these situations so you can practice seeing pre bark signals and responding with purpose rather than reacting when it is already too late.
The Smart Method Approach to Pre Bark Signals
The Smart Method is our structured, progressive, outcome driven system. It builds calm, consistent behaviour that holds up in real life. We apply its five pillars directly to pre bark signals.
Clarity
Dogs need unambiguous information. We use clear markers to tell the dog when they made the correct choice. When you see pre bark signals, you give a simple cue and then mark the instant your dog turns back to you, steps off pressure, or relaxes.
Pressure and Release
We pair fair guidance with immediate release and reward. That might look like a gentle, well timed lead prompt to break fixation, followed by release when the dog disengages and a reinforcer for reorientation. The release carries meaning, and the dog learns to take responsibility for coming back to neutral.
Motivation
We build engagement so dogs want to work. Food, toys, praise, and access to the environment are used in ways that keep the dog optimistic. When early choices around pre bark signals lead to reinforcement, your dog will volunteer the same calm choices more often.
Progression
We layer skills from easy to hard. First learn to spot pre bark signals in low distraction settings, then add distance, duration, and finally difficulty. We do not skip steps. This progression is why results last.
Trust
Trust is built when guidance is fair and consistent. Dogs become calmer because they understand what to do and can rely on your timing and feedback. This strengthens your bond and reduces the need to bark in the first place.
Responding to Pre Bark Signals in the First Two Seconds
The first two seconds are your window. Move early and move simply. Here is the sequence we coach at Smart Dog Training.
- Notice the first sign. Head lift, stillness, or lip tighten.
- Give a quiet orienting cue such as the dog’s name or a conditioned marker that means turn to me.
- Guide if needed. A small lead prompt or body step to disrupt fixation.
- Mark the instant of reorientation or relaxation.
- Reinforce with calm food to mouth, praise, or movement away from the trigger.
- Reset position so the dog can breathe and decompress.
If the dog does bark, do not panic. Reset calmly, increase distance, and return to the moment before pre bark signals. Aim to catch it earlier on the next repetition.
Teaching An Alternative Behaviour Before The Bark
We replace the impulse to bark with a rehearsed behaviour that is easy under mild distraction and reliable under pressure. The exact choice varies by dog, but the rules are the same.
- Orientation to handler with soft eye contact
- Loose lead position at your side
- Station on a bed or mat with chin rest
- Patterned movement such as a gentle arc or U turn
These behaviours give the dog a job to do at the instant pre bark signals appear. Because they are well reinforced, they compete with the urge to vocalise and win.
Patterned Interrupters and Markers
Smart Dog Training uses simple, conditioned sounds that reliably interrupt fixation and redirect to a known behaviour. A marker tells the dog they made the right choice, and a brief pattern such as a two step move or station reset gives their body something to do. This reduces arousal and shortens the path back to calm.
Lead Skills and Positioning
We teach lead skills with a focus on pressure and release. Your hands matter. Keep the lead short enough for information and long enough for relaxation. If you see pre bark signals, step your body into a slight angle, invite the dog to follow the line you present, mark the first softening, and reinforce at your side.
Reward Placement and Timing
Place rewards where you want the dog’s head and feet to be. Reward at your seam to build position, on the mat to build station, and slightly behind you to reduce forward drive. When pre bark signals appear, a single well timed reinforcement is more valuable than several late ones.
Building Reliability In Real Life
Reliability comes from progression. We do not hope for it. We create it.
- Stage 1 Home calm practice without triggers. Rehearse your orient cue, markers, station, and reward placement until they are automatic.
- Stage 2 Simulated triggers controlled distance and duration. Use a helper at twenty to thirty metres with brief exposures.
- Stage 3 Real world low density. Quiet streets, open parks, one or two triggers. Keep reps short and finish on a win.
- Stage 4 Normal life. Gradually reduce the gap between exposures, but keep the same early timing and reinforcement rules.
Track where pre bark signals appear and how quickly your dog can return to neutral. Each week, reduce distance a little or add a second of duration only when the dog meets criteria easily.
Handling Pre Bark Signals In Puppies
Puppies often show exaggerated pre bark signals because everything is new. The answer is not to correct the bark but to build clean patterns before the habit forms.
- Short, frequent sessions of orientation and station
- Prevent rehearsal by managing windows and garden access
- Pair novel sights and sounds with calm food delivery
- Teach a gentle name response and reinforce it hundreds of times
- Keep arousal low by balancing play with structured rests
With puppies, your goal is a clear routine where pre bark signals quickly convert into looking to you for guidance. A Smart Master Dog Trainer SMDT can shape this foundation so your puppy grows into a calm, confident adult.
Working With Reactive Or Anxious Dogs
Dogs that have rehearsed barking need extra clarity and support. We reduce intensity, create distance, and focus on the earliest pre bark signals. The training remains positive and structured while holding the dog accountable for simple, achievable choices.
- Begin outside the reaction zone and collect easy wins
- Use calm, rhythmic reinforcement rather than scatter feeding
- Teach a rock solid station and an efficient U turn
- Keep sessions short and end before fatigue
- Log exposures and note which pre bark signals appear first
Our behaviour programmes at Smart Dog Training are designed for these cases and follow the Smart Method from assessment through progression. If your dog struggles to settle or escalates quickly, professional coaching will accelerate results.
Tools Smart Trainers Use
Tools support communication. They do not replace it. Smart Dog Training selects equipment to enhance clarity and timing while keeping dogs comfortable and engaged.
- Well fitted flat collar or harness that allows clean lead information
- Standard lead length suited to the environment, never tight for long
- Reward pouch and high value food for precise delivery
- Mat or bed for station training with clear boundaries
- Calm toys for movement reinforcement when appropriate
We demonstrate how each tool is used within pressure and release and how to fade reliance on equipment as the dog internalises the behaviour.
Measuring Progress And Preventing Relapse
Progress is not just fewer barks. It is earlier recovery and better choices at the moment of pre bark signals.
- Time to orient back after the first cue should shrink week to week
- Distance to triggers can narrow without vocalisation
- Duration of calm station grows even when movement happens nearby
- Owner timing becomes automatic and quiet
Relapse prevention is simple. Keep rehearsing low effort wins, refresh the basics monthly, and maintain your dog’s routine. If a setback occurs, return to a level where your dog is certain to succeed, then rebuild. The Smart Method makes this process straightforward because each step is mapped.
When To Get Professional Help
If you cannot reliably interrupt pre bark signals, if your dog escalates quickly, or if safety is a concern, seek guided support. A certified trainer will observe your dog’s unique pattern, coach your handling, and structure sessions so progress is measurable. Smart Dog Training provides this level of support across the UK through our trainer network.
Ready to turn your dog’s behaviour around? Book a Free Assessment and connect with a certified Smart Master Dog Trainer - available across the UK.
Real Life Scenarios And Smart Responses
Doorbell Or Knock
Pre bark signals often include head snap, forward lean, and breath hold. Step toward your station, give your orient cue, guide to the mat, mark the first chin lower, and pay calmly. Repeat brief door sounds at a distance and build up. If the dog vocalises, reset, increase distance, and start sooner.
Window Watching
Cover visual access temporarily, then practice controlled reveals. The moment you see pre bark signals like ear lift or stillness, cue orientation, step the dog off the window line, mark reorientation, and reinforce behind you. Keep reveals short and unpredictable to prevent sustained scanning.
On Lead Dog Encounters
At first sight of another dog, watch for weight shift and eye fix. Take a soft arc line, invite your dog to your side with a prompt, mark a single glance and pay at your seam. If needed, add distance by stepping off the path early. Leave before fixation grows.
Garden Triggers
Use a long line for information. At the first ear flick or tail lift toward rustling, recall to you, mark the turn, and pay with calm food or a short inside break on a mat. Return only when your dog is fully decompressed.
Owner Skills That Change Everything
- Observation skills notice the smallest change first
- Timing skills mark the exact micro win
- Handling skills create clean lead information and body position
- Reinforcement skills place rewards where behaviour will live
- Planning skills set up sessions with controlled exposure
These owner skills are coachable. Our trainers build them through clear steps and lots of guided reps so they become second nature under pressure.
Frequently Asked Questions
What are the most reliable pre bark signals
The earliest and most reliable pre bark signals are stillness, mouth close, and forward weight shift. Many dogs also show ear height change and eye hardening. Learn your dog’s first two tells and act at that moment.
How can I stop barking without raising my voice
Intervene at pre bark signals with a quiet orient cue, a small guide if needed, then mark and reinforce the turn back to you. When you move early, you never need to raise your voice. Smart Dog Training teaches this calm sequence in every programme.
Will rewards make my dog bark for treats
No. When rewards are tied to early calm choices and delivered with precise timing, they build thoughtful behaviour. You are paying for disengagement at the first sign, not for barking. This is a core piece of the Smart Method.
What if my dog barks before I can catch it
Stay calm. Increase distance, reduce difficulty, and try again with closer attention to the very first pre bark signals. Rehearse your cues and station in low distraction settings so they are automatic when pressure rises.
Do certain breeds show different pre bark signals
All dogs show the same broad pattern, but intensity and speed can vary. Watch for your dog’s individual first tells. Some dogs lift their head before anything else, others show lip tension. Smart trainers help you map this pattern.
How long does it take to see results
Many families see change within one to two weeks when they consistently act at pre bark signals and follow the Smart Method progression. Complex cases take longer, but steady wins accumulate quickly with structured coaching.
Should I block the view out of windows
Temporarily limiting access helps you control exposure while training. Pair brief reveals with early intervention at pre bark signals, then gradually increase access as your dog shows reliable disengagement.
Can I use toys instead of food
Yes, if toys keep arousal stable. We favour calm food delivery for precision during early stages, then add movement reinforcement when the dog can think clearly around triggers.
Conclusion
Recognising pre bark signals is the fastest path to calmer days. When you learn to spot the first tiny changes and respond with clarity, your dog stops rehearsing noisy behaviour and starts rehearsing thoughtful choices. The Smart Method gives you a clear roadmap built on clarity, pressure and release, motivation, progression, and trust. With consistent practice, you will see fewer outbursts, faster recovery, and real world reliability.
Your dog deserves training that truly works. With certified Smart Master Dog Trainers SMDTs nationwide, you'll get proven results backed by the UK's most trusted dog training network. Find a Trainer Near You
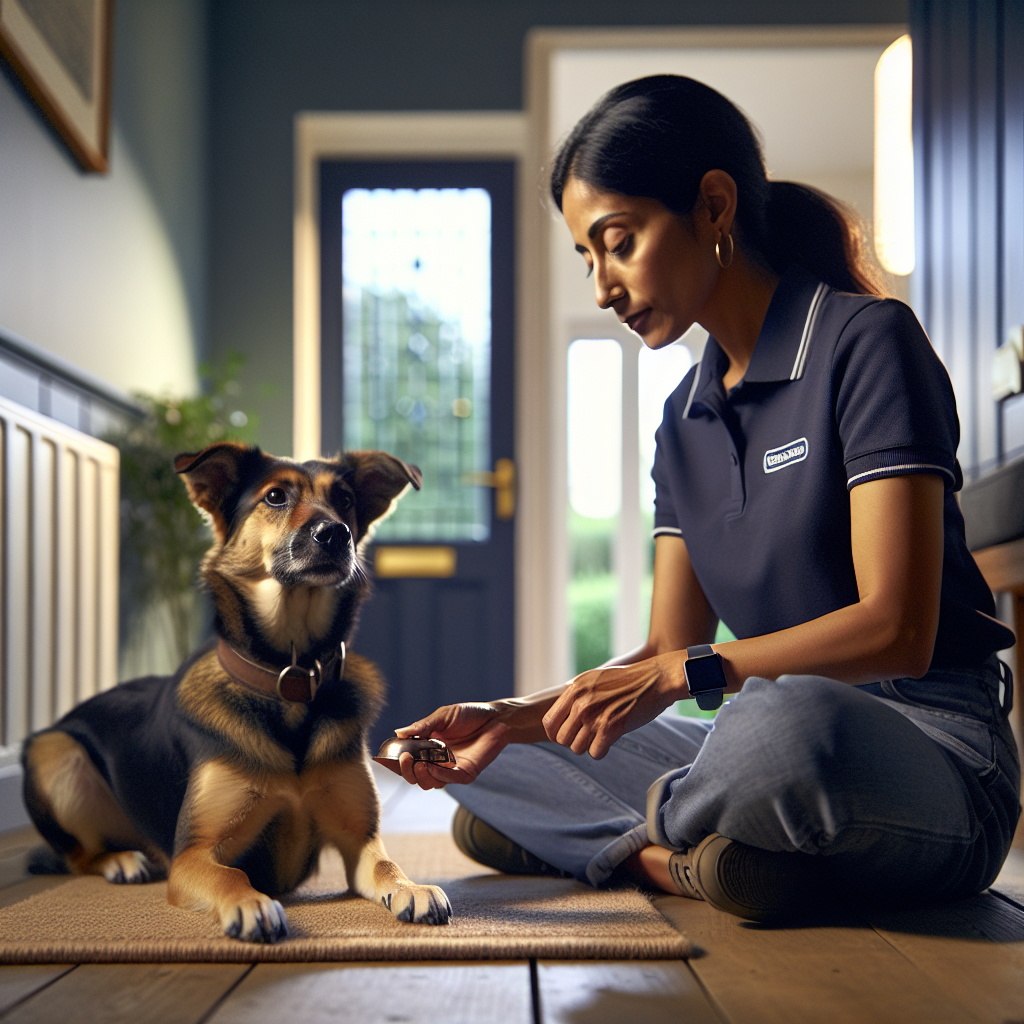
Recognising Pre Bark Signals
Why Focus Under Pressure Matters
Every dog can sit in a quiet kitchen. Real life is different. Buses hiss. Skateboards rattle. Another dog stares. That is pressure. If you want calm, reliable behaviour anywhere, you must help dogs focus under pressure, not only in calm spaces. At Smart Dog Training, we use the Smart Method to build that resilience in a clear and fair way. When extra support is needed, a Smart Master Dog Trainer is available across the UK to coach you in person.
Pressure is not always scary. It can be exciting, like a ball bouncing by or a friend calling your dog. Pressure simply means more demand on your dog’s mind. Our job is to turn that pressure into clarity, confidence, and trust, so your dog chooses you over the world.
The Smart Method For Real Life Focus
The Smart Method is a structured, progressive, and outcome driven system. It builds calm behaviour that lasts. Every Smart programme uses five pillars to help dogs focus under pressure in daily life.
Clarity
Clear language removes confusion. We use precise markers for yes, no reward, and finished, so the dog always knows what is expected. When the world gets loud, clarity cuts through the noise.
Pressure and Release
Fair guidance paired with a clear release builds accountability without conflict. Pressure is simply information. When the dog makes the right choice, pressure goes away and reward appears. This teaches responsibility and choice making under stress.
Motivation
Rewards matter. Food, toys, praise, and life rewards build drive and joy. Motivation creates buy in. Your dog learns that focus pays, even when other options compete.
Progression
We layer skills step by step. First without distraction, then with small challenges, then with duration, and finally in the busiest places. This is how we help dogs focus under pressure anywhere, not just in a training hall.
Trust
Training should strengthen your bond. Fair rules and consistent rewards build trust. A trusting dog stays calmer and is more willing to work when situations change quickly.
What Pressure Looks Like Day To Day
You cannot fix what you do not see. Pressure shows up in many ways. Here are common triggers that break focus.
- Movement like joggers, bikes, and scooters
- Environmental noise like buses, alarms, and crowds
- Other animals like dogs, squirrels, and pigeons
- People interactions like greetings and handling
- Confined spaces like lifts and narrow pavements
- Novel surfaces like metal grates and shiny floors
Knowing your dog’s top three triggers will guide your plan. We build proof against those triggers first using the Smart Method.
How To Help Dogs Focus Under Pressure Step By Step
Use this plan to build strong focus that holds in the real world. Keep sessions short. Always end on a win.
Step 1 Set Clear Cues And Markers
Pick a marker for correct, like yes. Pick a marker for keep going, like good. Pick a release word, like free. Use the same tone each time. Consistency in language is the fastest way to help dogs focus under pressure because the dog never has to guess what words mean.
- Teach a neutral watch cue. Say the dog’s name, pause one second, then mark and reward eye contact
- Pair a calm sit or down with the watch cue so posture supports focus
- Begin in a low distraction room. Aim for ten to fifteen clean reps
Step 2 Build Engagement On The Lead
Walk with your dog on a standard lead. Hold the lead in both hands to keep it quiet. Reward for checking in. If the dog forges ahead, make a small change of direction, invite the dog back into position, then mark and reward. This is pressure and release at work in a fair way. The dog learns that focus and position make the walk easy and rewarding.
- Use small food rewards for frequent check ins
- Keep steps slow so the dog can succeed
- Rehearse turns and stops to keep attention on you
Step 3 Add Distraction Then Duration Then Difficulty
Progression matters. Change one factor at a time. To help dogs focus under pressure, never jump from quiet to chaos in a single session.
- Distraction Add a calm friend walking ten metres away
- Duration Ask for two to five seconds of eye contact
- Difficulty Move to a new location or closer spacing
Return to an easier level if performance drops. Build back up with short, successful intervals.
Step 4 Pattern Triggers With Structure
Use patterns to remove the surprise. If passing dogs on walks is hard, rehearse a simple pattern. See the dog, cue heel, mark two steps of focus, feed, release, repeat. Structure turns pressure into a known routine. This builds confidence and choice.
Step 5 Generalise Everywhere
Focus must work in car parks, on high streets, and at the vet. Train in multiple places each week. Keep early reps short and easy to protect confidence. The Smart Method ensures you add difficulty only when performance is consistent.
Core Skills That Hold Under Pressure
These practical skills give you a toolkit for daily life. We teach them in every Smart programme so owners can help dogs focus under pressure with confidence.
Name Response And Watch
Your dog’s name should snap their attention to you. Follow with watch for direct focus. Mark and reward fast.
Place
Place means go to your bed and stay calm until released. This is vital for door greetings and visitors. Start with one metre distance, then increase distance and add mild distractions.
Heel With Focus
Heel is not just position. It is a state of mind. Walk slowly, reward for eye contact and loose lead. Add short sits and stands to keep your dog thinking with you.
Leave And Out
Leave stops your dog from chasing or grabbing the environment. Out ends the reward. These cues keep you in control of the game so arousal stays balanced.
Stationing For Handling
Teach a chin rest or stand for exam. This turns grooming and vet checks into predictable tasks your dog can handle.
Using Motivation Without Losing Calm
High value rewards build power, but we pair them with structure. That balance is the hallmark of the Smart Method.
- Use food for high repetition drills like watch and heel
- Use toys for short bursts, then ask for calm on place
- Use praise and touch for steady work like duration downs
Reward placement matters. Feed in position. Toss the toy behind you to keep the dog with you. Place the reward on the bed to grow value for place. This strategic use of reward helps dogs focus under pressure without over arousal.
Fair Guidance With Pressure And Release
Dogs do well when guidance is clear and fair. Small amounts of pressure, such as a gentle lead cue, provide information. Release comes the moment the dog makes the right choice. We pair the release with a marker and reward so the dog understands how to succeed. This approach creates accountability and focus while maintaining trust.
Reading Your Dog Under Stress
Learn early signs that focus is fading so you can help before your dog fails.
- Breathing speeds up
- Eyes lock on the trigger
- Head rises and ears tense
- Lead pressure increases
- Scents the ground to avoid work
When you see these signs, reduce distance, ask for a simple win, and reward. By stepping in early you keep your dog learning. This is the smart way to help dogs focus under pressure.
Handler Mechanics That Keep Focus Strong
Your body language drives your dog’s choices. Sharpen your skills to get better results.
- Stand tall and square to reduce mixed signals
- Use a calm voice for duration work and a bright voice for engagement
- Keep the lead short but relaxed to prevent accidental tension
- Mark with precise timing at the exact moment of success
Small changes here often create big leaps in focus. A Smart Master Dog Trainer can coach your timing and reward placement so every rep builds confidence.
Scenario Plans For Busy Environments
Door Greetings
Before the knock, send your dog to place. Reward two calm breaths. Open the door a crack and close it. Reward. Build to a full open with a friend entering. Release your dog only when calm. This routine will help dogs focus under pressure when guests arrive.
Passing Dogs On Walks
Spot the dog first. Move to the side. Cue heel and watch. Mark two steps of focus. Reward. Increase the number of steps over time. If your dog locks on, turn away, find space, and reset for a quick win.
Busy High Street Or Station
Begin on the edge of the foot traffic. Ask for short sits and watches. Walk five steps of heel with reward every step. Build to every second step, then every third. End with a relaxed place on a bench area if allowed.
Cafes And Pubs
Arrive after a short walk. Give water. Send to place under the table. Reward calm. If attention drifts, ask for a quick watch or chin rest, reward, then back to place.
Equipment Used The Smart Way
We keep tools simple and fair. Under the Smart Method, tools provide clarity. They never replace training.
- Standard flat collar or well fitted harness
- Two metre lead for everyday walking
- Long line for recall drills in safe areas
- Place bed with clear edges
- Treat pouch and tug or ball
The tool is not the fix. The system is. Structure, progression, and trust are what help dogs focus under pressure wherever you go.
Common Mistakes That Break Focus
- Jumping into hard places too soon
- Talking too much and muddying the cues
- Bribing instead of marking and rewarding
- Holding lead tension that creates conflict
- Letting the dog practice chaotic greetings
Avoid these errors and your progress will surge.
How To Measure Progress
Track three simple metrics each week.
- Latency How fast does your dog respond to the watch cue
- Duration How long can your dog hold focus in one spot
- Distance How close can your dog work near a trigger
When two metrics improve but one dips, step back one level and rebuild. If progress stalls for more than two weeks, it may be time for guided help. You can Find a Trainer Near You to review your plan and sharpen your technique.
When To Get Professional Support
If your dog struggles with reactivity, explosive greetings, or anxiety, do not wait. Early intervention prevents habits forming. Our behaviour programmes take the same Smart Method and apply it to your home and neighbourhood so you can help dogs focus under pressure with expert support.
Ready to turn your dog’s behaviour around? Book a Free Assessment and connect with a certified Smart Master Dog Trainer - available across the UK.
FAQs
How long does it take to help dogs focus under pressure
Most families see clear gains in two to four weeks when training five short sessions per week. For complex behaviour issues, our structured programmes often run eight to twelve weeks for stable results.
What is the best first exercise to build focus
Start with the name and watch routine in a quiet room. Ten clean reps twice a day will prime your dog to check in. Then add small distractions and short duration.
Can food rewards make my dog frantic
Not if you pair motivation with structure. Feed in position, ask for calm breaths, and insert simple tasks like sit or down between rewards. This keeps arousal balanced.
What if my dog ignores me around other dogs
Increase distance until you get one second of eye contact. Mark, reward, and leave. Build reps at that distance before you move closer. Use the heel and watch pattern to guide choices.
How do I handle surprises I cannot control
Have a default routine. Turn away, cue heel, ask for watch, reward, then place or sit. A known routine helps dogs focus under pressure even when the environment changes fast.
Will this work for puppies and adult dogs
Yes. The Smart Method is about clarity, motivation, and fair guidance. We adjust session length and reward types for age, but the process is the same.
Do I need special equipment
No. A flat collar or well fitted harness, a standard lead, a long line for recall practice, a place bed, and suitable rewards are plenty when you follow the Smart Method.
Conclusion
Focus that holds in busy places is built, not born. With the Smart Method you layer clarity, fair guidance, motivation, progression, and trust. You set clear language, teach reliable patterns, and build proof against the pressures your dog faces each day. This is how you help dogs focus under pressure in the real world.
Your dog deserves training that truly works. With certified Smart Master Dog Trainers (SMDTs) nationwide, you'll get proven results backed by the UK's most trusted dog training network. Find a Trainer Near You
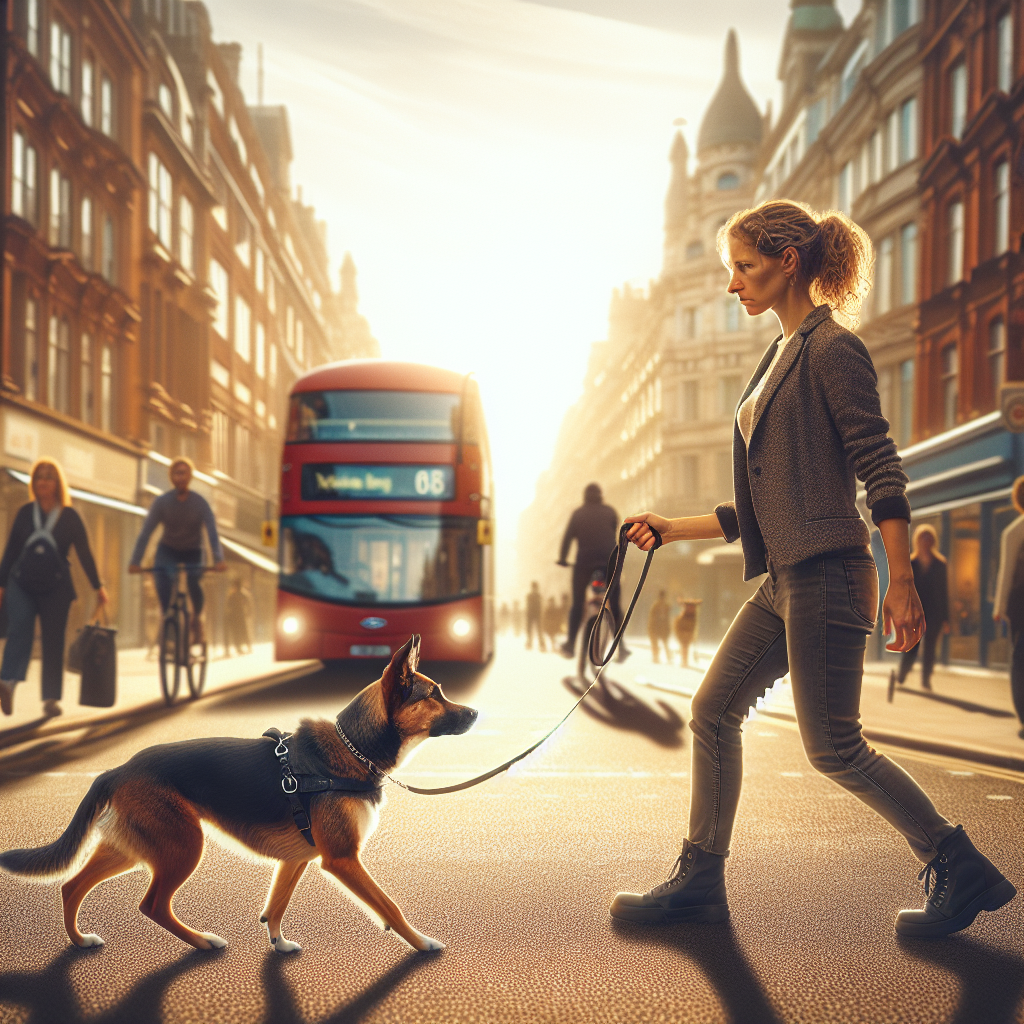
How to Help Dogs Focus Under Pressure
Why Dogs Anticipate and Why It Matters
If you are searching for how to stop your dog anticipating commands, you are not alone. Many owners see the same pattern. The dog sits before being asked, breaks the stay as you reach for the lead, or drops into a down when you only glanced at the floor. It looks clever at first, yet it quickly becomes a problem. Anticipation erodes control, feeds anxiety, and makes obedience unreliable in daily life.
At Smart Dog Training, we address anticipation with the Smart Method, a structured system used across the UK by every Smart Master Dog Trainer. Our approach blends clarity, motivation, progression, pressure and release, and trust. The result is calm, consistent behaviour that holds anywhere. In this guide, you will learn how to stop your dog anticipating commands with a step by step plan you can begin today.
What Anticipation Looks Like in Daily Life
Anticipation is any action your dog takes before you give a clear cue or before you release them from a command. Common examples include:
- Sitting or downing before you cue
- Breaking heel as you slow down or turn
- Standing up from a sit the moment your hand moves to a pocket
- Racing to the door when you pick up keys
- Dropping the toy because you exhale like you do before asking for Out
These behaviours show that the dog is reading patterns and predicting, not listening. Your goal is responsiveness, not guessing. To fix it, we train clarity and accountability in a fair, positive way that makes sense to your dog.
The Smart Method That Stops Anticipation
Every Smart programme follows the Smart Method. It delivers calm, confident behaviour through five pillars:
- Clarity. Commands and markers are precise so the dog always knows what is expected.
- Pressure and Release. Fair guidance is paired with a clear release and reward. This builds accountability without conflict.
- Motivation. Rewards create engagement and positive emotion, so dogs want to work.
- Progression. We add distraction, duration, and difficulty in layers until skills hold anywhere.
- Trust. Training strengthens the bond and produces willing behaviour.
This balance of motivation, structure, and accountability is how to stop your dog anticipating commands in a way that lasts.
Before You Begin: The Three Non‑Negotiables
To remove anticipation, you need three foundations in place:
- One clear command per behaviour. Sit means sit. Down means down. No double cues.
- One release word. Your dog holds the position until you say the release word. Avoid chatter that sounds like the release.
- Accurate markers. Yes or Good marks the exact moment of success. No marks a mistake in a calm, neutral tone. The release is separate.
These rules remove noise. They are the backbone of how to stop your dog anticipating commands with speed and clarity.
Step 1: Reset Expectations With Neutral Handling
Your dog has rehearsed predicting. First, remove the reward for guessing. For one week, avoid free setups that trigger anticipation. For example, do not raise your hand toward a treat unless you intend to cue. Move slowly and neutrally around the dog to break the pattern of hand movement meaning an incoming command.
In short sessions, stand near your dog, move your hands, shift your feet, and do nothing. Reward calm stillness with a quiet Good and a treat after a brief pause. This teaches your dog that movement does not always predict a command or release.
Step 2: Reinforce the Release Word
Most anticipation comes from weak release habits. Your dog should wait until you say the release word, then come off position to you for the reward. Teach it like a brand new skill:
- Ask for Sit. Pause for one second. Say your release word. Step back and present a reward at your body. Praise as the dog comes to you.
- Repeat five times. Do not reward if the dog pops up before the release. Calmly reset the Sit and try again.
- Gradually extend the pause before the release. Two seconds, then four, then six.
Be precise. Do not move your hands toward the treat before the release. This rule is at the heart of how to stop your dog anticipating commands.
Step 3: Marker Clarity That Prevents Guessing
Markers are simple yet powerful. They cut through confusion and stop speculation.
- Yes means you did it, reward is coming now.
- Good means keep going, reward is coming if you hold.
- No means that was not it, try again. Then help the dog find the right answer.
Use Good to hold the dog in position while you add small distractions. Use Yes at the exact moment you release. Avoid saying Good and then releasing without a pause. That blend blurs the difference and invites guessing.
Step 4: Pattern Breaks That Remove Predictability
Dogs anticipate when routines are too predictable. Break patterns so your dog learns to wait for the actual cue, not the routine around it.
- Vary your count before the release. Two seconds, then seven, then three.
- Change your body position. Stand tall, kneel, turn slightly, and keep the same rules.
- Move the reward location. Sometimes from the right hand, sometimes from the left, sometimes on the floor after the release.
- Change the picture. Train in the kitchen, hallway, garden, and front step.
Pattern breaks are a core part of how to stop your dog anticipating commands and produce obedience that works in the real world.
Step 5: Position Fidelity and Duration That Holds
Position fidelity means the dog holds the exact position until released. Ears and eyes can move. Elbows, hips, and feet do not. Teach it in layers:
- Short duration. Ten to twenty seconds of Sit and Down with Good marking steady posture.
- Micro distractions. Toe taps, a light lead flick, a treat moving in front of the nose. Good if the dog stays, No and reset if they break.
- Longer duration. One minute, then two, then five with natural life happening around you.
Duration without clarity produces guessing. Clarity with fair proofing produces confidence.
Step 6: Fair Accountability With Pressure and Release
Guidance should be calm and consistent. Anticipation often disappears when the dog understands that breaking position brings gentle pressure, and holding position brings release and reward.
- Use a lead and flat collar for exercises. If the dog starts to rise from Sit, apply steady upward pressure to guide them back into Sit. The moment they sit, release the pressure and mark Good.
- Keep pressure light. The release teaches more than the pressure. We reward the choice to hold.
- Avoid repeated chatter or nagging. One cue, then guidance, then release and reward.
This sequence is central to the Smart Method and is used by every Smart Master Dog Trainer. It is a humane and effective part of how to stop your dog anticipating commands.
Step 7: Motivation That Channels Energy
Anticipation can come from overexcitement. We want enthusiasm under control, not shut down. Build motivation with structure:
- Work to earn. Use part of your dog’s daily food in training sessions.
- Match the reward to the dog. Food for calm precision, a toy for short bursts of drive, or both.
- Quiet delivery. Present the reward to your body after the release. Avoid frantic hand motions.
High motivation with clear release rules is how to stop your dog anticipating commands while keeping joy in the work.
Step 8: Proofing That Removes Predictive Cues
Proofing is a controlled way to test your dog against the cues that used to set them off. Build it slowly.
- Environmental triggers. Pick up keys, put on shoes, touch the lead. Your dog holds position until released.
- Handler habits. Cough, laugh, look at the floor, or scratch your head. Reward calm stillness.
- Spatial pressure. Walk toward and around the dog while they hold. Mark Good for steady posture.
Keep success high. If you hit a wall, reduce difficulty, then rebuild. That is how to stop your dog anticipating commands without creating frustration.
How to Stop Your Dog Anticipating Commands: The Core Drill
Use this five minute drill daily for two weeks:
- Warm up with five clean Sits, each with a two second pause, then release.
- Ask for Down. Count to three. Step to the side. If your dog holds, mark Good. Count to three more, then release and reward at your body.
- Repeat Down with mixed counts. Sometimes add a tiny distraction like a foot shuffle.
- Finish with a short Heel. Stop. Ask for Sit. Stand still for five seconds. Release and reward.
This micro routine builds clarity, release strength, and position fidelity. It is simple and powerful.
Common Mistakes That Create Anticipation
- Releasing with movement instead of words. The dog watches your hand, not your voice.
- Double cues. Sit sit or Sit please. One cue only.
- Marking and releasing at the same time. Good should not blend into the release.
- Rewarding the break. If the dog pops up early and you still feed, you taught the pop up.
- Predictable timing. Always releasing at three seconds teaches the dog to leave at two.
Removing these errors is a big part of how to stop your dog anticipating commands across all obedience positions.
Session Structure That Builds Calm Reliability
Short, focused sessions beat long, sloppy ones. Follow this structure:
- Two to three sessions per day
- Five to eight minutes per session
- Start with an easy win to build momentum
- Train one primary skill and one secondary skill
- End with a clean release and play
Keep notes on what triggers anticipation. Tackle one trigger at a time. This makes your plan clear and effective.
Measuring Progress So You Know It Is Working
Track three metrics each week:
- Hold time. Longest reliable duration in Sit and Down around mild distractions.
- False starts. How many early breaks per session. The number should trend down.
- Cue response. How fast your dog responds to the first cue without guessing.
When these improve together, you are on the right track and have found how to stop your dog anticipating commands in a sustainable way.
Midway Checkpoint and Next Steps
After two weeks, your dog should show fewer false starts, stronger holding power, and a calmer attitude during setup. If anticipation still dominates, you likely need sharper release mechanics and better proofing.
Ready to turn your dog’s behaviour around? Book a Free Assessment and connect with a certified Smart Master Dog Trainer - available across the UK.
Real Life Scenarios and How to Fix Them
Breaking the Stay as You Reach for the Door
Train the stay with the door ritual split into parts. Touch the handle, return and reward for holding. Open the door a crack, return and reward. Step through the door, return and reward. Only release once the full picture is calm. This sequence shows your dog that the door is not the release, your word is.
Dropping Into Down When You Say Sit
Your dog has learned that Down has paid more. Rebalance the value. Spend three short sessions that pay Sit with higher value food or short play while Down earns a simple food reward. Mark Sit with Yes and release more often. The value shift plus clear markers removes the urge to guess Down.
Forging Ahead in Heel When You Slow
Dogs read speed changes as a cue to move. Teach neutral weight shifts. Walk in Heel, slow for two steps, then speed up. Mark Good during the slow if your dog holds position. Reward at your thigh after a release. Add turns and halts later. Now speed changes do not predict a release or a new cue.
When to Bring in a Professional
If your dog rehearses anticipation for months, it turns into a habit. A Smart Master Dog Trainer will spot small handling errors, rebuild your release mechanics, and tailor proofing to your dog. This is often the fastest way to find how to stop your dog anticipating commands and keep the results in daily life.
How Smart Dog Training Delivers Results
Smart programmes are delivered in home, in structured group classes, and via tailored behaviour plans. Every programme follows the Smart Method and builds calm responsiveness through clear cues, fair guidance, and steady progression.
- Public facing programmes for puppies, obedience, and behaviour issues
- Advanced pathways like service dog preparation and protection foundations
- Outcome driven training that holds in real life settings
If you want a plan built around your routine and goals, our national trainer network is ready to help.
FAQs: How to Stop Your Dog Anticipating Commands
Why does my dog guess the next command?
Dogs are experts at patterns. If your timing and routines are predictable, they learn to act before the cue. Clear markers, a strong release word, and varied timing remove the pattern and stop the guessing.
Is anticipation a sign of anxiety?
It can be. Some dogs rush to act because they feel pressure to be right. Clear rules and fair guidance often lower stress. Calm training with the Smart Method builds confidence.
Should I ignore my dog if they break position?
Do not reward the break, but do not punish confusion. Calmly reset, guide back to position, and reinforce holding until the release. Accountability with kindness is the standard at Smart Dog Training.
How long will it take to fix anticipation?
Most families see changes within two weeks of focused work. Deeply rehearsed habits can take six to eight weeks. Consistency and clear release mechanics are the key.
Can food rewards cause anticipation?
Food does not cause anticipation. Predictable food delivery does. Present rewards only after the release, vary timing, and sometimes place the reward on you or the ground after release to remove predictability.
What is the best release word?
Use a word you do not say in everyday conversation. Keep it short and upbeat. Be consistent across the whole household. The release word is central to how to stop your dog anticipating commands.
Do I need equipment to stop anticipation?
A flat collar and lead are enough for most dogs. These provide light guidance for pressure and release. The brilliance lies in timing and clarity, not gadgets.
Will this help with recall anticipation?
Yes. The same rules apply. Do not cue recall on a predictable count. Sometimes step away, sometimes wait longer, and always release before you ask for the recall so the dog listens to the cue, not the pattern.
Putting It All Together
Anticipation is not obedience. It is guessing. To replace it with calm, reliable responses, you need clarity in your cues, a strong release word, fair accountability, and strategic proofing. The Smart Method gives you all four in a clear, progressive plan. That is how to stop your dog anticipating commands and build behaviour that lasts.
Your dog deserves training that truly works. With certified Smart Master Dog Trainers (SMDTs) nationwide, you'll get proven results backed by the UK's most trusted dog training network. Find a Trainer Near You
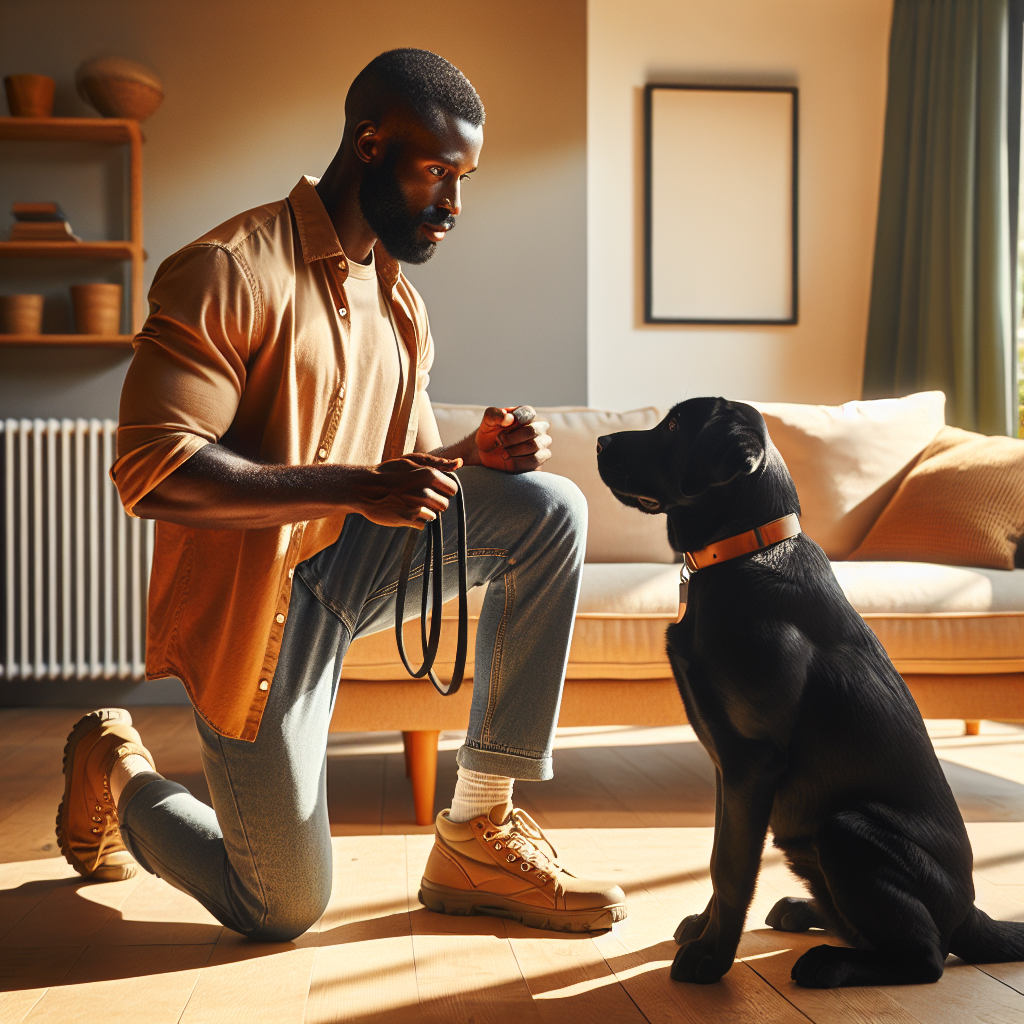
How to Stop Your Dog Anticipating Commands
Why Pattern Games for Dog Training Work
Pattern games for dog training give your dog a predictable script to follow. When the pattern is clear and always ends in success, worry drops and focus rises. At Smart Dog Training we use pattern games every day to build calm, confidence, and reliable obedience in real life. This is how we guide families and their dogs through busy streets, vet visits, and noisy parks without stress.
In the Smart Method, pattern games for dog training are not party tricks. They are structured, repeatable routines that teach the dog exactly what to do next. That clarity is what unlocks steady behaviour even around big distractions. If you want a dog who stays engaged, waits politely, and walks nicely, pattern games are one of the fastest ways to get there. A certified Smart Master Dog Trainer will set the pattern, control the environment, and coach you to keep standards high while your dog wins often.
Many dogs struggle because the world feels random. Patterns make life simple. Repetition lowers arousal, and consistent markers tell the dog they are right. Over time, those wins stack up and the dog chooses the trained pattern when things get exciting. This is the foundation of real world obedience at Smart Dog Training.
How Pattern Games Fit Into The Smart Method
The Smart Method is our proven system for calm, consistent behaviour. Pattern games for dog training sit inside all five pillars of this method.
- Clarity. The pattern creates a simple loop. Cue, response, marker, reward. Your dog knows the next step.
- Pressure and Release. We guide fairly, then release pressure the moment the dog finds the pattern. That release becomes a reward in itself.
- Motivation. Food, praise, or play keep the pattern upbeat. Your dog chooses to engage because it is worth it.
- Progression. We start easy, then build distraction, duration, and distance. The pattern holds everywhere.
- Trust. Predictable success builds confidence. You and your dog work as a team, not in conflict.
Used this way, pattern games for dog training develop accountability without confusion. They teach the dog to think clearly in motion and to stay present with you.
When To Use Pattern Games
Pattern games work across ages and issues because they are simple, fair, and repeatable. Smart Dog Training builds them into every programme.
Puppies And Adolescent Dogs
Young dogs benefit most from predictable routines. Pattern games for dog training channel energy into simple jobs like following, checking in, and settling on a bed. You get fewer impulse mistakes and a faster path to polite manners.
Rescue And Fearful Dogs
Nervous dogs require steady structure. A fixed pattern like Treat and Retreat lets them take space, come forward, and succeed at their own pace. This is core to our behaviour plans at Smart Dog Training.
Reactivity And Overarousal
Patterns give reactive dogs a job when triggers appear. Instead of lunging at a jogger, the dog drops into the known loop. Over time, the presence of the trigger becomes the cue to start the pattern. This is how pattern games for dog training reduce reactivity in real settings.
Everyday Manners And Obedience
From door greetings to lead walking and vet handling, patterns make expectations black and white. Your dog learns a script they can replay any time.
Essential Setup And Tools
Pattern games for dog training need very little equipment, only consistency and timing.
Markers And Rewards
- Use one reward marker. Yes or good means food arrives. Keep the word short.
- Use a release word like free to end positions or to move on.
- Choose soft treats your dog loves. Reward the right moment, not a second later.
Lead, Collar, And Space
- Use a standard lead to guide your dog into the pattern. No need for special gear.
- Start in a quiet area where the dog is calm enough to learn.
- Keep sessions short and upbeat. Stop while your dog still wants more.
Foundation Pattern Games for Dog Training
Below are core routines we teach across Smart Dog Training programmes. They are simple to learn and powerful to use. Each is a pattern you can repeat anywhere.
1 2 3 Walk
Goal. Turn loose lead walking into a predictable sequence so your dog chooses to stay close and focused.
How to teach.
- Stand still. Say one, pause for a second.
- Step forward. Say two, pause for a second.
- Step again. Say three, then mark and reward at your leg.
Repeat the one two three cadence as you walk. The reward always lands by your left leg, which anchors position. If your dog surges, reset to one and slow the steps. This is one of the most effective pattern games for dog training on busy pavements.
Look At That Pattern
Goal. Help your dog notice a trigger, then swing back to you before arousal builds.
How to teach.
- At a safe distance, wait for your dog to glance at the trigger.
- Mark the glance, then feed at your leg as the dog turns back.
- Repeat until the dog quickly checks in after each look.
Keep distance steady until your dog is smooth. Then edge closer over sessions. You are teaching your dog a reliable pattern. See the thing, hear the marker, collect the reward, refocus on you.
Middle Position Pattern
Goal. Create a safe parking spot between your legs for crowds or close passes.
How to teach.
- Lure your dog between your legs from behind, nose forward.
- Mark when all four feet are centered. Feed three to five treats in position.
- Release, move, then repeat. Build short holds before release.
The Middle pattern gives anxious dogs instant safety and gives handlers a clear plan when space gets tight. It is a cornerstone of pattern games for dog training in city life.
Treat And Retreat
Goal. Allow a worried dog to approach and retreat on their terms while learning that people mean food and space.
How to teach.
- Toss a treat behind your dog when a person appears. The dog turns away to eat.
- When the dog returns, mark and toss another treat back again.
- Repeat until the dog moves fluidly between approach and retreat.
This pattern reduces pressure and shows the dog they can choose space. Over time, approaches get closer, and the dog learns they are safe around people.
Find It Scatter
Goal. Lower arousal fast and redirect sniffing to the ground.
How to teach.
- Say find it, then scatter five to ten small treats at your feet.
- Let your dog sniff them out while you relax your lead.
- When complete, cue back into your next pattern.
This is a reset button you can use between reps of other pattern games for dog training.
Patterned Place Work
Goal. Build a strong settle on a raised bed or mat with a repeatable routine.
How to teach.
- Guide your dog onto the bed. Mark four feet on, then feed on the bed.
- Feed multiple times for stillness. Then release your dog off the bed.
- Repeat the cycle. On, mark, feed. Off, release. Keep it rhythmic and calm.
Place becomes a safe zone your dog loves. You can use it for door greetings, dinner time, and visitors.
Step By Step Teaching Plan
Here is how Smart Dog Training introduces any new pattern in a way that sticks.
Stage 1. Create Clarity
- Teach in a quiet room.
- Mark the exact moment your dog hits the target position or choice.
- Place rewards with purpose. Where you pay is what you get.
Stage 2. Add Light Movement
- Take a few steps between reps.
- Mix in short pauses and releases to keep the dog engaged.
- Keep success high. If your dog hesitates, lower the challenge.
Stage 3. Grow The Pattern
- Add mild distractions like a toy on the floor.
- Increase duration by two to five seconds per session.
- Change rooms and floor surfaces so the pattern travels.
Stage 4. Real Life Proofing
- Practice outside at a distance from triggers.
- Use your pattern games for dog training on routine walks.
- Test near shops, parks, and school gates once your dog is ready.
Progression That Builds Reliability
Progression is the fourth pillar of the Smart Method. We layer difficulty in three dimensions so your dog keeps winning.
- Distraction. Add sights, sounds, and smells a little at a time.
- Duration. Hold positions or patterns for a bit longer, then reward.
- Distance. Increase space from you, or work closer to triggers.
Do not increase more than one dimension at once. When the dog struggles, return to the last easy win. Pattern games for dog training only work when the pattern remains clear and success is frequent.
Common Mistakes To Avoid
- Going too fast. If your dog fails twice, step back a level.
- Messy markers. Say your marker once at the right moment, then pay.
- Paying in the wrong place. Rewards should pull your dog into the next correct rep.
- Long sessions. Stop while your dog is still keen to play the game.
- Ignoring arousal. Use Find It or Place to bring levels down before trying again.
Pattern Games For Specific Behaviours
Loose Lead Walking
Blend 1 2 3 Walk with Look At That. Count your steps and pay at your leg. When a trigger appears, let your dog glance, mark, then restart the count. Over time, the street becomes part of the pattern. This is one of the most productive pattern games for dog training in daily life.
Door Greetings And Visitors
Use Patterned Place Work. When the bell rings, cue Place, mark four feet on, then feed a few calm treats. Release only when the dog is settled. Add Treat and Retreat for dogs who feel unsure about guests.
Vet And Grooming Handling
Middle Position plus Find It prepares dogs for touch. Short, predictable reps build trust. We pair gentle guidance with quick release and reward, which reflects the Pressure and Release pillar of the Smart Method.
How We Measure Success
Smart Dog Training is outcome driven. We track three signs that pattern games for dog training are working.
- Latency drops. Your dog responds faster to the cue or trigger.
- Arousal stays low. Your dog breathes, eats, and recovers quickly between reps.
- Generalisation holds. The pattern works in new places without starting over.
We also set clear milestones. Five calm guests greeted on the mat. A 20 minute walk with 1 2 3 Walk and no pulling. A smooth pass by two dogs at a park. Your Smart Master Dog Trainer will help you log these wins and plan the next steps.
Real World Example
Max is a one year old rescue who barked and lunged at bikes. We taught Look At That at a rugby field where bikes passed far away. Each glance earned a marker and a quick reward at the handler’s leg. When Max saw a bike at medium distance, we ran two cycles of Find It, then switched back to Look At That. Within two weeks, Max could walk on a quiet street using 1 2 3 Walk while bikes passed at a safe distance. The pattern made choices simple and the world less scary.
Integrating Pattern Games Into Daily Life
- Morning walk. Start with 1 2 3 Walk for five minutes, then sniff breaks.
- Meal times. Ask for Place while you prep food, then release to eat.
- School run. Use Look At That for passing scooters and prams.
- Evening. Practice Middle when you meet neighbours on the pavement.
Small, frequent reps give big gains. Pattern games for dog training become habits when you weave them into routines you already do.
Why Choose Smart Dog Training
Our programmes use the Smart Method to blend motivation, structure, and accountability. This balance is what makes pattern games for dog training truly effective. Every session is mapped to real goals, from calm greetings to safe city walking. You get a precise plan, clear markers, and a progression that fits your dog. Training is delivered by certified experts who know how to create success without conflict.
Ready to turn your dog’s behaviour around? Book a Free Assessment and connect with a certified Smart Master Dog Trainer - available across the UK.
Coaching Owners To Run Great Patterns
Handler skill matters. At Smart Dog Training we teach you how to deliver clean reps so your dog understands every step.
- Posture. Stand tall, breathe, and avoid crowding your dog.
- Lead handling. Keep a safe, loose line between reps. Apply gentle guidance only to protect the pattern.
- Reward rhythm. Short strings of two to five treats beat one big payout for building duration.
- Reset cues. A simple let’s go clears the slate after an error.
With coaching, owners become consistent and confident. Your dog feels that clarity and gives you better work.
Safety And Welfare First
Smart Dog Training focuses on fair guidance, timely rewards, and calm emotional states. Pattern games for dog training should lower stress, not raise it. Keep sessions short, fit the environment to the dog, and progress only when your dog eats, thinks, and recovers well between reps. If your dog shows rising tension, use Find It or Place, then finish on a win.
When To Work With A Professional
If your dog rehearses lunging, snapping, or panic, guided support is essential. A certified Smart Master Dog Trainer will build the right pattern, choose safe distances, and set clear criteria so every rep helps, not harms. Our team operates nationwide and follows one method, one language, and one standard so you get consistent results that hold up outside.
FAQs About Pattern Games for Dog Training
What are pattern games for dog training
They are simple, repeatable routines that create predictable success. The dog learns a fixed loop like look, turn back, and collect reward. This reduces stress and builds focus.
Do pattern games replace obedience
No. At Smart Dog Training they are how we teach obedience to hold in the real world. Patterns deliver clarity, then we layer distraction, duration, and distance.
How often should I practice
Short sets of two to five minutes, two to three times a day. Frequent wins beat long sessions. Keep the dog fresh and keen.
Will this help a reactive dog
Yes, when done with structure. Pattern games for dog training give reactive dogs a job around triggers. Start at safe distances and progress with care.
What if my dog ignores food
Lower distractions, use higher value rewards, and tighten your timing. Many dogs eat when the pattern is simple and stress is low.
Can I use toys or praise instead of treats
Yes, if your dog values them. Food is easiest for speed. We can blend toy play and praise once the pattern is strong.
How long until I see results
Most families see calmer walks in one to two weeks of daily practice. Complex behaviour cases may need a tailored plan and coaching.
Do I need special equipment
No. A standard lead, a flat collar or harness, and soft treats are enough. The method and timing are what matter most.
Conclusion
Pattern games for dog training turn chaos into clear choices. They fit the Smart Method perfectly, giving your dog a steady path to success while you build trust and real world obedience. Start with simple patterns like 1 2 3 Walk, Look At That, Middle, Find It, and Place. Keep reps short, place rewards with purpose, and progress one step at a time. If you want professional guidance, our nationwide team is ready to help you create calm that lasts.
Your dog deserves training that truly works. With certified Smart Master Dog Trainers (SMDTs) nationwide, you'll get proven results backed by the UK's most trusted dog training network. Find a Trainer Near You
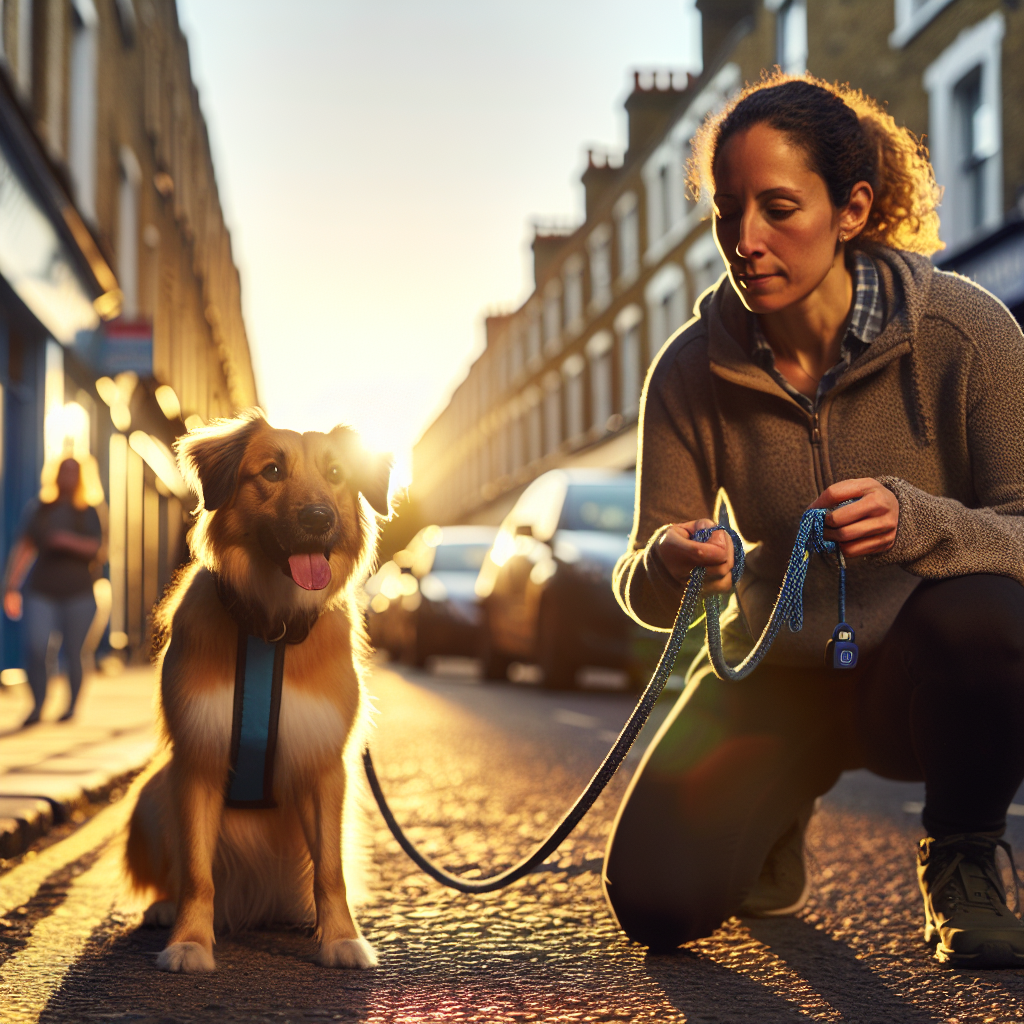
Pattern Games for Dog Training
Dogs Learn From Calm Moments
When your home feels peaceful, your dog is learning. When your dog takes a slow breath, softens their eyes, and settles on their bed, the brain opens up for learning. That is the simple truth at the heart of the Smart Method. Dogs learn from calm moments, and we design every step of training to create and reinforce that state on purpose.
At Smart Dog Training, our structured programmes show families how to use quiet, clarity, and fair guidance to shape behaviour that lasts. A certified Smart Master Dog Trainer will coach you to capture stillness, reward it, and then build skills that hold up in real life. From puppies to complex behaviour cases, dogs learn from calm moments when the plan is clear and consistent.
Why Calm States Shape Lasting Behaviour
Excitement can be useful for play, but it often blocks understanding. In a high arousal state, dogs may miss cues, ignore food, and rush into bad choices. In a calm state, your dog can hear you, take feedback, and enjoy the reward. This is why dogs learn from calm moments. The nervous system is settled. Focus is available. Repetition becomes reliable.
Smart programmes help you create these conditions. We reduce noise in the environment, set clear markers, and use pressure and release to guide choices without conflict. Then we reward calm choices so they grow. Over time, dogs learn from calm moments in the kitchen, in the garden, on the pavement, and finally in busy public spaces.
The Smart Method for Calm Based Learning
The Smart Method is our proprietary system for building calm, consistent behaviour that lasts in real life. Every session follows five pillars.
Clarity in Quiet
We mark and reward what we want. Sit means sit. Down means down. The marker tells your dog the exact moment they were right. Clear cues in a quiet state speed up learning. That is why dogs learn from calm moments when we teach with precision.
Pressure and Release Without Conflict
Fair guidance is paired with a clean release and reward. A light lead prompt, then release when the dog softens into the position. The release is the message. Your dog earns relief and reward by choosing calm. Used this way, pressure and release builds accountability without stress.
Motivation That Rewards Stillness
We use food, toys, and life rewards like access and freedom. The key is to match the reward to the state we want. If your dog is already buzzing, a tug toy may add fuel. Calm food rewards or quiet praise keep the nervous system settled. Again, dogs learn from calm moments when the reward supports that state.
Progression From Home to Real Life
We start where your dog can succeed. Then we add distraction, duration, and difficulty step by step. This prevents failure loops and protects confidence. It also proves the behaviour anywhere.
Trust Built in Every Rest
Consistency grows trust. When the rules are fair and the handler is steady, your dog relaxes. Training becomes a conversation that your dog understands and enjoys.
What Calm Looks Like in Real Life
Before you can build it, you need to spot it. Dogs learn from calm moments, so watch for signs that the body and mind are settling.
Body Language to Watch
- Soft eyes, slow blinks, and relaxed ears
- Loose jaw and quiet mouth
- Even breathing and slower movements
- Weight shifted to a hip in a down
- Relaxed tail with gentle movement
When to Train and When to Pause
Use short sessions. Finish while your dog is still successful. If arousal spikes, pause and reset. Remember, dogs learn from calm moments, so protect that state by keeping sessions clean and brief.
Setting the Stage at Home
Home is where habits are formed. Build a daily rhythm that makes calm easy. You are not waiting for a perfect mood. You are creating it with structure.
Environmental Management for Calm Moments
- Limit free access to windows that trigger reactivity
- Use baby gates to reduce chaos between rooms
- Keep training food and lead at hand to capture good choices
- Make a simple plan for morning and evening quiet time
The Settle Pattern on Bed or Mat
Teach a place cue for a bed or mat. Lure into down. Mark the moment your dog softens. Quietly deliver a treat between the paws. Add duration a few seconds at a time. Release with a clear word, then invite a bit of movement. Repeat in many short reps. Over days, dogs learn from calm moments on the mat and begin to choose that spot by themselves.
Structured Crate Time and Decompression
Used well, crate time is a calm break, not a punishment. Feed meals in the crate. Give a safe chew. Cover part of the crate to reduce stimulation. After play or a walk, allow 15 minutes of quiet in the crate. This pattern teaches your dog that rest follows activity. It also makes it easier to train, since dogs learn from calm moments right after a decompression break.
Practical Exercises Where Dogs Learn From Calm Moments
The following drills are simple, fair, and highly effective. Each one is built to amplify stillness and focus.
Engagement From Neutral
Stand still. Wait for your dog to offer eye contact. Mark the instant of focus. Feed at your leg. Repeat three to five reps, then take a short walk. This teaches your dog that engagement grows from stillness. With repetition, dogs learn from calm moments before any cue is given.
The Three Beat Reward Rhythm
Use a steady rhythm when delivering food. Mark, pause, feed. Mark, pause, feed. The pause is vital. It gives your dog a breath to settle. Over time this rhythm signals that calm brings reward. You will see softer posture and better choices.
Thresholds and Door Manners
Approach the door on a short lead. Stop and wait. When your dog softens and looks to you, mark and slightly open the door. If they rush, close the door and reset. Access opens only when the body is calm. Very quickly, dogs learn from calm moments at thresholds because calm is the key that opens the world.
Lead Pressure to Relaxed Heel
Standing still, place light lead pressure backward and slightly up. The moment your dog eases toward you and softens, release and reward at your leg. Take one or two calm steps and repeat. Pressure teaches, the release explains, and the reward confirms. This is how dogs learn from calm moments during lead work.
Calm Recall and Release
Call once. When your dog arrives, ask for a sit. Mark when the sit is still. Feed two or three calm treats low and steady. Then release to a sniff or a toy. Your dog learns that calm at you unlocks the next fun thing. Recall remains fast and focused without frantic energy.
Handling Excitable Dogs Kindly and Firmly
Some dogs go from zero to sixty in a flash. We help them learn a new pattern that feels safe and predictable.
Interrupt, Guide, and Release
When arousal rises, interrupt with a brief reset. Guide to a simple behaviour like down on a mat. Release and reward when the body softens. Keep your voice low. Keep movements smooth. Reps build the association that relief follows calm. With practice, dogs learn from calm moments because calm is the fastest route to comfort.
Choosing Rewards That Keep Arousal Low
- Use soft, low value food for quiet drills and higher value food only when you add difficulty
- Keep toy play short and structured, then settle
- Use life rewards like access to the garden after a calm sit
Proofing Calm in Public
Once your dog is consistent at home, take calm on the road. Work near the edge of distraction first. Then move closer.
Cafes, Pavements, and Parks
- Practice a one minute settle under a chair at a quiet cafe corner
- Walk one pavement block in relaxed heel, then give a sniff break
- In the park, rehearse door manners at the gate and a calm recall from short distance
In all these places, dogs learn from calm moments because calm unlocks access and freedom. Keep sessions short. Finish while your dog is still winning.
Visitors and Household Chaos
Before guests arrive, do a short structure game. Bed, down, mark, feed, release. Use the lead for the first two minutes after the door opens. Reward four paws on the floor. If energy spikes, settle on the mat for sixty seconds and try again. With this routine, dogs learn from calm moments even when life gets busy.
Common Mistakes to Avoid
Good intentions can be undone by small habits. Avoid these pitfalls so progress stays smooth.
Over Talking and Poor Timing
- Too many words become noise
- Late markers confuse the picture
- Slow delivery after the marker weakens the link
Keep it simple. One cue. One marker. Clean reward. That is how dogs learn from calm moments with confidence.
Rewarding Frenzy by Accident
- Feeding while your dog is bouncing reinforces the bounce
- Opening doors when your dog is pulling rewards pulling
- Throwing the ball when your dog is barking rewards barking
Wait for the body to soften. Then mark and reward. Calm first, then access. Repeat until the new pattern is automatic.
Measuring Progress the Smart Way
We do not guess. We measure. Calm is not a feeling. It is a set of clear, repeatable behaviours.
Daily Targets and Criteria
- Two short settle sessions on the mat each day
- One calm lead drill indoors and one at the front path
- One threshold session at the door or car boot
Track duration, distance from triggers, and recovery time. When recovery gets faster, dogs learn from calm moments and choose them sooner.
Capturing Calm Moments With Markers
Carry a few treats at home. When your dog offers a quiet down or chooses the bed, mark and reward. Ten seconds of attention at the right time can shift a whole day. Over a week, you will see more offers because dogs learn from calm moments that get noticed.
When to Call a Smart Master Dog Trainer
Some cases need a tailored plan. If your dog struggles with reactivity, resource guarding, separation issues, or chronic over arousal, professional support makes the difference. A Smart Master Dog Trainer will assess your dog, structure a step by step programme, and coach you through daily routines so dogs learn from calm moments in a way that is safe and fair.
Our training is delivered in home, in structured group classes, and through tailored behaviour programmes. Each pathway follows the Smart Method and is designed to produce calm, consistent behaviour that lasts in the real world.
Ready to turn your dog’s behaviour around? Book a Free Assessment and connect with a certified Smart Master Dog Trainer - available across the UK.
Dogs Learn From Calm Moments in Every Life Stage
Puppies and Adolescents
Puppies are sponges. Keep sessions very short. Teach the mat early. Use calm food rewards and gentle handling. Build a daily rhythm of train, play, rest. With this structure, dogs learn from calm moments before habits of chaos take root.
Adult Dogs and Rescues
It is never too late to teach new patterns. Start at home where your dog feels safe. Use clear markers, simple positions, and predictable breaks. Add short public sessions only when your dog shows calm at home. In a few weeks, you will see why dogs learn from calm moments faster than from hype.
How Smart Dog Training Delivers Reliable Results
Every Smart programme is outcome driven. We blend structure, motivation, and accountability to build habits that hold. You will learn exactly how to create the conditions where dogs learn from calm moments. Your trainer will show you how to progress each skill from low distraction to busy environments. The result is a dog that is calm, confident, and willing in daily life.
If you want guidance from the UK’s most trusted network, we make it simple to get started. Find a Trainer Near You and speak to your local SMDT today.
FAQs
Why do dogs learn from calm moments better than from high energy training?
In a calm state the brain processes information more clearly. Your dog can hear cues, accept gentle guidance, and enjoy rewards without tipping into chaos. This leads to faster learning that lasts.
How do I create calm if my dog is always excited?
Use structure. Short sessions, clear markers, and planned rest breaks. Reduce triggers in the home and use a mat or crate for decompression. With practice, dogs learn from calm moments that you create on purpose.
What rewards should I use to keep my dog calm?
Use small food rewards delivered slowly at the point of stillness. Add life rewards like access to the garden after calm. Keep toy play short and follow with a settle.
Can puppies learn this, or is it only for adult dogs?
Puppies can learn from day one. Keep reps tiny, use soft handling, and build a routine of train, play, rest. Puppies learn that calm opens doors.
How long will it take to see change?
Many families see change in the first week when they apply structure. With daily practice, most dogs learn from calm moments and show reliable progress within two to four weeks.
When should I seek professional help?
If you see reactivity, guarding, separation issues, or if progress stalls, book support. A Smart Master Dog Trainer will design a plan that fits your dog and your life.
Conclusion
Calm is not luck. Calm is a skill that you can build with the right plan. With the Smart Method, you will create the conditions where dogs learn from calm moments every day. You will mark and reward stillness, add structure that feels safe, and progress those skills into the real world. The payoff is a dog you can trust in busy life and a home that feels peaceful.
Your dog deserves training that truly works. With certified Smart Master Dog Trainers (SMDTs) nationwide, you'll get proven results backed by the UK's most trusted dog training network. Find a Trainer Near You
Dogs Learn From Calm Moments
What Is Impulse Control In Real Life?
Training impulse control using real life means your dog learns to choose calm behaviour during everyday events. It is not a trick for the kitchen. It is a lifestyle that shows your dog how to pause, think, and then act with permission. At Smart Dog Training, we build this skill through The Smart Method so results hold up in any environment.
Impulse control is the difference between a dog who launches out the door and a dog who waits to be released. It is the difference between grabbing food and offering eye contact. It is the habit of checking in with you first. A certified Smart Master Dog Trainer will help you teach that habit step by step, using short moments that already happen in your day.
When we talk about training impulse control using real life, we are talking about structured choices in real contexts. Your dog learns that calm focus opens doors, earns food, and unlocks freedom. This is simple to say and powerful when done with clarity, motivation, and fair accountability.
Why Training Impulse Control Using Real Life Works
Dogs do what works. If jumping up gets attention, they jump more. If checking in earns access, they check in more. Training impulse control using real life reshapes what works for your dog in the exact places you need it to work. That means your living room, your front door, your street, your local park, and any public space you visit.
By anchoring training to daily routines, you remove confusion. Your dog rehearses the behaviour that matters to you during the events that trigger them. This makes learning fast, fair, and durable. It also lowers the time you spend in formal sessions because life itself becomes the session.
The Smart Method For Impulse Control
The Smart Method is our proprietary system for calm, consistent behaviour that lasts. We apply it to every case of training impulse control using real life. It blends clarity, pressure and release, motivation, progression, and trust. Here is how each pillar looks in daily practice.
Clarity In Everyday Moments
Clarity means your dog always knows when to try and when to wait. We use simple markers to make that crystal clear. A precise yes releases your dog to the reward or the opportunity. A good marks correct effort that should continue. A brief no is feedback to stop a choice and reset. Clear words, delivered the same way every time, build fast understanding.
Pressure And Release Done Fairly
Pressure and release is gentle guidance that teaches responsibility. Light lead pressure invites your dog to soften and follow. The moment they do, pressure ends, and reward arrives. This teaches accountability without conflict. It also makes safety skills like loose lead walking and doorway control reliable in public.
Motivation That Builds Desire To Comply
We pay your dog for the right choices. Food, toys, affection, and access to life rewards all have value. Smart Dog Training uses the right reward at the right moment so your dog wants to comply. The reward is not random. It is earned by calm behaviour and focus.
Progression From Kitchen To World
Progression is the art of raising the bar one step at a time. You add distraction, duration, and distance only when your dog is ready. We do not jump from the kitchen to a busy high street in one leap. We stack success until reliability holds anywhere.
Trust Between You And Your Dog
Trust is the outcome of fair training. Your dog learns that listening to you is safe, clear, and worth it. You learn to read your dog and guide them with confidence. This bond is what makes training impulse control using real life feel smooth in the moments that matter.
Foundations Before You Start
Before you dive into drills, set up a few basics.
- Pick your marker words and stick to them. Yes releases to reward. Good continues behaviour. No resets calmly.
- Choose simple rewards. Kibble or small treats for high repetition. A favourite toy for short bursts. Access to go outside, greet, or sniff as life rewards.
- Fit a flat collar or harness and a standard lead. You need safe control for any doorway or outdoor work.
- Decide your release word. It can be free or break. Use it to end a hold or position.
- Keep sessions short. Five minutes or less, many times per day. Life gives you many chances.
With these foundations in place, you can start training impulse control using real life in every room and every routine.
Daily Drills For Training Impulse Control Using Real Life
These drills use the moments you already have. Each one builds calm choices in the context that causes excitement. Work them at low distraction first, then add challenge as your dog succeeds.
Doorway Manners And Thresholds
Goal: Your dog waits at any doorway until released.
- Approach the door on lead. Ask for a sit. Say good as your dog holds the sit.
- Touch the handle. If your dog breaks, close the door and reset with no, then sit. If they hold, say good and open a crack.
- Repeat in small steps. Handle touch, latch click, door open a little, door open wider.
- When your dog holds with the door fully open, release with free and walk through together.
- Pay with access. The reward is going outside. Add food if needed for extra motivation.
Common triggers like garden smells or street noise can spike excitement. Use calm resets and small steps. This is the heart of training impulse control using real life.
Food Bowl Patience
Goal: Your dog waits for permission before eating.
- Prepare the bowl. Ask for sit. Lower the bowl a little. If your dog moves, lift the bowl and reset. Mark good for holding the sit.
- Place the bowl down. Pause one second. Release with yes and free to eat.
- Add time slowly. Two seconds, then three. Keep success high.
- Proof with you stepping away, picking the bowl up, or moving the bowl. Maintain calm resets for errors.
Food is powerful. When your dog can wait for food, they can learn to wait for almost anything.
Lead Pressure And Loose Lead
Goal: Your dog yields to soft lead pressure and follows calmly.
- Stand still with mild lead pressure to the side. The moment your dog softens or steps toward the pressure, mark yes and release the pressure.
- Reward with food at your leg. Repeat in both directions until the response is smooth.
- Start walking. The instant the lead tightens, stop. Wait for softening. Mark yes, step forward, and pay at your leg.
- Build duration between rewards as your dog stays with you.
This drill makes outdoor control fair and clear. It is essential for training impulse control using real life on walks.
Proofing Distractions Duration And Distance
Reliability grows when you add the Three Ds. Do it slowly. Keep wins high. Move back a step when needed.
- Distraction. Start with mild, like you lifting a hand or dropping a lead. Work up to bigger events like a family member entering, toys rolling, or a pet passing at distance.
- Duration. Add time in seconds, then short minutes. Reward during the hold with good to keep your dog engaged.
- Distance. Start next to your dog. Step away one step at a time. Return to deliver the reward. Do not always release from a distance.
Layering the Three Ds is a core part of training impulse control using real life. It makes the same behaviour hold in busy places, not just quiet rooms.
Ready to turn your dog’s behaviour around? Book a Free Assessment and connect with a certified Smart Master Dog Trainer, available across the UK.
Common Mistakes And How To Fix Them
- Rushing the process. If your dog fails three times, make it easier. Close the door more. Lower the bowl less. Shorten the pause.
- Talking too much. Use clear markers. Extra chatter blurs the message.
- Inconsistent rules. If waiting matters, it should matter every time. Random releases slow learning.
- Rewarding by accident. Laughing at jumping or moving forward when the lead is tight pays the wrong choice. Pause, reset, and then pay the right one.
- Skipping life rewards. Access to outside, sniffing, greeting, and play are powerful. Use them as payment for calm choices.
Fixes are simple. Break tasks down. Mark and pay the behaviours you want. Stay calm when you reset. These habits keep training impulse control using real life on track.
Marker Words And Reward Strategies
Markers are the timing tool that make your message precise. Use them the same way every time.
- Yes means release and reward now. Use it when your dog completes the behaviour you want.
- Good means keep going. It lets your dog know they are right while they hold the position.
- No means reset and try again. It is brief and neutral. Follow it with the chance to get it right.
Rewards should match the task. Calm holds often need calm food rewards, delivered at position. Fast choices like moving to heel can benefit from a quick toy game. Life rewards fit impulse control perfectly. Opening the door, stepping off the curb, greeting a friend, or sniffing a tree can be the best payment in the world. That is why training impulse control using real life works so well.
Foundations Before You Start
Before building more, check your foundation again. Your markers should feel fluent. Your dog should understand that waiting is part of getting what they want. Your lead skills should be smooth. If any piece feels shaky, revisit the earlier drills until you feel confident.
Real Life Scenarios To Practice
Here are common situations where you can apply the same steps. Keep the plan simple. Break it down. Mark the right choices. Pay with access.
- Visitors at the door. Ask for sit away from the door. Touch the handle. If your dog holds, good. Open a crack. If they break, close, no, and reset. When they hold for the full open, release and invite the visitor in. Reward with greeting.
- Exiting the car. Clip the lead before the door opens. Ask for sit. Crack the door. Build to fully open. Release to hop out only when your dog holds. Pay with a sniff break.
- Passing dogs on pavement. Keep a loose lead. Ask for eye contact as you pass. Mark yes and pay for focus. If your dog surges, stop. Wait for slack. Mark yes and continue.
- Cafe settles. Start with a mat at home. Reward long downs with good. Move to a quiet cafe corner. Build duration and distraction slowly. Pay calm with food and quiet praise.
In each case, you are training impulse control using real life. The context is the lesson. Your consistency makes it stick.
Progress Tracking That Keeps You Motivated
Measure progress with clear metrics. This helps you know when to add challenge.
- Door holds. Count how many seconds your dog can hold a sit with the door fully open.
- Food bowl patience. Track the longest calm wait before release.
- Loose lead. Time how long you can walk with a slack lead without a stop.
- Public settle. Note how many minutes your dog can hold a down around light foot traffic.
Small improvements each week show you that training impulse control using real life is working. Celebrate those wins. They add up fast.
When You Need Professional Support
If you feel stuck, it is time for guidance. An experienced Smart Master Dog Trainer will assess your dog, adjust the plan, and coach your skills so you get results. Our trainers are certified through Smart University and supported by our national Trainer Network. Every programme uses The Smart Method so you get clear structure and proven outcomes.
If your dog shows fear, reactivity, or aggression, do not push through alone. Professional support will keep everyone safe and move you forward. Smart Dog Training delivers in home coaching, structured classes, and tailored behaviour programmes that bring real life reliability.
FAQs And Expert Answers
How long does it take to see results from training impulse control using real life?
Most families see early wins in the first week, such as calmer doorways and better eye contact. Durable results across busy environments often build over four to eight weeks with daily practice.
What should I do if my dog keeps breaking the sit at the door?
Make it easier. Open the door less. Shorten the pause. Stand farther from the opening. Mark good for holding and release soon. Add difficulty only after several smooth reps.
Can I use toys instead of food for rewards?
Yes. Use what your dog values most. Many dogs work well for a short tug or fetch as payment. For long holds, food tends to keep arousal lower and helps the dog stay settled.
What if my dog gets frustrated when I reset with no?
Keep your tone calm and neutral. Follow no with a fast chance to earn yes. Frustration usually means the step is too hard. Lower the difficulty so your dog wins.
Is this suitable for puppies?
Absolutely. Puppies learn routines fast. Keep reps short, keep rewards frequent, and focus on simple choices like waiting for food and doors. Training impulse control using real life is ideal for young dogs.
Do I need special equipment?
No. A flat collar or harness and a standard lead are enough to start. If you need more control for safety, an SMDT can advise and teach you how to use tools fairly within The Smart Method.
What if my dog only listens at home?
Increase challenge gradually. Practice in the garden, then on your street, then in quiet public spaces. Add one distraction at a time. Pay well for focus in new places.
Conclusion And Next Steps
Training impulse control using real life is simple to start and powerful over time. You mark the right choices, you pay with rewards that matter, and you raise the bar step by step. The Smart Method gives you the structure to make it last in any environment. With daily practice, your dog learns that calm focus opens every door in life.
Your next step is to map the drills to your routine. Pick two moments today. Work the doorway and the food bowl. Track your wins. If you want expert guidance, we are ready to help.
Your dog deserves training that truly works. With certified Smart Master Dog Trainers, SMDTs, nationwide, you will get proven results backed by the UK’s most trusted dog training network. Find a Trainer Near You
Training Impulse Control Using Real Life
Should You Use Play as a Reward
Owners often ask a simple question that has a big impact on training results. Should you use play as a reward. The short answer is yes when it is used with structure, clarity, and purpose. At Smart Dog Training, play is not a free for all. It is a powerful reinforcer that fits inside the Smart Method so your dog learns fast and stays reliable in real life. When a Smart Master Dog Trainer guides you, play becomes more than fun. It becomes a tool that builds calm focus, strong obedience, and a better bond.
This article explains why you can use play as a reward, when it makes sense, and how to do it the Smart way. You will learn how the Smart Method turns toys and games into clear communication. You will also see how we prevent chaos, manage arousal, and keep safety front and centre. If you have wondered whether you should use play as a reward, you will have a complete answer by the end.
The Short Answer
You should use play as a reward when it helps your dog stay engaged and work with you. Play can build drive, increase motivation, and make training feel like a game your dog wants to play. The key is structure. Without rules and timing, play can distract, overexcite, or teach the wrong lesson. With the Smart Method, you can use play as a reward and still keep calm, consistent behaviour.
What Counts as Play Rewards
Play rewards are any interactive games your dog finds exciting. Common examples include tug, fetch, chase, and search games. The handler delivers the game after a correct behaviour. You mark the moment the dog is right, then release to play. When you use play as a reward inside a clear structure, the dog links effort to outcome and wants to repeat the behaviour.
How the Smart Method Uses Play
The Smart Method is our proprietary training system at Smart Dog Training. It delivers calm, consistent behaviour that lasts in real life. Play fits inside each pillar of the method so it supports learning rather than competing with it.
Clarity
Clarity means your dog always knows what you want. We use clear commands and markers so the dog understands when to work and when to play. A reward marker such as Yes or Good tells the dog they earned the game. A release marker such as Break tells the dog that play is now available. A control cue such as Out returns the toy to the handler. This simple language keeps play neat and prevents conflict.
Pressure and Release
Pressure and release is fair guidance that builds accountability. During play, pressure can be as simple as a steady hold on the toy until the dog gives it. Release is the moment you lighten your hold or say Out and then mark and restart the game when the dog complies. The dog learns that following the cue turns pressure off and turns the fun back on. This builds responsibility without conflict.
Motivation
Motivation makes dogs want to work. Many dogs find toys and play more exciting than food. When you use play as a reward you tap into that excitement. We teach you to channel it so your dog works with you, not against you. The game becomes a paycheck that your dog is eager to earn.
Progression
Progression means we layer skills step by step. We start in a quiet room with simple rules for play. We add mild distractions, then new environments, then longer durations. By the time you go to a busy park, your dog can still use play as a reward without losing focus. The skill is now reliable anywhere.
Trust
Trust grows when play is fair, predictable, and fun. Your dog learns you are a safe and consistent partner. You learn to read your dog and make good choices. This deepens the bond and supports calm, confident behaviour.
When You Should Use Play as a Reward
You should use play as a reward when it serves the goal of the session. Consider your dog, the task, and the environment.
Puppies and Young Dogs
Puppies are curious and playful. Short games can keep attention high and make training feel like a joy. Keep sessions brief and upbeat. Use play as a reward after one or two easy behaviours. Keep arousal low to moderate. Teach Out early so you have control.
Adult Dogs
Adult dogs can work for longer periods and follow more rules. Play can maintain energy and reduce stress. It also helps dogs who get bored with food. Use play as a reward for correct work and build the ability to switch from work to play and back again.
High Drive Dogs
High drive dogs thrive with toy rewards. They will chase, tug, and fetch with intent. Use play as a reward to harness that energy. Keep markers clear and rules tight. Add impulse control tasks such as hold position then release to play.
Lower Energy Dogs
Some dogs enjoy calm games. They may prefer gentle fetch or soft tug for short bursts. Use play as a reward that matches the dog’s style. Keep sessions light and end while the dog still wants more.
Goals That Fit Play
- Building fast recalls and stays
- Improving heel and focus
- Enhancing task engagement for service dog pathways
- Creating reliable off leash control in our advanced programmes
In each case, you use play as a reward to make the right choice pay. The dog learns the pattern. Do the work, hear the marker, then play.
Choosing the Right Toy
The best toy is safe, durable, and exciting to your dog. It should be easy to handle and simple to hide or present quickly. Avoid toys that invite chewing on your hands. Rotate toys to keep interest high.
Tug
Tug builds engagement and interaction. It works well for many breeds. Use a tug long enough to keep teeth off your fingers. Present the tug with a clear cue such as Get it after your reward marker. Keep the game short. Ask for Out, then restart when the dog releases. This teaches the dog that giving the toy brings the game back.
Fetch
Fetch is great for dogs who love to chase. Throw the ball or bumper after the marker. Ask for a return and a clean release. Avoid endless chase that winds your dog up. Use fetch as a reward, not a marathon.
Chase and Search
Chase games or searching for a toy can build drive and confidence. Keep the area safe. Keep your dog working with you, not away from you. Call back to restart.
Safety First
- Use soft but durable materials
- Keep teeth off skin and clothing
- Play on safe footing to protect joints
- End while your dog still wants more
Build a Play Reward System
Here is how we teach owners to use play as a reward in a clean way. This is how a Smart Master Dog Trainer will coach you in session.
Step One: Check Engagement
Before you use play as a reward, check that your dog wants to work with you. Offer brief eye contact or a simple sit. If your dog tunes in quickly, you are ready to add the toy.
Step Two: Teach the Language
- Reward marker Yes or Good means you did it
- Release marker Break means the reward is available
- Get it starts the game
- Out ends the game and returns the toy
Use the same words every time. Say the marker at the moment of success. Pause for a beat. Then release to play.
Step Three: Short Bursts
Keep early games short. Five to ten seconds is enough. Ask for Out. Mark the release. Restart. Short bursts keep arousal in the right zone and build impulse control.
Step Four: Insert Obedience
Now ask for a simple behaviour before each game. Sit, Down, or a few steps of heel all work. Mark the correct effort. Use play as a reward. Your dog learns that working with you opens the game.
Step Five: Add Distraction
Move to a new room or the garden. Keep the same rules. When your dog can succeed in each new place, you can progress to busier spots. This is how we build real world reliability.
Keep Arousal in the Sweet Spot
Play can spike arousal. Too much and your dog stops thinking. Too little and your dog loses interest. The Smart Method teaches you to read your dog and adjust.
- If your dog grabs clothes or misses the toy, lower intensity and shorten the game
- If your dog wanders away, make the toy more exciting and shorten the time between rewards
- If your dog is vocal or frantic, slow your handling, add simple obedience, and pause longer before release
When you use play as a reward with good timing, you keep your dog in the learning zone. Calm effort, quick reward, back to calm effort.
Common Mistakes When You Use Play as a Reward
- Letting the dog decide when the game starts or ends
- Markers that are late or inconsistent
- Endless tug that teaches pushiness
- Chase games that teach running away
- Ignoring arousal and safety
- Using play as a bribe instead of a reward
The fix is simple. Lead the game. Mark the right moment. Keep sessions short. Use fair pressure and clear release. Your dog will understand and perform better.
Use Play as a Reward Without Losing Control
Some owners worry that play will create chaos. In our programmes, we prove the opposite. You can use play as a reward to build better control than food alone in many cases. Toys are easy to deliver at distance. They can reward speed and power. They strengthen recall and heel with real enthusiasm. The rules make all the difference.
Rules That Keep Play Clean
- Handler presents and removes the toy
- Dog waits for the cue to take it
- Dog releases cleanly on Out
- Game restarts after calm focus
Follow these rules and you can use play as a reward anywhere.
Multi Dog Homes
Play rewards in a multi dog home need extra structure. Work one dog at a time. Keep the other dog behind a gate or on a bed. Rotate jobs. Reward each dog for calm when it is not their turn. This prevents conflict and builds patience.
Practical Sessions You Can Try
Five Minute Tug Routine
- One minute of calm engagement and simple sits
- Ten seconds of tug after each success
- Out on cue
- Repeat five to six cycles
Fetch For Recalls
- Call your dog from a short distance
- Mark as soon as your dog commits to you
- Throw the ball behind you as the reward
- Ask for Out on return
Focus Then Play
- Two steps of heel with eye contact
- Mark
- Release to play with a short tug
Use play as a reward in short sessions like these. You will see faster recalls, better focus, and more joy in the work.
Case Examples From the Smart Team
A young collie arrived with weak focus outdoors. Food worked indoors but failed in the park. We used play as a reward with a long tug and added short heel bursts. Within two weeks the dog could heel past joggers and then earn a ten second game. The owner reported calmer walks and quicker response to cues.
A terrier mix ignored recalls when birds were present. We switched to a ball on a line so we could control the outcome. We marked early commitment to the handler and rewarded with a quick throw in the other direction. The dog learned that coming in fast paid better than chasing birds. Recall became reliable in a month.
These changes are typical when a Smart Master Dog Trainer runs the plan. Structure and timing turn play into progress.
How Smart Programmes Integrate Play
Every Smart Dog Training programme follows the Smart Method. We decide when to use play as a reward based on your dog, your goals, and your lifestyle. In puppy training, play builds engagement and bite inhibition with control. In obedience programmes, we use play for speed in recall and heel. In behaviour programmes, we use play carefully to teach calm focus before and after triggers. In advanced pathways such as service dog and protection, play becomes a precise tool that rewards accuracy and steadiness under pressure.
Our trainers coach you on markers, arousal, and safety. We also help you choose and fit equipment so handlers and dogs are safe. The outcome is simple. You learn to use play as a reward to create reliable behaviour that lasts.
Ready to turn your dog’s behaviour around? Book a Free Assessment and connect with a certified Smart Master Dog Trainer - available across the UK.
FAQs
Is food or play better as a reward
Both can work well. The Smart Method uses what motivates your dog in each context. Many dogs respond best when we blend both. Use play as a reward for energy and speed. Use food for calm precision. We will show you how to switch cleanly.
Will tug make my dog aggressive
No when played with structure and rules. Tug builds control and trust. You decide when it starts, when it ends, and how intense it gets. Teach Out and keep sessions short. If needed, your trainer will set a plan that fits your dog.
What if my dog does not like toys
We can build interest. Use soft movement and short wins. Pair toys with food. Keep the toy special and only present it in training. Many dogs learn to love play when it is introduced with care. If your dog truly prefers food, we will lean on that and use play later.
How do I stop my dog from getting overexcited
Reduce intensity, shorten games, and insert simple obedience before each round. Mark calm and reward often. If your dog struggles, we adjust the plan. The goal is a dog that can use play as a reward and stay thoughtful.
Can I use play in public places
Yes with the right foundation. Build the skill indoors first. Add mild distractions, then moderate ones, then busy settings. Keep rules clear. Use a line for safety until your dog is reliable.
How often should I use play as a reward
Short daily sessions work well for most dogs. Two or three five minute sessions can transform engagement. End each session while your dog still wants more. Consistency matters more than length.
What markers should I use for play
Use a reward marker such as Yes, a release such as Break, a cue to take the toy such as Get it, and a cue to release such as Out. Keep your words and timing consistent.
Conclusion
So should you use play as a reward. Yes, when you use it with the Smart Method. Clear markers, fair pressure and release, meaningful motivation, steady progression, and trust make play a powerful force for learning. You can build recalls that fly, heel that looks smooth, and obedience that holds up anywhere. You can also grow a stronger relationship with your dog. That is what Smart Dog Training delivers every day for families across the UK.
Your dog deserves training that truly works. With certified Smart Master Dog Trainers (SMDTs) nationwide, you'll get proven results backed by the UK's most trusted dog training network. Find a Trainer Near You
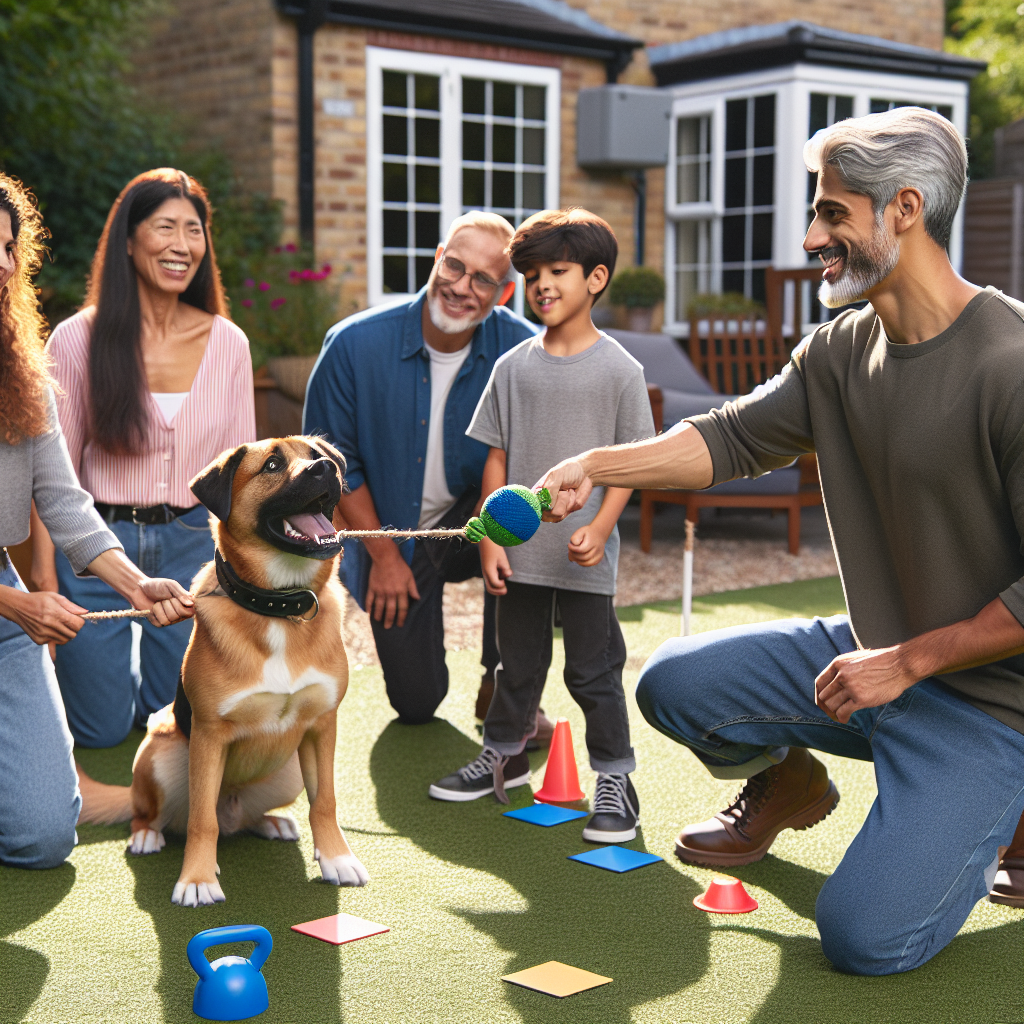
Should You Use Play as a Reward
Introduction
Knowing when to change your dog's routine can be the difference between stress and calm. The right schedule gives your dog clarity, balance, and confidence. The Smart Method shows you exactly how to assess, adjust, and measure routine changes so results last in real life. If you want expert support on when to change your dog's routine, a Smart Master Dog Trainer is ready to help across the UK.
Why Routine Matters in the Smart Method
Dogs thrive on structure. Routine sets expectations so your dog can relax, listen, and enjoy daily life. In the Smart Method, routine is the frame that holds training together. It delivers five outcomes that matter most.
- Clarity. Predictable timing for walks, training, food, and rest stops confusion.
- Pressure and Release. Fair guidance is paired with clear release and reward so your dog learns accountability without conflict.
- Motivation. Reward time is planned to make learning exciting and focused.
- Progression. Sessions evolve from easy to hard so skills stick anywhere.
- Trust. Consistent routines build a strong bond and calm confidence.
Understanding when to change your dog's routine lets you adjust these pillars at the right moment, not after problems grow.
When to Change Your Dog's Routine
The best time to adjust a schedule is when your dog’s behaviour, health, or environment shifts. The signs below help you decide when to change your dog's routine with confidence.
Behavioural Red Flags That Signal Change
- New barking or reactivity on walks
- Restlessness at home or pacing at night
- Chewing, digging, or chasing shadows
- Slow response to commands that used to be reliable
- Over-arousal after walks or training
These patterns tell you the energy and focus in the day are off balance. This is exactly when to change your dog's routine to restore calm and clarity.
Health and Age Changes
- Puppies need more short naps and short sessions
- Adolescents need structure and impulse control
- Adults need mental work, not just miles
- Seniors need gentler exercise, joint-friendly enrichment, and more rest
Any vet-advised change or age milestone is when to change your dog's routine to match new physical needs.
Environmental Shifts
- Moving home or a new family schedule
- New baby, roommate, or pet
- Seasonal changes that affect daylight or walk routes
- Busy periods at work or holidays
New pressures require new patterns. This is when to change your dog's routine so you can guide behaviour before stress builds.
Life Stages That Demand Adjustment
Puppy to Adolescent
As a puppy grows, naps reduce and curiosity spikes. This is when to change your dog's routine from many short sessions to targeted training with more structure. Keep sessions short, rewards high, and rules clear.
Adulthood to Senior
Mobility and stamina shift. Shift from long runs to steady walks, scent work, and calm place training. This is when to change your dog's routine to protect joints while keeping the mind sharp.
After Adoption or Rehoming
New dogs need stability. First stabilise with a simple, repeatable day. Then layer training and enrichment once the dog is eating, sleeping, and settling well.
How Smart Designs a Routine That Works
Smart Dog Training uses a simple daily framework that can flex to any dog. Knowing when to change your dog's routine starts with understanding each pillar.
- Exercise. Movement that matches breed and body, not random miles
- Training. Two to three short, focused sessions using clear commands and markers
- Enrichment. Scent work, puzzles, chew time, or search games to satisfy instincts
- Rest. Protected sleep time and a calm place where your dog can fully switch off
Every Smart plan blends these pillars so behaviour stays balanced and dependable in the real world.
Routine Changes For Specific Behaviour Goals
Reactivity and Barking
Over-aroused dogs need a calmer arc to the day. Cut high arousal play, add structured heel work, and build neutral exposure. This is when to change your dog's routine to trade chaos for calm engagement.
Separation Issues
Reduce free access, add place training, and schedule short, planned absences with clear return markers. This is when to change your dog's routine to teach independence one step at a time.
The Smart Timeline For Making Changes
Immediate Changes
Safety or severe stress calls for fast action. Restrict triggers, simplify the day, and focus on rest and clarity.
Phased Changes
Most dogs do best with a steady plan. Decide when to change your dog's routine, then adjust one pillar per week so you can measure impact.
Step By Step Plan To Change Your Dog's Routine
Week 1 Stabilise and Measure
- Keep wake, feed, walk, and sleep times consistent
- Log behaviour and energy levels morning to night
- Run two short training sessions per day with clear markers
Week 2 Adjust The Pillars
- Swap one walk for a scent game or search on lead
- Add structured heel and place training
- Introduce calm chew time after work or school
Week 3 Add Distraction, Duration, and Difficulty
- Increase place duration with mild distractions
- Proof heel around low level triggers
- Stretch rest windows so your dog learns to settle
By Week 4 you will see patterns. This is when to change your dog's routine again if a pillar still looks out of balance.
Training Sessions That Anchor A New Routine
- Engagement. Name recognition and eye contact at the start of walks
- Heel. Slow, precise steps with turns and sits
- Place. Go to bed, lie down, and relax until released
- Recall. Short, high value repetitions in safe spaces
- Impulse Control. Wait at doors, sit for lead, and release to food
These sessions reflect the Smart Method pillars and make it easy to decide when to change your dog's routine during the week.
Feeding and Sleep Adjustments That Support Training
- Meal Timing. Align food with training windows for better motivation
- Food Delivery. Use part of meals in training if safe and suitable
- Sleep Hygiene. Protect a quiet sleep space and set a lights out time
If appetite drops or sleep changes, that is when to change your dog's routine to protect rest and focus.
Tools, Commands, and Markers Used By Smart
Smart Dog Training uses clear markers, clear releases, and fair guidance. We select tools and rewards based on the dog, not trends. Precision matters so your dog always knows what earns success and what earns release. This clarity is how you will know when to change your dog's routine and exactly what to change.
Common Mistakes To Avoid
- Changing everything at once so you cannot see what worked
- Adding more exercise instead of better structure
- Ignoring rest and overloading enrichment
- Letting timing drift across the week
- Dropping training as soon as behaviour improves
When problems rise again, that is when to change your dog's routine with small, measured tweaks rather than big swings.
Measuring Progress The Smart Way
- Daily Log. Track energy, triggers, and wins
- Weekly Goals. One clear target per week
- Proofing Plan. Add distraction, duration, and difficulty in order
- Calm Index. Count calm hours at home as a core metric
These measures tell you when to change your dog's routine and when to hold steady.
Real Life Examples
The Adolescent Springer
High miles created more hype. We swapped one run for scent work, added heel and place, and fixed sleep. Within two weeks the dog was calmer and recall improved. That is when to change your dog's routine from more exercise to better structure.
The Home Worker’s Collie
All day access led to pacing and barking. We set short training blocks, planned rests, and patio breaks. Barking dropped within days. Knowing when to change your dog's routine ended the guesswork.
The Senior Labrador
Stiffness and restlessness at night needed a softer day. We swapped long walks for two gentle strolls and nose work, plus a warm bed and earlier finish. Sleep returned in a week.
When You Need Professional Help
If behaviour feels stuck or safety is at risk, it is time for a guided plan. A Smart Master Dog Trainer will assess your dog’s day, map the right changes, and coach you through each step. This ensures you know exactly when to change your dog's routine and how to make those changes stick.
Ready to turn your dog’s behaviour around? Book a Free Assessment and connect with a certified Smart Master Dog Trainer - available across the UK.
FAQs
How do I know when to change my dog's routine?
Look for new behaviours, age or health changes, and life changes. If calm and focus are slipping, that is when to change your dog's routine.
Should I change exercise or training first?
Adjust one pillar at a time. Often start with training and rest, then tweak exercise and enrichment as needed.
How fast should I change my dog’s schedule?
In most cases, phase changes over two to four weeks. Go faster only for safety or severe stress.
What if more exercise makes things worse?
That is common with over-arousal. Replace some cardio with structured heel, place, and scent work. This is when to change your dog's routine toward calm work.
Can routine fix separation problems?
It is a key part. Plan rests, place training, and controlled absences. If issues persist, get help from an SMDT.
How do I keep results after I change the routine?
Hold the plan for two weeks after things improve. Keep two to three short training sessions daily and protect rest times.
Who can guide me on my specific dog?
A certified SMDT can assess your dog, set the right schedule, and coach you to success with the Smart Method.
Conclusion
Knowing when to change your dog's routine is a core skill for any owner. Watch the signs, make measured adjustments, and test one pillar at a time. Use the Smart Method to build clarity, motivation, and trust so your dog settles and performs in real life. If you need tailored guidance, our nationwide team is ready to help.
Your dog deserves training that truly works. With certified Smart Master Dog Trainers (SMDTs) nationwide, you'll get proven results backed by the UK's most trusted dog training network. Find a Trainer Near You
When to Change Your Dog's Routine
Understanding Why Dogs Don’t Generalise Well
If you have ever wondered why your dog sits brilliantly at home but seems to forget everything at the park, you are not alone. Many owners ask why dogs don’t generalise well and how to fix it. The answer sits at the heart of how dogs learn. Dogs are highly context driven. They attach meaning to cues based on the place, the handler, the equipment, the scent in the air, and even the direction you are facing. At Smart Dog Training, we expect this. Our programmes use the Smart Method to translate skills from the kitchen to the pavement to the busiest high street. With a certified Smart Master Dog Trainer (SMDT) guiding you, reliable behaviour is not only possible, it is predictable.
This article explains why dogs don’t generalise well, how to spot the pattern, and how to build rock solid obedience that works anywhere. We will unpack the learning science in plain language, then show step by step how the Smart Method turns context bound behaviours into calm, consistent responses in real life.
What Generalisation Means in Dog Learning
Generalisation is the ability to perform a learned behaviour across different settings. When a dog learns to sit in the kitchen, true generalisation means he will sit in the lounge, at the front door, in the garden, on the pavement, and at the busy park. It also means he will sit for different handlers, on different surfaces, and with different sights and sounds around him.
Humans tend to generalise quickly. Once we learn to open one door, we can open almost any door. Dogs are different. They are masters of pattern recognition and context specificity. A dog learns that sit means lower your bottom to the floor when Mum stands by the fridge with a treat in hand. Change any part of that picture and your dog may not recognise the cue. That is why dogs don’t generalise well without a training plan that teaches them how.
The Science Behind Context Specific Behaviour
Dogs form associations through repetition and reinforcement. The cue, the environment, and the reward history combine to create a picture. That picture becomes the behaviour. When the picture changes, many dogs act as if the behaviour is new. This is not stubbornness. It is learning specificity. Your dog is not being difficult. He is waiting for clarity.
Why Context Matters So Much
- Sensory overload changes priorities. New scents, people, dogs, and traffic compete with you for attention.
- Surfaces and positions alter the feel of movement. Sitting on wet grass is different from sitting on kitchen tile.
- Handler posture cues behaviour. If you usually bend forward, standing tall may confuse the dog.
- Equipment signals meaning. Wearing a lead or long line can change expectations for some dogs.
Understanding these factors explains why dogs don’t generalise well without planned exposure. It also explains why our Smart Method focuses on clarity, motivation, and fair guidance so dogs can succeed step by step.
Everyday Signs Your Dog Has Not Generalised
- Your dog sits indoors but not at the curb.
- He heels well in your cul-de-sac but pulls on a new route.
- Recall works in the garden but stalls at the park entrance.
- Place is solid on the bed but breaks during a delivery.
- Down is easy at training class but fails on damp ground.
If you recognise any of these, you are seeing the normal limits of generalisation. The fix is training that respects how dogs learn and guides them through new contexts with structure.
Why Dogs Don’t Generalise Well Across Locations
The simple reason why dogs don’t generalise well is that dogs connect cues to the picture that was present when they learned. New pictures feel like new tasks. Without a plan that layers distraction, duration, and distance, most dogs will falter. The Smart Method solves this by presenting one new variable at a time while protecting clarity. We never expect reliability in a new place until we have built a foundation and rehearsed success in similar situations.
The Smart Method For Reliable Behaviour Anywhere
At Smart Dog Training, all programmes follow the Smart Method. This structured system balances clarity, motivation, and accountability so your dog learns faster and remembers longer. It is how we overcome the limits that make owners ask why dogs don’t generalise well.
Clarity
We teach crisp commands and marker signals so your dog knows exactly when he is right. The cue, the hand signal, and the release are consistent. Clear guidance removes guesswork and speeds up learning across places.
Pressure and Release
Fair guidance paired with a clear release helps a dog take responsibility without conflict. Light lead pressure shows the path. Release marks the choice. This builds accountability and resilience when the environment changes.
Motivation
We use rewards that your dog cares about. Food, play, praise, and life rewards are layered to create a positive emotional response. A motivated dog engages even when the picture shifts.
Progression
Skills are layered step by step. We change one variable at a time and only when the previous step is fluent. Distraction, duration, and distance are added gradually until the behaviour is reliable anywhere.
Trust
Training strengthens the bond between dog and owner. Trust keeps a dog willing and calm under pressure, which is essential for generalisation.
A Step By Step Plan To Teach Generalisation
Below is a simple, structured progression that reflects the Smart Method and answers why dogs don’t generalise well by teaching them how to succeed in new contexts.
Stage 1 Home Base
- Pick one cue such as sit. Teach with high clarity and clean markers.
- Reward placement matters. Deliver close to position to reduce fidgeting.
- Build short duration. Add a one second pause before release.
Stage 2 Room To Room
- Repeat the same exercise in different rooms. Keep distractions low.
- Keep your cue mechanics the same. No extra words or movements.
- Reward each success to protect confidence.
Stage 3 Garden and Driveway
- Move outdoors where sights and scents increase.
- Use a lead for safety and clarity. Light guidance then release.
- Short sets work best. Two to three minutes, then reset.
Stage 4 Quiet Street
- Train near your home on a quiet path.
- Lower your criteria at first. Ask for short duration sits.
- Reward frequently, then fade the rate as your dog settles.
Stage 5 Busy Environments
- Introduce parks, shops entrances, and vet car parks.
- Change only one element at a time. New place but same short duration.
- Build to longer duration and mild distractions, then add more challenge.
Layering the Three Ds
For every behaviour, progress one variable while holding the others steady:
- Distraction Increase challenge gradually such as people at a distance, mild movement, then dogs passing.
- Duration Add seconds slowly. Ten short wins beat one long failure.
- Distance Change your position after duration is stable.
Generalising Handlers and Equipment
- Have another family member give the cue once the dog is fluent with you.
- Practice with and without a lead. Introduce a long line for recall proofing.
- Switch surfaces such as grass, gravel, and indoor mats.
This progression shows your dog what to do when the picture changes. It is the practical answer to why dogs don’t generalise well.
Tools That Support Clarity
Tools do not replace training. They make clarity easier to achieve. In Smart programmes we select equipment that supports the skill being taught and the stage of progression.
- Lead and long line Offer guidance and safety during early proofing.
- Place bed Provides a clear target for boundaries and calm duration.
- Treat pouch and toy Keep rewards fast and consistent to maintain motivation.
- Markers and releases Yes, Good, and Free create precise communication.
These tools help you solve why dogs don’t generalise well because they keep information clean while you change the environment.
Common Mistakes That Block Generalisation
- Jumping too fast Asking for the final picture in a brand new place.
- Muddy cues Changing words, tone, or hand signals across sessions.
- Over talking Adding chatter that becomes background noise.
- Reward drift Letting reinforcement fade before the behaviour is stable.
- No release Forgetting to tell the dog he is free to move.
- Inconsistent rules Allowing pulling sometimes and forbidding it other times.
When owners ask why dogs don’t generalise well, these mistakes are usually part of the answer. The Smart Method removes these blockers with structure and consistency.
Generalising For Puppies
Early training sets the tone for life. Puppies absorb patterns quickly, but they still face the same limits. To help a puppy generalise:
- Keep sessions short and upbeat. One to three minutes is enough.
- Use simple markers and clear release.
- Rotate locations daily. Kitchen in the morning, hallway at lunch, garden in the evening.
- Plan controlled field trips. Watch the world at a distance, then move closer as confidence grows.
These steps teach a young dog that cues always mean the same thing. That is the clearest fix for why dogs don’t generalise well as they grow.
Generalisation For Reactivity and Behaviour Issues
Dogs with reactivity, fear, or frustration need even more structure. Their emotions compete with learning, which is another layer in the question of why dogs don’t generalise well. Smart behaviour programmes combine obedience with tailored exposure, so the dog can think and choose correct responses in real life.
- Start at a working distance where your dog can focus and breathe.
- Use fair guidance with pressure and release to help your dog make good choices.
- Reward calm, neutral behaviour often. Reinforce disengagement and attention to the handler.
- Progress gradually. Never add distance, duration, and distraction at the same time.
This is where our mentorship and coaching matter. A certified Smart Master Dog Trainer (SMDT) will map your dog’s thresholds, set the right progression, and keep sessions productive.
Measuring Progress So Reliability Sticks
To move from one stage to the next, look for these markers:
- Success rate above 80 percent in the current context.
- Short latency between cue and response.
- Calm body language through the set such as soft eyes and steady breathing.
- Recovery after a startle or unexpected event.
If any marker drops, step back one level. This protects clarity and prevents rehearsing failure. It also keeps the process enjoyable which is vital when owners ask why dogs don’t generalise well and how long it takes to fix.
Ready to turn your dog’s behaviour around? Book a Free Assessment and connect with a certified Smart Master Dog Trainer - available across the UK.
Putting It All Together In Real Life
Imagine your dog sits perfectly at home but stalls at the kerb. You follow the Smart progression. You practice sit with a lead on the driveway, then at the kerb during quiet times, then with a neighbour walking by, then with a cyclist passing, then on a busier street. You keep cues consistent, use light guidance and release, and reward generously at first. Within days your dog learns that sit means sit everywhere. You solved why dogs don’t generalise well by teaching through contexts with structure.
When To Work With A Professional
If your dog struggles with anxiety, reactivity, or poor impulse control, do not wait. These cases benefit from tailored coaching. A Smart trainer will design the right steps, prevent overwhelm, and keep you accountable. The fastest path to reliability is a clear plan and expert eyes on the details.
To get matched with a local expert, use our national network of certified trainers. Find a Trainer Near You and start a programme that delivers results in real life.
FAQs
Why do dogs forget cues in new places?
They do not forget. They are reading a new picture and waiting for clarity. This is the core of why dogs don’t generalise well. You need a plan that changes one variable at a time and rewards success.
How long does it take to generalise a behaviour?
Basic cues often generalise in two to four weeks with daily practice. Complex behaviours or behaviour issues take longer. The Smart Method keeps progress steady by controlling distraction, duration, and distance.
Can I fix this without using food?
Yes. We mix food, play, praise, and life rewards. Motivation keeps engagement high. We also use fair pressure and release for clarity and accountability, then release and reward when your dog makes the right choice.
My dog listens to me but not my partner. Why?
Handler generalisation has not happened yet. Your dog has linked the cue to you and your style. Practice the same routine with your partner using identical cues, markers, and release. Start in easy places and progress gradually.
What is the difference between proofing and generalisation?
Generalisation is performing a behaviour in new contexts. Proofing is stress testing that behaviour under distraction, distance, and duration. Both are built into Smart programmes so you are not left asking why dogs don’t generalise well after class.
Is my dog being stubborn?
Stubborn is rarely the issue. Lack of clarity and overfacing are the usual culprits. With the Smart Method, you remove confusion and raise criteria carefully so your dog can succeed anywhere.
Do I need professional help for reactivity?
Reactivity adds emotional layers that can slow generalisation. Professional coaching keeps exposure safe and productive. A Smart Master Dog Trainer will map the right distances, guide timing, and track progress.
How often should I train to improve generalisation?
Short daily sessions beat long weekend marathons. Aim for three to five mini sessions a day in varied locations. Keep each set focused and end on a win.
Conclusion
Now you know why dogs don’t generalise well and how to change it. Dogs learn in pictures. When the picture changes, the behaviour must be retaught with structure. The Smart Method delivers that structure with clarity, motivation, fair guidance, and careful progression. Start at home, move room to room, then step outside. Change one variable at a time. Reward success and keep cues consistent. If you want results faster or you are facing behaviour challenges, partner with a certified professional.
Your dog deserves training that truly works. With certified Smart Master Dog Trainers (SMDTs) nationwide, you'll get proven results backed by the UK's most trusted dog training network. Find a Trainer Near You
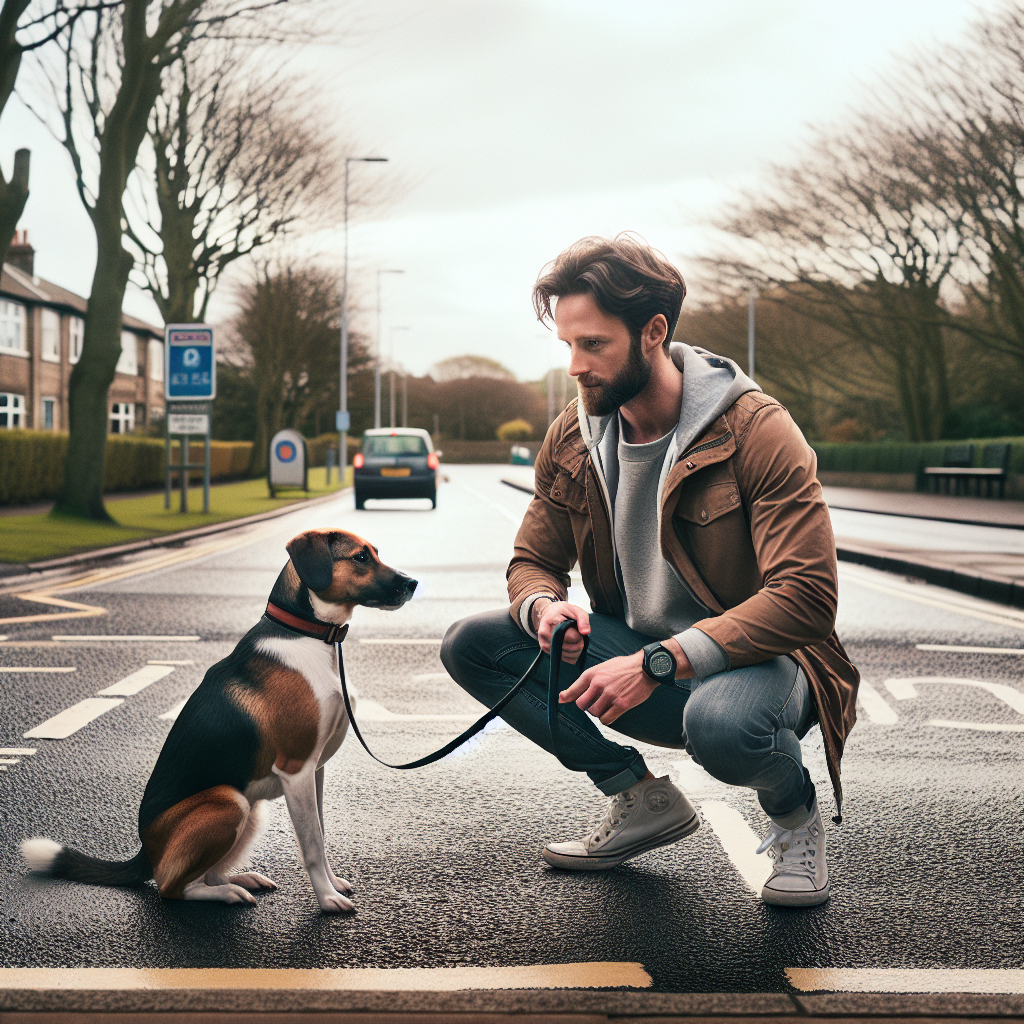
Why Dogs Don’t Generalise Well
Walks should be simple and calm, yet many families face pulling, barking, and lunging from excitable adolescents. Managing lead frustration in young dogs is the key to turning this pattern around. At Smart Dog Training, we use the Smart Method to bring structure, motivation, and accountability to every step, so you get results that hold up in real life. If you want expert guidance, a Smart Master Dog Trainer can assess your dog and provide a tailored plan that fits your daily routine.
What Is Lead Frustration in Young Dogs
Lead frustration is the build up of tension when a dog is restrained on the lead but wants to get to something. It often looks like pulling toward other dogs, jumping, whining, or barking. You may notice this most with adolescent dogs between six and eighteen months. Managing lead frustration in young dogs means teaching the dog to handle excitement, accept limitations, and engage with the handler even when something interesting is nearby.
In practical terms, lead frustration is not the same as fear based reactivity. Many young dogs are social and simply over eager. They want to reach a person or dog because it has always felt rewarding. The lead says not today. Without guidance, the dog tries harder, pulls harder, and learns a new habit. Managing lead frustration in young dogs breaks that habit by giving the dog clear rules, a fair release, and rewards for choosing calm.
Why Lead Frustration Happens
There are three common drivers. Arousal rises quickly in young dogs, the environment is often unpredictable, and the lead restricts movement. Together these create pressure that needs a clear outlet. Managing lead frustration in young dogs starts with understanding how each factor plays a part.
Adolescence and Arousal
During adolescence the brain is still wiring up. Impulse control is low and novelty is exciting. A squirrel, a football, a friendly Labrador, or a jogger can flip a calm walk into a tug of war. The dog has not yet learned a reliable way to cope with delay or denial. Managing lead frustration in young dogs at this stage prevents habits from setting and keeps arousal within a workable range.
Learned Patterns and Handler Tension
Dogs repeat what works. If pulling has ever got your dog closer to a greeting, the behaviour strengthens. Handler tension adds fuel. Tight leads, sharp voice tones, and inconsistent rules teach the dog to expect conflict. Managing lead frustration in young dogs replaces that pattern with calm markers, softer hands, and consistent criteria that are easy for the dog to understand.
Signs and Early Red Flags
Look for these signals before things boil over. Early noticing makes managing lead frustration in young dogs much easier.
- Scanning the environment and ignoring their name
- Lead tightens often, even in quiet spaces
- Whining, bouncing, or pawing when held back
- Hard eye and forward weight toward dogs or people
- Sudden barking at the moment the lead tightens
- Slow recovery after a trigger passes
If you see two or more of these often, begin managing lead frustration in young dogs with a structured plan before the behaviour escalates.
The Smart Method for Managing Lead Frustration in Young Dogs
The Smart Method is our structured, progressive, outcome driven system. It is how every Smart Dog Training programme delivers calm, consistent behaviour that lasts. Each pillar works together to make managing lead frustration in young dogs clear and fair.
Clarity
We use precise cues and markers so your dog knows exactly what earns reward and what does not. Simple words for yes, try again, and finished remove guesswork. Clarity makes managing lead frustration in young dogs humane and efficient because the dog always understands what is expected.
Pressure and Release
Lead guidance is information, not conflict. We teach the dog to soften into light pressure and relax when it releases. The release is always paired with a marker and a reward. This builds accountability without a fight. It is central to managing lead frustration in young dogs because the dog learns that calm choices turn pressure off.
Motivation
Food, play, and praise are used in the right balance to build enthusiasm for the work. We want the dog to choose you over the environment. By feeding strategically and playing at the right time, motivation becomes the engine that powers new habits. This keeps managing lead frustration in young dogs positive and engaging.
Progression
Skills are layered from easy to hard. We add distraction, duration, and difficulty step by step. Progression protects your results. It stops the common pattern of a good week at home followed by chaos at the park. Progression is how we keep managing lead frustration in young dogs consistent across locations.
Trust
Every repetition is designed to strengthen the bond between dog and owner. The dog learns you will be fair, predictable, and rewarding. Trust turns training into a relationship, not a transaction. It is the foundation that makes managing lead frustration in young dogs sustainable for years.
Equipment That Supports Success
We keep equipment simple and purposeful. Managing lead frustration in young dogs does not rely on gadgets. It relies on timing, clear criteria, and repetition guided by the Smart Method.
- Standard fixed length lead, ideally 1.8 to 2 metres, to prevent constant tension
- Well fitted flat collar or training collar recommended by your Smart trainer
- Treat pouch for rapid reinforcement and tidy handling
- High value food, measured from meals to maintain balance
- Optional long line for controlled freedom during progression stages
Your Smart trainer will select what fits your dog and your goals. A Smart Master Dog Trainer will also show you how to handle the lead so your hands stay neutral and calm, which is essential for managing lead frustration in young dogs.
Foundation Training at Home
Before the street, build skills where you can control the environment. These short sessions are the backbone of managing lead frustration in young dogs.
- Name response. Say the name once. Mark and feed when the eyes meet yours.
- Hand target. Present a still hand. When the nose touches, mark and feed. This gives you a quick redirect tool.
- Settle on a mat. Feed for relaxed posture. Release between reps. Calm starts here.
- Follow me. Walk three to five steps indoors. If the lead is slack, mark and feed at your knee.
- Leave it. Teach the dog to disengage from a placed item when cued, then reward for calm focus on you.
Repeat daily. Keep reps short, fun, and precise. Managing lead frustration in young dogs is won through many clean successes rather than a single long session.
Lead Skills Indoors Before the Street
Once the dog responds well off lead, add the lead indoors. This step makes managing lead frustration in young dogs smooth when you head outside.
- Attach the lead and stand still. Wait for slack. Mark, release, then reward.
- Take two steps. If the lead stays light, mark and feed at your thigh.
- Turn away from mild distractions in the room. Reward the turn and the slack lead.
- Add a short sit. Reward the sit and the calm release.
These micro wins teach the dog that slack lead brings rewards and that your direction is always worth following. This is the heart of managing lead frustration in young dogs.
Progressing to Garden and Pavement
Next, take the same skills into the garden, driveway, and finally the pavement. Progression protects your results and keeps managing lead frustration in young dogs on track.
- Garden walks. Five minute routes with easy turns and frequent rewards for slack lead.
- Driveway drills. Watch cars at a distance. Reward for looking and then choosing you.
- Pavement patterns. Walk a small square. Reward the corners to build focus when changing direction.
- Short exposures. Watch passing dogs from across the road. Reward engagement with you.
Increase difficulty only when your dog succeeds at the current level for several short sessions in a row. Managing lead frustration in young dogs means we pace the challenge so the dog experiences success, not struggle.
Engagement Games to Lower Arousal
These simple games turn your dog toward you before the lead gets tight. They are ideal for managing lead frustration in young dogs in busy areas.
- Find it. Drop three pieces of food at your feet. This resets focus to the handler.
- Middle. Dog steps between your legs and faces forward. Reward calm posture.
- One step heel. Take one slow step. Reward at your seam. Reset and repeat.
- Look then move. Dog looks at the trigger, then looks to you. Mark and move away together.
- Clockwork turns. Quarter turns in place to reorient the dog without tension.
Use these games before the dog tips over threshold. Consistent use makes managing lead frustration in young dogs far simpler because the dog learns a reliable pattern around triggers.
Reading Body Language and Timing
Timing is the difference between de escalation and a full outburst. Managing lead frustration in young dogs depends on early action.
- Soft eye and loose tail mean stay the course and reward often.
- Forward weight, closed mouth, and fixed stare mean break the pattern with a turn and a reward for following.
- Hackles, hard panting, and yips mean increase distance and reset with a simple game like Find it.
When body language warms up, act. Mark and reward for any choice to check in with you. This is the fastest way to keep managing lead frustration in young dogs under control.
Calm Handling of Triggers in Public
Use this simple plan when you see a trigger on your walk.
- Pause and breathe. Keep the lead short but soft. Do not add tension.
- Gain attention with name response or a hand target.
- Turn away on a curve. Reward the first two steps of following.
- Build distance, then reward for looking at the trigger and back to you.
- When calm returns, resume your route at a lower difficulty.
Once this plan becomes habit, managing lead frustration in young dogs becomes routine. Your dog learns that you will lead, pressure will release, and rewards will follow good choices.
Common Mistakes to Avoid
- Letting greetings happen after pulling. This teaches the wrong lesson.
- Holding a tight lead all the time. Constant pressure removes the meaning of release.
- Training only at the park. Start at home where success is easy.
- Long sessions that end in failure. Keep reps short and end on a win.
- Inconsistent rules between family members. Agree on cues and criteria.
Avoid these and you will find that managing lead frustration in young dogs becomes much less stressful for everyone.
A Sample Two Week Plan
This plan shows how we layer skills through the Smart Method. It is a template that your Smart trainer will tailor to your dog.
- Days 1 to 3. Indoors. Name response, hand target, settle on a mat, follow me. Three sessions daily, two to four minutes each.
- Days 4 to 6. Indoors on lead. Two step walks, turns, sits with clean releases. One short session outdoors in a very quiet area.
- Days 7 to 9. Garden and driveway. Five minute routes, reward corners, watch cars from a distance, use Find it to reset.
- Days 10 to 12. Pavement. Short exposures to dogs across the road, look then move pattern, one step heel before crossings.
- Days 13 to 14. Mix environments. Short park entry with easy exits, practise clockwork turns, maintain a high rate of reinforcement.
Follow this path and keep a daily log. You will see how managing lead frustration in young dogs improves as your consistency grows.
When to Work With a Smart Master Dog Trainer
If your dog is strong, your walks are stressful, or you worry about safety, bring in a professional. A Smart Master Dog Trainer will assess triggers, arousal patterns, and your handling. You will get a step by step plan, live coaching, and support as you progress. Managing lead frustration in young dogs is much faster with skilled eyes on the details.
Ready to turn your dog’s behaviour around? Book a Free Assessment and connect with a certified Smart Master Dog Trainer available across the UK.
FAQs
What is the difference between frustration and fear on lead
Frustration is an excited push toward something the dog wants. Fear is a defensive reaction to something the dog would rather avoid. Managing lead frustration in young dogs focuses on impulse control and engagement. Fear cases require additional confidence building within the Smart Method.
Will my dog grow out of it
Not without guidance. Rehearsal builds habits. Managing lead frustration in young dogs early stops rehearsal and creates a new pattern of calm choices.
How long before I see progress
Many families see change within two weeks when they follow the plan daily. The exact timeline depends on history, consistency, and environment. Managing lead frustration in young dogs is fastest when you start in easy settings and move up step by step.
Can I still let my dog greet others
Yes, when calm behaviour is consistent. Earned greetings are a powerful reward within the Smart Method. Use them only when the lead is slack and attention is with you. This makes managing lead frustration in young dogs both fair and rewarding.
What if my dog is already barking and lunging
Create distance and reset with a simple game like Find it or a hand target. When calm returns, continue at a lower level of difficulty. For consistent outbursts, get help from a Smart Master Dog Trainer. Managing lead frustration in young dogs is completely achievable with the right plan.
Do I need special equipment
You need a standard lead, a well fitted collar, and good food rewards. The skill is in how you use them with the Smart Method. Managing lead frustration in young dogs comes from timing, clarity, and progression, not from gadgets.
Conclusion and Next Steps
Managing lead frustration in young dogs is about structure, not struggle. With clear cues, fair lead guidance, strong motivation, and steady progression, your dog learns that calm choices work every time. That is the promise of the Smart Method used by Smart Dog Training across the UK. If you want expert help or a tailored programme for your family, we are ready to guide you.
Your dog deserves training that truly works. With certified Smart Master Dog Trainers (SMDTs) nationwide, you'll get proven results backed by the UK's most trusted dog training network. Find a Trainer Near You
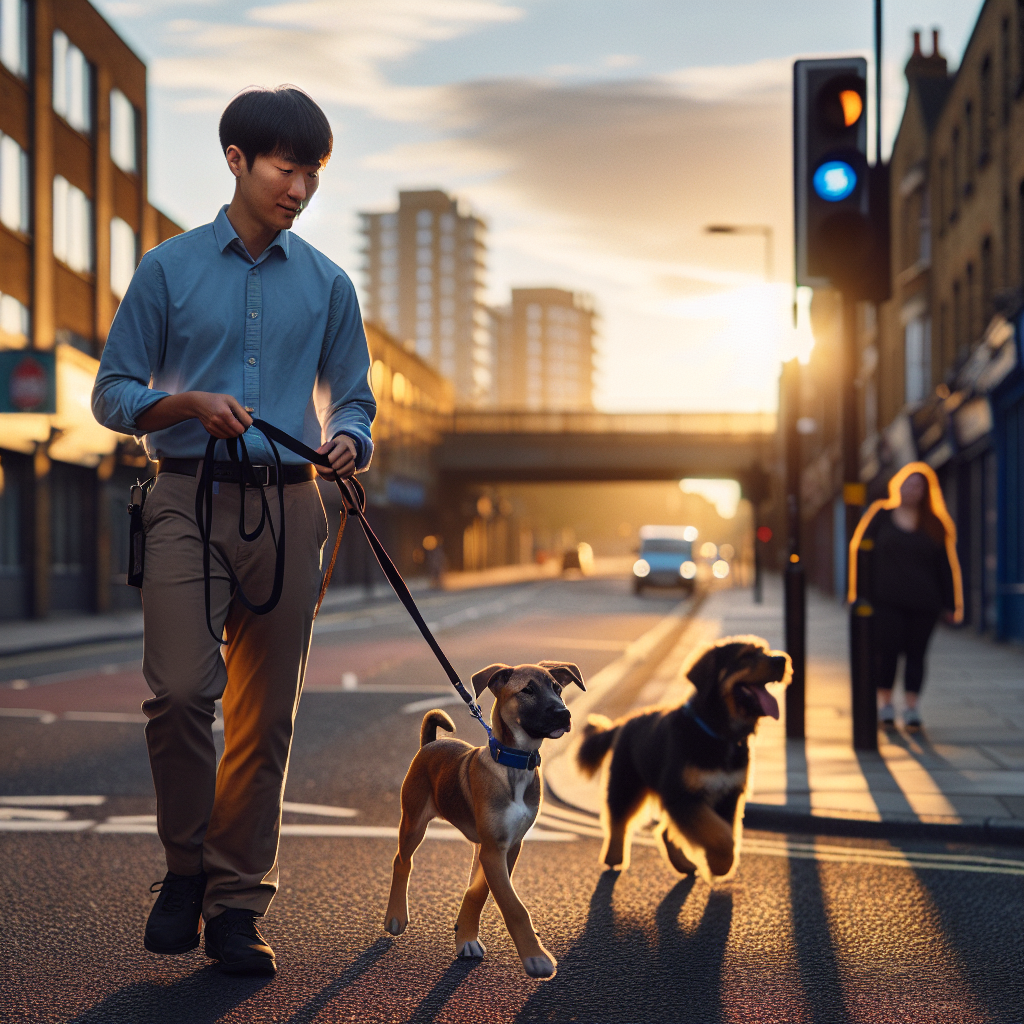
Managing Lead Frustration in Young Dogs
Why Your Dog Won't Engage and How to Fix It
If your dog won't engage, it can feel frustrating and personal. You ask for a sit, a heel, or eye contact, and you get nothing. At Smart Dog Training, we see this every day, and we resolve it with structure, motivation, and clarity. Our Smart Method turns confusion into cooperation, even when a dog won't engage at home or outside. If you want calm focus that lasts in real life, this is where it starts. Many families work directly with a certified Smart Master Dog Trainer, or SMDT, to fast track results.
What Engagement Means at Smart Dog Training
Engagement is your dog choosing to tune in and work with you. When a dog won't engage, they look away, sniff the ground, pull toward distractions, or shut down. Engagement is not just eye contact. It is a steady loop of cue, behaviour, and reward. It feels like a conversation. The Smart Method builds that loop so your dog understands what to do and why it pays.
- Attention: your dog orients to you on cue and by choice
- Responsiveness: they follow known commands on the first ask
- Recovery: they can re-engage after a distraction
- Durability: the behaviour holds with time and distance
If your dog won't engage, you do not have a stubborn dog. You have a learning gap. We close that gap with a clear plan.
What to Do When Your Dog Won't Engage
When a dog won't engage, you need a simple reset that restores focus. The Smart Method gives you five pillars that solve the root cause and create lasting cooperation.
Clarity: Make It Obvious
Clarity means your dog always knows when they are right. We use precise markers to remove guesswork. One marker tells your dog a reward is coming. Another releases them from work. If your dog won't engage, start here. Use a calm voice. Say the cue once. Mark the instant your dog even glances at you. Pay well. Clarity builds a fast yes from your dog because the path is obvious.
Pressure and Release: Fair Guidance
Pressure and release is your steering system. It is not conflict. It is gentle guidance with an instant release when your dog makes the right choice. That release is a reward in itself. When a dog won't engage, fair guidance creates accountability. You show the way and then remove pressure the second your dog tries. They learn to own their behaviour, which grows real engagement. This pillar is a cornerstone in every Smart programme.
Motivation: Make It Worth It
If a dog won't engage, the reward is often too weak or too rare. Motivation is not random treats. It is a plan that brings food, play, and praise to life so your dog wants to work. Use high value food for new skills. Use a toy to build drive and speed. Layer in calm affection to settle arousal. Smart trainers teach you how to switch rewards to keep your dog balanced and willing.
Progression: Reliable Anywhere
Progression is the ladder from easy to hard. Many owners stall here. They ask for perfect behaviour in a busy space before the dog is ready. When a dog won't engage outside, we step down the ladder and rebuild. First, get it right in a quiet room. Then add duration, then distance, then simple distractions. Only then do we move into the real world. Progression is how Smart turns skills into reliability.
Trust: The Bond That Holds
Training should reduce stress and grow confidence. When a dog won't engage, it often reflects worry or mixed messages. The Smart Method builds trust through fair rules, predictable rewards, and calm leadership. Your dog learns that working with you is safe and rewarding. Trust turns pressure into guidance and rewards into promise.
Quick Triage When Your Dog Won't Engage Today
Use this same-day plan if your dog won't engage right now.
- Reduce noise. Move to a quiet area with a six foot lead.
- Short sessions. Train for two to three minutes, then break.
- Upgrade rewards. Use something your dog truly loves.
- Mark small wins. Pay for glances and turns toward you.
- End on success. Stop while engagement is rising.
This reset stops the downward spiral. It gives you a base to build from.
Why a Dog Won't Engage
Behaviour always has a reason. When a dog won't engage, look for these common causes.
Over Arousal or Stress
Fast breathing, scanning, and vocalising tell you your dog is over threshold. In that state, a dog won't engage because the brain is in survival mode. We step back to calmer spaces and rebuild confidence with clarity and reward timing.
Under Motivation
If the reward does not matter, the dog won't engage. Work hungry but not starving. Rotate rewards. Make food lively and toys structured so your dog learns to earn and enjoy.
Confusion and Inconsistent Cues
Inconsistent words or body language create doubt. A dog won't engage when the rules are foggy. Choose one cue for each skill. Say it once. Mark the exact success. Pay right away.
Fatigue or Health Issues
Tired dogs and sore dogs check out. If your dog won't engage and it is sudden, shorten sessions, and speak with your vet if you suspect pain. Training should leave your dog brighter, not drained.
Handler Habits
Chatter, nagging cues, and slow payment weaken engagement. When a dog won't engage, handlers often over talk and under pay. Tighten your timing and shorten your sentences.
Step by Step Plan to Build Engagement
This plan follows the Smart Method. If your dog won't engage, use each step in order and do not rush progression.
Step 1 Reset the Routine
- Two to three micro sessions per day in a quiet room
- Lead on for guidance and safety
- Pre-measure five to ten high value rewards per session
- End on a win every time
The reset tells your dog that training is simple and rewarding again. A dog won't engage when the work feels muddy. Resetting clears the mud.
Step 2 Build the Engagement Loop
Teach Look. Stand still. Say Look once. The moment your dog glances at your eyes, mark, then reward. Repeat five to eight times. If your dog won't engage, pay tiny tries, not perfect stares. Next, add movement. Take one step back. When your dog orients to you, mark and pay. This loop of orient, mark, reward is the engine behind focus.
Step 3 Use Pressure and Release on Lead
Lead pressure is a whisper, not a pull. Apply light pressure toward you. The instant your dog follows or softens the lead, release and reward. When a dog won't engage on walks, this is your steering. Your dog learns that responding to pressure turns off pressure and earns a payoff. That is clarity and motivation working together.
Step 4 Add Marker Clarity
Use two markers. One marker means a food reward is coming where you stand. Another marker means a release to a toy or sniff. If your dog won't engage, the release marker is often the missing link. It tells your dog when they can enjoy the world and when they are working with you.
Step 5 Progress in Layers
- Duration: hold a sit or eye contact for one second, then two, then five
- Distance: take one step away, then two
- Distraction: add a quiet prop, then a moving person at distance
When a dog won't engage under pressure, go back one layer. Win there, then step up again.
Step 6 Generalise to Real Life
Practice near the front door, then in the garden, then on the pavement. Keep the lead on. If your dog won't engage at a new spot, pay the first glance. Release often. Engagement should feel like a game you both enjoy.
Environmental Setup That Helps When a Dog Won't Engage
- Use a standard six foot lead and a well fitted collar or harness
- Remove toy clutter during training
- Train before big meals so food rewards matter
- Keep sessions short and upbeat music low
Environment shapes behaviour. Smart trainers control it so your dog won't engage less and chooses you more.
Reward Strategy That Makes Work Worthwhile
Rewards drive engagement. If a dog won't engage, fix the reward plan before adding pressure.
- Food: use small, soft, high value pieces
- Toys: short, structured play that ends on your cue
- Life rewards: release to sniff, greet, or explore
Rotate rewards to keep your dog eager. Make the first reward in each session the best one. A dog won't engage when the first minute feels dull.
Session Structure That Builds Momentum
- Warm up with three quick Look reps
- Run one core skill, like heel for five steps
- Insert a simple win, like a hand touch
- Finish with a release to play or sniff
End while your dog is still keen. If your dog won't engage at minute three, you trained to minute five.
Distractions and Real World Proofing
The world is rich with smells, movement, and sounds. When a dog won't engage outside, manage distance first. Work far enough from triggers that your dog can still think. Stack tiny wins.
- Start across the road from a mild distraction
- Ask for a glance, mark, pay, then release to sniff
- Step five feet closer on the next session
This balance of work and release teaches your dog that engagement brings access to the world. A dog won't engage less when work opens doors.
Multi Dog Homes When One Dog Won't Engage
Train dogs one at a time. Rotate short sessions. Crate or tether waiting dogs. If one dog won't engage, that dog needs more one-to-one clarity and reward history. Later, add both dogs with one working while the other settles.
Your Mindset as a Handler
Calm handlers create calm dogs. If your dog won't engage, drop frustration. Breathe. Speak less. Pay faster. Your timing and tone are part of clarity. A steady rhythm of ask, mark, reward builds confidence.
Measuring Progress So You Know It Is Working
- How many cues get a first-time response
- How fast your dog re-engages after a distraction
- How many seconds of eye contact you can hold
- How close you can work to triggers without conflict
If your dog won't engage less each week in harder places, your plan is working. If not, change one variable at a time: reward, distance, or duration.
When to Bring in a Smart Master Dog Trainer
Some cases need professional eyes. If your dog won't engage and you see reactivity, fear, or shutdown, work with a certified Smart Master Dog Trainer, or SMDT. Our trainers follow the same Smart Method nationwide and will tailor a plan to your dog, your home, and your goals.
Ready to turn your dog’s behaviour around? Book a Free Assessment and connect with a certified Smart Master Dog Trainer - available across the UK.
How Smart Programmes Solve a Dog That Won't Engage
Every Smart programme follows the Smart Method. We start with a clear assessment, then we map a progression plan. If a dog won't engage, we set up in-home structure, install precise markers, and build motivation that matches your dog’s drive. We layer distraction and duration until focus holds in real life. Families learn how pressure and release guides without conflict. The result is a calm, willing partner who trusts you and chooses you.
Mini Case Example
A young herding mix arrived with owners who felt stuck. Their dog wouldn't engage on walks and ignored recalls. We started in the kitchen with two minute sessions. We paid for quick glances, then a soft heel for three steps. We used light lead pressure and released the instant she tried. Rewards alternated between food and a short toy tug. Within one week, the dog checked in every few steps in the garden. By week three, the dog held engagement near passing dogs at ten metres. The owners now had a dog that chose them first.
Frequently Asked Questions
Why does my dog get treats and still won't engage?
Often the reward is poorly timed or lacks value in that moment. If your dog won't engage, mark the instant they try and pay right away. Increase reward value and reduce distractions until the behaviour is strong.
How long will it take to fix a dog that won't engage?
Most families see wins in a week with daily micro sessions. If a dog won't engage due to stress or a long history of confusion, allow more time and follow a clear progression.
What if my dog won't engage outside but is fine at home?
That gap means you advanced too fast. When a dog won't engage outside, increase distance from distractions and pay for small tries. Rebuild duration and distance step by step.
Can pressure and release harm engagement?
Used fairly and released at the exact try, it builds engagement. Your dog won't engage less when guidance is clear and the release comes fast at the right choice.
What rewards are best if my dog won't engage with food?
Use play and life rewards. Many dogs value a toy or a release to sniff more than food in busy places. If a dog won't engage with food, use the environment as the paycheck.
Should I stop walks if my dog won't engage?
Do shorter, structured walks in quieter areas. If your dog won't engage at close range to triggers, increase distance and rebuild skills before returning to busy routes.
Do I need a professional if my dog won't engage at class?
Classes can be hard for some dogs. If your dog won't engage in a group setting, an SMDT can provide tailored support at home and then transition you back to groups when ready.
Conclusion
If your dog won't engage, the answer is not louder cues or more chaos. It is structure. The Smart Method gives you clarity, fair guidance, meaningful rewards, and a stepwise path to reliability. With trust at the core, engagement becomes a habit, not a hope. If you want focused walks, responsive obedience, and a dog that chooses you over the world, we are ready to help.
Your dog deserves training that truly works. With certified Smart Master Dog Trainers (SMDTs) nationwide, you'll get proven results backed by the UK's most trusted dog training network. Find a Trainer Near You
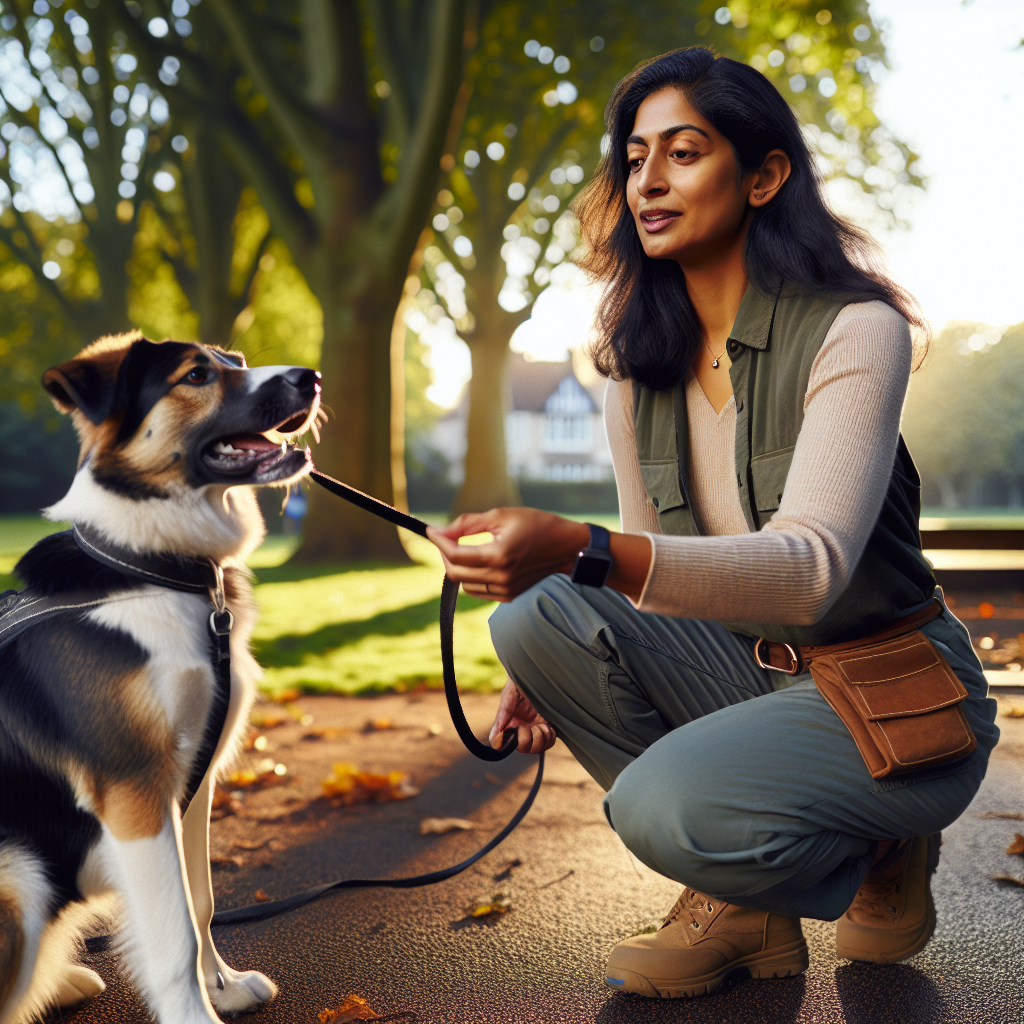
What to Do When Your Dog Won't Engage
Dog Learning Curve Plateaus And Regression
The dog learning curve is the roadmap that explains why training sometimes feels fast, then slow, then suddenly messy before it clicks again. At Smart Dog Training we plan every step of that journey so families see calm, consistent behaviour that lasts in real life. Early wins are great, but real progress comes from understanding plateaus and regression and then working the Smart Method to move forward with confidence. If you need hands on guidance, a Smart Master Dog Trainer will assess your dog, your routine, and your goals so we can tailor a plan that works.
What Is The Dog Learning Curve
The dog learning curve describes how skills build over time. At first, dogs learn fast in simple environments. Then progress slows as we add distraction, duration, and difficulty. With the right structure, performance rises again and becomes stable anywhere. The Smart Method gives you that structure. We use clarity, pressure and release, motivation, progression, and trust to shape the dog learning curve so your dog understands, wants to work, and takes responsibility for choices.
Plateau Or Regression What Is The Difference
A plateau is a flat spot in the dog learning curve. Your dog is not getting worse, just not getting better yet. It often shows up when you lift criteria such as adding distractions or asking for longer duration. Regression is a drop in performance. Behaviours that were reliable suddenly fall apart. Distinguishing these states matters because the fix is different. Plateaus call for patient progression and clearer guidance. Regression calls for a reset, a fast win, and a careful rebuild so confidence returns.
Why Plateaus Happen In The Dog Learning Curve
Plateaus are normal. They mean your dog is processing new information. Here are common reasons the dog learning curve flattens for a while:
- Criteria jumped too quickly. The step from quiet kitchen to busy park was too big.
- Markers or commands were inconsistent, blurring clarity.
- Reinforcement was delayed or not compelling enough to maintain engagement.
- The dog has reached an age stage such as adolescence where attention wobbles.
- Repetition without progression led to boredom and sloppy responses.
In the Smart Method, a plateau is a sign to refine the plan, not a reason to stop. We adjust one variable at a time and keep the dog learning curve moving upward.
Signs You Are On A Plateau Not In Regression
Knowing where you are on the dog learning curve prevents overreactions. Indicators of a plateau include:
- Behaviour is steady in low distraction areas but not improving in new places.
- Latency to respond is consistent, just slower than you want.
- Errors are similar and predictable rather than random.
- Your dog still wants to work and accepts guidance, but output is flat.
When we see these signs, Smart trainers keep the exercise, reduce one difficulty factor, and add clarity. That combination unlocks the next step on the dog learning curve.
How The Smart Method Breaks Plateaus
The Smart Method turns plateaus into progress. We follow five pillars:
- Clarity. Short, sharp markers and precise leash guidance tell the dog exactly right or try again. Clear feedback reduces confusion and moves the dog learning curve forward.
- Pressure and Release. Fair guidance followed by a timely release and reward builds accountability without conflict. The dog learns that making the right choice turns off pressure and earns reinforcement.
- Motivation. Food, toys, play, and praise keep the emotional state high. A motivated dog repeats the behaviour and the dog learning curve rises.
- Progression. We add distraction, duration, and difficulty step by step so success stays high. If the dog struggles, we lower one variable and capture quick wins.
- Trust. Calm leadership and predictable structure build confidence. Dogs that trust their handler take guidance in new situations and hold behaviour under stress.
This is how Smart Dog Training guarantees steady movement through each stage of the dog learning curve.
Understanding Regression On The Dog Learning Curve
Regression means a real dip. A recall that was solid at home now fails in the park. A dog that held place for five minutes now pops off after ten seconds. Common triggers include lack of generalisation, sudden stress, new environments, low motivation, or handlers introducing mixed cues. In the Smart Method we treat regression like a signal. We reset the picture, create an instant success, and then rebuild criteria so the dog learning curve climbs again.
Common Causes Of Regression And How Smart Fixes Them
We see patterns across cases and correct them using the Smart Method:
- Overfacing. Criteria jumped too far. Smart fix lower one variable and reward success immediately.
- Inconsistent markers. Mixed words or timing confuse the dog. Smart fix one marker system used with precision so the dog learning curve re stabilises.
- Weak reinforcement. Rewards lost value. Smart fix adjust reward type and schedule, bring back the desire to work.
- Handler hesitation. Late guidance lets errors repeat. Smart fix coach timing and leash handling until clarity returns.
- Stress spikes. New dogs, crowds, or noises change behaviour. Smart fix set controlled exposures with guidance and release, then layer distractions.
Regression is not failure. With a measured reset and structured progression, the dog learning curve recovers fast.
Progression Stages That Shape The Dog Learning Curve
Smart programmes follow a predictable path so the dog learning curve makes sense to both dog and owner:
- Acquisition. Teach the behaviour in a simple space. Mark the exact moment of success and reward.
- Fluency. Remove lures, build rhythm, and tighten timing. Keep criteria simple but raise repetition.
- Generalisation. Practice in new rooms, then gardens, then quiet streets. Maintain a high success rate.
- Proofing. Add controlled distractions, longer duration, and more distance. Use pressure and release, then reward compliance.
- Maintenance. Blend rewards into life, top up skills weekly, and use structured play to keep the edge.
These stages ensure each layer is solid, so the dog learning curve steps up without collapses.
Clarity And Markers Keep The Dog Learning Curve Clean
Clarity is non negotiable. We choose a release word, a reward marker, and a no reward marker and we use them exactly. We keep commands short and consistent. When a dog hears the same words with the same timing, the dog learning curve becomes predictable and progress accelerates. Smart coaches owners to speak less, signal more, and reward at the right moment.
Pressure And Release Builds Accountability
Pressure and release is fair guidance paired with a clear off switch. The dog learns that pressure turns off when it complies. This builds responsibility without conflict and keeps the dog learning curve steady under higher distraction. We pair this with rewards so the dog feels both relief and positive outcomes for correct choices.
Motivation And Reward Schedules That Work
Dogs learn best when they want to work. We keep motivation high by using the right reward at the right moment. Early on, we use frequent primary rewards. As the dog progresses on the dog learning curve, we shift to variable schedules, add play, and build the habit of effort. Motivation is never an afterthought in Smart programmes. It is built into every session.
Proofing Skills So The Dog Learning Curve Holds Anywhere
Proofing is where most plateaus and regressions show up. Smart proofing uses simple rules:
- Change one variable at a time. If you add distraction, keep duration and distance easy.
- Catch wins early. Mark and reward the first two seconds of correct behaviour when criteria rises.
- Balance guidance and reward. Apply fair pressure to prevent rehearsal of errors, release on compliance, then pay.
- Return to easy. If an error repeats twice, drop criteria and collect success.
This keeps the dog learning curve rising even when life gets busy and noisy.
Measuring Progress On The Dog Learning Curve
Tracking small wins prevents frustration. Smart trainers set simple metrics per behaviour like response time, duration held, number of successful reps in a row, and ability to perform in new places. When you measure, plateaus are obvious and you know exactly which variable to change. A Smart Master Dog Trainer will give you a written progression plan so you can see the dog learning curve in black and white.
Real Life Scenarios And Smart Solutions
Puppy Focus Slips Outside
Plateau. The puppy sits brilliantly indoors but ignores you in the garden. Smart fix reduce distraction by facing away from the street, run five fast sits with high value rewards, then turn slightly toward the distraction for one rep. Repeat until the dog learning curve rises outdoors.
Adolescent Recall Falls Apart
Regression. Hormones and curiosity spike. Smart fix use a long line for accountability, set low level recalls at short distance, reward instantly on arrival, then layer distance and distraction slowly. This rebuilds the dog learning curve for recall in real life.
Rescue Dog Shuts Down In Crowds
Regression. Stress reduces performance. Smart fix create space, ask for a simple behaviour like heel for three steps, release and reward, then leave. Return later with slightly more exposure. The dog learning curve climbs as trust grows.
Multi Dog Household Chaos At The Door
Plateau then regression. Excitement triggers mistakes. Smart fix train individual place first, then two dogs together with distance between beds, then add the doorbell as a staged distraction. Pressure and release for accountability, then pay compliance. The dog learning curve stabilises and holds when guests arrive.
Owner Habits That Accelerate The Dog Learning Curve
- Short, frequent sessions. Three to five minutes beats one long block.
- Single goal per session. Decide the one metric you will improve today.
- Clean mechanics. Prepare rewards, lines, and markers before you start.
- Consistent language. Use the same commands and tones every time.
- Calm leadership. Breathe, guide, and reward. Avoid frantic chatter.
When owners follow these habits, the dog learning curve smooths out and progress speeds up.
When To Bring In A Smart Master Dog Trainer
Call us when you feel stuck, when errors repeat, or when you want to move from good to great. An SMDT will diagnose exactly where the dog learning curve stalled, show you the handling skills to unlock it, and build a progression plan that fits your life. We work in home, in structured groups, and through tailored behaviour programmes so support is always local and practical.
Ready to turn your dog’s behaviour around? Book a Free Assessment and connect with a certified Smart Master Dog Trainer available across the UK.
How Smart Keeps Results For The Long Term
Lasting behaviour comes from balanced training. We pair motivation with accountability and progression with proofing. We then coach owners to maintain skills with two weekly top up sessions and daily lifestyle structure. The result is a dog learning curve that climbs, plateaus briefly as new layers are added, and then rises again into stability.
The Mindset That Protects Your Dog Learning Curve
- Expect plateaus. They are part of learning, not a problem.
- Treat regression as data. Reset, simplify, and rebuild.
- Celebrate small wins. Success fuels motivation for both dog and owner.
- Be consistent, not perfect. Clean reps beat occasional hero moments.
- Trust the plan. The Smart Method works when you work it.
FAQs About The Dog Learning Curve
How long does a plateau usually last
Most plateaus on the dog learning curve last a few sessions to two weeks, depending on how quickly we adjust variables. With Smart coaching, small changes often unlock progress within days.
Is regression a sign my dog is stubborn
No. Regression simply means conditions have changed faster than learning has stabilised. We adjust clarity, motivation, and accountability so the dog learning curve returns to its previous level and then rises.
Should I stop training during a plateau
Keep training but change the plan. Shorten sessions, lower one difficulty factor, and reward fast wins. This keeps the dog learning curve moving without building frustration.
What if my dog only performs at home
That means generalisation is incomplete. We follow the Smart progression and proofing steps to move the behaviour from easy rooms to gardens and then to public spaces. The dog learning curve rises again as environments change.
Can treats alone fix regression
Motivation helps, but treats without structure will not hold in real life. The Smart Method pairs motivation with pressure and release, clear markers, and step by step progression so the dog learning curve stabilises.
When should I bring in an SMDT
Bring in an SMDT when errors repeat, when behaviour matters for safety, or when you want faster results. Expert coaching will identify the exact point on the dog learning curve that needs attention and show you how to fix it.
How do I know if my timing is the problem
If your dog looks unsure after commands or responds on the second or third cue, timing is likely off. A Smart trainer will refine your marker timing and leash handling so the dog learning curve becomes clean again.
Conclusion
The dog learning curve is not a straight line. It rises, flattens, and sometimes dips before it climbs again. With the Smart Method, plateaus and regression become simple signals that guide your next step. Clarity, pressure and release, motivation, progression, and trust keep training fair and effective. If you want expert, local support, Smart has certified trainers across the UK with the structure and accountability needed to produce calm, confident dogs that perform anywhere.
Your dog deserves training that truly works. With certified Smart Master Dog Trainers (SMDTs) nationwide, you'll get proven results backed by the UK's most trusted dog training network. Find a Trainer Near You
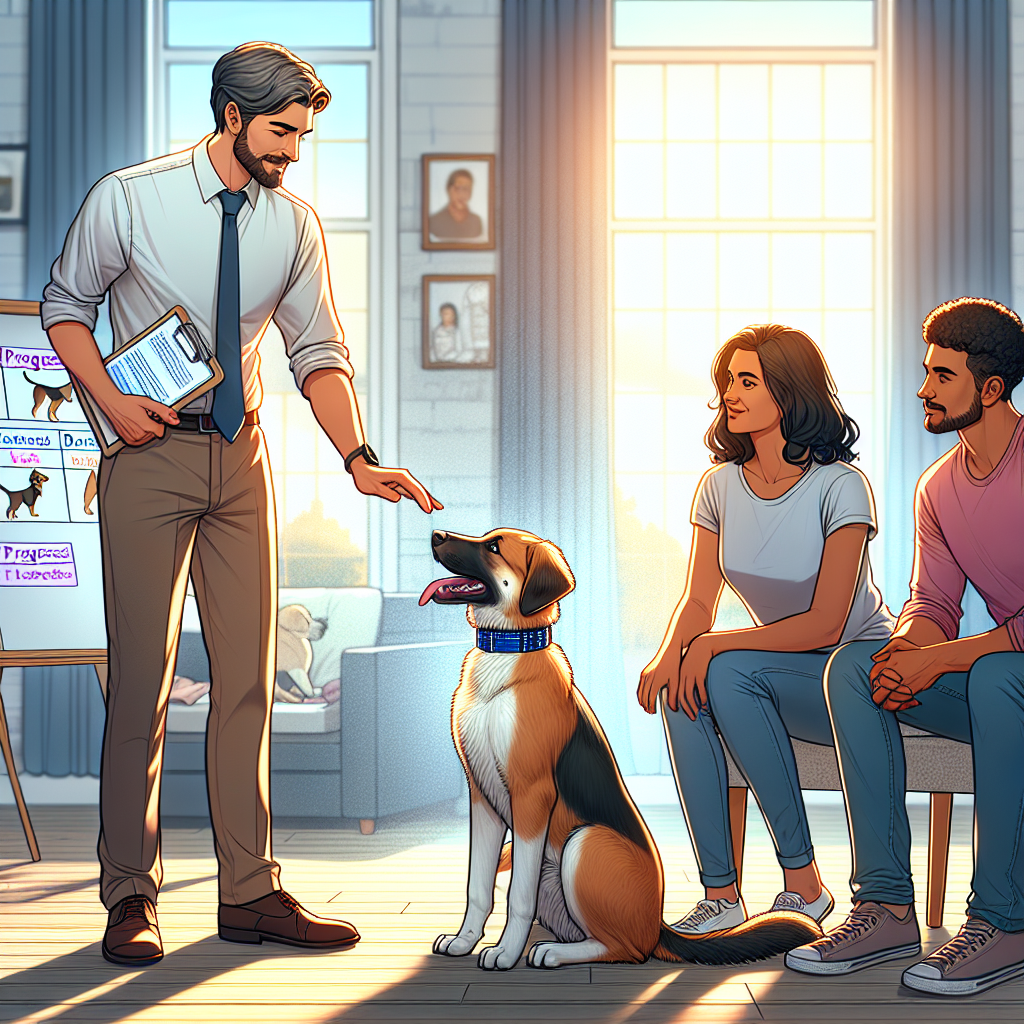
Dog Learning Curve Plateaus And Regression
Why Calm Sound Exposure Matters
Dogs do not automatically learn to relax around noise. They learn it through structured, positive experience that proves the world is safe and predictable. Building calm exposure to everyday sounds gives your dog that skill. It reduces stress, improves focus, and turns chaotic environments into places your dog can handle with ease. When you make building calm exposure to everyday sounds part of your routine, you protect your dog from future noise issues and set a standard of behaviour you can rely on.
At Smart Dog Training we follow a single method for all noise work. The Smart Method is clear, progressive, and built for real life results. Every certified Smart Master Dog Trainer works to the same standard so families get consistent outcomes across the UK. If your goal is building calm exposure to everyday sounds, our programmes show you each step and keep you on track.
Many dogs struggle with appliances, traffic, deliveries, children playing, or sudden bangs. Puppies may bark or bounce between fear and excitement. Adult dogs can develop avoidance or reactivity. The answer is not to avoid noise. The answer is to teach calm behaviour in controlled stages. That is what building calm exposure to everyday sounds looks like with Smart Dog Training.
The Smart Method for Noise Neutrality
The Smart Method is our proprietary system for producing calm, consistent behaviour. It is the backbone of building calm exposure to everyday sounds. We apply five pillars to every session so your dog always knows what to do, how to do it, and when they have done it right.
Clarity Markers and Calm Behaviours
Clarity means your dog understands your words and your timing. We teach a clear marker for correct behaviour and a release word that ends the exercise. When you pair these markers with a settle behaviour like Place, your dog gains a simple rule set. Noise is present, the cue is Place, the dog stays until released, and rewards mark the right choice. This is the foundation for building calm exposure to everyday sounds because confusion fades and confidence grows.
Pressure and Release on Lead
Pressure and release is fair guidance that helps your dog find stillness. A neutral lead cue invites the dog to step into position or soften away from tension. The instant the dog complies, pressure is gone and reward can follow. Used with sensitivity and timing, this builds accountability without conflict. It keeps dogs engaged during building calm exposure to everyday sounds and prevents frantic movement from turning into bad habits.
Motivation and Reward Schedules
Motivation keeps training enjoyable. We pay calm choices generously at first, then move to variable schedules as the dog becomes fluent. Food rewards, gentle praise, and touch are layered to suit your dog. Over sessions, the sound becomes the background and the dog learns that quiet behaviour creates good things. This is essential for building calm exposure to everyday sounds that lasts.
Progression Across Intensity and Distance
We progress in small steps. Volume, distance, novelty, and duration change only when the current step is solid. Done right, your dog barely notices each increase. This is how building calm exposure to everyday sounds becomes reliable in kitchens, gardens, pavements, and busy parks.
Trust and Bonding Under Sound Stress
Trust grows when your guidance is fair and consistent. You protect your dog’s thresholds, you show exactly what to do, and you reward calm. Over time, sound becomes the test that strengthens your bond. That is the Smart Method way.
Assessing Your Dog’s Starting Point
Before you begin building calm exposure to everyday sounds, you need a baseline. Your plan should match your dog’s current comfort level, not your end goal.
- Notice body language. Look for soft eyes, loose jaw, and relaxed tail. Watch for tension, scanning, lip licking, or yawning.
- Find the distance where your dog can hear a sound and stay calm. That is your starting intensity.
- Record triggers. Make a simple list of sounds your dog hears each week and rate your dog’s response from one to five.
If you are unsure where to start, a Smart Master Dog Trainer can assess your dog and set clear criteria that remove guesswork.
Core Skills Before Sound Work
Building calm exposure to everyday sounds is easier when your dog already knows how to relax on cue and follow light guidance. Two skills make the biggest difference.
- Place settle. A defined bed or mat becomes the station for calm work. We teach Place with clear markers, a release word, and calm reinforcement. This tells the dog exactly what to do when sounds happen.
- Leash guidance. Soft, consistent communication on lead supports the dog as environments become busier. Pressure and release stops frantic movement and brings your dog back to you.
Put these skills in place first, then layer sound. That is the cleanest route to building calm exposure to everyday sounds without confusion.
Step by Step Plan For Building Calm Exposure to Everyday Sounds
The following plan applies the Smart Method in a simple sequence. Move forward only when your dog stays calm and responsive to your marker and release cues. If your dog struggles, return to the last successful step and rebuild. That is still progress.
Stage 1 Low Level Introductions
- Set up in a quiet room with your dog on Place. Keep a light lead on as a safety line.
- Play a low volume sound or create a soft household noise. Think cutlery placed gently, a phone notification, or a cupboard shut.
- Mark and reward calm stillness. If your dog breaks, guide back to Place and reset.
- Repeat short sets of two to three minutes. End on success with a release word.
At this stage, the goal is simple. Your dog notices the sound and remains settled. Reward that choice. This is the first true step in building calm exposure to everyday sounds.
Stage 2 Duration and Distraction
- Add mild movement. Walk a few steps, sit down, stand up, and handle light chores while the sound plays softly.
- Increase duration of Place from two minutes to five, then to eight or ten.
- Vary the direction of the sound source. Move it behind your dog or to another room.
- Keep rewards frequent and quiet. Pay the calm you want to see again.
Now your dog learns that calm holds even as life happens. This cements building calm exposure to everyday sounds because duration is what transfers to daily living.
Stage 3 Real World Transitions
- Shift to the kitchen during normal activity. Run the tap, open drawers, and put a pan on the hob without slamming.
- Move to the garden. Work Place while bins rattle, neighbours chat, or cars pass at a distance.
- Walk down a quiet street. Stop for short Place breaks on a portable mat while traffic hums in the background.
Increase only one variable at a time. If distance shrinks, keep volume low. If volume rises, keep duration short. This keeps building calm exposure to everyday sounds smooth and stress free.
Stage 4 Startle Recovery
- Introduce single, unexpected sounds at a manageable level. A dropped spoon from a low height or a door knock at low volume.
- Coach a quick recovery. Guide to Place, mark eye contact or a breath out, and reward.
- Keep repetitions low and quality high. We are teaching bounce back, not chasing thrills.
Startle recovery is the heart of resilience. It makes building calm exposure to everyday sounds hold when life throws surprises.
Ready to turn your dog’s behaviour around? Book a Free Assessment and connect with a certified Smart Master Dog Trainer - available across the UK.
Everyday Sounds to Practise
Map your sound list and work from easy to hard. Use short, focused sessions. Keep your dog under threshold and finish with a relaxed win.
- Home appliances. Kettle, microwave beeps, washing machine spin, hoover at a distance, hair dryer from another room.
- Kitchen clatter. Pans placed on a counter, cutlery in a tray, fridge door closing, bin lid, recycling boxes.
- Doors and deliveries. Letterbox flap, parcel set down, door knock, doorbell chime, footsteps in the hall.
- Human noise. Laughter, TV shows with crowd sounds, children playing outside, exercise workouts.
- Street and travel. Car doors, engines idling, buses braking, bikes passing, train platform at off peak times.
Each category supports building calm exposure to everyday sounds across home and public life. Mix them through the week so your dog generalises the skill.
Fireworks and Thunder Preparedness
Seasonal noise needs a plan. You can use the same Smart Method steps to prepare for firework season or storm periods. Begin early, at very low volume, and build slowly. Secure windows and curtains, set up Place in an inner room, and run short sessions that reward calm breathing and orientation to you. Treat the loud night as a practice ground for the work you have already done.
- Use daytime rehearsals with recorded rumbles at a whisper level.
- Create a calm zone with a familiar bed and white noise like a fan.
- Run structured walks before dusk so natural tiredness supports relaxation.
- Coach startle recovery on cue, then release to a chew on Place.
Handled this way, building calm exposure to everyday sounds becomes your safety net when skies boom or the neighbourhood celebrates.
Troubleshooting Common Setbacks
Progress is rarely a straight line. If issues appear, adjust one factor at a time and return to clean success.
- Over arousal. Shorten sessions and lower volume. Pay calm breathing and soft eyes. Reset with a simple Place at a greater distance.
- Shut down. Increase distance first and add movement. Keep rewards higher value and mark small changes like head turns toward you.
- Vocalising. Do not reward barks. Guide to Place, wait for a pause, mark quiet, and pay. Reduce intensity for the next rep.
- Refusing food. Switch to gentle praise and touch, then stop the session. Next time, lower intensity and work before a meal.
These adjustments keep building calm exposure to everyday sounds productive without creating conflict.
Measuring Progress and Raising Criteria
Good training tracks results. Use simple metrics so you know when to progress.
- Latency to settle. Count seconds from sound to calm stillness. Aim for a faster return over time.
- Duration on Place. Build from two minutes to ten minutes with normal home activity.
- Distance to triggers. Reduce distance in small steps while keeping calm intact.
- Number of exposures per week. Aim for short daily reps rather than one long session.
When your dog meets these markers with ease, raise one criterion. This steady approach is key to building calm exposure to everyday sounds that holds up anywhere.
When to Work With a Professional
If your dog shows intense fear, panic, or worsening reactivity, bring in expert support. A certified Smart Master Dog Trainer will tailor the Smart Method to your dog and coach you through each step. You will get exact volumes, durations, and distances, plus live feedback on timing and lead skills. That level of clarity accelerates building calm exposure to everyday sounds and protects welfare.
Ready to get personalised help that fits your home, your schedule, and your goals? Book a Free Assessment today and we will map your plan.
How Smart Programmes Deliver Lasting Change
Smart Dog Training delivers public facing programmes that follow one structure from start to finish. We install Place, leash guidance, and markers. We run a progressive plan that blends home, garden, and street exposures. Then we push reliability with real world distractions. Every step is part of the Smart Method so building calm exposure to everyday sounds becomes a normal way of living with your dog.
- Structured plan. Clear steps, clear wins, and simple criteria.
- Progressive exposure. Gradual increases that never flood or overwhelm.
- Balanced motivation. Rewards for calm choices and fair guidance when needed.
- Owner coaching. We train you, not just your dog, so results last.
Across the UK, our Trainer Network brings this standard to your doorstep with mapped support and ongoing mentoring through Smart University. The result is calm, confident dogs and relaxed families.
FAQs
How long does building calm exposure to everyday sounds take?
Most families see changes in two to three weeks with daily five to ten minute sessions. Strong reliability across home and street often builds over six to eight weeks. Dogs with a long history of noise sensitivity may need a longer plan.
Can puppies start right away?
Yes. Gentle work begins as soon as your puppy has basic Place and marker skills. Keep sessions very short and stop before your puppy is tired. Early work makes building calm exposure to everyday sounds simple later on.
Do I need special equipment?
No. A stable bed or mat, a standard lead, and a pouch for rewards are enough. Smart Dog Training uses simple tools and precise timing to deliver results.
What if my dog will not take food during sessions?
Lower the intensity until your dog accepts food again. Use calm praise and touch as needed. Resume food rewards once your dog is comfortable. This keeps building calm exposure to everyday sounds positive.
Will this help with barking at the doorbell?
Yes. We pair Place with door sounds at low intensity, then raise realism in small steps. Dogs learn to hold calm while the bell rings and visitors enter. It is a direct application of building calm exposure to everyday sounds.
Is it safe to practise during firework season?
Yes, if you control intensity and protect thresholds. Work in daylight at very low volume, keep sessions brief, and give your dog a secure Place. If in doubt, contact us for guidance.
Conclusion
Calm around noise is not luck. It is the result of a structured plan, fair guidance, and steady progression. By building calm exposure to everyday sounds with the Smart Method, you teach your dog exactly how to relax anywhere. Start with Place and clear markers, guide with pressure and release, and progress at a pace your dog can handle. Track simple metrics so you know when to raise criteria. If you need tailored help, our certified team is ready to support you.
Your dog deserves training that truly works. With certified Smart Master Dog Trainers (SMDTs) nationwide, you'll get proven results backed by the UK's most trusted dog training network. Find a Trainer Near You
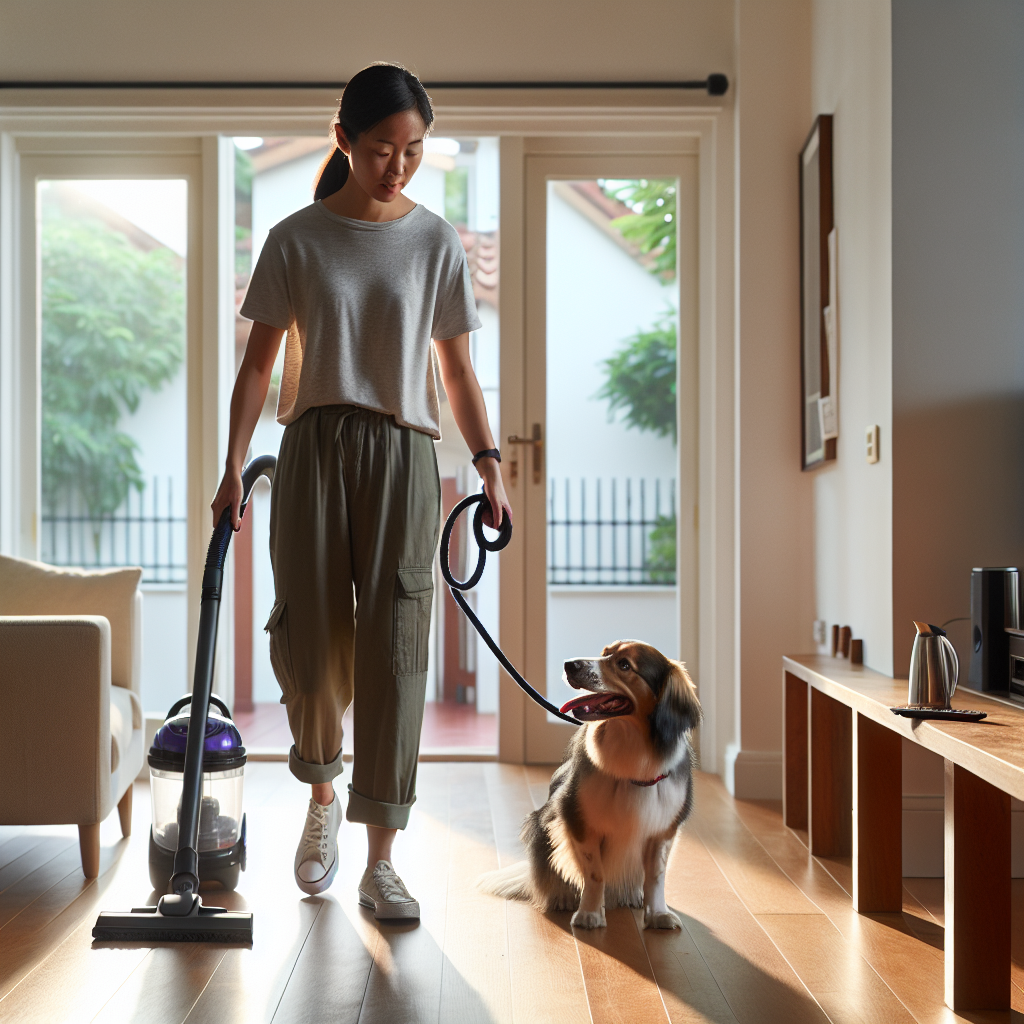
Building Calm Exposure to Everyday Sounds
Managing Dog Behaviour in Open Plan Homes
Open plan living is bright, social, and modern. Yet many families find that it also supercharges excitement and bad habits. If you are managing dog behaviour in open plan homes, you need more than quick fixes. You need a structured plan that creates calm anywhere in the space. At Smart Dog Training, we coach families through a clear, proven system that works in real life. Every programme is delivered by a certified Smart Master Dog Trainer SMDT who follows the Smart Method from first session to final result.
This guide explains how to start managing dog behaviour in open plan homes with a step by step plan. You will learn the core skills, how to set up smart zones, and how to build daily habits that make calm the default. The aim is not to control your dog only when you are watching. It is to create understanding and responsibility that holds in every room.
Why Open Plan Design Changes Dog Behaviour
Open plan spaces invite movement. Dogs can watch everything at once, sprint from room to room, and rehearse habits without a pause. Without walls, sound travels farther and faster. Visitors, food prep, toys, and children all live in the same field of view. That can drive arousal up and self control down.
Managing dog behaviour in open plan homes is about removing chances to fail while you build strong, simple rules. The more clarity you create, the less your dog will default to pacing, jumping, barking, counter surfing, or door rushing. Smart Dog Training sets that clarity from day one.
The Smart Method For Open Plan Living
Smart Dog Training uses the Smart Method across all programmes. It is structured, progressive, and outcome driven. These five pillars apply directly to managing dog behaviour in open plan homes:
- Clarity. Commands and markers are precise. Your dog always knows what earns release and reward.
- Pressure and Release. Fair guidance paired with a clear release builds accountability without conflict.
- Motivation. Thoughtful rewards keep your dog engaged and willing to work.
- Progression. We add distance, duration, and distraction in steps until behaviour holds anywhere.
- Trust. Training grows your bond, which makes calm choices easier for your dog.
Every Smart Master Dog Trainer SMDT delivers these pillars in a way that fits your home, your family, and your goals.
Setting Up Zones Without Walls
When you are managing dog behaviour in open plan homes, zones are your best friend. You do not need walls or gates to do this well. You need simple markers and consistent follow through.
- Pick anchor spots. Choose one mat or bed in the main living area and one in the kitchen. These become rest stations.
- Define no go lines. Use a rug edge or floor seam to mark where your dog should pause at the kitchen or hallway.
- Use a light lead to guide. A short house line attached to a flat collar gives silent influence without a chase.
- Reward calm. Reinforce your dog for resting in the right spot while life moves around them.
By shaping invisible lines, you remove constant micromanaging. Managing dog behaviour in open plan homes becomes much easier when your dog understands simple boundaries.
The Place Command That Anchors Calm
The Place command is the cornerstone for managing dog behaviour in open plan homes. It gives your dog a clear job. Place means go to your mat, lie down, and stay calm until released.
How we teach Place the Smart way:
- Introduce the mat. Lure your dog onto it. Mark yes. Reward. Keep the first reps short and upbeat.
- Add a down. Help your dog settle on the mat. Mark yes. Reward calm breathing and soft posture.
- Name it. Say Place as your dog moves to the mat. Reward heavily on the mat, not off it.
- Build duration. Feed a small treat every few seconds at first. Slowly space out the rewards as your dog relaxes.
- Add distraction. Walk around. Sit and stand. Prepare a snack. Your dog learns that Place holds through life.
Managing dog behaviour in open plan homes gets easier the moment Place becomes a habit. It is how your dog can be in the room without being in the way.
Doorways, Thresholds, and Invisible Lines
Threshold control stops door rushing and hallway sprints. It also lowers arousal. Smart Dog Training uses simple rules that work in any layout.
- Stop before moving. Ask for a Sit and eye contact at each doorway. Release with a clear cue.
- Lead the way. You step first. Your dog follows when invited.
- Respect the line. If your dog breaks, guide back with the lead, reset, and try again.
Managing dog behaviour in open plan homes depends on these small rituals. They create calm before motion and turn chaos into structure.
Calm Kitchen Manners in Open Plan Homes
Kitchens draw dogs with smells and movement. In open plan spaces, the line between lounge and kitchen is blurred. Managing dog behaviour in open plan homes means setting a kitchen boundary your dog understands and respects.
- Define the kitchen line. Use a rug edge or tape as a visual aid at first.
- Place during prep. Send your dog to Place while you cook and serve.
- No counter surfing. Do not leave food within reach. Reward your dog for ignoring dropped crumbs and movement.
- Release to water and bed. Keep routines the same so your dog knows when the job is over.
Structure reduces scavenging and jumping. With clear lines, kitchen time stays safe and calm.
Stop Window Barking and Hallway Sprints
Sentinel barking is common in open plan homes because your dog sees and hears more. Managing dog behaviour in open plan homes requires a plan that redirects energy into calm work.
- Interrupt early. A quiet marker paired with Place stops escalation before it peaks.
- Block the view. Lower blinds to reduce triggers while you train.
- Teach a sound marker. One calm cue means turn away and return to you for reinforcement.
- Add structured walks. Better outlet outside means less patrolling inside.
The goal is not to silence your dog. It is to teach them what to do instead of rehearsing guard duty all day.
Structured Rest and Crate Success in Shared Spaces
Dogs need real rest to behave well. In open plan homes, it is easy for a dog to stay switched on. Managing dog behaviour in open plan homes includes planned down time.
- Use the crate or pen as a bedroom. Make it restful, not a punishment.
- Time the naps. Young dogs need several naps each day. Adults still benefit from a mid day rest.
- Keep a calm pre nap routine. Short lead to crate, soft word, cover if needed, white noise if helpful.
Scheduled rest raises your success rate. It is easier to teach self control when the brain is not tired and frantic.
Leash Skills Indoors for Real Control
Many families only use the lead outside. We flip that. Indoors is where your dog learns to follow with no pulling. Managing dog behaviour in open plan homes improves fast when you use the lead for clarity.
- Fit a flat collar and short lead. Keep it light and calm.
- Teach follow me. Walk slow figure eights around furniture. Reward for soft slack.
- Practice guided Place. Lead to the mat. Pause. Reward. Repeat from different rooms.
- Add small challenges. Walk past toys and the sofa. Reward for staying with you.
These micro sessions turn the whole house into a training field. Your dog learns that your pace and choices matter.
Play and Kids in Open Plan Families
Movement and noise can spike arousal. That is normal. You can still keep play fun and safe. Managing dog behaviour in open plan homes means you call time outs before things tip over.
- Set a play zone. Keep chase games in the garden. Keep indoor play slower and structured.
- Use Place between bursts. Two minutes on the mat resets arousal and mind.
- Teach kids simple rules. Hands off during meals. Do not chase the dog. Ask before petting.
Shorter play with clear breaks beats long chaotic play. Everyone relaxes more, including your dog.
Enrichment That Reduces Noise and Pacing
Dogs need tasks. If you do not provide them, they invent their own. Managing dog behaviour in open plan homes means giving jobs that lead to quiet, not chaos.
- Food work. Stuffed chew toys, scatter feeding in a defined area, and simple puzzles that do not excite.
- Scent games. Find it searches on a mat or in a single room build focus.
- Chewing time. Safe chews ease stress and keep your dog settled near you.
A little planning goes far. Ten minutes of nose work can remove thirty minutes of wandering and whining.
Guest Greetings That Stay Polite
Open plan homes put the front door in full view. That can mean noisy greetings and jumping. Managing dog behaviour in open plan homes needs a greeting script.
- Set the stage. Dog on lead. Guest waits.
- Place first. Send to mat and pay for calm while the door opens.
- Release to greet. Only when your dog is calm. Ask for a Sit to earn petting.
- Return to Place. A short reset keeps arousal from rising.
Repeat this script until your dog runs to the mat when the bell rings. You control the pattern and your dog follows it.
Alone Time Protocols for Open Plan Dogs
Some dogs struggle when alone if they can see the whole space. We make alone time predictable and safe.
- Use a routine. Short lead to crate or bed. Calm good bye word. No fuss.
- Start with micro absences. One to five minutes. Build up at a steady pace.
- Keep returns boring. Return, pause, then release. Reward calm, not drama.
Managing dog behaviour in open plan homes also means managing your patterns. Your routine teaches your dog what to expect.
Progression Plan For Reliable Behaviour
This simple progression helps families start strong. It is built for managing dog behaviour in open plan homes with steady gains.
Week 1 Foundation
- Place introduction in the quietest corner of the living area
- Five micro lead sessions each day for one minute each
- Two planned nap times
- Threshold pause at each doorway
Week 2 Distraction
- Place during light kitchen prep
- Lead work past toys and the sofa
- Guest drill with a family member acting as visitor
- Short alone time reps with a simple chew
Week 3 Duration
- Fifteen minute Place while you eat
- Calm kitchen line during full dinner prep
- Window practice with blinds open then closed
- Longer alone time with a set routine
Week 4 Anywhere
- Place in new spots and rooms
- Visitor greetings with a real guest
- Leash work while kids play quietly
- Generalise all skills across time of day
Progression matters. Managing dog behaviour in open plan homes is not about a single big fix. It is about small steps that add up to big change.
Common Mistakes to Avoid
- Letting your dog rehearse chaos. Stop the sprint before it starts by using Place and the lead.
- Training only when it is quiet. You need practice in the real moments you want to improve.
- Being vague. Your dog needs clear markers and a clear release.
- Skipping rest. Tired brains make poor choices.
- Expecting progress without a plan. Follow the Smart Method and track sessions.
When to Bring in a Smart Master Dog Trainer
If your dog rehearses reactivity, intense guarding, snapping, or cannot settle, bring in an expert. Managing dog behaviour in open plan homes is faster and safer with guided coaching. A certified Smart Master Dog Trainer SMDT will assess your layout, your dog, and your routines. They will build a plan that fits your family and will coach you to follow it with confidence.
Ready to turn your dog’s behaviour around? Book a Free Assessment and connect with a certified Smart Master Dog Trainer available across the UK.
Real Life Scenarios and How to Respond
Kids Running Through The Lounge
Send your dog to Place before the game starts. Reward calm for the first minute. Release for a short sniff break. Repeat. Managing dog behaviour in open plan homes means you act before arousal spikes.
Cooking While Hosting Friends
Place at the kitchen line. Practice a few resets. If excitement rises, guide to the crate for a short rest with a chew. Return to Place when calm.
Working From Home
Set two Place stations. One near your desk and one across the room. Rotate every hour. Add a short lead walk to the garden at set breaks.
Tools We Use And Why
Smart Dog Training keeps tools simple because clarity beats clutter. For managing dog behaviour in open plan homes, we often use:
- Flat collar and short house line for quiet guidance
- Elevated cot or mat for a clear Place target
- Crate or pen for deep rest and safety
- Simple food rewards and safe chews for motivation
We select tools to match your dog and your goals. The plan is fair, consistent, and easy to keep up.
How Owners Communicate The Smart Way
Handling and timing matter. Managing dog behaviour in open plan homes works when your cues are clean.
- Say less. Use short words you can repeat the same each time.
- Mark the moment. A single yes or a click tells your dog they got it right.
- Release with purpose. A clear free word ends the job and avoids grey areas.
- Follow through. If your dog breaks Place, guide back, reset, and reward the next good rep.
Keeping Progress When Life Gets Busy
Even when schedules change, you can protect your gains. Managing dog behaviour in open plan homes is about routine more than time.
- Run micro sessions. One minute is enough to keep skills sharp.
- Anchor events. Place during meals, doorbell, and cooking. These moments happen daily.
- Plan rest. Put naps on the calendar like a meeting.
How Smart Dog Training Supports Families
Our programmes are built for real homes. We coach in your space, set up your zones, and practice in the moments that matter. We mentor you to lead with calm and clarity. When managing dog behaviour in open plan homes, that coaching makes the difference between knowing what to do and getting it done.
FAQs
What is the fastest way to start managing dog behaviour in open plan homes?
Start with Place in a quiet corner and add a short house line. Practice three one minute sessions today. Use a release word. You will see calmer behaviour in the first week.
Do I need gates to succeed in an open plan home?
No. We create invisible lines with Place, threshold rituals, and a light lead. Managing dog behaviour in open plan homes relies on clarity, not barriers.
My dog barks at everything outside. What should I do first?
Interrupt early, send to Place, and pay for a quiet turn away. Lower the blinds while you train. Add more structured walks to reduce indoor patrolling.
Can I train more than one dog at the same time?
Yes, but start one at a time. Teach Place to each dog. Then practice short paired Place sessions. Add greeting and kitchen drills once both hold Place well.
How long will it take to fix counter surfing and door rushing?
Most families see big changes in two to four weeks with daily practice. It depends on consistency and follow through. Managing dog behaviour in open plan homes is a progression, not a single event.
What if my dog gets frustrated on Place?
Shorten the time, pay more often, and make the next rep easier. Guide back softly if they break. End on a win with a calm release.
Should I crate my adult dog in an open plan home?
Many adult dogs benefit from a daily rest period in the crate or pen. It prevents over tired behaviour and supports better choices later.
Conclusion
Open plan living can work beautifully with dogs. The key is structure. By using Place, threshold rituals, planned rest, and simple lead skills, you create calm that lasts. Smart Dog Training applies the Smart Method to everyday life so your dog knows what to do in every room, with every distraction. If you are managing dog behaviour in open plan homes, start today with short sessions and clear follow through. Then build in steady steps until calm becomes the norm.
Your dog deserves training that truly works. With certified Smart Master Dog Trainers SMDTs nationwide, you will get proven results backed by the UK’s most trusted dog training network. Find a Trainer Near You
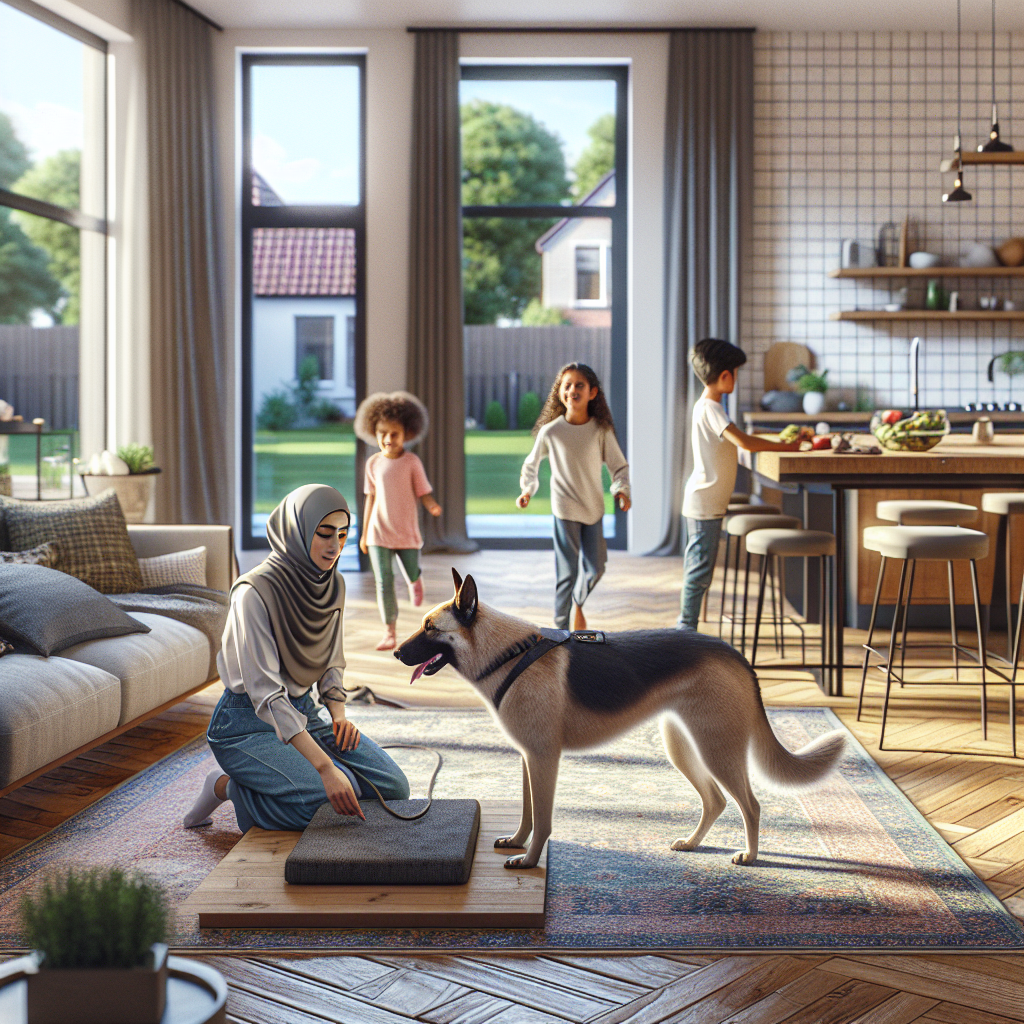
Managing Dog Behaviour in Open Plan Homes
Why Repetition Matters and How to Keep It Calm
Repetition is how dogs build habits, yet too much or the wrong kind can tip a session into stress. The answer is repetition without frustration. When you repeat skills with clarity, fair guidance, and timely rewards, your dog learns faster and stays engaged. At Smart Dog Training, we build every programme around structured, calm practice that produces reliable behaviour in real life.
In this guide, I will show you how repetition without frustration works inside the Smart Method. You will learn how to plan sessions, set the right number of reps, use markers and rewards, and add challenge without conflict. If you want support from a certified Smart Master Dog Trainer, our team can shape a plan that fits your home and lifestyle.
What Repetition Without Frustration Really Means
Repetition without frustration is intentional practice that keeps a dog under threshold while repeating the same skill many times. You protect your dog from confusion, you set fair expectations, and you reward with purpose. The result is calm focus, a confident learner, and behaviour that sticks.
Smart Dog Training defines repetition without frustration with three rules. First, every rep is clear and short. Second, feedback is fast and fair so the dog knows when they got it right. Third, you adjust difficulty only when the dog shows readiness. These rules turn practice into progress.
The Smart Method That Makes Repetition Work
The Smart Method is our proprietary training system. It is structured, progressive, and outcome driven. It ensures repetition without frustration by aligning five pillars in every session.
Clarity
Clear commands and markers remove guesswork. You say the cue once, wait, then mark the instant the dog meets criteria. With clarity, repetition without frustration feels simple and predictable to the dog.
Pressure and Release
We use fair guidance that switches off the moment the dog makes a good choice. Release paired with reward builds accountability without conflict. This keeps repetition without frustration steady and respectful.
Motivation
Rewards create engagement and positive emotion. Food, toys, and praise are placed with intent so the dog wants to repeat the behaviour. Motivation is the engine that powers repetition without frustration.
Progression
We add distraction, duration, and distance step by step. Progression ensures your dog meets the right level of challenge. Controlled progress is how repetition without frustration becomes reliable anywhere.
Trust
Training that feels safe deepens the bond. When the dog trusts the process, they stay calm through many reps. Trust is the glue that holds repetition without frustration together.
The Learning Basics Behind Calm Repetition
Dogs learn by association and consequence. A clear cue predicts an action, a marker predicts a reward, and the right placement makes that action worth repeating. When you repeat this loop many times with low stress, the behaviour becomes a habit. That is the core of repetition without frustration.
You can picture each rep as a simple cycle. Cue, behaviour, marker, reward, reset. If any part is messy, confusion grows. If the cycle stays clear and short, repetition without frustration takes root and speed of learning increases.
Designing Sessions That Use Repetition Without Frustration
Good sessions are short, focused, and repeat clean reps with small breaks. Here is how Smart Dog Training structures them so you get repetition without frustration from the start.
- Pick one to two skills only. More than that invites confusion.
- Set a target of five to eight clean reps per mini set.
- Take a short reset walk or play for 30 to 60 seconds between sets.
- End sessions while your dog still wants more.
Keep the first rep as easy as possible, then make small increases. This is how repetition without frustration stays consistent across the session.
How Long Should a Session Last
For young or green dogs, eight to twelve minutes is plenty. For trained dogs, fifteen to twenty minutes works well. You can run two or three micro sessions in a day. Spacing sessions with rest protects repetition without frustration and prevents mental fatigue.
The Structure of a Clean Rep
Each repetition follows the same flow. Say the cue once. Pause. Allow the behaviour. Mark at the exact moment the dog meets criteria. Deliver the reward. Reset to your starting point. That sequence keeps repetition without frustration and avoids nagging or confusion.
Patterns, Rituals, and Resets
Dogs love patterns. Use a start routine so your dog knows training has begun. Use a simple reset walk between reps. End with a release word so your dog knows they can relax. These small rituals turn repetition without frustration into a calm rhythm your dog understands.
Ready to turn your dog’s behaviour around? Book a Free Assessment and connect with a certified Smart Master Dog Trainer - available across the UK.
Using Rewards to Fuel Repetition Without Frustration
Rewards are the fuel for engagement. Smart Dog Training uses food, toys, and praise with purpose so that repetition without frustration stays strong.
- Food rewards are fast and precise, perfect for high rep drills.
- Toys add energy for dogs who love to chase or tug.
- Praise and touch maintain a calm tone when arousal is high.
Place the reward where you want the dog to be. If you want a sit that holds, feed in position. If you want a fast recall, throw the reward behind you so the dog runs past and anchors to you. Precise placement keeps repetition without frustration and shapes the exact picture you want.
Variable Reinforcement That Still Feels Clear
As your dog improves, you can vary reward frequency. Mark every correct rep, then sometimes give a top reward, sometimes give a smaller one. The marker always promises something, so confidence stays high. This approach keeps repetition without frustration while building resilience and persistence.
Fair Pressure and Release That Prevents Conflict
Pressure and release done the Smart way adds clarity and accountability. Guidance is steady and mild, then switches off the instant the dog makes a good choice. The release itself becomes a reward. When used with markers and food, this pairing keeps repetition without frustration and builds reliable behaviour under mild stress.
This is not about force. It is about communication that is black and white, and about timing that respects the dog. A certified Smart Master Dog Trainer will show you how to blend pressure and release with rewards so your dog understands and remains confident.
Reading Arousal and Stress So You Can Adjust
Your dog will tell you when the work is too easy or too hard. Watch for signs. If you see scanning, slow responses, lip licking, paw lifts, loss of appetite for food, or a sudden drop in focus, your dog is telling you the reps are too much. Lower criteria or increase reward value. That adjustment is how you keep repetition without frustration.
If your dog is bored, you can add a tiny challenge, a small distraction, or a change in reward placement. When you respond to what you see, you protect trust and maintain repetition without frustration.
Proofing in Real Life With Repetition Without Frustration
Once a skill works at home, you need to make it reliable outside. We call this proofing. You do it with the same clean rep cycle, then add distraction, duration, and distance one step at a time. This ladder of progress gives you repetition without frustration in parks, on pavements, and around other dogs.
Distraction, Duration, Distance
- Distraction. Begin with low level sounds or mild movement, then grow exposure slowly.
- Duration. Extend the hold time in tiny steps, mark often, and feed in position.
- Distance. Increase the space between you and the dog only when the first two are solid.
Smart Dog Training maps these steps to your dog and lifestyle so your proofing stays calm and consistent.
Common Mistakes That Create Frustration
- Stacking too many skills in one session. This blurs clarity and breaks repetition without frustration.
- Overtalking and repeating cues. Say the cue once and wait, then help or reset.
- Late markers. If you mark late, the dog does not link action to reward.
- Big jumps in difficulty. Change one thing at a time.
- Training past fatigue. End while your dog still wants more.
Smart Dog Training removes these errors with precise coaching, real time feedback, and a plan that matches your dog.
A Sample Week Built on Repetition Without Frustration
Use this simple plan to keep structure and progress steady across seven days. It is an example of repetition without frustration done the Smart way.
- Day 1 Home focus. Sit and place, five sets of five clean reps. Low distraction, high reward.
- Day 2 Loose lead skills. Three micro walks of eight minutes. Reward every correct position change.
- Day 3 Recall games. Ten short recalls in the garden. Vary reward placement to build speed.
- Day 4 Rest and review. Two five minute sessions of obedience at home. Short and sweet.
- Day 5 Proofing in a quiet park. Add mild distractions. Keep criteria low and reward often.
- Day 6 Add duration to place. Build from five seconds to twenty seconds across sets.
- Day 7 Light day. Play based training and one skills set to keep motivation high.
Across the week, keep your sessions tidy, end early, and log progress. This pattern protects repetition without frustration while moving toward real life goals.
Case Study A Reactive Dog Learns to Settle
A young herding mix came to Smart Dog Training for reactivity on walks. He barked at dogs and people, and the owners felt stuck. We built a plan anchored in repetition without frustration. We taught a strong place and a reliable heel with clear markers and reward placement. We used pressure and release to guide decisions at a distance from triggers.
Week by week, we layered distraction, then duration, then distance. Reps were short and predictable, with resets and play between sets. By week six, the dog could walk past moving triggers at ten metres with focus. By week ten, the dog held a calm down stay at a cafe for fifteen minutes. The owners kept the same structure, and the dog stayed relaxed. That is repetition without frustration put to work.
Frequently Asked Questions
What is the fastest way to get repetition without frustration
Keep reps short and clear. Use one cue, one behaviour, one marker, and a quick reward, then reset. End sessions early. When you keep the cycle simple, you get repetition without frustration and steady progress.
How many repetitions should I do in one session
Start with five to eight clean reps per set and two to three sets per skill. If your dog stays keen, you can add a set. If engagement dips, stop. This balance gives you repetition without frustration.
What rewards work best for calm repetition
Use small soft food for speed and precision. Add toy play for dogs who love movement. Mix in praise to keep arousal in check. Place rewards where you want the dog to be. That keeps repetition without frustration and a clear picture.
How do I add challenge without causing stress
Change only one thing at a time. Add a mild distraction or a few seconds of duration or a small step of distance. If the dog struggles, drop back. This step wise approach preserves repetition without frustration.
Can I use pressure and release with rewards
Yes. Smart Dog Training blends fair guidance with markers and rewards so dogs learn what turns pressure off. This pairing builds clarity and trust, and it protects repetition without frustration.
What if my dog shuts down or gets excited
Lower criteria and raise reward value. Shorten sets, increase your rate of reinforcement, and add resets or play. When you respond to your dog, you safeguard repetition without frustration.
How does Smart Dog Training support owners day to day
We coach you through session design, rep timing, reward placement, and proofing steps. Your trainer maps progress to your goals so you keep repetition without frustration from home to public spaces.
Who will I work with during training
You will work with a certified Smart Master Dog Trainer who follows the Smart Method. Our SMDTs deliver consistent results and maintain repetition without frustration across all programmes.
Conclusion Build Habits That Last With Calm Practice
Great training is not about doing more. It is about doing the right thing again and again without stress. When you plan sessions with clarity, fair guidance, and smart rewards, you get repetition without frustration and behaviour that lasts. If you want a plan tailored to your dog, our team is ready to help.
Your dog deserves training that truly works. With certified Smart Master Dog Trainers (SMDTs) nationwide, you'll get proven results backed by the UK's most trusted dog training network. Find a Trainer Near You
Repetition Without Frustration in Dog Training
Training Low Arousal Heel
Training low arousal heel is about more than walking without pulling. It creates calm focus beside your leg so your dog moves with you, not against you. At Smart Dog Training, this skill sits at the heart of our programmes because it brings order to daily life. With the Smart Method and guidance from a Smart Master Dog Trainer, you can build a reliable heel that holds up anywhere.
What Low Arousal Heel Means
Low arousal heel is a steady, calm walk beside your leg with a soft lead and quiet mind. Your dog tracks your pace, changes direction with you, and sits when you stop. There is no frantic scanning, barking, lunging, or racing ahead. Training low arousal heel teaches your dog that stillness, patience, and focus are the path to movement and reward.
Why Arousal Control Matters on Lead
High arousal makes thinking hard. That is when you see pulling, jumping, spinning, and reactivity. Training low arousal heel flips the script. It helps your dog regulate energy and learn that calm earns progress. The result is easier walks, safer handling, and a more confident dog who can cope in busy places.
The Smart Method Applied to Heel
Every Smart programme follows the Smart Method. Training low arousal heel is built through five pillars that turn a chaotic walk into smooth teamwork.
Clarity
Your dog must know exactly where heel is, how to find it, and how to keep it. We define heel position beside your left or right leg and mark correct placement with precision. Clear markers and consistent cues make training low arousal heel simple to understand.
Pressure and Release
Guidance is fair and easy to read. Light lead pressure or body pressure shows your dog how to adjust. The instant your dog finds heel, pressure releases and reward follows. This pressure and release loop builds accountability without conflict and supports training low arousal heel in a way dogs find natural.
Motivation
We reinforce calm choices with food, toys used carefully, praise, and access to forward motion. Rewards are structured to avoid over arousal. With Smart Dog Training, motivation builds willing behaviour and keeps training low arousal heel enjoyable and sustainable.
Progression
We layer skills step by step. First position. Then one step. Then a turn. Then duration and distractions. The Smart progression ensures training low arousal heel grows from quiet rooms to busy streets without falling apart.
Trust
Clear rules, kind guidance, and consistent follow through build trust. Your dog learns that you are worth following. Training low arousal heel strengthens your bond and gives your dog confidence in you.
Gear and Setup That Support Calm
You do not need complex equipment. Use a well fitted flat collar or harness, a standard training lead, and a few soft treats. Keep the environment simple at first. A quiet room or garden sets the tone for training low arousal heel from the start.
- Flat collar or Y shaped harness that does not restrict shoulders
- Standard training lead around 1.8 to 2 metres
- Treat pouch with calm food rewards
- Optional long line for early outdoor sessions
Choose rewards that do not spike energy. Use small, soft food pieces that your dog can swallow fast. Save play for later stages once your dog can hold low arousal heel without escalating.
Foundation Skills Before Heel
Training low arousal heel is easier when your dog understands a few basics:
- Marker words for yes and no reward moments
- Calm sit and down with a brief stay
- Name response and eye contact for focus
- Lead pressure and release in place
These foundations keep your dog thinking and reduce frustration. They make the first steps of training low arousal heel smooth and predictable.
First Steps Indoors
Start in a low distraction space. We will teach position, then movement.
- Find Heel Position Stand still with your dog beside your chosen leg. Lure the head into alignment with your hip. The moment your dog is straight and calm, mark and reward. Reset. Repeat until your dog offers the position without a lure.
- Build Stillness Hold heel position for two or three seconds before marking. If you see fidgeting or scanning, wait for stillness. Reward low muscle tone and soft eyes. Training low arousal heel starts with this quiet mindset.
- Add One Step Take a single slow step forward. If your dog stays beside your leg, mark and reward. If the dog forges ahead, step back to reset and try again. We do not pay for frantic movement.
Keep sessions short. Five minutes, two or three times per day, is enough. End on a win so training low arousal heel stays positive and precise.
Adding Turns and Pace Changes
Real life is not a straight line. Teach your dog to read your hip and follow your path.
- Inside Turns Turn toward your dog so the dog must slow down and tuck in. Mark and reward the moment the dog stays in position.
- Outside Turns Turn away so the dog must step up and stay aligned. Reinforce when the dog keeps shoulder to hip.
- Pace Changes Walk slow for three steps, normal for three, then slow again. Low arousal heel means the dog matches your pace without rushing.
These patterns teach elasticity. Training low arousal heel becomes a dance of small adjustments instead of constant correction.
Building Duration and Focus
Once your dog can hold position for a few steps, stretch it.
- Duration Ladder Walk 5 metres, reward. Then 8 metres, reward. Then 12 metres. If focus drops, shorten and build again.
- Automatic Sit Stop walking. Wait. Mark the moment your dog sits calmly at your side. Reward. This reduces fidgeting at stops and supports low arousal heel in busy settings.
- Check Ins Sprinkle planned check ins every 10 to 15 steps. Your dog glances up, you mark and pay. These small wins keep training low arousal heel stable under pressure.
Proofing Against Distractions
Distractions are where most teams falter. We add them in a controlled way so training low arousal heel stays intact.
- Distance First Start with distractions far away. Reward calm heel while the distractions remain at a safe distance.
- Movement Second Add slow moving distractions like a person walking past. If arousal rises, increase distance and reset.
- Intensity Last Only add exciting triggers once your dog has many wins at lower levels. Keep rewards calm and fast.
Midway is a great time to work with a pro. Ready to turn your dog’s behaviour around? Book a Free Assessment and connect with a certified Smart Master Dog Trainer - available across the UK.
Taking It Outdoors
Move from the kitchen to the drive, then a quiet street, then a busier path. Training low arousal heel in new places is not a test. It is a fresh lesson. Lower the criteria and rebuild wins.
- Use a longer lead at first to avoid tension spikes
- Start sessions away from doorways and cars
- Keep sessions short, then leave before arousal rises
Pair each new place with easy reps. Your dog should feel, That was simple. I can do that. This is how training low arousal heel becomes real life behaviour.
Handler Skills That Make the Difference
Your dog mirrors you. Calm handlers produce calm dogs.
- Lead Handling Keep a light J shape in the lead. Avoid constant pressure. Use small pulses and release as the dog finds heel.
- Body Language Point your hip where you want to go. Use soft shoulders and smooth turns.
- Voice and Markers Speak less. Mark with precision. Praise should be warm, not wild, to support low arousal heel.
- Pacing Walk at a pace your dog can match. Too fast invites pulling. Too slow can cause drifting.
Rewards That Do Not Overheat Your Dog
Training low arousal heel means balancing motivation with calm.
- Use food more than play during early phases
- Deliver rewards at your leg to reinforce position
- Pay often at first, then thin the schedule as reliability grows
- End with a short sniff break so your dog can decompress
When you do use toys, keep play short and structured. One or two calm tugs, then a clean out and back to heel. If energy spikes, switch to food.
Fixing Common Heel Problems
Hiccups happen. Here is how Smart Dog Training resolves them within the Smart Method.
- Forging Ahead Slow down. Use inside turns and reward for pulling back toward your hip. If the dog hits the end of the lead, stop and reset. Forward motion is earned by heel, not pulling.
- Lagging Use outside turns and tiny pace increases. Reward as the dog steps up into alignment.
- Cutting In Front Reinforce position with food delivered behind your leg. Add slow inside turns to encourage rear end awareness.
- Looking Everywhere Increase distance from triggers and rehearse check ins. Mark any calm eye contact during heel.
- Reacting to Dogs or People Step out of the trigger path, lower criteria, and rebuild focus. Use the pressure and release loop and reward calm choices fast.
What to Do When Arousal Spikes
Spikes will happen. Training low arousal heel prepares you to act.
- Pause and let your dog breathe
- Increase distance from the trigger
- Reset with a short sit or down
- Walk a small circle to re engage
- Reward the first sign of calm focus
If arousal remains high, end the session on a small win and try again later. Consistency beats force. This is how Smart Dog Training keeps progress steady and kind.
Progression Plan for Two Weeks
Use this sample plan to pace your training. Adjust based on your dog’s wins.
- Days 1 to 3 Heel position indoors. One to three steps. Stillness before each reward. Training low arousal heel is the focus over distance.
- Days 4 to 6 Add inside and outside turns. Build to 10 to 15 steps with check ins.
- Days 7 to 9 Move to the garden or drive. Short sessions. Reinforce calm around mild distractions.
- Days 10 to 12 Quiet street. Introduce automatic sit at stops. Thin rewards to every 6 to 10 steps if focus holds.
- Days 13 to 14 Busier path during off peak hours. Practice distance from triggers. Keep calm rewards and end on success.
By the end of this plan, most teams see smoother walks. If you need extra help, our SMDT certified trainers can guide each step with personal coaching.
Keeping Everyone Consistent at Home
Dogs thrive on consistency. Share the plan with the whole household.
- Use the same heel cue and markers
- Walk at the same side and pace
- Do not allow pulling for anyone
- Schedule short daily sessions so training low arousal heel stays sharp
Consistency across people and places turns lessons into lived behaviour.
When to Work With a Professional
If your dog is strong, easily overstimulated, or reactive, do not wait. A Smart Master Dog Trainer will assess arousal triggers, set a customised plan, and coach your lead handling. You will progress faster and keep setbacks small. With Smart Dog Training, you also gain access to structured programmes that embed training low arousal heel into a complete obedience path.
Ready to get personalised help with training low arousal heel and other skills? Book a Free Assessment to map your plan with a local SMDT.
Real Life Targets to Measure Progress
Clear goals help you know you are on track.
- Lead stays loose for 90 percent of the walk
- Automatic sit at every stop without fuss
- Calm heel past a person at two metres
- Calm heel past a dog at five metres
- Recovery from a surprise startle within five seconds
These targets show that training low arousal heel is not only learned but reliable in the world you live in.
Common Mistakes to Avoid
- Paying Movement, Not Mindset Do not reward speed or frenzy. Reward quiet alignment.
- Too Much Talk Extra chatter can excite your dog. Keep markers crisp and praise warm but soft.
- Jumping to Busy Environments Proof step by step. Lower criteria in new places.
- Inconsistent Rules If heel matters on weekdays, it matters on weekends too.
- Overusing Tight Leads Constant pressure creates resistance. Use pressure and release with timing.
FAQs on Training Low Arousal Heel
How long does training low arousal heel take?
Most teams see change in two weeks of daily work. Calm, reliable heel in busy places can take four to eight weeks. With Smart Dog Training structure and coaching, you will move faster with fewer setbacks.
Can I teach training low arousal heel if my dog is very energetic?
Yes. Energy is not the issue. Arousal control is. Smart Dog Training channels energy through clarity, pressure and release, and motivation so your dog learns to settle and follow even when excited.
What rewards work best for training low arousal heel?
Use soft food rewards that do not spike energy. Pay at your leg to reinforce position. Add brief, structured play only when your dog can stay calm.
Should I use a special collar for low arousal heel?
Most dogs do well with a well fitted flat collar or a comfortable harness. The method and your timing matter more than the tool. Your Smart trainer will choose gear that supports clarity and calm.
My dog pulls to sniff. How does training low arousal heel handle that?
Sniff time becomes a reward you control. Heel calmly for a set distance, then release to sniff. Over time your dog learns that heel earns access to the environment.
What if my dog reacts to other dogs?
Work under threshold with more distance and slower progressions. A Smart Master Dog Trainer will set safe setups and coach recovery skills so training low arousal heel can hold around triggers.
Conclusion
Training low arousal heel turns every walk into practice for calm, connected behaviour. With the Smart Method, you create clarity, guide with pressure and release, reward the right mindset, and layer difficulty with care. That is how heel becomes a habit that sticks.
Your dog deserves training that truly works. With certified Smart Master Dog Trainers (SMDTs) nationwide, you'll get proven results backed by the UK's most trusted dog training network. Find a Trainer Near You or Book a Free Assessment to start today.
Training Low Arousal Heel
Understanding When to Step Back in Dog Training
Knowing when to step back in dog training is a mark of real skill. A smart reset stops confusion, protects confidence, and keeps progress moving. At Smart Dog Training, stepping back is not failure. It is a precise tool within the Smart Method that keeps learning clear and calm. If you have hit a training plateau, seen more mistakes, or feel tension building, stepping back may be exactly what your plan needs.
As a Smart Master Dog Trainer, I teach families to spot early signs and apply simple resets before habits slip. Every Smart programme follows the same five pillars: Clarity, Pressure and Release, Motivation, Progression, and Trust. Stepping back is built into Progression. We lower criteria with purpose, get clean reps, then advance again with confidence.
This guide shows you when to step back in dog training, how to do it the Smart way, and how to measure when you are ready to push forward again. Whether you are building a reliable recall, calm loose lead, or addressing reactivity, the same structure applies.
The Smart Method at a Glance
Smart Dog Training delivers a structured, outcome driven system that works in real life. The Smart Method layers skills so your dog learns with clarity and accountability, without conflict. Here is how each pillar relates to stepping back:
- Clarity: If cues, markers, or positions get fuzzy, we step back to restore clean communication.
- Pressure and Release: We guide fairly, then release and reward at the right moment. If pressure rises without release, we reset criteria so the dog feels successful again.
- Motivation: We use rewards to build drive and a positive emotional state. If motivation drops, we reduce difficulty and boost reward value.
- Progression: We add duration, distraction, and distance in small steps. If any one factor spools too fast, we dial it back and rebuild.
- Trust: Consistent success grows confidence. When trust wobbles, quick step backs protect the relationship.
Why Stepping Back Speeds Progress
It feels counterintuitive, yet stepping back in your training plan often gets you to your goal faster. Dogs learn best when the reinforcement rate is high and feedback is crystal clear. Short, easy wins reduce stress and help the brain retain patterns. When you see regression in training, a timely reset prevents rehearsing errors. That saves you weeks of frustration and strengthens reliability.
Signs Your Dog Needs a Reset
Spot the signs early and you will know exactly when to step back in dog training. Look for the following patterns:
More Mistakes and Fewer Wins
If your reinforcement rate drops under about 8 to 10 rewards per minute in early stages, or below about 80 percent success in later stages, your criteria are too high. The fix is to lower difficulty so you can mark more correct choices, more often.
Slower Responses and Confusion
Delays in sits, downs, recalls, or heel positions often mean the picture has changed. Perhaps you added distance and distraction together. Step back by changing only one factor at a time.
Stress Signals and Loss of Motivation
Yawning, lip licking, scanning, sniffing, or refusal to take food can signal stress. When this shows up, reduce the challenge, simplify the task, and use a higher value reward until your dog reengages.
Environmental Overwhelm
New places, new dogs, or sudden noises can swamp focus. If your dog cannot hear the cue, you are past the edge. Move to a calmer spot, shorten duration, and rebuild engagement.
Common Reasons Training Stalls
When you understand what caused the wobble, you can step back with purpose, then progress with confidence.
Criteria Jumps Too Fast
Adding duration, distance, and distraction all at once is the classic mistake. Choose one, keep the others easy, and step forward in small layers.
Missing Clarity in Markers
If your marker timing slips, the picture blurs. Refresh your mark and reward routine so your dog knows exactly what earned reinforcement.
Too Little Motivation
Low value rewards or long gaps between paydays drain effort. When energy dips, step back to easier reps and pay generously to restore drive.
Pressure Without Fair Release
Guidance must be paired with a clear release and reward. If pressure rises and the dog cannot find the right answer, reset to an easier version so the release comes quickly and cleanly.
Lack of Generalisation
Behaviours learned in the lounge do not instantly transfer to the park. Step back to simple reps in each new location, then layer distractions slowly.
How to Step Back in Your Training Plan the Smart Way
When to step back in dog training is only half the story. How you do it matters. Use these Smart protocols so your reset builds momentum.
Reduce One Dimension at a Time
Training has three core dimensions: distance, duration, and distraction. When things wobble, reduce just one. For example, keep the same distance and environment, but cut duration in half. This keeps learning tidy and avoids confusion.
Return to the Last Clean Rep
Think of your clean rep point as the last moment everything felt easy. Go back there, collect five to ten perfect reps, then step forward one notch. This prevents rehearsing errors.
Shorten Sessions and Raise Your Win Rate
Use micro sessions of one to three minutes. End while you are ahead. High success builds confidence and accelerates progression.
Refresh Markers and Reward Delivery
Stand tall, breathe, and rebuild your mechanics. Mark the instant the behaviour meets criteria, then deliver the reward where you want the dog to be. If you want a tight heel, pay at your leg. If you want a fast recall, pay near you after the collar touch.
Rebuild Trust Through Calm Structure
Swap complex drills for simple place work, engagement games, and decompression walks. Trust grows when expectations are clear, pressure is fair, and the path to reinforcement makes sense.
Step Back Frameworks That Work
Smart Dog Training uses simple frameworks so families always know when to step back in dog training and how to climb forward again.
The 3D Ladder
Break every behaviour into distance, duration, and distraction. Change one step at a time. When you add distraction, drop duration. When you add distance, drop distraction. Climb steadily, one rung per session.
The Five Clean Reps Rule
Progress only after five clean, easy, and quick repetitions. If you cannot get five, step back until you can. This keeps standards consistent.
The 80 Percent Success Metric
Hold at each level until you achieve at least 8 successes out of 10 tries. If you dip below 80 percent, reduce criteria. This protects confidence and keeps learning sticky.
The Two Session Reset
When things feel off, run two short sessions at a level you know is easy. End on a win, then reassess. Often this is enough to restore rhythm.
Real World Examples From Smart Programmes
Puppy Loose Lead Foundations
Problem: A puppy walks beautifully indoors but pulls outside. The handler wonders when to step back in dog training because the lead work seems to fall apart at the door.
Smart Reset: Move to the driveway or a quiet path. Keep duration to 15 to 30 seconds, mark every two to three steps of nice position, and pay at your leg. If traffic increases, retreat a few metres, reset, and collect clean reps. After five clean reps, increase duration by five seconds. Progress only when success stays at or above 80 percent.
Recall Around Wildlife
Problem: The dog recalls in the garden but ignores the cue near birds and small mammals. The owner asks when to step back in dog training to avoid shouting and chasing.
Smart Reset: Use a long line for safety. Begin at a distance where the dog notices wildlife but can still turn to you. Cue once, mark the head turn, then reward near you. If the dog locks on, increase distance and lower distraction by moving to a quieter area. Once you have five clean recalls, edge closer by a few steps or increase distraction slightly, never both at once.
Reactivity Near Home
Problem: A dog rehearses barking at passersby. The family tried to hold duration on place while the world walks by, but the dog explodes after a minute.
Smart Reset: Reduce duration to five to ten seconds on place, then release to a reward in the quietest window. Use visual barriers to lower distraction. Build back up by adding seconds slowly. Mark calm, pay generously, and keep the reinforcement rate high. If arousal spikes, step back to the last calm level and collect clean reps before trying again.
Tools That Support a Confident Step Back
Smart Dog Training equips families with simple tools that make resets easy and effective.
Training Journal and Criteria Tracker
Write down your criteria before you start. Note distance, duration, distraction, and the planned reward. After the session, record success rate and any stress signals. This keeps decisions objective and shows exactly when to step back in dog training.
Reinforcement Menu and Value Ladder
List three to five food rewards and three play options from low to high value. When difficulty increases, step up reward value. If motivation fades, step back the task and pay better. Balance both levers for steady progress.
Long Lines and Place Boards
Safety breeds confidence. Long lines prevent rehearsal of errors during recall work. Place boards give a clear target for stays, building clarity and clean positions. If the picture blurs, return to these tools and rebuild.
Measuring Progress After You Step Back
Stepping back is only complete when you know it worked. Here is how to measure it.
What Reliable Looks Like
Reliable behaviour is calm, quick, and consistent across locations. Your dog responds on the first cue, holds position as asked, and offers engagement between reps. If this describes your sessions, keep moving forward.
When to Progress Again
Progress when you have five clean reps at your current level, an 80 percent success rate over a full session, and your dog shows eager focus. Increase only one variable. If success dips, step back and repeat the process.
Maintaining Momentum Across Weeks
Alternate build days and easy days. Sprinkle short reset sessions even when things are going well. This proactive approach prevents plateaus and keeps morale high for both of you.
Ready to turn your dog’s behaviour around? Book a Free Assessment and connect with a certified Smart Master Dog Trainer, available across the UK.
Safety First and When to Call a Professional
There are moments when the right answer is not just when to step back in dog training, but when to bring in expert help.
Safety Concerns and Bite Risk
If your dog snaps, bites, guards, or shows escalating reactivity, do not push criteria on your own. Step back to management, avoid triggers, and contact a Smart Master Dog Trainer for a tailored behaviour programme.
Persistent Regression Despite Resets
If you apply the frameworks above for two weeks and still see regression in training, you likely need a fresh set of eyes. Structured coaching will refine mechanics, criteria, and environment.
Tailored Plans and Mentorship
Smart Dog Training provides in home programmes, structured classes, and custom behaviour plans. Your trainer will assess your dog, map criteria across the 3D ladder, and coach you through each stage. That guidance turns step backs into fast breakthroughs.
FAQs
How do I know when to step back in dog training versus repeating the same level?
Use the 80 percent rule. If success drops below 8 out of 10 reps, step back one notch. If you are consistently at or above 80 percent but responses feel sticky, repeat the same level for one or two micro sessions to build fluency.
Should I change rewards when I step back?
Often yes. Pair lower criteria with a higher reinforcement rate. If motivation is low, also increase reward value. When behaviour becomes crisp again, you can vary rewards without losing drive.
How long should a reset last?
Most resets are brief. One to two short sessions, 1 to 3 minutes each, is often enough. For bigger issues, you may run a lighter week with simple reps, then rebuild.
Can I step back and still train in busy places?
Yes, by adjusting only one dimension. In a busy place, reduce distance and duration until your dog can succeed. If the environment is overwhelming, relocate to a calmer spot first.
What if my dog looks bored when I step back?
Make it fun. Increase reinforcement rate, mix in play, and keep sessions short. Boredom usually signals criteria are too easy for too long. Once you have clean reps, progress again.
Is stepping back admitting failure?
No. In the Smart Method, stepping back is strategic. It protects confidence, keeps learning clean, and accelerates progress. The best trainers step back early and often.
Will stepping back ruin my progress with recall or heel?
It does the opposite. By rehearsing clean, easy reps, you strengthen the pattern and make it more reliable under pressure later.
When should I call a Smart trainer?
If safety is a concern, if stress signals increase, or if resets do not improve success within two weeks, contact us. Professional coaching turns scattered practice into a clear plan that works.
Conclusion
The moment you wonder when to step back in dog training is the moment to act. Step back by reducing one dimension, return to your last clean rep, raise the reinforcement rate, and build trust through calm structure. Use the Smart frameworks to measure success and know exactly when to progress again. With Smart Dog Training, step backs are not setbacks. They are how you reach real world reliability faster, with a dog that is calm, confident, and eager to work.
Your dog deserves training that truly works. With certified Smart Master Dog Trainers, SMDTs, nationwide, you will get proven results backed by the UK’s most trusted dog training network. Find a Trainer Near You
When to Step Back in Dog Training
Why Your Dog Ignores You Outdoors
If you have ever asked yourself why your dog ignores you outdoors, you are not alone. Many dogs listen well at home, then switch off the moment the lead clips on. Streets are full of noise, scent, motion, and surprises. Without a plan, your voice becomes background noise. At Smart Dog Training, we fix this by building attention that holds in real life. Our Smart Method gives you clear steps to earn focus anywhere, so your dog chooses you over the world. Every certified Smart Master Dog Trainer uses the same system and standards to deliver results you can trust.
Here is the truth. Dogs do not wake up and decide to be difficult. They respond to what the world pays them for. If the environment rewards pulling, sniffing and scanning, those habits grow. If you reward focus and accountability in a fair way, engagement grows. When you learn why your dog ignores you outdoors and how to fix it, walks become calm, safe, and fun.
The Real World Is Loud and Fast
Outside is a sensory feast. The ground is layered with scent. Birds lift and land. Children laugh. Cyclists rush by. This flood of information can beat any weak training history. If your dog has only practised skills in the kitchen, the street will feel like level ten on day one. That gap is the main reason why your dog ignores you outdoors when it matters most.
Ignoring vs Not Understanding
It can feel personal when your dog looks away or drifts to the end of the lead. In most cases, this is not stubbornness. It is a mix of poor clarity, low reward history in that place, and high competing motivation. Before you label it as defiance, ask two questions. Does my dog truly know this cue in this setting. Has my dog been rewarded for the correct choice here, many times. Closing that gap is smarter and kinder than a battle of wills.
The Smart Method That Changes Behaviour
Smart Dog Training applies one structured system across every programme. The Smart Method has five pillars.
- Clarity. You give clean cues and consistent markers so the dog knows exactly what earns reward and what releases pressure.
- Pressure and Release. You guide with fair pressure and remove it the instant your dog makes the correct choice, then reinforce. This builds accountability without conflict.
- Motivation. You use rewards that your dog values, so your dog wants to work for you even when the world is tempting.
- Progression. You layer difficulty step by step, adding distraction, duration, and distance only when your dog is ready.
- Trust. Training grows the bond between you and your dog. Calm, confident behaviour follows.
This balance of motivation and structure is why our results hold. It also explains why your dog ignores you outdoors when one of these pillars is missing.
Common Reasons Why Your Dog Ignores You Outdoors
Competing Motivation Beats Weak Habits
If the world pays better than you do, your dog will take the better deal. Scent, chase, social contact, and freedom can outbid dry biscuits and vague praise. When the environment pays more often and more clearly, it wins. This is a core reason why your dog ignores you outdoors around busy paths and parks.
Scents and Wildlife Override
Sniffing is not bad behaviour. It is a need. But uncontrolled tracking across every surface puts your dog in a bubble. A dog that lives nose down will not hear you. Smart training uses planned scent permissions and structured check ins, so sniffing becomes a reward you control.
People and Dogs as Magnets
Greeting others can be thrilling. If your dog has often pulled to say hi and has been allowed to greet, the behaviour is self rewarding. Your dog learns that ignoring you outdoors works. We change the picture so greeting becomes something your dog can earn on cue.
Lack of Clarity in Cues
Many owners change their words and tone without noticing. Come becomes here or let us go or whistling. Sit becomes wait or just a hand wave. Mixed signals slow learning. In public, unclear cues are easy to dismiss, which is why your dog ignores you outdoors even when you think the cue is obvious.
Reward History in the Wrong Place
Dogs are contextual learners. A hundred sits in the lounge does not prove the dog can sit by the school gate. If you have not paid the behaviour in that setting, your dog may not recognise the task. Without proofing, this gap is a primary reason why your dog ignores you outdoors.
Handler Inconsistency
Sometimes you allow pulling. Other times you correct it. Some days you reward recall. Other days you let the dog chase birds. The world becomes a slot machine. Inconsistent rules teach dogs to gamble. Consistency is kinder and more effective.
Leash Pressure Without Release
Constant tension on the lead makes dogs lean and pull. Pressure only teaches if release marks the right choice. At Smart Dog Training, we pair light guidance with clean release and reward. That is how we add accountability while maintaining trust.
Stress or Anxiety Outside
Some dogs shut down or scan when the street feels unsafe. They are not ignoring you to be rude. They are coping. You need a calmer route, clear structure, and controlled exposure. Building confidence through the Smart Method reduces this stress. Knowing this can explain why your dog ignores you outdoors in crowded areas.
Adolescent Brain Changes
Between six and eighteen months many dogs go through a phase of selective hearing. Hormones rise and curiosity peaks. This is normal but not a reason to drop standards. It is a reason to use a plan. A certified Smart Master Dog Trainer will help you set that plan and guide you through the bumps.
How Smart Rebuilds Attention Outside
We do not guess. We follow the Smart Method to turn focus into a habit that survives distraction. Here is how we apply each pillar to fix why your dog ignores you outdoors.
Clarity Through Clean Cues and Markers
We teach a simple marker system. A reward marker for yes you got it. A release marker to end positions. A no reward marker to try again without emotion. Your voice becomes a map. Your dog learns what each word means and how to earn reward. This removes doubt and makes your voice matter outside.
Pressure and Release Done Right
We use fair leash guidance on a flat collar or harness when needed. Pressure is light and timed. As soon as your dog turns or gives into the leash, pressure is released and the correct choice is reinforced. Your dog learns that paying attention brings relief and reward. That is how we build accountability without conflict.
Motivation That Competes With the World
We teach you to build a rewards ladder. Food your dog values. Toys used with structure. Life rewards like sniffing or greeting, given on cue. When your rewards compete, your dog chooses you. That is the turning point in solving why your dog ignores you outdoors.
Progression From Home to High Streets
We map training environments from easy to hard. Home. Garden. Quiet street. Park at off hours. Busier paths. Markets. Trains. We only climb when your dog meets criteria. This is how we prevent failure and keep engagement strong.
Trust as the Glue
We protect the relationship. Clear rules, fair guidance, and generous reward remove friction. Your dog learns that you are the safe place and the path to everything good. Trust makes attention durable.
Step by Step Plan You Can Start Today
Use this four week outline to start solving why your dog ignores you outdoors. Adjust the pace to your dog. If your dog struggles, drop back one step and build again.
Week 1 Foundation Focus Indoors
- Name Response. Say your dog’s name once. The moment eyes flick to you, mark and reward. Repeat in short bursts. Build speed.
- Engagement Game. Stand still. Wait for your dog to offer eye contact. Mark and reward. Take a few steps. Wait again. Your dog learns to check in to make you move.
- Station Work. Teach a place mat. Send your dog to the mat, mark, reward, then release. This builds impulse control that helps outside.
- Leash Skills at Home. Clip the lead indoors. Practise tiny circles. Reward slack lead and following your leg. Make it a game.
Week 2 Doorway and Garden
- Threshold Calm. Sit at the door. Handle the latch. Reward calm. Open and close the door. Reward stillness. Only go out on release.
- Garden Drills. Repeat Week 1 in the garden. Add mild distractions like a toy on the ground. Keep sessions short and fun.
- Permission to Sniff. Walk three steps. Ask for eye contact. Mark and say go sniff. After a few seconds, call back, reward, and walk again. Sniffing becomes earned.
Week 3 Quiet Streets
- Patterned Walking. Pick a simple pattern such as two steps then turn. Reward check ins in the turns. Your dog learns to follow your movement.
- Micro Recalls. Take one step away, call once, mark the turn of the head, and reward by your legs. Do many tiny reps. Keep your dog on a long line if needed.
- Park and Pay. Stop at a bench. Ask for a sit or down. Reward calm. Release to sniff. Rotate between work and free time.
Week 4 Busy Environments
- Distance Management. Work far enough from distractions that your dog can still think. As focus improves, move a little closer.
- Proof Cues. Practise sits, downs, and recalls near mild activity. Only say cues once. Pay well for clean responses.
- Settle in Public. Use your place mat at a cafe table or park bench. Short sessions. Reward breathing and stillness.
Ready to turn your dog’s behaviour around. Book a Free Assessment and connect with a certified Smart Master Dog Trainer available across the UK.
Focus Games That Get Results Outside
Name Game With Movement
Say the name once. When your dog looks, step backward. Mark and reward when your dog follows. Movement makes you magnetic. This directly counters why your dog ignores you outdoors when the world is moving.
Auto Check In Walks
Walk at an easy pace. Every time your dog glances up, mark and reward by your leg. Do not lure. Let your dog discover that checking in is valuable. Soon the habit sticks.
Find It Scatter
When a mild distraction appears, say find it and drop five treats between your feet. Your dog learns to anchor on you. Over time, switch to asking for eye contact first, then use find it as a reward.
Emergency Turn
Teach a fast U turn. Say let us go, pivot, and move away with purpose. Mark and reward when your dog turns with you. Practise many reps in easy places before you rely on it near a trigger.
Call and Collar
Call your dog. When your dog arrives, calmly take the collar for a second, reward, then release. This prevents dogs from dodging the hand at the park exit.
Tools and Rewards That Help Outside
Lead, Collar, and Long Line
Use a standard lead of about two metres for street work, and a long line for safe recalls in open spaces. Avoid equipment that hides poor handling. The skill is in timing pressure and release, then paying the correct choice. This skill is why our programmes answer why your dog ignores you outdoors without guesswork.
The Rewards Ladder
- Food. Use small, soft pieces your dog loves. Keep them varied to prevent boredom.
- Toys. Use structured tug or fetch as planned rewards, not free for all play.
- Life Rewards. Sniffing, greeting, jumping on a log, or exploring a hedge can all be earned when your dog checks in.
Handler Skills
- Body Position. Keep your shoulders open to invite your dog in. Turn your body to guide, not only your hands.
- Timing. Mark the instant your dog makes the right choice. The marker buys you one to two seconds to deliver the reward.
- Consistency. Cues are single use. Rewards are frequent at first, then thinned as habits form.
Measuring Progress So It Sticks
Criteria That Make Sense
Set clear criteria for each exercise. For example, I will reward eye contact within two seconds on a quiet street for ten reps before moving closer to activity. If your dog misses the mark, reduce difficulty. This approach explains and fixes why your dog ignores you outdoors in stages, not in one jump.
Journal Your Walks
Log where you trained, the distance to distractions, and how many good reps you got. Two minutes of quality work beats thirty minutes of chaos. A short, focused walk can transform your day.
When to Seek an SMDT
If your dog is highly reactive, if there has been a bite, or if attention disappears under any pressure, you need a tailored plan. Work with a certified Smart Master Dog Trainer who understands the Smart Method inside out. We will assess, set your milestones, and coach you through each step.
Real Smart Results
Millie the adolescent Spaniel pulled to the end of the lead and ignored recall at the park. Her owners wondered why their dog ignores them outdoors after trying many treats. We rebuilt clarity with a clean marker system, introduced permission to sniff as a life reward, and used patterned walking to build check ins. Within four weeks, Millie walked on a slack lead past dogs at ten metres and recalled away from pigeons on a long line.
Rex the rescue Shepherd scanned and barked at movement. He was not being stubborn. He felt unsafe. We started with trust building at home, then short garden sessions with clear pressure and release. We added calm station work in car parks and rewarded breathing and stillness. Rex learned that focus on his handler brought safety and reward. His owners no longer ask why your dog ignores you outdoors because Rex now looks to them when unsure.
Troubleshooting Why Your Dog Ignores You Outdoors
- If food does not work outside. Reduce distance to easy, remove one distraction, and use a higher value food. Pair food with life rewards like sniffing to keep motivation fresh.
- If your dog surges at the end of the lead. Stop gently, wait for a softening of the lead, mark, and move again. Your movement is the reward for slack lead.
- If recall fails. Go back to micro recalls on a long line. Pay the first head turn toward you. Build up to full runs only when head turns are automatic.
- If your dog fixates. Interrupt early with an emergency turn. Create space, then ask for a simple behaviour like hand target or eye contact, and reward well.
FAQs About Why Your Dog Ignores You Outdoors
Why does my dog listen at home but not outside
Context changes behaviour. At home there are few distractions and a strong reward history. Outside there are competing rewards everywhere. That gap is why your dog ignores you outdoors. You need to rebuild the behaviour in each setting with clear criteria and better rewards.
How long will it take to fix this
Most families see change within two to four weeks when they follow the Smart Method. Complex cases take longer. Consistency and progression are key. Short, focused sessions win.
Do I need better treats or better training
Both. You need rewards your dog values and a plan that adds clarity, pressure and release, and progression. Treats alone often fail. Structure without motivation also fails. The Smart Method gives you both, which is why your dog ignores you outdoors far less after training.
Should I stop walks until my dog listens
No. Replace chaotic walks with structured training walks in easier places. Use short sessions, then build up. Allow earned sniff breaks so your dog’s needs are met.
What if my dog ignores recall outside
Put your dog on a long line. Practise micro recalls and pay the first head turn. Do many easy reps before asking for full distance. Never chase your dog. Make returning to you the fastest way to earn reward and freedom.
Is my dog being stubborn on purpose
Most of the time no. Dogs do what pays. If the world pays better, your dog will choose it. That is why your dog ignores you outdoors. Change the pay plan with the Smart Method and behaviour will change.
Can you help if my dog is reactive
Yes. We use the same Smart Method with extra care for distance, safety, and confidence. An SMDT will build a step by step plan and coach you in real environments so progress is steady and safe.
Do I need special equipment
No special gadgets. A standard lead, a well fitted flat collar or harness, and a long line for recall practice are enough. The result comes from timing and consistency, not gear.
Conclusion
If you have wondered why your dog ignores you outdoors, now you know the core reasons and the fix. Competing motivation, unclear cues, and weak proofing are the usual culprits. The Smart Method rebuilds attention with clarity, fair pressure and release, strong motivation, sensible progression, and trust. You will feel the difference in your first week of focused practice. If you want guidance that removes guesswork, we are ready to help.
Your dog deserves training that truly works. With certified Smart Master Dog Trainers nationwide, you will get proven results backed by the UK’s most trusted dog training network. Find a Trainer Near You
Why Your Dog Ignores You Outdoors
How to Use Space to Manage Reactivity
If your dog reacts to people, dogs, bikes, or other triggers, you can change those moments with a single powerful tool. You are about to learn how to use space to manage reactivity in a precise, humane, and repeatable way. At Smart Dog Training we use a structured system that turns space into clarity and calm. Every step aligns with the Smart Method, delivered by your local Smart Master Dog Trainer. With the right distance and timing, your dog can think, listen, and choose better behaviour.
Space gives your dog room to breathe and process. When you know how to use space to manage reactivity, you stop fights before they start, prevent rehearsal of bad habits, and build wins that stack into lasting progress. This approach is not a quick trick. It is a skill set you apply on every walk so your dog stays under threshold and learns to be steady anywhere.
What Reactivity Really Is
Reactivity is an emotional response that shows up as barking, lunging, stiff posture, or freezing when a trigger appears. It is not stubbornness. It is your dog saying this is too much. The behaviour you see is the output. The driver is stress and arousal. When pressure rises, thinking drops. When thinking drops, behaviour unravels. That is why space works. It reduces pressure so thinking returns.
At Smart Dog Training we frame reactivity through the Smart Method and teach owners to manage arousal first, then layer obedience and proofing. A certified Smart Master Dog Trainer can help you read your dog, set distances, and follow a progressive plan.
Why Space Changes Behaviour
Space affects your dog in three ways. It lowers the emotional load, it restores engagement with you, and it turns every trigger into a training rep instead of a meltdown. Think of distance as a dimmer, not a switch. More distance reduces intensity. Less distance increases it. You control that dial.
There are two forms of space you can use. Physical distance from the trigger and social space created by neutral body language and movement. When you learn how to use space to manage reactivity, you combine both so your dog can observe, breathe, and choose calm responses while you mark and reward success.
The Smart Method Framework for Space
Every Smart programme follows the Smart Method, a structured, progressive, and outcome driven system. Space fits under each pillar.
- Clarity. You set a clear plan for where you will stand, how you will move, and which markers you will use so your dog always understands what is expected.
- Pressure and Release. You guide with fair pressure on the lead and release the moment your dog makes a good choice, then you add distance as relief. This builds accountability without conflict.
- Motivation. You pay calm decisions with food, praise, or access to move away. Rewards keep your dog engaged and willing to work.
- Progression. You layer skills step by step, then add duration, distraction, and difficulty. Space starts large, then gradually reduces as reliability grows.
- Trust. Your dog learns that you create safety and predictability. Over time that trust becomes calm, confident behaviour in real life.
Thresholds and Safe Distances
Threshold is the line where your dog can no longer think or respond. The goal is to stay on the thinking side. Here is how to find and use that distance.
- Spot early tells. Ear flicks, a closed mouth, weight shift forward, or a fixed stare are early signs. That is your cue to create space.
- Find the first distance where your dog can look at the trigger, then look back to you within two seconds. That is a workable threshold.
- If your dog locks on, slows to a stalk, or begins to lunge, you are too close. Add space immediately.
Knowing how to use space to manage reactivity means you never wait for an explosion. You move early, you coach a breath, you mark engagement, and you leave the scene with a win.
Reading Early Signals
Great handling starts before the trigger is close. Watch your dog’s eyes, mouth, tail set, and body weight. Micro changes matter. The instant you see interest rise, cue a check in. If your dog cannot respond in one to two seconds, add space. Early action prevents big reactions.
At Smart Dog Training we teach owners to read these signals in calm settings first. A SMDT will coach you on timing, handling, and reward placement so your dog associates you with relief and clarity.
Lead Skills That Protect Space
Your lead is a safety line and a communication tool. Use it to draw smooth arcs, not tight lines, and to guide your dog into better positions without conflict.
- Neutral lead. Keep a soft, short lead with a relaxed arm by your side. Slack tells your dog there is no pressure.
- Stop the zip line. Do not reel back or drag. If tension builds, step laterally and reset. Then release pressure the moment your dog follows.
- Lead hand position. Hold near your belly button to keep motions small and consistent.
- Marker timing. Mark the instant your dog disengages from the trigger. Reward in position, then move away for extra relief.
These mechanics make it easier to use space well. Combined with clear markers, they keep your dog’s arousal in the workable zone.
Positioning and Movement That Create Space
Space is not only distance. It is also how you stand and move.
- Body block. Stand between your dog and the trigger to reduce visual pressure.
- Quarter turns. Turn your body slightly away from the trigger to signal neutrality and invite your dog to mirror you.
- Arcing path. Walk in a soft arc around the trigger instead of a straight line toward it. Arcs read as polite and lower social pressure.
- Stop and breathe. Pause at your workable distance, wait for a breath or head turn, then mark and reward.
When you know how to use space to manage reactivity, these small moves become automatic. They shift the picture from confrontation to calm observation.
Choosing Routes and Environments
Route choice is training. Wide pavements, open verges, and predictable sight lines give you safety margins. Blind corners and tight paths do not. Plan your walks like a pilot plans a flight. Have exits, detours, and quiet zones ready.
- Start in low traffic areas at off peak times.
- Use car parks, quiet estates, or wide parks for early reps.
- Avoid bottlenecks until your dog is stable over distance.
The better your routes, the easier it is to use space well, which means faster progress.
Using Space in Urban Settings
Cities compress space, but you still have options.
- Cross early. If you see a dog or bike ahead, cross the road before your dog fixates.
- Use parked cars as visual blocks. Position your dog on the inside, you on the outside, and feed calm engagement.
- Take laybys, shop fronts, or driveways to step off the main flow and create breathing room.
- Choose the quiet side of the street where footfall is lower.
These tactics make it practical to apply how to use space to manage reactivity during busy walks.
Using Space in Parks and Open Spaces
Open ground gives you more distance but more variables.
- Hold the high ground. Small changes in elevation can reduce visual pressure.
- Work parallel rather than head on. Walk the same direction as triggers at a safe offset.
- Practise stationary watch me at distance, then release to sniff as a reward.
- Keep your dog on a long line until recall is solid around triggers.
Smart Dog Training programmes always begin with structure. Space comes first, then duration, then movement toward mild triggers as reliability grows.
Training Drills That Use Space to Manage Reactivity
Here are simple, progressive drills that teach you how to use space to manage reactivity every day.
Look then Look Back
- At your safe distance, let your dog notice the trigger.
- Wait for a head turn back to you within two seconds.
- Mark, feed two to three small rewards, then add distance as relief by walking away.
Repeat until your dog is checking in quickly and softly.
Arc and Go
- Spot a trigger at a distance.
- Draw a gentle arc path. Keep your dog on the inside of the arc.
- Mark every disengage and move to a wider arc if your dog locks on.
End with a short sniff break as a reward for calm choices.
Parallel Social Walks
- Work with a neutral helper dog at a long distance.
- Walk in the same direction with ample space between you.
- Gradually close the gap over sessions, only when both dogs are soft and responsive.
Parallel setups let you layer proximity without pressure.
Step Off and Reset
- If a surprise trigger appears, step laterally into a driveway or verge.
- Place your dog behind your leg, breathe, and feed a few rewards.
- Exit when the path is clear.
Mastering these drills is the core of how to use space to manage reactivity. They fit naturally into any walk and keep your dog under threshold.
Ready to turn your dog’s behaviour around? Book a Free Assessment and connect with a certified Smart Master Dog Trainer, available across the UK.
Common Mistakes and How to Fix Them
- Waiting too long. Move as soon as you see early signs. Fix by acting on the first head lift or stare, not the first bark.
- Going straight at triggers. Fix by using arcs and parallel paths to reduce social pressure.
- Talking too much. Fix by using clear markers and quiet handling. Let space do the heavy lifting.
- Feeding at the wrong time. Fix by marking disengagement, not fixation. Reward when your dog checks in.
- Chasing distance without clarity. Fix by setting position, breathing, then moving. Space plus structure creates wins.
Puppies, Adolescents, and Adults
Puppies need gentle introductions with generous space and many calm observations. Adolescents need consistent rules because hormones magnify arousal. Adults often have rehearsed patterns, so distance and repetition matter most.
In every stage, the plan is the same. Learn how to use space to manage reactivity, teach check ins, pay calm decisions, and raise criteria slowly with the Smart Method as your guide.
Multi Dog Households and Space Management
Two dogs can escalate each other. Work one at a time at first. Teach each dog to settle without the other. Then run parallel walks at distance before combining.
- Separate tools and training time.
- Match pace and arousal, not just size.
- Reward calm following and soft eye contact.
A SMDT can help you structure sessions so both dogs learn to share space without conflict.
Measuring Progress and Raising Criteria
Progress is not the absence of triggers. It is your dog staying calm through triggers that used to cause problems. Track outcomes across three markers.
- Recovery time. How quickly does your dog look back and breathe after noticing a trigger
- Working distance. How close can you be with soft body language and fast response
- Generalisation. Can your dog perform in new places with new triggers and varied weather and time of day
Only raise difficulty when all three markers are steady. Reduce distance slowly, increase duration of calm observation, and add mild motion toward triggers late in the plan. This is the practical heart of how to use space to manage reactivity in the real world.
Safety and Ethics
Your job is to keep your dog and the public safe. Use secure equipment and fit it well. Choose routes that allow exits. Advocate for your dog by saying no thank you to greetings. Space is not avoidance. It is ethical handling that builds trust and reliability without conflict.
When to Work With a Professional
If your dog has rehearsed intense reactions, or if you feel anxious on walks, work with a professional right away. A Smart Master Dog Trainer will design a step by step plan, coach your handling, and progress your dog within the Smart Method so you can apply how to use space to manage reactivity with confidence.
Want expert coaching on your next walk? Book a Free Assessment and get a clear plan from a certified trainer.
FAQs
What does it mean to use space to manage reactivity
It means adjusting distance, position, and movement so your dog stays under threshold around triggers. When you know how to use space to manage reactivity, you cut the emotional load, keep your dog thinking, and coach better choices that you can mark and reward.
How much distance should I start with
Start where your dog can notice the trigger and quickly look back at you within two seconds. For many dogs this is 10 to 50 metres, but the right distance is the one where your dog stays soft and responsive.
Am I just avoiding the problem by adding space
No. Space is the environment control that lets you train. You first stabilise behaviour at safe distances, then you narrow that distance through planned progression until your dog is reliable in normal settings.
What rewards should I use
Use rewards your dog values and can eat or access calmly. Food is practical for frequent reps. Relief and movement away can also be rewards. In the Smart Method, rewards are timed to mark disengagement and reinforce calm choices.
What if a trigger appears suddenly
Step off the path, place your dog behind your leg, breathe, and feed a few rewards while the trigger passes. Then exit when clear. This quick reset is part of how to use space to manage reactivity during surprise moments.
When will I see results
Many owners see early changes within one to two weeks of consistent practice. Reliable behaviour under varied conditions takes longer. With Smart Dog Training you will follow a progressive plan so changes stick in real life.
Do I need a professional trainer
Professional coaching speeds progress and protects safety. A SMDT will assess your dog, set precise thresholds, and guide you through the Smart Method so every session builds the right habits.
Conclusion
Space is a lever you can control on every walk. When you learn how to use space to manage reactivity, you lower stress, create clarity, and build consistent wins that turn chaos into calm. The Smart Method gives you the structure to progress from large distances to everyday reliability without conflict. If you want a step by step plan with expert coaching, we can help.
Your dog deserves training that truly works. With certified Smart Master Dog Trainers nationwide, you will get proven results backed by the UK’s most trusted dog training network. Find a Trainer Near You
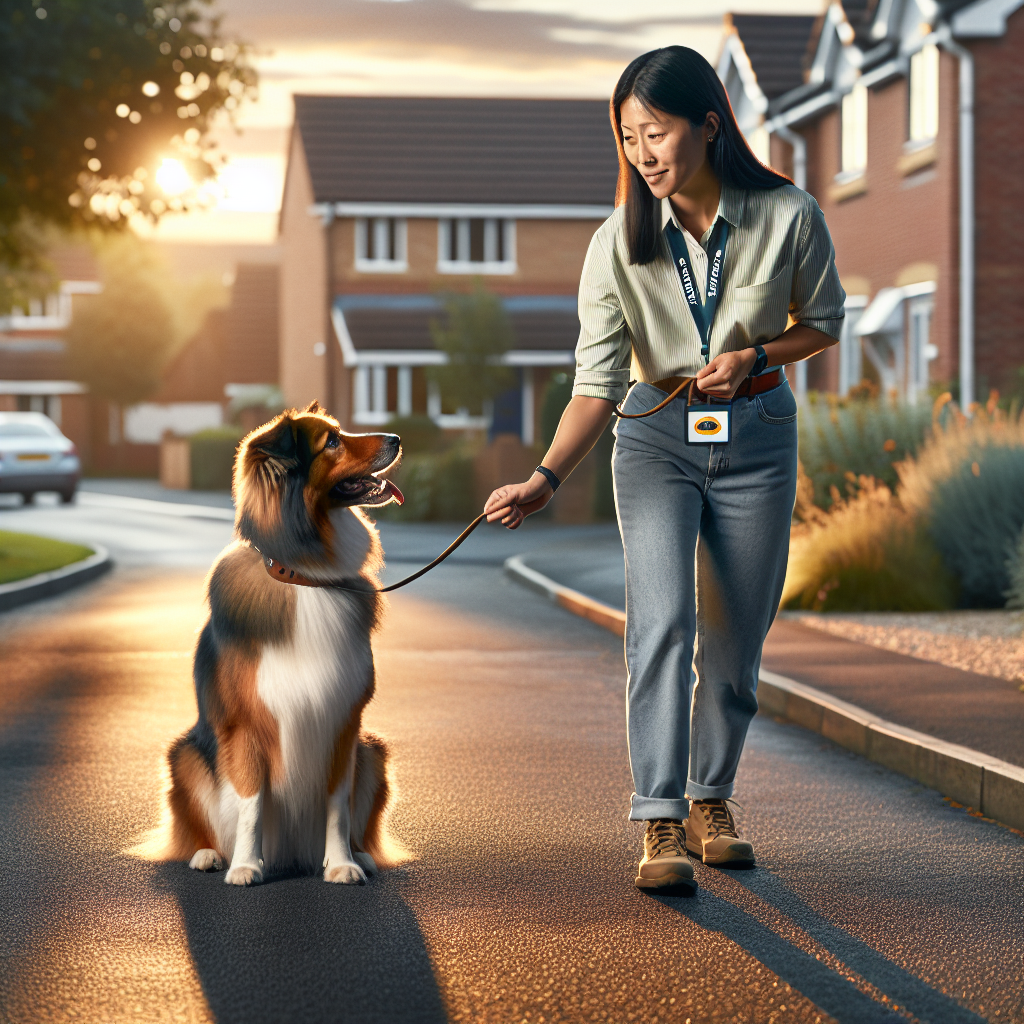
How to Use Space to Manage Reactivity
Why Neutrality Matters in Busy Places
Training dogs to stay neutral in crowds is a life skill that protects your dog, reduces public stress, and makes everyday tasks easier. Shops, high streets, school runs, and events can flood a dog with noise, motion, smells, and fast changes. Without structure, that load leads to pulling, whining, jumping, barking, or shutdown. With a Smart plan, neutrality becomes a learned response. Your dog learns to focus on you, ignore constant movement, and hold a calm state even when people rush past with food, prams, or trolleys.
At Smart Dog Training, neutrality is taught through the Smart Method. It blends clarity, pressure and release, motivation, progression, and trust into a simple system that holds up in real life. Every certified Smart Master Dog Trainer uses the same step by step process, so you get consistent results across the UK. Whether you have a young pup or an adult rescue, training dogs to stay neutral in crowds is achievable when the steps are clear and fair.
What Neutral Looks Like
Neutral does not mean flat or lifeless. It means your dog can notice what is around them without choosing to act on it. Signs of neutrality include a soft body, closed mouth or relaxed panting, ears neutral, slow breathing, and an easy tail carriage. The dog may glance at a passing jogger, then choose to shift attention back to you. The lead stays loose. The dog holds a position such as heel, sit, or down without fuss. This is the outcome Smart Dog Training builds, even in busy places.
In practice, neutrality shows up as clean choices. Your dog steps off the path when you cue it, gives eye contact when asked, and settles on a mat while people pass. That is why training dogs to stay neutral in crowds is a core goal across our obedience, behaviour, and advanced pathways. Calm behaviour that lasts is always the priority.
The Smart Method for Crowd Neutrality
The Smart Method is structured, progressive, and outcome driven. It delivers the same steps across every Smart Dog Training programme, so owners understand exactly how to move from quiet rooms to busy streets with success.
Clarity
Dogs need clear markers and consistent cues. We teach a clean yes marker to release and pay, a no reward marker to reset, and a calm good marker to sustain behaviour. Clear signals reduce confusion and make it easy for your dog to stay with you even when the world is busy.
Pressure and Release
Pressure and release means fair guidance followed by instant relief the moment the dog makes the right choice. Light lead pressure, a body block, or spatial guidance is paired with a clear release and reward when the dog returns to position or focus. This builds accountability without conflict and keeps choices black and white. It is central to training dogs to stay neutral in crowds because it keeps decisions simple under stress.
Motivation
We create a positive emotional state. Rewards include food, toys, and life rewards such as movement and access. We balance engagement with calm so the dog learns to work with you without getting over aroused.
Progression
Skills are layered step by step. We add distraction, distance, and duration in a mapped path so the dog wins often and learns to hold behaviour anywhere. This is the backbone of crowd neutrality.
Trust
Training builds a bond where your dog feels safe and willing. Trust is grown through fair rules, predictable rewards, and consistent leadership. With this bond, neutrality becomes easy to hold near loud crowds and fast movement.
Prerequisites Before You Begin
- Health check. Make sure your dog is fit, pain free, and comfortable on their kit.
- Equipment. Use a well fitted flat collar or training collar selected by your Smart trainer, a six foot lead, and a non slip mat for place. Avoid long lines in dense crowds.
- Reward plan. Prepare high value food, a tug or ball if your dog can stay calm with toys, and life rewards such as movement breaks.
- Time. Short, frequent sessions beat long marathons. Start with five to ten minute blocks.
If your dog already shows reactivity, resource guarding, or serious anxiety, work one to one with a Smart Master Dog Trainer early. Guided support speeds up training dogs to stay neutral in crowds and keeps everyone safe.
Foundation Skills at Home
Strong foundations make public work simple. Smart Dog Training begins in low pressure rooms so your dog can learn fast without noise and motion.
- Eye contact on cue. Mark and reward any look to your face. Build to a three to five second hold.
- Hand target. Teach your dog to touch your palm. This is a quick redirect tool in crowds.
- Sit and down with a calm good marker. Pay the hold, not the drop.
- Simple heel position at your left leg or right leg. Focus on alignment and a loose lead.
- Place. Send to a mat and build duration with a calm good marker. This is your portable anchor in public.
Foundation sessions are quiet and short. Keep criteria clear. End on success. Training dogs to stay neutral in crowds starts with stillness and focus at home before you add any people or dogs.
Clarity and Marker System
Clarity is non negotiable in busy spaces. Your dog must know when they are right, wrong, and continuing. Use three markers consistently.
- Yes. Means release and reward. Use it when your dog makes the target choice. Deliver the reward fast and clean.
- Good. Means hold that behaviour and you will get paid. Use a calm voice. Place and heel are built on this marker.
- Try again. A gentle no reward marker. Reset with guidance, then allow another rep.
Pair markers with light guidance. A small lead pulse into heel that melts the instant the dog returns to position teaches your dog how to turn off pressure. This is pressure and release done the Smart way. It keeps decisions simple when you start training dogs to stay neutral in crowds outside.
Lead Skills and Positioning
A neutral dog stays in position without tension. Heel is the default in crowds. Teach alignment to your seam, shoulder to knee, head facing forward. Start with one step, mark, and reward. Add steps slowly. If the lead tightens, stop, guide back, and release the moment the dog returns to position.
Teach a parking brake. When you stop, your dog sits automatically at heel. This simple rule reduces bouncing and scanning and is a cornerstone for training dogs to stay neutral in crowds. When you pause at a queue, your dog already knows to sit and wait.
Graduated Distractions Indoors
Before you face a high street, proof indoors. This keeps success high and stress low.
- Motion. Walk past your dog with slow to fast pace while they hold place or heel. Reward calm stillness.
- Noise. Use recorded sounds at low volume. Pair with place and food scatter recovery if needed.
- Food on the floor. Teach a leave cue and reinforce eye contact or place. Life reward is permission to move after control.
- People. Have a family member walk by without greeting. Your dog learns that people nearby do not equal interaction.
Keep sessions short, stop before your dog loses focus, and log criteria. Neutrality grows when you move one step at a time.
Training Dogs to Stay Neutral in Crowds Step by Step
Here is a clear path that Smart Dog Training uses to take your dog from quiet space to busy crowds while keeping behaviour calm and clean.
Step 1 Quiet outside space
Start on a quiet street or large car park at off peak times. Work short heel lines with frequent turns. Mark eye contact. Layer in sits when you stop. If your dog glances at a passerby and reorients to you, mark and reward. You are training dogs to stay neutral in crowds by first proving that the world can move while your dog stays with you.
Step 2 Light foot traffic
Move to a path with occasional walkers. Use more distance than you think you need. Keep the lead loose. If your dog locks in on a person, use a hand target or a small lead pulse into heel, then release and pay when your dog returns to you. Add place on a portable mat for one to two minutes while people pass.
Step 3 Perimeter work at busy venues
Train on the edges of a market or a shopping area. You are close enough to feel the buzz, but far enough to keep your dog successful. Work heel, sits, and short place holds. Reward choices to disengage from smells and motion. This edge work is vital for training dogs to stay neutral in crowds because it lets you raise pressure slowly with built in wins.
Step 4 Controlled close passes
Practice parallel walking with a helper if possible. Pass at a safe distance, then shrink the gap over several sessions. The moment your dog stays soft and keeps the lead loose, mark and reward. If your dog forges, use pressure and release to bring them back to position and then pay heavily for the right choice.
Step 5 Inside the flow
When your dog can work on the perimeter, step into the flow of people. Keep sessions short. Use your parking brake sit at every stop. Move off with a focus cue. Ask for a place settle in a quiet corner for two to three minutes while you chat or check your list. Training dogs to stay neutral in crowds becomes a rhythm of move, sit, settle, and walk on.
Step 6 Proof with real life tasks
Queue quietly, wait while trolleys pass, stand still at a crossing, and walk calmly past food outlets. Use a calm good marker to sustain behaviour. Pay out at the end of each success block. If your dog struggles, drop criteria. Step out of the flow and reset. Progression should feel steady and fair.
Ready to turn your dog’s behaviour around? Book a Free Assessment and connect with a certified Smart Master Dog Trainer available across the UK.
Handling Approaches From People and Dogs
Random greetings undo a lot of progress. Protect your dog’s focus and your training plan.
- Use a clear hand signal. Hold up your palm and say Sorry we are training. Most people will respect a calm, firm tone.
- Step off line. Move your dog to the edge, park in a sit, and body block gently if someone closes in.
- Teach a greet cue. Your dog only meets people when you give permission. That cue is rare in crowded places.
- For dogs, create space early. Arc away, keep the lead loose, and pay your dog for orienting back to you. If a dog rushes up, step between and guide your dog behind you while you exit.
With these rules, training dogs to stay neutral in crowds gets easier because you remove surprise interactions that would pull your dog off task.
Reading and Redirecting Arousal
Learn your dog’s tells. Fast panting, scanning, paw lifts, and a forward weight shift show rising arousal. Catch it early.
- Change pace. Slow down or add turns to bring your dog back into heel.
- Reset to place. Two minutes of stillness can drop arousal and restore focus.
- Pattern games. Three steps, sit, reward. Then repeat. Predictable patterns lower stress.
- Food scatter. A short scattered search on grass can decompress a dog without raising drive.
When you guide early and fairly, your dog learns to self regulate. That is the heart of training dogs to stay neutral in crowds. The Smart Method builds accountability with low conflict choices your dog can win.
Criteria Distance and Duration
Neutrality grows when criteria are obvious. Use this simple map.
- Distance first. Keep a wide buffer from heavy foot traffic until your dog is winning easily.
- Then duration. Ask for longer sits and longer place holds before you move closer.
- Then difficulty. Shrink distance to moving people, food smells, and loud sounds after duration is solid.
Only raise one lever at a time. If your dog breaks position, lower criteria, guide back with pressure and release, then pay for success. Training dogs to stay neutral in crowds thrives on smart criteria that set the dog up to get it right.
Common Mistakes and Smart Fixes
- Going too fast. Crowds too soon cause pulling and barking. Fix by returning to the perimeter and rebuilding distance first.
- Talking too much. Constant chatter blurs cues. Use clean markers and quiet guidance. Reward the hold.
- Bribing. Luring without structure creates frantic behaviour. Instead, guide into position, then release and reward.
- Inconsistent equipment. Changing kit changes feel. Keep gear consistent until behaviour is stable in public.
- Letting people greet at random. Protect your dog’s focus. Greet only on a cue and only when your plan allows.
Smart Dog Training solves these quickly with a structured plan and a trainer at your side. This is why owners trust our system for training dogs to stay neutral in crowds across busy UK towns and cities.
Troubleshooting Reactivity in Crowds
Some dogs already react to people or dogs. Barking, lunging, or freezing are signs that the dog is over threshold. Safety comes first.
- Increase distance. Move away until your dog can take food and offer eye contact.
- Shorten sessions. Two minutes of success beats ten minutes of struggle.
- Use strategic angles. Work behind cars, benches, or planters to block visual pressure.
- Switch to pattern work. Heel for three steps, sit, reward, breathe, repeat.
- Call in help. A certified Smart Master Dog Trainer will map a progression plan and coach your handling. This speeds up training dogs to stay neutral in crowds and keeps progress consistent.
Remember that neutrality is taught, not forced. The right plan and the right guidance will change the picture.
When to Work With a Smart Master Dog Trainer
If you feel stuck, your dog rehearses reactivity, or you want faster progress, work with an SMDT. Our trainers apply the Smart Method with precision and coach you to do the same. Whether you need help with heel mechanics, reading arousal, or building place duration in public, an SMDT will get you moving with clear steps. Training dogs to stay neutral in crowds becomes far easier when a professional sets criteria, observes timing, and adjusts the plan live.
Support is available in home, in small structured groups, or through tailored behaviour programmes. The goal is always the same. Calm, consistent behaviour that holds up anywhere.
FAQs
How long does it take to build neutrality in crowds?
Most dogs show solid changes in three to six weeks with daily practice. Full reliability in heavy crowds can take eight to twelve weeks. The Smart Method keeps gains steady by layering criteria slowly while the dog wins often.
Is neutrality the same as ignoring everything?
No. Neutrality means your dog can notice and then choose not to engage. Your dog stays in position, keeps a loose lead, and checks in with you when you ask. That is the outcome of training dogs to stay neutral in crowds.
What if my dog loves people and wants to greet everyone?
Teach a greet cue and use it rarely in busy places. Protect focus. Work on sit for petting in low pressure areas first. Then bring that skill into light foot traffic only when your dog can hold position calmly.
Can food rewards make my dog more excited in public?
They can if used without structure. Smart Dog Training pairs food with calm markers and clear positions. We pay the hold and the choice to disengage. This keeps arousal balanced while you work through crowds.
What equipment should I use?
Use a well fitted flat collar or training collar selected with your Smart trainer, and a standard six foot lead. Avoid long lines in dense crowds for safety. Keep kit consistent while you proof behaviour.
My dog barks at trolleys or prams. What can I do?
Start with distance. Work the perimeter of a shop car park when it is quiet. Reward disengagement. Add place holds while one trolley passes at a time. Layer closer passes slowly. If barking continues, work with an SMDT for a tailored plan.
Should I let strangers give my dog treats?
Not in crowded places. It blurs your rules and raises arousal. Keep rewards under your control so your dog associates calm behaviour with you.
Is this suitable for puppies?
Yes. Keep sessions very short and fun. Protect sleep and recovery. Focus on place, eye contact, and short heel lines in quiet spaces before you try busier areas.
Conclusion
Training dogs to stay neutral in crowds is a clear, teachable process when you follow the Smart Method. Start in quiet spaces, build clean markers, guide with pressure and release, and raise criteria one lever at a time. Protect your dog’s focus by managing greetings and reading arousal early. With this structure, your dog learns to move through busy places with a loose lead, steady breathing, and easy choices.
If you want expert help, Smart Dog Training is ready to guide you. Our trainers apply a proven system that produces calm, lasting behaviour in real life. Your next step is simple. Book a Free Assessment and start training dogs to stay neutral in crowds with a plan that works. Your dog deserves training that truly works. With certified Smart Master Dog Trainers (SMDTs) nationwide, you'll get proven results backed by the UK's most trusted dog training network. Find a Trainer Near You
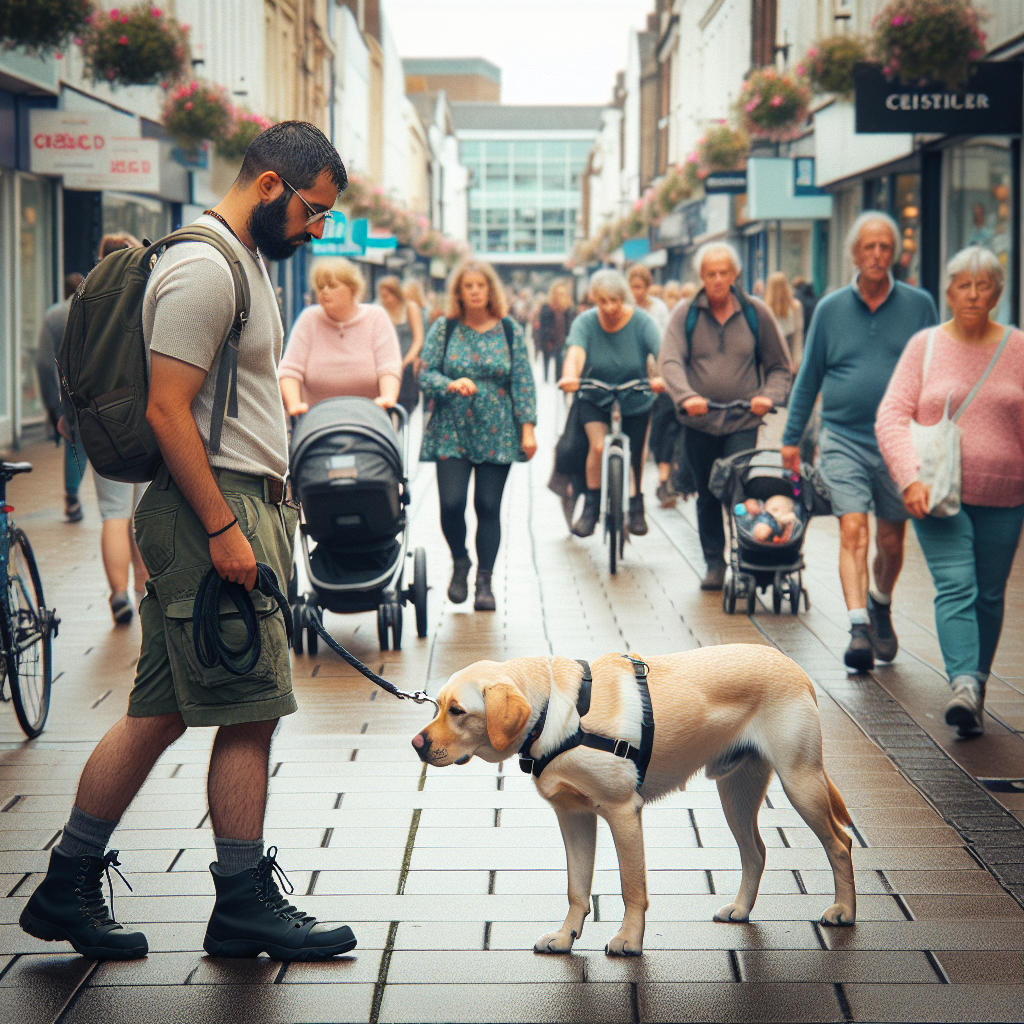
Training Dogs to Stay Neutral in Crowds
Introduction to Neutrality Around Toys
You are here to learn how to teach neutrality around toys. That choice speaks to a higher goal than simple obedience. Neutrality is the ability to remain calm and responsive in the presence of exciting objects. It means your dog can see, hear, or even brush past a toy yet stay focused on you until released. At Smart Dog Training, this ability is not optional. It is a core outcome of every programme because it underpins safety, confidence, and real life reliability.
If you are wondering how to teach neutrality around toys in a way that works in the living room and at the park, you are in the right place. This guide follows the Smart Method, our structured system used by every Smart Master Dog Trainer. You will learn clear steps, coaching cues, typical pitfalls, and how to progress without guesswork. The result is calm behaviour that lasts, not temporary tricks.
What Neutrality Around Toys Really Means
Neutrality is not disinterest forever. It is controlled interest anchored to your leadership and release words. Your dog learns that toys are not self service. They are available through you, and only when you say so. When clients ask how to teach neutrality around toys, the short answer is to blend clarity, motivation, and fair accountability so the dog chooses calm every time.
Signs your dog is neutral around toys:
- Eyes and body remain relaxed when toys appear
- Responds to name, sit, down, or heel near toys
- Waits for a clear release before moving to a toy
- Can walk past toys on the floor without diving in
Neutrality is the opposite of frantic grabbing, vocalising, or fixating. It is trained behaviour that becomes a habit through the Smart Method progression.
Why Neutrality Matters in Real Life
Before we dive into how to teach neutrality around toys, it helps to understand why it matters. Toys are not just for play. They are common triggers for impulse spikes. At home, they can cause guarding or panic when visitors arrive. In public, a stray ball or squeaker can pull your dog into traffic. On walks, off lead play can go from fun to frantic in seconds if neutrality is missing.
When your dog truly learns how to teach neutrality around toys within the Smart framework, you gain:
- Reliable focus under distraction
- Safer greetings with children and guests
- Cleaner play sessions that build skills, not arousal
- Confidence to enjoy parks and classes without chaos
The Smart Method Foundation for Toy Neutrality
Everything we teach at Smart Dog Training runs through the Smart Method. If you want consistent results with how to teach neutrality around toys, anchor your work to these five pillars:
- Clarity. Simple marker words and precise timing tell the dog when they are right and when to try again.
- Pressure and Release. Light, fair guidance helps the dog make the correct choice. Release and reward make that choice valuable.
- Motivation. Food and praise build engagement so the dog wants to work with you in the presence of toys.
- Progression. Distraction, duration, and difficulty are layered step by step until neutrality holds anywhere.
- Trust. Calm, consistent leadership grows a bond that turns training into a shared language.
Every Smart Master Dog Trainer follows this framework. It is how our teams across the UK deliver the same high standard for families and professionals alike.
Tools and Setup for Success
The right setup makes it easier to apply how to teach neutrality around toys. Prepare this simple kit:
- Flat collar or well fitted training collar appropriate for your dog
- Standard 1.8 to 2 metre lead plus a 5 to 10 metre long line for proofing
- Two to three low value toys to start, such as a plain ball or soft tug, then higher value toys later
- Small food rewards that your dog likes but does not go wild for
- Defined training space with minimal clutter
Keep toys you are not using out of sight. Neutrality begins with controlled exposure rather than flooding.
Safety and Rules Before You Start
Consistency makes how to teach neutrality around toys work. Set these rules first:
- Toys live with you, not on the floor. You present them and you put them away.
- No unsupervised toy time during training phases.
- Use one release word only, such as Free or Break, and do not pair it with other chatter.
- End every session while your dog is successful and calm.
Health note. If your dog shows signs of pain or frustration that seem out of proportion, pause and seek help. A structured assessment with a Smart trainer can fast track your plan.
Marker Language and Clarity
Neutrality depends on what your dog understands. In the Smart Method we keep markers simple:
- Yes. Marks correct behaviour and delivers a reward to you, not to the toy.
- Good. Sustains behaviour calmly. Often paired with duration work near toys.
- No. Neutral information that a choice was not correct. Reset and guide.
- Free. Clear release to move, which may include permission to take the toy later in training.
When you are learning how to teach neutrality around toys, make sure your markers are clean, consistent, and backed by fair guidance.
Step One Build Engagement Away From Toys
Start well before toys enter the picture. If you want how to teach neutrality around toys to stick, first create a powerful habit of choosing you.
Drills to use:
- Name game. Say your dog’s name. When they look at you, mark Yes and feed. Reset by looking away. Repeat briskly for 1 to 2 minutes.
- Hand target. Present your hand. When the dog touches, mark Yes and feed to your hand. This becomes a quick reset tool during toy work.
- Positions. Practice sit, down, and heel with smooth transitions and calm rewards.
Keep sessions short and upbeat. Your dog learns that engagement pays. This foundation is vital to how to teach neutrality around toys during later steps.
Step Two Controlled Exposure to Toys
Introduce a low value toy. Place it on the floor two to three metres away while your dog is on lead. The moment your dog sees the toy, you begin guiding choices.
Protocol:
- Stand still. Ask for a sit or heel. If your dog stares at the toy, wait one second. If they look back to you, mark Yes and reward calmly to you. If not, guide a small step back with the lead and reset the sit.
- Repeat until your dog begins to flick eyes back to you quickly. This is the first brick of neutrality.
- Close the distance by half a metre. Repeat the look-back pattern until it is immediate. Avoid rapid praise or high energy that spikes arousal.
In how to teach neutrality around toys we do not use the toy yet. That comes after the dog proves calm choices. This is the Smart difference. We build clarity and accountability first, then increase privileges.
Step Three Pressure and Release to Build Accountability
Pressure and Release is a core pillar of the Smart Method. It is fair guidance, not force. Here is how to apply it to how to teach neutrality around toys:
- Pressure. If your dog forges toward the toy on lead, apply light, steady tension back to position. Keep your body still and calm.
- Release. The instant your dog softens and returns to position or looks at you, release tension, mark Good, and reward calmly.
This pairing teaches a clear lesson. Choices that move toward you and calm get release and reward. Lunging does not. Over a few sessions, your dog learns to regulate themselves in the presence of toys. That is the heart of how to teach neutrality around toys the Smart way.
Step Four Add Duration and Distraction
Once your dog regularly looks back to you near a toy, build staying power. Duration work turns quick choices into a steady habit.
Use the Good marker to hold a sit or down while you perform low level distractions. Examples:
- Take one step toward the toy then return
- Tap the toy with your foot without picking it up
- Lift the toy for one second then set it down
Any break of position gets a calm No and a reset. Correct behaviour gets Good, then a quiet food reward. Repeat until your dog can remain settled for 20 to 30 seconds with you handling the toy. If you ask how to teach neutrality around toys that generalises, this is the bridge between simple exposure and real life control.
Step Five Add Permission and Controlled Play
Neutrality does not mean your dog never gets the toy. It means the toy is earned through you. Here is how to weave that into how to teach neutrality around toys:
- Ask for a sit near the toy. You lift the toy. Dog holds position for three seconds. Mark Free and present the toy to your dog for one to two seconds of calm grip.
- Say Out or Give. Use a light collar guide if needed. When the toy releases, mark Yes and reward with food to your hand. Then reset.
- Lengthen calm holds and shorten toy access to avoid spiking arousal. You decide when the toy appears and when it goes away.
This creates a clear pattern. Calm earns access. Calm returns the toy. The dog learns to park excitement and follow your markers. That is a cornerstone of how to teach neutrality around toys with lasting results.
Step Six Proof in Real Environments
Generalise your work with distance, duration, and difficulty. This is where many owners struggle with how to teach neutrality around toys, since new places inflate excitement. Follow the Smart progression:
- Change locations slowly. From kitchen to garden, then quiet street, then park.
- Increase distance to known toys first, then reduce distance over sessions.
- Add movement. Walk past a toy on a long line, holding heel and eye contact.
- Introduce higher value toys only when previous levels are clean.
If your dog’s arousal climbs, drop difficulty and win easy reps. Smart training is about planned progression, not pushing through chaos.
Troubleshooting Common Mistakes
Here are the usual blockers we fix when clients learn how to teach neutrality around toys:
- Too much energy in rewards. Keep praise soft and food delivery calm. Excitable tone raises arousal.
- Inconsistent markers. Use the same words every time. Markers are your shared language.
- Free toy access between sessions. This erases structure. Keep toys with you.
- Too fast progression. If you move locations or value too quickly, neutrality cracks. Step back and rebuild clean reps.
- No release rules. Always end positions with a clear Free so your dog understands when they are done.
How to Teach Neutrality Around Toys With Puppies
Puppies soak up patterns. That makes how to teach neutrality around toys both easier and faster when you start early. Keep sessions short and light.
Focus points for puppies:
- More engagement games. Name game and hand target are your best tools.
- Very low value toys. Soft fabric or plain rubber. Avoid squeaks at first.
- Micro duration. Two to five seconds is a win for young pups.
- Gentle guidance. Pressure is minimal. Use your body position and lead management.
Do not allow free toy piles or chaotic tug. Neutrality now prevents guarding and over arousal later.
How to Teach Neutrality Around Toys With High Drive Dogs
High drive dogs love work. Channel that energy with structure. When planning how to teach neutrality around toys for these dogs, prioritise:
- Longer warm ups without toys to drain excess energy
- Extra distance from toys early on
- More repetitions of look-back drills before permission is introduced
- Short, crisp toy access with immediate Out and food to your hand
Be predictably calm. Your posture, breathing, and cadence matter. High drive dogs read everything.
Integrating Play Without Losing Neutrality
Play is powerful when used the Smart way. The key is that you control the start, the rules, and the end. If you ask how to teach neutrality around toys while still enjoying play, follow this sequence:
- Calm position holds near the toy
- Permission to take the toy briefly
- Out on request
- Return to a calm position before any chance of more play
Rotate toys so value stays balanced. Use structured tug or fetch only after your dog has earned neutral reps in that session. This pairing guards against backsliding.
Measuring Progress and When to Advance
Progress is not a feeling. It is observable behaviour. When coaching how to teach neutrality around toys, our trainers look for these benchmarks:
- Immediate look-backs on toy exposure at 3 metres, then 2, then 1
- Thirty seconds of calm position while you handle the toy
- Clean Out and return to position within two seconds
- Neutral heel past a toy on the ground without a cue
Hit two clean sessions in a row before you add difficulty. This keeps momentum high and reduces frustration.
When to Call a Professional
If you are stuck, do not guess. A short session with a Smart trainer can identify the gap quickly. We often find the issue is timing, intensity, or unclear markers. That is easy to fix with coaching. If you need help with how to teach neutrality around toys, book a no obligation session and we will set you up with clear steps.
Ready to turn your dog’s behaviour around? Book a Free Assessment and connect with a certified Smart Master Dog Trainer - available across the UK.
What a Smart Session Looks Like
Here is what to expect when you work with Smart Dog Training on how to teach neutrality around toys:
- In home or local session with an SMDT who assesses engagement, arousal, and handling
- Custom marker plan and lead handling practice before toys appear
- Step by step exposure to toys with Pressure and Release coaching
- Homework that fits your schedule and environment
Every certified SMDT is trained through Smart University and mentored for 12 months, so you receive the same standard wherever you live.
Progression Roadmap You Can Follow
Use this simple weekly structure to apply how to teach neutrality around toys:
- Week 1. Engagement games and marker fluency away from toys. Five minutes twice daily.
- Week 2. Controlled exposure to a low value toy. One to two minutes near the toy, two to three times per session.
- Week 3. Add duration and light movement around the toy. Keep arousal low.
- Week 4. Introduce permission and short toy access with Out on cue.
- Week 5. Proof in a quiet public space. Use a long line and lower value toys first.
- Week 6. Add higher value toys and busier environments once previous steps are clean.
Move forward only when your benchmarks are consistent. If struggles appear, step back one level and rebuild. That is smart progression.
Owner Handling Skills That Make the Difference
Neutrality is as much about you as it is about your dog. The following handling habits elevate how to teach neutrality around toys:
- Stillness. Your body should be calm. Avoid fidgeting or bouncing praise.
- Lead management. Keep the lead short enough to guide, not tight. Use smooth pressure and instant release.
- Voice. Quiet and clear. Marker words only. Praise after the marker, not before.
- Reward placement. Feed to your hand near your body to center your dog on you.
Small changes in your handling create big changes in your dog’s choices.
Advanced Neutrality Heel and Recall Around Toys
Once your dog is solid, link neutrality to movement and freedom. This is a common next step in how to teach neutrality around toys within Smart programmes:
- Neutral heel. Walk past toys placed at intervals. Reward eye contact at your left leg. If the dog glances at a toy then back to you, mark Yes and feed while walking.
- Long line recall. Allow gentle sniffing near a toy. Call once. If the dog turns, mark Yes and reel in the line smoothly, then reward to you. If not, guide with steady pressure until the turn happens, then release and pay.
These drills keep your dog accountable even when the world is busy.
FAQs About Toy Neutrality
How long does it take to learn how to teach neutrality around toys
Most families see meaningful change within two to three weeks of daily short sessions. Full reliability in public can take four to six weeks with steady practice.
Do I have to remove all toys from my home
During early training, yes. How to teach neutrality around toys relies on structure. Toys become privileges that you present and put away.
What if my dog growls or guards toys
Pause free access. Begin the controlled exposure steps at a greater distance. If guarding persists, book help. A Smart Master Dog Trainer will create a safe plan for your home.
Can I use treats and toys together
Yes, but in order. When applying how to teach neutrality around toys, food rewards pay the calm choices first. Toy access comes later on your release.
What if my dog ignores food when toys are out
Lower the toy value and increase distance. Build engagement first. As neutrality grows, food interest returns. This is common with high drive dogs and is part of how to teach neutrality around toys successfully.
Is this suitable for puppies
Absolutely. Gentle, short sessions are ideal. How to teach neutrality around toys is easier to install early than to fix later.
What if my dog will not Out the toy
Use a quick trade to your hand and pair with a calm collar guide. Mark Yes the instant the toy releases. Keep access short. If you struggle, an SMDT can clean up your timing fast.
How often should I train
Two to three short sessions per day beat long marathons. The Smart approach favours quality over quantity, especially for how to teach neutrality around toys.
Conclusion Next Steps
Now you have a complete, structured plan for how to teach neutrality around toys. You know how to set up your space, use clean marker language, apply Pressure and Release, and progress from simple exposure to real life reliability. If you keep your energy calm, manage access to toys, and advance only when benchmarks are met, you will see your dog choose you over the toy without conflict.
If you want coaching tailored to your dog and home, we are ready to help. Your dog deserves training that truly works. With certified Smart Master Dog Trainers (SMDTs) nationwide, you will get proven results backed by the UK's most trusted dog training network. Find a Trainer Near You
How to Teach Neutrality Around Toys
Why Place Training with High Distractions Matters
When life gets busy, your dog needs a calm anchor. Place Training with High Distractions teaches your dog to settle on a defined spot and hold position even when the world is exciting. At Smart Dog Training, we use the Smart Method to turn place into a dependable behaviour that works in real life. Whether you have a jumpy puppy or a strong adult dog, our structured approach delivers reliability, not guesswork.
In the Smart Method, clarity comes first. We define the behaviour, teach it in easy steps, then add pressure and release, motivation, progression, and trust. This balance creates a dog that understands what to do and wants to do it. If you prefer professional guidance, a Smart Master Dog Trainer can install the foundations fast and coach you through high distraction proofing.
What Place Really Means
Place means go to a specific spot and remain there until released. The spot can be a raised cot, a mat, a bed, or a defined area. Place Training with High Distractions extends this simple rule so your dog can ignore guests, doorbells, children playing, food on the counter, and the movement of other dogs. The goal is calm on cue and self control that holds without conflict.
Why place beats constant micromanagement
- Simplicity for the dog. One clear job, one clear boundary.
- Safety for the home. No door rushing, no counter surfing, no jumping on guests.
- Mental balance. Dogs learn to regulate arousal and settle when asked.
- Transferable skill. Place works in the kitchen, at a cafe, in a vet waiting room, or at the park.
The Smart Method Applied to Place
Clarity
We teach a crisp cue for place, a precise marker for correct behaviour, and a clean release word. Clarity removes guesswork so Place Training with High Distractions stays consistent as you raise difficulty.
Pressure and Release
Guidance is fair and measurable. A light leash prompt invites the dog back to place if they step off. The instant they return, pressure stops and reward follows. This cause and effect builds understanding and accountability without conflict. Smart Dog Training uses pressure and release as a guiding conversation, never as punishment.
Motivation
Food, toys, and praise make place worth holding. We build value by paying generously at first, then shift to intermittent pay once the dog shows fluency. Motivation keeps Place Training with High Distractions upbeat and engaging.
Progression
Skills are layered step by step. We start in a quiet room, then add distance, duration, and distraction. The dog succeeds at each level before we move on. This structured progression is what makes results last in busy environments.
Trust
The dog learns that doing the job brings calm, comfort, and reward. Owners see predictable results. Trust grows on both sides, which is essential when you ask for place during life’s most exciting moments.
Set Up for Success
Choose the right place
- Raised cot or stable bed helps define boundaries.
- Non slip mat for hardwood or tile floors.
- Size that lets your dog lie flat and turn comfortably.
Equipment you will use
- Flat collar or well fitted training collar and a standard lead.
- Long line for early outdoor proofing.
- Treat pouch with small, soft rewards. A toy for higher drive dogs.
When preparing for Place Training with High Distractions, think about safety first. In early stages, use a lead or long line to prevent rehearsal of mistakes. Keep sessions short and finish while your dog still wants more.
Teach the Foundations
Step 1 Markers and release
Pick three words that you will not change. Place as your cue to go to the spot. Yes or good as your reward marker. Free or break as the release. In Smart Dog Training, we keep marker language clean so the dog always knows what the word means.
Step 2 Create value for the spot
Lure your dog onto the bed. The instant all four paws are on, mark yes and deliver a reward on the bed. Feed two to three times on the bed, then release free. Repeat five to eight reps. You are building the idea that the bed itself predicts good things.
Step 3 Add duration
Ask for place. When your dog lies down, quietly feed a few times at low energy. Release after five to ten seconds. Add a few seconds each set. If your dog breaks early, guide them back, release pressure the moment they return, and pay again. Place Training with High Distractions starts with relaxed duration before you add motion or noise.
From Quiet Room to Real Life
The three Ds
- Distance. You move away from the bed.
- Duration. Your dog stays longer before release.
- Distraction. Life happens around your dog and they remain steady.
Adjust one D at a time. If you add a new distraction, shorten duration and reduce distance so the dog wins. This approach keeps Place Training with High Distractions successful and avoids confusion.
A sample two week plan
- Days 1 to 3 Quiet room. Five to eight short sets. Duration up to one minute. Light movement from you.
- Days 4 to 7 Add doorbell recordings, a dropped spoon, or you jogging past. Begin two to three minute holds.
- Days 8 to 10 Move to the garden. Add bird noise, neighbour sounds, and mild street traffic. Use a long line.
- Days 11 to 14 Work near a park at quiet times. Add people walking past and bikes at a distance.
If your dog breaks more than twice in a set, make it easier. Success rehearsed becomes success under pressure.
Place Training with High Distractions Indoors
Mealtimes
Ask for place before you prepare food. If your dog holds while you plate up and sit down, reward with a quiet piece of kibble placed on the bed. Teach that calm behaviour keeps the meal calm too. Place Training with High Distractions prevents begging and pacing.
Doorbell and deliveries
Stage the doorbell. Ask for place before you ring. Reward the hold while you step to the door. Open and close while your dog remains steady. If a break happens, guide back and reset. Over a few sessions, real deliveries become easy.
Children and guests
Have guests enter while you feed on the bed at a low level. Keep voices soft, no leaning in, and no touching the dog. Release once guests are seated. Place Training with High Distractions gives you a safe anchor during busy social times.
Place Training with High Distractions Outdoors
Garden to pavement
Start with low level noise outside. Birds, distant cars, and the odd passerby are perfect. Short sessions with a long line prevent rehearsal of mistakes. Pay calm, release often, and keep it fun.
Park proofing
Work on the edge of activity. Ask for place on a portable mat as joggers and bikes pass at a distance. If your dog locks on to a distraction, feed quicker but quieter. Build to closer passes. Place Training with High Distractions means your dog can settle even when the world moves fast.
Dogs and wildlife
Use space. Start far enough from other dogs or wildlife that your dog can think. The moment your dog glances back to you, mark and reward on the mat. Gradually decrease distance over several sessions. Maintain duration targets even as distractions rise.
Motivation That Builds Calm
Food, toys, and praise
Match reward to the dog. Food is ideal for calm reinforcement on place. Toys can be used as jackpots given off the bed after a release. Praise should be soft and steady. Keep arousal low while on the bed so duration holds.
Variable reinforcement
Once your dog can hold place for several minutes with light distraction, move to a variable payout. Sometimes you pay after ten seconds, sometimes after forty. This keeps the behaviour strong and reduces reliance on constant feeding during Place Training with High Distractions.
Calmness protocols
- Feed low and slow on the bed.
- Massage ears or chest for dogs that enjoy touch.
- Exhale softly and move slowly when you walk past.
Pressure and Release Done Right
Guidance should be light, immediate, and fair. If your dog steps off, a gentle lead prompt brings them back. The instant paws return, pressure stops and reward follows. That release teaches the dog how to turn off pressure by choosing the correct behaviour. Smart Dog Training uses this system to build accountability while keeping the experience positive. In Place Training with High Distractions, this fairness is what keeps confidence high.
Common Mistakes and How to Fix Them
Paying off the bed
Always pay on the bed unless you have released the dog. Feeding off the bed dilutes the boundary.
Raising difficulty too fast
If you add a bouncing ball, reduce duration and your distance. Only raise one variable at a time during Place Training with High Distractions.
Talking too much
Excess chatter can excite some dogs. Use clear cues and quiet handling.
Letting the dog break without guidance
Gently guide back every time. Consistency builds understanding.
Advanced Uses of Place
Guest greetings
Ask for place when the knock comes. Bring guests in and let your dog settle for two to five minutes before release. Calm first, greeting second. Place Training with High Distractions keeps visits peaceful.
Restaurants and cafes
Bring a travel mat. Settle your dog under the table on place. Pay small and slow at first. Work up to full meals without fuss.
Sports sidelines and events
Practice on the outskirts. Build to closer seating as your dog proves solid. Use a long line for safety if needed.
Puppies vs Adult Dogs
Puppies benefit from short, frequent sessions. Aim for thirty to ninety seconds per rep at first. Adult dogs can hold longer early on but may have stronger habits to replace. In both cases, keep Place Training with High Distractions upbeat, clear, and fair.
Measuring Progress You Can Trust
- Duration goal. Ten minutes indoors, then fifteen, then thirty.
- Distraction goal. Doorbell, guest entry, dropped food, children playing, dogs passing.
- Distance goal. You can move to another room out of sight for short periods.
Log sessions. Note duration, top distraction, and success rate. Smart Dog Training programmes include structured tracking so owners see progress week by week.
When to Work with a Professional
If your dog struggles with impulse control, reactivity, or anxiety, guided coaching speeds up results. A Smart Master Dog Trainer will set up the environment, use the Smart Method pillars, and coach your handling so Place Training with High Distractions becomes reliable in real life.
Ready to turn your dog’s behaviour around? Book a Free Assessment and connect with a certified Smart Master Dog Trainer - available across the UK.
FAQs on Place Training with High Distractions
How long should my dog hold place?
Start with ten to thirty seconds and build to fifteen to thirty minutes indoors. Outdoors, build in stages. In Place Training with High Distractions, duration grows as distractions increase.
What if my dog keeps breaking place?
Lower the difficulty. Reduce distraction, shorten duration, and use a lead to guide back. Pay more frequently for success. Consistency brings stability.
Can I use toys or only food?
Both work. Use food for calm reinforcement on the bed. Use toys as a jackpot after a release. Keep arousal low while the dog is on place.
Is a raised bed better than a mat?
Raised beds create a clear edge, which helps many dogs. Mats are great for travel. Choose the tool that fits your space and your dog, then keep it consistent for Place Training with High Distractions.
How do I handle doorbell chaos?
Rehearse the sequence. Cue place, ring the bell, reward the hold, then open and close without letting the dog break. Add a real delivery only after several smooth rehearsals.
What if my dog barks on place?
Reward quiet moments. If barking continues, increase distance from triggers and reduce arousal before asking for place. Calm handling plus fair guidance usually resolves it.
Can reactive dogs learn place?
Yes. Start at a distance from triggers and work under threshold. Many reactive dogs progress quickly when place gives them a clear task. If needed, work with an SMDT for a tailored plan.
How often should I practice?
Two to three short sessions daily at home, plus a few one to two minute rehearsals during daily life. Make it part of your routine so Place Training with High Distractions becomes second nature.
Conclusion and Next Steps
Place is more than a party trick. It is a life skill that creates calm, safety, and trust. With the Smart Method and a step by step plan, Place Training with High Distractions becomes achievable for any breed and any age. Start in a quiet room, pay generously, and raise difficulty one level at a time. Protect the boundary, reward calm, and keep sessions short and successful. If you want structured, results focused coaching, Smart Dog Training is here to help with proven programmes delivered by certified professionals.
Your dog deserves training that truly works. With certified Smart Master Dog Trainers (SMDTs) nationwide, you'll get proven results backed by the UK's most trusted dog training network. Find a Trainer Near You
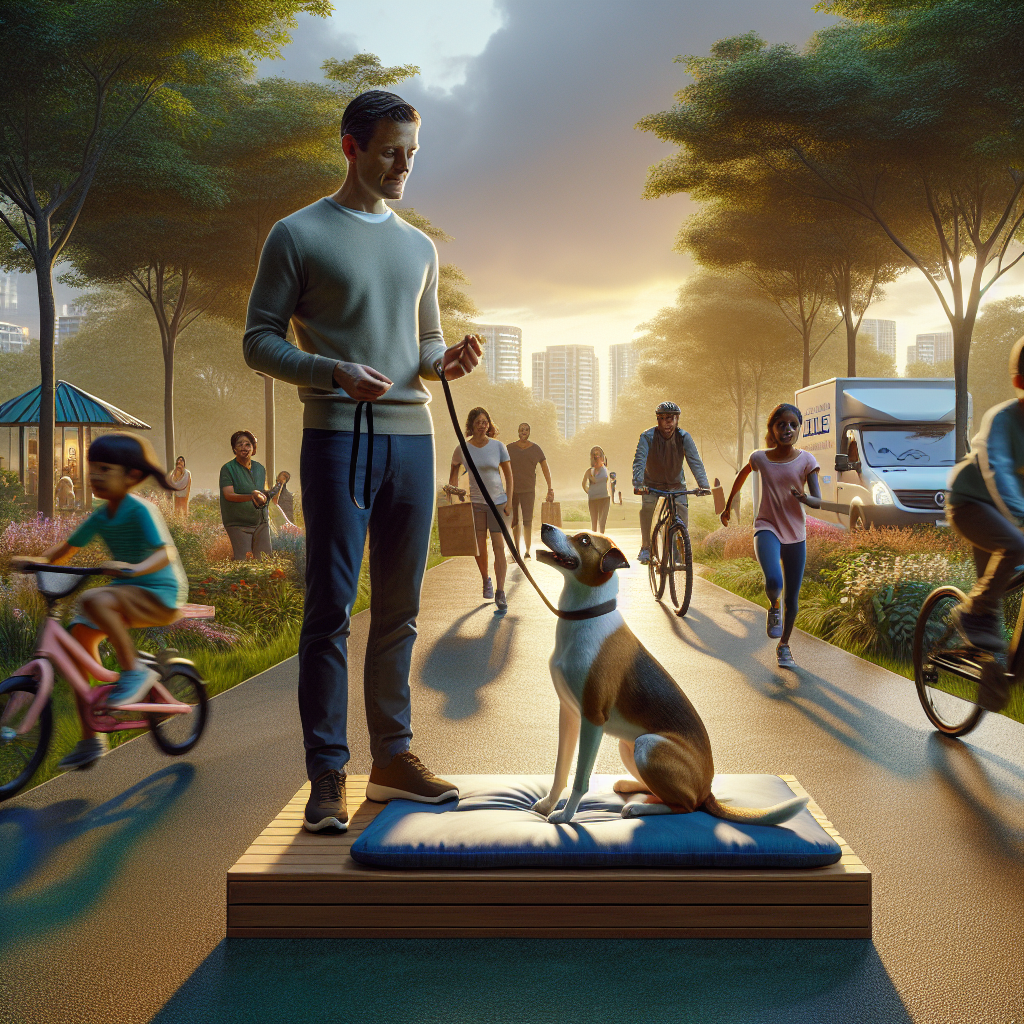
Place Training with High Distractions
Train Calm Behaviour When Life Gets Loud
City streets, busy parks, and family events are full of sound and movement. Horns, sirens, scooters, football matches, and excited children all test your dog. Obedience training in noisy environments is not about raising your voice or hoping for the best. It is about a structured plan that builds clarity, confidence, and calm under pressure. At Smart Dog Training we use the Smart Method to create reliable behaviour in the real world. Every certified Smart Master Dog Trainer applies the same system so your results are consistent across the UK.
Whether your dog pulls toward every distraction or freezes at sudden sounds, we can turn chaos into confidence. This guide shows how Smart builds obedience training in noisy environments through clear steps, fair guidance, and motivation. You will learn how to teach focus, heelwork, place, recall, and long duration stays so your dog can hold it together even when life gets loud.
The Smart Method for Loud Places
Smart Dog Training is built on five pillars that deliver steady results where it matters most. These pillars shape obedience training in noisy environments and make your dog reliable anywhere.
- Clarity. Commands and markers are crisp and consistent so your dog always knows what is right. Clarity cuts through noise.
- Pressure and Release. Fair guidance shows the path. Release and reward confirm the choice and lower conflict.
- Motivation. Food, praise, play, and life rewards keep engagement high even when the world is exciting.
- Progression. We stack skills step by step, then add distraction, duration, and difficulty until your dog is dependable in any setting.
- Trust. Training strengthens the bond. Your dog learns to take direction from you and remain calm because you are steady.
This balance of structure and reward is what sets Smart Dog Training apart. It is the backbone of obedience training in noisy environments and is used across our programmes by every Smart Master Dog Trainer.
Why Noise Disrupts Obedience
Dogs do not misbehave to be difficult. Loud or novel sounds pull their attention or create stress. The result is scanning, pulling, jumping, barking, or shutting down. Without a plan, owners repeat commands or tighten the lead, which often creates more tension. The Smart answer is to build strong foundations, then layer noise in a controlled way so the dog learns to choose calm.
Foundations First Clarity and Engagement
Before we take on the high street, we make your base strong. Obedience training in noisy environments begins in a quiet room where your dog learns the language of the Smart Method.
- Markers. Yes means reward is coming. Good means keep going. No or Try again means reset with zero drama. Your delivery is calm and consistent.
- Engagement. Your dog learns that checking in with you pays. Name recognition and eye contact are trained with short, fast reps.
- Release word. A clear release ends each command so the dog knows when the job is finished.
With this clarity, your voice becomes a cue for stability, not emotion. When noise increases later, your dog already understands your system.
Build a Neutral Baseline with Place
Place is a simple concept that creates huge value. The dog goes to a defined spot and relaxes until released. It becomes a safe task that anchors obedience training in noisy environments.
- Start on a bed or platform at home. Mark and reward calm stillness and a soft posture.
- Increase duration by seconds at a time. Reward quietly for choosing to relax.
- Introduce mild movement and sound indoors such as doors opening and closing. Return to reward calm.
Place gives the dog a clear job when life gets busy. It is ideal for cafes, visits, and greeting guests.
Pressure and Release That Lowers Friction
Guidance is not force. With the Smart Method, leash pressure is information. Pressure says follow the direction. Release says correct choice. Pair that with markers and reward and you build accountability without conflict. In busy areas this system prevents back and forth battles on the lead and lets your dog make good choices quickly.
Motivation That Stands Up to Sirens
Your rewards must compete with the world. That means using the right value at the right time. When we begin obedience training in noisy environments, we start with higher value food or play to maintain focus. As your dog succeeds, we move to variable reward. Sometimes it is food, sometimes praise, sometimes the reward is moving forward to sniff. This keeps behaviour strong without making the dog dependent on treats.
A Step by Step Progression Plan
Reliability is not built in a single jump from living room to market day. Follow this Smart progression for obedience training in noisy environments. Do not rush. Criteria move up only when the dog is calm and accurate at the current level.
Stage 1 Silent Focus at Home
- Short reps of eye contact on cue. Mark Yes, give reward, then release.
- Teach sit, down, place, recall to hand target. Keep sessions under five minutes.
- Begin loose lead walking indoors with heel position around furniture. Reward for shoulder at your leg and a soft lead.
Stage 2 Recorded Sounds at Controlled Volume
- Play urban sounds such as buses, chatter, clinking dishes at a low level while working the same skills.
- Keep the dog under threshold. If ears perk and body stays soft, continue. If the dog locks up or scans, lower the volume and reward calm.
- Rehearse startle recovery. A short sound plays, you pause, breathe, ask for a simple cue like sit, then mark and reward for settling.
Stage 3 Garden and Quiet Street
- Move to the garden, then a quiet street. Keep sessions short and set clear goals such as ten steps of loose lead walking with no tension.
- Practice place on a portable mat. Reward visitors walking past while your dog remains in place.
- Run two or three mini sessions per outing to keep energy focused.
Stage 4 Moderate Noise High Street Off Peak
- Work outside a cafe before opening or during a calm period. Keep distance from the busiest flow of people.
- Blend commands. Heel to a stop, sit, eye contact, release, then heel again. Frequent releases prevent buildup of stress.
- Introduce variable rewards. Mix food, praise, and the reward of moving forward on your walk.
Stage 5 Peak Noise Stations and Events
- Train near a station entrance or a market once earlier stages are solid. Start at greater distance, then close the gap as your dog handles it well.
- Use short training blocks. Two minutes of heel, then one minute of place. Repeat three times, then end on success.
- Rotate goals. One session focuses on loose lead, the next on down stay with duration, the next on recall around mild distractions.
Core Skills That Anchor Reliability
The following skills make obedience training in noisy environments dependable. Build each one in order, then blend them in your daily walks.
Focused Attention
- Name game. Say the name once. Mark and reward eye contact.
- Look cue. Add a cue for eye contact. Increase duration to three to five seconds. Release before your dog breaks.
- Proof by moving your free hand, then by adding mild noise. Always keep success above ninety percent.
Heelwork and Loose Lead Walking
- Teach a defined heel position beside your leg. Reward often for a soft lead and a relaxed head.
- Use gentle leash guidance for clarity. Pressure means step into position. Release and reward when the dog is right.
- Proof with passing people, bikes, and bins being moved. Start at a distance and close the gap over sessions.
Reliable Recall Around Distractions
- Start with a short line. Call once, then guide if needed. Mark Yes the moment the dog turns toward you.
- Pay big for fast responses. Hide and seek adds fun and builds speed.
- Proof with mild noise first, then busier settings. Never call if you are not ready to reinforce.
Down Stay and Duration in the Real World
- Build a relaxed down with steady breathing. Reward calm, not tension.
- Gradually add duration before adding distance and distractions.
- Use place as a bridge to longer downs in public spaces.
Release Control
A crisp release word keeps standards clear. Your dog understands that work time is focused and free time is allowed only when you say so. This prevents creeping out of position when the environment gets loud.
Startle Recovery and Sound Resilience
Even well trained dogs can startle. What matters is recovery. Smart trains a simple pattern. When a loud sound happens, stop, breathe, ask for eye contact or sit, mark Yes, and reward calm. This pattern teaches the dog that noise is not a cue to panic. It is a cue to check in with you. With repetition, obedience training in noisy environments becomes a pathway to confidence.
Reading Stress Signals Before They Boil Over
Learn to spot early signs of stress so you can lower criteria before your dog fails.
- Early signs. Head turn, lip lick, slow response, paw lift, scanning.
- Rising signs. Stiff body, fixed stare, refusal to eat, vocalising.
- Action steps. Create distance, simplify the task, pay for calm, then rebuild gradually.
Smart focuses on prevention. When you read your dog well, obedience training in noisy environments stays productive and kind.
Reward Strategy That Beats the Street
Value matters. Use higher value rewards early, then shape toward real life rewards.
- Food. Small, soft pieces that deliver fast. Use higher value near heavy traffic or lively crowds.
- Toys. Short tug or ball throws when safe. Keep it brief to avoid over arousal.
- Life rewards. Moving forward, greeting a friend, or sniffing a hedge. Mark the behaviour, then give access to what your dog wants.
By blending these, you keep engagement without bribery. This is central to obedience training in noisy environments where the world competes for attention.
Common Mistakes to Avoid
- Jumping into busy areas too soon. Skipping steps breaks confidence.
- Talking too much. One cue, one marker, then reward. Clarity beats chatter.
- Holding tension on the lead. A tight lead often creates more pulling.
- Rewarding anxiety. Do not pet frantic behaviour. Reward calm choices instead.
- Inconsistent releases. Without a clear end, dogs guess and drift out of position.
Real World Scenarios and Smart Solutions
Pavement Cafe with Clattering Dishes
Set up place on a mat away from the main walkway. Start with short sits and eye contact, then a one minute down. Mark and reward for calm while plates clink. Keep the session brief and end with a happy release.
School Pick Up with Running Children
Heel along the outer edge of the crowd. Pause, ask for eye contact, then release to sniff as a life reward. Rotate heel, sit, and place on the mat while the bell rings and children pass.
City Centre with Sirens and Buskers
Work at a distance from the noisiest spot. Train two minute blocks. Heel to a stop, down stay, then place. Reward with a quiet walk to a calmer side street before another block. This pattern keeps arousal stable while you advance obedience training in noisy environments.
Fireworks Season Preparation
Begin weeks before. Use recorded sounds at low volume while doing easy obedience. Pair with high value rewards. Build to short sessions near distant fireworks, then retreat to calm at home. The goal is not to cure noise overnight. It is to teach recovery and trust through the Smart system.
When to Call a Professional
If your dog shuts down, reacts intensely, or you feel stuck, bring in expert help. A certified Smart Master Dog Trainer will assess your dog, create a tailored progression, and coach you through each step. Because every trainer in our network uses the same Smart Method, you get clear, consistent guidance and measurable results.
Ready to turn your dog’s behaviour around? Book a Free Assessment and connect with a certified Smart Master Dog Trainer available across the UK.
Obedience Training in Noisy Environments The Smart Checklist
- Calm start. Train when your dog is rested and has had a short walk.
- Clear language. Markers, cues, and releases are consistent every time.
- Short blocks. Two to five minute sessions keep focus high.
- Step wise progress. Only raise criteria when success is steady.
- Distance is your friend. Start far from the noise and close the gap slowly.
- Reward wisely. Use value that matches the challenge.
- End on success. Keep momentum for next time.
Frequently Asked Questions
How long does obedience training in noisy environments usually take?
Most families see steady gains within two to four weeks when they train daily in short blocks. Full reliability in the busiest settings can take six to twelve weeks, depending on your starting point and consistency.
What if my dog will not take food outside?
That is a common sign of stress. Lower the difficulty. Create more distance from the noise and ask for easier tasks. Use praise or a calm walk forward as a reward. As your dog settles, food interest returns.
Should I comfort my dog when a loud noise scares them?
Stay calm and neutral. Ask for a simple behaviour like eye contact or sit. Mark Yes and reward recovery. This teaches your dog that checking in and settling is the path, which is key for obedience training in noisy environments.
Can I train this with a puppy?
Yes. Keep sessions very short and gentle. Pair low level sounds with easy success and soft rewards. Build confidence, not pressure. The Smart Method suits puppies because it is clear and progressive.
What tools do I need?
A flat collar or well fitted harness, a standard lead, a treat pouch, and a small mat for place. Add a long line for recall practice in safe areas. Your trainer will guide any adjustments for clarity and safety.
How do I handle setbacks in busy places?
Drop criteria and rebuild. Increase distance, reduce duration, and reward calm check ins. One step back today often means two steps forward tomorrow when you follow the Smart progression.
Is it safe to train near roads and stations?
Yes when you plan well. Use a secure lead, train at safe distances at first, and choose quieter times to start. Safety and clarity come before difficulty.
How do I keep progress once we succeed?
Blend training into daily life. Ask for short heel segments on walks, practice place at cafes, and refresh recall in parks. A few focused minutes each day protects your results.
Conclusion Build Calm That Lasts
Noise does not have to rule your walks. With the Smart Method you can create calm, confident obedience where it counts. Start with clarity, add fair guidance, use strong motivation, and progress step by step. If you want expert help at any stage, our nationwide team is ready.
Your dog deserves training that truly works. With certified Smart Master Dog Trainers SMDTs nationwide, you will get proven results backed by the UK’s most trusted dog training network. Find a Trainer Near You
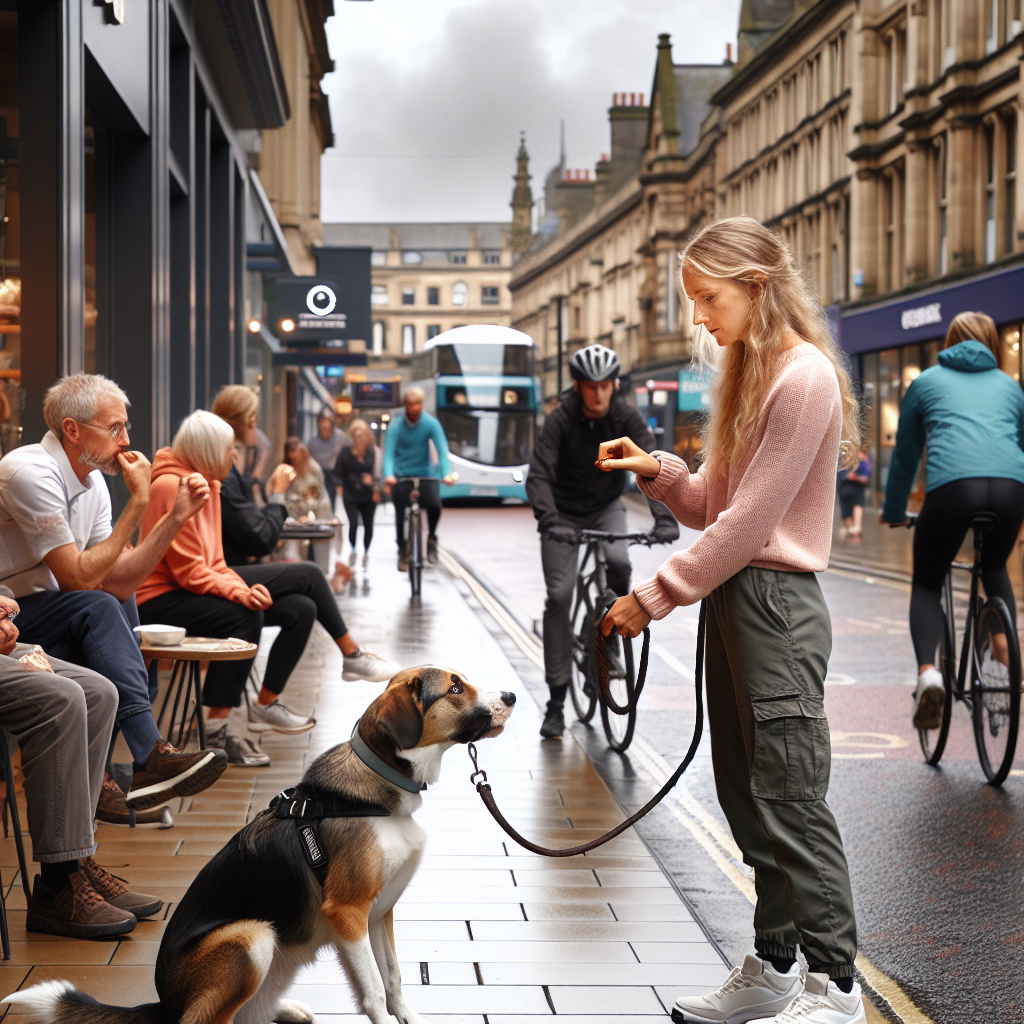
Obedience Training in Noisy Environments
A Calm Home Starts With Clear Rewards
Calm does not happen by chance. It happens because you reward it with skill and structure. In this guide, we walk you through rewarding calm behaviours around the home using the Smart Method. You will learn how to mark and pay the moments you want, how to build duration without conflict, and how to keep results strong in real life. Every step reflects Smart Dog Training programmes delivered by certified Smart Master Dog Trainers across the UK.
As a Smart Master Dog Trainer, I have helped thousands of families move from chaos to calm. The process is simple to grasp and practical to apply. It starts with clarity, builds with motivation, reinforces with fair pressure and release, and progresses until your dog is reliable anywhere. When you commit to rewarding calm behaviours around the home with precision, your dog learns to choose relaxation over reactivity.
The Smart Method That Makes Calm Stick
The Smart Method is our proprietary system for training dogs to be calm, compliant, and confident in daily life. It drives every public programme and every student pathway at Smart University. Here is how the five pillars produce results that last.
- Clarity. You use clear markers so your dog knows when they are correct, when to continue, and when they are free. Words like Yes, Good, and Free are consistent and precise.
- Pressure and Release. You guide with fair pressure, then release as soon as your dog makes the right choice. Release is the reward. This builds accountability without conflict.
- Motivation. Food, toys, praise, and life rewards maintain engagement. Motivation ensures your dog wants to work and wants to relax.
- Progression. You layer skills from easy to hard. You add distraction, duration, and distance in controlled steps.
- Trust. Training strengthens your bond. Calm becomes a shared habit that feels safe for your dog and simple for you.
When you focus on rewarding calm behaviours around the home through these pillars, you get a dog that settles by choice, not by force.
What Calm Looks Like in Daily Life
Before you can reward it, you must recognise it. Calm is not just stillness. It is a relaxed state that can be maintained with gentle activity in the background. Use this checklist to spot it and start rewarding calm behaviours around the home.
- Soft eyes, slow blinks, and a neutral mouth
- Loose body, weight resting on one hip, tail at rest
- Breathing that is slow and steady
- Choosing a mat or bed without being told
- Ignoring dropped food, toys, or minor noises
Common home triggers that test calm include doorbells, delivery noises, cooking, children playing, phone calls, and visitors. The Smart plan below addresses each one.
Set Up Your Home For Success
Structure makes calm easy. If you want rewarding calm behaviours around the home to work fast, stage the environment so your dog can win.
- Defined resting areas. Place a bed or mat in each key room. These become calm zones.
- Management tools. Use baby gates and a house line to prevent rehearsals of jumping, barging, or pacing.
- Reward station. Keep small pots of dry treats on shelves. You will pay calmly and often without hunting for food.
- Chew box. Stock long lasting chews that support relaxation when you need longer duration.
Markers and Rewards That Build Clarity
Clarity speeds learning. At Smart Dog Training we use a simple marker system that families can apply the same day.
- Yes. Instant marker for a correct choice. Paid with a small treat right away.
- Good. A calm continuation marker that tells the dog to keep doing exactly what they are doing. Randomly paid to stretch duration.
- Free. A clear release that ends the exercise. You give it when you are done and ready to move on.
When you are rewarding calm behaviours around the home, Good becomes your best friend. It keeps your dog relaxed while you cook, work, or chat.
The Core Exercise Place and Settle on a Mat
Place teaches your dog to lie down on a defined mat or bed and relax until released. It is the foundation of rewarding calm behaviours around the home because it gives your dog a clear job when life is busy.
Teach the First Reps
- Introduce the mat. Toss one treat on the mat. As soon as your dog steps on, say Yes and feed on the mat. Repeat five times.
- Add a down. Lure a down on the mat. Mark Yes the instant elbows touch. Feed two to three treats in place.
- Start duration. Say Good every few seconds while your dog stays down. Feed on the mat. After ten to fifteen seconds, say Free and toss a treat away to reset.
Add Distance and Distraction
- Step back half a step then return to feed. Build to two steps, five steps, then out of the room for one second.
- Move a chair, open the fridge, or pick up your keys. Mark Good and pay calm while your dog holds the down.
- Stand and talk on your phone. Sprinkle Good markers. Release with Free. Repeat in short sets.
Keep sessions short and upbeat. You are not bribing your dog. You are paying for earned relaxation. This is the heart of rewarding calm behaviours around the home.
Rewarding Calm During Daily Routines
Real life is where calm matters. Use the steps below to make rewarding calm behaviours around the home part of every routine.
Meal Prep and Dinner Time
- Place your dog on the mat before you cook. Mark Good every ten to twenty seconds at first. Randomise as your dog relaxes.
- Drop a utensil or open a noisy cupboard. If your dog stays down, say Yes and feed a bonus. Calm is profitable.
- As you sit to eat, pay with Good three times in the first minute, then once per minute. Release after you clear the table.
Doorbell and Visitors
- Pre cue Place when you are expecting a delivery. Pay Good while you sign or collect parcels. If your dog breaks, guide back with the house line, no chatter, then mark the return and continue.
- When visitors arrive, release only after your dog holds calm for ten seconds. Polite greetings start from stillness, not from jumping.
- If barking starts, reset with Place. Use Good to reinforce quiet. Rewarding calm behaviours around the home at the door changes the whole mood of arrivals.
Family Time and Play with Children
- Start with a settle before play begins. Good tells your dog to maintain calm while children move near by.
- Feed calmly to the mat. Avoid fast tossing which can excite your dog. Place the treat on the bed.
- Rotate chews or a stuffed toy on the mat to extend duration during noisy moments.
Evenings and Crate Relaxation
- Use the crate as a bedroom, not a prison. Cue Place, then Free into the crate for a chew. Good reinforces quiet resting.
- Lower lights and sound. Pay three to five calm reps in the first ten minutes of your evening wind down.
- End with a clear Free and a short garden break.
Using Pressure and Release the Smart Way
Fair guidance keeps training honest. If your dog breaks the down, gently guide with the house line back to the mat. The moment elbows touch, release the pressure and mark Yes. That release is the reward. This teaches accountability without conflict and keeps rewarding calm behaviours around the home consistent and clear. No nagging, no repeated cues, just simple cause and effect.
Reinforcement Schedules That Build Reliability
At first you pay frequently. As calm becomes the default, you shift to variable schedules. This is how we prevent a dog that only performs when food is visible.
- Front loaded reinforcement. Pay every five to ten seconds for the first minute of an exercise.
- Stretch the gaps. Move to every twenty to forty seconds, then every one to two minutes.
- Life rewards. Add real life pay. Access to the garden, greeting a visitor, and release to fetch all become earned rewards for calm.
By blending food with life rewards, you are still rewarding calm behaviours around the home, but now your dog works for privileges as well as treats.
Enrichment That Supports Relaxation
Calm is easier when needs are met. Smart Dog Training programmes pair structured exercise with targeted enrichment.
- Sniff walks that let your dog decompress
- Shaping games that build focus without frantic energy
- Long lasting chews or feeder toys used during Place sessions
- Short training sprints mixed with longer rests to keep arousal balanced
Troubleshooting Common Sticking Points
- Dog will not stay on the mat. Check that the mat is comfortable, your markers are clear, and your first goal is only ten seconds. Success builds fast with small targets.
- Only works when food is visible. Hide the food, keep your marker timing sharp, and pay from a pocket or nearby pot. Add life rewards like access to the garden.
- Breaks the down for every noise. Reduce the distraction, then rebuild duration. Gradually add one sound at a time while rewarding calm behaviours around the home.
- Overexcited by visitors. Rehearse Place with a family member acting as a visitor. Pay success before you ask for more.
Progression Plan Week by Week
Weeks One to Two Foundation
- Three Place sessions per day
- Ten to sixty seconds per rep
- Good every five to fifteen seconds
Weeks Three to Four Distraction and Distance
- Doorbell practice with a helper
- Move between rooms while your dog holds the down
- Begin to add life rewards as pay for calm
Week Five and Beyond Real Life Reliability
- Use Place during meals, calls, and deliveries
- Shift to variable reinforcement with random bonuses
- Target ten to thirty minutes of relaxed settling each evening
As you progress, keep rewarding calm behaviours around the home in small, surprising ways. That is how habits become permanent.
Measure Progress With a Simple Calm Scorecard
Track your results so you know what to adjust. Use this weekly checklist.
- Number of calm reps achieved each day
- Longest relaxed settle without a break
- Number of successful visitor arrivals without barking
- Meal times completed with a down on the mat
- Crate relaxation achieved within two minutes of bedtime
A short log keeps you honest and shows the value of rewarding calm behaviours around the home over time.
When to Bring in an Expert
If anxiety, reactivity, or aggression is present, a tailored plan matters. Smart Dog Training offers in home sessions, structured group classes, and bespoke behaviour programmes that follow the Smart Method from first session to final result. Working with a certified Smart Master Dog Trainer gives you mentorship, precise handling, and measurable outcomes. If you want support implementing rewarding calm behaviours around the home, we can help you move faster.
Ready to turn your dog’s behaviour around? Book a Free Assessment and connect with a certified Smart Master Dog Trainer available across the UK.
Real Life Examples of Calm Pays
- Phone rings. Dog stays on the mat. You quietly say Yes and feed, then continue your call.
- Child runs past. Dog glances then returns to resting. You say Good and place a treat on the bed.
- Door opens. Dog waits. You release with Free to greet because calm earned the privilege.
Each moment tells your dog the same story. Calm is the easiest way to get what you want. Keeping this message consistent is the core of rewarding calm behaviours around the home.
FAQs
How often should I reward my dog for being calm at home
At the start, pay every five to fifteen seconds while your dog is settled. As they relax, stretch to every thirty seconds, then every few minutes. Mix in life rewards so your dog learns that real privileges come from calm.
What is the best marker to use for calm
Use Good as a calm continuation marker while your dog holds the settle. Use Yes for single correct choices, like the moment elbows touch the mat. Finish with a clear Free to end the exercise.
Do I need food forever to keep my dog calm
No. Food is a powerful teaching tool, but Smart Dog Training transitions to variable reinforcement and life rewards. Access to the garden, greeting a visitor, or starting a walk becomes the pay for calm.
How do I handle barking at the door while rewarding calm behaviours around the home
Pre cue Place before the knock. Reinforce quiet with Good while you handle the door. If your dog breaks, guide back with the house line, release pressure as soon as elbows touch, then continue paying calm.
What if my dog keeps popping up from the mat
Shorten the duration, improve your timing, and pay more often. Make the mat comfortable and position it where your dog can see you. Build success in small steps before adding distractions.
Is crate time part of rewarding calm behaviours around the home
Yes. The crate works as a bedroom where calm is easy. Free your dog into the crate for a chew, reinforce quiet with Good, then release when you are done. It supports rest and prevents rehearsals of frantic behaviour.
Can this approach help energetic breeds
Absolutely. Smart Dog Training balances targeted exercise with structured settling. Energetic dogs thrive when they know how to turn excitement off as easily as they turn it on.
Conclusion
Rewarding calm behaviours around the home is not a trick. It is a complete training plan built on the Smart Method. You set clear expectations, pay the behaviour you want, and guide fairly when your dog makes mistakes. Day by day, calm becomes your dog’s default. If you want a practical, proven path, work the steps above and stay consistent. When you need tailored coaching, we are here.
Your dog deserves training that truly works. With certified Smart Master Dog Trainers SMDTs nationwide, you will get proven results backed by the UK’s most trusted dog training network. Find a Trainer Near You
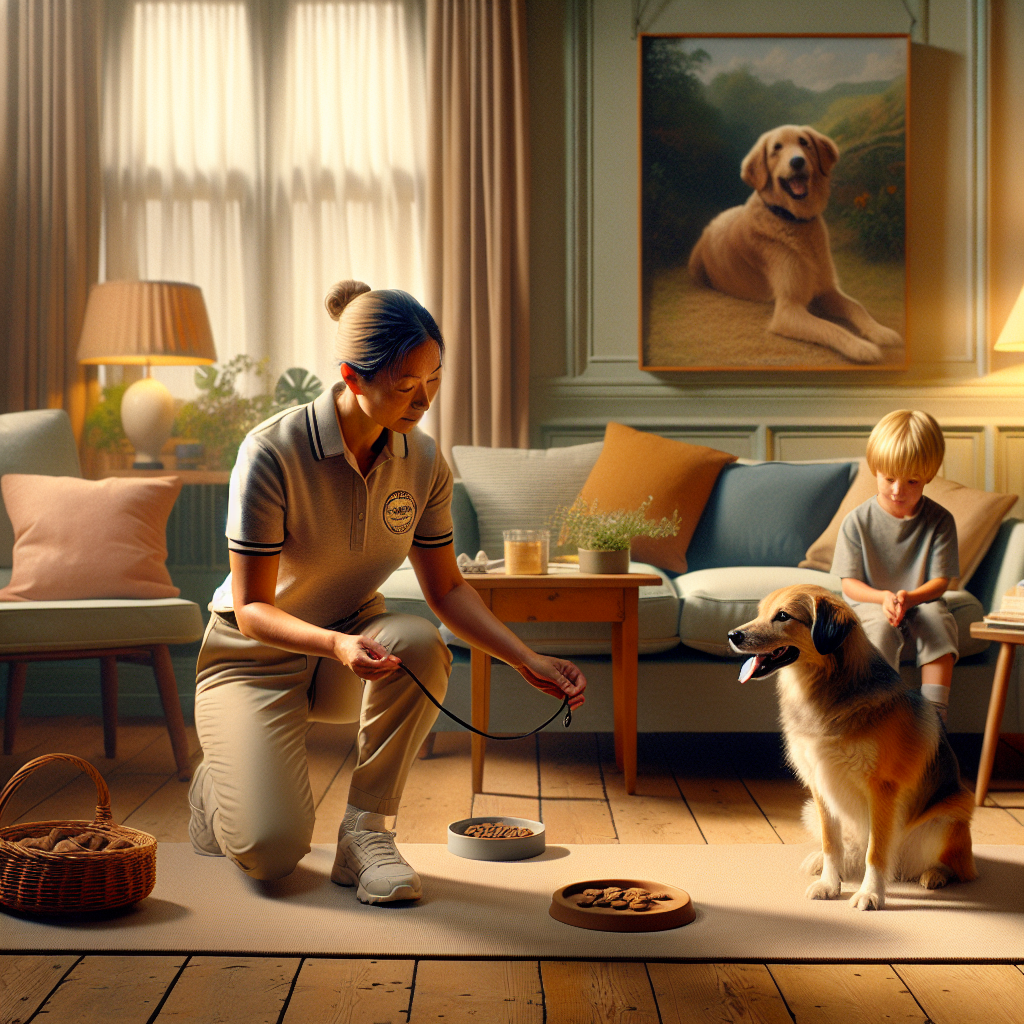
Rewarding Calm Behaviours Around the Home
Layering Calm Into Group Class Prep
Layering calm into group class prep is the fastest way to make training stick in real life. At Smart Dog Training, we use the Smart Method to build stable behaviour before your dog ever steps into a busy room. This calm-first approach makes group learning simple, fair, and reliable. From your dog’s first settle to off-lead focus, every step is planned, tested, and reinforced so your dog understands what to do and why it matters. If you want expert hands-on help, a certified Smart Master Dog Trainer is available across the UK.
What Layering Calm Into Group Class Prep Really Means
Layering calm into group class prep is the process of teaching calm behaviour in small, structured steps. We build clarity at home, then add challenge one layer at a time until it holds in class. Instead of hoping your dog will be calm around dogs and people, we train for it before class so the jump to real life feels easy.
Why Calm Comes Before Cues
In a busy class, arousal rises. Excitement, noise, and movement pull focus. Without calm, sit and down fall apart. By layering calm into group class prep first, your dog can think, listen, and choose good behaviour even when the room gets loud. Calm unlocks learning.
The Smart Method For Calm
Every Smart programme follows the Smart Method. It is structured, progressive, and outcome driven. It blends motivation with fair accountability, so your dog learns to enjoy doing the right thing and to stay with you when it counts.
Clarity
We teach a simple marker system so your dog knows exactly which behaviour earned the reward. Clear words, clear timing, and clear positions remove guesswork.
Pressure and Release
We guide with fair pressure and give instant release when your dog makes the right choice. This builds responsibility without conflict and is central to layering calm into group class prep.
Motivation
Food, play, and praise shape the emotional state we want. We reinforce calm so your dog values stillness as much as action.
Progression
We add distance, duration, and distraction step by step. Each layer is tested before we move forward.
Trust
Training should make your dog feel safe and confident with you. The bond grows as the rules stay consistent and fair. A Smart Master Dog Trainer will coach you through this process so you and your dog progress together.
Assessing Your Dog Before Class
Before layering calm into group class prep, we assess your dog’s current state so we choose the right starting point.
Energy Level and Arousal
- Does your dog pace, whine, or scan the room
- Can your dog lie down and breathe slowly for one minute
- Do ears, eyes, and tail show soft, neutral positions
Triggers You Will Face In Class
- Dogs moving past at different distances
- Handlers talking and handling food
- Doorways, equipment, and ring boundaries
Knowing these triggers lets us plan the layers your dog needs before stepping into class.
Home Foundations For Layering Calm Into Group Class Prep
Solid calm starts at home, where you control every variable. These drills build the core behaviours you will use in class.
Patterned Settles
Teach a predictable routine that ends in a relaxed down. For example, walk to a mat, pause, breathe, cue down, then reward calm. Repeat the same sequence until your dog relaxes on sight of the mat.
Place Training That Holds
Place means go to your station and stay calm. Use a raised bed or mat. Reward the first three seconds of stillness, then five, then ten. Pair place with a release word so your dog waits for permission to leave.
Tether and Mat Work
Attach the lead to a secure point while your dog relaxes on the mat. This adds gentle boundaries and prevents creeping. It is a key layer in layering calm into group class prep.
Equipment That Supports Calm
We select tools that improve clarity and safety. The goal is calm, not restraint.
Leads, Collars, and Long Lines
- A standard lead for close guidance
- A flat collar or well-fitted training collar for precise feedback
- A long line used only in controlled spaces for distance work
Reward Strategy
- High value food for early layers
- Calm delivery so rewards do not spark jumping
- Toy play kept short and tidy if used
Pre Class Routine That Sets The Tone
Layering calm into group class prep includes the hour before class. Your ritual should downshift, not hype.
Transport and Arrival
- Give a short sniff walk earlier in the day, not a frantic run
- Arrive ten minutes early to settle in the car
- Lead your dog out only when calm
Threshold Rituals
- Stop at the door, ask for eye contact, then enter
- Walk to your station, set the mat, cue place
- Reward slow breaths and soft posture
Building Calm Focus Around Dogs
This is where your layers meet the real world. We keep control of distance, angle, and timing so your dog stays successful.
Distance and Line Management
- Start at a distance where your dog can breathe and look away
- Keep a loose J shape in the lead to avoid constant pressure
- Close the gap only after two or more calm repetitions
Neutral Engagement
Ask for short eye contact, mark, then feed low to the mat. Avoid chattering. Quiet handling lets calm take root. This is central to layering calm into group class prep.
The Smart Marker System For Calm
Markers create instant clarity. They tell your dog what earned the reward and when the repetition ends.
Yes, Good, Free, and Break
- Yes marks the exact behaviour and pays quickly
- Good keeps the dog in position and pays calmly
- Free or Break releases the dog from the position
- No marker or neutral silence when the dog is off track
Use Good more than Yes when shaping stillness. Your delivery should reinforce calm, not spark movement.
Pressure and Release Applied Fairly
Calm is not just about food. Fair guidance shows the way when the world distracts. Pressure and release is a pillar of the Smart Method and a core part of layering calm into group class prep.
Lead Pressure and Body Pressure
- Lead pressure is applied toward the position you want
- Release the instant your dog yields and softens
- Body pressure means you step into space to slow, and step away to release
This teaches your dog to take responsibility for staying calm under light guidance.
Rewarding Calm Without Spoiling It
How you pay matters. The wrong delivery can pop your dog out of position.
Food Placement and Delivery
- Feed low and slightly behind the nose to keep the spine long
- Place the treat on the mat for deep settle
- Pet slowly under the collar rather than patting on top
Keep your voice soft. Short, calm words beat fast chatter.
Layering Duration and Distraction
Layering calm into group class prep succeeds when you scale difficulty with care.
Adding Motion, Noise, and Social Pressure
- Duration first. Build to two minutes of stillness at home
- Motion next. Walk past your dog, circle, then add mild foot shuffles
- Noise after. Drop a lead, open a door, place targets on the floor
- Social pressure last. Have a quiet person walk by at distance
Return to easier layers whenever your dog struggles. Progression is not a straight line. Smart programmes are designed to advance and regress as needed so your dog keeps winning.
Common Mistakes To Avoid
Over Tiring Before Class
Long runs often create over arousal, not calm. Choose light activity and short settle drills instead.
Talking Too Much
Constant chatter keeps your dog keyed up. Use clear markers and quiet handling so calm can grow.
Troubleshooting Different Dogs
Pushy Puppies
Keep sessions short. Reward the first signs of stillness, like a soft eye blink. Use place for two to five breaths, then release.
Sensitive Dogs
Start with distance and predictable patterns. Use more Good than Yes. Slow delivery lowers arousal so training feels safe.
Big Working Breeds
They need structure and fair accountability. Use tether and mat work, clear lead pressure and release, and well timed breaks. Layering calm into group class prep is vital for these dogs.
In Class Application Step By Step
Here is how we run that first class using your home layers. The plan is simple and repeatable.
Warm Up Reset Anchor
- Arrive early and do two minutes of place in the car or just outside
- Enter when your dog is calm and focused
- Set your mat and run 30 seconds of Good marks for breathing
Working Sets and Rest Sets
- Work for one to two minutes on simple cues within place
- Rest for one minute with quiet breathing and low feeding
- Repeat three to five cycles
If your dog loses focus, increase distance and return to the last successful layer. This is still layering calm into group class prep, even inside class.
Ready to turn your dog’s behaviour around? Book a Free Assessment and connect with a certified Smart Master Dog Trainer available across the UK.
After Class Decompression
End with calm to lock in learning.
- Short toilet break and a quiet car settle
- Home routine with place for five minutes
- Light sniff walk later if needed
Review And Progress Plan
Note what worked, what needs distance, and which layers to revisit. Smart trainers map this week to week so your dog keeps growing.
When To Work With An SMDT
If your dog struggles to settle, barks at dogs, or cannot focus, do not wait. Early help speeds progress and prevents patterns from sticking. A Smart Master Dog Trainer will design a plan for your dog, your home, and your class goals.
Programmes And Support
Smart Dog Training offers tailored behaviour programmes, structured obedience, and advanced pathways. Every programme follows the Smart Method with progression you can trust. To start layering calm into group class prep with expert coaching, you can Find a Trainer Near You.
FAQs
How long should I practise before joining a class
Most dogs need one to two weeks of daily home drills before class. Focus on place, patterned settles, and calm marker delivery. This makes layering calm into group class prep feel familiar when you enter a new space.
What if my dog barks or pulls as we arrive
Pause. Return to the car or a quiet corner and run your mat routine. Reward slow breaths and soft posture. Enter only when your dog shows calm. This is still layering calm into group class prep and it protects learning.
Should I exercise my dog before class
Yes, but lightly. Choose a short sniff walk and a settle routine. Over arousal from intense play makes calm harder. Keep energy low and the brain ready to learn.
What treats work best for calm
Use soft, easy to swallow food so delivery stays quiet. Feed low to the mat to maintain stillness. Save high intensity play for later layers, not for early calm lessons.
Can this help a reactive dog
Yes. Layering calm into group class prep is essential for reactive dogs. Distance, fair pressure and release, and calm reward delivery reduce emotional spikes and teach your dog to choose stillness.
How do I know when to progress
Progress when your dog can breathe slowly, hold position for one to two minutes, and engage on cue while ignoring mild movement. If any piece slips, go back one layer and win again.
Conclusion
Layering calm into group class prep makes class day simple. You train the nervous system first, then the skills. With the Smart Method, you get clarity, fair guidance, and steady progression that holds anywhere. If you want support from start to finish, our nationwide team is ready.
Your dog deserves training that truly works. With certified Smart Master Dog Trainers SMDTs nationwide, you will get proven results backed by the UK’s most trusted dog training network. Find a Trainer Near You

Layering Calm Into Group Class Prep
What Is Real Life Proofing
Real life proofing means teaching your dog to respond in the same calm, reliable way no matter where you are. At Smart Dog Training, it is the stage where obedience becomes dependable behaviour that works in your kitchen, your street, the park, and busy public spaces. With real life proofing, skills hold under pressure because we build clarity, motivation, and accountability through the Smart Method.
This process is structured and measurable. We add distraction, duration, and distance step by step, then test the behaviour in settings that match your real days. Whether you want a smooth school run, an off lead recall in safe fields, or steady manners in a cafe, real life proofing is how we get there. Every Smart programme is delivered by a certified trainer, and many clients choose to work with a Smart Master Dog Trainer for complex goals or behaviour cases.
Why Real Life Proofing Matters for Everyday Reliability
Dogs do not automatically generalise. A perfect sit in the living room may vanish on a busy pavement. Real life proofing builds the bridge between training and life. It removes guesswork by showing your dog exactly what to do around people, dogs, bikes, wildlife, and all the moving parts of modern living.
- Safety improves because recall and lead skills stand up to surprise events.
- Stress reduces for both dog and owner, which lowers reactivity and frustration.
- Freedom grows as your dog earns more access to new places and activities.
- Consistency gives you predictable behaviour and calm routines.
At Smart Dog Training we treat real life proofing as a core milestone. It turns obedience into a lifestyle. When your dog succeeds in many contexts, confidence rises and the bond deepens. This is the stage where owners say the training finally feels easy.
The Smart Method for Real Life Proofing
The Smart Method guides every step of real life proofing. Its five pillars ensure progress that lasts in real life.
Clarity That Cuts Through Distraction
Clear commands and markers mean your dog always knows what earns a reward and what releases pressure. During real life proofing we use consistent cues, reward markers, and release words so your dog is never confused when the world gets busy.
Pressure and Release Used Fairly
We teach calm accountability without conflict. Guidance is applied with precision and released the moment the dog makes a better choice. Real life proofing depends on this timing, because dogs learn what works even when temptation is strong.
Motivation That Builds Drive
Food, toys, praise, and life rewards keep your dog engaged. We use motivation to compete with the environment. In real life proofing we plan high value reinforcement for the hardest moments, then taper rewards as behaviour becomes reliable.
Progression That Sticks
Skills are layered from simple to complex. We control distance, duration, and distraction, changing only one factor at a time. This methodical growth is what makes real life proofing safe and effective.
Trust as the Foundation
Training is a partnership. We protect the relationship by being fair, predictable, and consistent. Trust keeps the dog willing, even when we raise the bar during real life proofing in new places.
Readiness Checklist Before You Add Real Life Proofing
Before you step outside with big goals, make sure the basics are solid at home. Use this simple checklist to confirm you are ready for real life proofing.
- Your dog responds to name and gives eye contact on cue.
- Sit, down, place, and recall work with mild distraction indoors.
- Loose lead walking is calm in low pressure spaces.
- Your reward markers and release word are consistent.
- You can reward quickly and handle the lead without fumbling.
- Your dog is neutral to low level movement and sounds indoors.
If more than one of these needs work, polish at home first. A Smart Master Dog Trainer can help you accelerate this stage so real life proofing starts on a strong foundation.
Core Skills to Proof First
Focus on a small set of high value skills that you will use every day. Real life proofing begins here.
Name Response and Engagement
Your dog should look to you on name, then hold focus for a few seconds. Build up to five to ten seconds of eye contact near open doors, windows, and mild distractions. This engagement fuels real life proofing in public.
Heel and Loose Lead
Proof a steady heel for short bursts and a relaxed loose lead for longer walks. Start indoors, then in the garden, then on quiet streets. Real life proofing for lead skills means your dog can pass people and poles without drifting or pulling.
Sit Down Place and Stay
Short stays under growing distraction build impulse control. Use place to anchor your dog during greetings, doorways, mealtime, and delivery visits. These are prime targets for real life proofing because they mirror home life.
Recall
Teach a fast, happy recall with strong rewards. Keep a line on at first for safety. Real life proofing for recall means success near dogs, food scraps, and moving objects in safe settings.
Leave It and Drop
Proof impulse control around food, rubbish, and wildlife. These are vital for safety and respect for the environment. Real life proofing of leave it protects your dog from bad choices.
The Proofing Pyramid
We use a simple structure to keep real life proofing clear and fair.
Distance Duration Distraction
Adjust only one D at a time. If you increase distance, keep duration and distraction low. If you raise distraction, shorten duration. This rule prevents overwhelm and protects confidence during real life proofing.
One Change at a Time
Stack small wins. Success compounds when you progress in tiny, predictable steps. If performance drops, step back to the last point of success and work forward again. This is the backbone of reliable real life proofing.
Building Distraction Ladders
A distraction ladder is a list from easy to hard for a single trigger. We build many ladders and climb them one rung at a time. Real life proofing becomes smooth when the ladder is clear.
People Dogs Vehicles Wildlife
- People ladder: one seated person, a person walking, two people talking, a child moving, a crowd near you.
- Dog ladder: a calm dog at a distance, a moving dog at a distance, a dog passing at a few metres, a playful dog in sight, multiple dogs nearby.
- Vehicle ladder: slow bikes, prams, scooters, then cars and buses at increasing proximity.
- Wildlife ladder: pigeons at distance, pigeons moving, squirrels at distance, squirrels closer, birds taking off.
Environmental Surfaces Sounds and Scents
- Surfaces: carpet, tile, wet grass, gravel, metal grates, shallow puddles.
- Sounds: doorbell, clatter of cups, traffic rumble, sirens, bus braking, station announcements.
- Scents: food smells near bins, bakery smells, animal scents on trails.
We weave these ladders into sessions so real life proofing covers the world your dog will meet each week.
How to Add Real Life Proofing Indoors
Start where you can control the game. Indoors is ideal for the first steps of real life proofing. Use simple wins to build momentum.
- Place during door knocks. Start with family members, add the real bell, then deliveries. Reward steady posture, not just initial compliance.
- Recall between rooms with mild food distractions on the floor but blocked by clear boundaries. Reward speed and a tidy front or into heel.
- Loose lead around the table while others move chairs, talk, and laugh. Deliver calm praise for a soft lead.
- Leave it with dropped items while you move and turn. Build to three to five items on the floor.
Keep sessions short. Two to five minutes is enough. Real life proofing grows best with frequent micro sessions.
How to Add Real Life Proofing in the Garden
The garden adds smells, sounds, and wildlife. It is a safe bridge between inside and the street, which makes it perfect for the next phase of real life proofing.
- Place while you wheel bins or water plants.
- Recall past flower beds and toys. Add a long line for safety if needed.
- Loose lead along fences where dogs may bark through gaps. Mark and reward neutral interest.
- Leave it around food smells near compost or barbecue gear.
Use the same commands and markers as indoors. Consistency is key to real life proofing. If the garden is busy, work farther away, then move closer as success grows.
How to Add Real Life Proofing on the Street
The pavement is where most owners feel the pinch. Here is how to make street sessions safe and productive during real life proofing.
- Choose quiet streets and short sessions at first. End on a win.
- Walk with a clear heel for short bursts, then relax into loose lead. Swap between modes to prevent fatigue.
- Drill name response as people pass at a distance. Reinforce quick focus without nagging.
- Use sit and wait at kerbs. Add duration only when your dog is calm.
- Rehearse leave it near food wrappers. Start with low value rubbish, then work up.
- Keep recall practice safe by using a line in secure greens where it is allowed.
Street proofing is a major part of real life proofing. Keep your tone calm and your steps small. If your dog struggles, increase distance from triggers, then try again.
How to Add Real Life Proofing in Busy Public Places
Stations, markets, garden centres, and cafes test the whole system. Only go here once your dog is winning on quiet streets. This is the summit of real life proofing.
- Start on the edge. Do engagement and simple sits in quieter zones before moving closer.
- Build short place or down stays at your feet while you sip a drink. Reward calm scanning, not stiff staring.
- Pass dogs with a focus cue and a smooth heel for a few steps, then release to loose lead.
- Use leave it near food counters or dropped snacks. Keep the lead short and soft.
Keep sessions brief and upbeat. One to three reps done well beats a long, messy visit. Real life proofing thrives on quality over quantity.
Ready to turn your dog’s behaviour around? Book a Free Assessment and connect with a certified Smart Master Dog Trainer, available across the UK.
Proofing for Puppies vs Adults
Puppies need shorter sessions and more sleep. Their world is new and their attention spans are small. Keep real life proofing playful and very short. Reward generously, then end early. Adults can handle longer work but still benefit from breaks. For both groups, social exposure is not the same as real life proofing. We focus on calm engagement and clear skills, not casual greetings.
Handling Setbacks and Plateaus
Setbacks are part of real life proofing. Treat them as data, not drama.
- If the dog breaks position, lower one D and repeat. Protect confidence.
- If rewards lose power, raise value or change the game. Use food, toys, or life access.
- If excitement spikes, reduce pace, create distance, or add simple tasks between hard reps.
- If you feel stressed, take a pause. Dogs read our state. Reset, then try again.
Smart Dog Training programmes include coaching for these moments so progress does not stall. Support and structure keep real life proofing on track.
Measuring Progress and When to Level Up
We want proof, not guesses. Use simple measures to track real life proofing.
- Success rate: aim for 80 to 90 percent before increasing difficulty.
- Latency: responses should get faster, not slower, as you repeat reps.
- Recovery: after a surprise, your dog should regain focus within seconds.
- Generalisation: new places should look better each week, not worse.
Level up when the data is strong. This protects reliability and ensures real life proofing feels easy for your dog.
Safety and Ethics in Real Life Proofing
We protect dogs and the public at every stage. At Smart Dog Training we never flood dogs in the name of resilience. Pressure and release are applied with care. Motivation is used to keep the dog engaged and willing. Tools and handling are matched to the dog and used with precision. Real life proofing never means risky off lead work in public areas where it is not allowed. We choose safe venues and follow local rules.
When to Work with an SMDT
If your dog shows reactivity, anxiety, or impulse control issues, or if you have advanced goals like service tasks or protection routines, work with a certified professional. A Smart Master Dog Trainer will build a plan and coach you through each stage of real life proofing. Our national network makes it simple to find help in your area. You can Book a Free Assessment to map your programme, or Find a Trainer Near You to start locally.
Real Life Proofing Step by Step
Use this practical flow to guide your sessions.
- Pick one skill and one environment.
- Define the starting point you can do at 90 percent success.
- Choose the next tiny increase in one D.
- Run five to eight short reps. Reward quality and release cleanly.
- Log results and note any sticky points.
- Repeat the same plan on two to three different days before moving up.
Simple, repeatable steps are the secret to efficient real life proofing. With the Smart Method you will see steady gains week by week.
Common Mistakes to Avoid
- Rushing into busy spaces before the dog is ready.
- Changing too many variables at once.
- Letting the lead go tight and staying tight.
- Rewarding late or after the behaviour falls apart.
- Using the cue many times instead of helping the dog do it once well.
- Skipping rest and decompression.
Correct these early and your real life proofing will move faster and feel easier.
Real Life Proofing in Everyday Routines
Here are simple ways to blend training into life so real life proofing becomes a daily habit.
- Morning walk: practise three short heel bursts and two leave it reps.
- School run: place by the door during shoes on and off, then a calm wait at the gate.
- Meal prep: down stay while you move around the kitchen, then release to a chew.
- Weekend cafe: one short visit with focus games, then end before your dog gets tired.
- Evening play: recall away from toys, then return to play as a reward.
These tiny inserts keep real life proofing consistent without adding hours to your schedule.
FAQs on Real Life Proofing
How long does real life proofing take
Most families see clear progress within two to four weeks when they follow the plan. Full reliability varies by dog and by goals. With Smart Dog Training structure and support, you can expect steady gains and fewer setbacks.
Can I do real life proofing with a puppy
Yes, with short, fun sessions. Keep expectations low and wins high. Use food and play to build engagement. Puppies need many easy reps and lots of sleep between sessions.
What should I do if my dog fails in a busy place
Lower one variable. Increase distance, reduce duration, or pick a quieter corner. Help your dog succeed, then step forward again. This is the core rule in real life proofing.
How do I know when to remove food rewards
Fade food gradually. Keep a variable schedule and switch to life rewards like access and praise. Maintain surprise jackpots for tough wins, especially during real life proofing jumps.
Is off lead recall part of real life proofing
Yes, where it is safe and allowed. Start with a long line. Build high value reinforcement and increase challenge slowly. Safety always comes first.
What if my dog reacts to other dogs or people
Work at a distance where your dog can think. Use engagement and structured heel to pass calmly. If reactivity persists, work with a Smart Master Dog Trainer for a tailored plan.
Do I need special equipment
You need a suitable lead, a collar or harness that fits, a long line for recall practice, and high value rewards. Your trainer will help match tools to your dog.
Can real life proofing help with anxiety
Yes. Clear structure, fair guidance, and predictable wins reduce stress. Many anxious dogs settle when they understand their job in each setting.
Conclusion
Real life proofing is where training meets life. With the Smart Method you build clarity, motivation, and fair accountability, then layer challenge in a way your dog can understand. Start with strong basics, move through distraction ladders, and measure progress each week. If you need support, we are here to help.
Your dog deserves training that truly works. With certified Smart Master Dog Trainers (SMDTs) nationwide, you'll get proven results backed by the UK's most trusted dog training network. Find a Trainer Near You
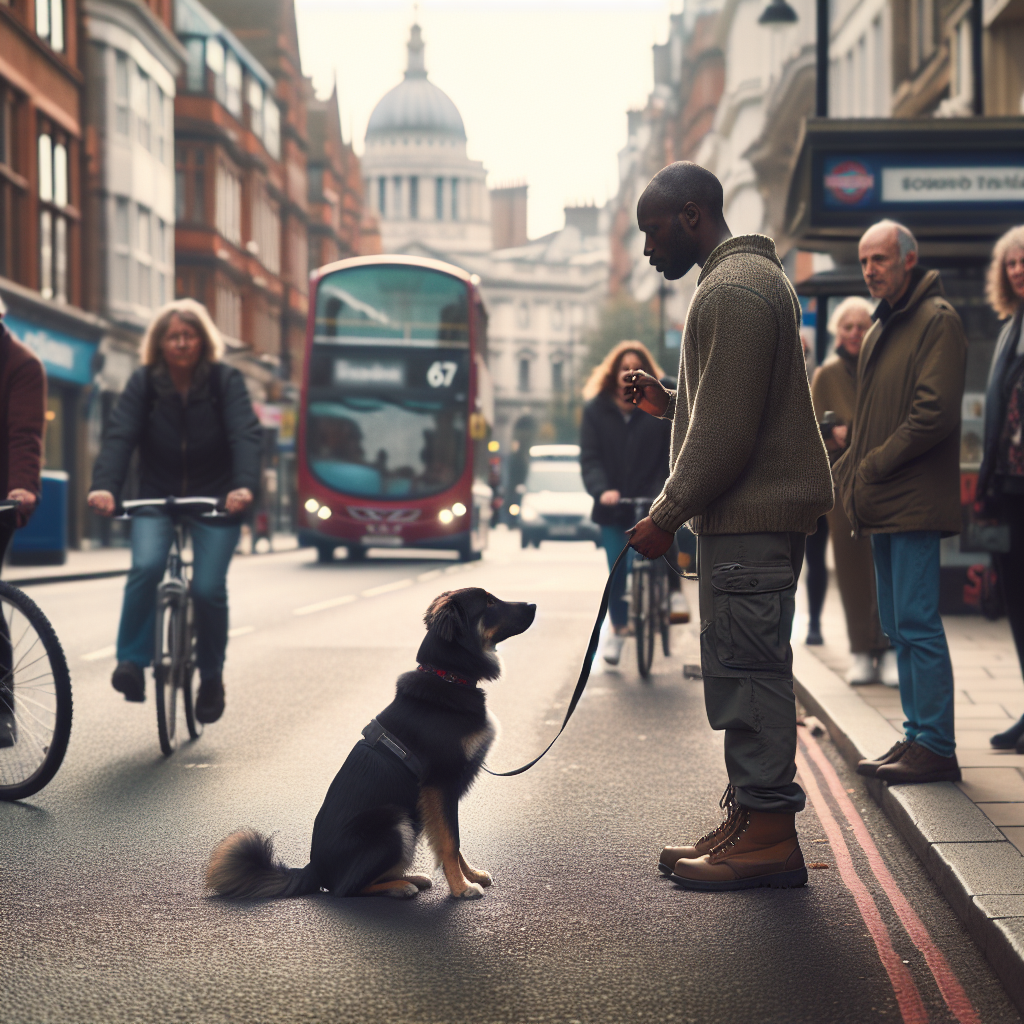
How to Add Real Life Proofing
Why Doorways Matter More Than You Think
Training calm movement through doorways is more than a neat party trick. It is a daily habit that drives safety, manners, and a calm state of mind. Doorways are thresholds where excitement spikes. If your dog surges, whines, or darts, every exit becomes stressful. With the Smart Method, we turn doorways into simple routines that guide your dog into a steady, thoughtful mindset. This change sets the tone for the whole walk and keeps everyone safe.
As a Smart Master Dog Trainer, I coach families to make doorways a place of clarity and trust. Every Smart programme follows a structured plan so training calm movement through doorways becomes effortless. By building a clear standard and a repeatable routine, you get a calm exit and entry every time.
The Smart Method for Doorway Success
Smart Dog Training uses a proprietary system built on five pillars. Training calm movement through doorways becomes simple when each pillar is in place.
Clarity
Your dog needs to know exactly what earns the next step. We use clear commands and markers so the dog understands when to wait and when to move. The release cue is the green light. Without clarity, doorways feel confusing and your dog fills the gaps with impulsive choices.
Pressure and Release
Gentle guidance creates accountability. Light lead pressure or calm body positioning invites a pause and soft eye contact. As soon as the dog settles, pressure goes away and we mark and reward. The dog learns that calm earns freedom. This is central to training calm movement through doorways that lasts.
Motivation
Rewards build a positive emotional state. Food, praise, and life rewards like moving through the door keep your dog eager to play the game. We pay well for calm self control at the threshold so it becomes the dog’s preferred choice.
Progression
We layer difficulty step by step. First a quiet interior door. Then a busier front door. Add the doorbell, visitors, and outdoor distractions. Each stage is rehearsed until calm is reliable. This progressive path is how training calm movement through doorways becomes proofed in the real world.
Trust
Doorways can feel exciting or even risky. With consistent routines your dog trusts that you will lead. That trust produces calm, confident behaviour and a stronger bond.
What Calm Movement Through Doorways Looks Like
The standard is the same for puppies and adult dogs. Calm approach on a loose lead or under verbal control. Pause at the door. Sit or stand still while you handle the latch. Hold position with the door cracked open. Wait for the release cue. Exit at a controlled pace without pulling. Turn and settle after the threshold. This pattern is the hallmark of training calm movement through doorways at Smart Dog Training.
Core Skills Before the Door
You will get faster results at the threshold if you prime a few basics. These are brief sessions that set up training calm movement through doorways for success.
Name Recognition and Orientation
Say the name once. When your dog turns to you, mark yes and reward. Repeat until orientation is quick. This attention is the foundation for a calm threshold.
Marker Training and the Release Cue
Teach three markers. Yes means you earned a reward now. Good means keep going and you are on the right track. Free or Break means you are released to move. The release cue is central to training calm movement through doorways because it separates waiting from moving.
Loose Lead and Spatial Awareness
Practice short approaches to a line on the floor. Stop before the line. If the lead tightens, take a small step back until loose. Mark and reward the slack lead. Your dog learns that slack is safe and earns progress.
Place and Sit Stay Foundations
Place on a bed teaches settle. Sit stay builds impulse control. Use them in easy rooms before you bring the game to the front door. Ten calm seconds on place can transform training calm movement through doorways later.
Step by Step Protocol for Training Calm Movement Through Doorways
Follow this sequence exactly. Short, frequent sessions beat long marathons.
Stage 1 Setup and Safety
- Use a flat collar or harness and a standard lead
- Pick a quiet interior door first
- Have high value food ready
- Decide on your release word in advance
When training calm movement through doorways, safety first. A lead prevents door darting and keeps practice tidy.
Stage 2 Approach and Pause
Walk toward the door at a relaxed pace. Two steps before the door, stop. If the lead stays loose and your dog pauses, mark yes and reward. If your dog forges, step back until the lead loosens, then try again. Keep your shoulders square to the door and breathe. Calm from you creates calm in your dog.
Stage 3 Sit and Eye Contact
Ask for a sit or a stand still. Either is fine as long as the dog is stable. Wait for a brief glance at you. Mark yes and reward. Repeat until the sit and quick check in happen without prompting. This is the start of training calm movement through doorways that your dog enjoys.
Stage 4 Door Handle and Micro Releases
Touch the handle. If your dog stays calm and the lead is slack, mark good and feed in position. If your dog pops up or pulls, simply reset by closing your hand and waiting for calm. No scolding. No repeated cues. The door only moves when your dog is composed.
Stage 5 Crack the Door and Reset
Open the door one inch and close it again. Reward stillness. If your dog moves, close the door then wait for calm before trying again. This is where the release cue matters. The door opening does not mean go. The release word means go. That link is the core of training calm movement through doorways.
Stage 6 Release to Move One Step
With the door cracked, give the release cue and take one slow step forward together. If your dog stays with you and the lead is slack, mark yes and reward just outside the door. Move back in and reset. The door itself becomes a reward. This life reward pairs nicely with food to build strong motivation.
Stage 7 Exit and Reentry Reps
Now chain the pieces. Approach. Pause. Sit or stand still. Handle. Crack. Release. Step out. Turn. Reenter. Each clean rep is a win. Five perfect reps beat fifteen messy ones. You are training calm movement through doorways by making the routine predictable and successful.
Using Pressure and Release Fairly
Pressure and Release is a key Smart Method pillar. Use it with feeling and timing. If your dog leans forward, apply light lead pressure back toward your hip. The moment your dog softens and the lead goes slack, release pressure and mark good. You are not restraining. You are guiding and then rewarding compliance. This approach builds accountability without conflict and supports training calm movement through doorways across any environment.
Lead Guidance and Body Positioning
- Keep hands low and close to your body
- Stand tall and face the door to reduce crowding
- Step back a half step if your dog crowds the threshold
- Step forward only when the lead is loose
Your body language is information. Calm, minimal movement keeps the picture clean.
Reward Strategy That Builds Reliability
Rewards should reflect effort. Pay more when the environment is tough. As your dog gets consistent, switch from frequent food to life rewards. The best reward for training calm movement through doorways is the right to go outside. Pair this with praise and a short sniff break. Your dog will choose calm because it pays.
Food, Toy, and Life Rewards
- Food for early learning and precise timing
- Toys for high play dogs when appropriate
- Life rewards like exiting, access to the garden, or greeting a friend
Rotate rewards to keep engagement high. If focus dips, you are paying too little for the level of distraction.
Proofing Distraction, Duration, and Distance
When the basics feel easy, we add difficulty in small steps. This is how training calm movement through doorways becomes bulletproof.
Doorbell, Visitors, and Deliveries
Rehearse the doorbell as a cue to go to place rather than to rush the door. Ring the bell, send to place, reward, then perform your doorway routine. Invite a friend to act as a delivery person while you practice. Keep sessions short and calm.
Multi Dog Households and Kids
Train one dog at a time first. When both dogs can perform alone, practice side by side with two handlers. If you are solo, exit with one dog while the other waits crated or on place. Involve children by giving them simple jobs like holding the treat pot or saying the release cue on your signal. Structure makes training calm movement through doorways a family habit.
Gates, Cars, Lifts, and Public Spaces
Take the routine to garden gates, car doors, lifts, shop entrances, and vet clinics. Use the same steps. Pause. Stillness. Handle. Crack. Release. One calm doorway standard fits every threshold. That consistency is the Smart advantage.
Solving Common Problems at the Door
Even with a solid plan, you may meet bumps in the road. Here is how Smart trainers fix the most common issues while keeping training calm movement through doorways on track.
Pulling, Forging, and Lunging
Go back to the approach step. If the lead tightens, step back until it softens. Mark the return to slack. Repeat. Only approach the door when your dog can reach it on a loose lead three times in a row. If outside is too exciting, rehearse at an interior door again to rebuild confidence.
Barking, Whining, and Spinning
Lower the arousal before you start. Add two minutes on place, then a few food scatters away from the door. Begin the routine only when breathing softens. Reward quiet and stillness generously. If noise returns, pause the session. Calm is what opens the door in training calm movement through doorways.
Door Darting and Escapes
Keep the lead on until the behaviour is rock solid. If a dash happens, calmly guide back inside and reset. Short, clean reps beat wrestling at the door. Practice the release cue in other contexts so it has strong meaning.
Daily Routines That Lock In Calm
Repetition builds habits. Treat every exit and entry as a training rep. You will be amazed how fast training calm movement through doorways becomes automatic.
The Walk Start Ritual
- Clip the lead while your dog is on place
- Approach the door on a slack lead
- Pause and breathe together
- Handle the latch and pay calm
- Release to move one step
- Exit and settle before the pavement
Start every walk this way for two weeks. Consistency now prevents problems later.
Return to Home Ritual
- Pause outside before reentering
- Ask for sit or stillness as the door opens
- Release to enter on a slack lead
- Send to place inside for a minute of quiet
Bookending the walk with calm protects your progress and keeps arousal low in the home.
When You Need Expert Help
Some dogs carry big feelings at thresholds. Rescue histories, strong prey drive, or a habit of pulling can make doors feel tricky. A certified Smart Master Dog Trainer will assess your dog and coach you through a tailored plan. Our trainers use the Smart Method to set clear standards and guide steady changes. If you want coaching on training calm movement through doorways, hands on support can make all the difference.
Ready to turn your dog’s behaviour around? Book a Free Assessment and connect with a certified Smart Master Dog Trainer available across the UK.
Real Life Scenarios to Practice
Use these short drills to generalise the routine and keep it strong.
- School run exits with backpacks and scooters nearby
- Rainy day exits with wind and noise
- Garden gate practice with neighbour dogs present
- Car boot practice with shopping bags
- Vet clinic entry where scents are intense
Each scenario deepens training calm movement through doorways and proves your dog can stay calm under pressure.
How Smart Programmes Build Lasting Results
Every Smart Dog Training programme follows the same structure. Assessment sets your goals. We teach the core skills in simple steps. We layer distraction, duration, and distance. We measure progress at home and in real environments. This is not random training. It is a progressive path that produces calm, consistent behaviour you can rely on. That is why training calm movement through doorways becomes just another easy habit.
Owner Mindset and Handling Skills
Your calm leadership matters. Keep your voice low and your movements tidy. Mark small wins. End sessions while your dog is still engaged. If frustration appears, take a short break then return to an easier version. You are learning a skill too. With practice, your handling becomes part of the cueing that keeps training calm movement through doorways dependable.
Safety Notes for Busy Homes
- Use baby gates or leads to prevent accidental escapes while you train
- Keep ID tags current while you proof the routine
- Set guest rules so visitors wait while you place the dog and complete the sequence
Safety allows you to practice without fear. When everyone understands the routine, your dog relaxes faster and training calm movement through doorways accelerates.
FAQs Training Calm Movement Through Doorways
How long does it take to teach calm doorway behaviour
Most families see clear improvements within one week of daily practice. Full reliability across busy doors can take two to four weeks. Short, clean sessions are best for training calm movement through doorways that lasts.
Should my dog sit or just stand still at the door
Either is fine. Stillness is the goal. Many dogs find a sit easier to hold at first. Over time, the real skill is waiting for the release cue. That is the core of training calm movement through doorways.
What if my dog is too excited to take food at the door
Use distance and decompression. Step back from the door, add place work, and feed away from the threshold. Then return to the door for very short reps. You can also use life rewards by exiting as the reward for stillness.
Can puppies learn this or should I wait
Puppies can and should learn the routine early. Keep sessions very short and upbeat. Use soft guidance and lots of rewards. Training calm movement through doorways is one of the safest ways to teach impulse control to young dogs.
How do I handle guests who arrive while I am training
Place the dog, open the door only when stillness is present, then release to greet on cue if appropriate. If your dog struggles, keep greetings brief or skip them. The doorway routine comes first.
What leash and collar should I use
Use a simple flat collar or well fitted harness and a standard lead. Avoid equipment changes mid process. Consistency helps your dog read the picture and supports training calm movement through doorways.
Conclusion
Doorways shape the entire outing. When you make them calm and predictable, everything that follows improves. With the Smart Method you set a clear standard, guide with fair pressure and release, motivate well, progress step by step, and build trust. That is how training calm movement through doorways becomes reliable in every context. Start inside, keep sessions short, and protect your routine. Your dog will soon choose calm at the threshold because it works and it pays.
Take the Next Step
Your dog deserves training that truly works. With certified Smart Master Dog Trainers SMDTs nationwide, you'll get proven results backed by the UK's most trusted dog training network. Find a Trainer Near You
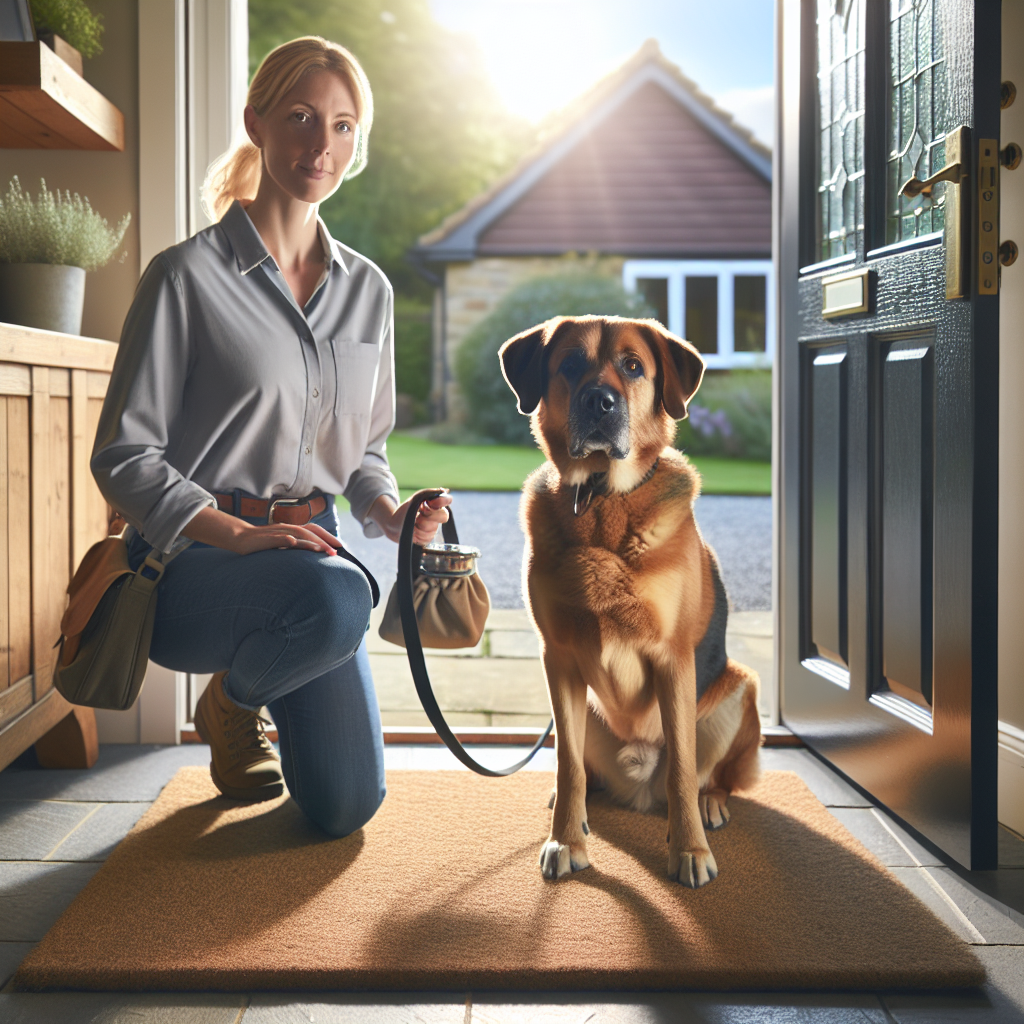
Training Calm Movement Through Doorways
Dog Pre-Walk Routines for Calm Starts
When a walk begins in chaos, it often stays chaotic. Dog pre-walk routines for calm starts set the tone for the entire outing. At Smart Dog Training, we use the Smart Method to transform the moments before you step outside, so your dog moves from excitement to clarity, then to engagement and self control. Every step below is part of a structured sequence that any family can learn with guidance from a Smart Master Dog Trainer. Calm starts are not luck. They are the result of a repeatable plan that works.
Why Calm Starts Matter
The first minutes of a walk create your dog’s state of mind. If your dog rehearses barking, spinning, or lunging as you reach for the lead, that arousal carries forward. By installing dog pre-walk routines for calm starts, you:
- Reduce pulling and reactivity on the pavement
- Lower frustration and barking at the door and gate
- Build focus so your dog checks in with you by choice
- Create predictable structure that feels safe and easy to follow
- Set up loose lead walking before you even leave the house
Smart Dog Training programmes always begin with the moments before the door opens. A certified Smart Master Dog Trainer will teach you how to turn pre-walk chaos into composed, willing behaviour.
The Smart Method Approach
The Smart Method delivers calm, consistent behaviour that lasts in real life. We apply five pillars through the entire pre-walk routine.
- Clarity. Simple, precise markers and positions that your dog understands.
- Pressure and Release. Fair guidance with clear release and reward, so your dog learns accountability without conflict.
- Motivation. Food, toys, and praise used strategically to create engagement and joy.
- Progression. Step by step layering of challenge, duration, and distraction until it works anywhere.
- Trust. A predictable routine that strengthens the bond and builds calm confidence.
Understanding Arousal Triggers Before Walks
Most pre-walk problems are predictable. Common triggers include the sound of the lead clip, the harness appearing, the phrase walkies, and the movement toward the door. Your dog has learned that these signals predict access to the outside, so excitement spikes. Dog pre-walk routines for calm starts decouple those triggers from frantic behaviour. We change the meaning of each step by asking for specific, simple behaviours that are rewarded, then reinforced with access to the walk.
Setting Up Your Home Environment
Control the space to control the state of mind. Before you begin:
- Choose a calm staging area near the door with minimal distractions.
- Place the lead, harness, and rewards in a set location.
- Decide your start button behaviour. We recommend Sit or Place.
- Remove clutter or slippery mats that cause fidgeting.
- Limit access to windows that trigger barking at passersby.
When everything is prepared, you can focus on the routine rather than searching for equipment while your dog escalates.
The Pre-Walk Timeline At a Glance
Think of the routine as a short lesson. In ten minutes, you will guide your dog through a sequence that anchors calm and focus.
- Reset and settle in the staging area.
- Start button behaviour for harnessing.
- Lead pressure and release for attention.
- Door manners and threshold training.
- Two minute focus circuit outside, then begin the walk.
You can extend or shorten each step depending on your dog’s needs. The structure stays the same, which is why these dog pre-walk routines for calm starts are so dependable.
Step One Clarity With a Start Button Behaviour
Clarity is your foundation. Pick one behaviour that tells you your dog is ready to proceed. We use Sit, Down, or Place. Place means all four paws on a mat or bed. The rule is simple. If the dog leaves the behaviour, the routine pauses and resets. When the dog returns to the behaviour, the routine resumes. This builds self control without conflict.
How to install it:
- Lure or guide your dog onto Place or into Sit.
- Mark Yes when the dog meets criteria, then reward in position.
- Bring the harness toward the dog. If the dog pops up, calmly reset to the start button behaviour.
- When the dog holds position as the harness approaches, mark and reward.
Repeat until your dog understands that calm stillness makes the routine move forward.
Marker Words and Release
Smart Dog Training uses clear marker words. Yes means your dog earned a reward. Free means your dog is released from position. Pair markers with tiny, accurate timing so your dog knows exactly which behaviour you liked. Clarity removes confusion and prevents frustration, which is essential for dog pre-walk routines for calm starts.
Sit to Equip Harness as a Consent Routine
Turn harnessing into a consent exercise. Present the neck opening or chest strap. If the dog moves into position, mark and reward. If the dog backs away or wiggles, calmly reset to Sit or Place, then try again. Your dog learns that calm cooperation makes the harness appear and the game continue.
Step Two Pressure and Release for Door Manners
Pressure and Release, applied fairly, teaches your dog how to follow light guidance and then switch off pressure by making a good choice. In pre-walk routines, we use it with the lead and door threshold.
Threshold Training Without Conflict
Stand at the door with your dog on lead. A closed door is your first rep. Ask for Sit. Reach for the handle. If your dog breaks position, quietly close your hand and reset. When your dog holds the Sit as you touch the handle, mark and reward. Repeat with the door opening a crack. The door only opens fully when your dog remains calm and responsive. This builds automatic manners without repeated cues.
The Lead Pressure Reset
Apply gentle, steady lead pressure upward or toward you until your dog softens and yields. The instant your dog gives to the pressure by stepping toward you or relaxing the neck, release and mark Yes. This teaches a simple rule. Follow light guidance and the pressure turns off. Used in short reps, it prevents bolting and anchors attention at the door. It is a cornerstone of dog pre-walk routines for calm starts at Smart Dog Training.
Step Three Motivation and Engagement Games
Motivation changes how your dog feels about listening. We use rewards with purpose, not hype. The goal is a calm, happy worker, not a frenzied one.
Food, Toys, and Praise Used Smartly
Keep rewards small and frequent early in the routine. Reinforce stillness, eye contact, and slow breathing. Save higher value food for moments when your dog resists the urge to break position. If your dog becomes giddy with a toy, switch to food or calm praise before the door opens.
The Two Minute Focus Circuit
Right after you step outside, set a two minute timer. Do not march off yet. Run a quick circuit that locks in attention:
- Name response for five reps. Say the name once, mark Yes for fast eye contact, reward.
- Hand target for five reps. Present your palm near your dog’s nose. When the nose touches the hand, mark and reward.
- Positioning for five reps. Step off, ask for Heel or Loose position for three steps, mark and reward. Reset and repeat.
This micro lesson turns the environment into a training field. It is one of the most powerful parts of dog pre-walk routines for calm starts because it prevents early pulling and barking.
Step Four Progressive Distraction and Duration
Progression makes training reliable anywhere. Add challenge in layers.
- Duration. Increase holding Sit at the door from two seconds to ten, then to thirty.
- Distance. Step away from your dog while keeping the Sit, then return and reward.
- Distraction. Introduce mild sounds like a dropped keyring or a family member walking by. Reward calm staying.
Only raise one variable at a time. If your dog struggles, drop difficulty and win small. This is how Smart Dog Training produces real world results.
Step Five Trust and Calm Handling
Trust grows when the routine is predictable and fair. Speak less and mean more. Use soft hands, neutral breathing, and measured movement. Praise your dog for thoughtful choices. Your calm communicates safety. Over several days, your dog will begin to meet you in the middle, offering the behaviours that start the walk in a quiet, focused state.
Owner Energy and Consistency
Set the tone. If you rush, your dog will rush. If you sigh or repeat cues, your dog will tune them out. Repeat the same steps every time. Consistency is the secret ingredient in dog pre-walk routines for calm starts.
Troubleshooting Common Pre-Walk Problems
Barking When You Pick Up the Lead
Desensitise the cue. Pick up the lead ten times a day without going for a walk. Place it down calmly. When your dog stays quiet, mark and reward. When your dog barks, ignore the noise and wait for a breath of silence before putting the lead away. Over a few days, the lead loses power as a trigger and becomes part of a calm pattern.
Harness Nipping or Spinning
Slow the picture down. Restart at the start button behaviour. Present the harness slowly. Reward for stillness as the harness approaches, then for the head going through, then for the buckle clipped. If needed, break it into even smaller steps. Short, easy wins stack into cooperation.
Lunging at the Door
Use the threshold as feedback. If your dog surges, the door closes. If your dog softens and sits, the door opens. Avoid frustration. Keep your voice calm. Let the door do the talking. Pair with gentle lead pressure and release so your dog learns how to switch off pressure by making a better choice.
Tailoring for Puppies and Rescue Dogs
Puppies have short attention spans and rescue dogs may carry stress from past routines. Shorten each step. Reward more often. Use softer distractions. Aim for one to three minutes per stage rather than long holds. The structure stays the same, but the pacing is kinder. Dog pre-walk routines for calm starts work beautifully for young and sensitive dogs when scaled appropriately.
Tools Used the Smart Way
Leads, Collars, and Harnesses
Pick equipment that fits well and allows clear communication. A flat collar or well fitted harness works for most dogs when guided with the Smart Method. The key is timing and technique. Equipment does not replace training. Training makes equipment effective.
Reward Pouch Positioning
Keep rewards on the hip nearest the dog. Reward low and close to your leg. This anchors the position you want to reinforce and prevents snatching or jumping.
Measuring Progress and Keeping Records
Track three metrics for two weeks:
- Time to calm. How long until your dog offers the start button behaviour after you prepare the lead
- Door threshold success. How many smooth exits without breaking Sit
- First five minutes on lead. How many check ins and how many pulls
Numbers reveal progress that feelings can miss. Families are often surprised by how quickly these dog pre-walk routines for calm starts change the picture when applied daily.
Sample Ten Minute Pre-Walk Routine
Use this template as written for two weeks. Then adjust with your trainer to match your dog.
- Minute 0 to 1. Quietly gather lead and rewards. Dog waits on Place.
- Minute 1 to 3. Harness consent. Present the harness. Mark and reward stillness and cooperation. Reset to Place if the dog pops up.
- Minute 3 to 4. Lead pressure and release in the hallway. Three short reps of yielding to light pressure, mark, reward.
- Minute 4 to 6. Door manners. Sit, touch the handle, mark and reward. Open a crack, mark and reward. Open fully when calm holds. If the dog breaks, close gently and reset.
- Minute 6 to 8. Step outside and run the two minute focus circuit. Name, hand target, three step position work. Mark and reward.
- Minute 8 to 10. Begin walking at an easy pace. Reward check ins. If arousal spikes, pause, reset with a short Sit or hand target, then continue.
Repeat daily. Keep it light. The goal is steady calm, not perfection on day one.
When to Get Professional Help
If your dog rehearses intense behaviours such as biting the lead, panicking at equipment, or explosive lunging at the door, bring in a professional. A certified Smart Master Dog Trainer will assess your dog, tailor the routine, and coach your timing so progress feels smooth and safe. Ready to turn your dog’s behaviour around
Book a Free Assessment and connect with a certified Smart Master Dog Trainer, available across the UK.
FAQs
How long should dog pre-walk routines for calm starts take
Most families see best results with a five to ten minute routine. Young puppies and excitable dogs may start with three to five minutes and build up as they learn the pattern.
Do I use food forever
No. Use food heavily at first to build clarity and motivation. As behaviours become reliable, fade to intermittent rewards and praise. Access to the walk becomes the main reward.
What if I have limited time before work
Shorten the routine, not the structure. Two minutes for start button behaviour, one minute for lead pressure, one minute for door manners, then a one minute focus circuit outside. Consistency matters more than length.
My dog shakes with excitement when I say walkies. Should I stop saying it
Yes, at least for now. Retire the cue while you build a new, calm routine. Later, reintroduce the word with calm criteria so it predicts focus rather than frantic behaviour.
Can I train more than one dog at a time
Teach the routine to each dog individually first. When both dogs can hold the steps alone, pair them and reduce difficulty. Use Place beds to manage space and fairness.
Will this help with pulling on the actual walk
Yes. Calm starts reduce arousal, which reduces pulling. The two minute focus circuit also installs attention and position. Combine this with Smart Dog Training loose lead coaching for lasting results.
What should I do if my dog refuses the harness
Break the step into smaller pieces. Reward for looking at the harness, then for approaching, then for touching, then for placing the head through. Keep sessions short. If refusal persists, get support from a Smart trainer.
How often should I practice on non walk days
Run mini reps daily. Present the lead, ask for the start button behaviour, then end the session with a reward and a play break in the house. This removes the outside reward and builds real understanding.
Ready to Train With Smart
Families across the UK rely on Smart Dog Training to build dog pre-walk routines for calm starts that hold up in real life. Our programmes are structured, progressive, and tailored to your home and neighbourhood. If you are ready to change your first five minutes, we are ready to coach you step by step.
Your dog deserves training that truly works. With certified Smart Master Dog Trainers, SMDTs, nationwide, you will get proven results backed by the UK’s most trusted dog training network. Find a Trainer Near You
Conclusion
Calm begins before the door opens. By following these dog pre-walk routines for calm starts, you install clarity, fair guidance, motivation, progression, and trust. The Smart Method turns scattered excitement into composed focus, so the whole walk improves. Start with a simple start button behaviour, add gentle lead pressure and release, reinforce door manners, and run a short focus circuit outside. Track your progress and keep the routine consistent. If you need tailored help, Smart Dog Training will guide you with a plan that works for your dog, your home, and your lifestyle.
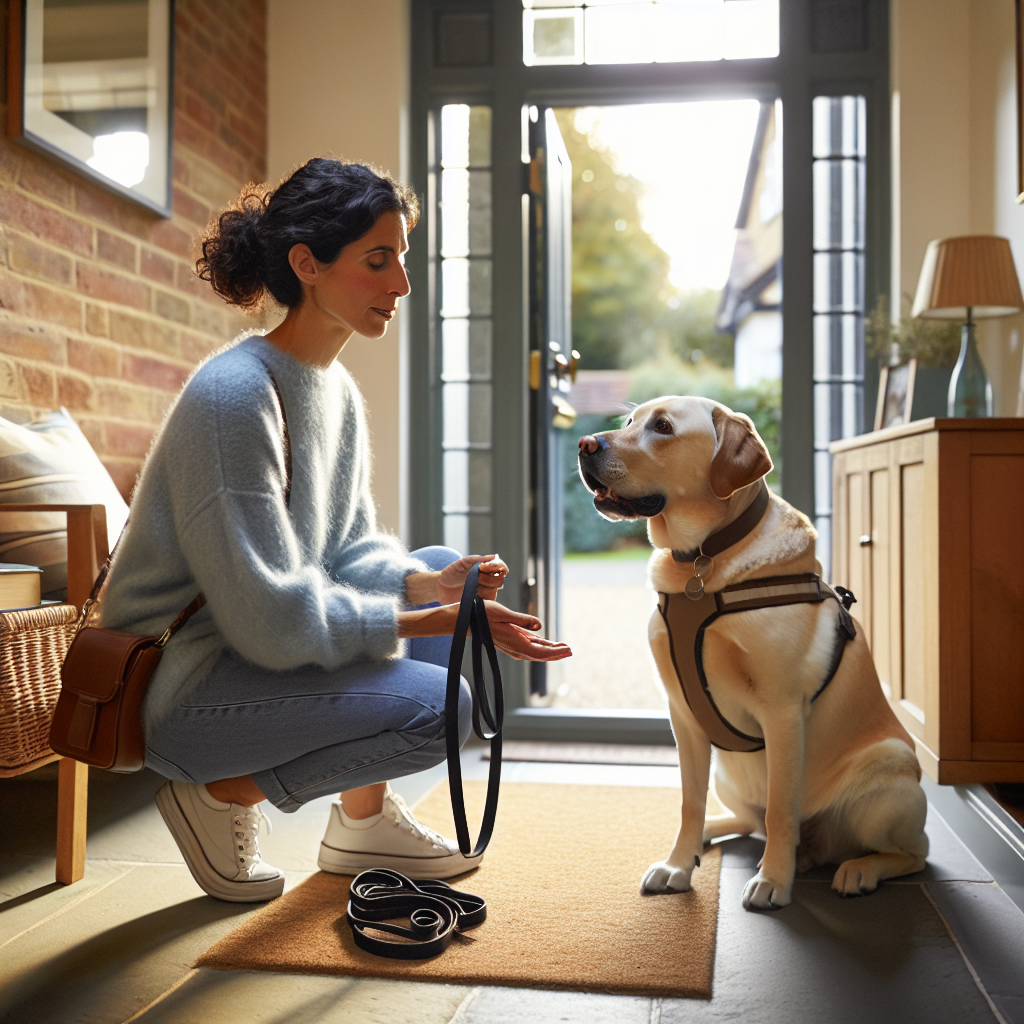
Dog Pre-Walk Routines for Calm Starts
Dog Training for Everyday Control
Every family needs calm, reliable behaviour that works in real life. Dog training for everyday control is where that starts. At Smart Dog Training, we deliver a structured system that turns chaos into clarity and builds skills that last on the school run, in the cafe, and on the sofa. With guidance from a Smart Master Dog Trainer (SMDT), you get a clear plan, fair accountability, and positive engagement that your dog understands and enjoys.
Dog training for everyday control is not a quick fix. It is a step by step pathway that blends precise communication, meaningful motivation, and measured progression. Our Smart Method has shaped thousands of dogs across the UK, producing calm, consistent behaviour that holds up anywhere. This article lays out that pathway so you can see exactly how Smart Dog Training builds everyday control that sticks.
What Everyday Control Really Means
Everyday control means your dog can relax, listen, and respond under normal life pressure. It looks like this in daily scenes:
- Loose lead walking past people and dogs without pulling
- Sitting to greet visitors instead of jumping
- Waiting at doors until released
- Settling on a mat in a busy cafe
- Coming when called at the park every time
- Ignoring dropped food and exciting distractions
Dog training for everyday control covers all these moments and more. It blends obedience with emotional control so your dog is not only obedient but also calm and confident.
The Smart Method at a Glance
Every Smart Dog Training programme uses the Smart Method. It has five pillars that shape how we teach and how dogs learn:
- Clarity. We use clear markers and commands so your dog knows when they are right, when to try again, and when they are released.
- Pressure and Release. We guide with fair pressure and remove it the instant your dog chooses the right answer. This makes learning clear, calm, and accountable.
- Motivation. We build desire to work using food, toys, touch, and praise. Dogs want to train when they understand how to win.
- Progression. We layer difficulty in steps. We add duration, distance, and distraction in a logical order and only when your dog is ready.
- Trust. Training strengthens the bond between you and your dog. Clear rules create safety and predictability.
Dog training for everyday control thrives when these pillars work together. You get a dog that listens, but you also get a relationship built on trust.
Why Structure Outperforms Guesswork
Most struggles at home come from mixed signals. One day the sofa is allowed, the next it is not. The lead is loose at the start of the walk but tight at the end. With Smart Dog Training, structure removes confusion. We decide the rules, teach them fairly, and follow them every day. Small consistent reps beat occasional long sessions. Short sessions layered across normal life create habits that stick.
Core Behaviours That Change Daily Life
Dog training for everyday control focuses on a core set of skills. These give you immediate wins and lasting reliability.
Name Response and Attention
Your dog must orient to you the moment you say their name. We teach a clean attention response with a marker for yes, a marker for try again, and a release word. This gives you a way to cut through distraction and begin any other skill.
- Say the name once
- Mark the moment your dog looks at you
- Reward with food or praise
- Repeat across rooms, then the garden, then the street
Place and Settle
Place is a game changer for households. Your dog goes to a defined spot and relaxes until released. This single behaviour prevents door dashing, kitchen chaos, and guest jumping.
- Introduce a raised bed or mat as the Place
- Guide to the mat, mark and reward calm
- Add a lie down and quiet breathing
- Increase duration one minute at a time
- Proof with light distractions before harder ones
Loose Lead Walking That Stays Loose
Pulling is the number one stressor on daily walks. We teach heelwork as a calm, focused walk position that the dog understands and enjoys. Pressure and release helps your dog find the sweet spot at your side while rewards keep engagement high.
- Start in a quiet hallway
- Reward for position and eye contact
- Use a clear no pull rule from the first step
- Take two to three steps, then release and play
- Grow distance only when the lead stays soft
Reliable Recall in Real Settings
Recall is non negotiable for safety. Our recall builds on attention, heelwork, and clear markers. We create a powerful conditioned response so coming back beats any distraction.
- Teach a fast turn and run to you on a long line
- Mark and reward at your feet
- Repeat in new places with low distraction
- Only increase challenge when recall is instant
Sit, Down, Stand, and Stay for Life
Static positions give you control in small spaces and busy places. We build duration slowly and add distance and distraction only after the dog is stable.
- Start with short holds and frequent releases
- Reward calm body language
- Add one new challenge at a time
- Use the same release word every time
Fair Guidance Using Pressure and Release
Pressure and release is the backbone of clear communication in dog training for everyday control at Smart Dog Training. We apply light guidance to show the path, then release pressure the instant the dog makes the right choice. Dogs learn how to turn off pressure by doing the task. This builds accountability without conflict and gives your dog real control over the outcome.
Motivation Without Mayhem
Rewards should focus the mind, not blow the lid off. We shape a dog who is excited to work yet steady and thoughtful. This comes from well timed reinforcement, not random feeding. Food and toys mark success. Calm praise reinforces stillness when you need it most, like in a cafe or at the vet.
Progression That Holds Under Distraction
Smart Dog Training uses a repeatable progression for every behaviour. It is simple and powerful:
- Skill first. Teach what to do in a quiet place.
- Duration second. Hold the behaviour longer.
- Distance third. Step away while your dog holds.
- Distraction last. Add movement, noise, and novelty.
Dog training for everyday control follows this ladder every time. Your dog wins in easy stages until real life feels easy too.
Proofing at Home and in Public
Once your dog knows a behaviour, we make it resilient. Proofing means practising around mild to strong distractions without losing clarity.
- Home. Practice while the kettle boils or the kids play.
- Garden. Add birds, smells, and passing neighbours.
- Street. Short reps near parked cars and doorways.
- Park. Use distance from high value distractions at first.
When proofing recall, always control the environment with a long line until your dog is reliably fast and focused.
Door Manners and Calm Greetings
Front doors are pressure cookers for dogs. We fix this with a simple routine:
- Place on the mat before you open the door
- Wait until your dog settles before greeting guests
- Release to say hello only when calm
- Return to Place between greetings
Dog training for everyday control shines here because the same rules apply whether it is a delivery, a neighbour, or family coming home.
Calm Around Food, Toys, and People
Impulse control is a vital part of real life training. We build it with planned reps, not surprise tests.
- Food. Ask for a sit and eye contact before the bowl goes down.
- Toys. Start and stop play on your terms using a clear release word.
- People. Reward calm sits for attention. No jumping earns nothing.
Your dog learns that patience makes good things happen. That is everyday control in action.
House Rules That Build Trust
Rules do not restrict your dog. They create safety. Decide your house rules and stick to them.
- Define on and off limits spaces
- Use Place during busy times like meals
- Keep leads and collars on during training blocks
- Use one set of commands and markers for the whole family
When rules are steady, your dog can relax. That is how trust grows through structure.
Common Mistakes to Avoid
- Repeating commands. Say it once. Guide the answer. Mark success.
- Overlong sessions. Short, frequent reps beat marathons.
- Skipping release words. Without a release, your dog does not know when a task ends.
- Jumping to distractions too fast. Follow the Smart progression.
- Using the lead as a tug rope. The lead is a line of communication, not a lifeline.
Two Sample Weeks for Fast Progress
Here is how dog training for everyday control looks in practice. Use this as a template and adjust to your dog.
Week One and Two Foundations
- Daily attention reps and name response in each room
- Place for two to five minutes, three times a day
- Loose lead walking in the hallway, then driveway
- Recall on a long line in the garden
- Sit and Down with short holds and clear releases
Week Three and Four Adding Distraction
- Place during meal prep and TV time
- Loose lead walking on quiet streets
- Recall with low level park distractions at distance
- Door manners with friends role playing visitors
- Short cafe settle sessions outdoors
Keep sessions short and upbeat. Use your release word often so your dog understands when they are done and when to try again.
When to Work with a Smart Master Dog Trainer
Some challenges need expert eyes and hands. A Smart Master Dog Trainer is certified through Smart University and mentored to deliver the Smart Method with precision. If you are dealing with strong pulling, unreliable recall, reactivity, or household conflict, guided support will save time and stress.
Ready to turn your dog’s behaviour around? Book a Free Assessment and connect with a certified Smart Master Dog Trainer available across the UK.
How Smart Programmes Deliver Results
Smart Dog Training offers structured programmes that blend in home coaching, small group sessions, and tailored behaviour plans. Every pathway follows the same progression so you get predictable results. Your trainer builds a plan, sets weekly targets, and coaches your timing and handling until the behaviours hold up anywhere.
- Clear goals set at the start
- Stepwise teaching with daily homework
- Real world practice in parks and public spaces
- Measured milestones that track progress
Tools We Use and Why
Tools are part of communication when used with skill. Smart Dog Training selects equipment that adds clarity without conflict. Leads, long lines, markers, and reward delivery are used with purpose. We match the tool to the dog and the exercise, then teach you how to handle it with finesse. The goal is always the same. Calm behaviour, clear choices, and trust.
Measuring Progress and Staying Consistent
Consistency is your best friend. Track three things each week:
- Latency. How fast does your dog respond
- Accuracy. How often is the answer correct first time
- Fluency. Can your dog do it in new places and under pressure
Dog training for everyday control is not about perfection. It is about steady gains. If progress stalls, reduce difficulty, rebuild wins, and move forward again.
Real Life Scenarios to Practise
- School run. Heel to the gate, Place on the grass, calm greeting, heel away
- Cafe visit. Settle on the mat, ignore food drops, release to greet
- Front door. Place before the knock, wait, controlled hello, back to Place
- Park walk. Loose lead past dogs, recall games on a long line, short settle on a bench
Tailoring for Puppies and Adults
Puppies need short, fun reps and lots of gentle exposure. Adults often need clarity and accountability to replace old habits. The Smart Method fits both. For puppies, we keep sessions very short and build confidence. For adults, we apply fair guidance with clear releases and reinforce calm choices.
FAQs
What is dog training for everyday control
It is a structured approach from Smart Dog Training that builds calm, reliable behaviour for daily life. It covers loose lead walking, recall, Place, impulse control, and door manners so your dog can handle real situations with confidence.
How long does everyday control take to build
Most families see meaningful change within two to four weeks of consistent practice. Full reliability depends on your starting point and follow through. A Smart Master Dog Trainer can speed up results by coaching timing and progression.
Can my dog still have fun if we focus on control
Yes. Dog training for everyday control increases freedom. When your dog learns to settle, walk nicely, and recall fast, you can do more together with less stress. Motivation is part of the Smart Method, so training stays upbeat and rewarding.
What if my dog knows commands but only at home
That is a proofing issue. We follow the Smart progression. First skill, then duration, then distance, then distraction. We add challenges in steps until the behaviour holds up in public.
Do I need special equipment
We keep tools simple and purposeful. A well fitted collar or harness, a standard lead, a long line for recall, a defined Place mat, and prepared rewards. Your Smart trainer will show you how to handle each tool with clarity and kindness.
When should I get professional help
Any time you feel stuck or stressed. Pulling, unreliable recall, or reactivity are strong signs to get support. Work with an SMDT who uses the Smart Method to guide you through a clear plan.
Will this work for rescue dogs or older dogs
Yes. Dog training for everyday control is built on clarity, motivation, and fair guidance. These principles fit all ages and backgrounds. We tailor pace and rewards to the individual dog.
Can the whole family take part
They should. One set of commands, markers, and rules makes learning faster. Your Smart trainer will teach everyone the same handling so your dog gets a single, clear message.
Conclusion
Dog training for everyday control is the foundation of a peaceful life with your dog. With the Smart Method, you get a repeatable system that teaches calm, builds focus, and holds up in the real world. From Place to recall to loose lead walking, every skill is taught with clarity, motivation, progression, and trust. If you want faster progress with expert guidance, connect with a Smart Master Dog Trainer and put a plan in motion.
Your dog deserves training that truly works. With certified Smart Master Dog Trainers (SMDTs) nationwide, you will get proven results backed by the UK's most trusted dog training network. Find a Trainer Near You
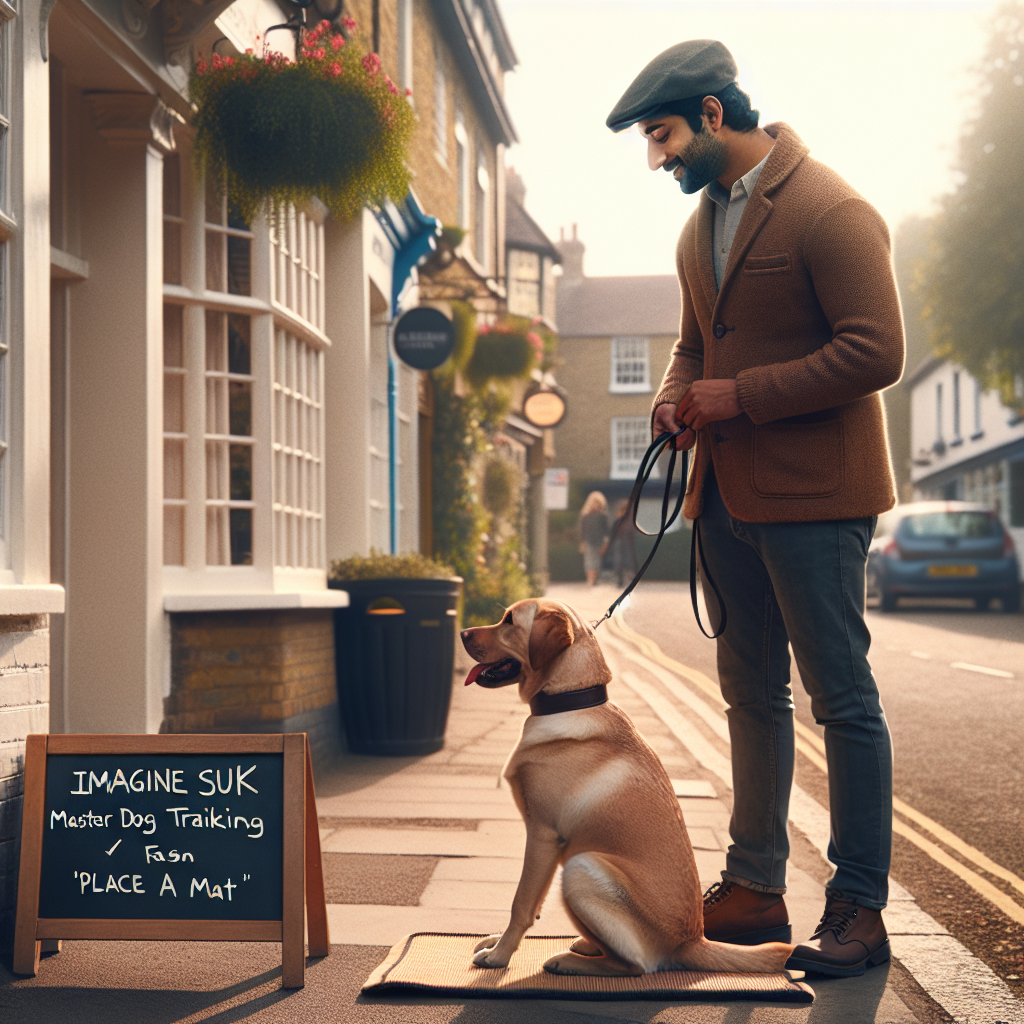
Dog Training for Everyday Control
Training Self Control Through Games
Training self control through games is the fastest way to build calm, reliable behaviour your dog can use anywhere. Games turn learning into daily habits, help your dog choose patience over impulse, and make training part of real life. At Smart Dog Training, every plan is built around training self control through games that are structured, progressive, and results focused.
Within the Smart Method, your coach is a certified professional who blends clarity, motivation, and accountability in every step. When you work with a Smart Master Dog Trainer, you follow a proven path that keeps sessions fun and fair while building skills that last. In this guide, I will walk you through training self control through games using Smart standards so you can see measurable change at home, on walks, and around distractions.
Why Self Control Matters in Real Life
Dogs do well when the rules are clear and consistent. Self control helps your dog pause, think, and make the right choice. It shows up in the moments that matter:
- Waiting at the door instead of bolting
- Keeping four paws on the floor when guests arrive
- Leaving food or toys when asked
- Walking calmly past dogs, bikes, and people
- Settling on a bed during family time
Training self control through games builds these behaviors in small steps. We start simple, then layer distraction, duration, and distance until the skill works anywhere.
The Smart Method for Calm, Consistent Behaviour
Smart Dog Training follows one system across all programmes, called the Smart Method. Every game in this guide aligns with its five pillars:
- Clarity: Short, precise cues and markers tell your dog when they are right.
- Pressure and Release: Fair guidance leads, and clear release teaches how to turn pressure off.
- Motivation: Rewards create desire, focus, and a positive emotional state.
- Progression: We add challenge step by step so skills hold up in the real world.
- Trust: Training strengthens your bond and builds calm confidence.
When you focus on training self control through games with this structure, you remove confusion and speed up results.
Foundations Before Games Begin
Before you start the full set of games, set these foundations. They make training self control through games smooth and predictable:
- Choose two reward types: one food reward and one toy reward. Keep them ready but out of sight.
- Pick a calm training area with low distraction.
- Use short sessions of three to five minutes, two to four times a day.
- Establish markers: a Yes marker for correct choices, a Good marker for sustained behaviors, and a Release marker such as Free.
- Decide on rules you will keep every time. Consistency builds trust.
Now you are set to start training self control through games that work even when life gets busy.
Game 1 Engagement Reset and Name Response
Goal: Your dog or puppy looks to you on cue and disengages from distraction.
Steps:
- Say the name once. When your dog makes eye contact, mark Yes and reward.
- If they do not respond, create gentle movement backward so your dog follows. Mark and reward the moment they look up.
- Repeat across the room and in the garden. Work up to brief distractions like a toy on the floor.
Why it works: All training self control through games relies on attention first. This game teaches your dog that checking in is always worth it.
Game 2 Food Bowl Wait and Release
Goal: Your dog waits calmly for food until released. This is a core self control pattern with daily practice built in.
Steps:
- Place the bowl on a surface. Ask Sit. Lower the bowl toward the floor.
- If your dog stands or moves toward the bowl, lift the bowl quietly and reset Sit.
- When your dog remains in Sit as the bowl touches the floor, pause, then say Free. Mark and allow the meal.
- Progress to longer pauses, then add you stepping one pace back while they hold position.
Why it works: Your dog learns that stillness and patience turn the reward on. Training self control through games thrives on clear release rules.
Game 3 Doorway Manners and Thresholds
Goal: Your dog stops and waits at doors, gates, and cars until you release.
Steps:
- Walk to the door with your dog on leash.
- Ask Sit. Touch the handle. If your dog pops up, close the door and reset.
- Open the door a crack. If your dog stays, mark Good. Close. Repeat.
- Build to a full open door. Release with Free and step through together.
Why it works: This game turns an exciting threshold into a calm checkpoint. It fits neatly within training self control through games because the environment itself is the reward.
Game 4 Place Command Relaxation
Goal: Your dog goes to a designated bed or mat, lies down, and remains there until released.
Steps:
- Lure onto the bed, mark Yes, and reward on the bed.
- Add Down on the bed. Feed several calm rewards in place.
- Add the cue Place. Start to step away one step, then two. Mark Good for holding still.
- Release with Free and toss a reward away to reset.
Progressions:
- Walk around the room, handle light chores, or greet a family member while your dog stays.
- Introduce mild noises and household distractions.
Why it works: Place becomes a chill zone. Using Place daily anchors training self control through games in normal family life.
Game 5 Fetch Wait Drop and Fetch Again
Goal: Your dog fetches, returns, drops on cue, then waits for the next throw.
Steps:
- Throw the toy. When your dog returns, swap for food at your knee. Mark Yes as the toy drops.
- Ask Sit. Pause one second. Release with Get it and throw again.
- Increase the wait to three to five seconds before release.
Why it works: Movement fuels arousal. This game teaches your dog to switch from high energy to calm, then back to fun on your cue. It is perfect for training self control through games in the garden or park.
Game 6 The Three Treat Test
Goal: Your dog learns Leave it and builds trust around open food in your hand or on the floor.
Steps:
- Show a treat in a closed fist. When your dog backs off, mark Yes and reward from the other hand.
- Open the fist briefly. If they move in, close it. If they hold off, mark Yes and reward.
- Place three treats on the floor with your hand hovering above. Say Leave it once. Reward any pause or look to you.
- Increase space between treats or move your hand away in small steps.
Why it works: This is one of the most practical ways of training self control through games. Your dog learns that ignoring the obvious reward brings a better reward from you.
Game 7 Leash Pressure and Release Walk
Goal: Your dog follows light leash guidance, then finds the sweet spot of a loose leash.
Steps:
- Stand still. Add gentle leash pressure to ask your dog to step toward you.
- The moment they step into the slack, mark Yes and reward at your side.
- Walk a few paces. If the leash tightens, stop and wait. Reward the return to slack.
Why it works: Dogs learn how to turn pressure off with the right choice. This aligns with the Pressure and Release pillar and supports training self control through games on every walk.
How to Layer Duration Distance and Distraction
Self control is strongest when you layer challenge slowly and fairly. Use this Smart ladder for training self control through games:
- Duration: Hold the behaviour one to five seconds. Then ten. Then thirty. Keep rewards calm and slow.
- Distance: Take one step away. Then two. Then around a corner for a second. Return to reward on the spot.
- Distraction: Add a person walking by, a toy on the floor, then mild outdoor noise. Use your markers and release to keep clarity high.
Move only one dial at a time. If your dog fails twice, drop back one level and win easy before moving on.
Common Mistakes and Smart Fixes
- Too much talking: Use clear cues and markers. Extra chatter blurs clarity.
- Missed releases: Always release with the same word. Without a release, dogs guess and break early.
- Jumping steps: If your dog breaks often, reduce either duration, distance, or distraction. Only change one variable at a time.
- Overuse of food: Blend in life rewards like going through the door or resuming play. This keeps training self control through games relevant.
- Inconsistent rules: Decide the standard and hold it every time. Trust grows when the rules never change.
Progress Tracking and When to Raise the Bar
Track three things for each game:
- Environment: Kitchen, garden, pavement, park
- Challenge: Duration, distance, distraction
- Success rate: Aim for eight out of ten correct reps before you increase difficulty
When you focus on outcomes like calm greetings, steady door waits, and loose leash walking, you will see how training self control through games turns practice into predictable behaviour. If progress stalls for more than a week, adjust the plan or seek coaching.
Training Self Control Through Games for Puppies and Adults
Puppies: Keep sessions very short with simple wins. Use soft rewards often. Avoid long holds. Focus on engagement resets, food bowl waits, and Place for brief rests. Training self control through games with puppies builds habits before bad patterns form.
Adult dogs: You can expect longer holds and slightly faster progression. Add structured play and leash pressure work sooner. Many adult dogs pick up the release concept quickly when the rules are clear.
Safety and Welfare Considerations
- Keep arousal in check. Insert calm breaks between active reps.
- Use gentle leash pressure and clear release. Never jerk or drag.
- Check surface safety. Avoid slippery floors for Place and door games.
- Fit your dog well with a comfortable collar or harness.
- Mind nutrition and health. Hungry dogs learn, but not if they are stressed.
Smart Dog Training designs all programmes to be fair and humane. Training self control through games should build trust and calm, not conflict.
Real Life Scenarios to Practise
- Postman at the door: Place for two minutes while the knock happens. Release after the door closes.
- Park bench pause: Loose leash to a bench. Sit, look at you, then Free to sniff as a life reward.
- Family dinner: Place for ten minutes with quiet rewards. A short release break midway, then return to Place.
- Street distractions: Leave it with dropped food near the pavement. Reward the decision to ignore.
By plugging these into your week, you are training self control through games where it counts most.
When to Bring in a Smart Master Dog Trainer
If you feel stuck, if your dog is anxious, reactive, or strong willed, or if you want faster progress, work with a Smart Master Dog Trainer. You will receive a tailored plan that follows the Smart Method and fits your routine. Every session focuses on training self control through games in real life settings so you see changes you can trust.
Ready to turn your dog’s behaviour around? Book a Free Assessment and connect with a certified Smart Master Dog Trainer - available across the UK.
How Smart Dog Training Structures Each Session
Smart trainers run sessions in predictable blocks so your dog knows what to expect:
- Warm up: Engagement reset and marker review
- Game block one: Foundation game like Place or food bowl wait
- Movement break: Loose leash walk and sniff
- Game block two: Doorway or Leave it progression
- Real life drill: Practise the skill in a real scenario
- Cool down: Calm touch, short Place, and review
This routine turns training self control through games into a structure you can repeat on your own between sessions.
Results You Should Expect
With steady practice five days a week, most families see changes in the first seven to ten days. You can expect:
- Less pulling and reactivity on walks
- Calmer greetings and reduced jumping
- Reliable door waits and better recall
- More focus around food, toys, and kids
- Longer ability to settle on Place during family time
Smart Dog Training measures progress based on outcomes you feel at home. Training self control through games becomes a lifestyle, not a one off trick.
FAQs
What does training self control through games actually teach?
It teaches your dog to pause, think, and choose the right behaviour. Games like food bowl waits, Place, and Leave it build patience and focus under clear rules.
How often should I practise these games?
Short daily sessions work best. Aim for two or three blocks of three to five minutes. Consistency is more important than long sessions.
Can I do training self control through games with a reactive dog?
Yes, but start in low distraction areas and keep safety first. Many reactive dogs improve faster when they learn clear release rules and focus games. For personalised help, work with an SMDT.
What rewards should I use?
Use soft food for quick delivery and a toy for movement based play. Blend in life rewards such as going outside or resuming fetch to keep skills relevant.
When should I increase difficulty?
When your dog is right eight times out of ten at the current level. Raise only one variable at a time: duration, distance, or distraction.
Do I need special equipment?
No. A standard leash, a fitted collar or harness, a place bed, and your rewards are enough. Keep it simple and clear.
Is Place the same as a crate?
No. Place is a visible spot your dog can see and move to easily. A crate is enclosed. Both can help, but Place is ideal for daily living areas.
When should I ask for professional help?
If you see little progress after two weeks, if safety is a concern, or if your dog is anxious or aggressive, contact a Smart Master Dog Trainer for a tailored plan.
Conclusion
Training self control through games is a practical, proven path to calm, confident behaviour. With the Smart Method, you build skills that work where life happens, from your kitchen to the local park. Start with engagement, food bowl waits, door manners, Place, Leave it, and leash pressure and release. Layer duration, distance, and distraction one step at a time, and keep your markers and release crystal clear.
If you want support, Smart Dog Training has certified SMDTs nationwide who can guide you through structured sessions that fit your goals and schedule. Together we will turn training self control through games into daily habits that last.
Your dog deserves training that truly works. With certified Smart Master Dog Trainers (SMDTs) nationwide, you'll get proven results backed by the UK's most trusted dog training network. Find a Trainer Near You
Training Self Control Through Games
Why Rewarding Pauses and Disengagement Changes Everything
Most owners spend their energy reacting to the things their dog does. Barking, pulling, jumping, chasing. At Smart Dog Training, we teach you to reinforce the quiet beats between those moments. Rewarding pauses and disengagement creates a dog that chooses calm, turns away from triggers, and settles faster in real life. This is not a trick. It is the backbone of reliable behaviour built with the Smart Method. Every certified Smart Master Dog Trainer uses this approach to give families lasting results that hold up anywhere.
Rewarding pauses and disengagement means you pay your dog for the instant they pause, breathe, soften their eyes, shift weight back, or look away from a distraction by choice. It is how we build impulse control without conflict. Under the Smart Method, clarity, pressure and release, motivation, progression, and trust come together to shape the dog’s default response. Calm becomes the habit. Distraction becomes background noise.
What We Mean by Disengagement
Disengagement is the moment your dog breaks attention from a trigger and returns to neutral or to you. A trigger could be a dog at distance, a dropped sandwich, a scooter, or a visitor at the door. Rewarding pauses and disengagement captures the split second when your dog chooses not to escalate. That choice is gold. When rewarded correctly, it grows into a stable pattern of calm focus and neutrality.
The Smart Method Framework
Our structured system defines exactly how to reward, when to add challenge, and how to keep behaviour strong. Smart relies on five pillars.
- Clarity. Your markers and cues tell the dog precisely when they are right.
- Pressure and Release. Fair guidance helps the dog find the right answer. The release and reward confirm it.
- Motivation. Food, toys, praise, and access to life rewards keep the dog eager to work.
- Progression. We stack difficulty step by step until behaviour holds anywhere.
- Trust. Training strengthens your bond so the dog chooses you over distractions.
Rewarding pauses and disengagement sits at the heart of each pillar. It gives the dog a clear target, fair feedback, and motivation to repeat calm decisions. If you want professional results, work exactly like this. Your local Smart Master Dog Trainer will coach you through each step, both in home and in real environments.
How Rewarding Pauses and Disengagement Works
Think of behaviour as a movie, not a snapshot. Before a dog explodes on lead, there is a pause. Before the sprint after a squirrel, there is a weight shift. Before a jump on guests, there is a head lift and a look. When you start rewarding pauses and disengagement, you catch those micro moments and pay them well. The dog learns that stillness pays more than action, and that turning away pays more than pushing in.
Here is the flow.
- See it. Watch for the smallest beat of calm or turning away.
- Mark it. Use a clear marker like Yes or Good the instant you see the pause or disengagement.
- Pay it. Deliver a reward quickly. Food, toy, or access to you. Vary placement so the dog resets calmly.
- Reset it. Give space, breathe, and let the dog practice another rep without pressure.
Repeat this sequence at low difficulty, then add distance, duration, and distraction as your dog improves. That progression is what changes daily life, from the pavement to the park to busy family spaces.
Reading the Small Signals That Matter
Rewarding pauses and disengagement starts with your eye for detail. Here are early signals you can catch.
- Softening of the eyes or a blink
- Head turn away from a trigger
- Weight shift back instead of forward
- Ears easing from pinned or alert to neutral
- Closed mouth after heavy panting
- A brief sit or standstill without tension
These are moments to mark and pay. Over time, your dog will offer them sooner and with less prompting, even when life is busy.
Markers That Build Clarity
Clarity is the first pillar of the Smart Method. The dog cannot repeat what they do not understand. Choose two markers.
- Success marker. Yes means the exact moment you liked. It is followed by a quick reward.
- Duration marker. Good means keep doing what you are doing. It builds longer pauses and calm sequences.
When rewarding pauses and disengagement, use Good for sustained calm, like a ten second settle on a mat, and Yes for that clean look away from a dog at distance. Keep your voice soft and neutral. Precision builds trust.
Motivation That Makes Calm Worth It
Motivation matters. Your dog should feel that calm pays. When rewarding pauses and disengagement, rotate rewards based on context.
- Food. High value pieces for tough moments, regular food for easy reps.
- Toys. Short play for confident, driven dogs. Keep arousal brief to protect calm.
- Life rewards. Move forward on the path, sniff access, greeting privileges, or hopping into the car.
We use motivation to draw the dog into the work, and pressure and release to guide them back to centre. This balance is our signature at Smart Dog Training.
Pressure and Release Done Right
Pressure and release is fair guidance. It might be a gentle leash cue or a body block that prevents rehearsing a bad choice. The instant your dog gives a pause or disengages, you release pressure and reward. The dog learns how to turn the pressure off by choosing calm. Rewarding pauses and disengagement through this lens produces accountability without conflict.
Daily Exercises That Deliver Results
Build reliable behaviour with these simple sessions, each designed around rewarding pauses and disengagement.
Doorway Neutrality
- Stand at the door with your dog on lead.
- Touch the handle. Pause. If your dog stays neutral, mark and pay.
- Open the door a crack. Pause. Mark and pay neutrality.
- Open fully. If your dog disengages from the outdoors and looks to you, mark Yes and step outside as the reward.
This teaches stillness before motion, and it transforms greetings and car exits.
Food Bowl Calm
- Lower the bowl a few inches. If your dog pauses or looks away, mark and raise the bowl as the reward.
- Repeat, lowering farther each time. Pay any disengagement from the bowl.
- Place the bowl down. When your dog waits and disengages from it to you, give your release cue to eat.
Rewarding pauses and disengagement during feeding builds patience that carries into other parts of life.
On Lead Recovery
- Stand at a comfortable distance from a mild trigger.
- As your dog notices it, wait. The instant they pause or look off, mark and pay.
- Take a few steps back to reset. Repeat until your dog disengages smoothly.
This drill builds the habit of turning away, which is crucial for reactivity work.
Mat Settle
- Place a mat and reward any approach.
- Reward a stand, then a sit, then a down on the mat.
- Use your duration marker Good to build longer pauses.
- Add mild distractions and pay disengagement from them back to the mat.
Rewarding pauses and disengagement on the mat creates a portable off switch for home, cafes, and travel.
Progression That Holds Up Anywhere
The Smart Method increases difficulty in three lanes. Distance, duration, and distraction. This is how we progress rewarding pauses and disengagement without losing clarity.
- Increase distance first. Stay far from triggers so your dog can succeed.
- Add duration second. Grow the length of the pause before the reward.
- Layer distraction last. Add movement, sounds, or food on the ground once your dog is successful at distance and duration.
Raise only one lane at a time. If your dog struggles, lower the lane you changed and rebuild momentum. This disciplined progression is how our clients see steady gains with fewer setbacks.
Common Mistakes To Avoid
- Waiting for perfect. Pay small pauses early so your dog understands the game.
- Marking late. Late markers reward the wrong picture. Be precise.
- Over talking. Keep words minimal so your markers stay meaningful.
- Paying only with food. Mix life rewards to keep behaviour relevant in the real world.
- Going too fast. Increase only one difficulty lane at a time.
- Unclear pressure. Release quickly when the dog makes the right choice.
Each error weakens clarity. Stay consistent and you will see change. If you want hands on guidance from a certified professional, Book a Free Assessment and work with your local Smart team.
Using Rewarding Pauses and Disengagement for Reactivity
Reactivity often comes from stress, frustration, or habit. Rewarding pauses and disengagement gives your dog a new habit. Notice. Pause. Turn away. Breathe. It also reduces trigger stacking because the dog can reset between exposures.
Start below threshold. That means your dog can notice the trigger and still think. Reward every pause, every breath, and every head turn. Keep sessions short and finish while you are still winning. Over time we reduce distance and add realism. This is the exact plan our Smart trainers use for reliable change.
Loose Lead Walking Through Calm Choices
Loose lead is not about a rigid heel. It is about choices. Rewarding pauses and disengagement teaches a dog to release tension and return to you when the world pulls them along. Pay glances back, a softening of the lead, and any break in pressure. Add life rewards by moving forward when the lead is slack. The street becomes a training ground for calm decisions.
Leave It That Truly Works
Leave it is more than a cue. It is a pattern. Rewarding pauses and disengagement builds it from the ground up.
- Present a low value item in your closed hand.
- Wait. The instant your dog pauses or looks away from your hand, mark Yes and reward from the other hand.
- Progress to an open hand, then to items on the floor with your foot ready to cover.
- Add your verbal cue only after the behaviour is fluent.
In the real world, you will use this pattern as your dog turns away from rubbish on walks or from a plate on the coffee table. Calm choices get paid. Impulse fades.
Helping Puppies Build Calm Early
Puppies are sponges. Rewarding pauses and disengagement is safe and powerful for early learning. Pay the tiny moments of stillness before you clip the lead, before you put the bowl down, and when they glance away from exciting people. Keep sessions light and upbeat. Short, frequent reps beat long sessions every time.
Multi Dog Homes and Family Life
In busy homes, rewarding pauses and disengagement gives structure that everyone can use. Teach each dog to settle on their own mat. Pay for head turns away from other dogs during feeding or play. Coach children to spot and reward quiet sits when the doorbell rings. Consistency creates culture. Your dogs will learn that calm behaviour is the house rule that always pays.
What Results Should You Expect
Clients who commit to rewarding pauses and disengagement report big changes within two to four weeks. You will see faster recovery after surprises, less pulling, fewer jumps, and better attention when it counts. By eight to twelve weeks, most dogs show real neutrality around routine triggers. Every case is unique, which is why your Smart trainer will tailor the plan to your dog and home.
When To Bring In a Professional
If your dog rehearses intense reactivity, bites, guards resources, or struggles to calm down in daily life, do not wait. A Smart Master Dog Trainer will assess your dog in person, set safe thresholds, and coach you through rewarding pauses and disengagement with the correct level of structure and accountability. We combine motivation with fair guidance, then build progression until behaviour holds in your real world.
Ready to turn your dog’s behaviour around? Book a Free Assessment and connect with a certified Smart Master Dog Trainer - available across the UK.
FAQs About Rewarding Pauses and Disengagement
What is the difference between engagement and disengagement
Engagement is your dog choosing to focus on you. Disengagement is your dog choosing to turn away from a trigger or distraction. Rewarding pauses and disengagement builds the ability to leave distractions and then re engage with you on cue. Both skills matter. We build both under the Smart Method.
Will I make my dog passive by rewarding calm
No. Rewarding pauses and disengagement does not suppress drive. It channels it. We teach your dog when to be calm and when to work. Structured play, clear markers, and fair release cues keep energy healthy while impulse control gets stronger.
How often should I reward
At first, reward often. Aim for high success in easy settings. As your dog improves, we shift to variable rewards. Rewarding pauses and disengagement still happens, but you will alternate food with praise or life rewards like moving forward on a walk.
What if my dog will not take food near triggers
That means you are too close or the challenge is too high. Step back, lower intensity, and look for smaller wins. Rewarding pauses and disengagement must happen under threshold so your dog can think. A Smart trainer will set the right starting point for you.
Can I use a toy as a reward for calm
Yes, with control. Keep toy play short and finish with a clear release. If arousal climbs, switch to food or life rewards. Rewarding pauses and disengagement is about keeping the nervous system balanced while the dog learns.
How long until I see progress
Most families see change within two to four weeks of daily practice. Consistency wins. The Smart Method uses progression that makes gains routine and lasting. If progress stalls, we adjust your plan and your reward strategy.
Your Next Step
Rewarding pauses and disengagement is a simple idea with powerful results. It gives your dog a clear path to calm choices in real life. Under the Smart Method, we build the skill with precision, fair guidance, and motivation, then progress it until it holds anywhere. If you are ready to see the change for yourself, our nationwide team can help.
Your dog deserves training that truly works. With certified Smart Master Dog Trainers (SMDTs) nationwide, you'll get proven results backed by the UK's most trusted dog training network. Find a Trainer Near You
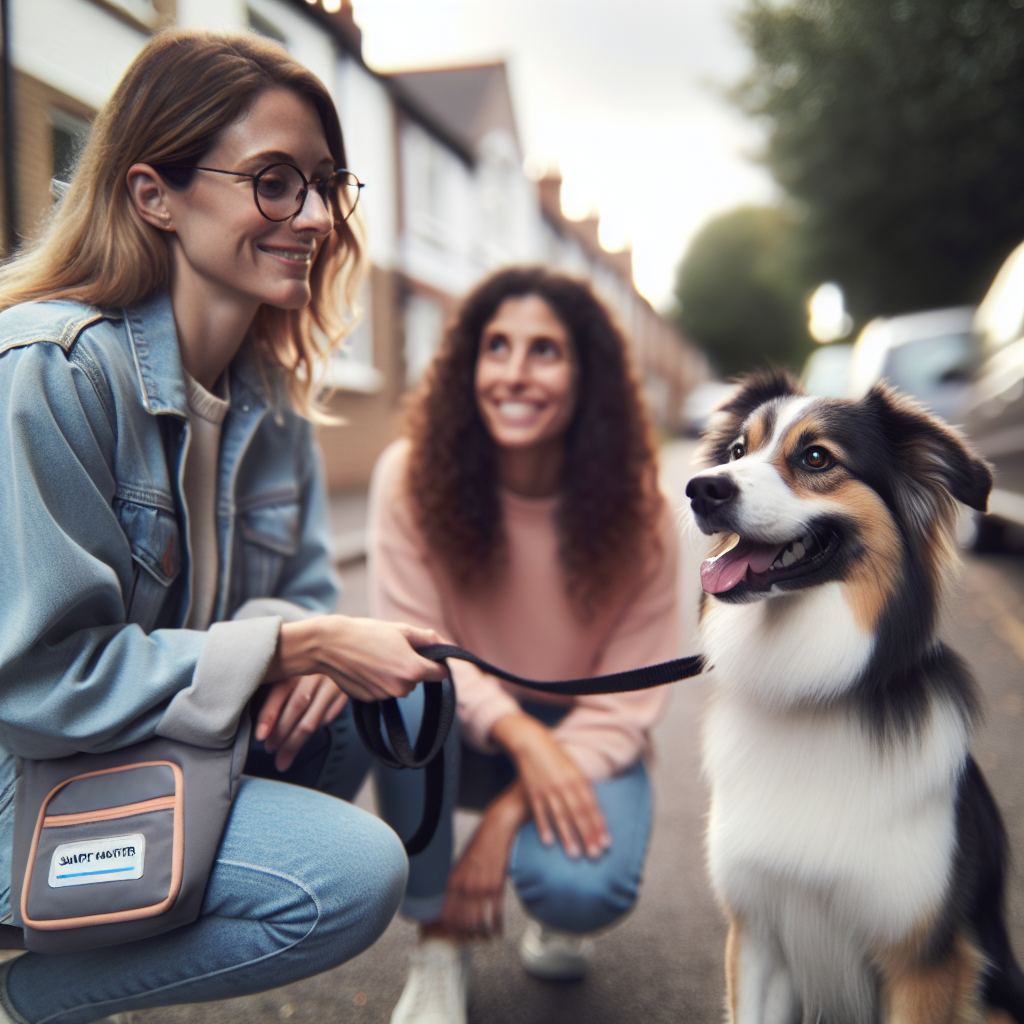
Rewarding Pauses and Disengagement in Dog Training
Clear Markers vs Praise in Training
When owners compare clear markers vs praise in training, they often assume both are the same. They are not. Praise is how we show our dogs we are pleased, yet it is vague. Clear markers are precise signals that tell the dog exactly what earned the reward, when a behaviour is finished, and what to do next. At Smart Dog Training, we build every programme on markers so dogs learn fast and behaviour lasts in real life. If you want results that stick, understanding clear markers vs praise in training is essential.
I have spent a decade teaching families and future professionals how to use the Smart Method. In that time, I have seen the difference a structured marker system makes. Our certified Smart Master Dog Trainers, known as SMDTs, rely on markers to remove confusion, build motivation, and create calm and consistent behaviour. This article explains how clear markers vs praise in training affects outcomes, how to set up your system, and what to do when things go wrong.
Understanding Clear Markers vs Praise in Training
Clear markers are short, consistent signals that carry meaning. They include reward markers like "Yes", duration markers like "Good", terminal markers like "Free", and fair consequence markers like "No" used with pressure and release. Praise is general approval, such as "Good boy" said with a warm voice. Both matter, yet they are not equal. The Smart Method puts clarity first, then adds praise to create strong emotional engagement without confusion.
When you evaluate clear markers vs praise in training, consider three questions. Does the dog know exactly which behaviour earned a reward. Does the dog know when to hold position and when to finish. Does the dog understand how to make a better choice after a mistake. Clear markers answer all three every time. Praise alone rarely does.
What a Marker Means in the Smart Method
In Smart programmes, a marker is a promise with a purpose. It tells the dog a specific outcome is coming, and it matches that outcome every time. This creates confidence, drive, and focus.
- Reward marker yes. The behaviour you just did earned reinforcement. The reward follows immediately.
- Duration marker good. Keep doing what you are doing. Payment is building and may arrive while you hold position.
- Terminal marker free. The exercise has ended. You may disengage.
- No reward marker try again. That choice did not earn a reward. Reset and offer the behaviour again.
- Consequence marker no with pressure and release. You chose incorrectly. Guidance is added and removed the moment you comply, followed by calm praise when you get it right.
Used together these signals form the language that makes clear markers vs praise in training so powerful.
The Role of Praise and Affection
Praise is still valuable. We use it to build relationship, encourage calm emotion, and smooth the handler’s presence. The key is to place praise inside the structure of markers. Without this structure, praise can interrupt duration, end an exercise early, or reward errors by accident. With the Smart Method you get both heart and precision.
Why Clarity Outperforms Flattery
Dogs learn through clear feedback delivered at the right time. When you rely on praise alone, timing becomes muddy. The dog hears words that change in pitch, length, and meaning. With markers, one sound equals one meaning. That is why clear markers vs praise in training produce measurably faster learning and better reliability.
The Science of Timing and Signal Value
Behaviour strengthens when the dog can predict outcomes. A crisp "Yes" marks the single moment the dog made the right choice. The reward that follows confirms the contract. Over many reps, this pairing creates a strong behaviour chain. Praise without a clear marker does not isolate the correct moment, so the dog may guess and drift.
Pressure and Release Without Conflict
Smart Dog Training uses fair guidance paired with clear release and reward. When a dog hits the end of the lead, light pressure appears. When the dog softens and yields, pressure vanishes and the marker confirms the better choice. This is pressure and release done the Smart way, calm and consistent. It turns mistakes into learning, which is another reason clear markers vs praise in training create lasting accountability.
The Smart Method Framework
Every Smart programme follows five pillars. This structure makes clear markers vs praise in training practical for families and professionals alike.
Clarity
Commands and markers are delivered with precision so the dog always understands what is expected. This is where marker training shines.
Pressure and Release
Fair guidance is paired with clear release and reward. The dog learns responsibility without conflict and gains confidence through success.
Motivation
Rewards create engagement and positive emotion. Food, toys, and life rewards are used with purpose. The marker predicts value which keeps the dog eager to work.
Progression
Skills are layered step by step, adding distraction, duration, and difficulty until they are reliable anywhere. The structure of markers allows clean progression.
Trust
Training strengthens the bond between dog and owner. Markers reduce confusion, so trust grows with every session.
Marker Systems You Can Use Today
Here is a simple version you can install this week. It demonstrates why clear markers vs praise in training bring rapid clarity.
Reward Marker Yes
Say "Yes" the instant the behaviour is correct. Deliver a reward straight after. Keep your tone neutral and crisp. Yes means you did it and payment is coming now.
Duration Marker Good
Say "Good" while the dog holds a position. Place a soft treat or stroke under the chin while the dog remains still. The message is keep going, you are on the right track.
Terminal Marker Free
Say "Free" to end the exercise. Step away and invite the dog to break position. This protects precision because the dog learns the end is earned, not guessed.
No Reward Marker Try Again
Say "Try again" after an error. Reset calmly and repeat your cue. Do not pay without the behaviour. This keeps criteria clear and removes frustration.
Consequence Marker No With Guidance
Say "No" then add light guidance with lead or body pressure. The moment the dog complies, release pressure and mark success with "Yes" or "Good". Finish with praise. The sequence teaches accountability and choice.
Setting Up Your Marker Words and Tools
Choose short words with crisp consonants. Keep your tone consistent. Practise your delivery without the dog so your timing is clean. Use a flat collar or harness and a two to three metre training lead for early sessions. Food and a favourite toy keep motivation high. Remember, when you install a system based on clarity, you showcase the power of clear markers vs praise in training.
Voice, Tone, and Body Language
Keep the marker neutral and the reward emotional. The marker informs, the reward celebrates. Stand tall, breathe, and avoid crowding the dog. Clarity in your body matches clarity in your words.
Using Food, Toys, and Life Rewards
Rotate rewards so the dog stays engaged. Food is clean for high reps. Toys add intensity. Life rewards like going through a door or greeting a friend reinforce calm manners. The marker connects behaviour to value in all three cases.
Praise That Works Inside a Marker System
Praise should soothe and acknowledge effort. After you say "Yes" and deliver a treat, add gentle praise. During duration marked by "Good", use low, rhythmic praise that keeps the dog settled. At the end with "Free", offer playful praise that releases tension. This is where clear markers vs praise in training complement each other, not compete.
Avoiding Praise That Breaks Focus
Common errors include clapping, high squeals, and excessive chatter while the dog is trying to hold position. Save excitement for the terminal marker and the reward. During work, keep communication simple and exact.
Common Problems With Praise Only Approaches
Many families arrive telling us their dog knows sit but will not sit when it counts. They praise a lot, yet the dog remains unsure. Here is why that happens and how clear markers vs praise in training solves it.
Mixed Signals and Accidental Reinforcement
A long stream of praise often covers both correct and incorrect behaviour. The dog hears noise while moving, jumping, or breaking position, and mistakes that for approval. Markers split moments with surgical precision, so only the right choices pay.
Over Excitement and Loss of Control
Some dogs escalate when praise gets lively. They spin up, grab the lead, and lose focus. Smart programmes put a duration marker first, which calms the dog, then add praise that matches the exercise goal. Focus remains steady and the dog learns to self regulate.
Step by Step Plan for Your First Week
Follow this simple plan to experience the effect of clear markers vs praise in training. Keep sessions short, upbeat, and regular.
- Day one. Install "Yes" and feed five tiny treats after each marker. No commands, just mark moments of eye contact and calm stillness. Add soft praise after the treat.
- Day two. Add "Good" for two second holds of Sit or Down. Pay twice while the dog holds. Release with "Free" after the second payment. Finish with gentle praise.
- Day three. Introduce "Try again" after a miss. Reset and mark correct choices. Keep your voice calm.
- Day four. Loose lead basics. Mark and pay when the lead goes slack. If the dog pulls, say "No", add light pressure, release when the dog softens, then mark success.
- Day five. Add distraction in a quiet park. Lower criteria to keep success high. Build back up quickly.
- Day six. Duration on a bed while you move around. Use "Good" to keep the dog settled. Pay calmly. Release with "Free".
- Day seven. Mix easy and hard reps. Finish with a fun game. Reflect on how clear markers vs praise in training changed your dog’s understanding in only one week.
Real Life Scenarios That Prove the System
Pulling on Lead to Loose Lead
Start in a quiet area. Walk forward. The moment the lead slackens, say "Yes" and pay by your leg. If the dog forges, say "No", add gentle lead pressure, release when the dog eases back, then mark with "Good" and pay for a few calm steps. Over a few sessions, this blend of pressure and release with precise markers creates a calm, accountable walker. This is the practical impact of clear markers vs praise in training.
Jumping on Guests to Four on the Floor
Clip the lead before guests arrive. Ask for Sit as the door opens. Mark holds with "Good". If paws lift, say "No" and guide the dog back to Sit, release pressure the instant bottom hits the floor, then add "Yes" and a treat while the dog sits. Let the guest greet only when you say "Free". Praise softly throughout. The dog learns that calm behaviour opens the door to social reward.
Recall Away from Dogs and Wildlife
Start on a long line in a low distraction field. Call once. When the dog turns his head, mark with "Yes" and pay when he reaches you. If he stalls, say "No" and guide gently with the line, release as he moves in, then mark and pay. Finish with a short game and praise. Crisp markers turn recall into a clear, fun contract.
Measuring Progress and Raising Criteria
Track three metrics. Latency, how fast the dog starts the behaviour after your cue. Duration, how long the dog holds with "Good". Distraction tolerance, what the dog can ignore while performing. Step up one metric at a time. This controlled progression is why clear markers vs praise in training stays effective as tasks become more complex.
When to Get Professional Help
If you are dealing with aggression, reactivity, or anxiety, or if progress stalls, work with a professional who uses the Smart Method. A Smart Master Dog Trainer will assess your dog, set up a tailored marker system, and coach your timing so results arrive quickly and safely. Our SMDTs operate across the UK and follow the same structured approach, which keeps standards high and outcomes reliable.
Ready to turn your dog’s behaviour around? Book a Free Assessment and connect with a certified Smart Master Dog Trainer, available across the UK.
FAQs on Clear Markers vs Praise in Training
Why are clear markers better than praise alone
Markers give the dog exact information about what earned a reward, when to keep going, and when to finish. Praise alone is vague. The Smart Method places markers first, then adds praise to build emotion without confusion.
What words should I use for markers
Use short words like Yes, Good, Free, Try again, and No. Keep tone consistent. Pair each word with the correct outcome every time so the promise holds.
Can praise be a marker
Praise is not a marker unless it is defined and delivered with a matching outcome. In Smart programmes, we separate the marker from praise, then add praise after the reward or during duration to keep the dog calm.
How does pressure and release fit with reward based training
Pressure and release at Smart Dog Training is fair guidance paired with clear release and reward. It builds accountability without conflict. The release is the moment the dog chooses correctly, which is then confirmed with a marker.
Will markers make my dog robotic
No. Markers reduce confusion so dogs relax and engage. We still use praise, play, and life rewards. The result is a calm, confident, and willing dog that enjoys working with you.
How often should I use markers during a session
Use them as often as needed to keep information clear. Early on, that means frequent Yes markers and Good for duration. As skills grow, space out markers while maintaining precision.
What if my dog gets over excited by the Yes marker
Lower your energy, deliver the reward calmly, and use more duration markers to settle the dog. Over time, the dog learns to work with composure.
Do I need a clicker
A clicker can act as a reward marker. At Smart Dog Training we prefer a verbal system for family life, though both can work when used with consistency and matched outcomes.
Conclusion
Comparing clear markers vs praise in training is not about choosing one and ditching the other. It is about putting clarity first and using praise inside a structured system. The Smart Method aligns clarity, pressure and release, motivation, progression, and trust so your dog knows exactly how to win. When your timing is clean and your markers are honest, you will see faster learning, calmer behaviour, and reliability that holds anywhere. That is the standard we deliver every day through Smart Dog Training programmes.
Your dog deserves training that truly works. With certified Smart Master Dog Trainers, SMDTs, nationwide, you'll get proven results backed by the UK's most trusted dog training network. Find a Trainer Near You
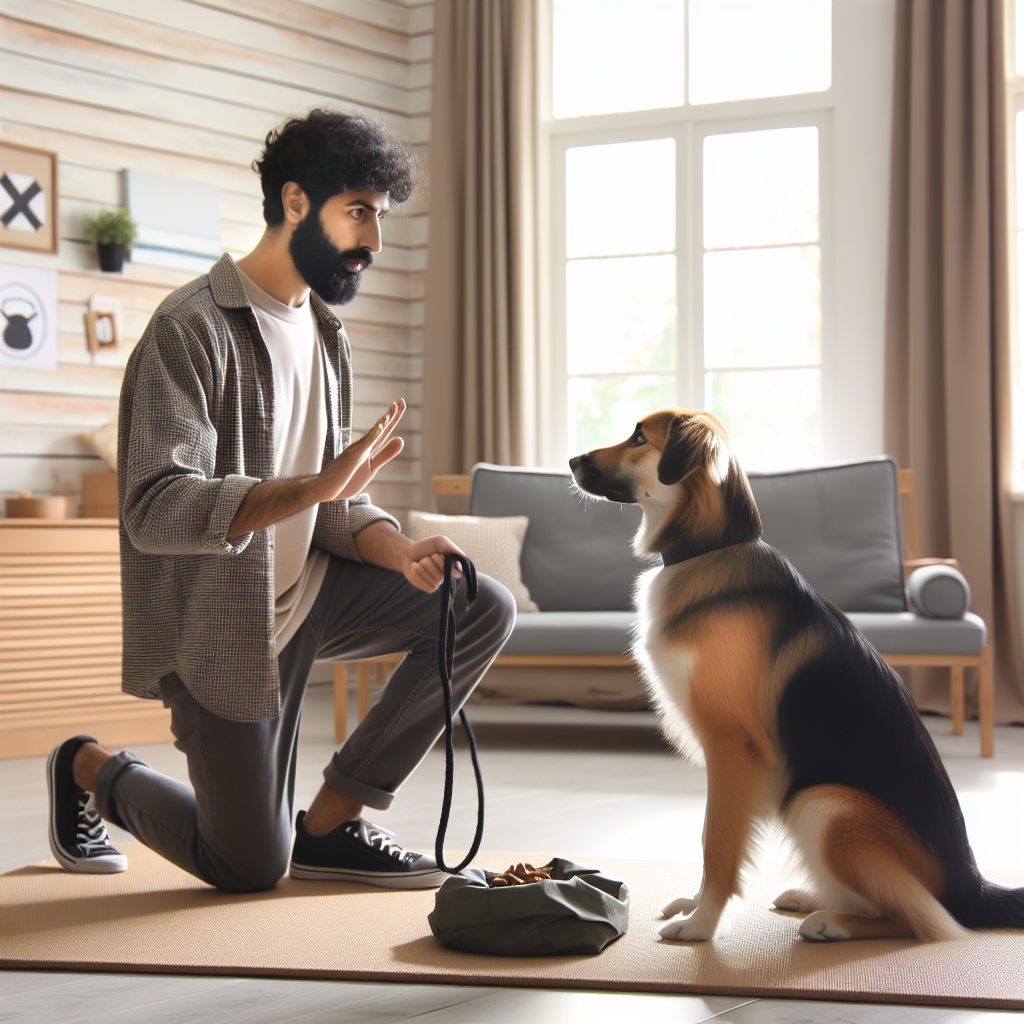
Clear Markers vs Praise in Training
Why Daily Structure Matters for Dogs
If you want calm, reliable behaviour that holds up in real life, you must understand why daily structure matters for dogs. Structure is not strictness for its own sake. It is a clear, repeatable way of living that helps your dog relax, learn, and succeed. At Smart Dog Training, every programme is built around The Smart Method. Our approach shows owners exactly why daily structure matters for dogs and how to put it in place without stress or confusion.
As a Smart Master Dog Trainer, I see the same pattern again and again. When families add a simple routine with clear rules and restful windows, problem behaviours drop. Focus improves. Confidence grows. This is why daily structure matters for dogs across all ages and breeds. It is a relief for the dog and for the home.
What We Mean by Structure
Structure means your dog knows what happens and when. It includes set times for walking, training, feeding, rest, and free time. It also includes simple house rules like where to settle and how to behave at doors, on the lead, and around food. In The Smart Method, structure is how we bring the five pillars to life.
- Clarity. Your dog hears precise markers and commands at predictable times.
- Pressure and Release. Fair guidance teaches accountability, then we release and reward.
- Motivation. Rewards are planned to build engagement rather than chaos.
- Progression. Skills grow step by step across the day and across the week.
- Trust. A stable routine builds a strong bond and a calm mind.
Put simply, this is why daily structure matters for dogs. It turns learning into a rhythm your dog can trust.
The Science of Calm Routines
Dogs thrive on predictability. A clear routine reduces stress, helps the brain learn, and supports good sleep. When a dog never knows what comes next, arousal rises and impulsive choices spill out. When a dog knows what comes next, the nervous system can rest. That is why daily structure matters for dogs with anxiety, reactivity, or excitability. The routine lowers stress before training even begins.
At Smart Dog Training we use calm structure to set the stage for learning. We do not hope the dog settles. We teach it. That is the heart of The Smart Method.
Why Daily Structure Matters for Dogs in Real Life
It is not just about neat schedules. It is about outcomes you can feel in day to day life. Here is what families report when they follow a structured routine for dogs through our programmes.
- Less barking and frantic behaviour at windows and doors
- Better lead manners and a steadier heel
- Improved recall because the dog checks in more often
- Calmer greetings with guests
- More restful sleep and fewer late evening zoomies
- Greater confidence in new places due to clear expectations
These changes stick because structure creates context. Your dog knows what counts as work, what counts as rest, and what earns reward. That is why daily structure matters for dogs far beyond the training session.
What A Structured Day Looks Like
Every household is different, but the bones are the same. Use this sample day to see why daily structure matters for dogs and how to start.
Morning
- Out to toilet on the lead, calm return
- Short obedience block. Heel, sit, down, place, recall. Two to five minutes is enough
- Breakfast. Food is earned through simple behaviours
- Rest in a crate or on a defined bed, not free roaming
Midday
- Lead walk with focus work, not a free for all
- Short play with clear rules. Start and stop on a cue
- Calm settle on place while you work or tidy
- Structured rest again
Evening
- Food training or enrichment in a controlled way
- Second obedience block. Practise stays, door manners, and recall
- Calm social time with family, no rough play before bed
- Final toilet on the lead, then settle for the night
This simple flow shows why daily structure matters for dogs. Work happens in short windows. Rest is protected. Free time is earned and guided. The dog experiences clarity, which builds trust.
The Smart Method Applied to Routine
At Smart Dog Training we design every routine through The Smart Method.
- Clarity. You use the same words and markers at the same times. Sit means sit. Place means settle on your bed until released. That is why daily structure matters for dogs that struggle with impulsive choices.
- Pressure and Release. We guide fairly through the lead, then release pressure and pay. The dog learns responsibility with a positive outlook.
- Motivation. Rewards are earned through effort. The dog seeks the work because it is predictable and fun.
- Progression. We add distraction, duration, and distance over days and weeks. The routine gives a safe path to grow.
- Trust. Predictable guidance and fair rules create a confident, willing partner.
Core Skills That Support Structure
Some skills carry more weight because they organise the day. Here is how Smart programmes build them and why daily structure matters for dogs in each area.
Place
Place is a defined bed or mat where the dog rests until released. It is the centre of calm in the home. We teach it with clear markers and fair guidance. Place lets your dog be part of family life without rehearsing chaos.
Crate
A crate is a safe den that supports sleep, recovery, and travel. It prevents bad habits when you cannot supervise. It also helps with toilet training and separation confidence. Crate time is balanced with training and structured free time.
Lead Manners and Heel
We build a steady heel and polite lead skills so walks become focused work, not random pulling. A focused walk meets mental needs better than a frantic sprint. This is another reason why daily structure matters for dogs that pull or react.
Door Manners
Waiting at doors reduces dashing and jumping. We practise sit or place with guests and when leaving the house. Calm in the doorway grows into calm in life.
Recall
We build a reliable recall in the home first, then in the garden, then out on walks. We add distraction and proof the behaviour through the week. Predictable practice is why daily structure matters for dogs that ignore recall.
Structure for Puppies, Adolescents, and Adult Dogs
Different ages need different ratios of work, rest, and play. The core idea stays the same.
Puppies
- Very short training windows with high reward
- Frequent toilet breaks on the lead
- Lots of naps in the crate
- Gentle social exposure with clear rules
For puppies, the question of why daily structure matters for dogs is simple. Structure protects sleep, stops bad habits, and turns energy into learning.
Adolescents
- More impulse control work like place and heel
- Clear play rules with planned stop and start
- Balanced exercise for body and brain
- Extra proofing of recall and stays
Adolescent dogs push boundaries. Structure is how you lead kindly and firmly through that stage.
Adult and Rescue Dogs
- Predictable routine to lower stress
- Calm decompression walks with focus games
- Clear house rules to replace guesswork
- Gentle but consistent accountability
For adult or rescue dogs, the best argument for why daily structure matters for dogs is clear. Structure replaces anxiety with certainty.
How to Introduce Structure If Life Feels Chaotic
- Start with place and crate. Teach your dog where to rest and how to switch off.
- Anchor mealtimes. Food is earned through simple behaviours like sit and eye contact.
- Replace long hyper walks with shorter focused walks and a few minutes of obedience.
- Use the lead indoors when needed so guidance is clear and calm.
- Plan your day. Write simple time blocks for work, rest, and free time.
- Be consistent for two weeks. Small changes add up fast when you stick with them.
These steps show why daily structure matters for dogs practically. You do not need more time. You need a better rhythm.
Common Problems That Structure Resolves
Separation Anxiety
We teach calm independence through crate time, place, and short out of sight drills. Predictable exits and arrivals lower arousal. This plan is a key reason why daily structure matters for dogs that panic when left.
Reactivity and Barking
Reactivity often comes from high arousal and low clarity. A steady routine with lead work, place, and short training blocks resets the nervous system. Your dog learns a better way to cope.
Jumping and Over Excitement
With place and door manners your dog practises calm greetings every day. We reward four feet on the floor and reliable sits. The routine turns excitement into self control.
Pulling on the Lead
Focused heel sessions and clear start stop rules during every walk build new habits. This is where you will see why daily structure matters for dogs that pull. Predictable practice wins.
Progression You Can Measure
Structure makes progress visible. In The Smart Method we track three Ds. Distraction, duration, and distance. Each week you raise one while keeping the others steady. This creates success without overwhelm.
- Duration. Longer stays on place while you cook or work.
- Distance. Greater space between you and your dog during recalls and stays.
- Distraction. Harder environments like parks or busy pavements.
This measured plan is another reason why daily structure matters for dogs that have stalled. Progress becomes simple and repeatable.
How Smart Dog Training Builds Your Routine
We do not guess. We assess your dog, your home, and your goals. Then we map a routine that fits your life. Your certified Smart Master Dog Trainer guides you step by step. You will know why daily structure matters for dogs and exactly how to live it. Programmes run in home, in structured classes, and through tailored behaviour courses. Every session follows The Smart Method so results last.
Ready to turn your dog’s behaviour around? Book a Free Assessment and connect with a certified Smart Master Dog Trainer - available across the UK.
Rules That Keep Structure Simple
- One clear cue per behaviour
- Rewards earned, not random freebies
- Short training, then real rest
- Lead guidance when needed, then timely release
- Place and crate used daily
- Proof skills in new places each week
Keep these rules in mind and you will feel why daily structure matters for dogs within days. The home becomes calmer. Walks feel purposeful. Your dog looks to you for leadership.
Realistic Exercise Within Structure
Exercise matters, but more is not always better. Over arousal is common when dogs run hard without rules. We blend exercise with obedience and calm decompression. A focused heel, a few recall reps, and a short fetch session with a clear stop cue often beats an hour of frantic running. This blend shows why daily structure matters for dogs that seem never to tire.
Enrichment Without Chaos
We love enrichment, but it must serve the plan. Use food puzzles during crate time. Use scent games with start and stop cues. Use tug only with structured rules. Enrichment becomes a training tool, not a source of hype. This is a subtle way to feel why daily structure matters for dogs. Fun and calm can live side by side.
Owner Mindset and Consistency
Dogs follow leaders who are clear and fair. Your tone, timing, and consistency matter. We will coach you on handling, markers, and reward delivery so your dog always knows when it has got it right. This is a vital reason why daily structure matters for dogs. Your leadership becomes steady and kind, and your dog relaxes into it.
Frequently Asked Questions
Why is structure better than more exercise?
Unstructured exercise can raise arousal and make behaviour worse. Structure gives balance. Short focused training, fair rules, and real rest teach self control. That is why daily structure matters for dogs that act wild after long runs.
Will structure make my dog less happy?
No. Dogs relax when life is predictable. Structure is kind. It gives clear ways to earn reward and clear times to rest. Most dogs become happier and more confident within days.
How long before I see results?
Many families notice changes in the first week. Place training, crate rest, and focused walks pay off quickly. Full reliability grows as you follow the plan for several weeks.
Can I still let my dog play and be free?
Yes. Play and freedom sit inside the routine with start and stop cues. That way fun does not spill into chaos. This balance is central to The Smart Method.
Is structure suitable for rescue dogs?
Absolutely. Rescue dogs need predictability most of all. A steady routine lowers stress and builds trust. This is a key reason why daily structure matters for dogs coming from uncertain backgrounds.
What if I work long hours?
Use short training blocks, meaningful walks, and planned rest. Quality beats quantity. A Smart trainer will help you create a routine that fits your schedule and still delivers results.
Do I need special equipment?
You need a lead, a defined bed for place, and a crate that fits your dog. We will guide you on fit and use so your dog stays safe and comfortable.
How does Smart ensure results?
We follow The Smart Method with clear steps, fair guidance, and proven progression. Your SMDT mentor checks your handling and routine. You learn why daily structure matters for dogs and how to apply it every day.
Conclusion
Now you can see why daily structure matters for dogs. It is not about strict control. It is about calm, clarity, and trust. A good routine organises the day so your dog can relax and learn. The Smart Method turns that routine into reliable behaviour in real life. If you want a home that feels peaceful and a dog that listens anywhere, structure is the path. We will walk it with you.
Your dog deserves training that truly works. With certified Smart Master Dog Trainers (SMDTs) nationwide, you'll get proven results backed by the UK's most trusted dog training network. Find a Trainer Near You
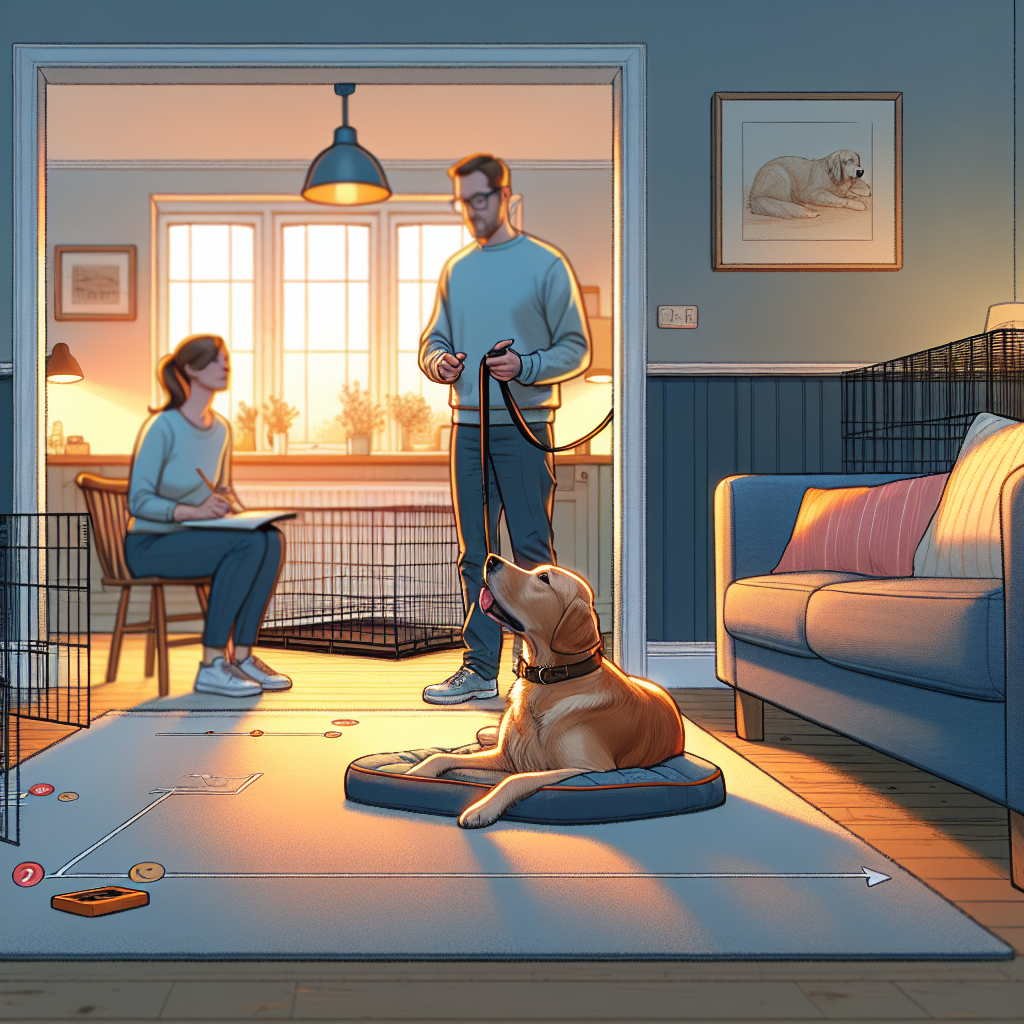
Why Daily Structure Matters for Dogs
Why Boundaries Matter For Calm, Safe Dogs
Boundaries protect your dog, your family, and your home. Done well, training dogs to accept boundaries creates calm manners you can rely on in real life. Your dog learns what is allowed and what is off limits, even when you are not right beside them. At Smart Dog Training, every boundary programme follows the Smart Method so results stick. If you want support from a certified Smart Master Dog Trainer, you can work with an SMDT anywhere in the UK.
Some people think boundaries are about strict rules. In truth, they are about clarity and freedom. When a dog understands the lines, they relax. They settle faster, make better choices, and gain more access to family life. Training dogs to accept boundaries is at the heart of polite door manners, staying out of the kitchen when meals are cooking, and stopping at the kerb before crossing a road.
What Training Dogs To Accept Boundaries Really Means
Boundary training means your dog understands a clear yes and no for spaces, thresholds, and behaviour. The goal is not to hover over your dog. The goal is to teach them to hold themselves within the lines, even with distractions. We build this skill in layers so your dog learns to choose the right behaviour without constant prompting.
With Smart Dog Training, boundaries are never about punishment. They are about clarity, pressure and release, motivation, progression, and trust. This system gives you a dog who is confident and accountable, not worried or shut down. A Smart Master Dog Trainer will map your plan so you move step by step and see progress every week.
The Smart Method For Training Dogs To Accept Boundaries
Our proprietary Smart Method powers every programme for training dogs to accept boundaries. It blends structure with reward so dogs learn fast and stay willing.
Clarity
We use clear markers for correct and incorrect responses. Your dog understands exactly when they are right, and when they need to adjust. We pair verbal markers with consistent body language and leash guidance so there is no confusion.
Pressure And Release
Fair guidance teaches responsibility. A light, steady cue invites your dog back to the line, then pressure releases the instant they comply. Release is the reward. This builds calm accountability without conflict.
Motivation
Food, play, praise, and access to life rewards keep your dog engaged. We reward position, effort, and duration so your dog enjoys staying inside the boundary you set.
Progression
We layer skills from easy to hard. First there is a clear line. Then we add duration, distance, distraction, and finally new places. This is how we turn lesson skills into real life habits.
Trust
Trust grows when training is fair and predictable. Your dog comes to you for guidance, not out of fear, and will hold boundaries with confidence.
Types Of Boundaries To Teach
Training dogs to accept boundaries applies across your day. Here are common lines we teach in Smart programmes.
Doorways And Thresholds
Prevent rushing at the door, deliveries, or visitors. Your dog waits behind a line until released.
House Zones And Furniture
Set areas where dogs can rest and places that stay people only. This includes bedrooms, nurseries, or sofas, based on your family plan.
Garden And Property Lines
Stop fence running or gate crowding. Teach the dog to stay within a safe line away from exits.
Street Kerbs And Safety Lines
Before you cross a road, your dog stops at the kerb, looks to you, and moves only on your release.
People And Dog Space
Establish calm greeting distance for visitors or other dogs, preventing rude jumping or crowding.
Tools And Markers Used By Smart
We keep tools simple and ethical. Your SMDT will help you choose what fits your dog and household.
- A flat collar or well fitted training collar
- A standard lead, 1.8 to 2 metres
- A long line for garden or park practice
- A raised bed or mat for place work
- High value food rewards and a toy your dog loves
- Markers for yes, no, and release words
Markers matter because they remove guesswork. Your dog hears a consistent signal for correct, incorrect, and freedom. This supports clarity and speeds up learning when training dogs to accept boundaries.
Step By Step Plan For Training Dogs To Accept Boundaries
Below is the Smart progression used by our trainers. Adjust sessions to your dog. Keep them short and positive, and end on success.
Step 1 Foundation Calm And Engagement
Start in a quiet room. Teach name recognition, eye contact, and a simple sit or stand with a soft lead. Reward stillness and focus. If your dog is too excited to think, boundaries will feel fuzzy. Calm comes first.
Step 2 Define The Line
Pick a clear boundary. For a doorway, place a visual line like the threshold strip or a short mat. Approach the line with your dog on lead. Stop your feet and use a hand target or food lure to position your dog behind the line. Mark and reward for staying.
If your dog leans over the line, apply light lead pressure back to the safe side, then release and reward the moment they step back. This is pressure and release at work. Repeat until your dog offers stillness behind the line without constant food in your hand. You are already training dogs to accept boundaries in a way that builds confidence and clarity.
Step 3 Add Duration
Build from two seconds to thirty seconds, then a few minutes. Keep rewards small and frequent at first. Mix in the place bed so your dog practises staying behind the line and also relaxing on a station.
Step 4 Add Distance
Take one step away from the line. Return and reward if your dog holds. Gradually build to moving around the room and even out of sight for a second. If your dog breaks, help them back with calm guidance, then reduce difficulty and rebuild. This is how we keep trust high while training dogs to accept boundaries.
Step 5 Add Distractions
Start with easy distractions. Open and close the door a little. Walk a loop around your dog. Pick up a parcel. Later, add real life triggers like visitors. Your release word must remain the only green light to cross the line.
Step 6 Generalise To New Places
Repeat the process at the back door, the car door, the garden gate, and a kerb on a quiet street. New context resets difficulty, so go back to short duration and easy distractions before levelling up. Smart progression turns a single skill into a reliable habit anywhere.
Handling Mistakes With Fairness
Mistakes will happen. In Smart training, mistakes are information, not failure. If your dog breaks the line, calmly guide them back, remove reward chance for a moment, then try again at an easier level. Keep your tone neutral. Success grows when you lower difficulty and help your dog win more often than not.
Remember these rules when training dogs to accept boundaries.
- Reward the position you want, not the approach to the forbidden space
- Release pressure the instant your dog returns behind the line
- Use your release word only when you truly mean freedom
- End sessions on a success, not after a mistake
Puppies Versus Adults
Both can learn quickly. The plan is the same, but the pace changes.
- Puppies need many short sessions and frequent rewards. We focus on place, threshold waiting, and gentle guidance. Expect little wins that stack up.
- Adults often progress faster in step one and two but may need more work with old habits. We add structure to daily routines so new rules become normal.
With either age, training dogs to accept boundaries works best when everyone in the home uses the same markers and release word. Consistency is king.
Common Problems And How Smart Fixes Them
Door Dashing
Cause is excitement about access. Solution is to build a strong threshold line with steady rewards for stillness, then proof with door sounds and movement. Only release when your dog meets your calm standard.
Fence Running
Cause is arousal from passers by. We create a boundary line several metres from the fence, then reward stillness on a place bed in that zone. A long line keeps choices safe while we build impulse control.
Jumping On Guests
Cause is lack of space rules. We use a place bed and a greeting boundary. Guests only give attention when four paws stay on the floor and your dog holds the line.
Ignoring The Kerb
Cause is weak proofing around roads. We teach a sit or stand at the kerb, then reward attention to you. Crossing happens only on your release. We practice on quiet streets before busy ones.
Hovering In The Kitchen
Cause is accidental reinforcement from crumbs or attention. We set a clear kitchen line and build duration during meal prep. Rewards are delivered away from the food zone.
Safety And Welfare
Smart programmes protect your dog at every step. We avoid flooding and keep distractions at a level your dog can handle. Pressure is fair, light, and released the moment your dog makes the right choice. We prioritise calm engagement, not tiredness. Training dogs to accept boundaries should build confidence, never fear.
How Smart Programmes Deliver Lasting Results
Our results come from structure and support. Your SMDT builds a tailored boundary map for your home, then coaches you through weekly goals. You get clear markers, a progression plan, and practical homework that fits your life. We layer skills until they hold in the doorway, the garden, the street, and the park. Because every step follows the Smart Method, your dog learns to take responsibility in a way that feels good for both of you.
When To Bring In A Smart Master Dog Trainer
If you feel stuck, if your dog rehearses unsafe behaviour, or if you want faster progress, bring in an expert. An SMDT will assess your dog, your environment, and your routines, then set the right structure on day one. Many families see major change within the first few sessions when training dogs to accept boundaries with our system.
Ready to turn your dog’s behaviour around? Book a Free Assessment and connect with a certified Smart Master Dog Trainer - available across the UK.
Case Snapshots Of Boundary Success
Doorway calm in a busy flat. A young spaniel sprinted to the door and barked at every knock. We installed a two metre hallway line and paired it with a place bed. Within two weeks, the dog held the line through deliveries and visitors, moving on release only.
Garden peace for a terrier. A small terrier patrolled the fence and erupted at dogs passing by. We created a calm zone away from the fence, used a long line for safety, and rewarded stationing on a raised bed. By week three, the terrier stayed settled even when dogs walked past.
Safe kerb habits for a rescue. A rescue shepherd pulled across roads. We taught a stop at each kerb, eye contact before release, and slow proofing with traffic noise. Within a month, the dog waited at every kerb without leash tension.
At Home Practice Plan And Checklist
Here is a simple weekly plan for training dogs to accept boundaries.
- Week 1 Establish your threshold line indoors. Practise ten short sessions of one to three minutes. Reward stillness and release on cue.
- Week 2 Add duration and distance. Start to generalise to a second door and the car. Keep distractions low.
- Week 3 Add real life distractions. Doorbell, visitors, deliveries, kids moving about. Maintain standards and keep wins high.
- Week 4 Take it outside. Practise garden lines and kerb stops on quiet streets. Build confidence before busier areas.
- Week 5 Proof and maintain. Mix easy and hard reps. Reward good choices. Fade food so life rewards carry the habit.
Checklist for success.
- Clear line for each boundary
- Consistent yes, no, and release words
- Lead on in early stages for fair guidance
- Calm rewards for calm behaviour
- Short, frequent sessions that end on success
- One standard everyone in the home follows
FAQs On Training Dogs To Accept Boundaries
How long does it take to get reliable boundaries
Most families see change in the first week. Reliability in real life often builds over four to six weeks with daily practice. Complex cases or high energy dogs may take longer, but steady progress is normal when you follow the Smart Method.
Do I need food forever to keep boundaries strong
No. We start with food to build clarity and motivation. As your dog understands, we shift to life rewards such as access through the door or greeting a visitor. The release itself becomes the main reward.
Is boundary training suitable for sensitive dogs
Yes. With fair guidance and clear release, sensitive dogs gain confidence. We keep pressure light and pair it with rewards and rest. This balance is central to Smart programmes for training dogs to accept boundaries.
Can multiple people train the same boundary
Yes, and it helps. Use the same markers and standards. If one person allows crossing while another does not, your dog will struggle. Consistency is everything.
What if my dog already rehearsed door rushing
We can still fix it. We reset the picture, lower excitement, and rebuild the threshold habit step by step. An SMDT will guide you through the right progression and prevent setbacks.
Is a place bed required
It is not required, but it speeds up learning. Place gives your dog a clear job. It pairs well with threshold work and helps turn excitement into calm focus.
Conclusion And Next Steps
Training dogs to accept boundaries gives you safety, calm, and freedom in everyday life. With the Smart Method, you will build clarity, fair accountability, and real trust. Start with one line, keep sessions short, and reward the calm behaviour you want more of. If you want tailored help, our nationwide team is ready to support you.
Your dog deserves training that truly works. With certified Smart Master Dog Trainers (SMDTs) nationwide, you'll get proven results backed by the UK's most trusted dog training network. Find a Trainer Near You
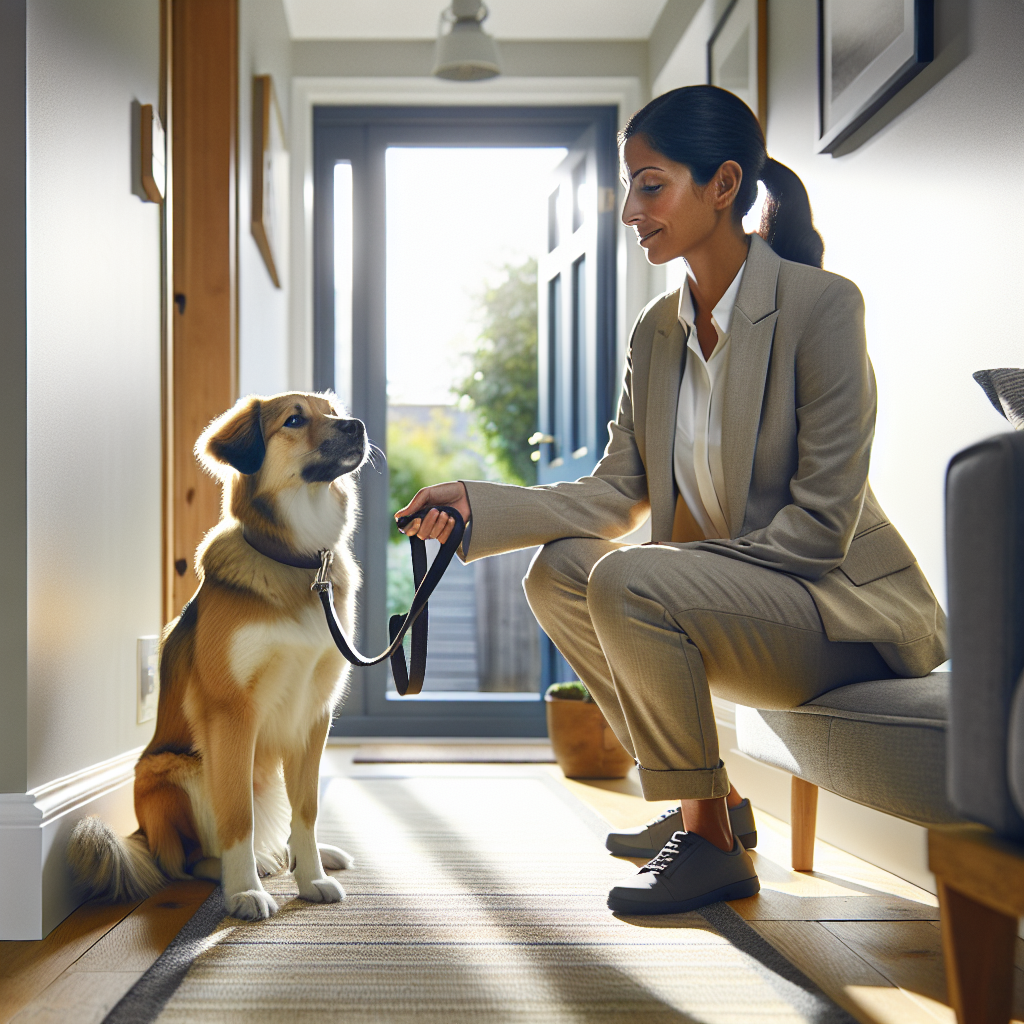
Training Dogs to Accept Boundaries
Progressing Stay Without Added Pressure
Stay is a cornerstone behavior for calm, reliable dogs. Yet many owners get stuck after the basics. The secret is progressing stay without added pressure so your dog remains confident, clear, and steady in real life. At Smart Dog Training, we follow the Smart Method to guide both dog and handler through a structured journey that builds trust and accountability without conflict. This outcome driven approach is delivered by a certified Smart Master Dog Trainer, ensuring every step is clear, fair, and motivating.
In this guide, you will learn how the Smart Method develops a precise stay from living room to busy outdoor settings. You will see how to reduce confusion, use pressure and release fairly, and build motivation so your dog enjoys the work. If you want a calm companion that can hold position kindly, this roadmap will help you start progressing stay without added pressure in a way that lasts.
Why Stay Matters In Real Life
Stay is not a show trick. It is a life skill that keeps your dog safe and your home peaceful. A strong stay allows you to open the door without chaos, greet guests politely, manage meal times, and keep your dog steady while children move around or bikes pass on a walk. The value is not only obedience. It is emotional control. When taught the Smart way, stay teaches your dog how to relax and make better choices, even when the world is exciting.
The Smart Method Approach To Stay
Every Smart programme follows five pillars that bring structure and calm results.
- Clarity. We use exact markers and cues so your dog always knows what earned reward and what ends the behavior.
- Pressure and Release. We guide with fair, light information and pair it with a clean release and reward. This builds responsibility without conflict.
- Motivation. Reward systems create engagement and a positive emotional response so dogs want to work.
- Progression. We layer skills in small steps, increasing distraction, duration, and difficulty only when ready.
- Trust. Training deepens the bond between dog and owner and produces calm, willing behavior.
This balance is what allows progressing stay without added pressure. Each pillar protects the dog from confusion while advancing the challenge in a measured way.
Understanding Pressure In Training
Pressure is any influence that asks your dog to change behavior. It can be spatial, like you stepping toward the dog, or mechanical, like a gentle leash cue, or social, like a firm look. Added pressure is when influence becomes unclear or heavy and the dog feels trapped or worried. Our goal is clear signals with immediate release when the dog makes the right choice. That release is the key to keeping training fair.
With the Smart Method, fair pressure is minimal, paired with clarity and reward, and always followed by a clear release. This format lets you keep the session calm while still progressing stay without added pressure.
Foundations Before You Begin
Before you build duration or distance, set a foundation that removes guesswork.
- Choose a position. Sit or down are ideal. Down is easier for long relaxations.
- Pick a place target. A bed or mat creates a visual boundary that helps clarity.
- Select markers. A yes marker for reward, a good marker for calm paycheck during duration, and a final release word such as free.
- Create a neutral start routine. Lead your dog to the spot calmly, cue the position once, and stand tall and quiet.
- Decide a payment plan. Small, frequent rewards keep the early stage light and confident.
Marker Words And Clarity For Stay
Clarity is the fastest way to reduce pressure. In Smart programmes we use simple markers that mean the same thing every time.
- Yes. Ends a rep and delivers a quick reward. Use it for reinforcement when you plan to reset.
- Good. Sustains the behavior and pays without ending the rep. Use it during duration building.
- Release word. Ends the behavior completely and invites the dog to move off the spot.
This consistent language prevents frustration and allows you to keep progressing stay without added pressure. Your dog understands what earns payment, what continues the task, and what ends it.
Motivation That Does Not Overexcite
Stay thrives on calm. Choose rewards that do not spike arousal. Use small soft food pieces and deliver them to the mouth with little movement. Petting should be slow and still. Your voice should be warm but neutral. If your dog is buzzing with excitement, take a short break, reset, and reduce intensity. Motivation should support relaxation, not fight it.
Phase 1 Build Stillness At Zero Distance
Start next to your dog so distance is not yet a factor. Keep reps short and light.
- Step 1. Cue the position on the mat. Stand neutrally. Count to two. Mark good softly and feed in position.
- Step 2. Count to three or four. Mark good and feed in position again. Keep your body still.
- Step 3. Say release and toss a treat off the mat to reset. Invite your dog back to begin the next rep.
Run six to eight easy reps. End while your dog is winning. Early success is vital for progressing stay without added pressure. If you see fidgeting, shorten the count and pay more often.
Reps Structure And Criteria
In the first sessions, build a simple rhythm.
- Two to five seconds of stillness per rep.
- One to two rewards per rep, delivered to the dog in place.
- Release and reset between reps.
Hold this plan for two or three short sessions in a quiet room. Then begin to add gentle difficulty.
Common Early Mistakes
- Talking too much. Extra chatter adds pressure and noise. Be quiet and consistent.
- Reaching over the dog. This invites movement. Feed low and straight to the mouth.
- Leaning in. Your body can feel pushy. Stand tall with soft eyes.
- Rushing the release. Always mark, then pause a beat, then release to keep the pattern clear.
Phase 2 Add Duration Smoothly
Duration is time spent calmly holding position. We delay distance and distraction until duration is strong. Keep the environment simple and increase time in small steps.
- Work to ten to fifteen seconds with two or three calm payments.
- Blend some slightly longer reps with shorter easy wins so confidence stays high.
- Use the good marker to pay during the hold. Save yes for reps you want to end right after payment.
As duration grows, remember the goal is progressing stay without added pressure. If your dog shows stress signals like yawning, lip licking, or scanning, shorten the next rep and pay sooner. Keep the dog winning.
Micro Releases And Reset Routines
Micro releases keep the session fresh without flooding your dog with excitement. After a longer rep, release, let your dog shake off, then calmly invite back to the mat. This ebb and flow preserves focus and prevents creeping tension.
Phase 3 Add Handler Movement Without Pressure
Movement introduces a new challenge. Start with tiny motions that do not invite your dog to follow.
- Shift your weight side to side for one second. Mark good and feed in place.
- Take a single slow step back, return, then pay. Keep your eyes soft and shoulders neutral.
- Turn your body slightly, return, and pay. Always return to the dog to deliver the reward in place.
If your dog breaks, simply guide back to the spot with a calm voice. Reset and try an easier motion. The aim is progressing stay without added pressure, so trim the challenge until your dog is steady again.
Ready to turn your dog’s behaviour around? Book a Free Assessment and connect with a certified Smart Master Dog Trainer - available across the UK.
Phase 4 Add Distance With Trust
Distance is about you moving away while your dog remains calm. Build this in small segments.
- Start with one step away, one step back, then feed in place.
- Increase to two or three steps. Vary the count so the dog does not predict a routine that creates anxiety.
- Introduce short pauses away, such as a one second pause before returning.
If needed, use a light house line clipped to the collar for gentle guidance back to the mat. Keep the tone calm. Reward generously for holding. This keeps you progressing stay without added pressure while adding responsibility.
Line Management And Fading
A line can prevent rehearsal of breaking. Handle it quietly. No jerks, no frustration. The line is there as insurance and clarity only. As your dog succeeds, step on the line less, then remove it altogether.
Phase 5 Add Distraction The Smart Way
Distractions are anything that competes for your dog’s attention. We introduce them one category at a time, and in controllable doses.
- Environmental. Place the mat further from the couch, near the door, then near a window.
- Object based. A toy on the floor. A bowl placed nearby. A food plate on a table.
- Movement. You sit, stand, or walk around. Another person walks by. A child moves across the room.
Start with low intensity versions and build slowly. Reinforce often when the distraction increases, then reduce payment as the dog relaxes. In this way, you are progressing stay without added pressure because the dog experiences success with each new step.
Environmental Proofing Checklist
- Different rooms within your home
- Front door open and closed
- Kitchen during meal prep
- Garden with mild noises
- Driveway with you placing items in the car
- Park edge with light foot traffic
Tick off each area once your dog can hold a calm stay for thirty to sixty seconds with one or two rewards.
Phase 6 Real Life Generalisation
Now apply stay to moments that matter. Keep the first reps easy and short, then stretch them slowly.
Stay During Door Greetings
Place the mat six feet from the door. Cue down and mark good as the door opens an inch. Pay in place. Close the door. Repeat, opening a little more each time. Invite your guest in only when your dog is settled. After a successful greeting, release and celebrate calmly.
Stay At Mealtimes And With Kids
Use the same structure. Offer a few calm payments early during the meal, then fewer as your dog relaxes. If children are present, begin when they are seated. Add movement later, such as one child walking past. Keep sessions short and end on success. This is how to keep progressing stay without added pressure in a busy family home.
Troubleshooting Without Raising Pressure
Even with clear steps, setbacks can happen. The key is to protect confidence and reduce pressure fast.
When Your Dog Breaks Stay
- Do not scold. Simply guide back to the spot.
- Ask for an easier rep and pay quickly.
- Review what changed. Was it distance, duration, or distraction that tipped the scale
- Split the step. Halve the time or the distance. Lower the distraction.
Success after a mistake is vital for progressing stay without added pressure. The dog learns how to recover and win again.
Signs Of Stress And How To Lower Arousal
- Watch for yawning, lip licking, paw lifts, scanning, or whining.
- Reduce criteria. Shorter reps, fewer distractions, closer handler.
- Improve reward delivery. Calm food to the mouth, slower movements, quiet praise.
- Add a short sniff break outside, then return to an easy win.
Tools And Setups That Help
Smart programmes keep tools simple and fair.
- Place target. A defined mat or bed clarifies boundaries and speeds learning.
- Light line. A thin line prevents rehearsals of breaking while staying unobtrusive.
- Food rewards. Small, soft pieces maintain focus without over arousal.
- Calm environment. Start in quiet rooms before adding the world.
These tools exist to protect clarity and trust so you can keep progressing stay without added pressure across new locations.
Tracking Progress And When To Advance
Progress depends on clean wins. Keep brief notes after each session so you know what to adjust.
- Duration benchmark. From five seconds to sixty across several short sessions with calm payments.
- Handler movement benchmark. You can circle your dog slowly while they remain relaxed.
- Distance benchmark. You can step six to eight paces away, pause, and return without tension.
- Distraction benchmark. Your dog holds while you open the door or handle a toy.
If you meet three of four benchmarks with low errors, increase the challenge slightly next time. If you see two or more breaks in a row, reduce criteria and rebuild confidence.
Progression Benchmarks
We use simple green, amber, red notes.
- Green. Easy wins and relaxed body language. Advance one variable next session.
- Amber. One or two breaks or mild stress signs. Hold criteria steady and add more payment.
- Red. Repeated breaks or concern. Step back one or two levels and rebuild.
Working With A Smart Master Dog Trainer
Some teams need expert eyes to spot small details. A certified Smart Master Dog Trainer can assess your dog, tailor the plan, and coach your timing and reward delivery. Because every Smart programme follows the Smart Method, you get a consistent, structured pathway for progressing stay without added pressure at home and outdoors. If you want hands on guidance, our national network makes it easy to get started. Find a Trainer Near You and we will match you with your local SMDT.
FAQs
What is the fastest way to start progressing stay without added pressure
Begin next to your dog on a mat in a quiet room. Use clear markers, short reps, and frequent calm rewards. End on success. This builds confidence and clarity before you add movement, distance, or distraction.
How long should my dog hold a stay before I add distance
Work up to thirty to sixty seconds of relaxed duration with you standing beside the dog. Once that feels easy, add one or two small steps away and return to pay. This keeps you progressing stay without added pressure while protecting confidence.
Should I use a leash or line for stay training
A light house line can help prevent rehearsals of breaking. Use it quietly as guidance, never as a correction. Pair with clear release and reward so the dog stays engaged and willing.
What do I do if my dog keeps breaking the stay
Lower the criteria and pay sooner. Shorter time, less distance, and easier distractions will bring back success. Guide back calmly, avoid scolding, and split the step smaller. This approach aligns with the Smart Method and keeps pressure low.
Can I reward during the stay or only at the end
Reward both during and after. Use a good marker to pay in position and keep the behavior going, and use yes or the release word when you plan to end the rep. Paying during the hold is vital for progressing stay without added pressure.
When should I bring in a Smart trainer
If you see repeated setbacks, rising frustration, or uncertainty about next steps, connect with an SMDT. Expert coaching refines your timing and criteria so progress feels smooth. You can Book a Free Assessment to begin.
Will stay training make my dog shut down
Not when taught with the Smart Method. We combine motivation, structure, and fair guidance to keep your dog relaxed and willing. If signs of stress appear, we reduce difficulty and reward calmer choices so learning stays positive.
Conclusion
Progress that lasts is built on clarity, fairness, and trust. By following the Smart Method and the phased plan above, you can keep progressing stay without added pressure in a way that protects your dog’s confidence. Build duration first, add movement and distance carefully, then layer in distraction with steady rewards. Track benchmarks, solve problems early, and keep sessions short and successful. If you want expert support, our certified network is ready to help.
Your dog deserves training that truly works. With certified Smart Master Dog Trainers (SMDTs) nationwide, you'll get proven results backed by the UK's most trusted dog training network. Find a Trainer Near You
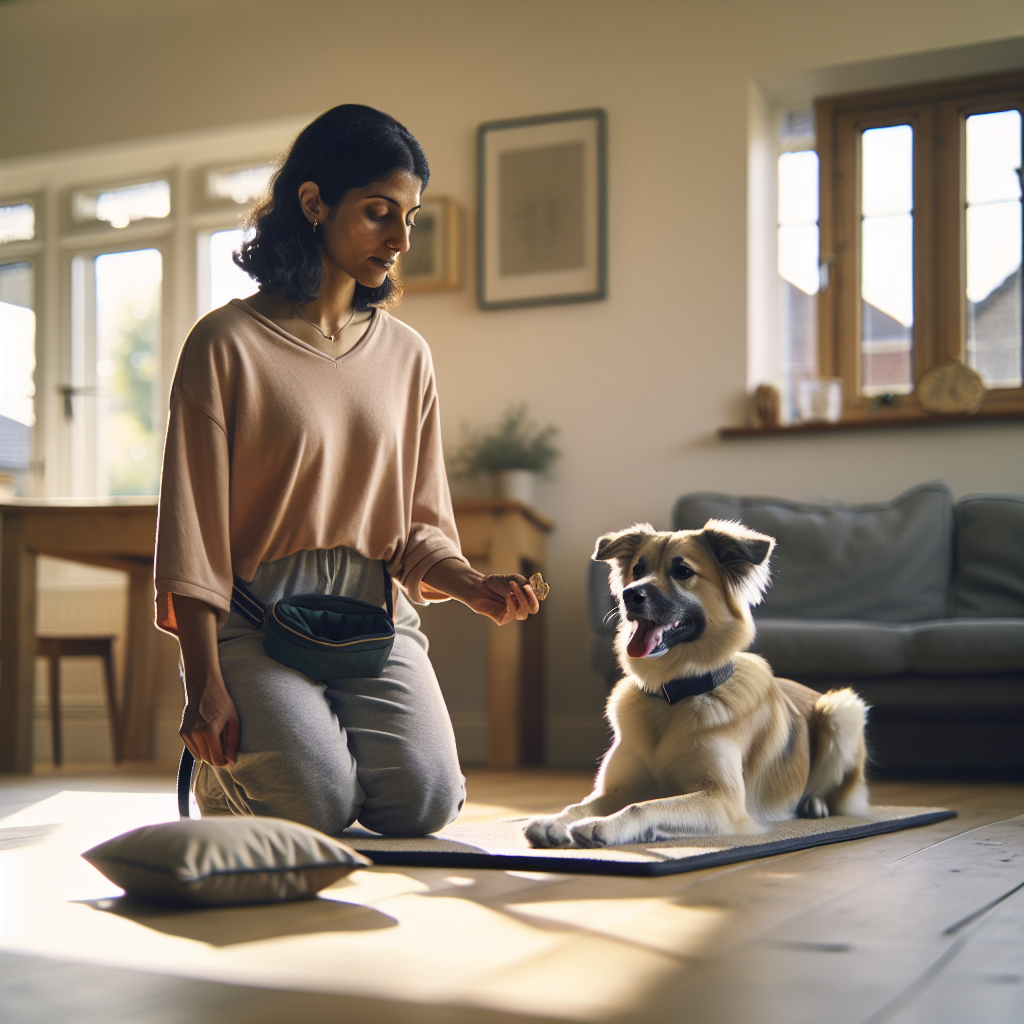
Progressing Stay Without Added Pressure
Training for Calm Transitions Between Spaces
Moving from room to room, stepping out through a door, or loading into the car should feel simple. Yet for many families, these moments spark pulling, barking, and chaos. At Smart Dog Training, we specialise in training for calm transitions between spaces so your dog moves with focus and self control in every environment. Every programme follows the Smart Method, and every certified Smart Master Dog Trainer (SMDT) teaches the same clear, progressive system that works in real life.
In this guide, you will learn how to build dependable threshold manners, how to hold focus under excitement, and how to apply training for calm transitions between spaces across the home, garden, car, and public areas. The goal is a dog that waits, releases on cue, and settles on command, even when life is busy.
Why Transitions Trigger Behaviour Issues
Thresholds and new spaces raise arousal. Scents change, sights shift, and the expectation of reward or freedom rises. Without structure, dogs rehearse rushing forward and pulling, which are self rewarding patterns. Over time, those patterns harden into habits.
Training for calm transitions between spaces interrupts those patterns. We give the dog a clear job to do, such as heel to the door, sit or down at the threshold, hold position while the door opens, and exit only on a release cue. Consistency across every door and boundary creates predictable rules that reduce anxiety and over arousal.
The Smart Method Applied to Transitions
Smart Dog Training uses the Smart Method to create calm, consistent behaviour that lasts. Each pillar shapes training for calm transitions between spaces.
Clarity
We use precise commands and markers so your dog always knows what is expected. Heel means move at your side with attention. Sit or down means plant and hold until released. A marker, such as yes or good, tells the dog exactly when they are correct. Clear words and consistent positions prevent guesswork at thresholds.
Pressure and Release
We pair fair guidance with a clear release and reward. Light lead pressure asks for position. The moment your dog yields and softens, pressure stops and reward begins. This teaches accountability without conflict and is central to training for calm transitions between spaces.
Motivation
Food, praise, and play keep your dog engaged. We mark correct choices and pay generously at first. As skills grow, we shift to variable rewards so the dog keeps trying. Motivation ensures your dog wants to hold still at the door even when excitement rises.
Progression
We layer skills step by step. First in a quiet room, then at an easy doorway, then with the door opening, people moving, and new environments. Distraction, duration, and distance increase only when your dog is ready. This progression is the engine of training for calm transitions between spaces.
Trust
Calm, fair training builds belief in you. Your dog learns that guidance is clear, rewards are reliable, and you will not put them in unsafe situations. This trust is why Smart programmes hold up in busy households, with children, guests, and daily life all around.
Foundations Before You Start
Strong foundations make training for calm transitions between spaces straightforward and predictable.
Markers, Rewards, and Release
- Marker word: yes to mark the instant your dog is correct
- Duration marker: good to maintain position calmly
- Release cue: free or break to tell the dog they can move
- Reward type: small soft food for rapid delivery, praise layered in
Use the same words every time. Consistency speeds learning.
Handling and Lead Skills
- Hold the lead with two hands for stability
- Keep the lead short but relaxed in heel position
- Apply light lead pressure up for sit, back for down, or inward for heel alignment
- Release pressure the moment your dog complies
These handling habits support training for calm transitions between spaces and prevent mixed messages.
Environment Setup
- Start in a quiet hallway or internal doorway
- Use a non slip mat at the threshold to anchor position
- Remove toys or triggers that spike arousal
- Have rewards prepped in a pouch
Core Skills for Calm Transitions
Before combining steps, teach the individual pieces. This is the blueprint Smart Dog Training uses in training for calm transitions between spaces.
Name and Focus
Say your dog’s name. The moment they look at you, mark yes and reward. Repeat until the response is instant in any room. This attention is the first gear for movement control.
Heel to Threshold
From a start point, cue heel. Walk at a steady pace toward the door. If your dog forges, halt and guide back into heel using light lead pressure. Mark and reward when position is correct. Build a calm, matched pace for a few steps at a time before increasing distance.
Sit or Down at Threshold
Stop at the door frame. Cue sit or down, then settle with a duration marker good. Pay several small rewards for stillness. Dogs that are quick to pop up often do best with down, as it invites more relaxation.
Open Door Neutrality
With your dog holding position, touch the handle. If they break, close the door and reset. If they hold, mark good and pay. Progress to a small open, then half open, then fully open. The door moving should predict calm and reward, not frantic motion.
Release Cue and First Step
When you are ready to move, say your release cue and take a single step. If your dog blasts ahead, reset. If they exit in a controlled manner, mark and reward outside. The release cue is the bridge in training for calm transitions between spaces.
Settle on Mat
Place a mat just beyond the doorway. After exiting, cue place or down on the mat. Reward relaxation. This prevents a post exit explosion and teaches the dog to switch off in the new space.
Step by Step Plans for Real Doors and Spaces
Now combine the pieces. Follow these simple sequences to apply training for calm transitions between spaces across daily life.
Room to Room
- Heel three to five steps to the internal doorway
- Down at threshold
- Door opens or you walk through first if it is open
- Release cue and one calm step
- Refocus and settle on a mat inside the next room
Keep sessions short, two to three minutes, repeated often.
Home to Garden
- Heel to the back door
- Down stay while you open and close the door a few times
- Release to a leash and step into the garden
- Pause, ask for a sit, then release to free time
Garden access can be very rewarding. Using training for calm transitions between spaces here prevents rehearsals of door rushing.
Crate to Door
- Open crate a few centimetres
- Reward stillness with the door part open
- Release cue, then lead to the door in heel
- Down at threshold and exit on release
Crate to door is where many dogs explode. Split the steps so the crate opening is not the start of a sprint.
Car Exit and Entry
- Open the car door or boot and wait for eye contact
- Down in the vehicle while the door is open
- Release cue to step down one foot at a time with support if needed
- Heel to a mat or designated spot before any sniff or greet
Reverse for entry. Cue heel to the car, sit, up into the car on cue, and down before the door closes. This sequence is a high value piece of training for calm transitions between spaces because it keeps everyone safe.
Front Door Manners and Visitors
- Place your dog on a mat away from the door
- Knock or ring the bell, reward staying on the mat
- Open the door a crack, reward calm
- Invite the guest in only after a release cue
- Keep your dog on lead at first to guide choice
Visitor practice is a cornerstone of training for calm transitions between spaces. Your dog learns that guests and open doors predict calm positions and slow releases, not jumping.
Multi Dog Transitions
Work dogs one at a time first. Pair dogs only when both can perform the full sequence alone. Stagger releases two seconds apart to prevent racing. Multi dog homes benefit most from training for calm transitions between spaces because structure prevents competition and arousal spikes.
Proofing with the Smart Progression
Proofing makes the behaviour reliable anywhere. Use the Smart Method progression to scale training for calm transitions between spaces from easy to advanced.
- Distraction: add people walking, toys on the floor, or mild noises
- Duration: hold the sit or down a little longer before releasing
- Distance: step away from your dog while they maintain position
- Location: practise at every door in the home, then at friends’ homes, then public spaces
Adjust one variable at a time. If your dog fails twice, lower one step and rebuild. Every certified Smart Master Dog Trainer will coach this simple rule because it protects confidence and clarity.
Troubleshooting Common Problems
Rushing the Door
If your dog surges forward, the criteria are too high. Close the door, reset the down, and reward more frequently for stillness. Practise micro opens of a few centimetres and build back up. Consistency wins in training for calm transitions between spaces.
Breaking on the Handle Touch
Many dogs anticipate movement when they hear the latch. Split the step. Touch and release the handle without opening, reward the hold, repeat. After several successes, open the door slightly while keeping your other hand on the lead for support.
Whining or Barking
Reduce excitement. Use a calm tone, slower breathing, and slower movement. Reward only when quiet. If whining persists, increase the distance from the door and build calm there before moving closer. Training for calm transitions between spaces works best when the emotional state is also calm.
Pulling Once Outside
Exit on release, pause, refocus with a sit or down, then heel away. If your dog pulls, stop and guide back into heel, then continue. Keep early sessions short and end on success. Outside does not mean freedom until a release cue is given.
Over Reliance on Food
Start with frequent rewards, then switch to variable rewards as performance stabilises. Keep praise and release as strong reinforcers. The Smart Method blends motivation with accountability, which keeps behaviour consistent even when food is not present.
Layering Calm Through the Day
Calm transitions are not only about doors. Stack the same rules across daily routines. This multiplies the effect of training for calm transitions between spaces.
- Out of the crate: pause, sit, release
- On and off furniture: cue, wait, release
- Lead on and off: stand still, clip, reward, release
- Before meals: sit, eye contact, release to eat
When every gateway has the same structure, your dog learns that waiting and releasing is normal life.
Advanced Challenges and Real Life Tests
- Children running past the door while you hold your dog in a down
- Guests greeting calmly while your dog remains on a mat
- Doorbell repetitions with increasing time before the release
- Public shop entrances, train platforms, or vet doors with a strong heel and down
Keep safety first. If the environment is too intense, step back a level. Training for calm transitions between spaces should feel successful far more often than not.
Welfare and Safety Considerations
Comfort and health come first. Use non slip surfaces, calm pacing, and fair handling. If your dog shows pain when sitting or stepping, pause the plan and seek veterinary guidance before continuing. At Smart Dog Training we structure programmes so dogs feel safe, calm, and successful from start to finish.
When to Work with a Professional
If your dog has a bite history, extreme reactivity, or you feel out of your depth, partner with a professional. A Smart Master Dog Trainer will assess your dog in your home, map a plan, and coach handling skills step by step. Our network delivers consistent, proven training for calm transitions between spaces across the UK.
Ready to turn your dog’s behaviour around? Book a Free Assessment and connect with a certified Smart Master Dog Trainer, available across the UK.
Case Study Snapshot
Spaniel, 10 months, door rushing and jumping at guests. We began with three days of foundation work. Name and focus in the hallway, heel to threshold, down at the door, release to a mat in the living room. By the end of week two, the family could open the door, greet a visitor, and release the dog to heel into the room without a single jump. The same plan then moved to the car and the garden gate. This is training for calm transitions between spaces in action, driven by the Smart Method and consistent daily practice.
Frequently Asked Questions
What is the fastest way to start training for calm transitions between spaces?
Begin at an easy internal doorway. Heel three steps, down at the threshold, open the door a crack, reward calm, then release. Repeat this short loop twice a day. Consistency beats long sessions.
Should I use sit or down at the door?
Choose the position your dog holds most calmly. Many excitable dogs relax better in down. The key in training for calm transitions between spaces is that the position is held until released.
How do I stop my dog rushing the garden door?
Split the sequence. Down at the door, door opens and closes while your dog holds, then release to a leash and step out. Pause outside for a sit before a final release to free time.
Can I train this with a puppy?
Yes. Keep steps tiny and fun. One step of heel, a short sit, door wiggles, and a quick release with praise. Puppies thrive with the Smart Method because clarity and motivation are built in.
What if my dog ignores the release cue?
Reduce arousal and reward more for holding position. Then release and step through the door together. Rebuild the meaning of the release cue in calm setups before using it in exciting ones.
How long before I see results?
Most families see change within a week of daily practice. Full reliability in new places can take several weeks. The Smart Method keeps progress steady by layering skills step by step.
Do I need a mat?
A mat is helpful but not required. It gives a visual target and helps many dogs settle. As training for calm transitions between spaces improves, you can fade the mat and keep the behaviour.
Conclusion
Calm movement through thresholds does not appear by accident. It is built with a simple, structured plan that your dog understands and loves to follow. Using the Smart Method, training for calm transitions between spaces becomes a set of predictable rules that reduce stress for you and your dog. Heel to the door, hold position, open with neutrality, release with control, and settle in the new space. Repeat that pattern across your home, garden, car, and public doors, and you will have a dog that floats through life with grace and focus.
If you want coaching tailored to your dog, Smart Dog Training offers in home programmes delivered by certified Smart Master Dog Trainers. We set clear goals, practise in real contexts, and support you until the behaviour is reliable anywhere.
Your dog deserves training that truly works. With certified Smart Master Dog Trainers (SMDTs) nationwide, you'll get proven results backed by the UK's most trusted dog training network. Find a Trainer Near You
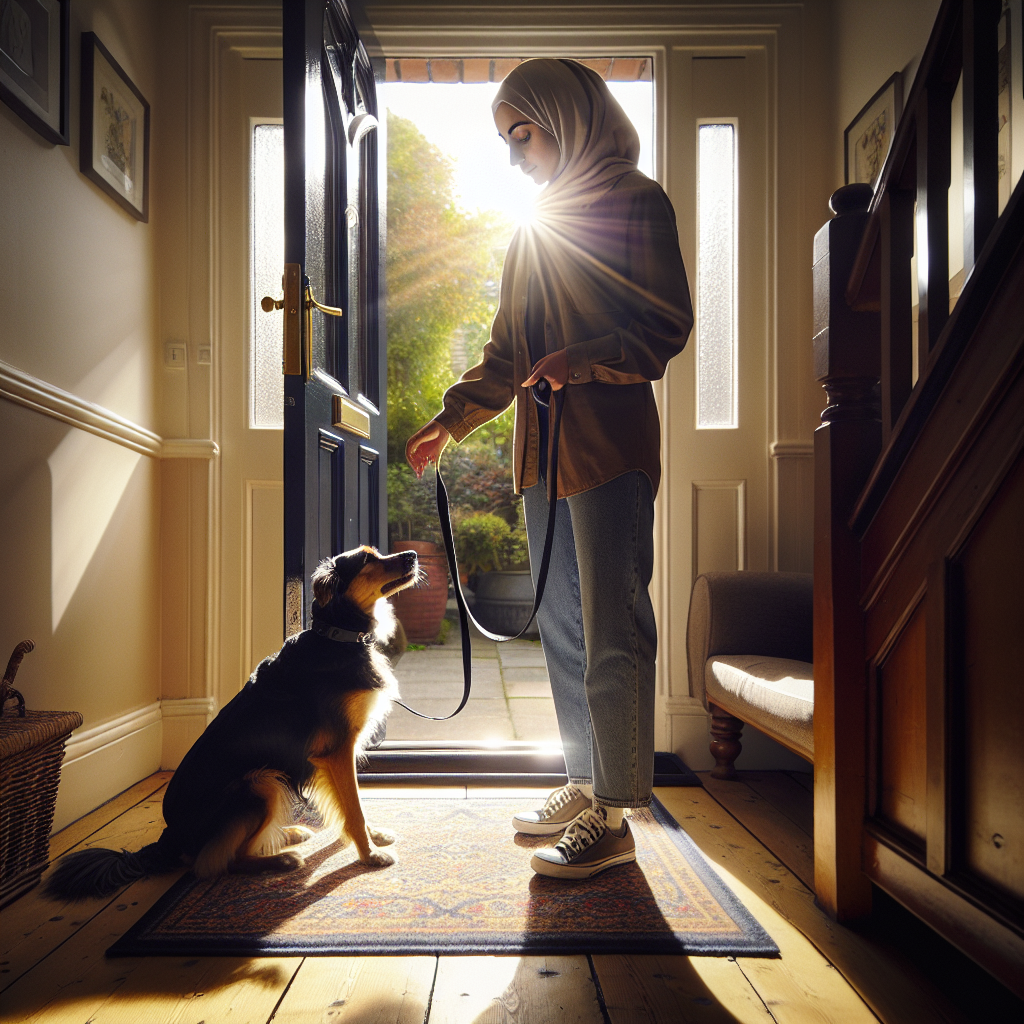
Training for Calm Transitions Between Spaces
Teaching Calm Returns From Recall The Smart Method
Many owners focus on the sprint when they call their dog, but the real magic is the arrival. Teaching calm returns from recall is how you get a dog that comes when called and settles by your side without jumping, circling, or grabbing at toys. At Smart Dog Training we build this outcome through the Smart Method, our structured and proven approach used by every Smart Master Dog Trainer across the UK.
This guide walks you through the exact steps for teaching calm returns from recall in real life. You will learn how to create clarity, use fair pressure and release, and keep motivation high while shaping a steady, reliable return that holds up around distractions.
Why Calm Returns Matter
A fast turn and a calm finish gives you safety and manners in one behaviour. When your dog comes back and settles by your side, you gain control at the moment it matters most. Here is why calm returns matter:
- Safety at the point of contact so you can clip the lead or move away
- Lower arousal which prevents jumping, mouthing, or blasting past you
- Stronger focus on the handler that carries into heel, stay, and leave it
- Cleaner reinforcement since your timing and delivery are easier when the dog is still
Teaching calm returns from recall gives you a complete behaviour you can trust, not just a partial one that breaks down when excitement rises.
The Smart Method Framework For Recall
Smart Dog Training teaches recall inside the Smart Method. Its five pillars shape the behaviour from first steps to advanced proofing:
- Clarity. We use clear markers and cues so the dog always knows what is expected on the return.
- Pressure and Release. We guide with a long line and body position, then release pressure the instant the dog makes the right choice.
- Motivation. Rewards are delivered thoughtfully to encourage calm and focus, not frenzy.
- Progression. We layer distance, duration, and distraction in a steady sequence so success compounds.
- Trust. The process strengthens the bond between you and your dog, building calm, confident, and willing behaviour.
Every certified Smart Master Dog Trainer follows this structure, so the path to teaching calm returns from recall is consistent and repeatable.
Foundations Before You Start
Good recall is built on great basics. Before you begin teaching calm returns from recall, set up the foundations.
Equipment and Setup
- Use a well fitted flat collar or harness and a 5 to 10 metre long line to keep choices safe and accountable.
- Choose a quiet, open area for first sessions.
- Have small, soft food rewards in a pouch for clean delivery.
Marker Words and Rewards
- Use a clear terminal marker like Yes to release to the reward.
- Add a duration marker like Good to sustain calm at your side.
- Decide where rewards will appear. For calm returns, feed low at your leg seam, not out in front.
Handler Position
Stand tall, shoulders soft, and turn slightly side on as the dog approaches. This invites a straight finish rather than a frontal collision. Keep hands low and quiet so your body does not create excitement.
Recall Cue Mechanics
Pick one recall cue and keep it sacred. Many owners use the dog’s name to get attention followed by the cue Come or a whistle. Your sequence might be:
- Name to gain attention
- Recall cue once
- Encouragement while the dog turns and commits
As the dog closes the last few metres, reduce vocal energy. Your calm will help the dog shift from fast approach to steady finish, which is the heart of teaching calm returns from recall.
Teaching the Approach Not the Sprint
We teach the return as a complete chain: turn, travel, arrive, and settle. Here is how Smart Dog Training builds it step by step.
Step 1 Pattern the Turn and Target
Start on the long line in a quiet area. Let your dog move away a few metres, say the recall cue once, then give a gentle guidance with the line toward you. The moment your dog turns, release any pressure and encourage. As the dog reaches you, present a hand target at your leg seam. When the nose touches your hand, mark Yes and feed two or three small treats low at your leg.
- Goal. A clean turn on the cue and a straight line to your target hand.
- Reps. Short sets of five to eight recalls with breaks between sets.
Step 2 Build a Calm Line to You
Repeat the pattern and shape the last few steps of the approach. On the final two metres, soften your voice and slow your breathing. Bring your target hand to your leg seam early so the dog aims for that calm landing spot. Mark and feed when the dog’s nose meets your hand, then feed another treat with the dog’s head still in the target position. This lowers arousal at the moment of arrival.
Step 3 Add the Sit on Arrival
Once your dog targets your hand smoothly, wait one second after contact. Most dogs will pause or lower their hips. Mark that pause and feed. Then start to ask for a sit before the mark. If the dog sits on arrival, mark and feed two to three small treats with the head level. You have just layered a simple auto sit that turns a fast approach into a calm finish.
Using Pressure and Release for Accountability
Pressure and release is a core part of the Smart Method. It is not about force. It is about guidance with a clear release. On a long line:
- Apply light, steady line pressure toward you as you give the cue.
- The instant the dog turns, release pressure fully.
- If the dog stalls or veers off, reapply light pressure, then release again the moment the dog chooses you.
This rhythm teaches accountability without conflict. It also keeps teaching calm returns from recall safe when you begin proofing around distractions.
Motivation Without Mayhem
We want desire without chaos. That is why Smart Dog Training emphasises how you deliver the reward, not just what you deliver.
- Feed low and close to the body. Reward placement shapes behaviour. Low feeding discourages jumping.
- Use a calm voice at the finish. Save the party for the turn and travel, not the landing.
- Mix in a chin rest or hand target after the mark to extend stillness for one or two seconds.
If your dog is toy driven, save the toy for a release after two seconds of stillness by your side. The chain becomes recall, land, settle, release, then toy play. This keeps teaching calm returns from recall focused on the calm arrival, not the toy chase.
How to Start Teaching Calm Returns From Recall
Here is a simple first week plan that follows the Smart Method.
- Day 1. Twenty short recalls in the garden on a long line. Focus on the turn and hand target. Two sets of ten with a break.
- Day 2. Repeat Day 1 plus introduce the sit on arrival. Keep criteria light. Mark any pause or half sit.
- Day 3. Move to a quiet field. Five metre line only. Keep the same pattern and add one second of stillness before you mark.
- Day 4. Practice at a busier time in the same field. Call only when you can win. Raise criteria to a full sit on arrival.
- Day 5. Add mild distractions like a person walking at distance. Use pressure and release if needed. Keep your voice calm in the last two metres.
- Day 6. Increase distance slightly. Maintain the sit and one to two seconds of stillness before marking.
- Day 7. Review your progress and keep sessions short and positive. Teaching calm returns from recall is a marathon, not a sprint.
Proofing Calm Returns The Three Ds
Proofing follows Progression. Add one D at a time.
- Distance. Gradually increase the length of the recall. Use a longer line so you can guide and release.
- Distraction. Start with predictable, low level distractions like birds at distance, then people walking, then dogs at distance.
- Duration. Build the stillness at your side from one to three seconds before the mark, then to five. Keep your dog successful.
In all proofing, keep the finish sacred. If the landing gets messy, lower the energy earlier in the approach and return to hand target plus feed low at your leg.
Real World Environments
- Parks. Position yourself so the dog is running toward a low traffic area. Call before your dog reaches the path or group of dogs.
- Woodland. Use straight lines along paths for cleaner approaches. Avoid calling when the dog is deep in scent work at first.
- Beach. Wind and waves are strong distractions. Stay on the long line longer and mark the turn early, not only the sit.
Common Mistakes to Avoid
- Repeating the cue. Say it once and follow through with guidance. Repetition weakens the cue.
- Calling into chaos. Do not call when the dog is at peak arousal early in training. Set up wins.
- Rewarding the jump. If the dog jumps on arrival, keep hands low, turn slightly side on, and mark only when four paws are down.
- Paying at distance. Never throw food far from you for recall rewards. All reinforcement should happen at your side.
- Dropping the long line too soon. Keep accountability until calm returns are consistent.
Problem Solving When The Return Is Not Calm
- Circling on arrival. Present your target hand early and step back one small step to help the dog find the straight line. Mark and feed low.
- Slamming into you. Reduce your vocal energy five metres out. Soften your posture. Ask for a sit before the mark.
- Spitting the reward to chase. Use higher value food in tiny pieces and deliver several small rewards in position.
- Sniffing mid return. Guide with the line, release on commitment, and increase reward rate for clean turns.
- Overshooting and running past. Do not chase. Turn your body ninety degrees and present the hand target at your leg seam.
When in doubt, return to the sequence that shaped the calm finish. Teaching calm returns from recall is about repeating the right picture until it sticks.
High Drive Dogs and Toy Rewards
Toy lovers can learn a calm landing too. Use toys in a way that supports stillness.
- Recall, land, settle for two seconds, mark, then release to tug or a short fetch directly from your hand.
- Keep the toy hidden until after the settle. Do not wave it during the approach.
- End toy play with a clear out cue and a quick food reward to lower arousal again.
This pattern keeps excitement within rules so that teaching calm returns from recall remains the focus, not the chase.
Multi Dog Homes
Teach each dog alone first. When you train together:
- Use stations or beds so non working dogs have a job.
- Call one dog at a time. Reward low and quiet, then return the dog to station.
- Rotate turns and keep sessions short.
Teaching calm returns from recall with more than one dog requires structure, but the Smart Method makes it simple when you apply clear markers and fair guidance.
Helping Children and Family Members
Make training consistent across the family.
- Everyone uses the same recall cue and markers.
- Adults manage the long line. Children can present the hand target and feed low once the dog is calm.
- Keep voices calm as the dog approaches. Model the behaviour you want to see.
Tracking Progress and Criteria
Write down what you want to see. For example:
- Turns within one second on the cue
- Approach in a straight line
- Auto sit on arrival with one to three seconds of stillness
Count clean repetitions and build streaks. When you can perform ten clean recalls in a row in one setting, raise one criterion at a time. This is the Progression pillar in action and it is how we keep teaching calm returns from recall reliable anywhere.
Integrating Recall Into Daily Life
Strong behaviours grow when you weave them into normal routines.
- Recall from the garden to the back door, then feed inside.
- Call your dog before you clip the lead, then release to walk.
- Recall after a short off lead play, then release back to play.
- Use a recall into heel at kerbs before you cross the road.
These tiny reps add up. Teaching calm returns from recall becomes part of how your dog moves through the world with you.
When To Bring In a Professional
If recall has a history of failure or if you feel unsure with timing, invest in guidance. A certified Smart Master Dog Trainer will assess your dog, set clean criteria, and coach your handling so calm returns appear fast and stay strong. Ready to turn your dog’s behaviour around? Book a Free Assessment and connect with a certified Smart Master Dog Trainer available across the UK.
FAQs
What is the difference between a fast recall and a calm return?
A fast recall describes the turn and travel. A calm return includes the arrival and settle by your side. Teaching calm returns from recall means you build both parts, not just speed.
Should I always ask for a sit on arrival?
We recommend an auto sit or at least one to two seconds of stillness. It creates safety and clarity for you and your dog.
How long should I keep the long line on?
Keep it until your dog is consistent in multiple places with rising distraction. Teaching calm returns from recall needs accountability while you proof the behaviour.
Can I use a whistle for recall?
Yes. Pick one cue and keep it consistent. The Smart Method focuses on clarity, so do not mix multiple recall cues.
What if my dog ignores the cue?
Do not repeat it. Guide with light line pressure, then release the instant your dog turns. Lower your criteria and set up easier wins.
How do I reward without creating more excitement?
Feed low at your leg seam, use small soft treats, and keep your voice calm as the dog arrives. If using toys, release to play only after a brief settle by your side.
My dog comes back but will not let me clip the lead. What should I do?
Pair the arrival with brief stillness and feeding near the collar clip. Touch the clip for one second, feed, then release the dog again. Build up to full clipping. This is part of teaching calm returns from recall.
Is recall possible around other dogs?
Yes with structure. Train at distance first, keep the long line on, and only close the gap as success grows. A Smart Dog Training programme will map the steps for your dog.
Conclusion
Calm returns turn a basic recall into a life skill you can trust anywhere. By following the Smart Method you will create clarity in your cues, guide fairly with pressure and release, build motivation without chaos, progress at a steady pace, and deepen the trust you share with your dog. Teaching calm returns from recall is the simplest way to transform day to day life, from park walks to front door safety.
Your dog deserves training that truly works. With certified Smart Master Dog Trainers SMDTs nationwide, you will get proven results backed by the UK’s most trusted dog training network. Find a Trainer Near You

Teaching Calm Returns From Recall
Smooth Transitions Between Locations
Moving from kitchen to garden, car to park, or home to vet can turn steady obedience into chaos if you do not have a plan. At Smart Dog Training we specialise in smooth transitions between locations so your dog behaves with the same confidence anywhere. Using the Smart Method we turn context into clarity and give you a repeatable routine you can trust. If you want world class guidance from a certified Smart Master Dog Trainer, this guide outlines how our programmes create reliability in real life.
Why Smooth Transitions Between Locations Matter
Dogs learn in contexts. A sit in the lounge does not always transfer to the high street. Without a structured approach you can see pulling at doorways, loss of focus in car parks, or stress at the vet. Smooth transitions between locations solve the root of this problem by teaching your dog to recognise the same rules, markers, and rewards no matter where you are. The result is calm, consistent behaviour that lasts beyond class and into daily life.
What Smooth Transitions Between Locations Really Mean
In Smart language a smooth transition is the moment your dog changes environment and keeps the same standards. That includes stationing at thresholds, matching your pace on lead, checking in before big distractions, and settling on cue in public. Smooth transitions between locations are not about perfection on day one. They are about a plan that scales up pressure, then releases it at the right moment, so your dog grows in confidence and accountability.
The Smart Method Foundation
Every programme at Smart Dog Training follows the Smart Method. This system is structured, progressive, and outcome focused. It is how we achieve smooth transitions between locations for family dogs, working dogs, and advanced pathways.
Clarity
We teach a precise marker system and simple, repeatable commands. Clarity removes guesswork so the dog knows exactly what earns a reward and what ends the rep. Clarity is the first building block for smooth transitions between locations because it travels with you anywhere.
Pressure and Release
Fair guidance shows the dog how to find the right answer. The release marks success and turns pressure off. Pressure and release used with skill builds responsibility without conflict. It supports smooth transitions between locations because the dog understands how to succeed even when surroundings change.
Motivation
We drive engagement with food, toys, praise, and access to life rewards. Motivation keeps your dog working with you and eager to repeat the right choice. It helps you maintain smooth transitions between locations by reinforcing effort in new places.
Progression
We layer distractions, duration, and distance step by step. Progression is the engine that carries indoors skills into the world. It is the structure behind smooth transitions between locations, so reliability never drops when the environment gets harder.
Trust
Training should strengthen your bond. We protect confidence and make success the most rehearsed story in your dog’s head. Trust holds everything together, making smooth transitions between locations feel safe and predictable for your dog.
Core Skills That Travel Anywhere
Before we change environments, we build portable building blocks. These skills make smooth transitions between locations consistent and low stress.
Marker System
We use markers for yes, try again, and finished. A clean release marker lets the dog relax or access a reward. When your markers are solid you can achieve smooth transitions between locations because the dog recognises the same language everywhere.
Lead Positions and Handling
We teach a clear heel position, a free walk position, and a stationary posture. Good handling helps your dog move through doorways, kerbs, and crowds without rushing. Proper handling makes smooth transitions between locations feel automatic.
Settle on a Mat
A portable mat gives your dog a defined place to switch off in cafes, lobbies, or at the vet. It is a reset button you can carry anywhere. This single skill often unlocks smooth transitions between locations in public spaces.
Build Your Transition Plan
We do not guess. We map the journey. A Smart Master Dog Trainer will design the route from easy to hard in your daily routine.
Pick Anchor Behaviours
- Name response and eye contact
- Stationing at thresholds
- Loose lead position
- Recall to front or heel
- Mat settle
Anchor behaviours turn into checkpoints that keep smooth transitions between locations on track.
Map Locations from Easy to Hard
- Lounge and hallway
- Back garden
- Front drive
- Quiet street
- Busy pavement
- Park at off peak times
- Park at busy times
- Shopping parade
- Cafe and public seating
We only move up when two sessions in a row meet your criteria. This keeps smooth transitions between locations consistent and stress free.
Home to Garden Transition
Start with a predictable warm up routine. This structure is the backbone of smooth transitions between locations.
- Two minutes of name response and hand target
- Ten steps of loose lead walking inside
- Station at the back door for three seconds, then release
- Open the door, close it, reward calm, then repeat
- Step out together, reward check in, then explore on cue
Keep early sessions short and end with a tidy finish on the mat. Little wins fuel smooth transitions between locations as difficulty grows.
Garden to Street Transition
The street changes scent, sound, and movement. Your checklist keeps performance steady and builds smooth transitions between locations.
- One minute of engagement in the garden before the gate
- Station at the gate with a fixed count
- Gate opens then closes while your dog holds position
- Release together, move five steps, reward check in
- Short loops back to the gate to reset arousal
If focus drops, reduce duration or step back to a quieter time. This is how we protect smooth transitions between locations without nagging.
Car to New Venue Transition
Many dogs explode out of the car. We turn the car park into training gold and keep smooth transitions between locations rock solid.
- Before opening the door, wait for eye contact
- Clip the lead and ask for a station for a fixed count
- Step out, close the door, reward check in
- Walk a small circle to release energy
- Run one minute of heel and sit reps, then enter the venue
Rehearsing this routine across different car parks cements smooth transitions between locations because your dog learns the same sequence every time.
Doorways and Thresholds Without Drama
Thresholds are where manners break. We replace rushing with rhythm and achieve smooth transitions between locations through repetition.
- Approach, pause, breathe
- Station with a fixed count
- Door opens then closes while your dog holds
- Release together on your cue
- Reset if excitement spikes
Clear checkpoints remove grey areas and sustain smooth transitions between locations even in busy buildings.
Public Spaces and Cafes
Settling around food, people, and clatter is a life skill. We show your dog how to switch off. This is central to smooth transitions between locations.
- Enter, do one short engagement loop
- Place the mat and send to settle
- Feed calmly for breathing and stillness
- Sprinkle recovery treats after sudden bangs or drops
- Release for a short sniff break, then return to the mat
Rotate between short stays and micro walks to manage arousal. That balance is how we protect smooth transitions between locations during longer outings.
Vet and Groomer Transitions
Clinical spaces are challenging. Smart programmes make handling predictable so your dog can cope. Smooth transitions between locations depend on rehearsed care routines.
- Practice stationing on a mat in a lobby at quiet times
- Pair touch of paws, ears, and tail with markers and rewards
- Introduce the exam table pattern with a clear release
- Rehearse weigh scale approach and stillness
- End each visit with easy wins and a short play
When your dog knows the sequence and the release, stress drops and smooth transitions between locations return quickly after surprises.
Managing Temporary Regressions
Every dog has off days. The answer is not louder cues. It is better structure. To protect smooth transitions between locations, adjust one variable at a time.
- Lower the distraction level
- Shorten duration
- Increase distance from triggers
- Raise reward frequency for engagement
- Run two easy sessions before trying again
Smart trainers use these resets to keep confidence high while standards stay clear.
Measure What Matters
Results speak. We track behaviour in places you care about. That is how we verify smooth transitions between locations are real and repeatable.
- Three key behaviours logged per outing
- Short video clips to review handling and timing
- Simple scores for focus, lead tension, and recovery time
- Weekly plan updated against performance
Consistent measurement turns good sessions into great habits and preserves smooth transitions between locations long term.
Common Mistakes That Break Transitions
- Jumping from lounge to busy park too fast
- Repeating cues instead of resetting criteria
- Holding a tight lead that blocks natural movement
- Skipping the settle and expecting instant stillness
- Ending sessions after a failure instead of a win
Avoiding these traps keeps smooth transitions between locations on course and speeds up progress.
Smooth Transitions Between Locations Checklist
- Warm up routine that is the same every time
- Markers and release that are crystal clear
- Anchor behaviours ready on cue
- Threshold plan for doors and gates
- Short engagement loop in each new place
- Mat settle for public spaces
- Calm exits from the car
- Video and notes to track progress
Work through this list in each environment. This single habit can transform smooth transitions between locations in a matter of weeks.
Ready to Get Help
When life feels busy or behaviour feels stuck, guided coaching makes all the difference. Smart programmes are delivered in home, in structured groups, and through tailored behaviour plans. Our trainers use one system and one standard so you get smooth transitions between locations that hold up in daily life.
Ready to turn your dog’s behaviour around? Book a Free Assessment and connect with a certified Smart Master Dog Trainer available across the UK.
When to Work With a Professional
If your dog struggles with reactivity, handling, or severe anxiety, personal coaching is the fastest route to safe, smooth transitions between locations. A Smart Master Dog Trainer will assess your dog, select anchor behaviours, and implement the Smart Method across your daily routes. You will learn timing, handling, and progression so reliability grows week after week. With national support, our trainers stay accountable to clear outcomes.
Real Life Scenarios and Routines
School Run with Kids and Dog
- Warm up engagement at home
- Threshold routine at the front door
- Loose lead position to the car
- Car park check in before unloading
- Short heel, settle, then pick up time
This pattern builds smooth transitions between locations even when mornings are busy.
Weekend Park Visit
- Car to park routine with a station and release
- Walk a focus loop away from the main path
- Structured play with recalls and returns
- Calm exit with a mat settle near the car
Keeping the bookends calm maintains smooth transitions between locations through the most exciting parts of the day.
City Centre Coffee Stop
- Short engagement loop outside
- Threshold station at the door
- Place on the mat under the table
- Sprinkle recovery treats after loud noises
- Release for a sniff break before leaving
Predictable rhythms are what make smooth transitions between locations stick in busy places.
FAQs
How long does it take to get smooth transitions between locations
Most families see solid improvements within three to six weeks with daily micro sessions and a weekly field trip. Exact timing depends on the starting point, the dog’s history, and how consistently you follow the Smart Method plan.
What should I practice first
Start with markers, a simple station cue, and a five step loose lead routine inside. These skills make smooth transitions between locations much easier once you begin moving between environments.
Do I need special equipment
No. A well fitted flat collar or harness, a standard lead, a mat, and suitable rewards are enough. Your Smart trainer will advise on handling so you can achieve smooth transitions between locations without confusion.
My dog is perfect at home but wild outside. What now
That is classic context specific learning. Reduce criteria, increase reward rate, and run the doorway routine. With the Smart Method you can rebuild smooth transitions between locations by moving stepwise from easy to hard places.
How do I handle setbacks after a bad day
Go back one step on the location ladder, shorten duration, and notch up rewards for engagement. Two easy wins usually reset confidence and bring back smooth transitions between locations.
Will this help with vet visits
Yes. Rehearsed handling, mat work, and clear release cues make clinical spaces predictable. With practice you can maintain smooth transitions between locations from car park to waiting room to exam room.
Can puppies learn smooth transitions between locations
Absolutely. Short, positive sessions with clean markers and simple stations help puppies generalise quickly. Smart programmes are built to give young dogs smooth transitions between locations early in life.
Conclusion
Reliable behaviour should not be tied to one room. With the Smart Method you can build clarity, guide fairly, motivate well, progress step by step, and deepen trust. That is the blueprint for smooth transitions between locations that hold up in the real world. If you want personal support, our certified trainers will map your daily routes and turn them into training opportunities. Your dog learns what to do, even when the scenery changes.
Your dog deserves training that truly works. With certified Smart Master Dog Trainers (SMDTs) nationwide, you'll get proven results backed by the UK's most trusted dog training network. Find a Trainer Near You
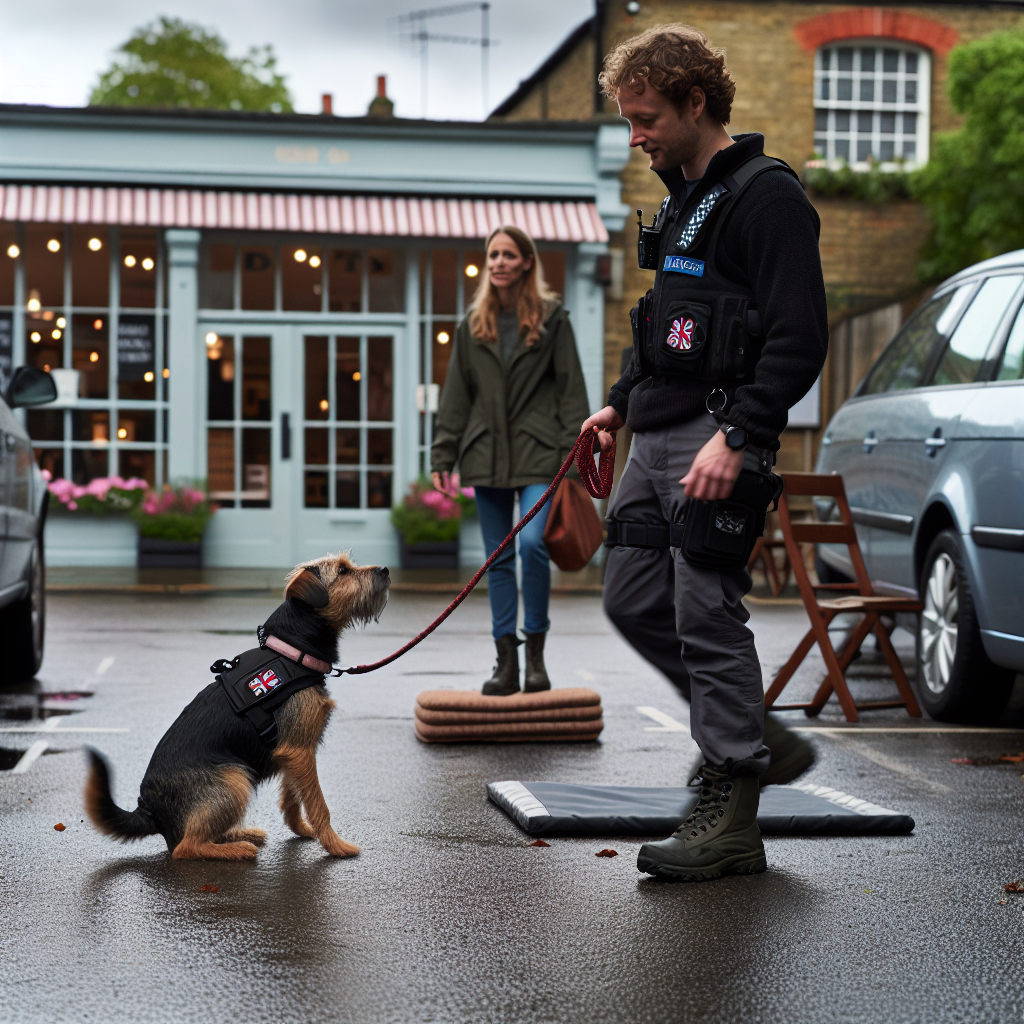
Smooth Transitions Between Locations
Why Dogs Rush Through Exercises and How to Fix It
Training dogs that rush through exercises is a common challenge for families. The dog seems eager, yet behaviours look messy and fragile. Sits pop up and collapse. Downs are performed at speed, then broken. Recall turns into a race without a clean stop. When dogs move faster than they think, learning stalls. At Smart Dog Training, we slow the moment down, add structure, and build calm confidence step by step.
If you are training dogs that rush through exercises, you need a clear plan and consistent coaching. Working with a certified Smart Master Dog Trainer in your area ensures every session follows the Smart Method and delivers real results. Our trainers are experts in creating steady behaviour that holds under pressure while keeping motivation high.
What Rushing Looks Like
Rushing is more than simple enthusiasm. It is a pattern where speed replaces understanding and control. You may notice your dog:
- Explodes into a sit or down, then bounces up before any release
- Anticipates cues and performs behaviours you did not ask for
- Breaks position when you move, reach for a reward, or shift your weight
- Surges ahead in heel instead of matching your pace
- Skids into front on recall or circles from excitement
- Grabs at food or toys and loses focus after the reward
These signs tell us the dog is practising speed without clarity. The fix is to build clarity, then layer duration, distraction, and difficulty with care.
The Smart Method for Steady Behaviour
The Smart Method is our proprietary system for creating calm, consistent results that last. It is the backbone of every programme we run, and it is the most effective path when training dogs that rush through exercises.
Clarity
Your words and markers must be precise. One cue means one behaviour. We teach three core markers. Yes ends the behaviour and pays. Good maintains the behaviour and pays later. Free ends the behaviour without a reward. This clarity removes guesswork and slows the dog into understanding.
Pressure and Release
Fair guidance builds accountability. Gentle leash pressure guides the dog into the correct position. Timely release and praise confirm the choice. The dog learns that settling into the right answer makes life easy and pleasant.
Motivation
Rewards matter. Food and toys create engagement and positive emotion. We start with high motivation, then teach the dog to stay calm around rewards. This allows energy without frantic movement.
Progression
We layer skills in small steps. First clarity, then duration, then distance, then distraction, and finally difficulty in real life. Rushing fades because the dog always knows what comes next.
Trust
Training must feel fair and predictable. Dogs that understand the rules relax. Trust grows, and so does performance.
Core Principle When Training Dogs That Rush Through Exercises
Slow is smooth and smooth becomes fast. That is how we coach dogs out of rushing. We create a pattern where stillness and thought earn the reward, not frantic speed. The dog learns to breathe, hold, and wait for the release word.
Set Up the Session for Calm
- Short sessions of five to eight minutes keep arousal in check
- Use a consistent training area with minimal distraction at first
- Keep your food or toy out of sight until the marker
- Stand tall, breathe slow, and speak in even tones
- Reward from your body, not from the floor, to avoid scavenging
These small details matter when training dogs that rush through exercises. Your dog mirrors your tempo.
Handler Mechanics That Stop Rushing
Your timing creates your dog. To reduce rushing, sharpen these mechanics:
- Say the cue once, then pause. Avoid repeating cues
- Mark only when the behaviour meets your criteria
- Deliver the reward to the position you want to grow
- Avoid body language that hints at an early release
- Release clearly with your chosen word, then reset
Clean mechanics turn fast, messy reps into clean, confident reps.
Reward Placement That Builds Stillness
Rushing often comes from poor reward placement. For downs that pop up, pay low at the chest or between the paws to reinforce the floor. For sits that slide forward, pay close to your body at the dog’s nose level. For heel that surges, deliver the reward at your seam so the hip stays aligned. When training dogs that rush through exercises, reward placement is the simplest fix with the biggest impact.
Simple Drills to Slow Fast Dogs
Tempo Sits and Downs
- Ask for the behaviour once
- Count one, two in your head after the dog lands
- Say good softly while the dog holds
- Feed one or two treats in position
- Say free and calmly step away before the next rep
This creates a habit of pausing and breathing before the release.
Place for Emotional Control
Place teaches a settle mindset. Guide your dog onto a bed or platform. Mark yes when all four paws are still. Feed on the bed. Then use good to pay for calm. Release with free. Build one minute, then two, before adding small distractions. Training dogs that rush through exercises becomes easier once place is fluent.
Stillness Games With Toys
- Hold the toy still until the dog relaxes
- Mark yes for calm eye contact
- Play for three seconds, then trade and reset
The dog learns that composure makes the game start again.
Using Pressure and Release Fairly
Leash guidance helps the dog find the right answer without conflict. For a down, apply gentle downward pressure through the lead. The instant elbows touch the floor, release pressure, mark yes, and pay in position. For heel, guide the dog back to the seam, then release and reward at your side. Consistent release at the right moment removes rushing and builds responsibility.
Step by Step Plan for Sit and Down
Stage 1 Clarity
- Teach sit and down with single cues and clean markers
- Reinforce in position with two to three calm deliveries
- Release with free and reset
Stage 2 Duration
- Increase the hold from one second to five, then ten
- Feed in position during good to keep the dog steady
- If the dog breaks, quietly reset and lower the criteria
Stage 3 Distance
- Take one step back, then return and pay
- Build to three steps, then five, always returning to reward in place
- Release the dog after the reward to keep the release under your control
Stage 4 Distraction
- Shift your weight, look away, or reach for a reward pouch
- Reward only if the dog holds position
- Use calm breaks between reps to avoid creeping arousal
Stage 5 Real Life
- Practice while you open a door, talk to a friend, or pick up keys
- Keep success high by changing one thing at a time
- Finish on an easy win to lock in confidence
Recall Without the Skid
Dogs love to sprint on recall. The art is turning speed into a clean stop without bouncing. When training dogs that rush through exercises, recall structure matters.
- Start with short distance on a long line for safety
- Call once, then hold your hands close to your body
- Mark yes only when the dog sits in front without jumping
- Pay low and close to the chest to keep the sit tidy
- Add a three count pause before the next release to reset arousal
Once front is clean, transition to heel finishes by paying at your seam. Do not reward if the dog circles or bumps. Simply reset and try again with less distance.
Heeling at a Calm Tempo
Steady heel comes from rhythm. Teach your dog to match your pace using tempo changes.
- Walk at a slow count for six steps with good and micro rewards at your side
- Shift to normal pace for six steps
- Add brief fast pace for four steps, then return to slow
Reward only when shoulder stays at your hip. If the dog surges, stop, settle, and start again. Over time, the dog reads your body and chooses control over speed.
Fixing Anticipation and Breaking Position
Anticipation means the dog guesses the next cue. Breaking means the dog releases before you do. Both come from patterns that are too predictable or rewards that arrive too early. Here is how we fix it when training dogs that rush through exercises.
- Vary the order of cues so the dog must listen
- Sometimes reward in position, sometimes release without a reward
- Add small pauses before markers so the dog stops chasing the sound
- Use neutral reps where nothing exciting happens and the dog practises calm
- If the dog breaks, replace without comment, lower criteria, and try again
Food, Toys, and Arousal Management
Rewards should drive focus, not chaos. Match the reward to the dog’s arousal. Use food for precision and toys for energy, then teach the dog to switch back to stillness on cue.
- Food delivery should be slow and placed to reinforce the position
- Toy play should be short and structured, with clear trades
- Alternate work and rest so the heart rate never runs away
Over time we shift from continuous rewards to variable reinforcement. The dog learns that patience pays even when rewards are less frequent.
Progression That Prevents Rushing
Progression is the heart of the Smart Method. Move forward only when success sits at 80 percent or higher. Change one factor at a time. If you add duration, do not add distance. If you add distraction, shorten the hold. This keeps the dog thinking instead of guessing. It is the safest route when training dogs that rush through exercises.
Session Structure You Can Trust
- Warm up with two easy behaviours for quick wins
- Train one primary skill for five minutes
- Insert a short settle on place
- Train a second skill for three minutes
- Finish with a calm release and play outside the training area
End each session before your dog fades. Stopping early preserves quality and confidence.
Common Mistakes to Avoid
- Stacking new criteria too fast
- Rewarding as the dog stands up instead of in position
- Repeating cues and teaching the dog to ignore the first one
- Allowing sloppy reps to slide because the dog looks eager
- Chasing speed before the dog proves control
Real Life Drills for Calm Confidence
Doorway Stillness
- Ask for sit or place one metre from the door
- Touch the handle, then reward if the dog holds
- Open a few centimetres, then close and reward
- Build to opening the door fully before release
This prevents door dashing and builds patience at the threshold.
Car Door Manners
- Place before the boot opens
- Open slowly while feeding in position
- Clip the lead, then release with free
The dog learns that calm behaviour makes adventures happen.
When to Seek Expert Help
If you feel stuck, or if your dog cannot slow down even in a quiet room, it is time to work with a professional. A certified Smart Master Dog Trainer will observe your mechanics, adjust criteria, and tailor a plan to your dog’s temperament. Many families see a measurable shift in the first session because small changes in timing and reward placement create big results.
Ready to turn your dog’s behaviour around? Book a Free Assessment and connect with a certified Smart Master Dog Trainer - available across the UK.
Smart Programmes That Target Rushing
Every Smart programme follows the same structure and standards, and each can be tailored for training dogs that rush through exercises.
- Puppy Foundations builds clarity and calm early, before habits form
- Family Obedience adds duration, distance, and distraction in real life
- Behaviour Programmes address arousal and control for high drive dogs
- Advanced Pathways such as service and protection require rock solid steadiness by design
You will work through clear milestones, coached by a trainer who understands both behaviour and performance.
Measuring Progress That Lasts
Track three metrics. First, time in position without rehearsing mistakes. Second, response to release words in different settings. Third, clean reps in novel environments. When you can reproduce clean behaviour in a new place within two to five reps, you know your progression is on track. That is the standard we use at Smart Dog Training.
FAQs on Training Dogs That Rush Through Exercises
Why does my dog rush even when he knows the cues
Rushing often comes from high arousal and unclear markers. The dog is chasing the next event rather than listening. Use single cues, reward in position, and insert brief pauses before the release.
Will slowing my dog reduce motivation
No. We keep motivation high while teaching control. Structured rewards and playful resets keep the dog engaged. Calm first, then speed returns with accuracy.
How long should each session last
Five to eight minutes for most dogs. Short, focused sessions prevent fatigue and keep the quality of reps high. End on a win.
What if my dog keeps breaking position
Lower criteria, reward in position, and remove triggers that cause breaking. Replace the dog quietly and try again. Avoid scolding. We want the dog to learn to wait for the release.
Can toys be used without creating more rushing
Yes. Keep toy play short and structured. Start the game only when the dog is still, then trade and reset. Stillness turns the game on.
When should I seek help from a trainer
If you cannot achieve calm behaviour in a quiet room or if progress stalls, work with an expert. A certified Smart Master Dog Trainer will troubleshoot your timing, mechanics, and plan.
Conclusion
Training dogs that rush through exercises requires a system that values clarity, control, and steady progression. The Smart Method gives you that system. By sharpening your markers, rewarding in position, using fair pressure and release, and moving forward step by step, you will turn frantic speed into reliable performance. Your dog will feel calmer, think more clearly, and deliver behaviours that hold anywhere.
Next Steps
Your dog deserves training that truly works. With certified Smart Master Dog Trainers SMDTs nationwide, you'll get proven results backed by the UK's most trusted dog training network. Find a Trainer Near You
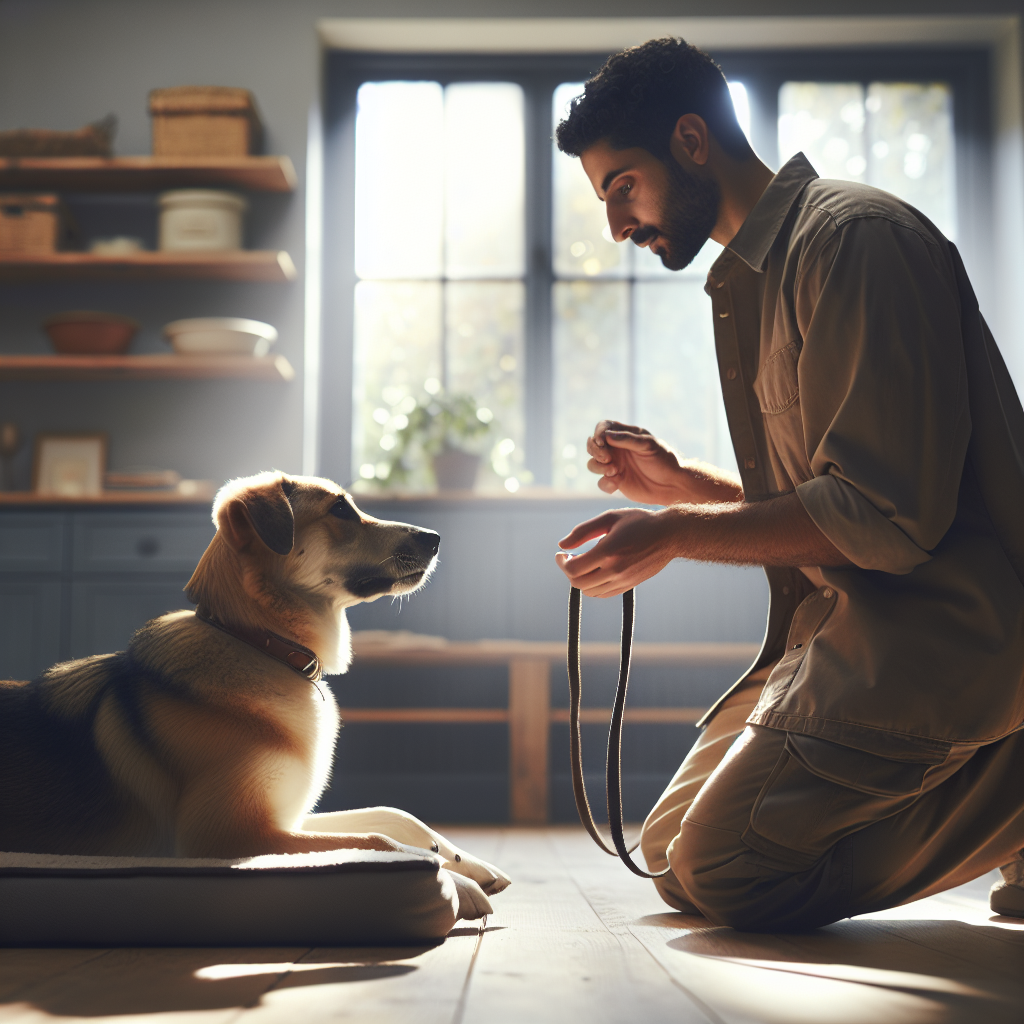
Training Dogs That Rush Through Exercises
Why Distance Response Matters
If you want true control in real life, you need to know how to train dogs to respond from distance. Distance response is the skill that turns recall, stay, and positional cues into reliable behaviour anywhere. It means your dog can down, come, or hold position even when you are across a park, near traffic, or in a busy field with wildlife. At Smart Dog Training, distance control is not a party trick. It is a core safety skill built into every programme we deliver.
Families choose Smart because our trainers develop calm, consistent behaviour that lasts. When a certified Smart Master Dog Trainer guides you, the process is structured and clear, and your dog learns to take responsibility without conflict. This article explains how to train dogs to respond from distance using the Smart Method. You will learn the exact steps, common mistakes to avoid, and how to proof skills so they work anywhere.
The Smart Method for Distance Control
The Smart Method is a structured, progressive, outcome driven system used across all Smart Dog Training programmes. It blends clarity, fair guidance, motivation, progression, and trust so dogs understand what to do, why to do it, and how to keep doing it under pressure. Here is how it applies to distance work.
Clarity at Range
Clear communication is essential when you are far away. We standardise markers and commands so your dog always knows when they are right, when to keep going, and when to try again. That clarity is the backbone of how to train dogs to respond from distance. Your voice and body language must be consistent. Hand signals should be bold and simple so they carry at range.
Pressure and Release with Long Line
Fair guidance builds accountability. We use a long line to provide physical boundaries while keeping the dog safe. Light line pressure asks. Release tells the dog they made the correct choice. This pressure and release principle prevents grey areas and avoids conflict. It is an ethical way to create responsibility even when you are twenty metres away.
Motivation that Travels
Rewards should matter more than distractions. Food, toys, and praise are used with precise timing so reinforcement lands where the behaviour happens. We teach owners how to deliver rewards at the dog or at the handler depending on the goal. This ensures your dog values responding to you even when you are far away.
Progressive Layers to Real Life
Distance skills do not appear overnight. We layer difficulty through distraction, duration, and distance. Each layer is added only when the previous layer is solid. This is the safest way to master how to train dogs to respond from distance and it prevents setbacks that come from rushing.
Foundations Before You Add Distance
Strong foundations reduce confusion later. Before you work at range, confirm that your dog understands the task at your side.
Marker Words and Rewards
We teach three simple markers. Yes means you are right, come get your reward. Good means keep going, you are doing it. No or try again means reset and try the cue again. Pair each marker with a reward plan. For distance response, your reward plan must cover both handler delivery and dog side delivery so you can reinforce where the behaviour happens.
Long Line Handling
A long line is a teaching tool, not a restraint. Choose a line length that suits your space. Ten to fifteen metres is common. Keep hands, feet, and the environment safe. Clip to a secure harness or a well fitted collar as advised in your Smart programme. Practise giving light pressure, then soft release, while maintaining calm posture and a neutral stance.
Step by Step Plan: How to Train Dogs to Respond from Distance
Follow this progression to build reliable response at range. The aim is simple. Your dog learns that cues always matter, close or far, calm or exciting.
Stage 1 Close Range Clarity
- Pick your core cues. We recommend recall, down, and place or stay. These three cover coming to you, stopping at range, and holding a spot.
- Teach each cue at one to two metres first. Use a consistent command, then help your dog succeed. Mark with yes when correct and reward at the dog.
- Add a mild distraction, like a toy on the ground. Use good to extend duration and build focus, then release with a clear release word.
- Introduce simple hand signals. For recall, a clear sweeping motion toward your body. For down, a flat palm moving toward the ground. For place, point to the target.
- End Stage 1 when your dog responds on the first cue eight out of ten times with minimal help.
Stage 2 Long Line Progression
- Attach the long line and move to a quiet field. Start at three to five metres, not the full length. Do a short warm up with close range reps.
- Increase distance slowly. Ask for one behaviour per repetition. Recall to front, then reward at you. Down at a distance, then walk to reward at the dog to keep the down strong.
- Use fair guidance. If your dog hesitates, add a light line prompt paired with the cue. The instant they commit, soften and release the line. Mark the choice with yes and reward.
- Split problems. If your dog breaks a down when you move, reduce distance, slow your pace, and reward more often for holding position while you move a single step.
- Introduce moderate distractions. Add a second person walking past, or a static dog at a distance. Keep distance short while you add distraction. Only increase both when you see easy success.
At this point you are living the core of how to train dogs to respond from distance. You have clarity, fair guidance, and rewards that matter. Your dog is learning to choose the right answer without you standing next to them.
Proofing Distraction Duration and Distance
Proofing turns trained behaviour into reliable behaviour. Work across these three variables one at a time before you combine them.
- Distraction. Present sights, sounds, and scents that your dog will face in daily life. Joggers, bikes, wildlife at a distance, and children playing are common triggers. Start below threshold, mark calm choices, and reward generously.
- Duration. Keep your dog in the behaviour for longer. Use good to confirm they are right. Deliver a reward during the hold so the dog learns that staying with the job pays.
- Distance. Step back one metre at a time. Keep your voice steady and hand signals clear. If your dog hesitates or forgets, close the gap, help them, and repeat the win.
Only combine two variables when each one is solid on its own. Then add the third in small bites. This structured approach is the safest way to complete how to train dogs to respond from distance without confusion.
Common Mistakes and Smart Fixes
- Jumping to off lead too soon. Fix by staying on the long line until your dog performs on the first cue with distractions.
- Repeating cues. Fix by giving one cue, then guide with the line. Reward the first correct response so the dog learns to listen the first time.
- Inconsistent markers. Fix by using the same words and timing every session. Yes for reward, good for keep going, and a reset marker when needed.
- Rewarding at the wrong place. Fix by rewarding where the behaviour happens. Down at a distance earns the reward at the dog. Recall earns the reward at you.
- Poor line handling. Fix by practising light hands. Pressure asks. Release teaches. Do not allow the dog to drag the line in busy areas.
When you correct these habits, you will see faster progress in how to train dogs to respond from distance, and your dog will stay confident and engaged.
Ready to turn your dog’s behaviour around? Book a Free Assessment and connect with a certified Smart Master Dog Trainer - available across the UK.
When to Work with a Smart Trainer
Some dogs need a seasoned eye to progress. If your dog is nervous, over aroused, or has a history of poor recall, a certified Smart Master Dog Trainer will guide you through a tailored plan. Smart Dog Training blends structure, motivation, and accountability so your dog learns calmly and quickly. We build distance control into puppy programmes, obedience refreshers, and advanced behaviour plans, all under the Smart Method.
Our trainers operate locally across the UK with mapped visibility and ongoing mentorship. You will train at home, in controlled group settings, and in real environments so your dog performs where it matters most. If you want hands on support with how to train dogs to respond from distance, we are ready to help.
FAQs
What age can I start distance training?
You can begin foundations in puppyhood. Teach markers, short stays, and gentle recall games at one to two metres. Add the long line and greater distance as your puppy shows focus and confidence.
How long does it take to get reliable distance control?
Most families see strong progress in four to eight weeks with daily practice. Full reliability outdoors depends on your consistency, the dog’s age and temperament, and how well you proof distractions.
Which cues are best for distance work?
Recall, down, and place or stay cover safety and daily life. Recall brings your dog to you. Down stops motion at range. Place teaches calm holding on a defined target.
Do I need a whistle?
A whistle can help in windy areas or over long distances. It is optional. The key is consistency. If you use a whistle, pair it with the same marker and reward system you use for voice cues.
What if my dog ignores me in the park?
Return to the long line and reduce distance. Build wins with easier distractions, then layer back up. Avoid repeating the cue. Guide once, mark the correct choice, and pay well.
Is food the only reward that works?
No. Use what motivates your dog. Food is fast and precise. Toys drive speed and enthusiasm. Praise adds emotional value. Smart programmes teach you how to blend rewards so your dog stays engaged at range.
Conclusion and Next Steps
Distance control is a life skill. When you follow the Smart Method, you get a clear pathway for how to train dogs to respond from distance and keep that performance in the real world. Start close, use markers, guide fairly with a long line, and reward with purpose. Layer distraction, duration, and distance one step at a time. The result is a dog that listens the first time, even when you are far away.
Your dog deserves training that truly works. With certified Smart Master Dog Trainers (SMDTs) nationwide, you'll get proven results backed by the UK's most trusted dog training network. Find a Trainer Near You
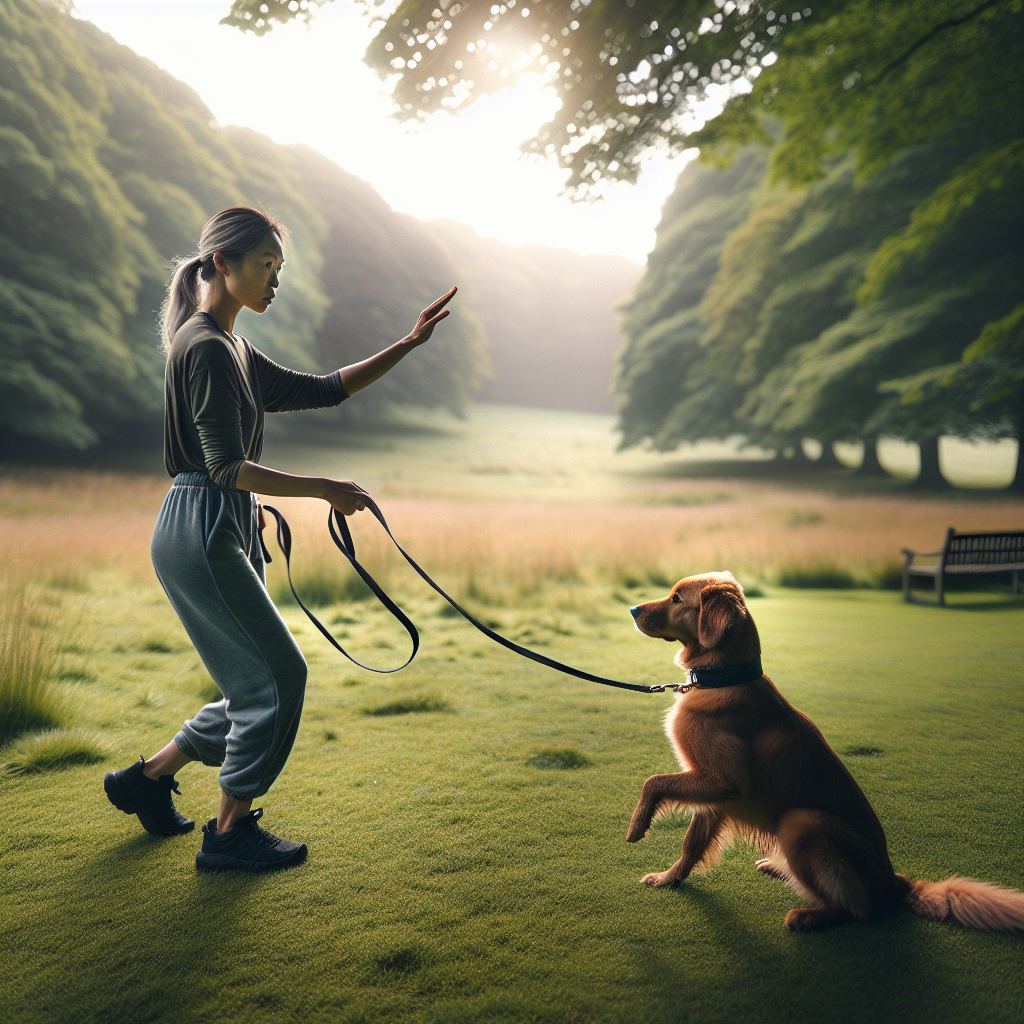
How to Train Dogs to Respond from Distance
Why Structure in Multi Dog Homes Matters
Life with more than one dog can be joyful, busy, and sometimes chaotic. Without clear routines and rules, dogs compete for space, attention, and resources, which leads to stress for everyone. The solution is structure in multi dog homes. With the Smart Method, we turn a noisy pack into a calm team. Our approach is precise, practical, and proven across thousands of UK families.
Structure in multi dog homes is not about harsh control. It is about clarity, fair accountability, and predictable routines that reduce conflict. When every dog knows what to do, when to do it, and how to earn reward, harmony becomes normal. If you need expert guidance, a Smart Master Dog Trainer can coach your household step by step. Every SMDT is trained to apply the Smart Method consistently so results last in real life.
The Smart Method Explained for Multi Dog Living
Smart Dog Training uses the Smart Method to create structure in multi dog homes. It blends motivation with accountability so dogs learn to be calm and cooperative. The five pillars are designed to work together.
- Clarity. We teach clear markers and commands so each dog understands what is expected, even when others are nearby.
- Pressure and Release. We give fair guidance paired with clear release and reward. Dogs learn to take responsibility without conflict.
- Motivation. Food, praise, and play build engagement so dogs want to follow the plan.
- Progression. We layer skills under distraction, duration, and difficulty until they hold anywhere, not just in the kitchen.
- Trust. Training strengthens your bond and reduces anxiety because life becomes predictable and safe.
These pillars make structure in multi dog homes simple to apply and easy to maintain. You gain calm obedience as a daily habit, not a one off trick.
Assessing Pack Dynamics Before You Train
Before we change routines, we map the current picture. A Smart Dog Training assessment looks at energy levels, arousal around food and play, sensitivity to handling, and comfort with proximity. This first step makes structure in multi dog homes targeted, not generic.
Signs of Friction and Stress
- Blocking pathways or pushing others away from people and doorways
- Hard stares, stiff posture, huffing, or side eye around toys or food
- Over arousal when you enter a room, with jostling and jumping for attention
- Explosive barking when the doorbell rings, followed by pacing or arguments
What Calm Looks Like
- Loose bodies, soft eyes, and relaxed breathing while resting together
- Waiting turns for food or leash clipping without crowding
- Reliable downs on individual beds while you move about the home
- Walks that start quietly and stay controlled at gates and doorways
When we can see both the problems and the calm moments, we can design structure in multi dog homes that fits your family and your dogs.
Roles and Routines for Every Dog
Structure in multi dog homes starts with consistent roles and routines. Each dog has a station, rules for movement, and a predictable daily flow. This prevents friction and builds confidence.
Stationing and Place Training
Teach every dog to go to a defined bed or mat and stay there until released. This is the backbone of structure in multi dog homes because it gives each dog a clear job and personal space. Start in a quiet room with one dog at a time. Layer in the second dog only when the first holds calmly. Add distance, duration, and distraction using the Smart Method progression plan.
Daily Schedule That Reduces Conflict
- Feeding. Feed dogs in separate stations or rooms. Lift bowls after meals to limit guarding and scavenging.
- Exercise. Give structured walks and training sessions before free play. Calm first, then fun.
- Rest. Protect two to three solid rest windows during the day. Tired dogs are not the same as calm dogs. Rest builds calm.
With these routines, structure in multi dog homes becomes automatic. Your rules run the day so you do not have to repeat yourself.
Foundation Obedience That Holds Under Distraction
Group living magnifies small gaps in training. Smart Dog Training focuses on a clean foundation so structure in multi dog homes does not collapse under excitement.
Clarity With Markers and Commands
Use a single yes marker to release and reward. Use a calm good marker to sustain position. Name each behaviour sit, down, place, here, heel. Keep your tone steady and predictable. Dogs cannot share signals if those signals change every minute. Consistency is the heartbeat of structure in multi dog homes.
Pressure and Release Done Fairly
Fair guidance means we apply light pressure through leash handling or body guidance, then release the moment the dog makes the right choice. The fast release is the reward, followed by food or praise. This teaches accountability without conflict. It is a key to durable structure in multi dog homes.
Management That Prevents Conflict
Great training is easier with great management. Smart homes use simple tools to make good choices easy and poor choices hard. Management is not a crutch. It is part of structure in multi dog homes.
Gates, Crates, and Tethers Used Smartly
- Interior gates to create calm entry zones and controlled door work
- Crates as quiet bedrooms for decompression and safe feeding
- Light tethers in supervised sessions to prevent crowding when visitors arrive
These tools keep arousal low and safety high while you build habits that anchor structure in multi dog homes.
Resource Control Without Drama
Guarding often appears when dogs share a home. Smart Dog Training handles resources with calm, predictable steps to maintain structure in multi dog homes.
- Food. Feed in stations. No hovering. Pick up bowls when finished.
- Toys. Rotate high value items. Play one dog at a time if needed. Teach drop and out on cue.
- Doors. Dogs earn door access through sits and eye contact. Release one at a time. No crowding the threshold.
When resources are earned through calm behaviour, competition fades. That is the core of structure in multi dog homes.
Structured Walks With Multiple Dogs
Walks can settle or spark the day. Smart Dog Training uses structured walks to reinforce structure in multi dog homes.
- Start at the door with place holds and calm leash clipping.
- Exit one dog at a time. Pause outside for a reset before movement.
- Walk at heel for the first five minutes to set the tone, then add free time on cue.
- Practise sits at curbs, passes around distractions, and calm greetings by invitation only.
These habits turn the walk into a training session that holds your pack together.
Play That Builds Cooperation
Play is useful when it builds skills, not rivalry. Smart Dog Training teaches the rules of play to maintain structure in multi dog homes.
- Start and stop are on cue so arousal never controls the room.
- Short rounds of tug or fetch with one dog while others hold place, then rotate turns.
- End every game with a down on place and a deep breath.
When play follows rules, you get joy without chaos.
Introducing a New Dog Into a Multi Dog Home
First impressions shape the future. The Smart Method gives you a clear checklist that protects structure in multi dog homes from day one.
- Neutral territory walk before entry. Dogs move forward together with space between them.
- Enter the home one dog at a time and station on places. Let the newcomer explore on leash.
- Short, supervised windows together. Rotate rest times in separate areas.
- Earn free access over days, not hours. Add privileges only when calm is the norm.
This measured plan prevents rehearsals of bad behaviour and accelerates trust.
Solving Common Problems in Multi Dog Living
Competing for Attention
Teach a default down or place when people enter the room. Reward the first dog that offers calm. The others learn that quiet earns connection. This keeps structure in multi dog homes intact during high excitement.
Barking at Visitors
Set up planned rehearsals. Door knocks are cues to go to place. Use leashes and tethers at first. Open the door only when all dogs are settled. Reward release happens after calm conversation, not before.
Guarding and Squabbles
Go back to stations and strict resource control. Remove triggers like leftover bones on the floor. Rebuild with short training blocks that reinforce sharing the room without competing. Smart Dog Training resolves these patterns by blending management and training, the heart of structure in multi dog homes.
Training Sessions Together and One to One
Group sessions teach patience. One to one builds precision. You need both to cement structure in multi dog homes.
- Individual reps for sit, down, place, recall, and heel to build clarity.
- Group reps where one works while others hold still to build impulse control.
- Short sessions of three to five minutes, many times a day, to keep momentum.
This balance ensures each dog feels successful while the group learns to function as a team.
Kids and Guests in a Multi Dog Home
Family success depends on simple rules everyone can follow. Smart Dog Training uses a family plan to protect structure in multi dog homes.
- Adults handle leashes at the door and during greetings.
- Kids ask a parent before interacting and follow the one dog at a time rule.
- Guests do not pet until all dogs are in a down on place and you give the go signal.
These steps keep arousal low and prevent mixed messages that break routine.
Measuring Progress With the Smart Method
Progression is not guesswork. Smart Dog Training tracks the same three metrics every week to maintain structure in multi dog homes.
- Duration. How long can each dog hold place with life happening around them
- Distance. How far can you move while they remain calm and confident
- Distraction. What real world triggers can they handle without breaking
Increase only one metric at a time. When setbacks happen, lower the level and rebuild. This protects confidence and makes results stick.
When to Bring in a Professional
If you see repeated fights, serious guarding, or anxiety that does not improve, it is time to get help. A Smart Master Dog Trainer will assess, design, and lead the programme in your home and in carefully structured sessions. With SMDT guidance, structure in multi dog homes becomes second nature and stress drops fast.
Ready to turn your dog’s behaviour around? Book a Free Assessment and connect with a certified Smart Master Dog Trainer - available across the UK.
Case Study Snapshot
A family with three medium dogs called us about door chaos and guarding. We started with place training and strict resource rules. We used short, structured walks and planned visitor rehearsals. Within two weeks, all dogs could hold place for ten minutes while the door opened and closed. Food was peaceful. Walks began quiet and stayed that way. This is the power of structure in multi dog homes guided by the Smart Method.
Frequently Asked Questions
What is the fastest way to create structure in multi dog homes
Start with place training and separate feeding. Add short structured walks daily. These three steps reduce 80 percent of friction and set the tone for calm living.
How long before I see results
Many families see change in the first week when they apply the Smart Method consistently. Clear markers, fair pressure and release, and routine build quick wins that stack into lasting structure in multi dog homes.
Should I train dogs together or separately
Do both. Begin with one to one sessions for clarity, then layer group work to proof behaviours. This blend is essential for reliable structure in multi dog homes.
What tools do I need
Leads for each dog, a few raised beds or mats, interior gates, and crates for rest and feeding. These simple tools make it easy to protect structure in multi dog homes while you train.
How do I handle new dogs or visiting dogs
Use a neutral walk, then controlled entry with stationing. Keep sessions short and supervised. Privileges expand only after calm is consistent. This protects structure in multi dog homes from the start.
When is professional help necessary
Call in an expert if you see repeated fights, biting, or intense guarding. Smart Dog Training will design a tailored behaviour programme that restores structure in multi dog homes safely and efficiently.
Conclusion
Calm, cooperative dogs are not a matter of luck. They are the product of thoughtful routines, fair guidance, and steady progression. The Smart Method gives you a clear roadmap to build structure in multi dog homes, from place training and resource control to structured walks and visitor rehearsals. Follow the plan, measure progress, and protect your routines. If you want hands on support, our trainers will lead you there.
Your dog deserves training that truly works. With certified Smart Master Dog Trainers (SMDTs) nationwide, you'll get proven results backed by the UK's most trusted dog training network. Find a Trainer Near You

Structure in Multi Dog Homes
Transitioning From Crate to Free Access
Transitioning from crate to free access is a milestone for any dog and family. Done well, it unlocks calm, safe independence at home without chaos or chewed skirting boards. At Smart Dog Training we guide owners through this change using the Smart Method, so your dog understands the rules, wants to follow them, and can be trusted for real life. If you want confidence at each step, a Smart Master Dog Trainer can help you tailor the plan to your dog and your home.
What Free Access Really Means
Free access does not mean your dog roams with no rules. It means your dog earns controlled access to chosen spaces and can settle on their own while you work, cook, or sleep. Transitioning from crate to free access is about clarity, structure, and trust. Your dog learns where to rest, what to ignore, and how to self regulate without constant supervision.
Why Crates Still Matter During the Transition
Crates give dogs a safe den, help with toilet training, and prevent rehearsals of bad habits. During the process of transitioning from crate to free access, the crate stays part of the routine. It remains a rest station, a reset tool, and a safety net when you cannot supervise. Retiring the crate too soon is the number one reason families see chewing, accidents, and door rushing return.
The Smart Method Applied to This Transition
- Clarity: You will teach simple markers that tell your dog when to settle, when they are free, and when a behaviour is complete.
- Pressure and Release: Light guidance through a lead, long line, or tether prevents mistakes, then release and reward the moment your dog makes the right choice.
- Motivation: Food, toys, and praise build a positive emotional state so your dog wants to work and can enjoy new freedoms.
- Progression: We layer difficulty slowly, adding duration and distance, then real life distractions. This is the core of transitioning from crate to free access.
- Trust: Your relationship deepens as your dog proves they can handle more freedom. Trust is earned, not guessed.
When to Start Transitioning
Begin when your dog shows the following:
- Zero accidents for at least two weeks
- Chew needs met with supervised outlets and safe items
- Understands settle on a mat and can hold it for 10 to 20 minutes with you in the room
- Comfortable resting in the crate without fuss for one to two hours during the day
- No signs of separation related distress when you leave the room briefly
Age is less important than readiness. Some puppies can begin light steps around five to six months. Some adult rescues need more foundation work. If you are unsure, speak to a Smart Master Dog Trainer for a personalised assessment.
Step by Step Plan for Transitioning From Crate to Free Access
This structured roadmap follows the Smart Method and protects your progress. Move on only when each stage is reliable for your dog and your home.
Stage 1: Keep the Crate, Add Planned Breaks
Maintain your crate routine for naps and overnight. Add short planned free time after walks, training, or enrichment when your dog is calm.
- Open the crate calmly. Cue your dog out only when they sit or stand quietly.
- Guide to a settle mat placed in a quiet area.
- Use a lead or house line to prevent wandering while your dog learns the pattern.
- Reward calm on the mat. Release for short sniff breaks on cue.
Goal: Ten to twenty minutes of calm free time with you present, then a relaxed return to the crate. Transitioning from crate to free access starts with rehearsals of calm, not excitement.
Foundation Behaviours to Rehearse
- Settle on a mat
- Leave it for food on surfaces and dropped items
- Recall within the home
- Place or bed cue near doors and in living spaces
Stage 2: Contained Freedom in One Safe Room
Pick one dog proofed room. Use baby gates or an exercise pen to create clear boundaries. The crate sits open nearby, so your dog can choose to rest there. You are present, working or relaxing.
- Rotate enrichment such as a stuffed Kong, lick mat, or safe chew to encourage relaxation.
- Mark and reward voluntary check ins and calm choices near the mat or crate.
- Interrupt wandering or scanning with a light lead guide back to the mat and reward.
Goal: Thirty to sixty minutes of calm in one room while you are hands off. This is a major step in transitioning from crate to free access without losing house manners.
Stage 3: Short Supervised Free Access Sessions
Now open the gate and allow access to a second room. Keep your dog on a light house line. Walk together through the pathway you want your dog to take, then guide back to the mat. Practise door etiquette, no counter surfing, and polite greetings.
- Reward your dog for choosing to stay near you or the mat.
- Interrupt nose up on counters with a calm lead guide, then reward four paws on the floor.
- Practise a soft knock on the front door and reward a place cue away from the entry.
Goal: Ten to fifteen minute tours of the home with zero mischief, then back to the crate to rest. Keep arousal low. Transitioning from crate to free access is built on short, successful reps.
Stage 4: Extend Duration and Distance
Stretch the time between rewards and increase the distance between you and your dog.
- Step into the kitchen for two to five minutes while your dog holds a settle in the lounge.
- Use a camera if needed to observe. Reward when you return if your dog stayed calm.
- Randomise short returns so your dog does not clock watch.
Goal: Forty five to ninety minutes of calm with you in and out of the room. This is a key milestone in transitioning from crate to free access.
Stage 5: First Unsupervised Trials
Set up a safe zone such as the lounge and hallway. Remove tempting items. Close off bedrooms and the kitchen at first. Give a calm enrichment item and leave for five minutes. Return, ignore for ten seconds to keep the energy low, then quietly praise if your dog is calm.
- Repeat and extend to ten, fifteen, and thirty minutes over a week.
- If you see signs of anxiety, reduce time and reset with more supervised practice.
Goal: Thirty to sixty minutes alone in a safe zone with no damage or distress. Transitioning from crate to free access for longer periods comes after this stage is rock solid.
Night Time Transition
Begin with the same room as the crate, with the crate door open. Add a bed or mat next to it. For the first nights, use a portable gate to keep the bedroom calm. If your dog settles all night for three to five nights, remove the gate. If they wander or pester, calmly return them to the mat and reduce freedom for a few nights before trying again.
Alone Time Transition
Alone time is the final test. Maintain the crate as a safety tool for longer absences while you build free time. Increase time slowly and use a camera to check for settling. Many dogs do best with a morning walk, a food toy, and two hours of rest, then a short break, then another rest block. Transitioning from crate to free access for full workdays should be the last step, not the first.
If There Is a Setback, Reset the Stage
Mistakes happen. Chewing, accidents, or door dashes are feedback. Do not punish. Reduce freedom, add management, and practise the skill your dog missed. When your dog wins three days in a row, try again with slightly more freedom. This is how Smart Dog Training prevents a spiral of bad rehearsals during transitioning from crate to free access.
Tools and Setup That Make Freedom Work
- Baby gates and pens to create safe zones
- Non slip mat or bed in each key room
- Lead or house line for early guidance
- Covered crate in a quiet corner for naps
- Camera to observe alone time
- Chew items and slow feeders to promote restful behaviour
Every tool supports clarity and progression. You are not relying on gadgets. You are shaping calm choices in real time.
Preventing Problems During the Transition
Chewing and Destructive Behaviour
Meet chew needs before free time. Pair freedom with calm activities. If your dog seeks out skirting boards or furniture, guide to the mat, reward calm, and shorten the session next time. Transitioning from crate to free access should never be an energy outlet. Exercise first, then freedom.
Toilet Accidents
- Keep a toilet schedule and reward outdoors within three minutes of eliminating.
- After meals or naps, offer a toilet break before free time.
- Supervise closely. A lead lets you interrupt circling and sniffing and redirect outside.
Counter Surfing
- Remove the reward by clearing food and rubbish.
- Reward four on the floor and a default place cue during food prep.
- Practise leave it with staged items at low value first.
Door Dashing and Window Barking
- Teach a place cue five metres from the door.
- Pair knocks or doorbell sounds with a move to the place mat and a calm reward.
- Use frosted film or block access to windows while you build success.
Motivation That Builds Calm, Not Chaos
Rewards should suit the goal. During transitioning from crate to free access, pay generously for quiet choices. Use soft treats, gentle praise, and tactile rewards like chest strokes. Save high energy tug or chase games for outdoors. Your dog should learn that the home is for rest and connection.
- Mark moments of eye contact and choosing the mat
- Pay for ignoring the bin, shoes, and cables
- Reward slow, thoughtful movement over frantic energy
Progress Criteria You Can Trust
Advancing too quickly is the most common error. Use these benchmarks before you expand access.
- Three consecutive days with zero mistakes at the current stage
- Independent settling for at least thirty minutes while you move about
- Quick recovery after mild triggers such as a door knock or a dropped spoon
- No signs of distress when you step out for five to ten minutes
When in doubt, hold the line. Transitioning from crate to free access is a skill that lasts a lifetime when layered with care.
Roles for Every Family Member
Consistency is everything. Agree on the rules and cues. Everyone should practise the same release word, the same place cue, and the same routine.
- Adults manage gates and leads and set duration goals
- Children reward calm on the mat and practice gentle greetings
- Visitors follow your house script, including ignoring your dog until they are settled
Apartment and House Considerations
In flats, sound carries and lift traffic can trigger alert barking. Use white noise and place the mat away from shared walls. In houses with gardens, the temptation to bolt out the back door is high. Treat the garden like a room with rules. Practise on-lead walks through the door to a calm sit before you release to sniff. Transitioning from crate to free access must include both indoor and garden boundaries.
Common Mistakes to Avoid
- Retiring the crate before your dog can settle for thirty to sixty minutes
- Giving full house access too soon
- Using freedom to burn energy instead of rewarding calm
- Inconsistent rules between family members
- Ignoring early signs of stress or scanning
Smart Dog Training avoids these pitfalls by following clear criteria and using fair guidance. This is how we keep momentum and protect the bond.
Real Life Case Study
Max, a nine month old Spaniel, chewed furniture when left loose for twenty minutes. We kept the crate, added a mat routine, and introduced contained freedom in the lounge only. We rewarded calm, interrupted scanning, and built alone time in five minute layers. After three weeks Max could hold a settle for an hour while his owner worked from home. After six weeks he had access to two rooms for two hours with a food toy and then returned to his crate for a nap. The family now uses the crate for travel and rare busy days, but day to day Max enjoys trusted freedom. Transitioning from crate to free access worked because criteria were clear and progress was slow and steady.
When to Call in a Professional
If you see separation related distress, frantic pacing, destructive chewing targeted to exits, or repeated toileting indoors, bring in help. A certified Smart Master Dog Trainer will assess your dog, your routine, and your home layout, then guide you through a plan that fits your life. Our national team uses the Smart Method to build calm behaviour that lasts.
Ready to turn your dog’s behaviour around? Book a Free Assessment and connect with a certified Smart Master Dog Trainer - available across the UK.
FAQs on Transitioning From Crate to Free Access
When should I start transitioning from crate to free access?
Start when toilet training is solid, your dog can settle on a mat for at least ten to twenty minutes with you present, and they rest calmly in the crate during the day. Behavioural readiness matters more than age.
Do I need to get rid of the crate once my dog has free access?
No. Keep the crate as a positive rest space and a management tool. Many dogs enjoy the crate for years. It protects your training during busy periods or when you host visitors.
How long does the process take?
Most families spend four to eight weeks transitioning from crate to free access, depending on age, history, and the layout of the home. Rushing is what causes setbacks.
What if my dog chews or has an accident during a trial?
Do not punish. Reduce freedom, increase supervision, and practise the specific skill that broke down. Then rebuild duration in smaller steps.
Is it different for puppies and adult rescues?
The structure is the same. Puppies need more supervised reps and toilet breaks. Adult rescues may need decompression time and careful alone time practice. The Smart Method suits both.
Can I transition my dog at night first?
Yes, you can start with night time if daytime structure is strong. Use a gate to contain the sleeping area, add a mat near the crate, and practise quiet returns if your dog wanders.
Should I leave toys out during free access?
Choose calm items like stuffed food toys or soft chews. Avoid high arousal toys in the house. Rotate items so they stay novel and rewarding for restful behaviour.
What if I live in a busy flat with lots of noises?
Use management such as white noise and distance from shared walls. Practise place for door and lift sounds. Build duration slowly and reward calm recovery after noises.
Conclusion: Freedom Earned, Trust Built
Transitioning from crate to free access is not a leap. It is a structured journey that blends clarity, fair guidance, and the right motivation. When you follow the Smart Method your dog learns to relax anywhere in the home, to ignore temptations, and to rest when you are not there to supervise. Keep the crate as a tool, expand access in planned stages, and let calm choices earn more freedom. If you want expert support at any point, our national team is ready to help you map the perfect plan for your dog and your space.
Your dog deserves training that truly works. With certified Smart Master Dog Trainers (SMDTs) nationwide, you'll get proven results backed by the UK's most trusted dog training network. Find a Trainer Near You
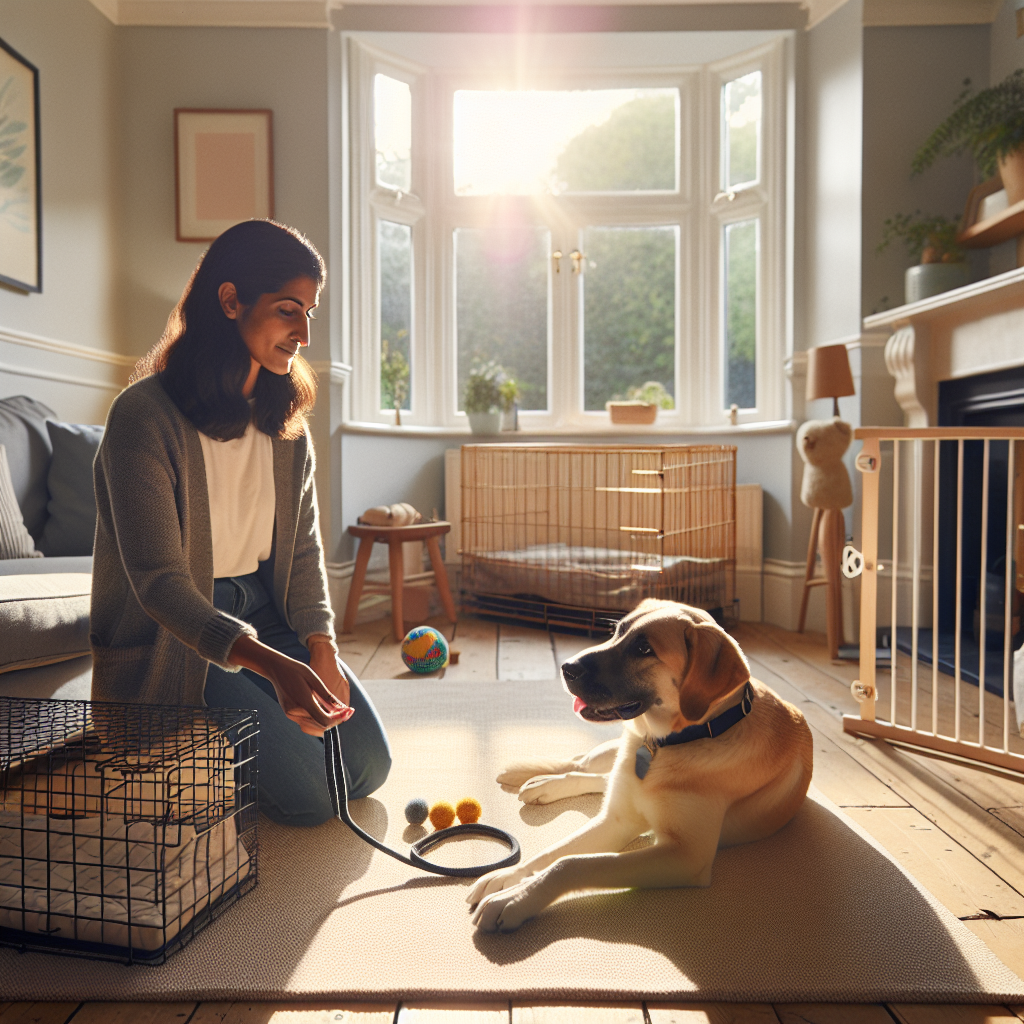
Transitioning From Crate to Free Access
Why Adolescence Creates Bad Habits and How to Stay Ahead
Adolescence is when your sweet puppy discovers the wider world, tests boundaries, and rehearses behaviours that either stick or vanish. If you want to prevent bad habits in adolescent dogs, you need a plan that balances motivation, structure, and accountability. That is precisely what the Smart Method delivers through Smart Dog Training programmes across the UK.
Adolescent dogs change fast. Hormones surge, curiosity spikes, and confidence grows at odd times. Many owners notice new challenges like jumping, pulling on lead, ignoring recall, or demand barking. The solution is not to hope they grow out of it. The solution is to teach reliable habits that carry your dog through the teenage phase and into calm adult behaviour. If you want guidance that works from day one, a Smart Master Dog Trainer can map a clear path based on your lifestyle and goals.
Understanding Canine Adolescence
Adolescence typically begins around five to six months and can continue up to two years depending on breed and individual development. You might see bursts of independence, selective hearing, and increased distractions. This is normal. To prevent bad habits in adolescent dogs, you must expect these changes and train with intention rather than react to problems.
Why Bad Habits Take Hold
Behaviours that are repeated become default choices. If pulling gets your dog where they want to go, they will pull more. If jumping earns attention, even negative attention, jumping becomes a strategy. The quickest way to prevent bad habits in adolescent dogs is to stop unhelpful rehearsal and give your dog clear, rewarding alternatives that work in real life.
The Smart Method That Makes Good Habits Stick
Smart Dog Training uses a proprietary system called the Smart Method. It is structured, progressive, and outcome driven. Each pillar prevents drift and confusion during the teenage months.
The Five Pillars of Reliable Training
- Clarity. Commands and markers are delivered with precision so the dog always understands what is expected.
- Pressure and Release. Fair guidance is paired with clear release and reward, building accountability and responsibility without conflict.
- Motivation. Rewards create engagement and positive emotional responses, ensuring dogs want to work.
- Progression. Skills are layered step by step, adding distraction, duration, and difficulty until they are reliable anywhere.
- Trust. Training strengthens the bond between dog and owner, producing calm, confident, and willing behaviour.
This combination allows you to prevent bad habits in adolescent dogs by teaching skills that hold under pressure, not just in the kitchen or garden.
Structure First to Prevent Rehearsal
Before advanced obedience, you need daily structure. Adolescents thrive when life is predictable and fair. Structure stops self employment and keeps your dog open to learning.
Design a Simple Daily Routine
- Sleep and rest. Protect naps and overnight sleep so the brain can consolidate learning. A tired brain makes better choices.
- Planned training windows. Short, focused sessions two to three times per day beat one long marathon. That rhythm helps prevent bad habits in adolescent dogs because success repeats often.
- Quality exercise. Use a mix of decompression walks, structured lead walks, and play with rules. Avoid endless free play that teaches your dog to ignore you.
- Calm downtime. Chews, place training, and quiet crate time prevent boredom from turning into mischief.
House Rules That Teach Self Control
- Place before freedom. Start sessions with a short settle on a mat. Reward calm. This anchors training in stillness, not chaos.
- Doorway manners. Sit and wait for a release before stepping through doors. This single habit helps prevent bolting, pulling, and jumping in one move.
- Polite greetings. Ask for sit to meet people and dogs. If the sit drops, the greeting pauses. Consistency here will prevent bad habits in adolescent dogs around visitors.
Clarity in Communication
Teenage dogs need clear language. Blurry cues create guessing and frustration. We remove guesswork by marking behaviours precisely and keeping words honest.
Build a Clean Marker System
- Yes or Good means reward is coming.
- No or Try Again means that was not the choice, reset calmly.
- Free means the exercise ends and the dog can relax.
Use these consistently. Clarity helps prevent bad habits in adolescent dogs because the consequence of each choice is predictable and fair.
Leash Language That Makes Sense
The lead is a communication line, not a towing rope. Teach your dog that light guidance has meaning and that soft lead pressure turns off when they respond. That is Pressure and Release in action. It builds accountability without conflict and helps prevent bad habits in adolescent dogs like forging ahead and zig zagging.
Motivation That Maintains Engagement
Rewards matter. Food, toys, and life access all have a place. Adolescents often value the environment more than a biscuit, so we bring the environment into the reward system.
Reward Schedules With Purpose
- Early learning. Pay often for correct choices to grow confidence.
- Intermediate stage. Switch to variable rewards so the dog works with focus even when payment is not guaranteed.
- Real life rewards. Use what your dog wants, like sniffing a tree or greeting a friend, as earned outcomes. This will prevent bad habits in adolescent dogs because they learn that you are the gateway to good things.
Food, Play, and Social Access
Rotate rewards to keep value high. Tug can power up recall. Food can sharpen precision. Access to the park path can reinforce loose lead walking. With the Smart Method, we redirect adolescent energy into purposeful work that pays.
Pressure and Release Done Fairly
Guidance paired with release teaches responsibility. When the dog makes the right choice, pressure ends and rewards arrive. When the choice is off track, a calm reset keeps emotion low. This balance prevents conflict and helps prevent bad habits in adolescent dogs by making good behaviour the easier path.
Introducing Accountability Without Friction
- Start in low distraction areas so lessons are easy to understand.
- Keep pressure light and timed with the behaviour, never after the fact.
- Release the instant the dog responds. The release is the lesson.
Progression and Proofing
Skills must survive the real world. We layer difficulty slowly and methodically so the dog wins often and learns to focus anywhere.
The Three Ds of Reliability
- Distraction. Add one distraction at a time, like a toy on the floor or a friend at a distance.
- Duration. Grow the length of sits, downs, and place in small increments.
- Distance. Step away gradually. Return and reward before the dog breaks position.
Staged progression ensures you prevent bad habits in adolescent dogs that show up when people rush to busy parks before foundations are strong.
Socialisation Versus Social Skills
Adolescence is not a free for all. True social skills mean your dog can observe, stay calm, and respond to you first. That is how we prevent bad habits in adolescent dogs where greetings turn into chaos.
Neutral Exposure Is Your Friend
- Watch quietly. Reward stillness while people and dogs pass by.
- Engage then release. Ask for focus, reward, then give a brief sniff or greet if the dog stays polite.
- End on a win. Leave before your dog becomes overstimulated so the last memory is calm.
Exercise and Arousal Balance
More exercise is not always the answer. Quality matters more than quantity. Many adolescent dogs are not over exercised, they are under trained in self control. We combine movement with thinking to prevent bad habits in adolescent dogs.
Calm Brain Before Cardio
- Begin every walk with two minutes of place or heel to settle the mind.
- Mix structured heel with sniffing breaks and recall games.
- Finish with a decompression stroll on a long line where your dog can enjoy the environment after earning it.
Common Bad Habits and How to Stop Them Forming
Here is how Smart Dog Training addresses the behaviours most owners face during the teenage window. The aim is to prevent bad habits in adolescent dogs before they become your new normal.
Jumping at People
- Teach sit to say hello. No sit, no greeting. Sit equals access to attention.
- Reward calm four paws on the floor with slow petting and quiet praise.
- If excitement spikes, step back and reset. Do not argue. Rehearse calm instead.
Demand Barking
- Do not feed the slot machine. Ignore barking and pay silence.
- Teach place. Reward quiet duration with food drops or a chew.
- Use predictable routines so your dog trusts that needs are met without noise.
Pulling on Lead
- Set a clear heel position and pay it often in the beginning.
- When the lead tightens, stop and guide back to position. Release and move when the lead softens.
- Blend structured heel with earned sniff breaks. This keeps the walk interesting and prevents rebellion.
Ignoring Recall
- Start on a long line. Pay fast returns with high value rewards and playful engagement.
- Keep recalls short and sweet. One or two reps, then release to free time.
- Never call to end the fun every time. Sometimes call, reward, then let your dog go back to play. This prevents the recall from becoming a punishment.
Door Dashing
- Install sit and wait at thresholds. Eye contact unlocks the door.
- Practice with inside doors first, then move to the front door.
- Reward with the walk. The world is the prize for patience.
Rough Play and Mouthing
- Teach out and drop so play has rules.
- Redirect to a toy and reward calm mouth on acceptable items.
- End the session if arousal spikes. Resume when your dog can think again.
Home Alone and Independence
Adolescents can become clingy or mischievous when left alone. To prevent bad habits in adolescent dogs, train independence on purpose.
- Crate or safe space time daily, even when you are home.
- Calm exits and entries. No big reunions. Reward quiet, settled behaviour.
- Pre leave enrichment like a stuffed chew, then a nap. Return before energy surges.
Environment Design That Stops Rehearsal
Management is not a shortcut, it is a foundation. If your dog cannot rehearse a problem, it cannot hardwire. Use gates, tethers, long lines, and crates while you build skill. This simple step will prevent bad habits in adolescent dogs more than any single exercise.
The Role of an Expert Coach
Smart Dog Training pairs families with certified professionals who deliver the Smart Method consistently. Working with a Smart Master Dog Trainer ensures your plan is tailored, humane, and measurable. You get step by step guidance, realistic milestones, and accountability that protects your progress.
When to Call a Smart Master Dog Trainer
- If your dog is rehearsing the same issue daily despite your efforts.
- If play or excitement is tipping into reactivity or frustration.
- If you want a proven pathway to prevent bad habits in adolescent dogs before they emerge.
Ready to turn your dog’s behaviour around? Book a Free Assessment and connect with a certified Smart Master Dog Trainer, available across the UK.
Real Life Scenarios and Solutions
Everyday life is where adolescent habits are built. Here is how the Smart Method applies when things get messy.
Busy park entry. Your dog forges, barks, and spins when you reach the gate. Step back ten metres. Ask for heel with food reinforcement and short attention checks. Walk toward the gate only while the lead stays soft. Turn away the second tension appears. The environment unlocks when your dog works with you. This pattern will prevent bad habits in adolescent dogs that form at thresholds.
Visitors arrive. Put your dog on place five minutes before the doorbell. Reward calm while you open the door. Greet guests briefly, then release the dog to say hello if they hold a sit. If they pop up, return to place and reset. After a few reps, your dog will choose sit first because it pays.
Off lead fields. Use a long line to keep recall honest. Call once, mark, then run away playfully as your dog turns. Pay big on arrival, then send back to free time. The freedom itself becomes part of the reward.
A Week by Week Training Blueprint
Use this simple structure to prevent bad habits in adolescent dogs while skills mature.
- Week one. Install house rules. Place, doorway manners, sit to greet, and short structured walks. Keep sessions under five minutes, two to three times daily.
- Week two. Add long line recall games, neutral exposure around people and dogs, and duration on place up to ten minutes with calm rewards.
- Week three. Blend heel with sniff breaks, add variable rewards, and practice polite greetings in new locations. Introduce light Pressure and Release on lead for clarity.
- Week four. Increase distractions. Work near parks, schools, or cafes while keeping durations short. Protect wins and finish every session with a simple success.
- Week five and beyond. Proof key behaviours with all three Ds. Keep independence training and calm downtime as daily habits. Adjust rewards to keep engagement high.
This framework is flexible. Smart Dog Training tailors progressions to your dog’s age, breed, and temperament so you keep momentum without flooding.
Troubleshooting and Red Flags
- If your dog breaks position repeatedly, you raised difficulty too fast. Reduce distance or distraction and rebuild success.
- If food loses value outside, raise reward quality, use play, or fold in real life rewards like access to the path.
- If lead pulling returns, slow down. Reward often for a soft lead and use brief resets before tension grows.
- If arousal spikes, end on a small win and let your dog decompress. You cannot train a brain that is too busy to think.
- If reactivity or aggression appears, do not wait. Work directly with an SMDT to prevent bad habits in adolescent dogs from hardening into patterns.
FAQs
When does adolescence start and end in dogs
Most dogs enter adolescence around five to six months and exit sometime between twelve and twenty four months. The window varies by breed and individual. What matters is not the exact date, but how you guide behaviour during this phase to prevent bad habits in adolescent dogs.
Can my dog grow out of bad behaviour without training
Usually no. Rehearsed behaviour becomes default behaviour. Without structure and practice, unwanted habits often intensify. The Smart Method gives you the clarity and progression needed to prevent bad habits in adolescent dogs before they stick.
How much exercise does an adolescent dog need
Enough to be content, not so much that arousal spikes. Blend structured walking, recall games, and calm decompression. Pair movement with self control training. That mix helps prevent bad habits in adolescent dogs far better than endless free play.
Is food the only reward I should use
No. Food, play, praise, and life access all have value. Smart Dog Training teaches you to use the right reward at the right time so engagement stays high and behaviour becomes reliable.
What is the fastest way to improve recall
Use a long line, make returns fun, pay generously, and then release back to freedom at least some of the time. Keep early recalls short and avoid calling when your dog is unlikely to succeed. This plan will prevent bad habits in adolescent dogs, like blowing off the cue.
When should I get professional help
If you feel stuck or see escalation, involve a professional early. A Smart Master Dog Trainer will assess your dog, tailor a plan, and coach you through each step so you prevent bad habits in adolescent dogs efficiently and kindly.
How does Smart Dog Training differ from general classes
Every Smart programme follows the Smart Method with clear milestones, tailored progression, and results that hold in real life. You work with certified trainers who focus on outcomes, not just drills, so you prevent bad habits in adolescent dogs across everyday environments.
Conclusion
Adolescence does not have to be chaotic. With the Smart Method, you can prevent bad habits in adolescent dogs by pairing motivation with structure, and accountability with trust. Design a routine that protects rehearsal, communicate with clarity, and progress skills step by step until they hold anywhere. If you want a proven pathway and expert support, Smart Dog Training is ready to help.
Your dog deserves training that truly works. With certified Smart Master Dog Trainers SMDTs nationwide, you will get proven results backed by the UK’s most trusted dog training network. Find a Trainer Near You
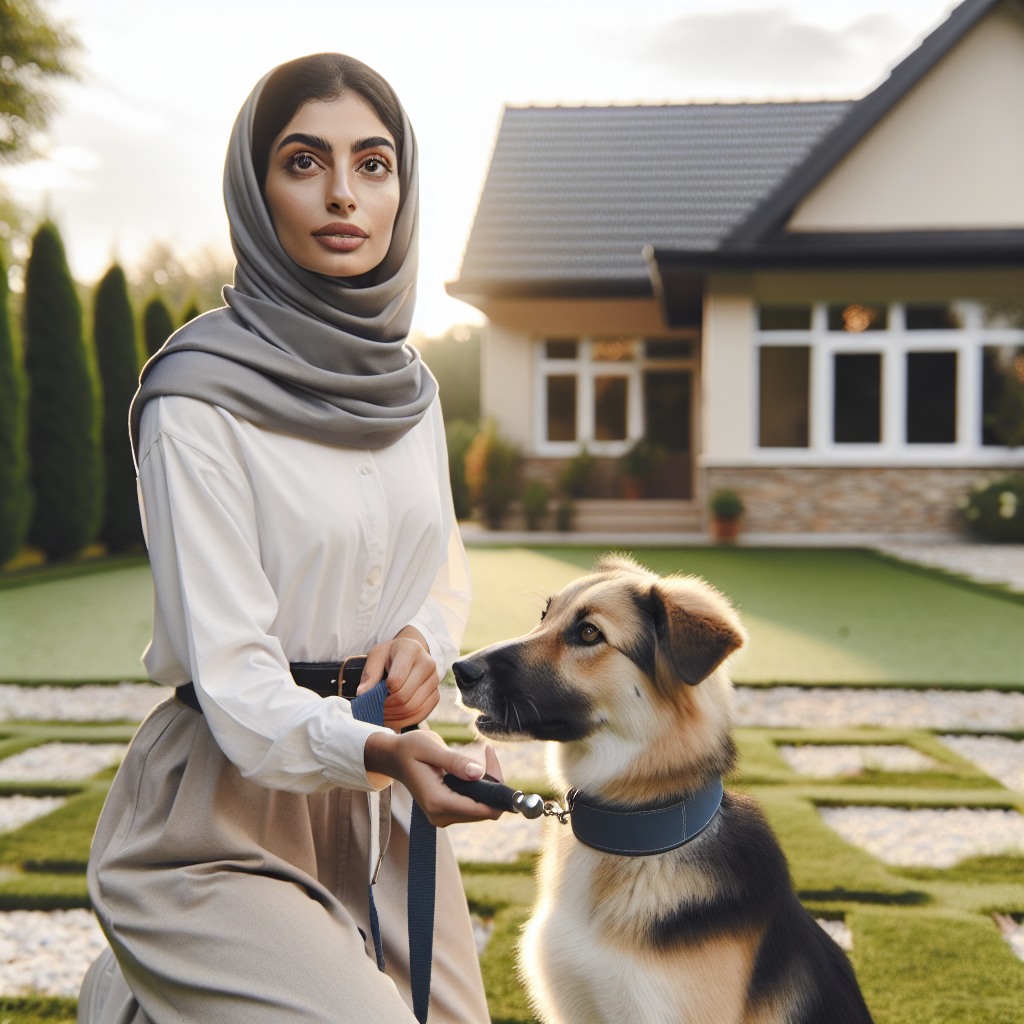
How to Prevent Bad Habits in Adolescent Dogs
Why Pressure Proofing The Stay Matters
Training dogs not to break stay under pressure is one of the most valuable skills a family can teach. The stay is not a party trick. It is the backbone of calm behaviour at doors, during mealtimes, when guests arrive, and out on busy streets. At Smart Dog Training, we use the Smart Method to teach a reliable stay that holds under real life stress, not just in quiet practice reps.
Pressure is anything that tempts or pushes a dog to move. It can be a ringing doorbell, a dropped sandwich, a stranger reaching to pet, or the handler walking away with intent. When we design a plan for stay, we do not guess. A certified Smart Master Dog Trainer will map the exact steps, coach timing, and build trust so the dog understands how to stay calm and responsible.
The Smart Method For A Rock Solid Stay
Every Smart programme follows one clear system. The Smart Method balances motivation with structure and accountability so dogs learn what to do, why to do it, and how to continue even when life gets loud. Its five pillars guide every stay repetition.
Clarity
We deliver commands and markers with precision. Sit means sit. Down means down. Stay is clearly cued and paired with a release word that ends the position. Clear communication removes guesswork, which reduces stress when pressure rises.
Pressure and Release
We guide fairly and release clearly. Guidance can be spatial pressure from the handler, a light leash direction, or an environmental boundary like a place bed. The instant the dog makes the right choice, pressure turns off and the dog is reinforced. This builds accountability without conflict.
Motivation
Rewards drive engagement and keep emotions positive. We use food, toys, and life rewards like greeting guests or going outside. The goal is a dog that wants to stay because staying pays well.
Progression
We layer skills step by step. First clarity in a quiet room. Then duration, distance, and distraction. Finally, we add pressure that mirrors daily life until the behaviour is reliable anywhere.
Trust
Training should strengthen the bond. The dog learns that the handler is consistent, fair, and predictable. Trust produces calm and willing behaviour that lasts.
Training Dogs Not to Break Stay Under Pressure
The phrase sounds intense, but the process is simple when you follow structure. We teach the position, define the release, and then proof against pressure in an organised ladder. This is the same blueprint our Smart Master Dog Trainer team uses across the UK.
Foundation Behaviours And Markers
Before heavy proofing, your dog needs a few basics:
- A clean sit and down on one cue
- A place command to a defined bed or mat
- A clear release word such as free
- Reward markers such as yes and calm praise
We start in a quiet space with minimal distractions. The dog learns that the cue means hold still until the release word, not until rewards stop or the handler looks away.
Clarity In Action
Stay is not a suggestion. It is a clear request followed by a clear release. Avoid repeating the cue. Cue once, guide if needed, and mark correct choices on the spot. This clarity makes later pressure far easier.
The Role Of Pressure And Release
Real life constantly applies pressure. The Smart Method teaches dogs to handle it through fair guidance and instant release when they choose correctly.
Fair Guidance And Clear Release
Examples of guidance include:
- Handler body movement approaching and stepping past the dog
- Light leash guidance to return the dog to the position if they move
- Environmental boundaries such as a raised bed that defines position
When the dog remains in place as pressure rises, we release pressure and pay. When the dog breaks, we calmly reset with minimal talk, return to the last step the dog can handle, and try again.
Accountability Without Conflict
Accountability is not harsh. It is consistent. If the dog breaks, the fun stops and we reset. If the dog holds, the good stuff flows. Over time, the dog learns that self control makes life better.
Building Motivation That Lasts
Motivation is a pillar at Smart Dog Training. We use rewards that matter to the dog, then we blend in life rewards. This keeps the stay strong for years, not days.
- Food for early repetitions and calm focus
- Toys for dogs that love play
- Life rewards like greeting family after a door knock or being released to the garden
We avoid bribery. Rewards come after the dog earns them by holding position through pressure.
A Progressive Framework For Reliable Stays
Pressure proofing follows a ladder. We add one variable at a time and only progress when the dog is successful. This method prevents confusion and keeps confidence high.
The Three Ds Plus P
- Duration hold for longer times
- Distance handler moves away
- Distraction mild to intense
- Pressure direct challenges that invite a break, such as fast movement or a door opening
We change one variable per set so the dog can think and win.
Adding Real World Stressors
After success with simple distractions, we layer daily pressures such as doorbells, visitors, dropped food, bouncing balls, and children moving quickly. Each is introduced in a precise order with clear criteria.
Step By Step Plan For Stay Under Pressure
Use this structure at home. Adjust the pace to your dog, and keep every session short, focused, and successful.
Week 1 Position And Place
- Teach place on a defined bed. Reward the dog for going to the bed and lying down.
- Add a calm stay cue once the dog understands place.
- Release with your word, then invite the dog off the bed for rewards.
- Goal calm position for 60 seconds while you stand still.
Week 2 Duration And Release
- Build duration in small blocks. Five, ten, then twenty seconds, up to two minutes.
- Mix in easy wins with shorter reps so the dog stays confident.
- Pay more for longer holds.
- Goal stay holds for two minutes with handler nearby.
Week 3 Distance And Line Pressure
- Add a light training line for safety.
- Take one step away and return to reward. Vary directions. Step left, right, and past the dog.
- Walk a small loop around the dog. If the dog moves, calmly guide back and reset.
- Goal handler circles the dog while the dog remains on place.
Week 4 Distraction And Novelty
- Introduce simple distractions. Pick up keys, clap once, open a cupboard door.
- Reward calm holds. If the dog breaks, reduce intensity and try again.
- Add novelty items. A chair moved across the room, a hat, or a new bed texture.
- Goal dog holds through mild sound and motion.
Week 5 Real Life Pressure
- Add a door knock and door open. Handler returns to reward the hold.
- Drop a soft treat. If the dog looks but stays, mark and pay from your hand. Do not allow scavenging.
- Have a helper walk by with a toy. Reward the stay often.
- Goal dog holds while the environment invites them to move.
Throughout these weeks, keep sessions short. Three to five minutes, several times a day, will build faster than one long session.
Tools And Environment That Support Success
- Place bed A defined target helps dogs understand boundaries and relax faster.
- Training line A long, lightweight line used indoors and outdoors for safety and gentle guidance.
- Flat collar or well fitted harness We teach with clarity and fairness.
- High value food and a toy that your dog loves Motivation matters.
Set up in a quiet area at first. As you progress, shift to rooms where pressure appears in real life such as the hallway near the front door.
Reading Body Language Under Pressure
A dog who is learning will show signals that you can read and support.
- Lip licking or yawning mild stress, lower intensity and reward success
- Weight shift forward temptation to break, add guidance
- Scanning eyes struggling to focus, reduce distraction
- Relaxed breathing and soft eyes ideal learning zone
By noticing early signs, you can make smart adjustments before a break happens.
Preventing Common Mistakes
When The Dog Breaks Stay
- Do not scold. Calmly return the dog to the exact spot.
- Reduce one variable. Shorter duration or less distance or lower distraction.
- Reward the next correct hold to rebuild confidence.
Handler Errors That Cause Breaks
- Repeating the cue. One cue, then guide.
- Releasing for free. Always use the release word.
- Moving too fast. Only change one variable at a time.
- Paying for failure. Do not reward after a break. Reset, then pay for success.
Advanced Proofing Under Pressure
Door Greetings And Deliveries
- Place the dog before you approach the door.
- Knock once and reward calm.
- Open the door a small amount. Reward if the dog holds.
- Practice with a helper who steps inside while you reward the stay.
Children Guests And Food Temptations
- Teach children to move slowly at first and then add faster movement later.
- Place the dog during meals. Release to a quiet chew after the family eats.
- Drop food at a distance. Mark and pay for eye contact on you, not the floor.
Outdoor Pressure
- Practice stay on grass with a line for safety.
- Add bikes at a distance, dogs behind a fence, and passing joggers.
- Increase pressure slowly and reward often.
Case Example From Smart Dog Training
A lively young Labrador arrived with a habit of bursting off the bed at every knock. We began with place in a quiet room, built a clean release word, and layered door noise at low volume. Over two weeks we added distance, then a helper approaching, then the door opening. By the third week, the dog held a down stay while the delivery person stepped inside. Pressure and release made the rules easy to understand. Motivation kept the dog engaged. Progression prevented overwhelm. The family now enjoys calm greetings every day.
Inside A Smart Programme
Our programmes are structured and outcome driven. You can work in home, join a focused group class, or follow a tailored behaviour plan. Each path uses the same Smart Method. You will learn how to cue, how to release, how to read your dog, and how to maintain results in busy environments.
Ready to turn your dog’s behaviour around? Book a Free Assessment and connect with a certified Smart Master Dog Trainer available across the UK.
Working With A Smart Master Dog Trainer
When pressure proofing the stay, timing and criteria matter. A Smart Master Dog Trainer will coach your handling, adjust progression, and set precise rules for sessions. With expert guidance, most families see rapid gains in clarity and calm within the first weeks. Your trainer will also show you how to maintain standards so the dog understands that stay means stay everywhere.
Measuring Progress And Maintaining Standards
- Track duration in seconds and minutes.
- Track distance in steps and rooms.
- List distractions the dog can handle.
- Record pressure scenarios that are now easy, such as a full door open or a dropped slice of toast.
Revisit simple reps often. Short refreshers keep performance sharp and prevent drift. If the dog breaks, step back one level, rebuild success, and then progress again.
FAQs
How long does it take to teach a reliable stay under pressure
Most families see clear progress within two to three weeks with daily practice. Full reliability in busy settings can take four to eight weeks. Consistency and clear release rules are key.
What is the best way to stop my dog breaking when guests arrive
Use place before the door routine begins. Knock once, reward calm, open the door a small amount, and repeat. Increase pressure in small steps. If the dog breaks, reset, reduce intensity, and pay the next correct hold.
Should I use food if my dog gets too excited
Yes, but choose calm delivery. Slow feeding at the position keeps arousal low. If toys over excite your dog, use food or quiet praise until the behaviour is solid.
Is a raised bed better for teaching stay
Many dogs relax faster on a defined surface. A raised bed creates a clear boundary which supports clarity, one of the Smart Method pillars.
What if my dog only stays at home and not outside
Progression is missing. Return to simple reps outdoors with a line for safety. Add duration first, then distance, then distraction, and finally pressure, one change at a time.
Can puppies learn to hold under pressure
Yes. Keep sessions very short and upbeat. Focus on place, a soft down, and tiny bits of pressure like a quiet knock. Build slowly to protect confidence.
Do I need professional help
If you are unsure about timing, guidance, or step size, working with a Smart Master Dog Trainer will speed progress and prevent mixed signals. We offer structured programmes that follow the Smart Method.
Conclusion
Training dogs not to break stay under pressure is a teachable skill when you follow structure. With the Smart Method, you build clarity, guide with fair pressure and clear release, use strong motivation, progress step by step, and deepen trust. The result is a dog that remains calm and reliable in daily life. If you want expert support, we are here to help with in home training, group classes, and tailored behaviour programmes that deliver results.
Your dog deserves training that truly works. With certified Smart Master Dog Trainers SMDTs nationwide, you will get proven results backed by the UK's most trusted dog training network. Find a Trainer Near You
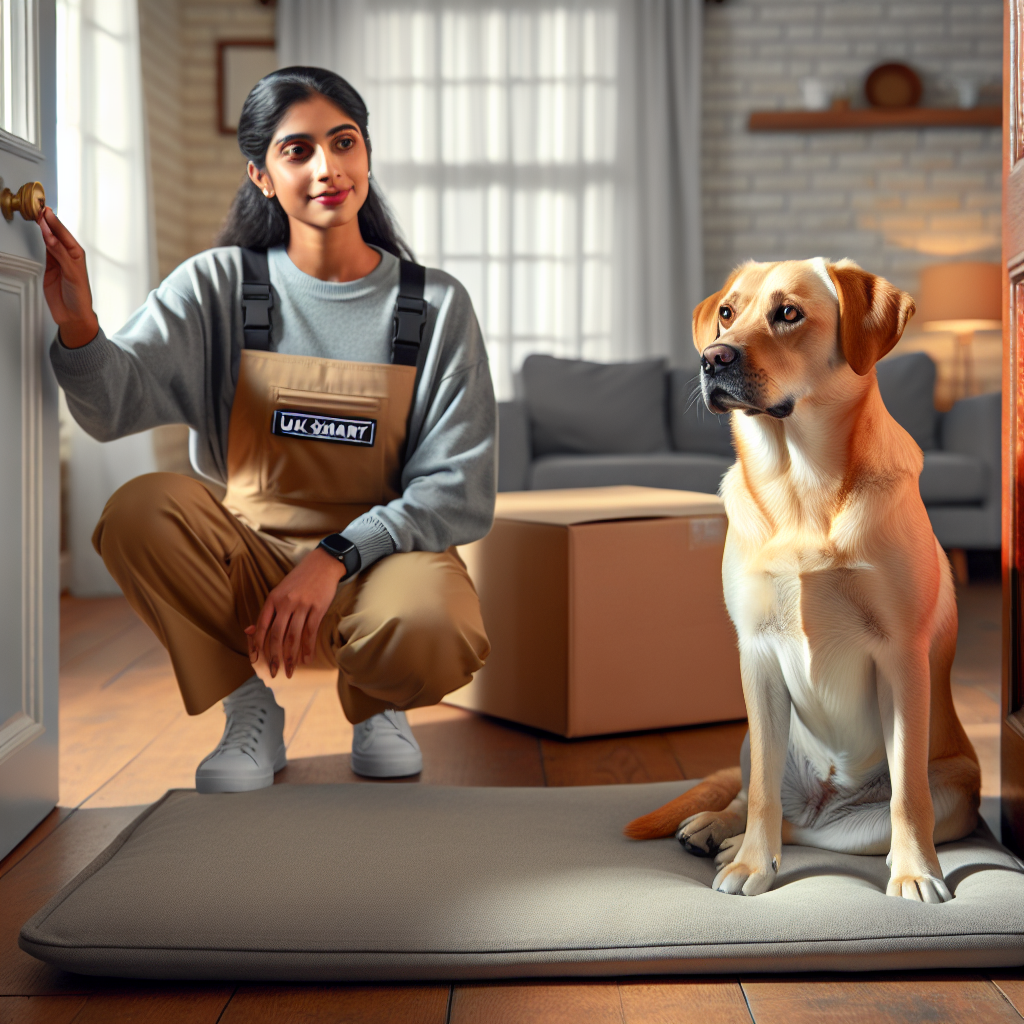
Training Dogs Not to Break Stay Under Pressure
Preparing for Your First Group Class
Preparing for your first group class should feel exciting, not stressful. At Smart Dog Training, we make the process simple and supportive, so you and your dog arrive calm, focused, and ready to learn. Your class is led by a certified Smart Master Dog Trainer SMDT who follows the Smart Method to build reliable behaviour that lasts in real life. This guide explains what to expect, what to bring, and how to set your dog up for success before week one even starts.
When you start preparing for your first group class, remember that structure is your friend. A few smart steps at home will ease nerves, improve engagement, and prevent common hiccups on the day. With Smart Dog Training, every step of your journey is mapped out. You will know where to stand, how to lead, when to reward, and how to keep your dog settled between exercises.
Why Group Classes Work at Smart Dog Training
Group classes are a powerful way to proof skills around real distractions. You will practise obedience in a safe environment with controlled spacing and expert coaching. We keep numbers small so your dog gets the attention needed without feeling overwhelmed. By preparing for your first group class well, you make space to learn and build confidence from the first minute.
- Real life distractions build reliability
- Clear structure from the Smart Method
- Coaching from a Smart Master Dog Trainer SMDT
- Calm, respectful class etiquette and spacing
- Measured progression week by week
What You Will Learn In Week One
Week one focuses on clarity, engagement, and calm handling. You will learn how we mark and reward, how to hold the lead, and how to settle your dog between reps. Expect short bursts of work with rest breaks that prevent overwhelm. If you are preparing for your first group class with a young or excitable dog, this first session is designed to meet them where they are and build up gradually.
- Name response and focus
- Handler position and lead handling
- Marker words and reward delivery
- Settle on a mat
- Intro to loose lead walking
- Intro to recall foundations
Preparing for Your First Group Class Checklist
Use this checklist when preparing for your first group class. Tick every item before you leave the house, and you will walk in feeling confident and composed.
Health, Safety, and Comfort
- Current vaccinations and worming where appropriate
- Well fitted flat collar or Y shape harness
- Lead 1.2 to 2 metres long
- Name tag with your contact details
- Poo bags and water bowl
- Weather ready coat for cold or wet days
Training Equipment That Meets Smart Standards
- High value food rewards pea sized and soft
- One favourite toy for engagement such as a tug or ball on a line
- Mat or small bed for settle work
- Treat pouch that clips to your waist
- Optional long line if advised by your trainer
Feeding and Exercise Before Class
- Feed a lighter meal two to four hours before class so food rewards stay valuable
- Give a short sniffy walk to take the edge off energy without tiring your dog
- Offer a toilet break right before you travel
Travel and Arrival Plan
- Plan to arrive ten minutes early
- Settle your dog in the car for a minute before entering the venue
- Enter with space and keep your dog beside you
- Follow the trainer’s directions to claim a safe working spot
By preparing for your first group class with this checklist, you remove guesswork and start as you mean to go on calm, focused, and ready.
Set Your Dog Up For Success At Home
Preparing for your first group class starts days before week one. Mini rehearsals at home make everything familiar and easy when you arrive at the venue.
- Practise short settle on a mat in your kitchen
- Load your reward markers such as Yes and Good
- Rehearse putting on the collar and lead while your dog stays still
- Warm up with name response and eye contact games
- Introduce the treat pouch and reward placement to your left side
These small routines make a big difference. They create clarity and reduce the chance of a rocky start when you step into the group space.
Helping Nervous Or Excitable Dogs
If your dog is shy or reactive, preparing for your first group class is about pacing and predictability. We will set your station near an exit if needed and adjust spacing so your dog feels safe. For dogs that get over excited, we teach calm entry, neutral handling, and regular rest breaks. You will learn to interrupt bouncing attention and bring your dog back to you with simple, fair steps.
- Arrive early to claim a quiet corner
- Use your mat as a safe home base
- Keep greetings for later and focus on your dog first
- Reward calm choices and stillness
- Ask for help the moment you need it
The Smart Method In Group Classes
Every exercise in class follows the Smart Method. While preparing for your first group class, it helps to understand the five pillars you will hear us use each week.
Clarity
We teach clear cues and marker words so your dog knows exactly what is expected. Precision builds confidence. That starts from lesson one.
Pressure And Release
We use fair guidance paired with a clear release and reward. This builds accountability and responsibility without conflict. Your trainer will coach you step by step.
Motivation
We harness the right rewards at the right time to keep your dog engaged. Food and play are tools that build positive emotional responses.
Progression
Skills are layered gradually. We add distraction, duration, and difficulty only when your dog is ready. Preparing for your first group class with calm rehearsals at home speeds this up.
Trust
Training should strengthen the bond between you and your dog. Our structure and fairness produce calm, confident, and willing behaviour.
Handler Skills You Will Practise
You are half the team. While preparing for your first group class, plan to practise these simple handler skills so you start strong.
- How to hold and shorten the lead without tension
- How to stand and turn so your dog can follow
- When to mark, when to reward, and when to reset
- How to deliver food so position stays neat
- How to pause and breathe if your dog gets stuck
Small changes in timing and posture create big changes in behaviour. Your Smart trainer will coach you in real time as you work.
Class Etiquette And Spacing
Good etiquette keeps everyone safe and relaxed. Preparing for your first group class includes understanding how we use space and how we greet other teams.
- Keep a two metre bubble around other dogs unless your trainer invites you closer
- Ask before greeting another dog
- Keep leads short but loose in busy areas
- Pick up after your dog quickly and quietly
- Save play for trainer approved moments
This approach protects focus and builds emotional stability so dogs can learn without pressure.
Common Mistakes To Avoid In Week One
We see the same avoidable slips every season. Preparing for your first group class with these in mind will save you frustration.
- Arriving late or rushing through the door
- Over feeding before class and losing food motivation
- Using a retractable lead which reduces control
- Letting dogs greet in doorways which creates tension
- Talking to your dog without clear cues or markers
- Practising too long at home and leaving your dog overtired
Puppies Versus Adult Dogs
If you are preparing for your first group class with a puppy, we focus on short windows of work, calm settle, and playful motivation. For adult dogs, we bring the same structure with mature expectations for impulse control. The content matches the stage your dog is in, and you will always progress at a pace that keeps confidence high.
What Happens If Your Dog Struggles
There is no perfect first class. Your trainer expects a few hiccups and will coach you through them. If a dog is overwhelmed, we increase space, simplify the task, and get a quick win. If a dog is disengaged, we change rewards, change pace, or change the task. Preparing for your first group class gives you a head start, but the SMDT leading your session will always make on the spot adjustments so your dog can learn.
Mid Week Practice That Actually Works
Great results come from short, consistent practice. After week one, practise three to five minutes, two to three times a day. Use your mat settle during meals. Add three focus reps before each walk. Do ten steps of loose lead walking from your front door to the gate. Preparing for your first group class is the launch pad. The magic is in small daily reps that build into reliable habits.
Real Life Skills You Will Build
Across the programme you will build skills that matter outside the hall.
- Loose lead walking past dogs and people
- Recall away from distractions
- Settle in cafes and at home
- Impulse control around doors and food
- Confident engagement in new places
Each skill follows the same Smart progression. Start simple. Mark and reward the right choice. Add gentle pressure and clear release where needed. Increase difficulty only when your dog shows understanding.
Ready to turn your dog’s behaviour around? Book a Free Assessment and connect with a certified Smart Master Dog Trainer - available across the UK.
How Smart Trainers Support You
Every class is led by a Smart Master Dog Trainer SMDT who understands behaviour and communication at a high level. You get real coaching, not generic tips. Your trainer will check your lead handling, adjust your reward strategy, and set clear homework so you know exactly what to do before the next session.
Preparing Your Mindset As The Handler
Dogs read how we feel. When preparing for your first group class, set a calm tone for your dog to match. Breathe, smile, and give your dog a moment to take in the room. Focus on one clear goal for the session. Trust the process and celebrate small wins. The Smart Method turns small wins into big changes.
What To Pack In Your Training Bag
Here is a quick packing list to use when preparing for your first group class. Keep these items by the door the night before.
- Treat pouch stocked with soft high value food
- Flat collar or well fitted Y shape harness
- Lead 1.2 to 2 metres
- Mat or small bed for settle
- Poo bags, water, and a small towel
- Favourite toy for engagement
- Notebook or phone to record homework
First Five Minutes At The Venue
The first five minutes set the tone. Preparing for your first group class makes this simple.
- Arrive early and park with space around you
- Clip on your treat pouch and have food ready
- Let your dog sniff the air and take a breath with you
- Walk in with purpose and go straight to your station
- Settle on the mat and reward calm
Now you are ready to listen to the trainer’s welcome and begin your first exercise.
How We Handle Social Time
Social time is planned and structured. We never let dogs learn chaotic meet and greet habits. If your class includes social work, it happens with clear rules and under guidance. Preparing for your first group class with a calm entry and a focus on you speeds up progress when we add polite greetings later.
When To Ask For Extra Help
If you are worried about barking, lunging, or fear, tell us before the first session. Preparing for your first group class may include a short one to one to build confidence first. Many dogs benefit from a tailored plan that blends home routines with the group course. Smart has that covered.
FAQs About Preparing For Your First Group Class
How early should I arrive for my first session
Arrive ten minutes before class starts. This gives you time to park, toilet your dog, and get set up at your station without rushing. Preparing for your first group class with a calm arrival is one of the biggest wins you can give yourself.
What should my dog eat before class
Feed a lighter meal two to four hours before class, then use soft, tasty treats during training. If your dog has food restrictions, bring approved options. Preparing for your first group class with the right food keeps motivation high.
Can I bring a retractable lead
No. Use a fixed lead between 1.2 and 2 metres. Retractable leads reduce control and add tension in a group setting. Preparing for your first group class with the right lead makes handling safer and clearer.
What if my dog barks or struggles to settle
Your trainer will help you create space, change tasks, and reward calm choices. Many dogs find the first ten minutes exciting. Preparing for your first group class with mat training at home makes settling much easier.
Will my dog meet other dogs in week one
Only if it suits your dog and the plan for that session. We build neutral behaviour first. Preparing for your first group class with a focus on you prevents over arousal and makes later greetings polite and controlled.
What happens if we miss a week
Your trainer will give you catch up tasks and may offer a make up option if available. Preparing for your first group class with strong home practice makes it easy to slot back in.
What age can a puppy start
We start puppies as soon as they are ready based on vaccinations and your vet’s advice. The content is age appropriate. Preparing for your first group class with short, fun practice at home helps your puppy arrive ready.
Do you use the same method for all dogs
Yes. Every programme follows the Smart Method. We adjust pace and rewards to suit each dog, but the structure stays the same. Preparing for your first group class with this in mind helps you see how clear and consistent the sessions feel.
Conclusion And Next Steps
Preparing for your first group class is about stacking small wins. Pack the right kit. Plan your arrival. Practise a short settle at home. Trust your Smart trainer and the Smart Method to guide each step. With that foundation, dogs learn faster, owners feel confident, and results show up in real life. If you want tailored advice before week one, we are here to help.
Your dog deserves training that truly works. With certified Smart Master Dog Trainers SMDTs nationwide, you'll get proven results backed by the UK's most trusted dog training network. Find a Trainer Near You

Preparing for Your First Group Class
Why Nagging Commands Hurt Training
If you want lasting obedience, you must reduce nagging commands. Repeating yourself makes your voice background noise and your dog learns to wait you out. At Smart Dog Training we build clear, reliable behaviour by teaching families to say it once, then follow through with calm structure. This is the core of the Smart Method, delivered by every Smart Master Dog Trainer. When you reduce nagging commands you replace frustration with clarity, and your dog learns to respond the first time, every time.
What Nagging Commands Look Like
Nagging shows up in small ways that grow into big habits. You ask sit three times. You call come while walking toward your dog with a worried tone. You repeat leave it as your dog inches toward the distraction. Each repeat teaches delay. The dog becomes skilled at guessing how many times you will ask. This is not stubbornness. It is the pattern that has been taught.
- Repeated cues that get louder but not clearer
- Begging tones or rising inflection that sounds like a question
- Adding extra words that dilute the cue
- Moving toward the dog while repeating, which adds pressure without clarity
- Rewarding after several repeats, which pays the delay
To reduce nagging commands you must change the pattern. Ask once. Guide cleanly. Mark and release with perfect timing.
The Smart Method For Clear Communication
The Smart Method is our proprietary system for calm, consistent behaviour that lasts in real life. Every programme follows five pillars that work together to reduce nagging commands and raise reliability.
- Clarity. Commands and markers are delivered with precision so the dog understands the task.
- Pressure and Release. Fair guidance shows the path, then a clear release ends the effort.
- Motivation. Rewards create drive and positive emotion so dogs want to work.
- Progression. Distraction, duration, and difficulty are layered step by step.
- Trust. Training builds a confident bond based on consistency and follow through.
When your Smart Master Dog Trainer structures sessions around these pillars, you get quiet, decisive communication instead of endless repeats.
Set Your Foundation Cues
Before you can reduce nagging commands you need a small set of foundation cues that never change. Keep them short and consistent. Pick one word per behaviour and ask it the same way every time.
One Cue One Action
Choose cues that are simple and distinct.
- Sit
- Down
- Place
- Come
- Heel
- Out or Drop
Say the cue once in a neutral tone. Hold still for a second so your dog can process. If no response follows, guide with a clear plan rather than repeating. This is how you reduce nagging commands without raising your voice or adding confusion.
Marker Words That Mean Something
Markers are short words that tell the dog if they are correct. We use three markers across Smart programmes.
- Yes. The dog completed the task. Reward is coming.
- Good. Keep going. You are on the right track.
- No. That was not it. Try again with guidance.
Markers replace guesswork with clarity. When used with exact timing, they reduce nagging commands because the dog knows when they hit the target or missed it.
Use Pressure And Release Without Conflict
Pressure and release is not force. It is the language of guidance followed by freedom. Apply light, fair pressure to direct the behaviour, then soften the moment the dog makes effort. This releases pressure and builds responsibility. The dog learns that the fastest path to comfort is to follow the cue the first time. When you train this way, you reduce nagging commands because you do not need to repeat. You simply help once, then release with perfect timing.
- Ask the cue once
- Pause for one second
- Guide with light, clear pressure or leash direction
- Mark the effort with Good
- Mark completion with Yes
- Release or pay the reward
Build Motivation So Your Dog Wants To Listen
Motivation and structure go hand in hand. If the work feels good, dogs offer it faster. If the rules are clear, they remain calm and focused. Use food and play as part of a plan. Reward in position to reduce movement and to reduce nagging commands tied to fidgeting. Vary rewards to keep engagement high.
- Use small food rewards for precision
- Mix in play to build drive and joy
- Place rewards where the behaviour happens
- Fade food as reliability grows, not before
Motivation does not replace structure. It fuels it. The Smart Method blends both so your dog chooses the right answer right away.
The Release Word That Ends Behaviour
Your release word ends the exercise and gives access to freedom. This single tool will reduce nagging commands more than any other. Many dogs break positions because they think the job is over when the reward happens. The release word solves that.
- Pick one release word such as Free
- Only use it when you want the behaviour to end
- Reward can come during the behaviour or after the release
When the release is consistent, your dog learns to stay in position until you say Free. You will say fewer reminders because the expectation is crystal clear.
How to Reduce Nagging Commands Today
Here is a simple plan you can use today to reduce nagging commands in your home. It is the same plan we coach in Smart programmes.
- Pick two behaviours for the week. For example Sit and Place.
- Decide your cue, marker words, and release word.
- Rehearse your words out loud so your timing is smooth.
- Run three micro sessions a day, two minutes each.
- Ask once, guide once, mark the effort, mark completion, then release.
- Reward where the behaviour happens. Do not lure out of position.
- Track reps. Aim for twenty clean reps per behaviour per day.
Commit to this plan for seven days. You will reduce nagging commands as your dog learns that the first cue is the only cue that matters.
The Three Step Rule For Asking Once
The Three Step Rule keeps you honest and clear.
- Say the cue one time in a neutral tone.
- Hold still for one full second. Let the dog think.
- If no response, guide calmly and immediately, then release after success.
You do not need to fill the pause with chatter. Silence lets your cue carry weight. Following through replaces a second cue. Consistency with this rule will reduce nagging commands across all behaviours.
Repetition That Builds Reliability Not Nagging
Repetition is not the enemy. Sloppy repetition is. Smart trainers use structured reps that strengthen the first cue.
- Short sets. Ten to twenty reps per set with purpose
- Clear criteria. The dog knows exactly what earns Yes
- Clean resets. Start each rep from a neutral position
- Accurate records. Note wins, misses, and distractions
When reps are clean you reduce nagging commands because first cue success becomes the habit.
Proofing With Distraction Duration And Distance
Dogs do not generalise well without structured progression. Proofing teaches your dog that one cue means the same thing anywhere. Smart progression removes the need to repeat.
- Distraction. Start in a quiet room, then add mild sounds, then people, then dogs
- Duration. Build hold times in seconds, then half minutes, then minutes
- Distance. Take one step away, then two, then around the room
Only raise one D at a time. Success compounds. As reliability grows, you will reduce nagging commands in busy environments because your dog already understands the rules.
Body Language Voice And Timing
Your body speaks before your words. Stand tall, face neutral, hands still. Use a calm, even voice. Time markers within one second of the behaviour. These details reduce nagging commands because they remove mixed signals.
- Neutral posture when cueing
- Hands quiet until after the mark
- Voice steady and low
- One second timing for markers and release
Small corrections become natural when your timing is exact. The dog trusts you because the information is always the same.
Common Mistakes And How Smart Fixes Them
- Stacking cues. Saying Sit Sit Sit. Fix by asking once, then guiding.
- Paying late. Reward after the dog breaks. Fix by paying in position or after the release.
- Unclear release. Dog breaks after Yes. Fix by separating Yes and Free so the dog holds for release.
- Mushy tone. Sounds like a question. Fix by neutral, confident delivery.
- Rushing proofing. Jumping straight to busy parks. Fix by progressing one D at a time.
Smart Dog Training programmes are designed to reduce nagging commands by replacing these habits with crisp structure and fair follow through.
Coaching For Families The Smart Programme
Every Smart family programme follows the Smart Method. We coach you through clear cues, fair pressure and release, and exact timing so your dog responds the first time. Sessions are structured, goals are defined, and progress is measured. You will learn how to reduce nagging commands in the home, on walks, and around real distractions. We build calm behaviour that holds up in daily life.
Ready to turn your dog’s behaviour around? Book a Free Assessment and connect with a certified Smart Master Dog Trainer - available across the UK.
When You Need Hands On Help From An SMDT
Some patterns run deep. If your dog has learned to ignore cues outdoors or around high value distractions, hands on support speeds success. A Smart Master Dog Trainer will personalise the plan, clean up timing, and select the right tools for guidance and reward. You will reduce nagging commands faster because coaching keeps every rep consistent. With national coverage through our Trainer Network, help is always close by.
FAQs
What does it mean to reduce nagging commands?
It means you ask once, guide once, and follow through with clear markers and a release word. By removing repeats you make each cue meaningful. Smart programmes teach this from day one.
Why does my dog only respond on the third command?
Your dog has learned that the first two cues do not matter. The pattern has taught delay. Use the Three Step Rule and the Smart Method to ask once, guide, and release. Within days you can reduce nagging commands and shift the habit.
How do I teach a release word without confusion?
Pick one word such as Free. Ask for the behaviour, mark completion with Yes, then pause. Say Free and encourage the dog to move out of position. Pay after the release at times so the dog learns to wait for Free. This will reduce nagging commands tied to early breaks.
Should I still use treats if I want reliability?
Yes, but with structure. Reward in position and vary the type and timing. Motivation supports clarity. Smart blends rewards with pressure and release so the first cue becomes the habit.
How long will it take to reduce nagging commands?
Most families see change within one week when they follow the plan. For complex cases or busy environments, expect several weeks of proofing. The key is consistent first cue practice and a clean release word.
What if my dog ignores me outside?
Lower the level of challenge. Add distance from triggers, shorten duration, and raise reward value. Guide once, then release with perfect timing. If you need support, work with an SMDT to personalise the progression and reduce nagging commands in real life.
Can children use this approach?
Yes with coaching. We teach families to keep words simple, stand still, and mark clearly. An SMDT will stage easy wins for children so cues stay clean and consistent.
Which behaviours benefit most from this plan?
Come, heel, place, and down show the fastest change because they include clear start and end points. Any behaviour improves when you reduce nagging commands and use a consistent release word.
Conclusion
Reliable obedience starts with clear words, fair guidance, and the courage to say it once. When you reduce nagging commands you give your dog a simple path to success. The Smart Method makes this practical for busy families. Pick your cues, use marker words with perfect timing, and anchor every exercise with a strong release word. Layer distraction, duration, and distance one step at a time. If you want faster progress, work with a Smart Master Dog Trainer who will coach every detail for you and your dog.
Your dog deserves training that truly works. With certified Smart Master Dog Trainers (SMDTs) nationwide, you'll get proven results backed by the UK's most trusted dog training network. Find a Trainer Near You

How to Reduce Nagging Commands
Do you step into another room and hear whining, pacing, or scratching at the door within seconds? Teaching your dog to stay calm when out of sight is not only possible, it is essential for peaceful home life. At Smart Dog Training, we use the Smart Method to build reliable calm, even when you are not in the room. If you want a clear plan and professional support from a Smart Master Dog Trainer (SMDT), you are in the right place.
Why Dogs Struggle When You Leave the Room
Many dogs have never been asked to relax while the handler moves away. They learn that following you earns attention and that vocalising brings you back. Without structure, the pattern repeats. Genetics, reinforcement history, and unclear communication all contribute. The solution is a structured, progressive plan that shows your dog exactly how to behave when you step out of sight.
The Smart Method That Makes Calm Last
Every Smart programme follows the Smart Method. It blends motivation with fair accountability so calm behaviour becomes a habit your dog chooses.
- Clarity. We use precise commands and markers so the dog knows when to work and when to relax.
- Pressure and Release. Light guidance communicates boundaries, and the instant release rewards the right choice.
- Motivation. Food, touch, and praise keep engagement high and emotions positive.
- Progression. We layer difficulty step by step, then proof skills in real life.
- Trust. Training strengthens the bond so your dog feels safe and confident.
When your goal is to help your dog stay calm when out of sight, this balance creates calm that holds up under distraction and duration.
What Calm Actually Looks Like
Calm is not a frozen statue. It is loose muscles, steady breathing, a low heart rate, and a soft jaw. Your dog can lie on a bed or settle on a mat with a relaxed posture. The eyes can follow movement without the body popping up. Calm means your dog can stay calm when out of sight without whining, scratching, or scanning.
How to Teach Your Dog to Stay Calm When Out of Sight
Below is the Smart blueprint for real results. Set up short, clean sessions and track progress daily. You will teach positions, duration, and distance, then add short periods out of sight. Each step is small, fair, and repeatable.
Readiness Checklist
- Healthy dog with a comfortable bed or mat.
- Properly fitted flat collar or slip line and a standard lead.
- High value food rewards and calm praise.
- A quiet starting room with a door you can open and close softly.
- Two marker words. Yes for release to reward. Good for calm duration.
Core Skills Before Distance
Build these foundations so your dog understands how to earn reward and release.
- Place. Send your dog to a bed or mat and reward relaxed posture. Use Good to mark calm. Release with Yes and a reward away from the bed, then reset.
- Leash Guidance. Apply light pressure toward the bed, then soften the lead as the dog follows. The release is the reward and creates clarity without conflict.
- Settle. Reward slow breathing and hip to one side. This reduces frantic energy and prepares your dog to stay calm when out of sight.
- Crate as a Calm Zone. If your dog is crate trained, teach the same markers in the crate. The crate can support success in early stages.
The Step by Step Plan
Work through these phases over one to three weeks for most dogs. Some will need more time, especially if reinforcement history includes door scratching or frantic following.
Phase 1 Build Duration on Place
- Send to Place. Reward three times for relaxed posture. Say Good between rewards to mark calm.
- Add Duration. Reward every five seconds for one minute. Then every ten seconds for two minutes. Aim for five minutes of quiet calm.
- Introduce Handler Movement. Step one pace left and right. Sit down and stand up. Reward if the dog holds the settle.
Goal. Five minutes of quiet on Place while you move within the room. Your dog should stay calm when out of sight when we reach later phases, so build a strong base here.
Phase 2 Distance Inside the Room
- Walk Away. Move three paces away, turn back, pause two seconds, then return to reward. Mark with Good as you pause if the posture stays relaxed.
- Randomise Pattern. Vary one to five paces and pause lengths. Keep rewards unpredictable.
- Silent Returns. Sometimes return without a treat, touch the collar softly, then reward after another few seconds of calm.
Goal. Eight to ten minutes of calm with you at varying distances. You are preparing the dog to stay calm when out of sight by normalising distance first.
Phase 3 Micro Out of Sight
- Step Through a Doorway. Leave the door slightly open. Step out for one second, step back, reward. Repeat five times.
- Build to Three Seconds. Add one second at a time. If your dog vocalises or stands up, quietly reset to Place and drop the time again.
- Change Angles. Step behind a sofa, a screen, or a partial wall for one to three seconds, then reward on return.
Goal. Your dog remains relaxed for one to five seconds without seeing you. This is the first real rehearsal of how to stay calm when out of sight.
Phase 4 Real Out of Sight
- Closed Door Reps. Close the door for two to five seconds. Open, pause, reward for calm. Keep your returns quiet and matter of fact.
- Extend Duration. Work to ten, twenty, and thirty seconds over several short sets. Mix in shorter reps to keep confidence high.
- Vary Sounds. Jingle keys, open a cupboard, or run water for a few seconds while out of sight, then return and reward if calm holds.
Goal. Two to three minutes of steady calm with you fully out of sight. Your dog is learning to stay calm when out of sight even with light sound triggers.
Phase 5 Movement and Multi Room Patterns
- Walk Past Doors. Walk down the hall and back. Reward if calm posture holds on Place.
- Upstairs or Downstairs. Move to another floor for ten to twenty seconds. Return quietly and reward.
- Front Door Routine. Put on a coat, lift your bag, touch the handle, then sit down again. Break the link between your patterns and arousal.
Goal. Five to ten minutes of calm with normal household movement. At this point, most dogs can stay calm when out of sight during everyday tasks.
What To Do If Your Dog Breaks Position
- Stay neutral. No scolding. Guide back to Place with calm leash pressure, then relax the lead when the dog settles.
- Lower the criteria. Reduce duration or distance, then build back up in smaller steps.
- Do brief resets. A short break outside for a toilet trip, then back to work.
Breaking position is feedback for you to make the next rep easier. The faster you adjust, the faster your dog will stay calm when out of sight on the next attempt.
Using Pressure and Release the Smart Way
Pressure and release is simple when done fairly. Apply light lead pressure toward the bed. The instant your dog follows, soften the lead. The release is the main reward. This makes choices clear without conflict and builds responsibility. It also prevents frantic jumping or door crashing when you return to reward calm.
Reward Strategy That Builds Real Calm
- High rate early. Pay every few seconds when the dog holds a relaxed posture.
- Switch to calm rewards. Use slow, quiet delivery. Chew rewards the dog can nibble without popping up.
- Thin the schedule. As duration grows, pay less often but still mark Good to confirm the choice.
- Surprise jackpots. Occasionally return with a small handful of treats for perfect calm after a longer rep.
This teaches your dog to stay calm when out of sight because calm itself becomes rewarding, not only the treat.
Common Problems and Smart Solutions
Whining or Barking
Do not rush back at the first noise. Wait for one second of silence, then return and reward calm. If noise persists, shorten the rep and reduce triggers. Use the lead to guide back to Place if the dog stands up.
Door Scratching
Use a place bed two to three metres away from the door. Practice micro out of sight with the door left ajar to prevent rehearsal of scratching. Reward heavily for stillness.
Following on Return
When you reenter, stand still for one second before moving. If the dog stays settled, step in and reward. If the dog pops up, guide back and reset. This builds patience and trust.
Daily Structure That Supports Calm
- Structured walks. Include loose lead, sits, and place on benches to practice calm while moving.
- Targeted enrichment. Food puzzles after training help your dog decompress.
- Sleep routine. Adult dogs often need more rest than owners expect. Over tired dogs struggle to stay calm when out of sight.
Family Rules For Success
- One set of marker words for everyone.
- No calling the dog off Place unless you use the release word.
- Calm greetings only after the dog is settled. Reward the calm you want to see.
From Calm Out of Sight to Home Alone
Once your dog can stay calm when out of sight for five to ten minutes, begin short home alone rehearsals. Use the same structure. Place, duration, step out, and return. Start with thirty seconds, then build to several minutes. Keep departures and arrivals low key. If you see distress at any stage, return to earlier phases until calm is reliable again.
When To Work With a Professional
Some dogs have long histories of vocalising or destructive behaviour when left. Others simply need clearer guidance. A Smart Master Dog Trainer can assess your dog, structure the plan, and coach you through each phase. Ready to turn your dog’s behaviour around? Book a Free Assessment and connect with a certified Smart Master Dog Trainer, available across the UK.
Proofing Calm in Real Life
- Change rooms and surfaces. Practice on rugs, tile, and hardwood.
- Add sounds. Kettle, doorbell, and stairs, one at a time.
- Vary you. Different shoes, a hat, or carrying a bag. Your dog learns that you always come and go, and calm always pays.
Safety and Welfare First
Never let a dog rehearse panic. Use the lead or a crate to prevent door rushing. Keep sessions short and set up wins. If your dog shows signs of escalating distress or shuts down, pause and seek support. Smart trainers tailor the pace so the dog feels safe while learning to stay calm when out of sight.
FAQs
How long does it take to teach a dog to stay calm when out of sight
Most dogs progress within one to three weeks of daily practice. Dogs with a strong history of following or whining may need more time. Consistency, clear markers, and fair guidance are the variables that drive success.
Do I need a crate to help my dog stay calm when out of sight
No, but a crate can help some dogs. We suggest teaching Place first since it transfers easily to any room. If your dog is already crate trained, run the same plan in the crate for a second option.
What should I do if my dog barks the moment I leave
Shorten the rep to one to three seconds and return only during a moment of silence. Mark Good for calm and reward. Slowly extend the time out of sight as your dog learns the pattern.
Can older dogs learn to stay calm when out of sight
Yes. Age is not a barrier. Clear structure, pressure and release, and appropriate rewards work for dogs at any stage.
How many sessions should I do each day
Two to three short sessions of five to ten minutes are enough for most dogs. End on success and keep notes about duration and triggers so you can plan the next session.
What equipment do I need
A flat collar or slip line, a standard lead, a comfortable bed or mat, and small food rewards are all you need. Avoid long lines indoors to prevent tangles at doorways.
What if my dog has true separation anxiety
If your dog shows intense panic, destruction, or self harm, book professional support. We adapt the plan, adjust expectations, and progress at a pace that protects welfare while building stability.
Conclusion
Teaching your dog to relax when you leave the room is a practical skill that improves daily life. With the Smart Method, you build clarity, fair accountability, and motivation in a sequence that makes sense to dogs. Work the phases, keep sessions short, and celebrate calm at every step. If you want a coach by your side, our nationwide team is ready to help.
Your dog deserves training that truly works. With certified Smart Master Dog Trainers (SMDTs) nationwide, you will get proven results backed by the UK's most trusted dog training network. Find a Trainer Near You

Teach Your Dog to Stay Calm When Out of Sight