Heeling on Slippery Surfaces

Why Heeling on Slippery Surfaces Matters
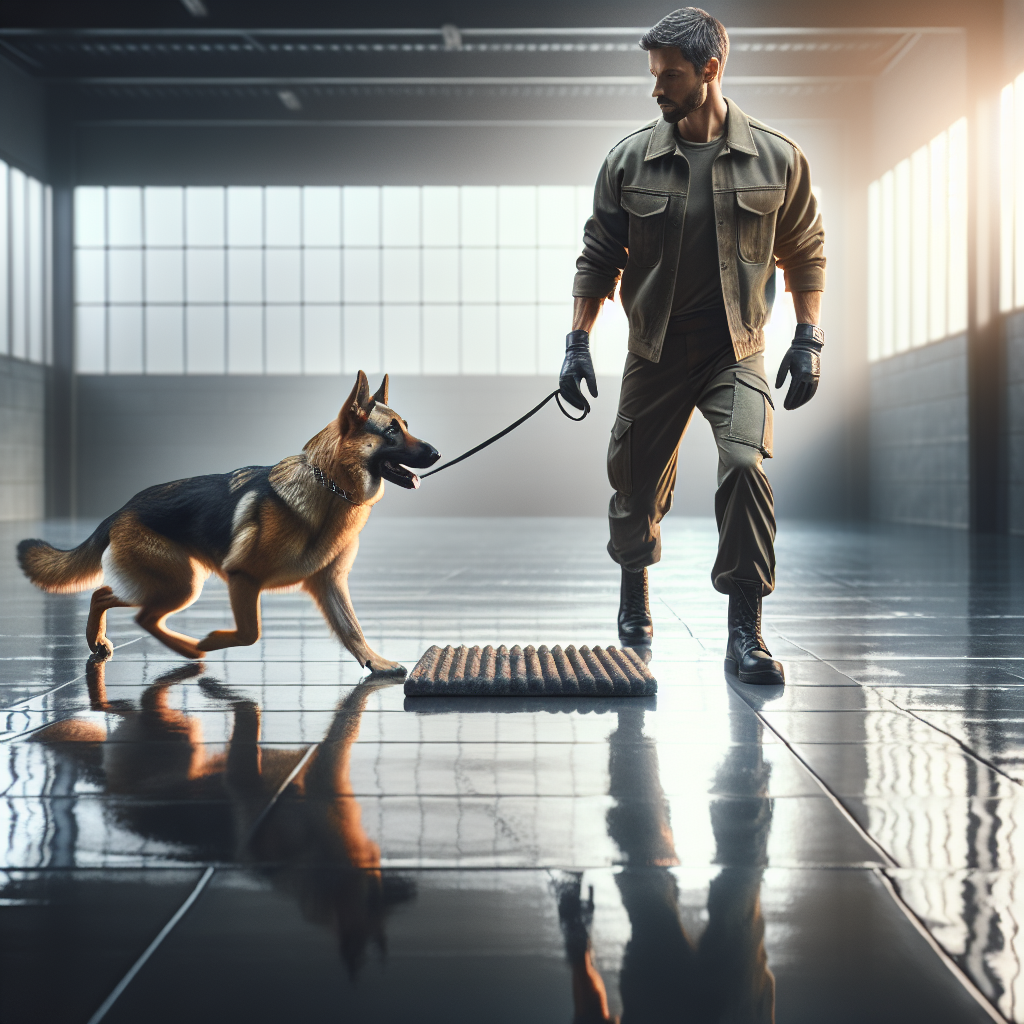
Many owners discover the limits of their training the moment they step onto tile, laminate, polished stone, or wet pavement. Heeling on slippery surfaces can expose gaps in balance, confidence, and control. At Smart Dog Training we turn those moments into wins using the Smart Method, our structured system for teaching reliable behaviour in real life. With guidance from a certified Smart Master Dog Trainer, dogs learn to move with calm precision even when traction is low.
Heeling on slippery surfaces is not just about style. It protects joints, prevents panic, and keeps both dog and handler safe. When your dog trusts your cues and understands how to place each step, the heel becomes a partnership. That is the standard we set and deliver through Smart Dog Training programmes nationwide.
What Counts as a Slippery Surface
Not all slick terrain is the same. Heeling on slippery surfaces includes:
- Indoor tiles, laminate, and polished concrete
- Wood floors with a shiny finish
- Metal plates, marina docks, and lift lobbies
- Wet pavements, painted lines, and leaf litter
- Frosted or lightly iced paths
Each surface changes traction, sound, and feel under the paw. The goal is to build a heel that holds up across this variety. Smart Dog Training’s step by step approach keeps the dog safe while we shape precise movement and solid confidence.
Why Dogs Struggle on Slick Ground
Heeling on slippery surfaces magnifies small mistakes. The dog may drift, splay, or rush to escape the feeling. The main reasons are:
- Unclear heel criteria that break down under stress
- Limited rear end awareness and weak core stability
- Anxious responses to new sounds and reflections
- Over arousal that leads to rushing or pulling
Smart Dog Training fixes this by sharpening clarity, building motivation, and adding fair accountability. The result is calm movement that lasts, not just quick wins.
Safety First Before You Start
Before you train heeling on slippery surfaces, set the scene for success.
- Check nails and dewclaws. Keep nails short to improve grip and reduce splaying.
- Inspect paw pads. Healthy pads with no cracks increase traction and comfort.
- Use traction mats. Place a stable mat next to the slick zone to build confidence and give a clear start point.
- Choose a secure lead and flat collar or well fitted harness. Avoid equipment that slides or rotates.
- Go slow. Short, successful reps prevent slips and keep trust high.
These simple checks reduce risk and help your dog stay focused on you, not the floor.
The Smart Method Applied to Slippery Heeling
Everything we do at Smart Dog Training follows the Smart Method. It balances motivation with structure so your dog learns to work with you anywhere. Here is how the five pillars apply to heeling on slippery surfaces.
Clarity
We set exact heel criteria. Shoulder to seam, head position neutral, pace matched to the handler, and a smooth start marker. Clear markers tell the dog when a rep starts, when a behaviour is correct, and when the exercise is finished.
Pressure and Release
We guide with fair pressure and an immediate release when the dog finds the position. This is not about conflict. It is about clean feedback. The dog learns that soft guidance leads to the answer and the release confirms success. Paired with rewards, it builds accountability without stress.
Motivation
Rewards make the work feel good. Precise reward placement reinforces the correct line and posture. We use food for repetition and engagement, and toys when the dog can hold position and drive without losing balance.
Progression
We layer difficulty step by step. First on grippy mats, then on seams, and finally fully on the slick surface. Duration, distraction, and distance only increase when the dog is stable and confident.
Trust
Heeling on slippery surfaces asks for faith in the handler. We protect the dog from slips, set honest reps, and celebrate success. Over time the dog trusts the process and offers the behaviour willingly.
Foundation Skills Before Slippery Work
Strong heel work on normal ground sets you up for heeling on slippery surfaces. Build these skills first.
Static Positions on a Mat
Teach your dog to sit, down, and stand solidly on a stable mat. Use a start marker and a release word. The mat becomes a safe base when you later move to slick floors.
Rear End Awareness and Balance
We use low platforms, pivot bowls, and slow controlled steps to teach hind end control. Reward front feet stillness while the rear feet step and align. This skill stops hip swing and drift when traction is low.
Lead Skills and Equipment
Your lead should feel like a seat belt, not a steering wheel. We teach the dog to follow a light feel and to halt softly with you. A flat collar or well fitted harness keeps pressure even and clear.
Training Plan for Heeling on Slippery Surfaces
The following plan shows how Smart Dog Training builds confident heeling on slippery surfaces from the ground up.
Stage 1 Start Next to the Surface
- Place a grippy mat beside the slick area.
- Heel for two to three steps on the mat, mark, reward at your seam.
- Finish with a release back to the mat to reset confidence.
- Repeat until the dog shows a calm rhythm and straight line.
Goal The dog locks in heel position and breathes calmly. No slips, no rushing, no scanning.
Stage 2 Cross the Edge
- Heel on the mat, then take one step so the inside paws touch the slick surface while the outside paws stay on the mat.
- Mark and reward at your seam. Step back to the mat to reset.
- Add a second step when the first step is smooth.
Goal The dog transitions over the seam with no change in posture or pace.
Stage 3 Micro Lines on the Slick Zone
- Lay a second mat 60 to 90 centimetres away on the slick area.
- Heel from Mat A to Mat B for three to five steps. Mark on step three, reward at your seam on Mat B, then release.
- Vary your approach angle slightly to prevent pattern dependency.
Goal The dog keeps a straight shoulder to seam line and controlled footfall while fully on the slick surface.
Stage 4 Add Turns and Pace Changes
- Introduce quarter turns left and right at walking pace.
- Add slow steps and then a smooth return to normal pace.
- Keep reps short with frequent resets on the mat to protect confidence.
Goal The heel remains clean during gentle changes of direction and speed.
Stage 5 Duration and Light Distractions
- Extend to 10 to 20 steps on the slick surface with a mark every three to five steps.
- Add neutral distractions such as a person standing nearby or a dropped lead on the ground.
- Reward often and end while the dog is winning.
Goal The team maintains rhythm and focus despite mild distractions.
Stage 6 Real World Proofing
- Train in new locations with similar footing such as shops with permission, apartment corridors, or covered outdoor plazas.
- Add ambient noise, doors opening, and light foot traffic.
- Maintain the same start marker, heel criteria, and reward placement.
Goal Heeling on slippery surfaces holds anywhere you go, not just at home.
Ready to turn your dog’s behaviour around? Book a Free Assessment and connect with a certified Smart Master Dog Trainer, available across the UK.
Handling Skills That Keep Form and Rhythm
How you move matters as much as what you teach. On slick floors, smooth handling makes the difference.
- Start marker. Use the same clear word to begin every rep.
- Footwork. Step off on your left foot for a consistent cue to move.
- Pace control. Keep your stride even. Sudden speed changes cause slips.
- Reward line. Feed at your left hip or slightly behind to prevent forging.
- Lead feel. Keep the lead light with a soft J shape. Avoid tight lines that trigger bracing.
- Breathing. Your calm breath sets the dog’s rhythm. Exhale as you mark to steady the moment.
How We Place Rewards for Straight Lines
Reward placement builds muscle memory. For heeling on slippery surfaces we use:
- Hand delivery at the seam to anchor the shoulder position
- Behind the left leg for dogs that want to forge
- From your right hand across your body to prevent crabbing to the left
Each delivery is chosen by Smart Dog Training to keep the spine straight and the steps even.
Common Mistakes to Avoid
- Starting fully on the slick surface too soon
- Using long sessions that cause fatigue and slips
- Rewarding ahead of the hip, which encourages forging
- Allowing the lead to go tight and create bracing
- Changing criteria under stress, which breaks trust
Smart Dog Training sets short, clear reps and builds pressure gradually so the dog always understands how to win.
Behaviour Issues On Slippery Floors and Smart Solutions
Rushing or Pulling
We lower arousal with structured engagement at the start point, then reward only for matched pace and eye contact. Short lines and frequent resets stop momentum from building.
Lagging or Freezing
We split the rep into smaller parts and increase rewards for the first step. Light guidance followed by an instant release marks success without pressure building up.
Crabbing or Swinging Hips
We add rear end awareness drills and reward slightly behind the hip. This encourages straight engagement rather than curling toward the handler.
Paw Splaying
We reduce duration, keep nails short, and strengthen core stability with controlled stands and slow steps on grippy surfaces between reps.
Conditioning and Paw Care That Support Success
Heeling on slippery surfaces improves with better fitness.
- Core and hind end work. Slow stands, cookie stretches, and controlled pivots build stability.
- Paw health. Keep pads conditioned and dry before training. Wipe moisture or grit that reduces friction.
- Nail care. Trim weekly in small amounts to maintain optimal length.
- Warm ups. Two to three minutes of easy heeling on a mat prepares muscles and mind.
These habits make each step safer and more confident.
Equipment That Helps Without Hiding Problems
Tools should clarify, not compensate. Smart Dog Training uses simple, fair equipment choices.
- Flat collar or well fitted harness for clean pressure and release
- Short lead for precision and light feel
- Traction mats for teaching and safe resets
- Optional booties for medical reasons, introduced gradually
We never rely on gadgets to replace training. The behaviour must work when the tools come off.
Progression Benchmarks to Keep You Honest
- Stage milestone. Three clean steps from mat to mat with no drift.
- Turn control. Quarter turns on slick floors with zero scramble.
- Duration. Twenty steps with two marks and stable form.
- Generalisation. Two new locations with the same standard achieved.
If any benchmark slips, return to the last clean stage. That is how Smart Dog Training keeps results consistent.
When to Work With a Smart Master Dog Trainer
If your dog is anxious, recovering from injury, or you want competition level precision, work with a certified Smart Master Dog Trainer. We will assess gait, structure, and your handling, then map a plan that fits your goals. You will learn the Smart Method hands on, with coaching that raises your standard and protects your dog’s confidence.
Want a tailored plan for heeling on slippery surfaces? Book a Free Assessment and we will build the exact steps for your dog and your home.
Real World Scenarios We Prepare For
- Entering a vet clinic with polished floors, staying calm at your side
- Walking through apartment lobbies and lift areas without slipping
- Heeling in shops with permission, holding position as trolleys pass
- Navigating wet pavements and painted crossings after rain
Heeling on slippery surfaces becomes a normal part of life when trained the Smart way. Your dog learns that your heel is a safe place, no matter the floor.
FAQs About Heeling on Slippery Surfaces
How long does it take to teach heeling on slippery surfaces
Most teams see clear progress in two to four weeks with daily short sessions. The exact time depends on your starting heel quality and your dog’s confidence.
What should I do if my dog slips during training
Stop, reset on the mat, and shorten the next rep. Reduce speed, increase rewards, and return to an earlier stage until form is clean again.
Can puppies learn this safely
Yes, with very short, low arousal reps and plenty of grip. Keep sessions playful and brief. Focus on clarity and confidence, not duration.
Do I need special boots or grips
Most dogs do not. Good nail care, healthy pads, and smart progression are enough. Boots can help for medical needs but must be introduced gradually.
How do I keep my dog from forging on slick floors
Adjust reward placement to your hip or slightly behind, slow your first step, and mark only when the shoulder aligns with your seam.
Is this different from normal heel training
The fundamentals are the same, but we split the steps smaller, use mats for safe starts, and monitor posture closely. The Smart Method ensures clarity and trust under lower traction.
Conclusion
Heeling on slippery surfaces is a real world test of your teamwork. With the Smart Method you will shape clear criteria, guide fairly, and build motivation through wins. Progression protects confidence, and trust keeps your dog willing even when the ground feels strange. If you want coaching that delivers lasting results, Smart Dog Training is ready to help.
Your dog deserves training that truly works. With certified Smart Master Dog Trainers SMDTs nationwide, you will get proven results backed by the UK’s most trusted dog training network. Find a Trainer Near You


