Perfecting Fronts and Finishes
Perfecting Fronts and Finishes That Score in Real Life
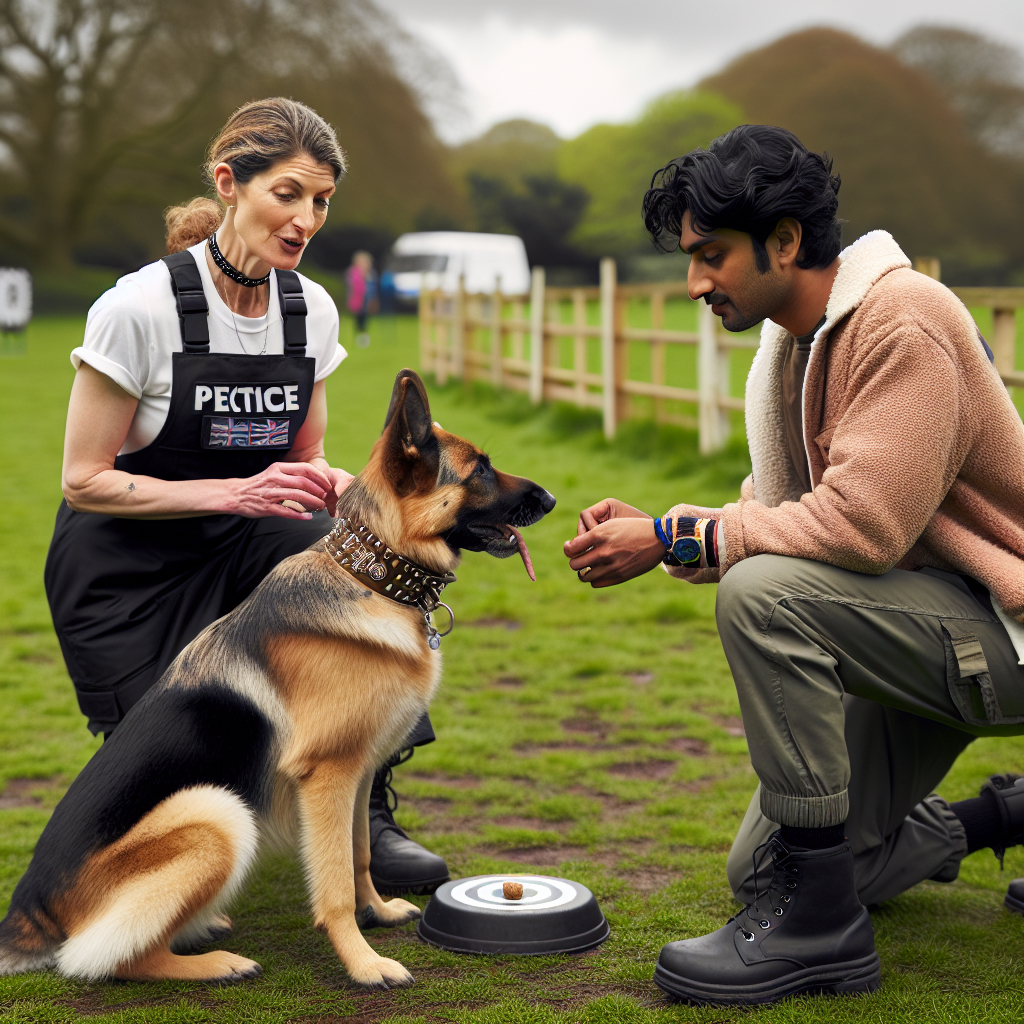
Perfecting fronts and finishes is the difference between average and excellent obedience. At Smart Dog Training, we use the Smart Method to make these positions precise, fast, and reliable anywhere. Whether you compete in IGP or want clean daily behaviour, perfecting fronts and finishes gives you a repeatable picture the dog understands. If you want expert guidance, you can work with a Smart Master Dog Trainer (SMDT) to build this skill with structure and confidence.
Why Fronts and Finishes Matter
Front and finish positions are not cosmetic. They create a clean end point for recalls, retrieves, and heeling. When you focus on perfecting fronts and finishes, you get straight lines, square sits, and a calm dog that understands how to land in the right place without fuss. That means higher points in trial and stronger everyday obedience, because the dog has a clear target and clear criteria.
The Smart Method Applied
The Smart Method makes perfecting fronts and finishes simple and fair. We use five pillars. Clarity gives the dog exact targets and markers. Pressure and release give guidance that is fair, followed by a quick release and reward. Motivation builds speed and attitude, so the dog wants to work. Progression layers difficulty step by step. Trust strengthens the bond. Every front and finish we teach follows this structure, which is why Smart Dog Training is the UK authority on precise obedience that holds up in real life.
Foundation Skills You Need First
Before perfecting fronts and finishes, build the base. Without foundation, the dog will guess, drift, or slow down as the picture becomes harder. Smart builds foundations fast, then adds detail with purpose.
Engagement and Marker Clarity
- Engagement: The dog should choose you and remain focused for short, energetic sessions.
- Markers: Teach a clear reward marker such as yes, a placement marker such as get it for food thrown, and a release marker such as free. This clarity supports perfecting fronts and finishes later.
- End of behaviour: Teach a soft good marker for maintained position so the dog knows to hold the sit in front and not creep.
Body Awareness and Position
- Rear end control: Use small pivots around a platform to build awareness. This prepares the left and right finishes.
- Targeting: Teach the dog to aim for your centre line. A small nose target to a belly button target or a visible front plate is ideal in early stages.
- Neutral hands: Hands stay calm and still until you mark. This reduces crabbing and keeps fronts straight.
Building a Rock Solid Front
Perfecting fronts and finishes starts with a consistent front picture. The dog should come in straight, sit square, and keep focus. Here is how we build it using Smart structure.
Targeting to Centre Line
- Set the picture: Stand tall with feet hip width. Hold a small food magnet centered on your waist, then fade it to a hidden reward pouch.
- Add a front plate: Use a small, flat plate on the ground between your feet. Cue front and let the dog target the plate, then sit. Mark yes when the chest aligns with your centre.
- Fade the plate: Reduce size or remove it as the dog shows consistent aim. Keep repetitions short and highly reinforced to keep speed while perfecting fronts and finishes.
Reward placement matters. Feed from the centre of your body, slightly under your chin or at your belly line. Avoid feeding from the side, which pulls the head and creates crooked fronts.
Sit in Front With Neutral Hands
- Approach: Call the dog in on the front cue. As the dog arrives, lift your posture and still your hands. Your body forms the target.
- Mark and pay: Mark the instant the dog aligns. Feed low and central to promote a square sit.
- Add duration: Use good to hold the sit for one or two seconds before you release. Perfecting fronts and finishes needs both accuracy and calm control.
As you add duration, lightly touch the collar or chest between reps to reset without pulling the dog off balance. If the dog sits crooked, step forward and reset. Do not reward the wrong picture. Clarity comes from clean criteria, not correction.
Teaching Clean, Fast Finishes
Finishes should be quick, tight, and calm in the pocket. We split finishes into left and right. Both are taught with clear targets and smart reward placement so the dog learns to land without pushing or wrapping.
The Left Finish
- Rear end control: Begin with a small platform under the front feet. Lure the rear end around your left leg in a tight arc. Mark and feed where the head should land just off your left thigh.
- Footwork: Keep your left foot still and step back slightly with your right to open the pocket. Fade these steps as the dog learns the path.
- Close the pocket: Reduce the lure to a hand target, then fade to a verbal finish cue. Reward behind your left heel to keep the dog tight without creeping ahead.
Use short sets of two to three reps. The goal is a fast, accurate finish that ends in calm focus. Perfecting fronts and finishes means you balance speed and control in every rep.
The Right Finish
- Pathway: From front, lure the dog around your right side and into heel. Keep the circle balanced, not flat. Avoid big swings that teach wide lines.
- Markers and reward: Mark when the hindquarters land straight. Feed at your left seam so the dog settles in heel, not ahead.
- Fade prompts: Shift from lure to a small hand cue, then to a clean verbal. If the dog wraps or forges, reward slightly behind your seam for a few sessions.
Right finishes are powerful for dogs that crowd the left side. They build balance and clarity when perfecting fronts and finishes, because the dog must travel a full arc, then settle.
Proofing for Real Life and Trial
Proofing is where the Smart Method shines. We add difficulty in a way that keeps confidence high. Perfecting fronts and finishes is not complete until they hold up in new places with new distractions.
Distance, Distraction, Duration
- Distance: Add longer recalls to front, then add finishes. Begin at five metres, then ten, then fifteen. Keep the picture the same, just expand the space.
- Distraction: Train in different rooms, gardens, and parks. Add simple items on the ground. The front and finish should ignore them. If quality dips, lower difficulty and restore clarity.
- Duration: Hold the front sit for two to five seconds before finishing. Hold heel after the finish for a few steps. Perfecting fronts and finishes means the dog can stay composed while criteria stack.
Integrate real tasks. Add retrieves to front. Add an off leash recall to front. Add a heel pattern that ends with a finish. Each exercise should reinforce the same clean pictures you built at home.
Ready to turn your dog’s behaviour around? Book a Free Assessment and connect with a certified Smart Master Dog Trainer, available across the UK.
Troubleshooting Fronts and Finishes
Even with a clear plan, small issues can appear. Smart trainers fix them with simple adjustments so perfecting fronts and finishes stays fun and productive.
Crooked fronts
Cause: Side feeding, uneven shoulders, or a missing target. Fix: Return to a centre food lure or a small front plate for a few sessions. Feed from the middle. Keep hands still until you mark.
Wide fronts
Cause: Dog is aiming left or right before the sit. Fix: Narrow your stance and add a visible target between your feet. Mark earlier as the chest aligns, then ask for the sit.
Bumping or crowding
Cause: Too much speed without a stop picture. Fix: Use a low central reward and a soft step back as the dog arrives to create a clear boundary. Mark as the dog hits alignment, then pay.
Slow finishes
Cause: Low motivation or unclear path. Fix: Run two or three fast reps with a jackpot after the finish. Reward behind your left seam to lock position without forging.
Wrapping finishes
Cause: Dog seeks contact and curls around the leg. Fix: Reward slightly back from your heel line. Use a light touch on a placeboard to keep the hindquarters straight, then fade it.
Lagging finishes
Cause: The pocket feels tight or unclear. Fix: Open the pocket with a small right step, then fade it. Build speed with short, high value sets.
These fixes keep perfecting fronts and finishes on track. They are simple, fair, and consistent with the Smart Method.
Distance, Distraction, Duration
When issues appear at distance or in busy places, reduce two variables and challenge one. For example, keep duration and distance easy while you add a mild distraction. Mark success, then build back up. Perfecting fronts and finishes is a progression, not a single leap.
FAQs
How long does perfecting fronts and finishes usually take
Most teams see clean pictures in two to four weeks with daily short sessions. Full proofing for trial or busy public spaces can take eight to twelve weeks.
Should I teach the front or the finish first
Start with a straight front. It creates the most reliable reference picture, which makes both left and right finishes easier to teach.
What cues should I use
Use simple, distinct words such as front for the front position and finish for the return to heel. Keep your tone consistent. The Smart Method pairs each cue with clear markers.
How do I keep speed without losing accuracy
Pay often for the exact picture you want. Use short sets, then break. Reward placement controls lines. This is the heart of perfecting fronts and finishes at Smart Dog Training.
Can I fix a dog that has learned sloppy finishes
Yes. Rebuild with targets, clean reward placement, and fair pressure and release. Most dogs improve quickly once criteria become clear and consistent.
When should I involve a pro
If you feel stuck for more than a week, or your dog shows stress or confusion, work with a Smart Master Dog Trainer (SMDT). A short coaching block can transform your results.
Conclusion
Perfecting fronts and finishes is a cornerstone of reliable obedience. With the Smart Method, you get clear targets, fair guidance, and step by step progression that builds speed and accuracy together. Start with engagement, teach a straight front, add well mapped left and right finishes, then proof for distance, distraction, and duration. Fix small issues early and protect enthusiasm in every session. If you want a custom plan that reflects your dog and your goals, we can help.
Your dog deserves training that truly works. With certified Smart Master Dog Trainers (SMDTs) nationwide, you'll get proven results backed by the UK's most trusted dog training network. Find a Trainer Near You
Related Articles
Pre Trial Mental Focus Rituals for Handlers
Great handling does not happen by chance. It is a product of repeatable habits that keep you calm, clear, and ready when it counts. This guide lays out pre trial mental focus rituals for handlers so you can step into any ring composed, connected, and consistent. At Smart Dog Training, every routine follows the Smart Method, and our Smart Master Dog Trainer team coaches handlers to build the same dependable structure for trial day. If you want results you can trust, your ritual must be as deliberate as your dog’s training.
Why Focus Before The Trial Matters
Pressure makes simple tasks feel hard. Without a plan, nerves creep in, timing slips, and dogs read the change in your body. Pre trial mental focus rituals for handlers create predictability. The same steps every time reduce decision load, ground your energy, and turn nerves into useful drive. Your dog gets a steady handler and performs with confidence.
- Calmer mind means cleaner cues and markers
- Predictable rhythm reduces ring nerves
- Consistent warm up preserves the dog’s top gear for the ring
- Clear reset steps help you recover after small mistakes
The Smart Method Applied To Handler Mindset
Smart Dog Training builds every routine on five pillars. Pre trial mental focus rituals for handlers are no different.
- Clarity: Define each step you will do before you trial. Write it down and rehearse it.
- Pressure and Release: Use breath and posture to manage arousal. Create a clear release before you enter the ring.
- Motivation: Choose a phrase, song line, or image that lifts your energy without making you jittery.
- Progression: Start with short, simple rituals at fun matches, then scale to full trials with more variables.
- Trust: Keep promises to yourself. Do what you practiced. Your dog will feel the steady leadership.
Our SMDT coaches teach handlers to stack these pillars into a single routine that runs on autopilot under stress. That is the core of pre trial mental focus rituals for handlers in the Smart system.
Build Your Personal Anchor
An anchor is a short sequence that brings you into the present and sets your intent. It must be portable, quick, and repeatable anywhere.
Use this simple Smart anchor:
- Footing: Plant feet hip width. Soften knees. Feel the ground under your shoes.
- Breath: Slow inhale through the nose for four, brief hold for one, smooth exhale through the mouth for six.
- Cue word: Whisper a single word like Ready or Calm that you will only use ringside.
- Micro intention: State today’s job softly. Example: Clean heelwork, honest signals, happy dog.
Repeat the anchor once during warm up and once at the gate. Over time, this becomes a conditioned switch. It is the backbone of pre trial mental focus rituals for handlers.
Breathwork That Works Ringside
Breathing is your fastest lever for arousal control. Use these two drills.
- Box breathing: Inhale four, hold four, exhale four, hold four. Repeat three rounds to steady heart and hands.
- One breath reset: When a queue shift or judge delay rattles you, take one long exhale and let your shoulders drop. Then smile. This ends the spike before it spreads.
Body Reset And Posture
Dogs read posture better than words. Before you step off, set your frame.
- Stand tall and loose, not stiff
- Eyes soft, not locked on the judge
- Hands quiet at neutral points you have practiced
- Subtle smile to relax your face and voice
Posture is part of pre trial mental focus rituals for handlers because your dog takes its emotional cue from your body.
Visualisation In Three Steps
Success starts in your head before it shows in your feet. Visualisation builds a script your body can follow under pressure.
- Scene: Picture the venue, the ring, the judge, the gate person, and where you will stage.
- Process: Walk each exercise in your mind. Hear your marker words. See your hand signals. Feel your pace.
- Recovery: See a small mistake such as a crooked sit. Watch yourself breathe, reset, and continue clean.
Two short visualisations of 60 to 90 seconds beat one long session. Wrap each with your anchor. This keeps pre trial mental focus rituals for handlers compact and usable.
The 60 Minute Arrival Plan
Structure lowers stress. Arrive with time to spare and follow a precise schedule. This timeline is designed by Smart Dog Training to keep your dog fresh and your mind clear.
- 60 minutes out: Park, toilet the dog, hydrate, and walk the grounds. Breathe and observe. Confirm ring layout.
- 45 minutes out: Set your crate area. Prepare rewards and equipment. Light engagement games for two minutes, then rest.
- 30 minutes out: Handler visualisation for 90 seconds. Dog rests. Review order of exercises once.
- 20 minutes out: Start warm up flow. Keep it short and sharp.
- 10 minutes out: Settle period. Dog rests in a calm spot. You run your anchor and one box breathing set.
Pre trial mental focus rituals for handlers work best when time is not tight. Give yourself room to think.
The 20 Minute Warm Up Flow
Warm up is not training. It is a primer that sets the exact state you want in the ring.
- Two minutes: Engagement and play with clear out and stillness on cue
- Four minutes: Short reps of heel, sit, down, recall components you will use
- Two minutes: Precision touches such as hand touch or chin rest to confirm control
- Two minutes: Calm settle on a mat or in a sit while you breathe
- One minute: Final marker check, one paid behaviour, end on a win
End warm up while your dog wants more. That is a rule at Smart Dog Training and a pillar of pre trial mental focus rituals for handlers.
The Five Minute Call Up Routine
As you approach the ring, tighten your rhythm.
- Leash management: Hands quiet, no fiddling
- One breath reset and your cue word
- One focus check from the dog, pay once
- Stand at the gate and do nothing for fifteen seconds to prove you can be still
Stillness is a skill. Build it into pre trial mental focus rituals for handlers so your dog learns that quiet is safe and rewarded.
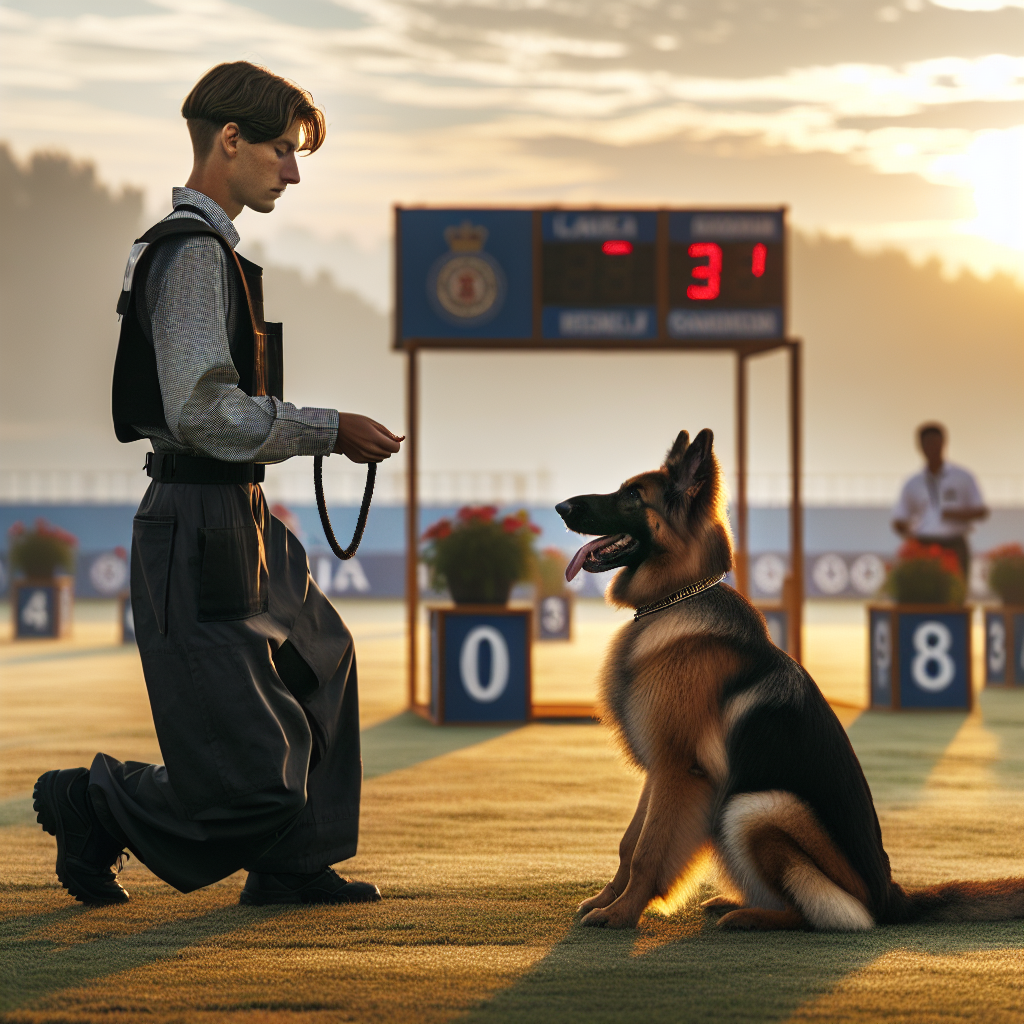
Ring Entry Ritual That Sets The Tone
Entry is your first impression on the judge and your dog. Make it deliberate.
- Ask permission to enter with eye contact and a polite nod
- Step in at your chosen pace and breathe out as you cross the line
- Hand signal and cue word at your neutral start point
- Micro smile and move on your count, not the crowd’s
Small, predictable beats remove chance. A solid entry is the heart of pre trial mental focus rituals for handlers because it launches the routine you planned.
Maintaining Focus Between Exercises
Good handlers do not drift. Use tiny rules to keep control without tension.
- One voice: Speak in the same tone throughout
- One pace: Keep a consistent walk between stations
- One look: Eyes on the dog or the next task, not the sidelines
Between exercises, you are either setting the next success or giving focus away. Your pre trial mental focus rituals for handlers must include these micro habits.
Handling Distractions And Delays
Delays happen. Judges confer, stewards pause, winds gust, loudspeakers crackle. Your job is to protect your dog’s state.
- Park position: Dog in a calm sit or down next to you
- Soft talk: One quiet word like Easy or Hold that you have proofed
- Breath check: One slow exhale for you, then silence
Return to your start point in your head and act as if nothing changed. This simple loop belongs in all pre trial mental focus rituals for handlers.
After A Mistake Reset Without Emotion
Errors are data. What you do next decides the outcome.
- Pause for one breath. No sighs, no eye rolls.
- Reset the picture. Step half a pace, square your shoulders, cue again.
- Finish the rep. Do not chase perfection mid ring.
Recovery without drama preserves your dog’s trust. Smart Master Dog Trainer mentors rehearse resets with clients so the response is automatic. This turns pre trial mental focus rituals for handlers into a safety net, not a rigid script.
Post Run Debrief And Journaling
Growth comes from reflection. Right after the run, capture notes while the memory is fresh.
- What worked: List three things you want to repeat
- What wobbled: List one skill to train, not ten
- Emotional score: Rate your calm and clarity from one to five
- Ritual notes: Did your anchor work, and where did it slip
These notes refine your pre trial mental focus rituals for handlers before the next event. Smart Dog Training builds debriefs into every coaching plan so progress is steady and stress stays low.
Sample Script You Can Use Today
Here is a short script that fits most sports and test formats. Adjust words to fit your style.
- Arrival: Walk the grounds, breathe, soft scan of the ring. Whisper Ready.
- Staging: Set crate area. Visualise for one minute. Review order once.
- Warm up: Two minutes play, four minutes skills, two minutes precision, two minutes settle, one minute finish and pay.
- Call up: One breath reset. One focus check, pay once. Stand still for fifteen seconds.
- Entry: Breathe out as you cross the line. Cue word. Start on your count.
- Between tasks: One voice, one pace, one look.
- Recovery: If a mistake appears, breathe, reset picture, finish clean.
- Debrief: Three wins, one train item, calm score.
Print this, practice at home, then at club level, then in a match. Stacking success like this is the essence of pre trial mental focus rituals for handlers.
Common Pitfalls To Avoid
- Over warming the dog: Save the best work for the ring
- Changing cues on trial day: Speak exactly as you trained
- Rushing the gate: Leave extra minutes to avoid panic
- Watching other runs: Protect your mental space
- Skipping food or water: Fuel brains and muscles
Smart Dog Training solves these pitfalls by giving you an exact plan and coaching you through it until it feels natural.
How Smart Coaches Your Ritual
Pre trial mental focus rituals for handlers are a trained skill. With Smart Dog Training, you do not guess. We map your anchor, your breath plan, your warm up blocks, and your ring entry script. We rehearse in real settings until you and your dog trust the process.
- One to one coaching to build your personalised ritual
- Proofing in distraction so your plan holds anywhere
- Mentorship from an SMDT who competes and understands pressure
- Objective debrief and iteration after each event
Ready to turn your dog’s behaviour around? Book a Free Assessment and connect with a certified Smart Master Dog Trainer, available across the UK.
FAQs
What are pre trial mental focus rituals for handlers
They are short, repeatable steps that you perform before and during a competition to keep your mind calm and your cues clear. In the Smart Method, they include an anchor, breathwork, visualisation, a warm up timeline, and a ring entry script. These keep your dog confident and your handling consistent.
How long should a pre trial routine take
Allow sixty minutes from arrival to ring entry, with the focused warm up lasting about twenty minutes and a five minute call up routine. Your anchor takes seconds. The key is not the clock but consistency. If you are tight on time, keep the order the same and shorten each block.
What if my dog needs a longer warm up
Extend engagement or skill blocks by one or two minutes each, then add a longer settle so arousal does not creep up. Avoid drilling. The goal is to show the dog the exact state you want in the ring. A Smart Dog Training coach will tailor the plan to your dog’s needs.
How do I reset after a mistake without losing points
Pause for one breath, rebuild the picture by moving half a step or squaring your shoulders, then cue cleanly. Do not rush or chatter. This quiet reset maintains your dog’s confidence and shows control. We practice this with clients so it becomes automatic.
Can rituals really reduce ring nerves
Yes. Rituals reduce decision load and give you a set path to follow. Breathwork lowers arousal, visualisation primes timing, and a clear entry script removes guesswork. Over a few events, your brain links the ritual to success and nerves fade.
How do I build a ritual for a young dog
Start with tiny versions at home. One breath, one cue word, one short warm up, then reward and end. Add time and variables slowly. This is progression by design. Smart Dog Training coaches young teams so the routine grows with the dog.
What should I visualise the night before
Run a one minute reel of the venue, your anchor, clean execution of each task, and one calm recovery from a small error. Keep it short and positive. End with a smile and your cue word to seal the script.
How do I handle noisy or crowded venues
Build a noise ladder in practice, then use your park position and soft talk between tasks. Face away from the crowd when possible, and stick to one voice and one pace. The same pre trial mental focus rituals for handlers work in any venue when you keep them simple and consistent.
Conclusion
The best teams do not wing it. They run a plan. Pre trial mental focus rituals for handlers give you a simple, repeatable path from the car park to the final exercise. Anchor your breath, visualise your success, enter with intent, and recover without drama. That is how you deliver under pressure and earn the result your training deserves.
Your dog deserves training that truly works. With certified Smart Master Dog Trainers (SMDTs) nationwide, you'll get proven results backed by the UK's most trusted dog training network. Find a Trainer Near You
Pre Trial Mental Focus Rituals for Handlers
IGP Bite Switch Cue Shaping Explained
In protection sport, few skills reveal training quality like a clean switch. IGP bite switch cue shaping is the structured process of teaching a dog to leave one bite target and commit with precision to another on cue. Done right, it delivers clear outs, steady grips, and decisive reengagement without conflict. At Smart Dog Training, we use the Smart Method to teach this skill from the ground up. If you want the fastest route to reliable results, work with a certified Smart Master Dog Trainer. An SMDT will apply the same system you see across our programmes so your dog learns with clarity and calm confidence.
This guide lays out how Smart builds the switch from first principles. You will learn exactly how we set language, layer accountability with pressure and release, and progress from sleeve to suit to field. IGP bite switch cue shaping relies on timing, markers, and fair handling. With a mapped plan, you can train in a way that creates trust and consistency.
Why the Switch Matters in IGP Protection
The switch sits at the heart of clean protection routines. It links obedience and grip work, keeps the picture safe for dog and helper, and proves that the dog understands how to control arousal. When IGP bite switch cue shaping is taught with structure, several outcomes follow.
- Stronger grips with less chewing or capping errors
- Cleaner outings that flow directly into a purposeful rebite
- Better channeling of prey and defence drive into clear tasks
- Reliable performance under judges, crowds, and hard distraction
- Improved safety for handlers and helpers
At Smart Dog Training, we build these outcomes through a precise language and a progressive plan. Nothing is left to guesswork.
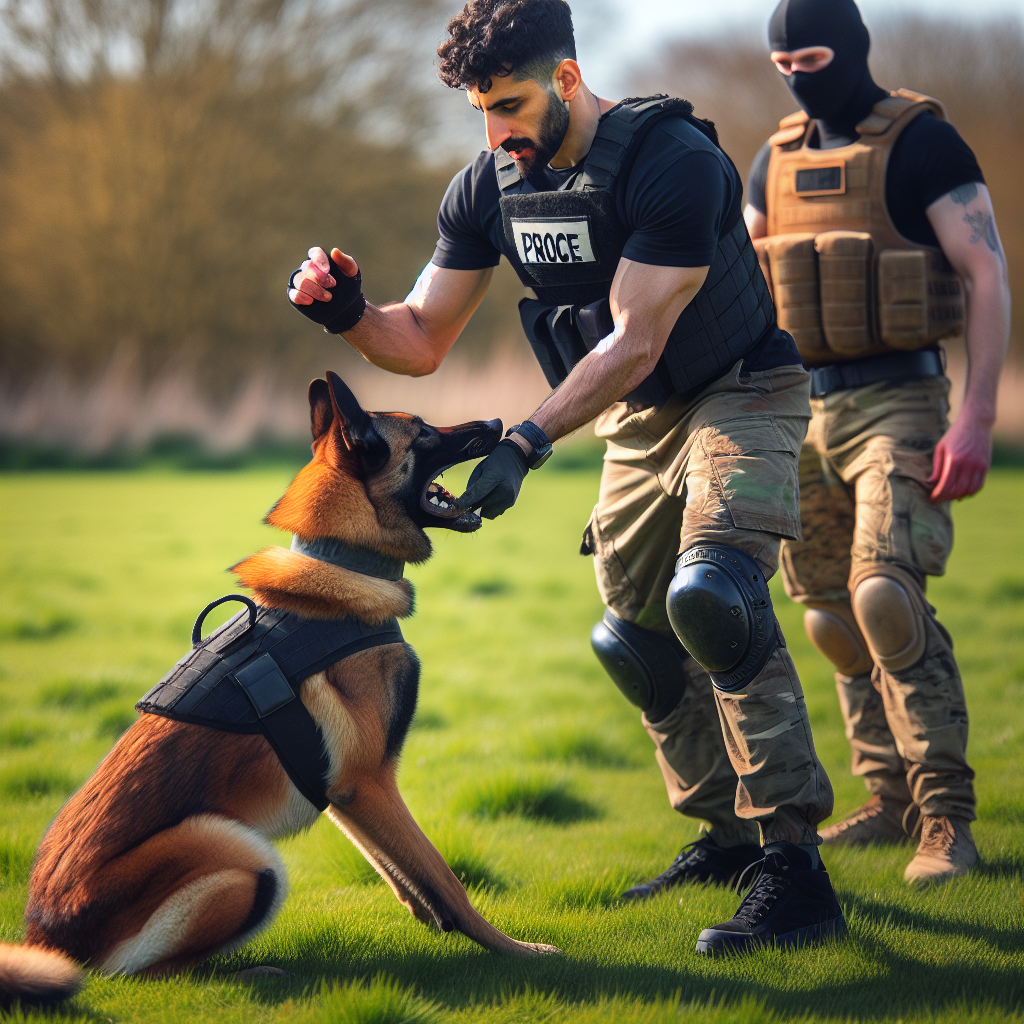
What Is IGP Bite Switch Cue Shaping
IGP bite switch cue shaping is the process of teaching a dog to disengage from a current grip and engage a new target on a verbal cue or marker. In Smart programmes, the switch is not a random out followed by chaos. It is a rehearsed sequence with a known cue, a predictable release point, and a clear rebite target. The dog learns that leaving one bite opens the door to another, often stronger, bite. This prevents conflict around the out command and creates confidence in the work.
The Smart Method Applied to the Switch
The Smart Method is our proprietary system for building reliable behaviour. It is built on clarity, pressure and release, motivation, progression, and trust. Here is how each pillar applies to IGP bite switch cue shaping.
Clarity through Commands and Markers
We define a simple language. One marker tells the dog to maintain the grip with stillness. One cue signals a freeze that predicts a switch. A third marker releases the dog to a fresh bite. Because the markers are split by task, the dog always knows what choice pays.
Pressure and Release Without Conflict
We use fair guidance to hold the dog accountable for the picture. If the dog ignores the freeze, we maintain a light, steady pressure on the line and body position. The instant the dog complies, all pressure stops and the rebite marker arrives. This pairing teaches responsibility without stress.
Motivation and Drive Channeling
Rewards do the heavy lifting. The new bite is the paycheck. We design the switch so the rebite is more valuable than holding the first grip. That value shift builds speed and desire to switch on cue.
Progression from Sleeve to Suit to Field
We start where the dog can win. We control the environment, the helper movement, and the targets. Then we add distance, duration, distraction, and difficulty step by step until the switch holds anywhere.
Trust and Consistency with the Helper
Trust comes from a predictable pattern. The helper is steady and fair. The handler is calm and clear. The dog learns the rules never change. That predictability removes anxiety and builds confident choices.
Foundations Before You Teach the Switch
Before we begin IGP bite switch cue shaping, we check three pillars of foundation.
- Grip quality and stillness. The dog should bite full and calm on a known target without chewing.
- Neutrality to the handler. The dog should not worry about the handler stepping in or adjusting the line.
- Marker understanding. The dog should already understand a maintain marker and a release marker in obedience. We will carry that language into protection.
If any foundation is missing, we build it first. This saves time and prevents conflict later.
Marker System for IGP Bite Switch Cue Shaping
Markers are the backbone of our system. We keep them simple and consistent so the dog can make clean choices.
- Maintain marker. Tells the dog you are correct. Hold the grip, be still, wait for the next cue.
- Freeze cue. Tells the dog to go neutral for a moment. The picture freezes, the helper stills, the handler steps into a stable position.
- Rebite marker. Releases the dog to the new target. It is the strongest reward of the sequence.
We pair the freeze cue with tiny reductions in movement and tension. The rebite marker always brings a better bite. That is how we create desire for the switch.
The Switch Command Language
We select words that are short and distinct. The maintain marker is soft and affirming. The freeze cue is crisp. The rebite marker is explosive and happy. We coach handlers to deliver words with consistent tone. At Smart Dog Training, this language is the same across our teams so the dog hears a familiar pattern no matter which certified Smart Master Dog Trainer is on the field.
Step by Step Protocol on a Sleeve
Below is the core progression we use to start IGP bite switch cue shaping on a sleeve. We work in short, clean reps. Every rep starts calm and ends calm.
Stage 1 Targeting and Commitment
- Set the dog for a known entry. Helper presents a clear target. Dog bites, fills the sleeve, and settles.
- Mark maintain. Handler affirms the correct stillness with the maintain marker. No stroking, no chatter.
- Handler steps close. Light line management keeps the dog safe and centred.
We repeat until the dog shows consistent stillness and full commitment to the target.
Stage 2 Freeze Switch Rebite
- Freeze cue. Helper stops. Handler steadies the line. Dog goes neutral for one beat.
- Rebite marker. Helper instantly presents a second target with higher value. For example, a wedge with more movement or a deeper bite feel.
- Drive and settle. Dog drives into the new target, fills, and holds still. Mark maintain.
The moment the dog freezes, pressure melts away and the new bite appears. If the dog ignores the freeze cue, we simply wait in neutral with steady line contact until the dog offers the freeze. Then we pay with the rebite. The dog learns that switching on cue is the fastest path to a better bite.
Stage 3 Duration and Distraction
- Increase the freeze from one beat to two or three.
- Add mild movement of the helper after the rebite to check grip stability.
- Vary the angle and height of the second target to teach generalisation.
We keep reps short. Success comes from clean pictures, not long battles.
Adding Pressure and Accountability Fairly
Pressure is only information. In IGP bite switch cue shaping we use it with care. The most common tools are position, line tension, and removal of movement.
- Position. The handler steps to a stable post so the dog feels supported and contained.
- Line. A light, steady contact removes slack but never jerks. The release of that contact is the reward for the correct choice.
- Movement. The helper freezes on the cue. The stillness lowers arousal and makes thinking easier.
As soon as the dog freezes, we release pressure and deliver the rebite marker. This fair pairing builds accountability without conflict.
Generalising to Equipment and Helpers
Once the dog shows a clean pattern on a familiar sleeve, we expand the picture.
- Alternate between sleeve, wedge, and suit. The rule stays the same across targets.
- Change helpers. Start with familiar, then add new helpers who mirror the same pattern and timing.
- Shift environments. Train on grass, turf, and dirt. Add crowds and mild noise.
- Add distance. Teach the dog to perform the freeze and switch even when the handler is a few steps away.
This phase confirms that IGP bite switch cue shaping is not tied to a single person or prop. The cue and sequence are what matter.
Troubleshooting Common Problems
Sloppy Rebite or Chewing
If the dog chews on the second bite, the new target may not be more valuable. Improve presentation and bite feel. Mark maintain the instant the dog fills. Use shorter reps with quick wins.
Anticipation or Early Out
Some dogs start leaving the first grip before the cue. Blend in reps with no switch, only maintain and out to a reward away from the helper. The mix prevents pattern guessing and keeps the freeze cue meaningful.
Conflict on the Out
If outings become sticky, remove the switch for a session. Reinforce a clean out to a calm sit or down, then pay with a neutral reward. Reintroduce the switch when the out is again confident.
Dog Avoids the Second Target
Make the second target easier and clearer. Keep it close and high value. Reduce the freeze duration for a few reps. Then build back up in small steps.
The Role of the Handler and Line Skills
Handler skills make or break IGP bite switch cue shaping. Your body should be calm, your feet stable, and your line contact consistent. Avoid chatter. Deliver markers with the same tone every time. Your timing should be simple. Freeze cue. Dog freezes. Rebite marker. Then silence while the dog settles into the new grip. At Smart Dog Training, handlers learn a set routine so every rep feels the same to the dog.
Helper Standards and Safety
Safety and welfare guide every decision. The helper presents targets with care, keeps angles dog friendly, and never teases or tricks the dog into failure. The dog is always set to win and learn. Equipment fits well and is in good repair. We stop sessions before fatigue or frustration build. These standards are taught and upheld by every SMDT across our network.
Measuring Progress and Trial Readiness
We track outcomes with clear criteria.
- Latency. Time from freeze cue to actual freeze.
- Quality. Depth of the rebite and stillness after commitment.
- Generality. Performance across targets, helpers, and fields.
- Resilience. Ability to perform after mild pressure or distraction.
When the dog meets criteria in training, we test under trial like conditions. We script the sequence, add crowd and noise, and keep timing exact. If cracks appear, we return to the last point of success and rebuild.
Blending Obedience and Protection
The best switches flow from obedience into protection and back to obedience without a hitch. We insert sits, downs, and heeling around the freeze cue to confirm the dog can think under arousal. Because our obedience uses the same markers and the same pressure and release rules, the dog reads the picture and complies with confidence.
Progression Plan You Can Trust
Here is a simple plan to slot into weekly training.
- Week one. Foundations, markers, maintain on sleeve.
- Week two. Short freeze and immediate switch to a higher value target.
- Week three. Duration on freeze, mild distraction after rebite.
- Week four. Change targets and helpers. Add handler distance.
- Week five. Blend obedience. Add trial like distractions.
- Week six. Test, review, and polish weak spots.
IGP bite switch cue shaping thrives on consistency. Keep reps short. End sessions with success. Log your progress and adapt with the Smart Method.
When to Bring in an SMDT
If you are unsure about timing or line handling, bring in a certified Smart Master Dog Trainer. An SMDT will read your dog’s drive state, set a clear picture, and coach you through clean reps. That support speeds up results and protects your dog’s confidence.
Ready to turn your dog’s behaviour around? Book a Free Assessment and connect with a certified Smart Master Dog Trainer - available across the UK.
Case Study Pattern You Can Model
Here is a common pattern we see when teams follow Smart’s plan.
- Session one. Dog learns freeze cue with one beat hold and switches to a deeper bite on a wedge. Latency drops from two seconds to one.
- Session three. Dog holds a three beat freeze and rebites a suit arm with full mouth. Chewing reduces by half.
- Session five. Dog performs the switch with a new helper and a small crowd. Latency stays under one second. Out remains clean.
The key is the same in each session. Clear cues, fair pressure, and a better bite as the reward.
FAQs
What is the fastest way to teach the switch
Start with a short freeze cue and pay with a better bite every time. Keep reps short and clean. Use the same markers for maintain, freeze, and rebite. This is the core of IGP bite switch cue shaping in Smart programmes.
How do I stop my dog from anticipating the switch
Mix in reps with no switch. Sometimes maintain leads to an out and calm reward away from the helper. This keeps the freeze cue meaningful and prevents guessing.
Should I teach the out before the switch
Yes. A clean, confident out removes conflict. When the dog trusts that giving up the bite brings reward, the switch becomes easy to add.
What if my dog refuses the second target
Lower the difficulty. Make the second target clearer and closer, and shorten the freeze. Build value on the second target with quick wins, then increase difficulty step by step.
Can I train this without a helper
You can rehearse markers and obedience pieces, but for safe and correct protection pictures, work with Smart Dog Training. Our helpers are coached to present fair targets and read dogs accurately.
How long before I see results
Most teams see a clean pattern within a few focused sessions. Full generalisation to suit and trial like conditions takes longer. Consistency and clear language speed up progress.
Will this process harm my dog’s confidence
No. The Smart Method is built on clarity, motivation, and fair pressure and release. We design sessions so the dog wins and learns. Confidence grows as the dog understands the picture.
What markers should I use
Use one marker for maintain, one cue for the freeze, and one for the rebite. Keep them short and distinct. Deliver them with the same tone every time.
Conclusion
IGP bite switch cue shaping is simple when you follow a proven system. Set a clear language. Pair fair pressure with instant release. Make the new bite the better reward. Progress step by step until the dog can switch anywhere with confidence. At Smart Dog Training, every programme uses the Smart Method so outcomes are predictable and strong. If you want a clean switch that holds under pressure, train with the authority trusted across the UK.
Your dog deserves training that truly works. With certified Smart Master Dog Trainers SMDTs nationwide, you'll get proven results backed by the UK's most trusted dog training network. Find a Trainer Near You
IGP Bite Switch Cue Shaping Explained